The Field Service module in Odoo ensures that all operations regarding a field service quotation are managed effectively and efficiently. With the help of this module, one can easily monitor the services provided by a company to their customers. After purchasing a product or service from a company, sometimes the customer requires an expert’s assistance in order to understand the proper functioning of the product/service or installation/maintenance activities. In such cases, companies often provide field service options for customers to help them at their workstations. You can keep a record of all field services provided by your company in the Odoo Field Service module. This module will be helpful to create new tasks for field service, assign employees for the particular task, record timesheets of each employee, monitor the progress of the task, invoice the time & material to the concerned customer, and many more activities.
In this module, you will get some advanced configuration options in the menu to improve the performance of the module. Using these options, you can create projects, stages, worksheet templates, products, and tags for various tasks in field service. While creating a new task in this module, you can configure these options on the task.
This blog will give you an insight into the configuration options available in the Odoo 15 Field Service module.
Without any delay let’s take a look into each of these options in detail. When you open the Field Service module, you can find the Configuration menu in the main menubar of the module as marked in the screenshot below.

As you can see, the Configuration menu includes the Settings, Projects, Stages, Worksheet Templates, Products, and Tags.
Projects
A service-providing company offers various types of field services to its customers. These field services can be saved as separate projects in the Field Service module. Under each project, you can assign different tasks according to the activities included in the field service operation. The List view of the projects dashboard shows the details regarding the Name, Default Worksheet, Company, Start Date, End Date, Project Manager, and Status of each project created in this module

Using the Create button, you can configure a new project in simple steps. The steps in the configuration of new projects are almost similar to that of the Project module.
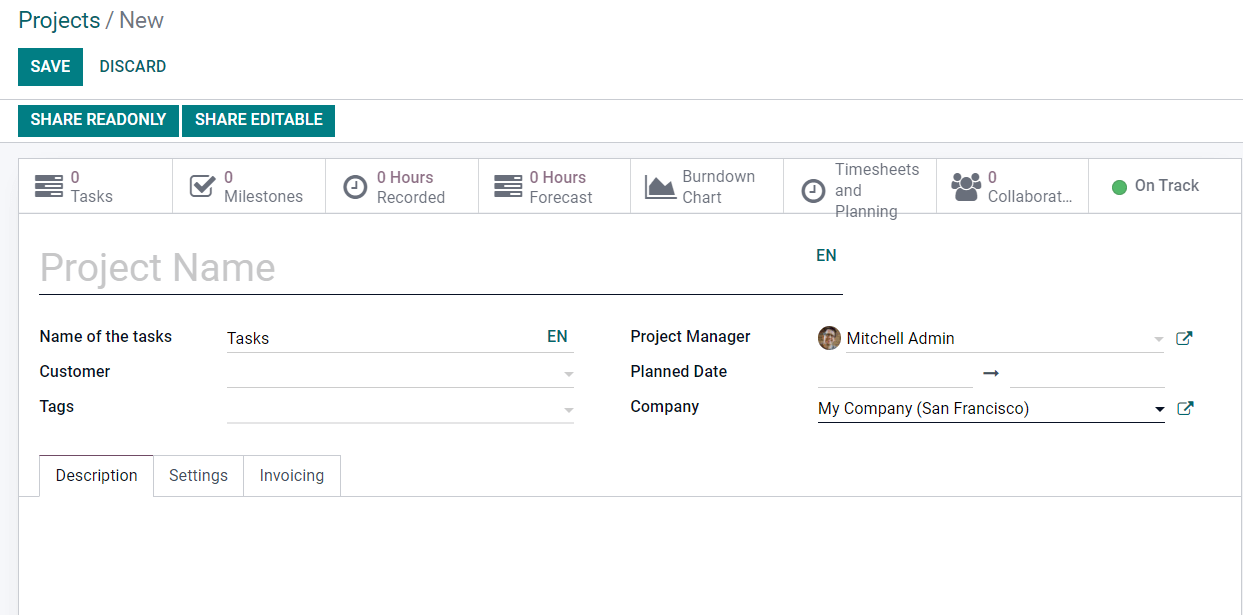
The details about the Name of the Project, Name of the Tasks, Customer, Tags, Project Manager, Planned Date, and Company can be specified in the corresponding fields given in the new project creation window. The Description tab can be used to specify additional information and instructions to the assignees regarding the project.
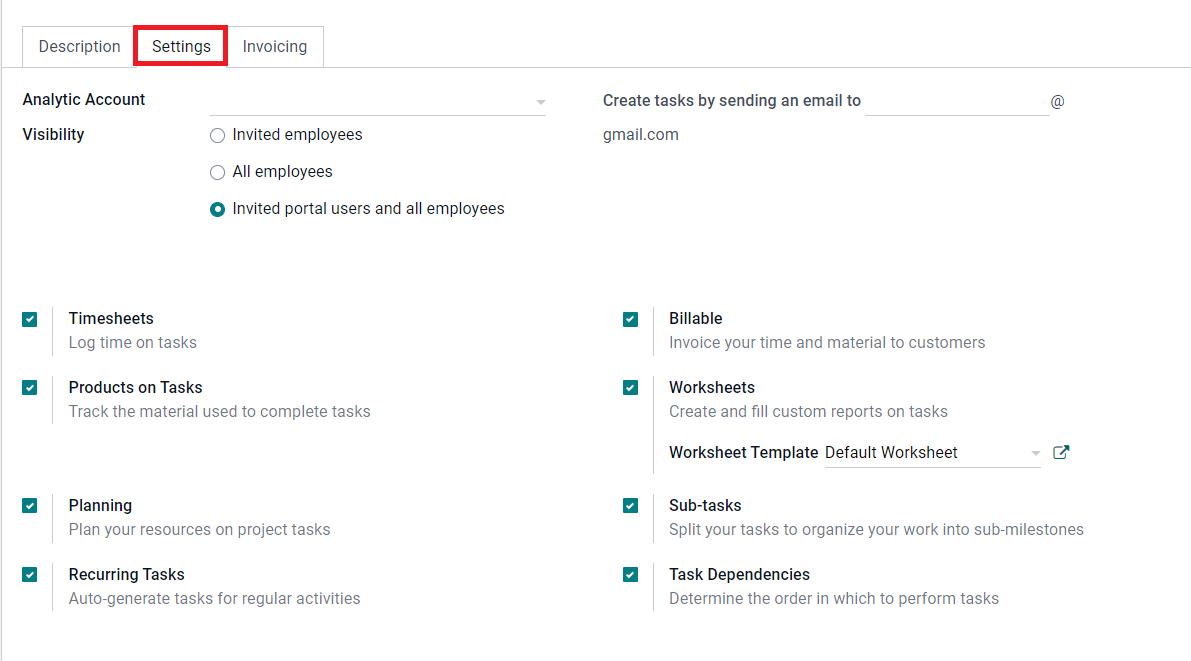
In the Settings tab of the new project, you can mention the Analytic Account to record the cost and revenue of the project. You can set the Visibility to the project on Invited Employees, All Employees, or Invited Portal Users and All employees. You can activate many more features to ensure advanced performance such as Timesheets, Billable, Products on Tasks, Planning, Recurring Tasks, Worksheets, Sub-tasks, and Task Dependencies.
The Invoicing tab includes an option to configure Default Service where you can specify a service product with which you can bill your time used to complete each task in a project.

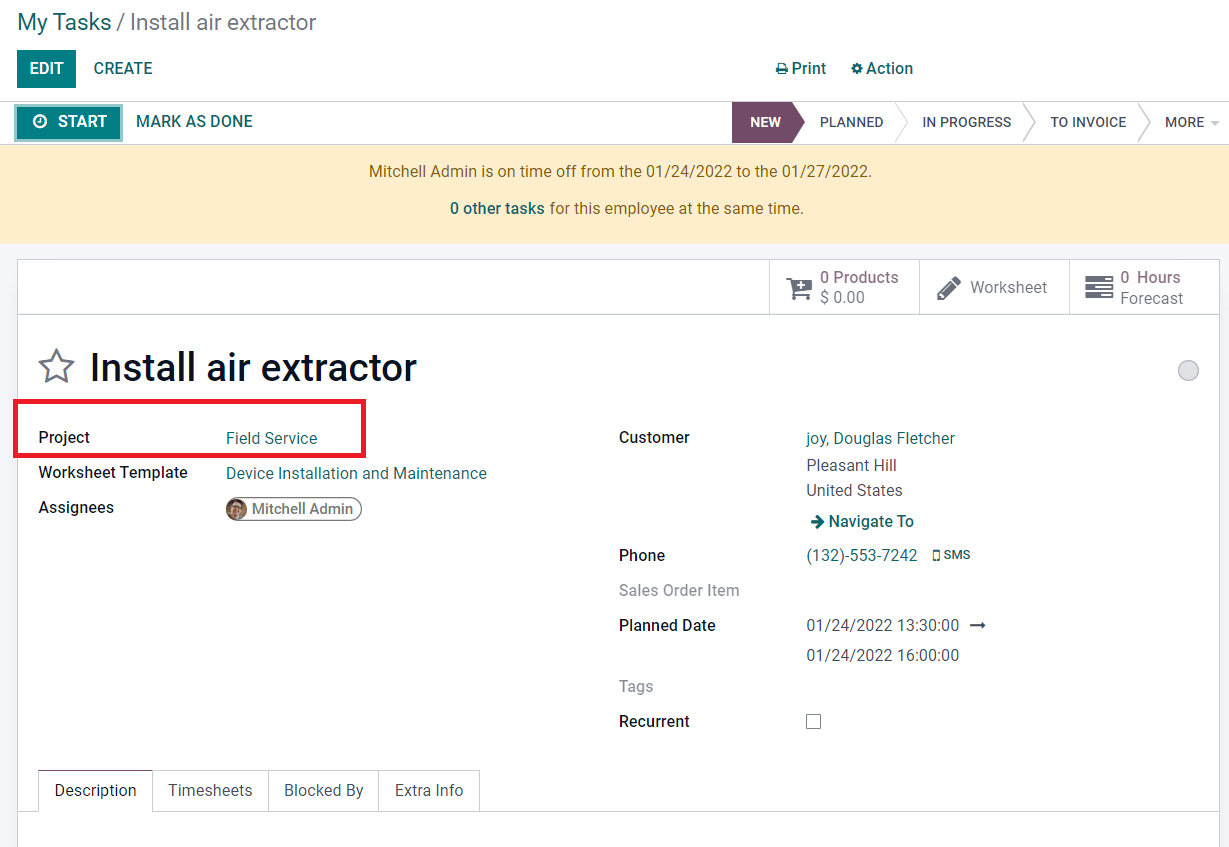
Using the Add a Line option, you can define the sales order to link the timesheet of each assigned employee. This line will also define the rate of each employee’s time used to bill the project. After completing all the specified fields, you can save the new project by simply clicking on the Save button. Now, you can create tasks for this project. It can be done by mentioning the project name in the Project field while creating a new task from the task dashboard of the module.
Stages
In Odoo, you will get an additional platform to define various stages in almost all modules for the operations conducted in that module. Defining stages will help a user to understand the progress of operations easily. The Kanban view will arrange each operation separately according to the stage they reached. In the Field Service module also, you can assign stages for the projects effortlessly using the Stages option from the Configuration menu. According to the progress of projects, you can change them from one stage to another.

Already created stages can be seen in the Stages platform as shown in the screenshot above. The list includes the Name, Project, and Stage Owner of each stage. You can see that some columns of Folded in Kanban field are marked as checked. This indicates that those stages are folded in the Kanban view. The instructions to create a new stage are the same as the other modules in Odoo. Using the Create button, you can enter into the new stage creation window.
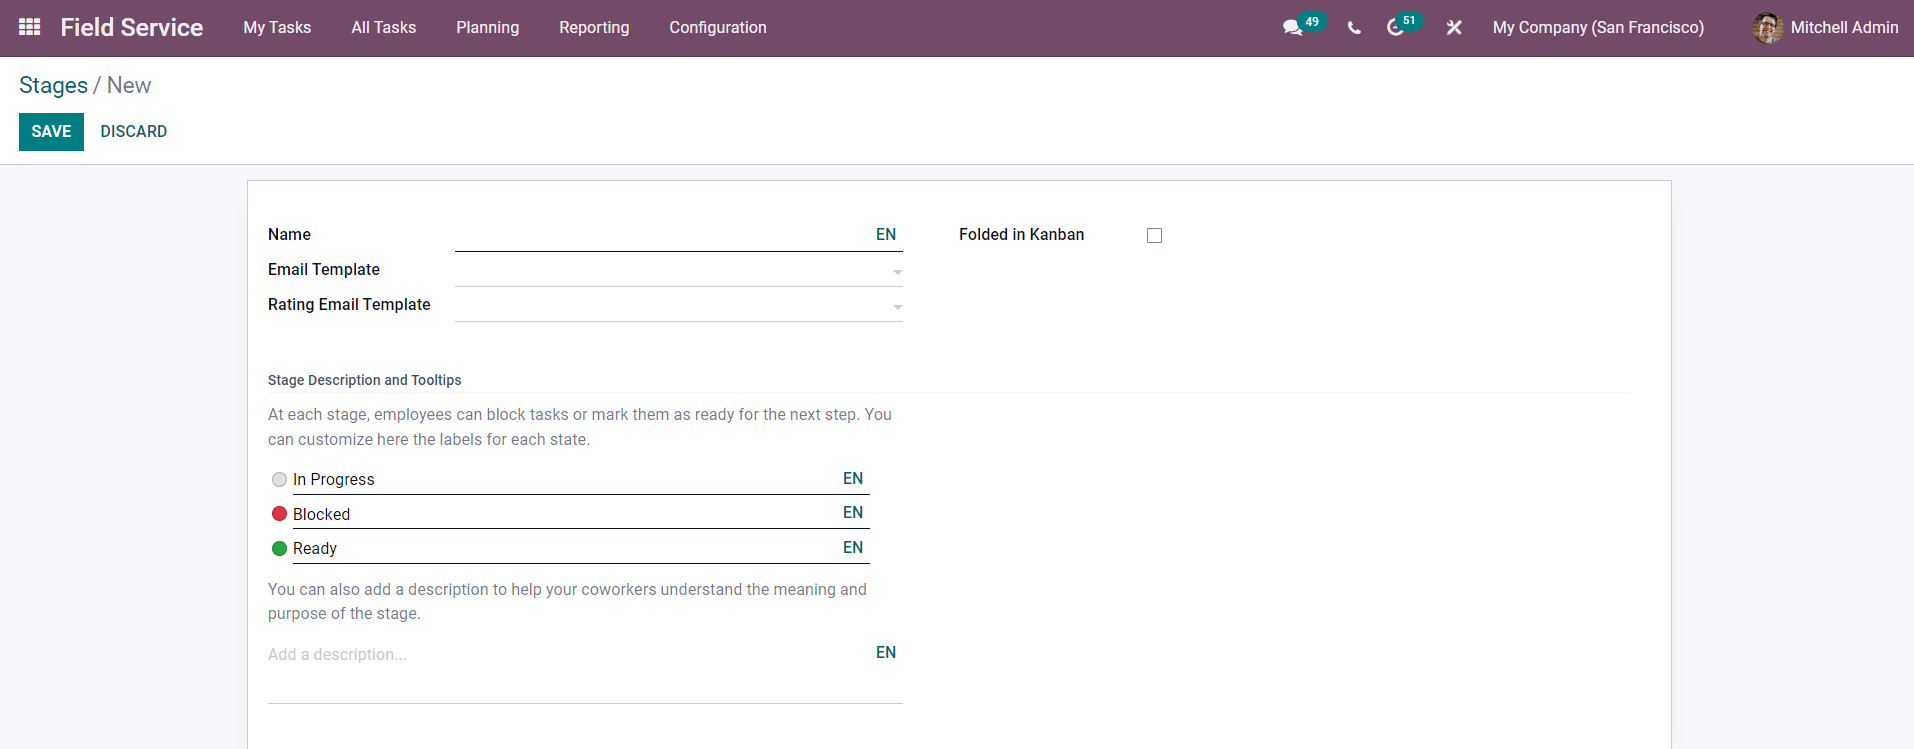
You can specify the Name that you want to give to the stage in the corresponding field. Also, add an Email Template for this stage so that Odoo can automatically send an email to the concerned customer to inform them about the progress of the project. It is possible to give a rating to the project when changing stages. The Rating Email Template can be used to send an email to the customer when your project reaches this specific step. If the stage doesn’t contain any project to display, you can fold them in the Kanban view by activating the Folded in Kanban option. A description of the stage can be added in the respective space to give information to your teammates about the purpose of the stage. You can save the new stage using the Save button.
Worksheet Templates
Worksheet templates are helpful to keep work records of the assigned employees of a particular task or project. After completing the task, you can send these worksheet reports to the customer to collect their sign. As you can see in the screenshot below, under the Configuration menu of the module, you will be able to get access to the Worksheet Templates platform.

The list view shows already configured worksheet templates along with the details of their Name, Companies, number of worksheets included, and Color. Let’s take a look at the creation of new worksheet templates in the Field Service module.

Specify the Name, Companies, and select a color for the template in the given fields. After saving the new template, you will get the Design Template option as marked in the screenshot below.

This button will help you to design your worksheet template as per your requirement.
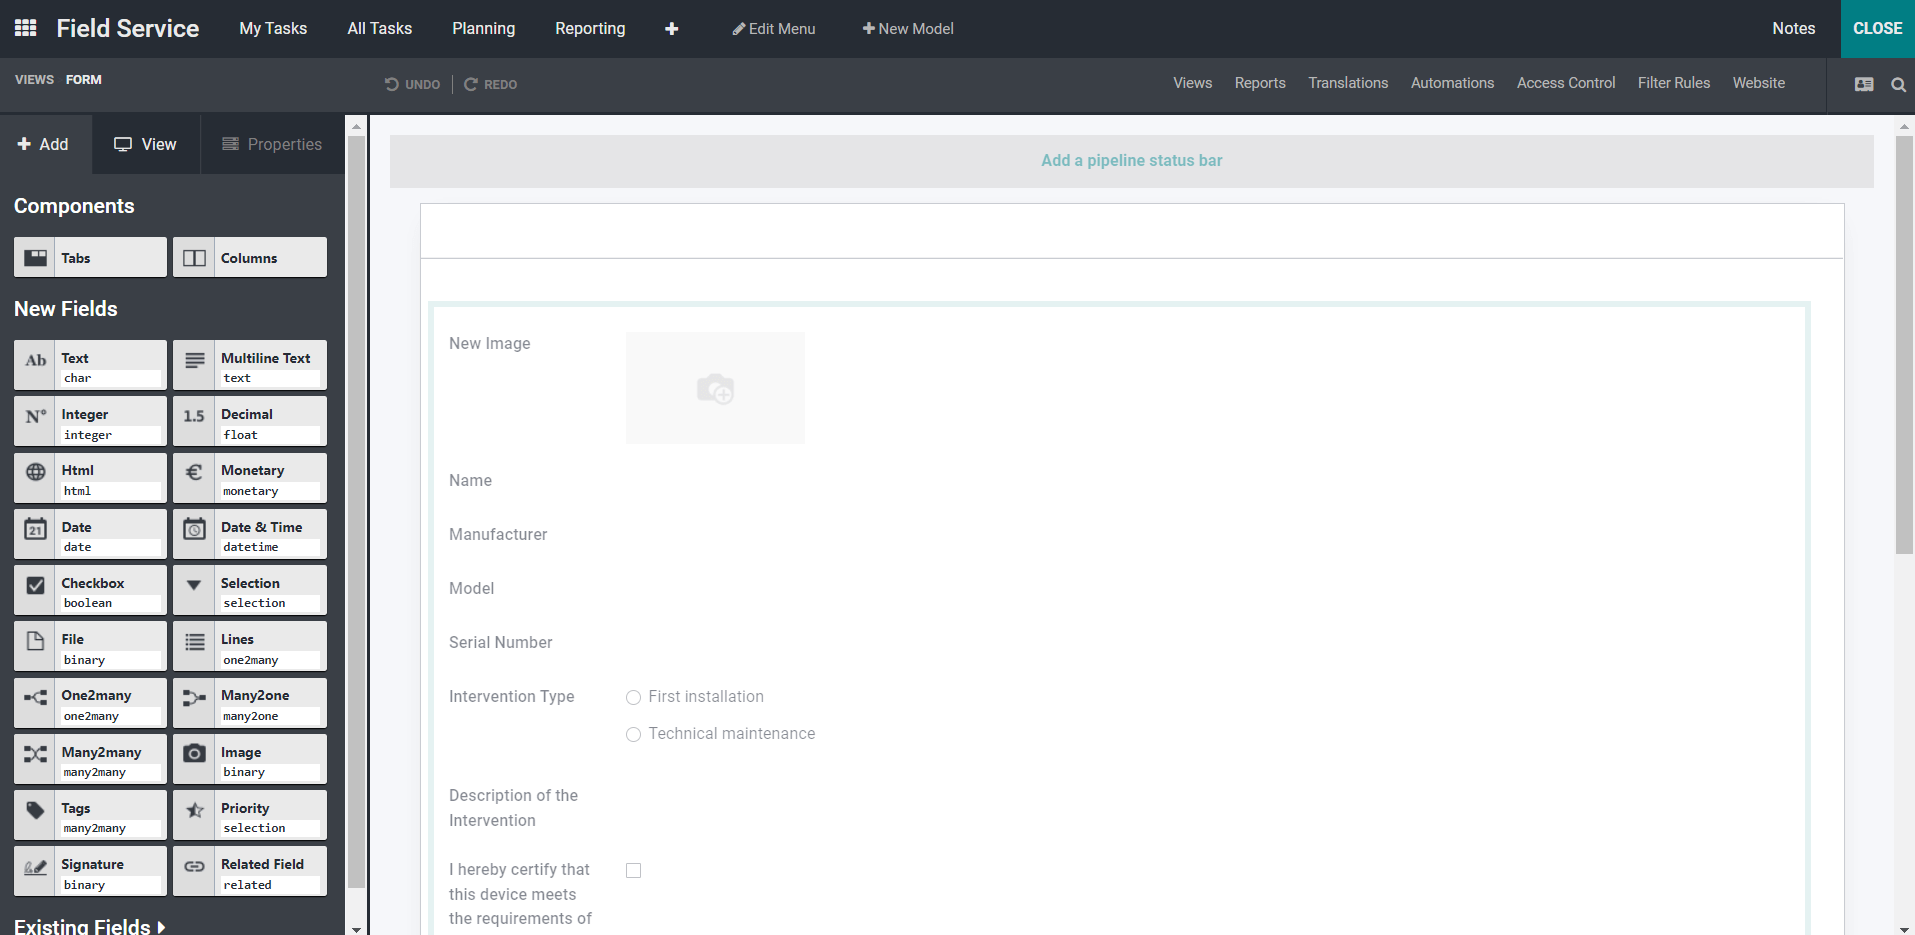
You can add new fields to your template by using the drag and drop option from the panel shown on the left side of your screen to the main body of the template. After adding all required fields to your template you can save them. These templates can be configured to a task in the Worksheet Template field at the time of the creation of that particular task.
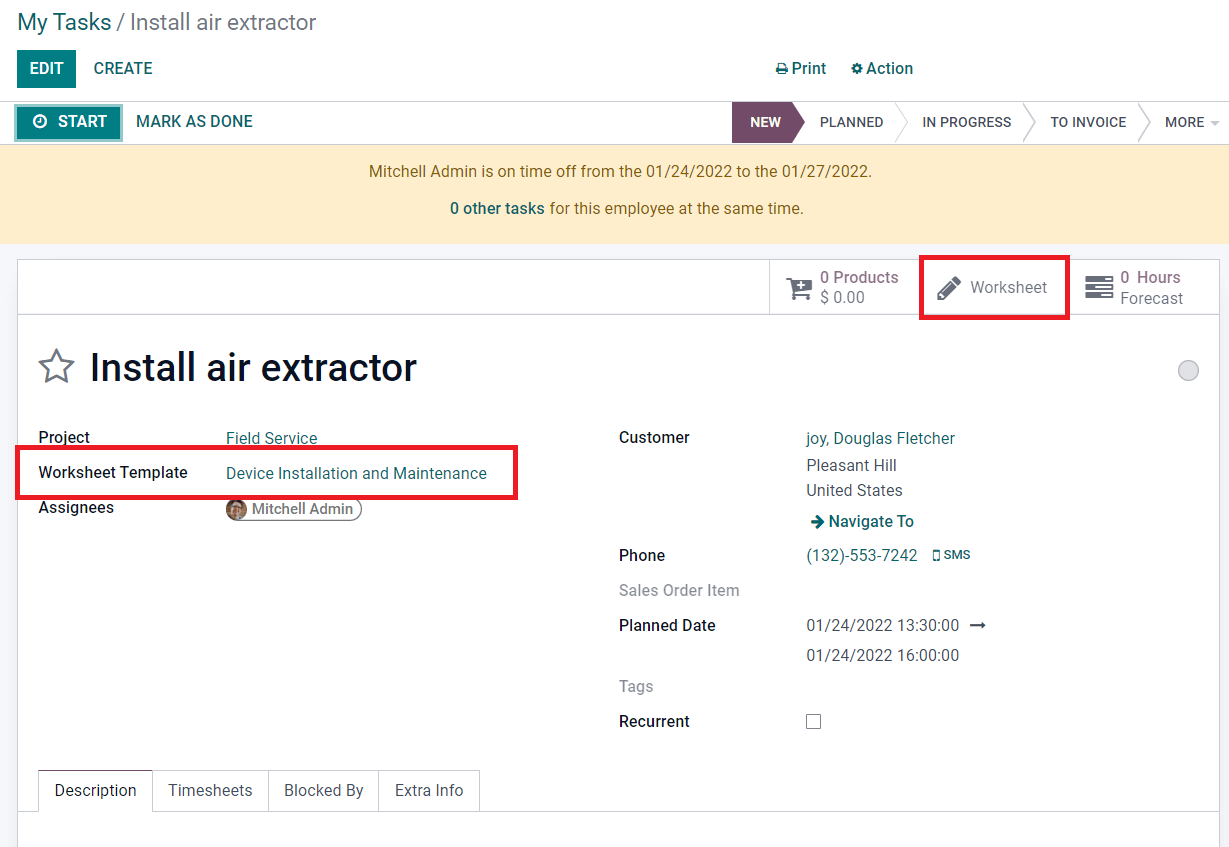
Such configured worksheets of tasks can be seen in the smart button available in the window of the particular task as well as the worksheet template.
The Analysis button will help you to get the reports about the worksheets configured under this particular worksheet template.
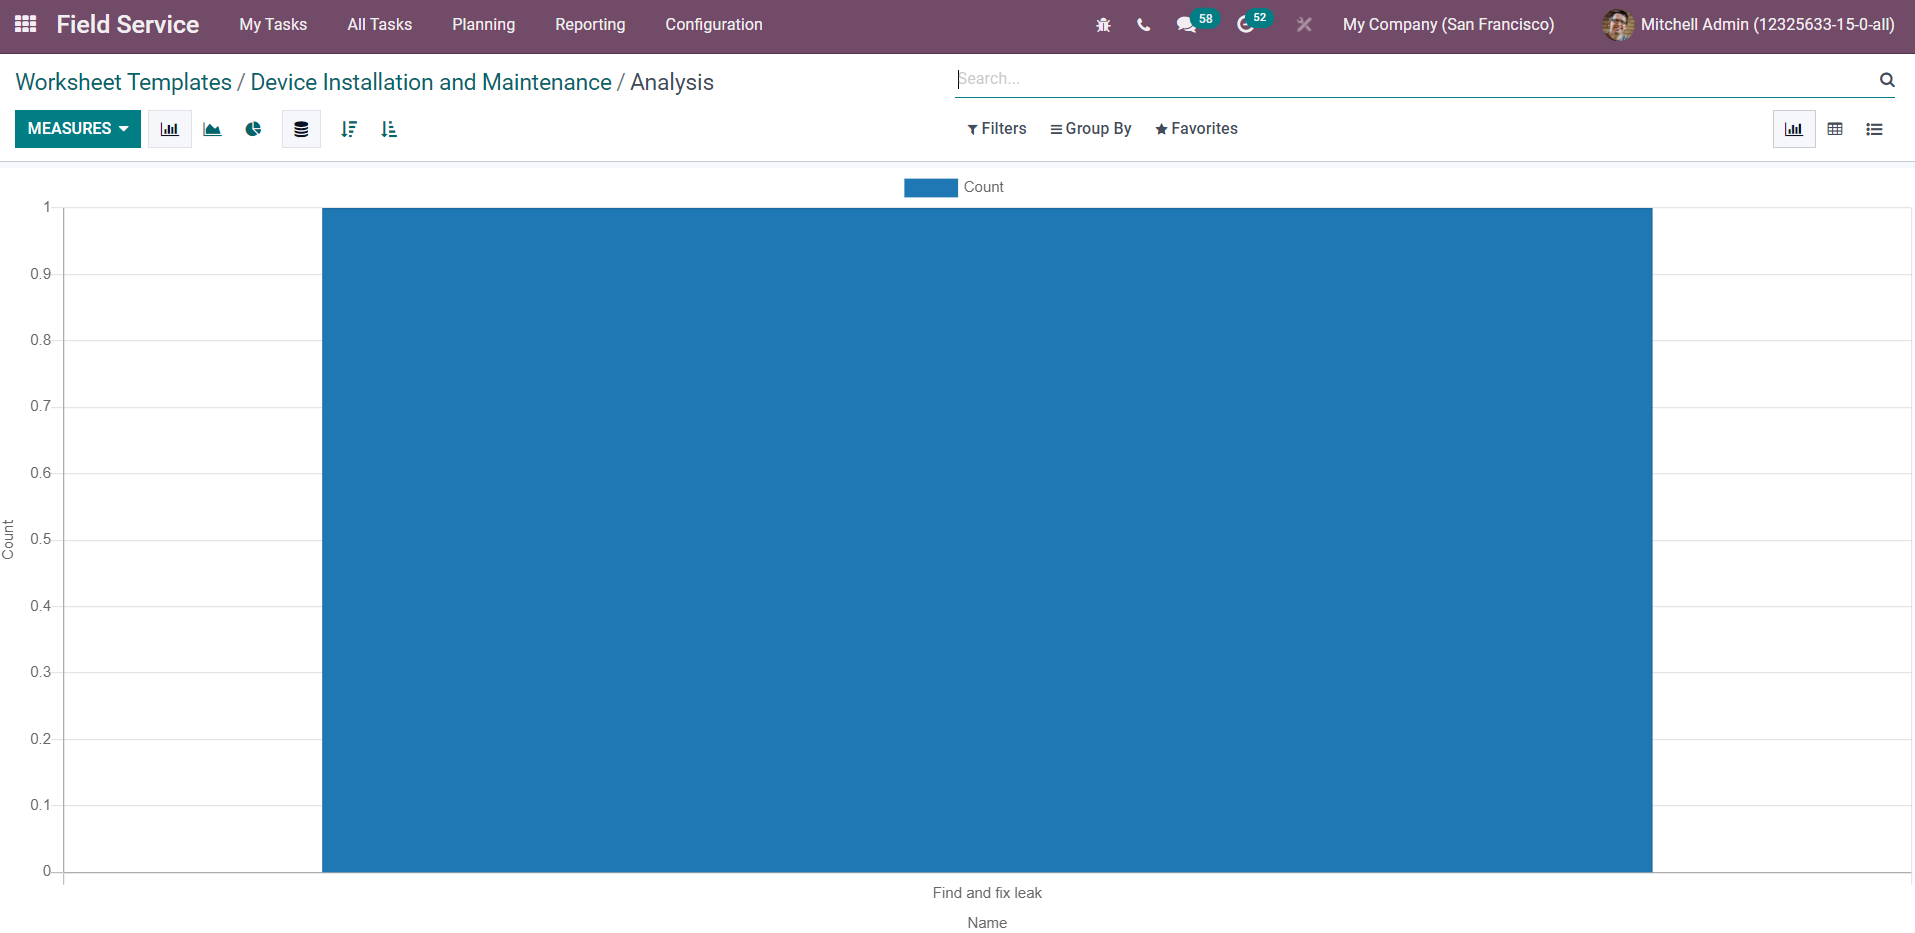
The report will show the name and count of worksheets created in the module which can be filtered using the custom filtering option.
Products
At the time of field service, the assigned employee may require different products and materials to complete the task successfully. You can keep a record of the materials and products used for a field service operation in the respective task window.
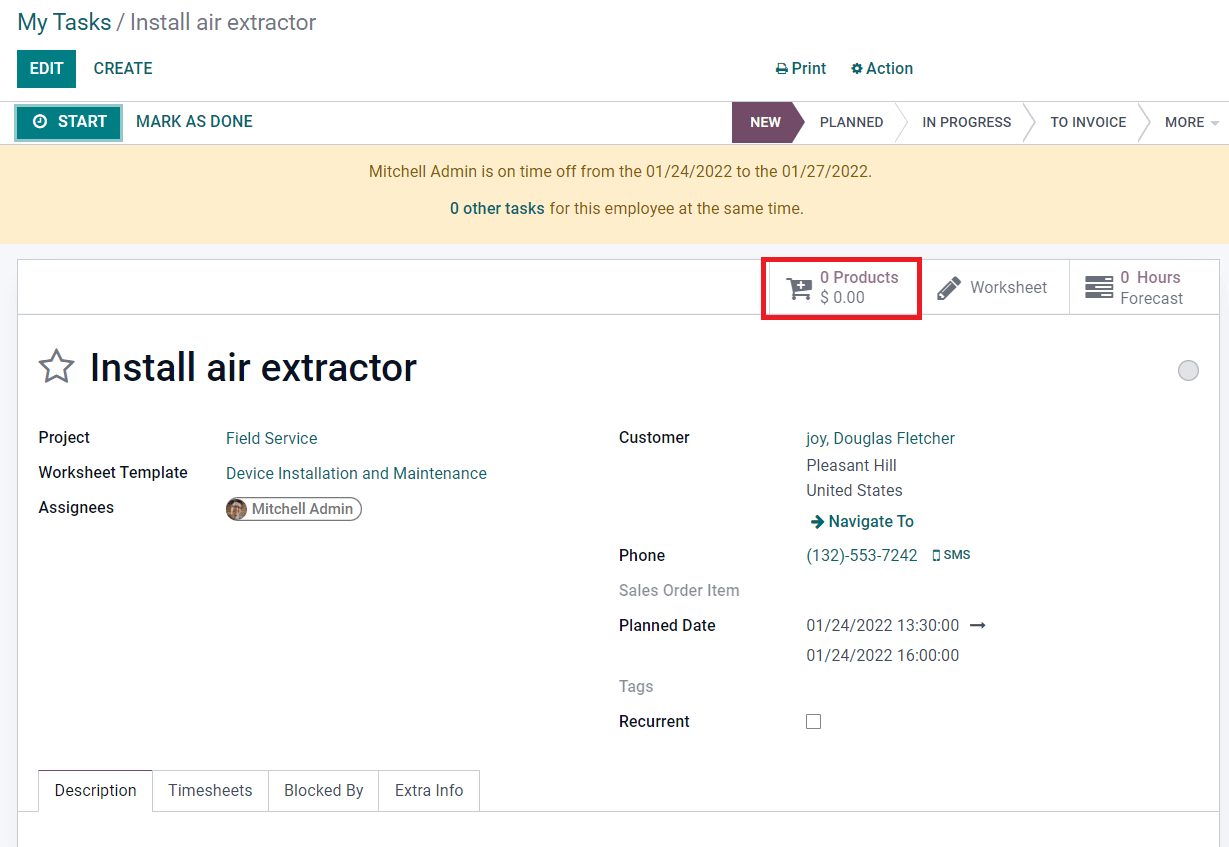
You will be able to get a smart button called Products in order to maintain the list of products used in a task. This record will also help you when generating bills for the task. Under the Configuration menu of the module, you can find the Products menu where you will get the list of all products configured in Odoo.
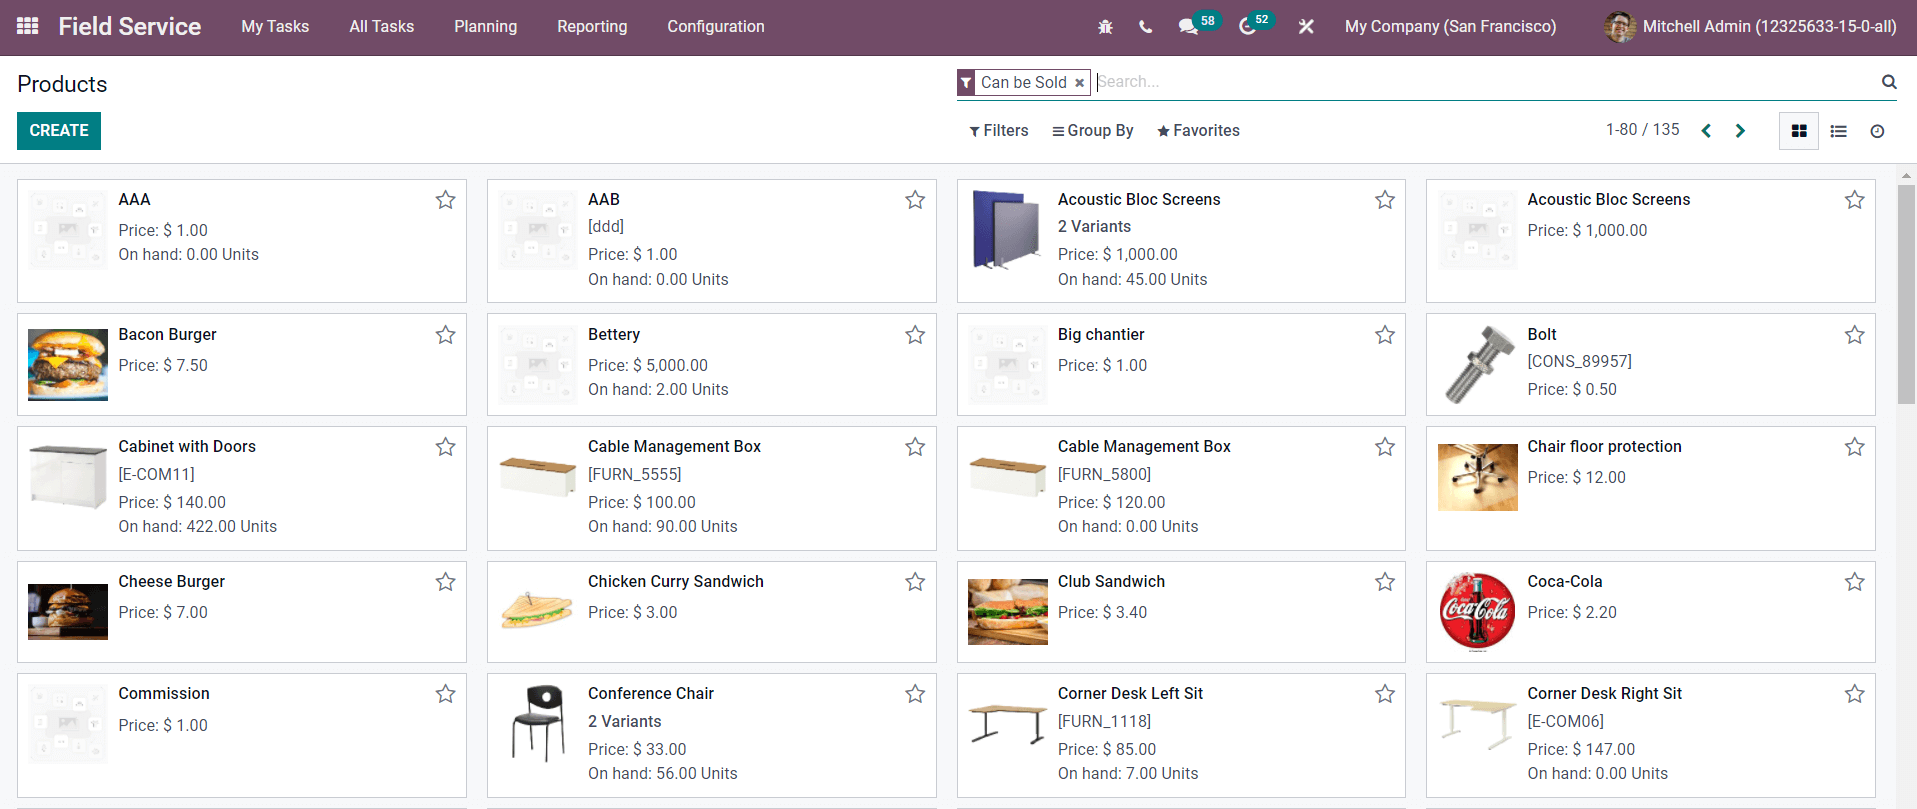
The Create button will help you to add a new product to your system. You can completely follow the method of product configuration that we discussed in other modules here also.
Tags
Tags will always help you to reduce the difficulties in the searching and sorting processes. In the Field Service module, you can add suitable tags to a task. You can use the configured tags while searching for particular tasks or projects in this module. Needless to say, the creation of tasks can be easily done in Odoo using the Configuration menu.

All created tags in the Field Service module can be observed in the Tags platform as shown in the screenshot above. By clicking on the Create button, a new line will appear at the top of the existing list of tags. You can specify the Name of the tag in this line and select a color for the tag.
In this blog, we discussed all configuration options available in the Field Service module. You can use these options to enhance the user experience and performance.