Odoo being an efficient inventory management support can help to control the inventory of products and stock. We can avoid stockouts and surplus stock with the help of this software tool. Internal transfer of the components or finished products and supply and resupply of items can be managed with the help of this tool. We also get assistance for managing the lot and a serial number of the product to track the product at different stages.
Odoo Inventory module is a tool that not only manages the stock or product of the company but also plays a vital role in warehouse management. This module helps to manage the warehouse of the company. It can help you to manage one or many warehouses simultaneously. It will also ensure support to manage warehouse locations and routes.
The warehouse is the building that is used to store or stock materials or finished products. A company may have one or more warehouses depending on the size of the business. The number of warehouses may vary depending on the type of business also. It is important to manage the warehouse and warehouse operations in an effective way to manage operations smoothly.
Using Odoo inventory we can configure many features which are helpful to manage the inventory and warehouse operations. We can configure warehouses, locations, rules, etc. We can also configure operation types, routes, and putaway rules.
Using this blog you can get an idea of how to configure Warehouses in Odoo Inventory.
Before starting the Warehouse configuration we have to change some settings.
For this, we have to go to Inventory> Configuration> Settings
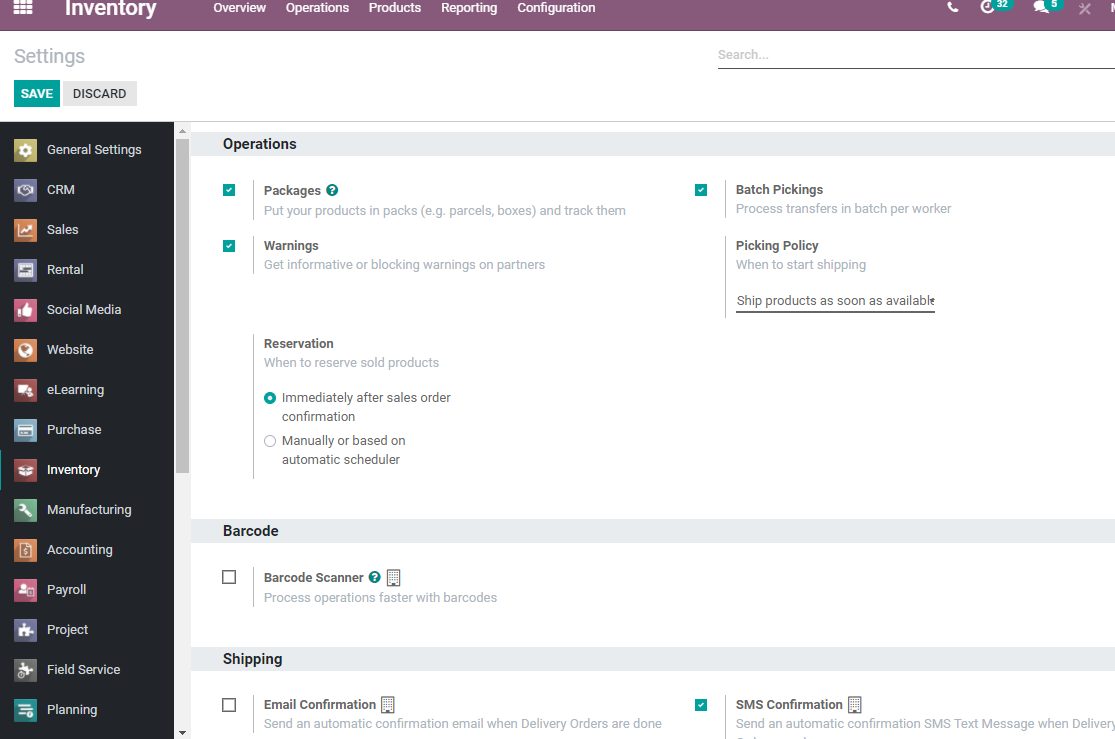
On this settings page, we can find the Warehouse section below

We have to enable the Storage locations and Multi-step routes to manage the warehouse. This will also enable us to manage and configure locations, putaway rules, and warehouse routes.
Installing the Inventory module is the first step and then we have to move straight to the Configuration menu. Below this, we can find Warehouse management.
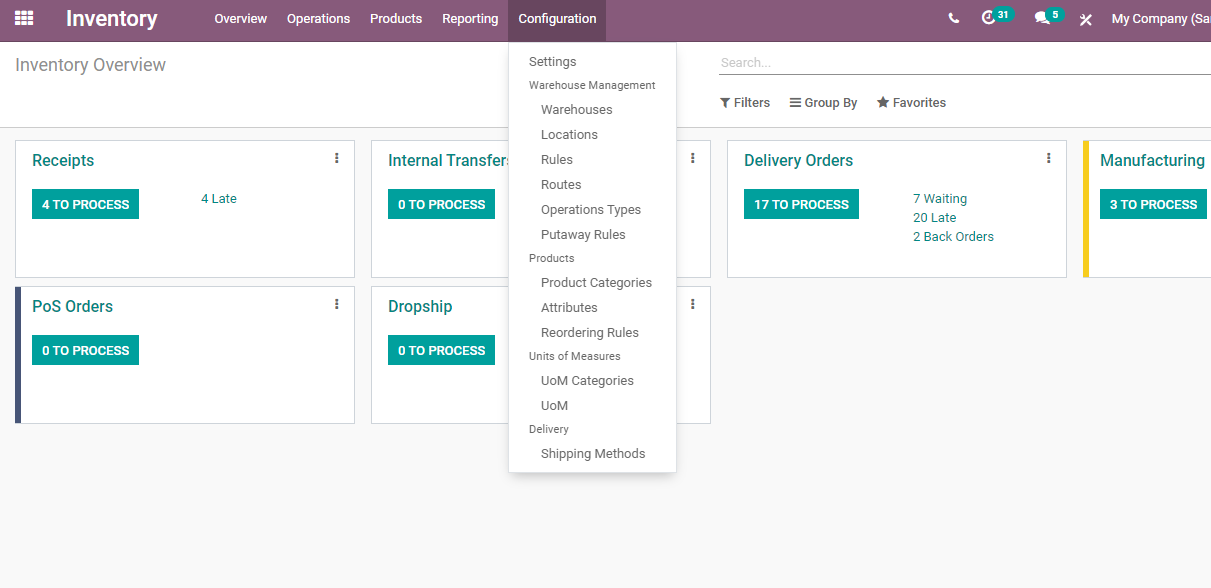
Underneath Warehouse Management we have Warehouse, Locations, Rules, Routes, Operations Types, Put away Rules, etc.
We can click the Warehouse option and go to the warehouse page.

In this page, we can find Warehouse San Francisco along with location stack and address details. We can also find the option to create a new warehouse. Let us check how to do this.
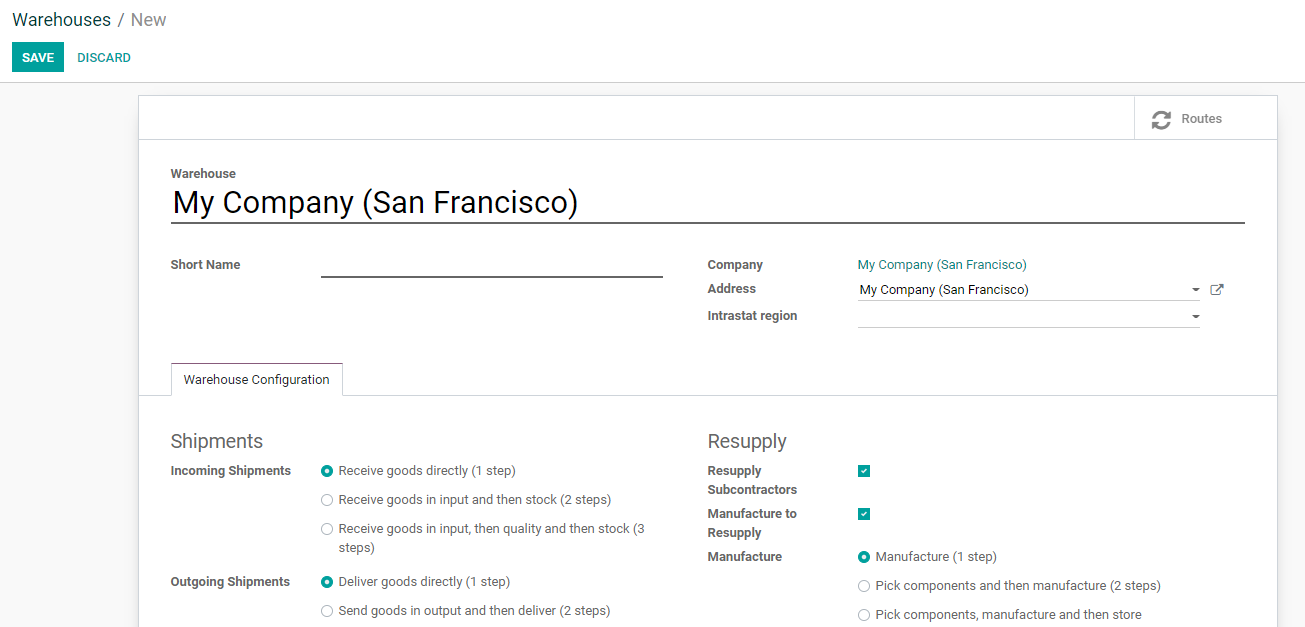
The page gives us separate fields to add warehouse name, short name, company name, address, Intrastat region, etc.

A tab Warehouse Configuration can be found below.
Here we can find different segments namely Shipments and Resupply.

Shipments
Shipments are the major part of this warehouse configuration. We can find two different types of shipments here and they are Incoming shipments and outgoing shipments.
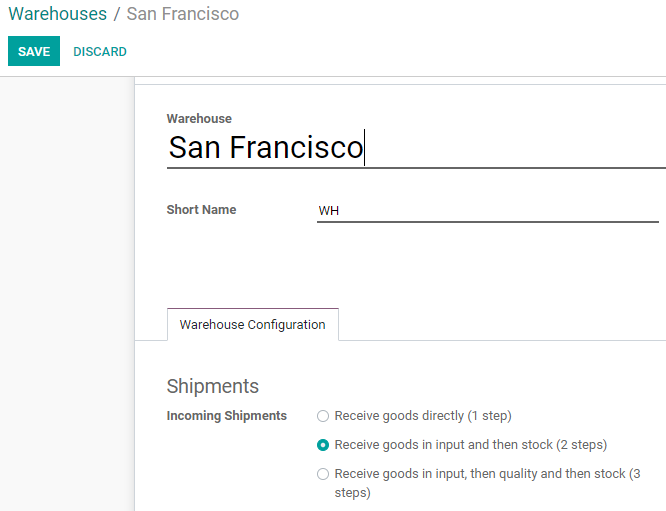
Incoming shipments
There are different options to manage the incoming shipment.
Receive Goods directly- It is a single-step process.
Incoming shipment is to receive the product. On selecting the first option we can receive the product directly.
Receive Goods in input and then stock. This two-step process will need two steps to receive the goods. The goods will be received and then moved to the stock.
If we choose to Receive goods in input, then quality check, and then stock, we will have to undergo three different steps before receiving the product. If we enable this option we will first receive the input. But then we will move the goods to a quality checking area. The quality of the product will be examined and verified before the goods are shifted to the stock.
Outgoing Shipment

Outgoing shipment means the goods being delivered or supplied from our inventory. Here also we have three options.
Delivering goods directly is the first option. This process will be over in one step. Here, the goods can be delivered to the customer directly.
Sending goods in output and then delivering is the second option involving two steps. Then we have the third option that is to pack goods, send goods in output, and then deliver to the customer location. It is a three-step process where packaging is also involved.
Resupply
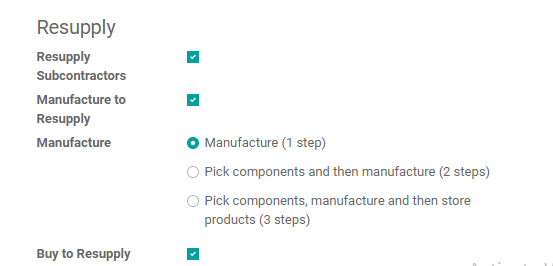
The second segment under the warehouse tab is Resupply.
Resupply subcontractors: We can find a checkbox here and enabling this check box will help us to resupply our subcontractors with the components. This is useful if the manufacturer assigns some work to subcontractors by providing the material for the work.
Manufacture to Resupply: On enabling this option we can manufacture items in the warehouse if the products are manufactured.
Manufacture: Here we have three different options as in shipments.
The first one is manufacturing and this is a single-step process. Manufacturing can be done using the components available in the warehouse.
Then the second option is to pick components and then manufacture. Here we have to pick the raw materials from and then start the manufacturing.

As we enabled the pick components and manufacture option we have a new operation type named Pick components in the above image.
The third option is to pick components, manufacture, and then store products. This three-step process enables us to store the products manufactured by the business in the warehouse.
As we have enabled the third option where we can store finished products a new operation type has been created.

We can find the new operation type store finished product here.
Buy to Resupply: Enabling this we can buy products or components to resupply. This is done based on stock assessment.
This is the method to configure warehouses using Odoo 14 inventory. We can configure as many warehouses as required using this tool. This is how it helps us to manage multiple warehouses and smoothen our operations. We can also manage the physical location of the product as well with Odoo.

We will be discussing all different topics related to Odoo Inventory through our blogs. We will be discussing Location configuration in Odoo 14 inventory, Inventory Adjustment, Product management, batch transfer, and every other feature of the Odoo Inventory module. We also maintain a YouTube channel to help you learn about Odoo. Interested readers can click the link to visit our YouTube channel.