The ship later is an advanced new feature of the PoS module that allows you to ship products at a different time and not instantly to the customer; in short, it means sell now and delivering the product later. This feature allows maximum fluidity on products and shipping management. This feature can be used in industries where the customer can choose to customize a product and they have to pay additionally to get their desired product crafted for them.
This blog will give you a complete overview of the Ship later feature and how to configure it in the Odoo PoS module
Configuration
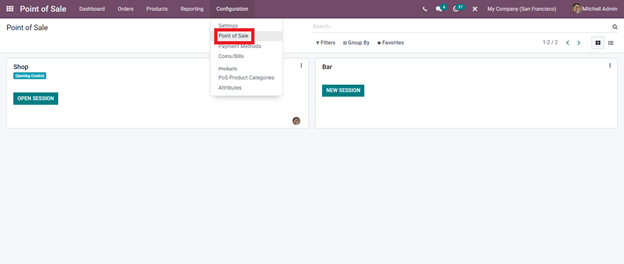
It is easy to configure this feature in the module. You can access the feature from the Point Of Sales module under the Configuration tab in Odoo 15 PoS module as shown in the screenshot given below
Odoo will take you to your point of Sales list tab as shown below
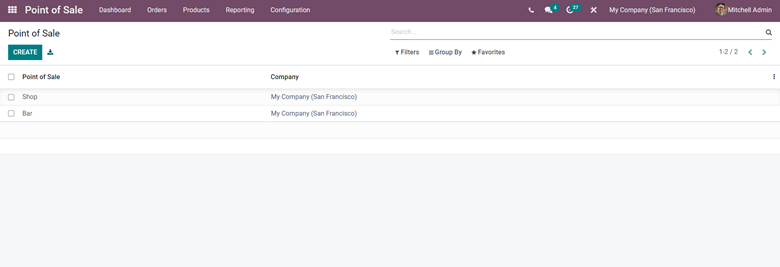
If you want to create a new point of sale click on the Create a button and configure the new Point of sales. All of the created Points of sales will be shown in the list view as shown in the screenshot given above. If you want to configure the Ship later feature click on the Point of Sales that you want to configure. Odoo will take you to a configuration page and scroll down to view the ship later feature as shown in the screenshot given below.
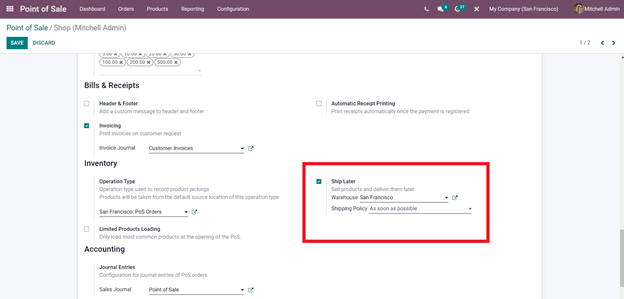
From the configuration, section click on theShip later features to activate it. Choose the Warehouse and the Shipping policy to finalise the configuration on the feature. After the configuration proceeds to the save button to save the changes for Odoo to act upon. After the configuration, the feature will be available in the POS module.
After the configurations, to use the feature go to your PoS section by clicking on the Open section key from the PoS dashboard. Odoo will immediately take you to the PoS section as shown in the screenshot of the PoS section given below.
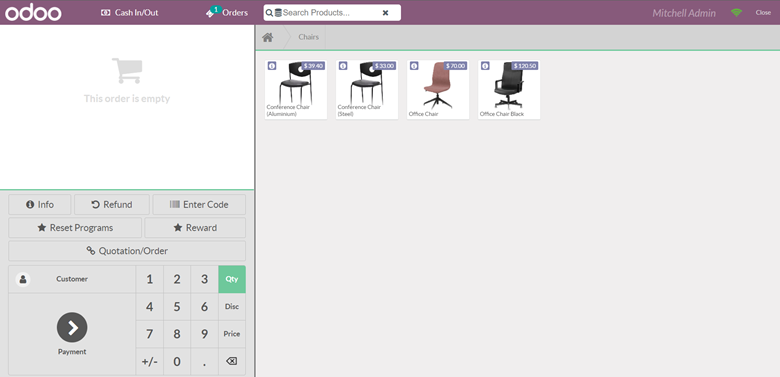
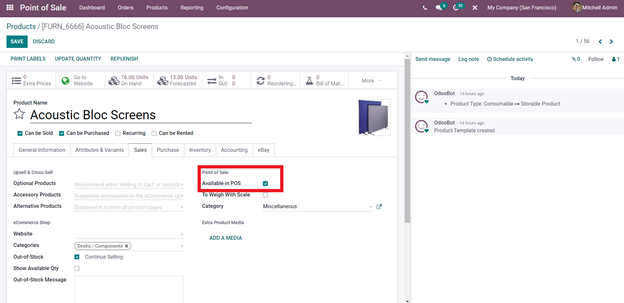
From the PoS section select and add the products. It is important to note that the desired product must be included in the PoS module from the Product tab. To configure this go to the product tab of the PoS module and click on Products. Odoo will give you the list of products, click you have at hand, proceed on to the product that you want to include inPoS and configure it by clicking on the Edit button and ticking the Available in POS, the box under the Point of Sales in the Sales tab as shown in the screenshot given below.
After adding the product click on the From the Customer, tab add the customer by clicking on them as shown in the screenshot given below.
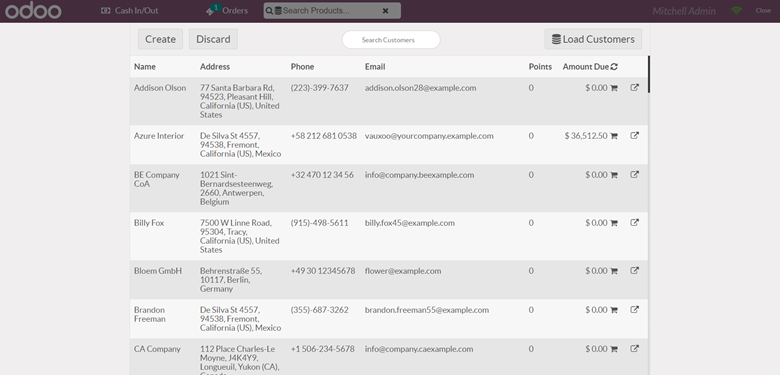
Select the customer from the list and continue with the PoS section. From the PoS section enter the amount and proceed on to the Payment button to continue.
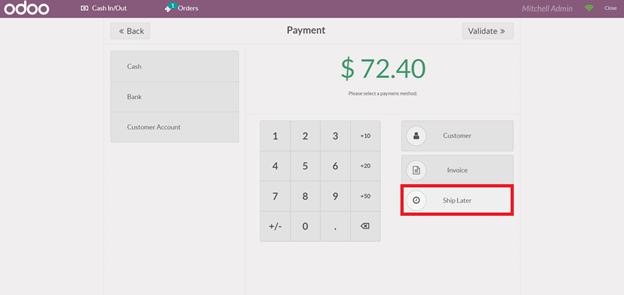
Odoo will take you to another section as shown above. From here you can see that a new button Shiplater appeared as a result of activating it earlier. Click on the Ship Laterbutton as highlighted above and validate by pressing on the Validate button as shown in the screenshot given above. Odoo will give you a page on billing details that you can overview and send to the customers to confirm the Orders shown in the screenshot given below. It is important to note that you must select the customer for the validation button to work.
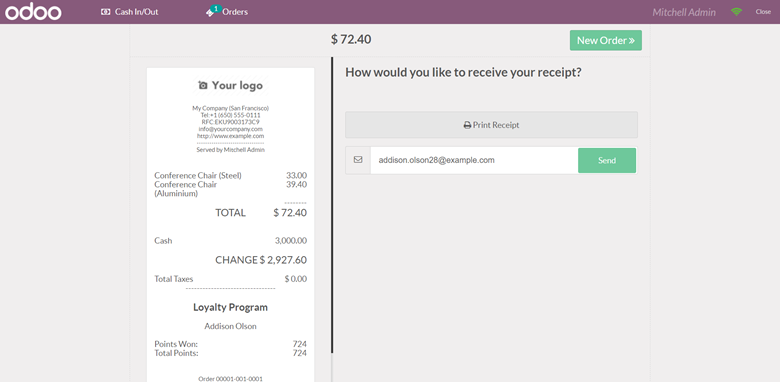
Overview of the details and you can send the receipt via the mail ID of the customer by clicking on the send button as shown in the screenshot given above. Odoo will automatically recognize the maIl based on the customer configurations. You can also print the Receipt if the need arises by clicking on the Print receipt button. You can create a new order by clicking on the New order button and Odoowill take you to the Order configuration tab for creating a new order. To exit click on the Close button at the right-hand corner near your name display.
You can view the order from the orders tab in your PoS dashboard. Go to your Orders tab and click on the Orders from the dropdown options as shown in the screenshot given below.
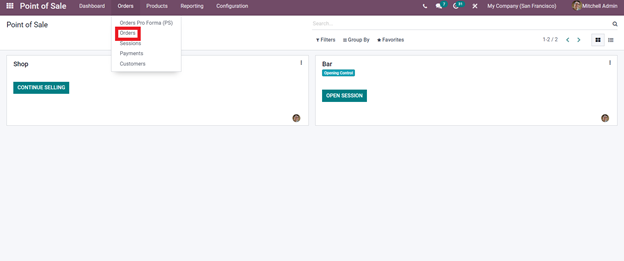
Click on Orders and Odoo will take you to the order's tab as shown in the screenshot given below.
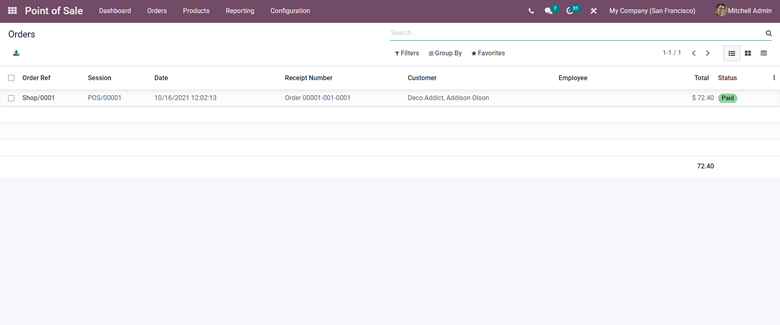
You can view the orders from here. The last added will be displayed at the top. Click on the order to display the details on ita s shown below.
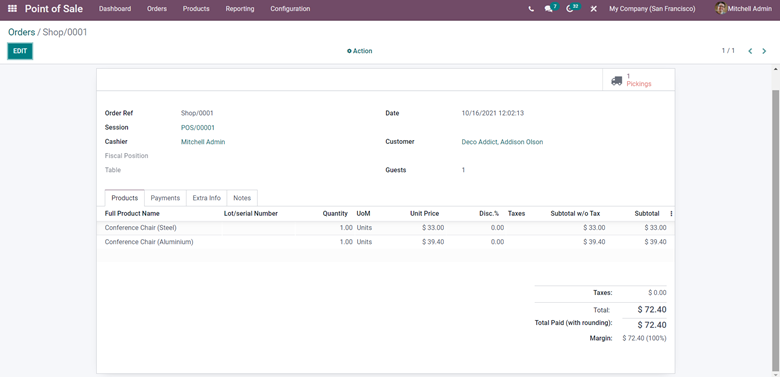
All of the details regarding the order such as the Products, Payments, Extra info and Notes can be seen and edited from here. You can also note that a new button has appeared on the screen called Pickingsas highlighted in the screenshot given below.
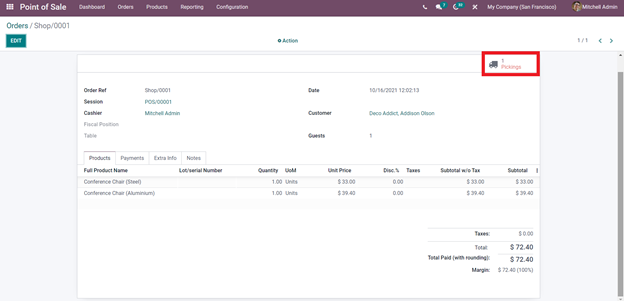
Click on the Pickingsbutton to see the delivery order as shown in the screenshot given below to view the order as shown below.
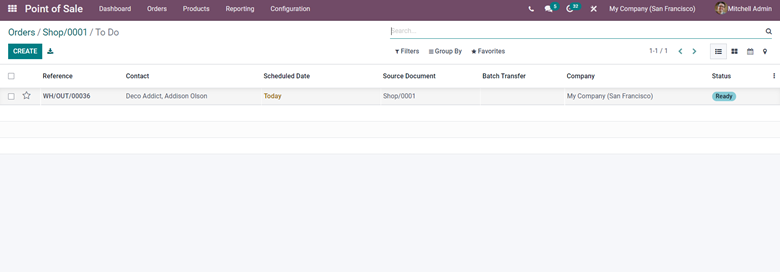
Click on the order that you have created to move to the final step of the process
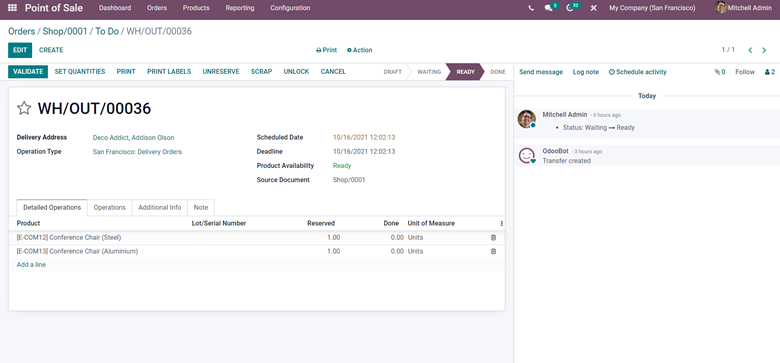
You can finalize the order form here. You can edit and reconfigure the order by clicking on the Edit button and viewing the detailed operations, Operations, Additional info, and note. Once the product is delivered you can validate and mark it as done from the backend or here. You can after this continue the process as much as you want in the same way. The PoSmodule is capable of handling complicated product-related matters and the Shiplater feature can be applied to multiple orders and products simultaneously without any data or product clutter to avoid unnecessary confusion.
The new feature provides more fluidity in Product and order management in Odoo 15 PoS module. This feature can be efficiently used to ensure sales and customer satisfaction to a huge extent. If you are running a company that takes orders first and makes the product later then this feature can help you a lot to preserve important sales status