The Odoo Subscription Management module can help you manage your subscribers—membership-based businesses like health clubs, insurance providers, landlords, cable operators, etc. Clients must pay a monthly fee in exchange for subscription-based services. Your ability to manage your subscribers is made simple by the Odoo Subscription Management Module.
The subscription module is a simple method for managing subscribers and recurring billing. Focus on your services and relationships while Odoo handles your subscriptions and recurring revenues. Deliver flawless, automated invoices and contracts in a flash, easily handle payments, and have taxes handled according to your preferences.
The application can be used as a marketing strategy to maintain client relationships. For instance, there is a high probability that a consumer will make repeated purchases if they have a subscription with your company.
Features of Odoo Subscription
1. Easy tools for automatic subscription management.
2. Build solid and enduring relationships with your subscribers.
3. Spend less time on boring activities and more time on increasing sales.
4. In one click, learn which metrics to consider.
5. Users can simply login into the application without any login requirements and conditions.
6. Users can provide a user-friendly portal to customers from which they can quickly gather all data and contract options.
7. Users can set automatic payment and auto-invoicing facilities for hassle-free subscription management.
8. You could help your sales staff move quickly by providing contract templates for your most used sales scenarios.
9. Sales team members can analyze their individual performance to improve their max potential.
10. Inbuilt revenue analysis will display a dashboard view with all the details that help to improve the business.
11. The platform helps to generate the forecast of your business, comprehend your progress, and aid in your company's achievement of its goals using the overall statistics of your company to evaluate every aspect.
These are some of the primary features of the subscription module for Odoo. Let's peek inside the module platform and evaluate the applicability of the features we covered in the previous section.
How to create a new subscription
Creating a new subscription is a manageable task in the subscription management application. So Let’s hop into the module’s interface available in the odoo ERP platform.
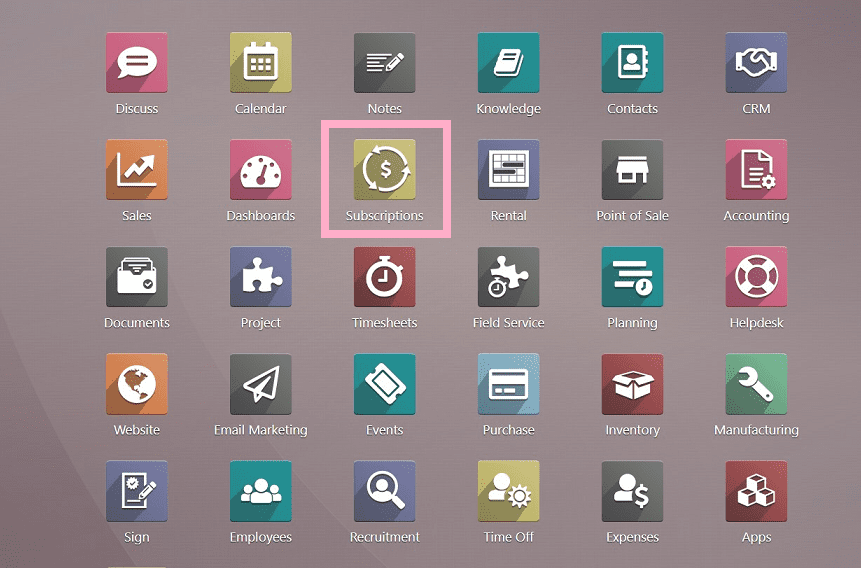
We can see the subscriptions home page as shown in the screenshot below.
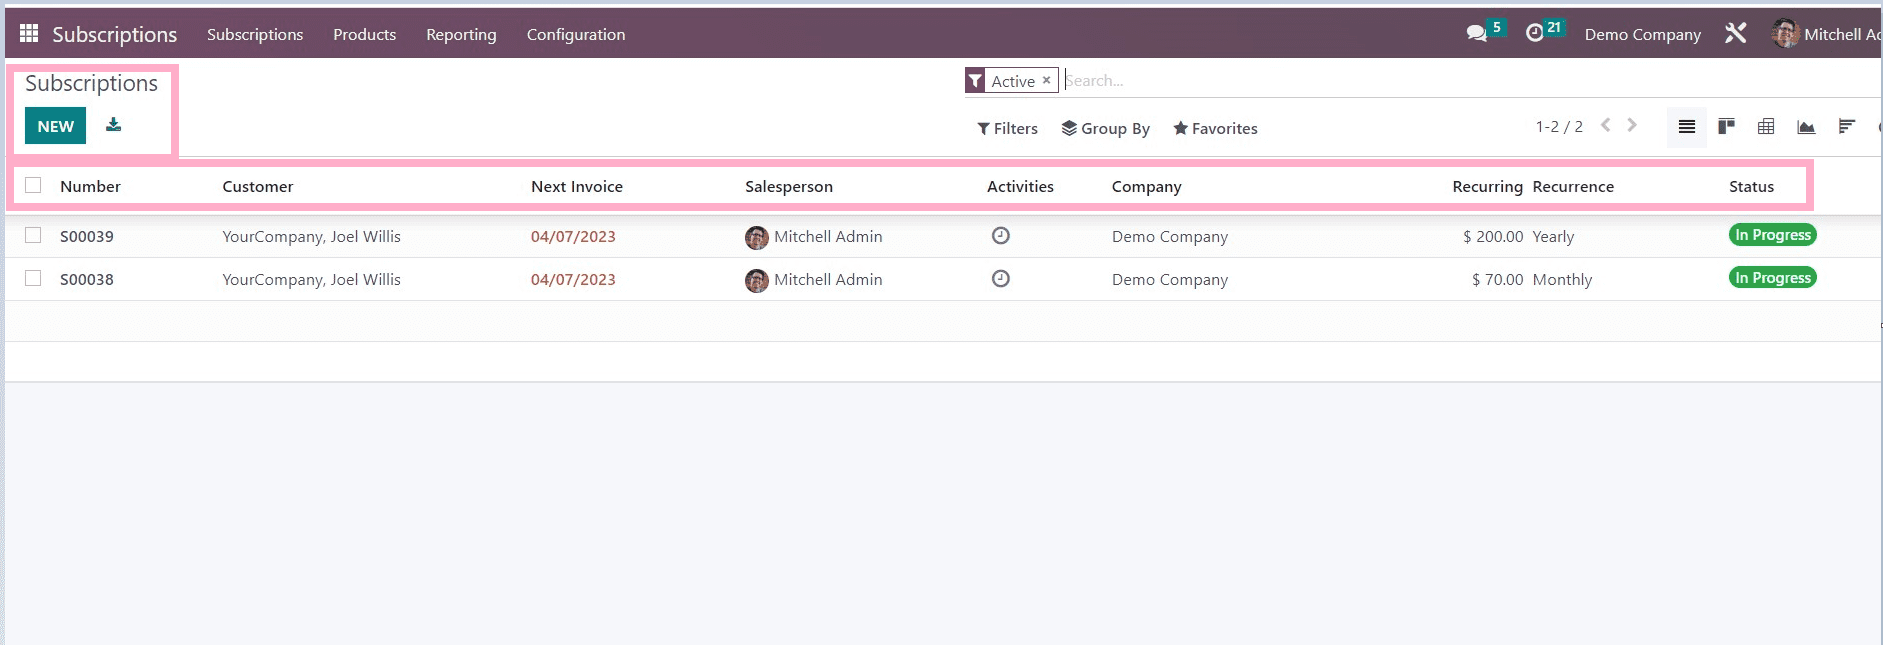
The page contains a list view of the user data such as Subscription number, customer details, next invoice date, salesperson’s name, activities, company, recurring recurrence, and status.
We can change the view of the created data to a Gantt chart view, bar chart view, etc. This feature is similar to every other Odoo application.
Users can create a new subscription using the” New” upper left button in the screenshot above.
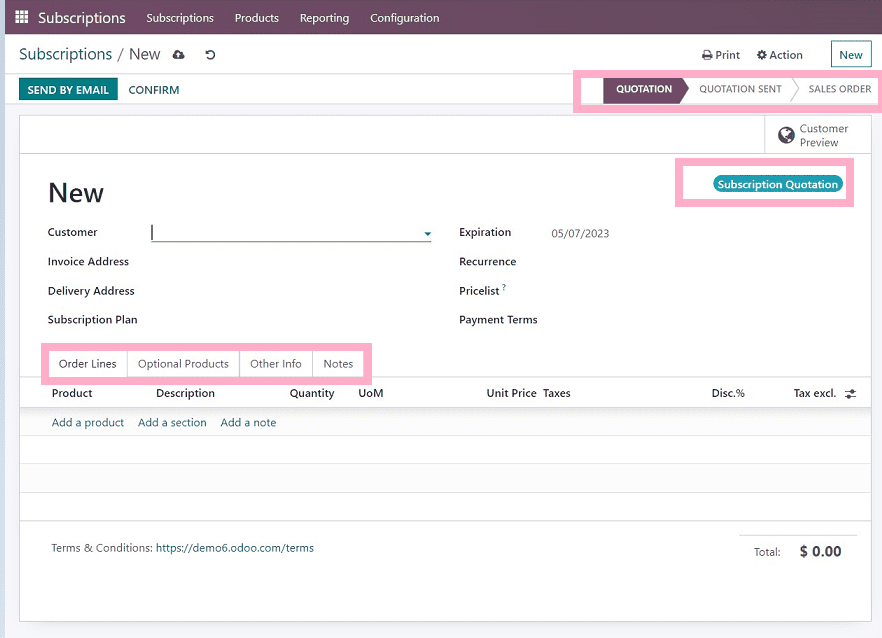
We can see the subscription form view from the above screenshot, which contains four sections,
1. Order Lines
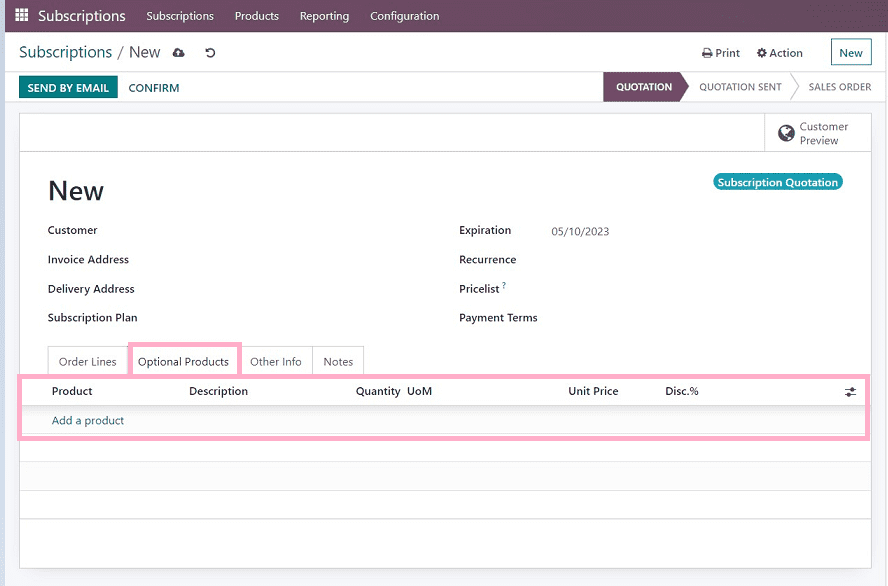
2. Optional products
3. Other info
4. Notes
In the above form view, we have to provide the customer details, such as the customer name, invoice address, delivery address, Subscription plan (monthly subscription, yearly subscription),
Expiration, recurrence, price list, payment terms, etc.,
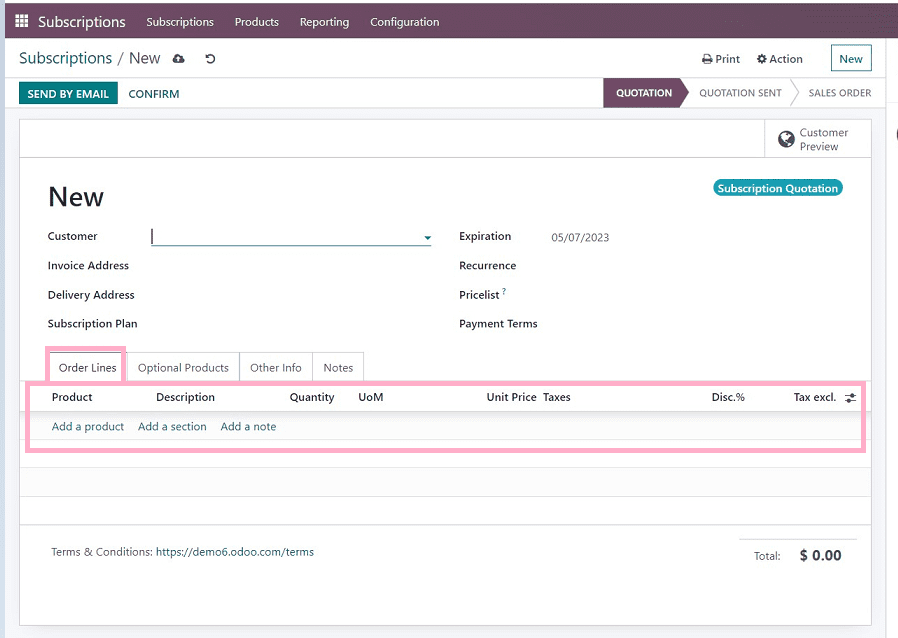
Order Lines
In this section, Users can add products, quantity, price per unit, taxes, discount rates, etc.
Optional products
Users can add optional products using this section. Using optional items is a marketing strategy for cross-selling products in addition to a primary product. The objective is to offer your clients products that are pertinent and beneficial, and also we can provide the description of your product, quantity, unit price taxes, etc.,
Other info
Users must fill in the details regarding Sales, Invoicing and payments, delivery, and Tracking.
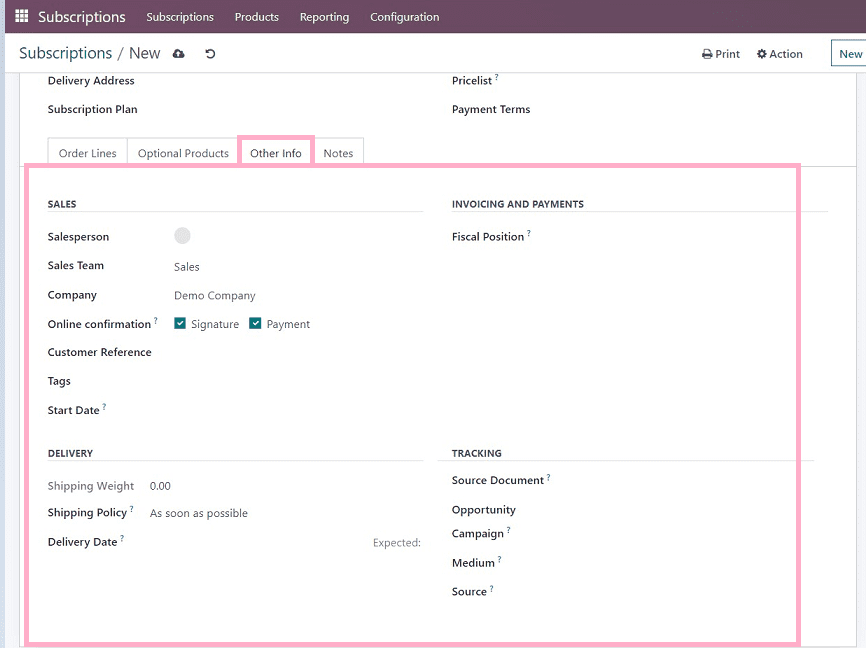
In this form, we have to fill in the details regarding the
1. Salesperson name: Name of the salesperson
2. Sales Team: Name of the sales team
3. Company Details: Company name and address
4. Online Confirmation: Select the check boxes for the online confirmation while putting signature and processing payments.
5. Customer Reference: References of customers
6. Tags: Tags related to the subscription
7. Start Date: Start date of the subscription
8. Shipping Weight: weight of the products in case of delivery
9. Shipping Policy: Shipping policies regarding the products
10. Delivery Date: Delivery date
11. Fiscal position: The default values used to adapt taxes and accounts for particular customers
12. Source Document: Delivery reference documents
13. Campaign: campaign names regarding specific products, collections, offers, etc.
14. Medium: Method of delivery such as post, email, banner ad, etc.
15. Source: Source of the link
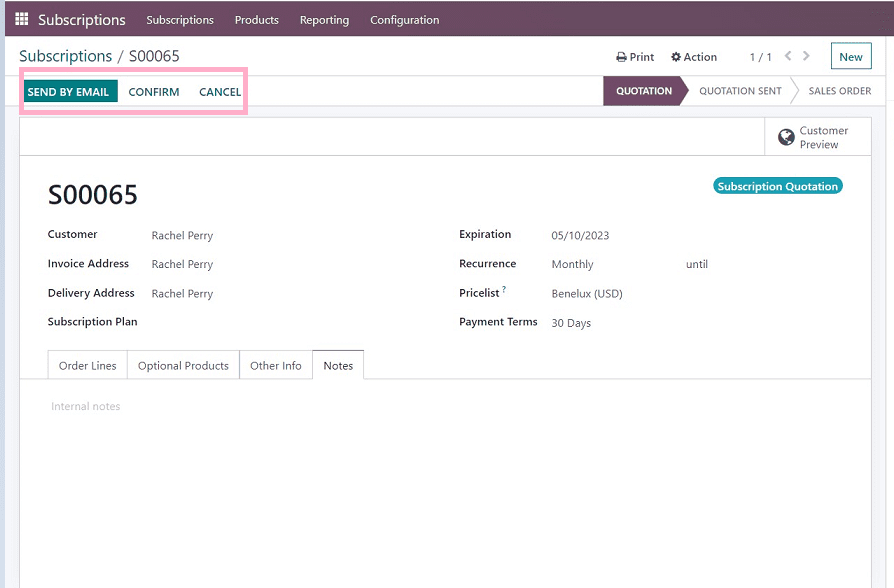
Save the information once it has been entered into the appropriate fields. It is also possible to send an email regarding the subscription.
The draft from which we can send the email will display an email body, as seen in the screenshot below.
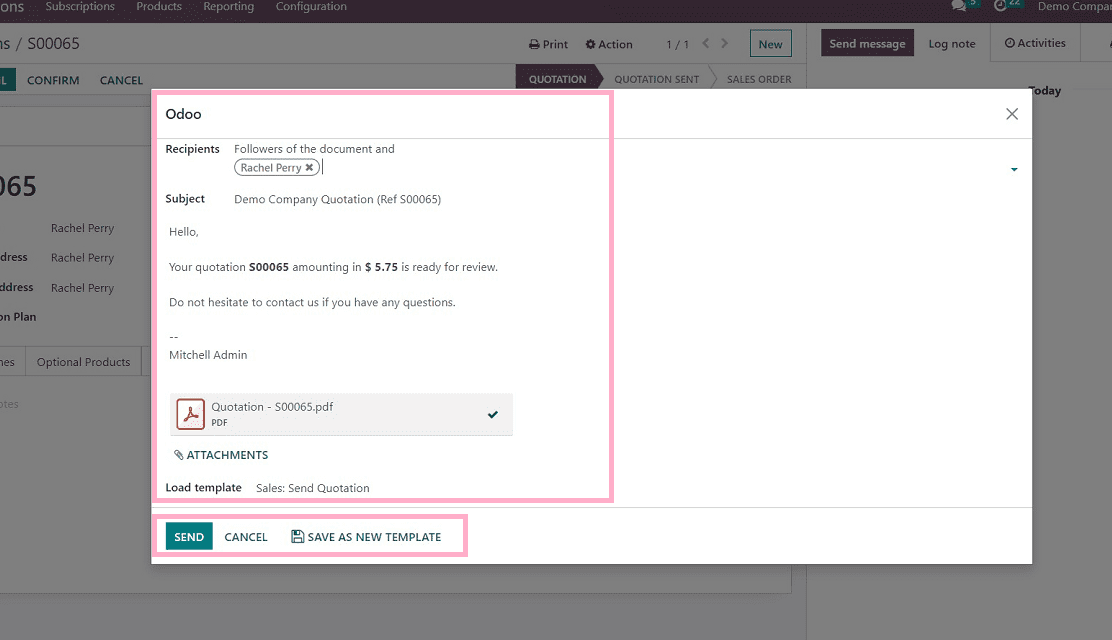
Send the mail after editing the mail as per your requirements.
Click on the “Confirm” button once you are sure about the subscription process, as shown in the screenshot below.
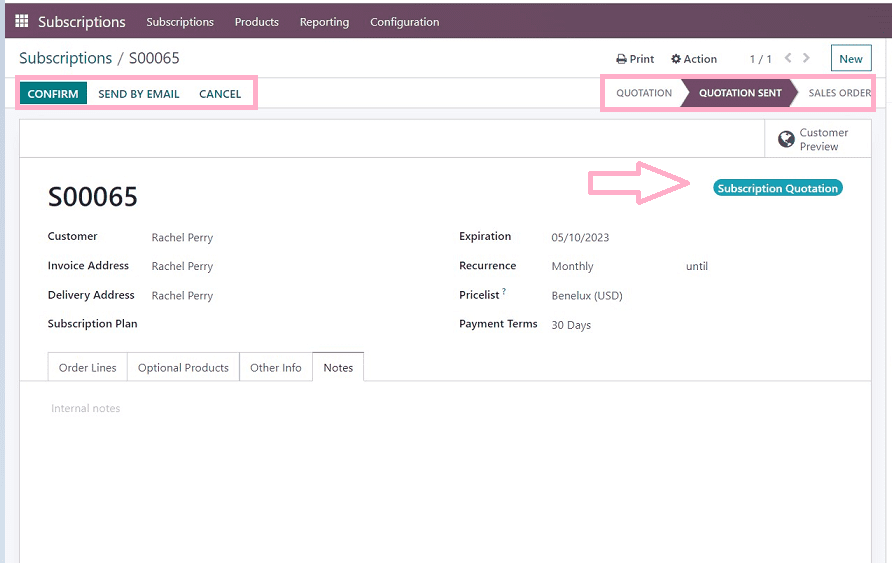
We can see our subscription status from the upper right corner of the form view. Once we have confirmed the subscription, another form view will be displayed, as shown in the image below.
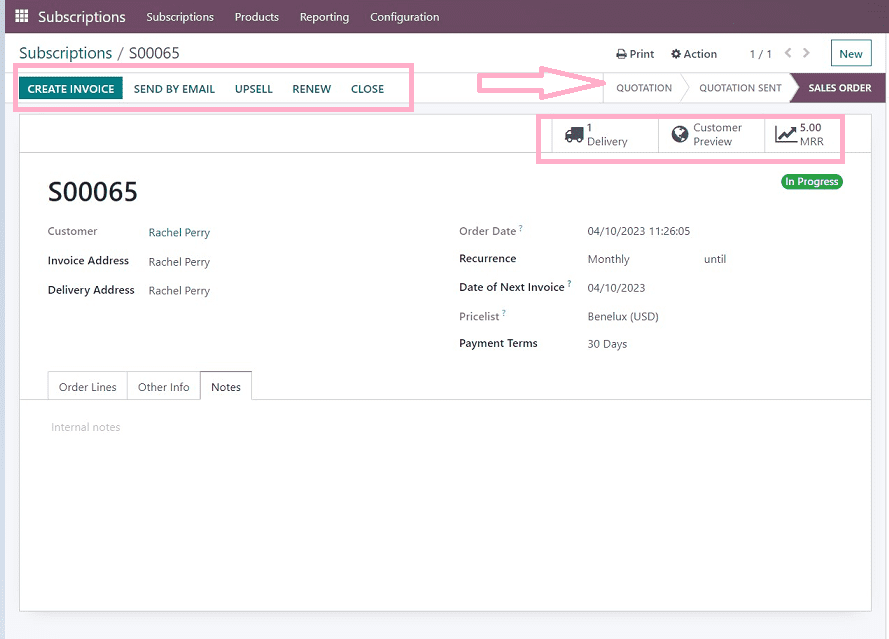
The next step is creating an invoice. Users can do it by clicking the “ Create Invoice” button in the upper left corner of the from view. Also, we can upsell the product or service and renew the service using the respective buttons.
Upsell & Renew
Users can upsell the product or services after its creation just by simple clicks. You can only order an upsell if the delivered quantity exceeds the invoiced amount and the invoice is created based on the requested quantity.
Users can also renew their old subscriptions using the “Renew” button.
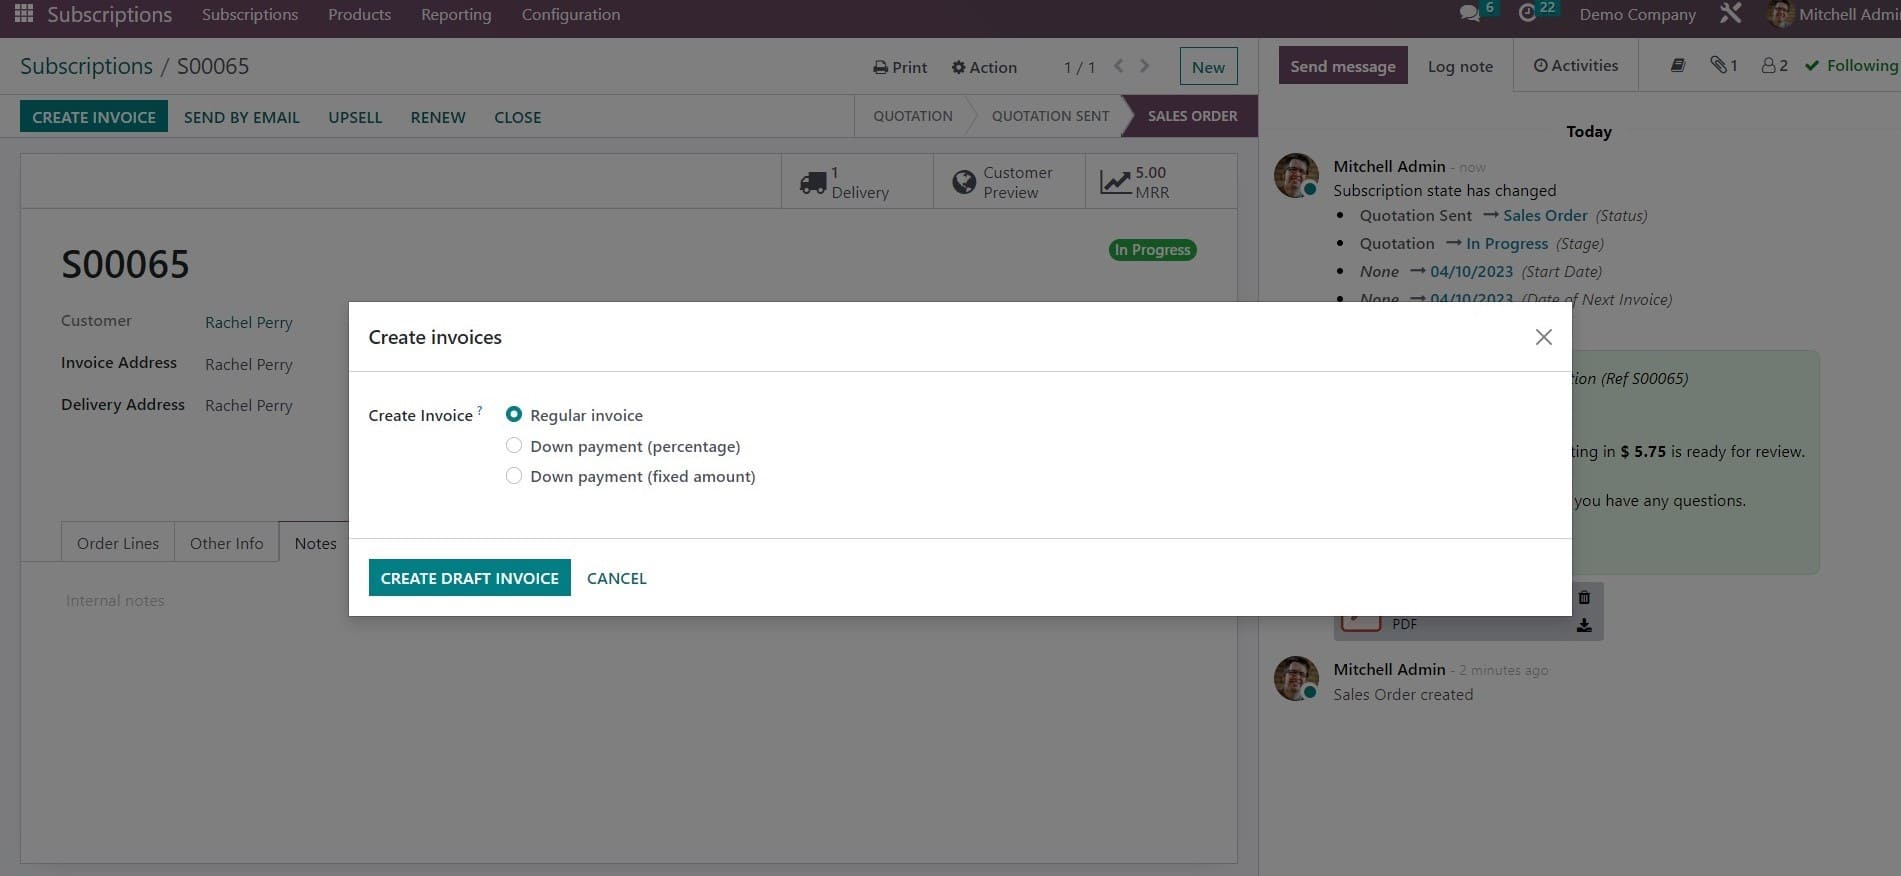
We can create an invoice using the above page and click the “ Create Draft Invoice” button to create the same.
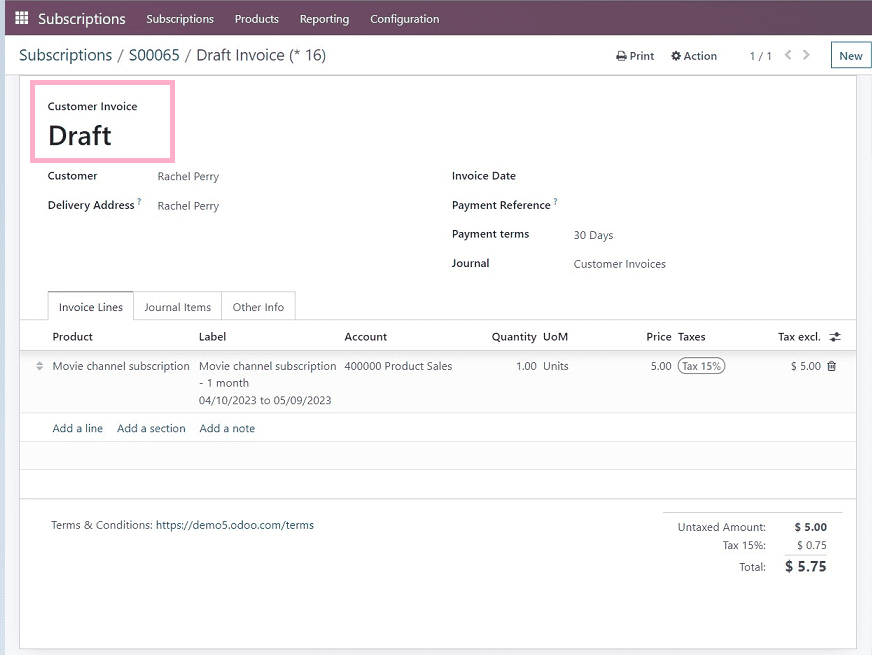
We can see our invoice draft in the above screen snip. Also, it is possible to add journal items to the completed invoice.
After creating the invoice, we can do the payment processes using the “Register Payment” button from the upper left corner of the form.
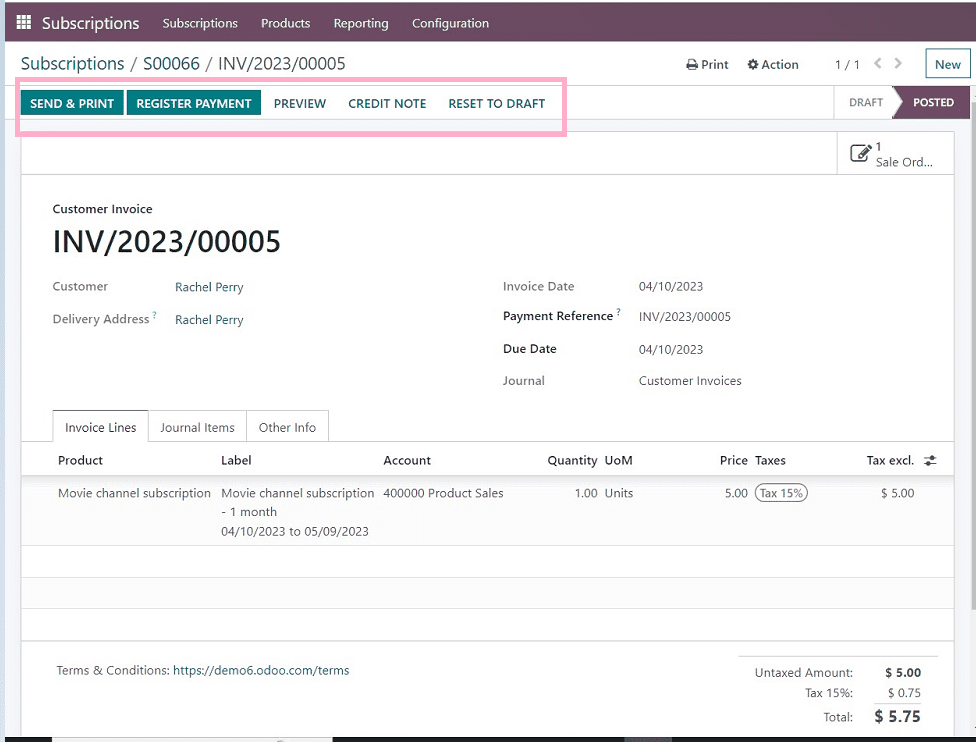
A payment form will appear on the screen after clicking the “Register payment “button, as shown below.
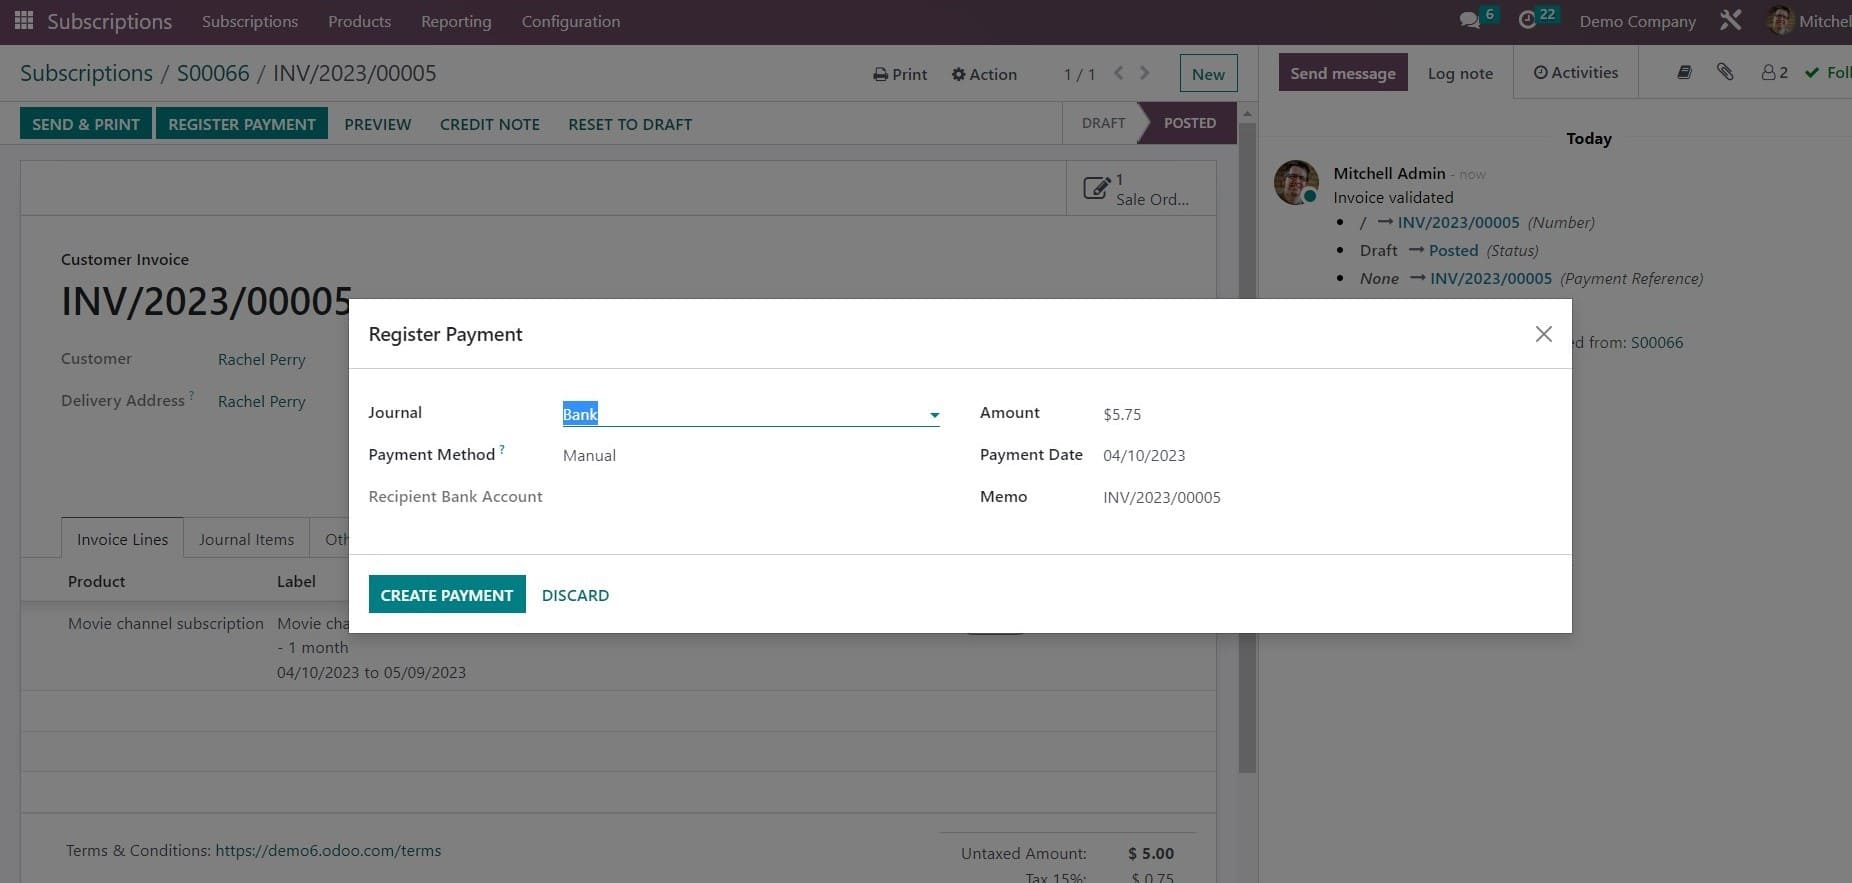
Users must add their payment journal as a bank, cash, etc.
Payment method, recipient's bank account details, amount, payment date, and memo.
After providing the required details, click the “ Create payment” button.
We can see the subscription payment status in the form view, denoted by a green ribbon in the screenshot below.
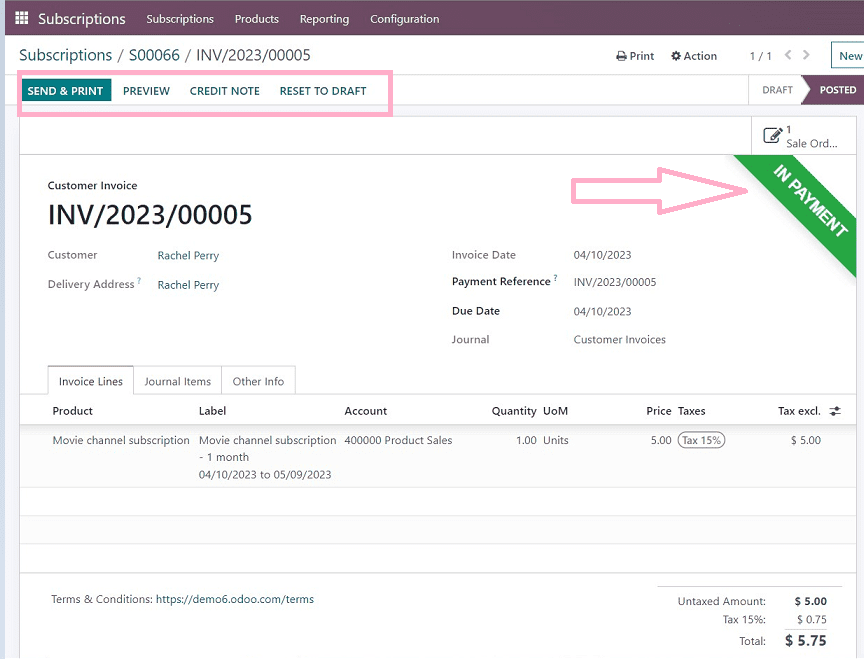
As we can see, a green ribbon appeared on the page, indicating the subscription is in payment. We can get a preview of the invoice, add a credit note, and reset the invoice into the draft by using the upper left buttons available in the form view, as shown in the above screenshot.
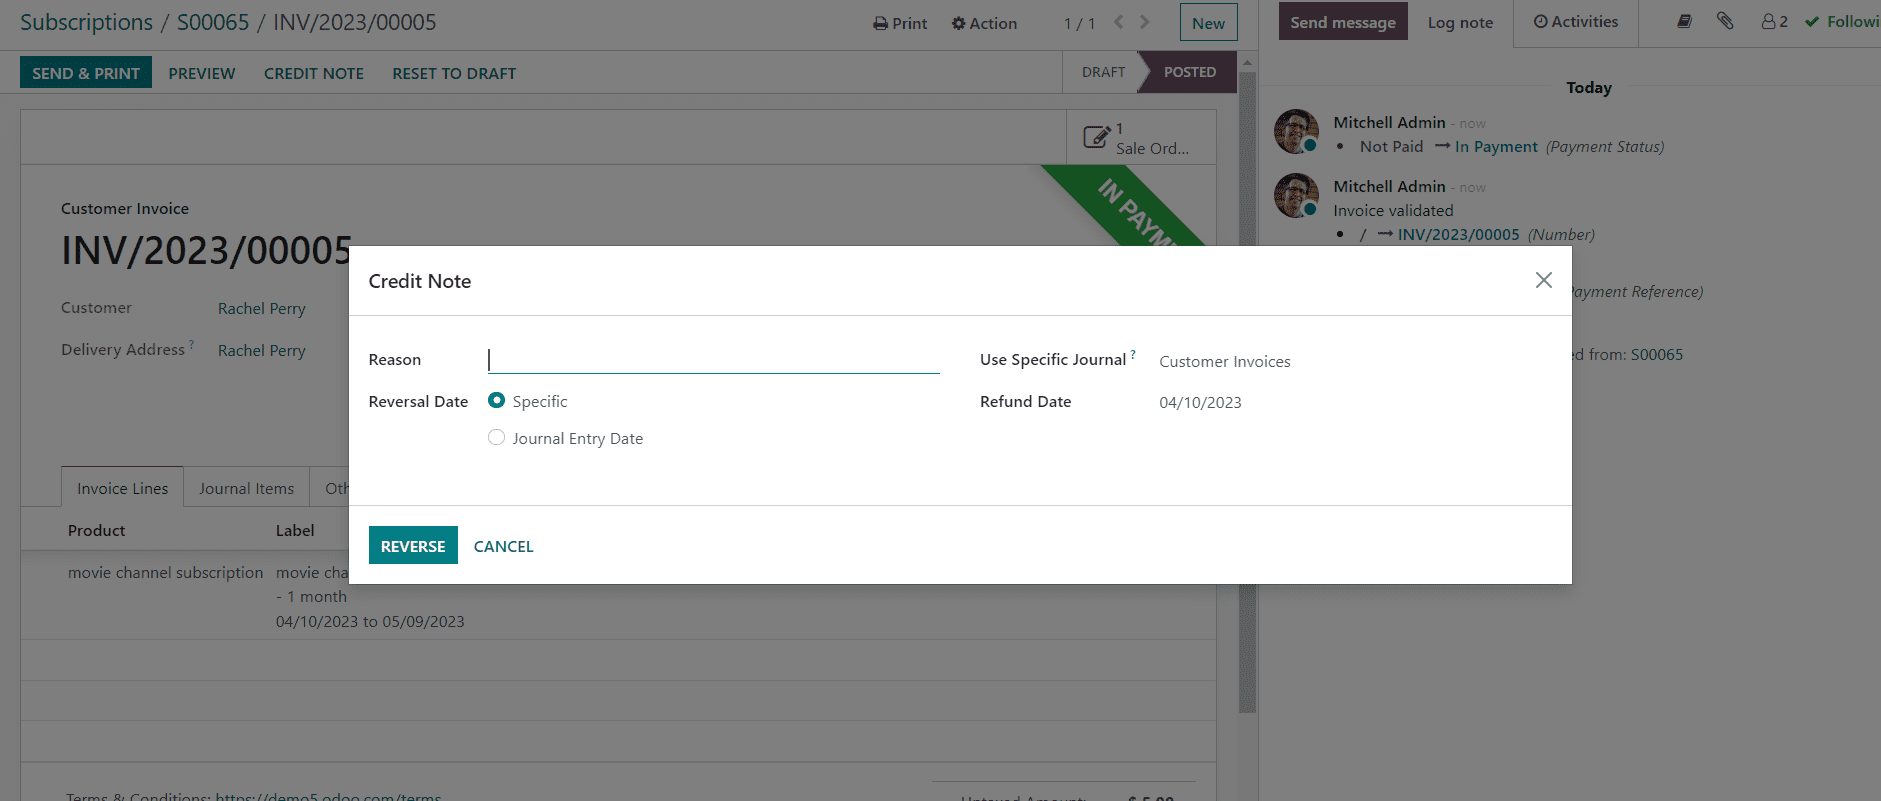
The above screenshot shows the credit note section and its processes.
We can check our newly created subscription order from the subscription menu. It will be added to the previous dashboard view, like the screenshot below.
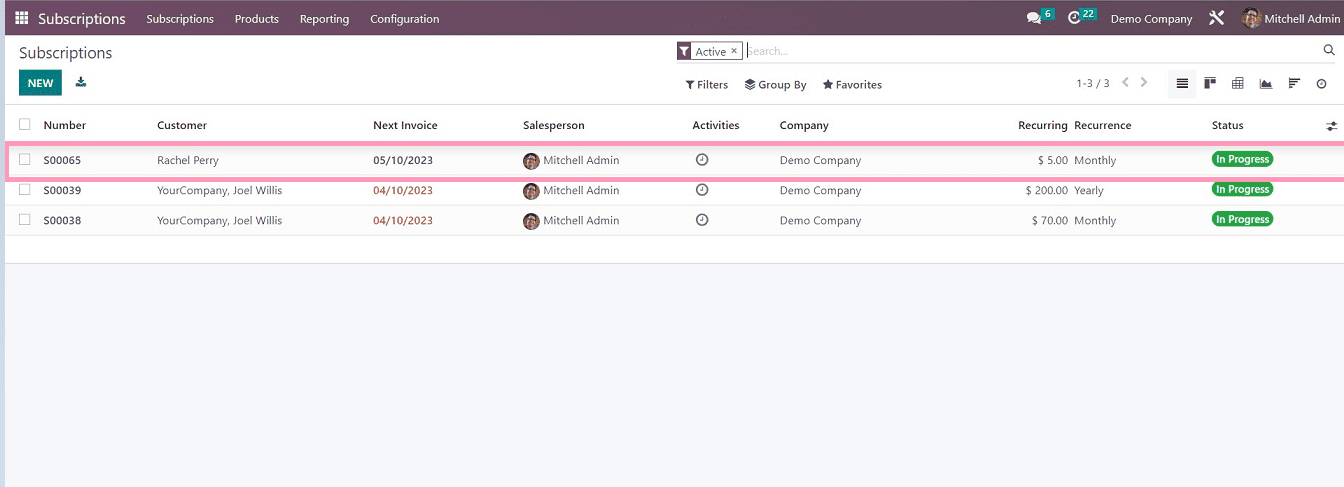
Now the users can manage the created subscriptions by clicking on the respective field.
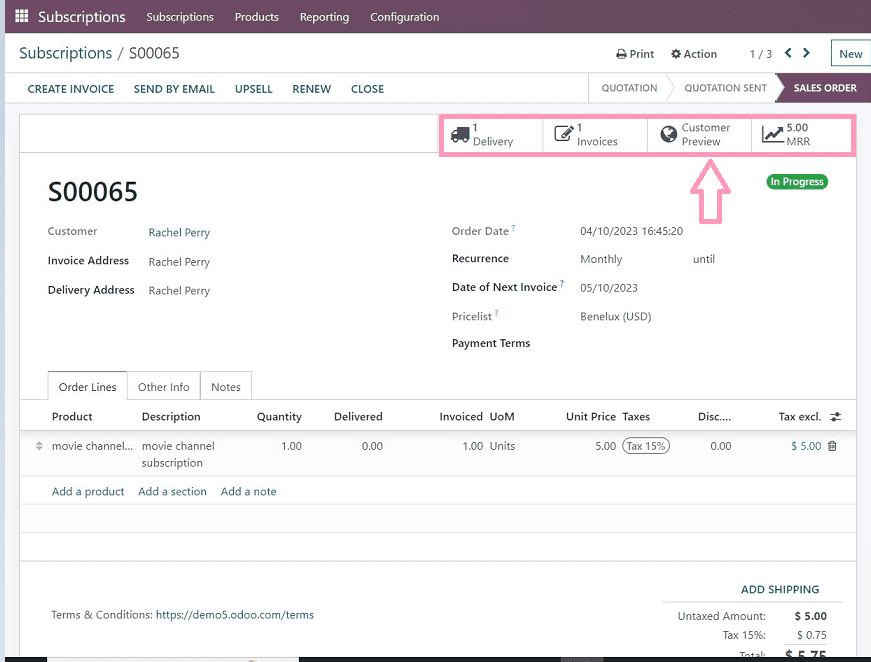
We have now entered into the newly created subscription. We can check and manage the subscription from here. Using the upper right corner buttons, we can also check and manage the delivery details, invoices, customer preview page, and monthly recurring revenue analysis.
The procedures for adding new subscribers to the Odoo 16 platform have been covered in this article. This blog will provide an overview of the features and operations of the Odoo subscription platform. This is only a high-level overview of how new subscriptions are created. We can talk about it in another session.