One of the vital parts of an organization is to give remuneration and appraisal for employees based on their services. An asset of the company boosts by evaluating the employees' performance and giving them more opportunities. The employees are satisfied with work recognition and services through the appraisal. An employee appraisal provides several benefits for the company, and an ERP system easily automates the employee appraisal process. The Odoo 15 Appraisal module ensures you develop goals, surveys and analyze the appraisal. It is easy to design your survey and automate the evaluation process.
This blog gives you an insight into Employee Appraisal in the Odoo 15 Appraisal module.
You can develop appraisals and evaluate the performance of employees easily through Odoo 15 Appraisal module. A periodical employee evaluation is a profit for large and small organizations. We can see the appraisal status for each employee in a company using the Odoo 15 Appraisal module. Let's look at a detailed view of employee appraisal with the Odoo 15 Appraisal module.
Appraisal Module
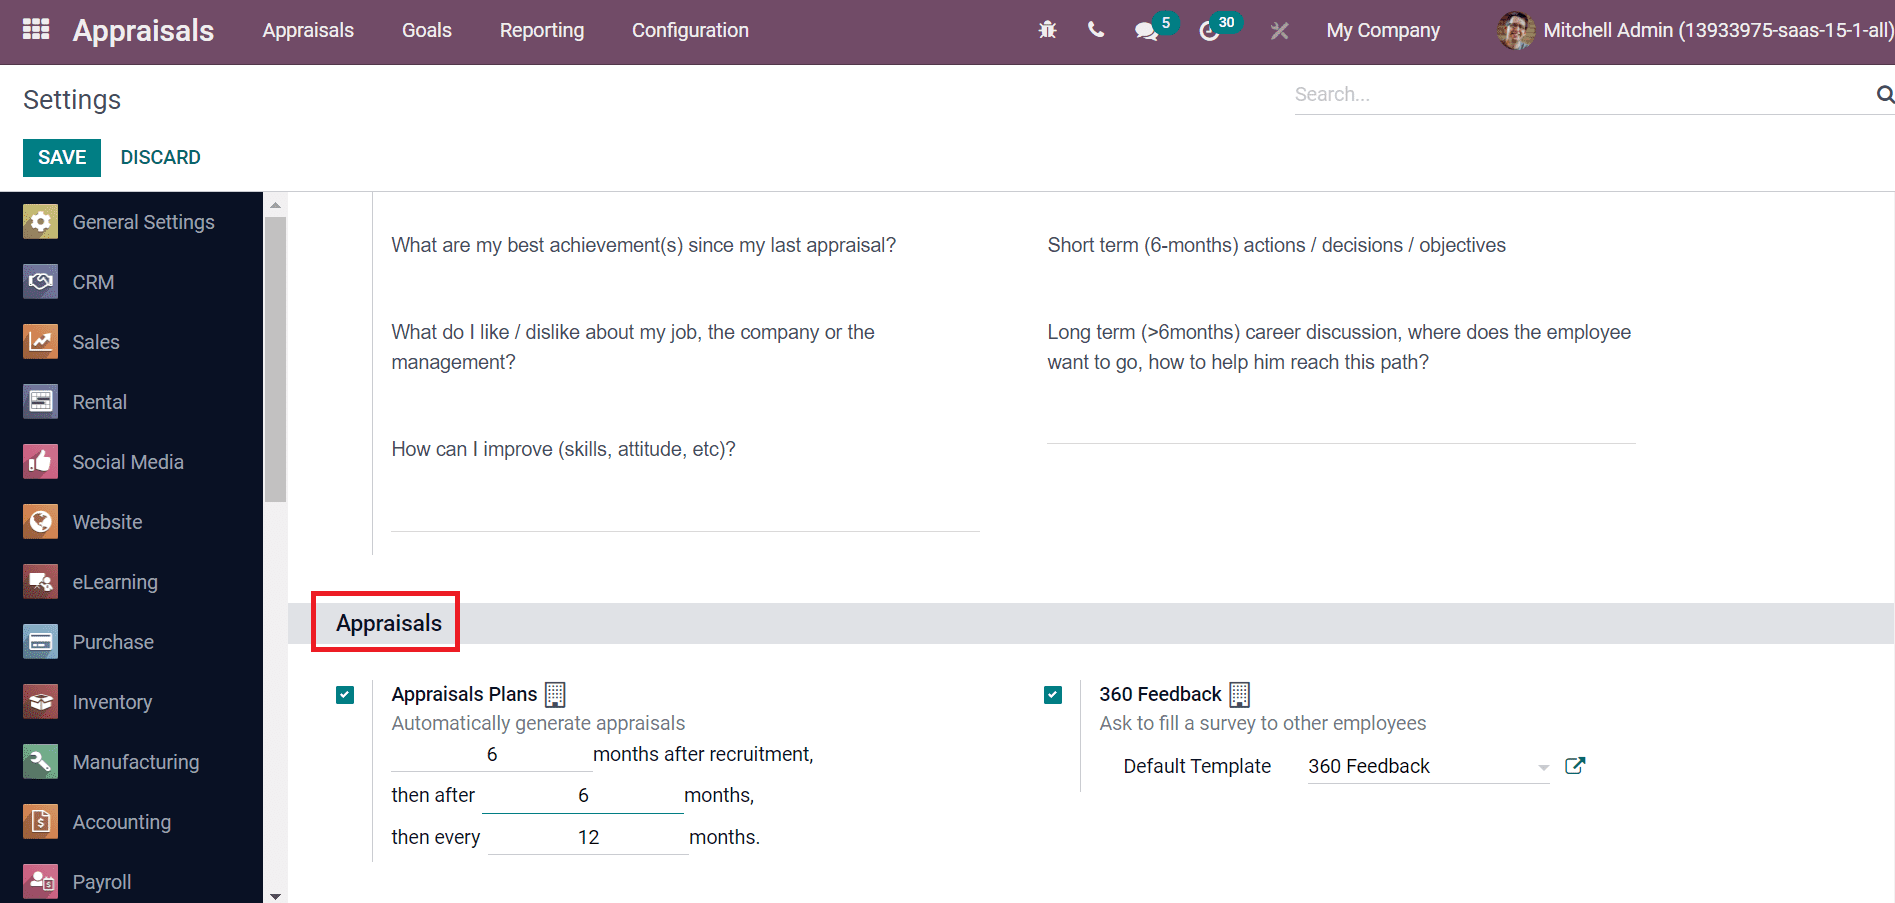
Setting a minimum time for appraisals from the Settings is necessary before developing an Appraisal module. Choose the Settings menu from the Configuration tab, and you can manage the appraisal settings. Here, enable the Appraisals Plan option to generate appraisals based on months. You can also ask employees to fill out surveys by activating the 360 Feedback option inside the Appraisal section. Select the Save icon after enabling these options, as illustrated in the screenshot below.
We can generate a new appraisal by clicking on the Create icon in the Appraisals dashboard. Users can create an appraisal from the Odoo Employees module. From the Employees dashboard, choose one of your employees.
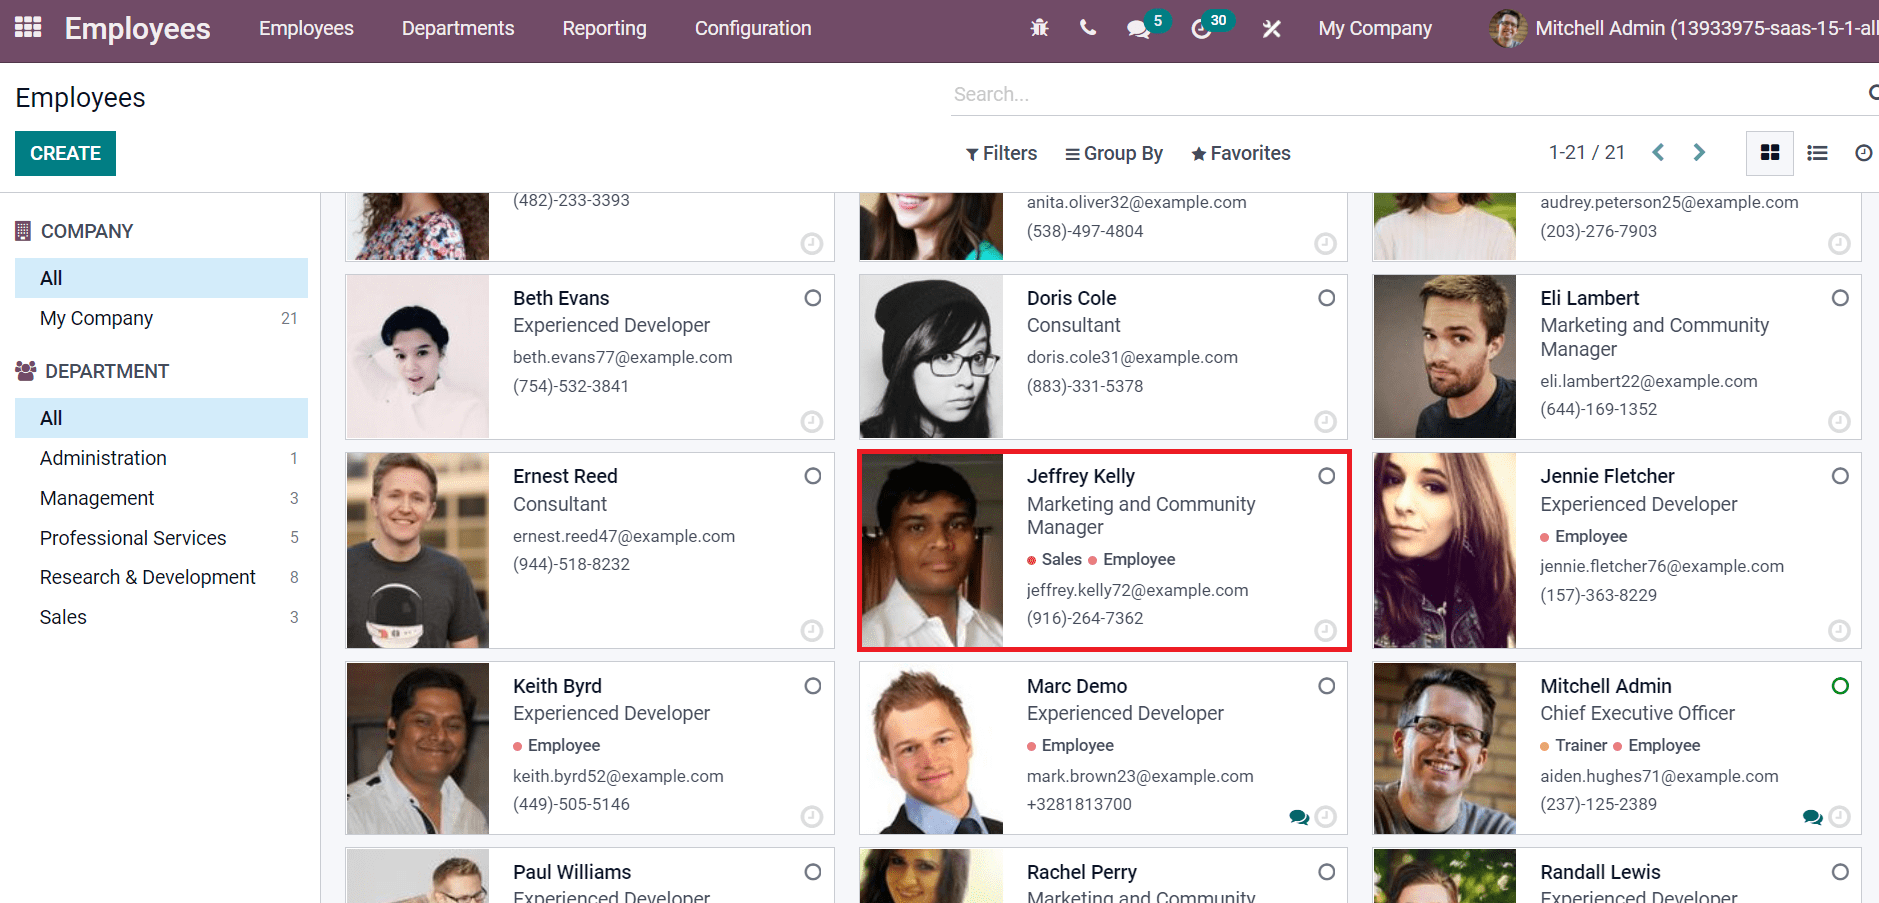
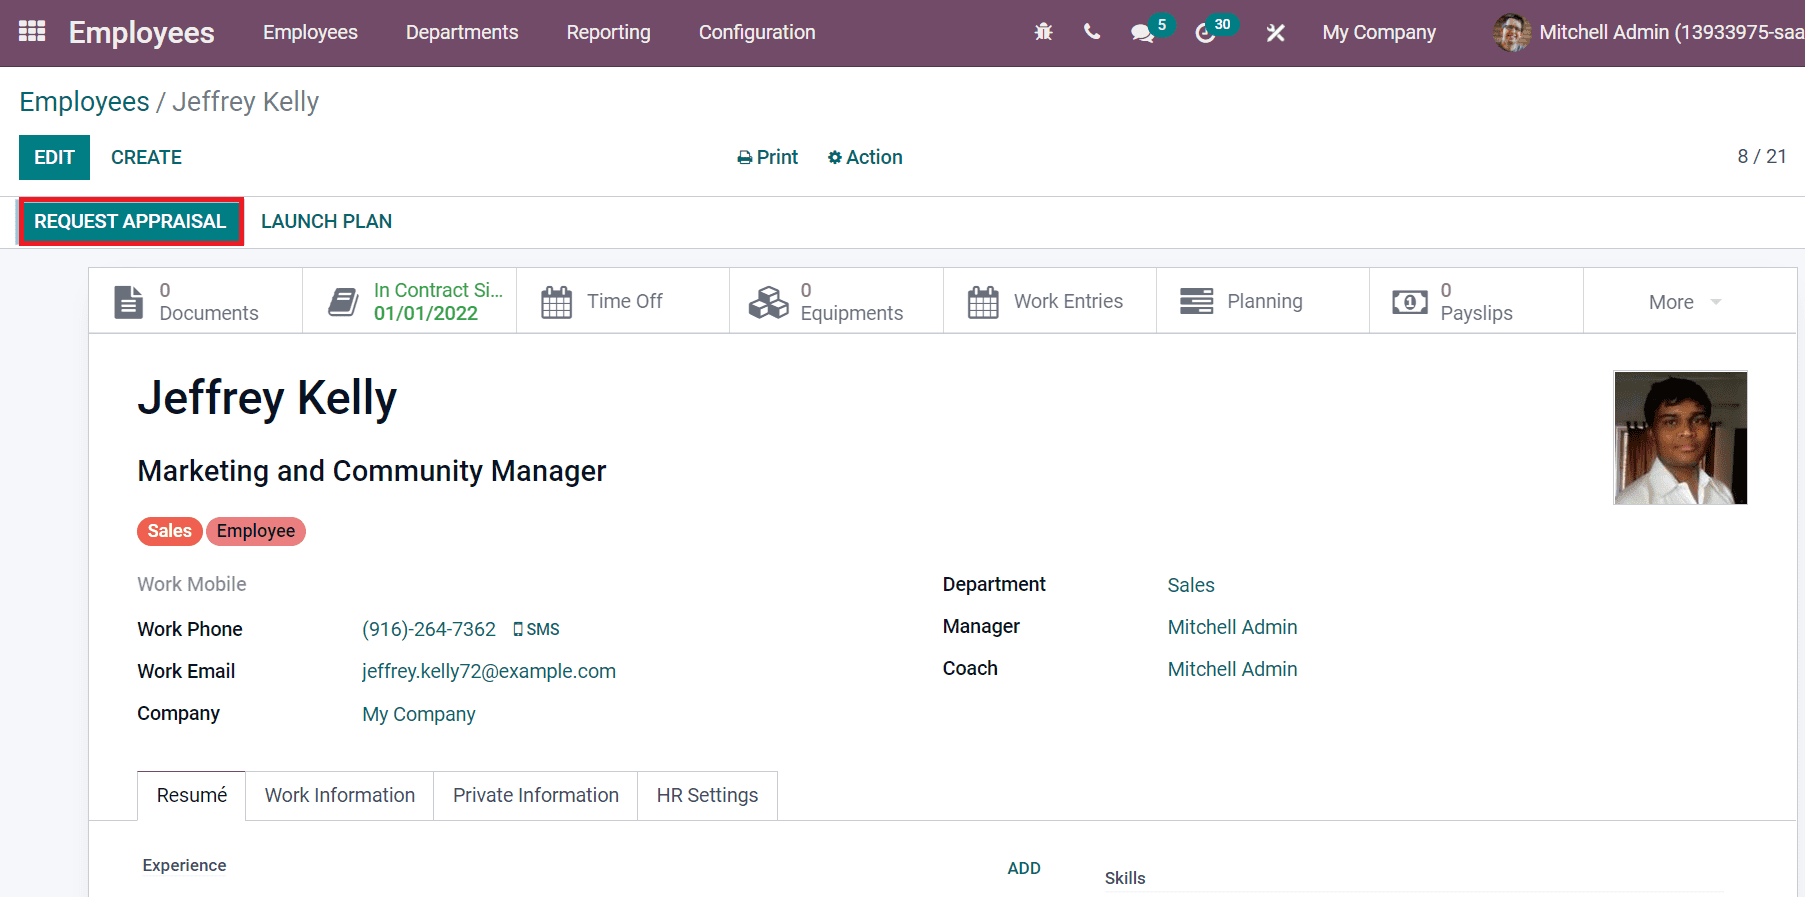
Here, we are talking about an employee named Jeffrey kelly. In the employees' window, you can request an appraisal for Jeffrey Kelly by clicking on the Request Appraisal icon as displayed in the screenshot below.
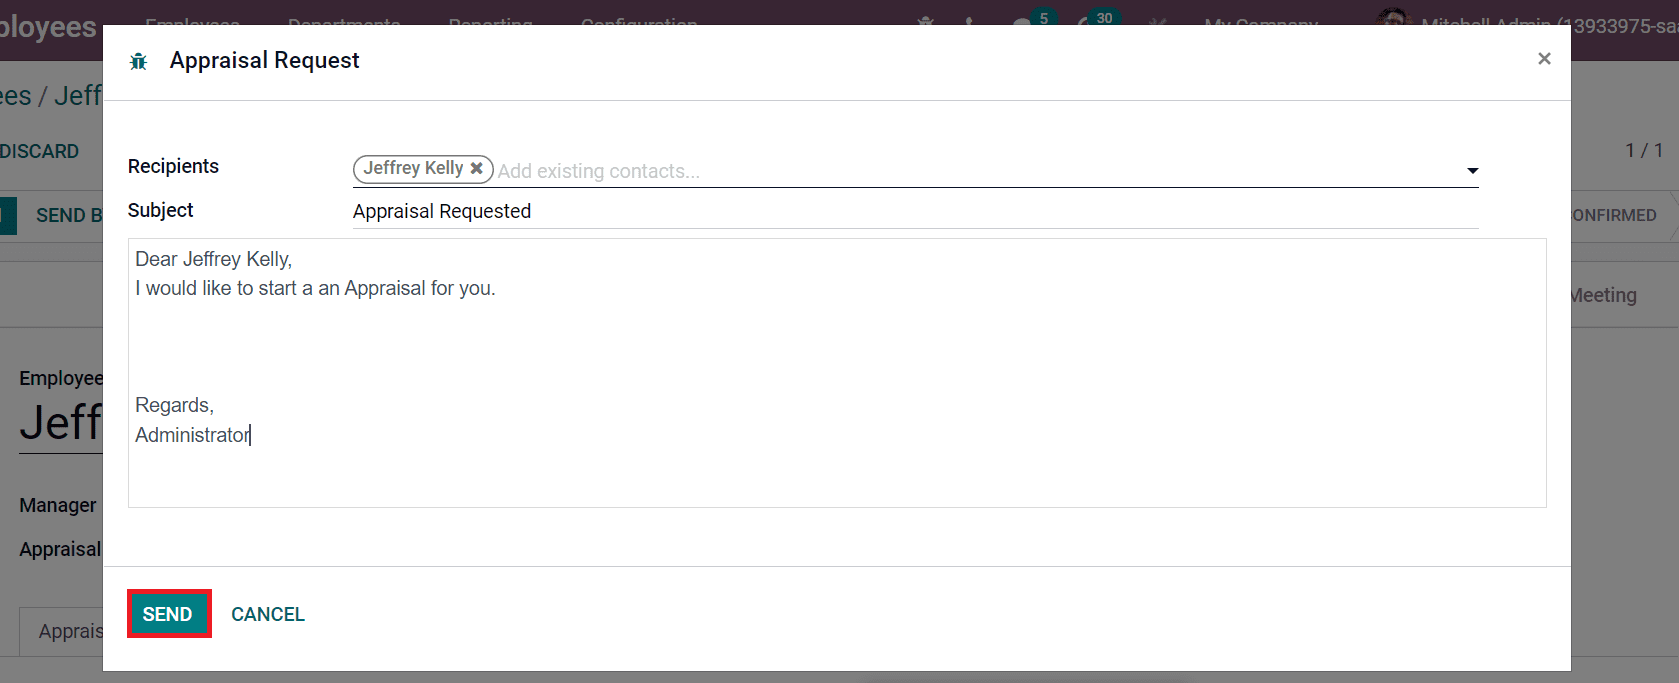
You can add an appraisal request by clicking on the SEND BY EMAIL icon in the Employees window. An Appraisal Request window opens before you after clicking on the SEND BY EMAIL icon. Here, add the Recipient as Jeffrey Kelly and apply the Subject. After that, enter a message on the command box and click on Send icon, as displayed in the screenshot below.
We redirected to a new appraisal after sending the request, and you can modify the employee details. For that, click on the Edit icon, and you can see the Employee name, Manager and the Appraisal Date that is automatically updated when an appraisal is cancelled or done. The Department and Company of Jeffrey Kelly are also shown here. Inside the Appraisal tab, we can see the Managers Feedback, and you can publish it for employees by activating the icon at the right end.
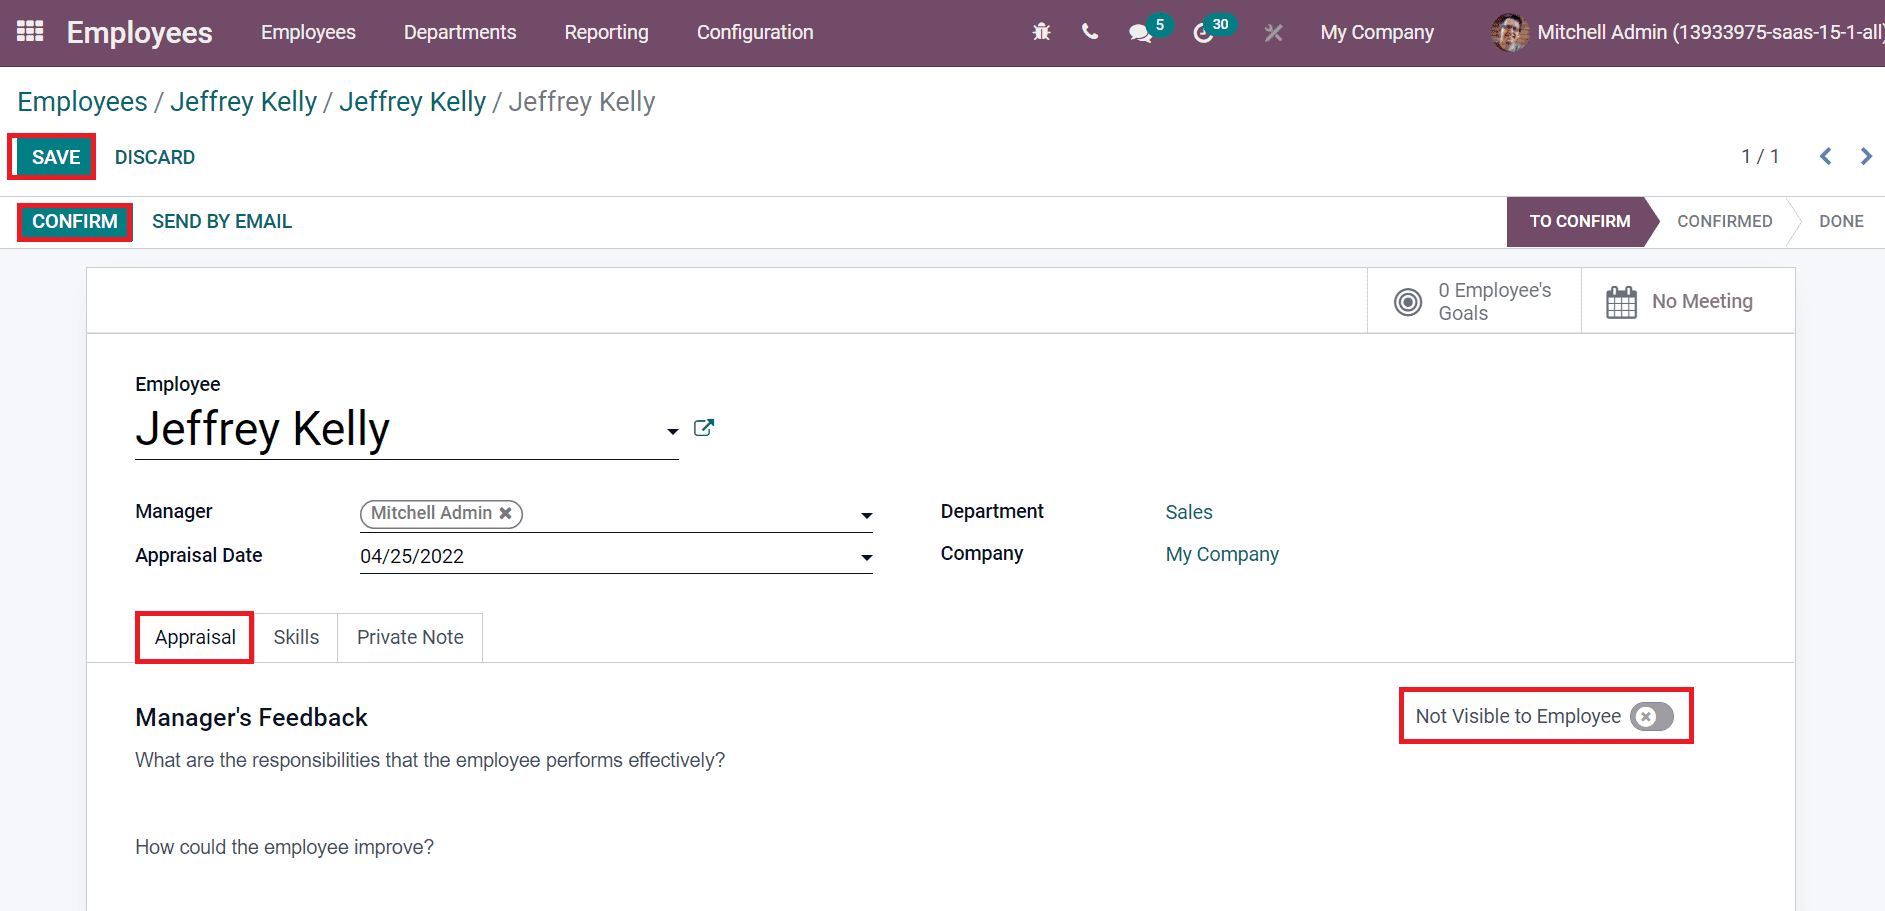
Later, choose the Save icon and later select the Confirm icon. The stage is changed from To Confirm to Confirmed, as displayed in the screenshot below.
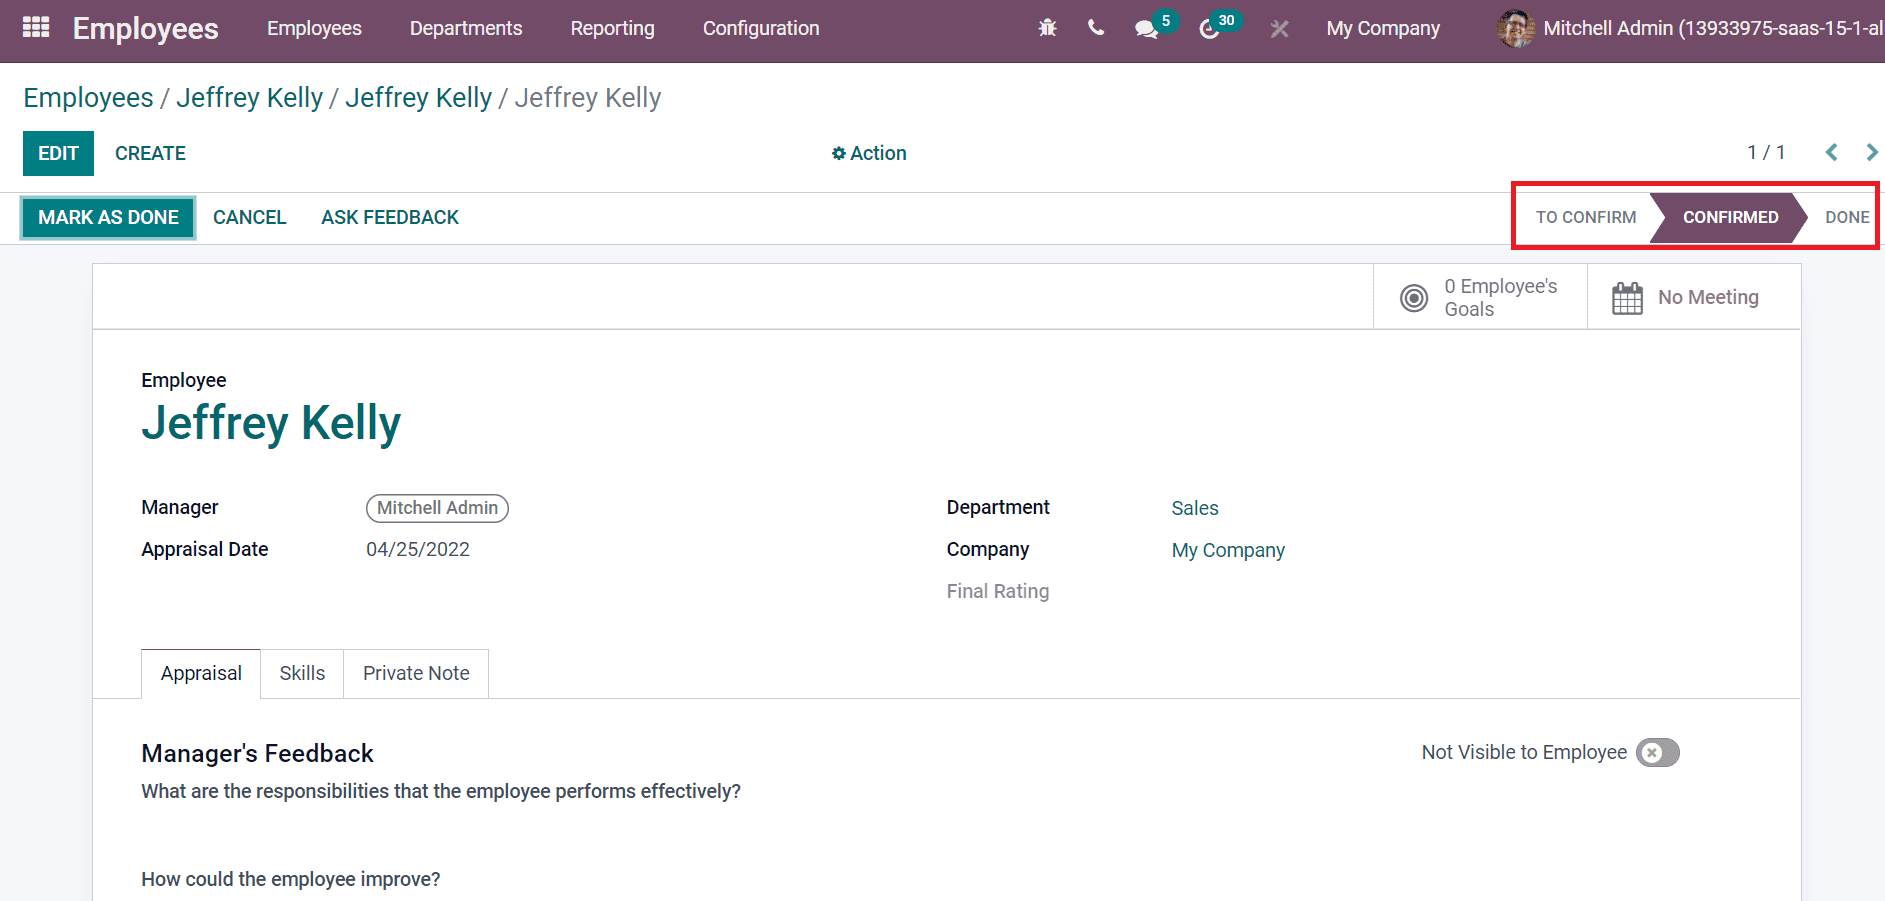
At the end of the Employees window, there is an appraisal form to fill for Jeffrey Kelly inside the Planned Activities section. You can mark it as done by clicking on the Mark Done icon. Write your feedback in the new pop-up box and select the Done icon. Hence, the new appraisal for the employee(Jeffrey Kelly) is confirmed.
Now, let's go back to the Appraisal dashboard and select the employee Jeffrey Kelly from the window. You can see that the appraisal for Jeffrey Kelly is confirmed in the Appraisals window, as depicted in the screenshot below.
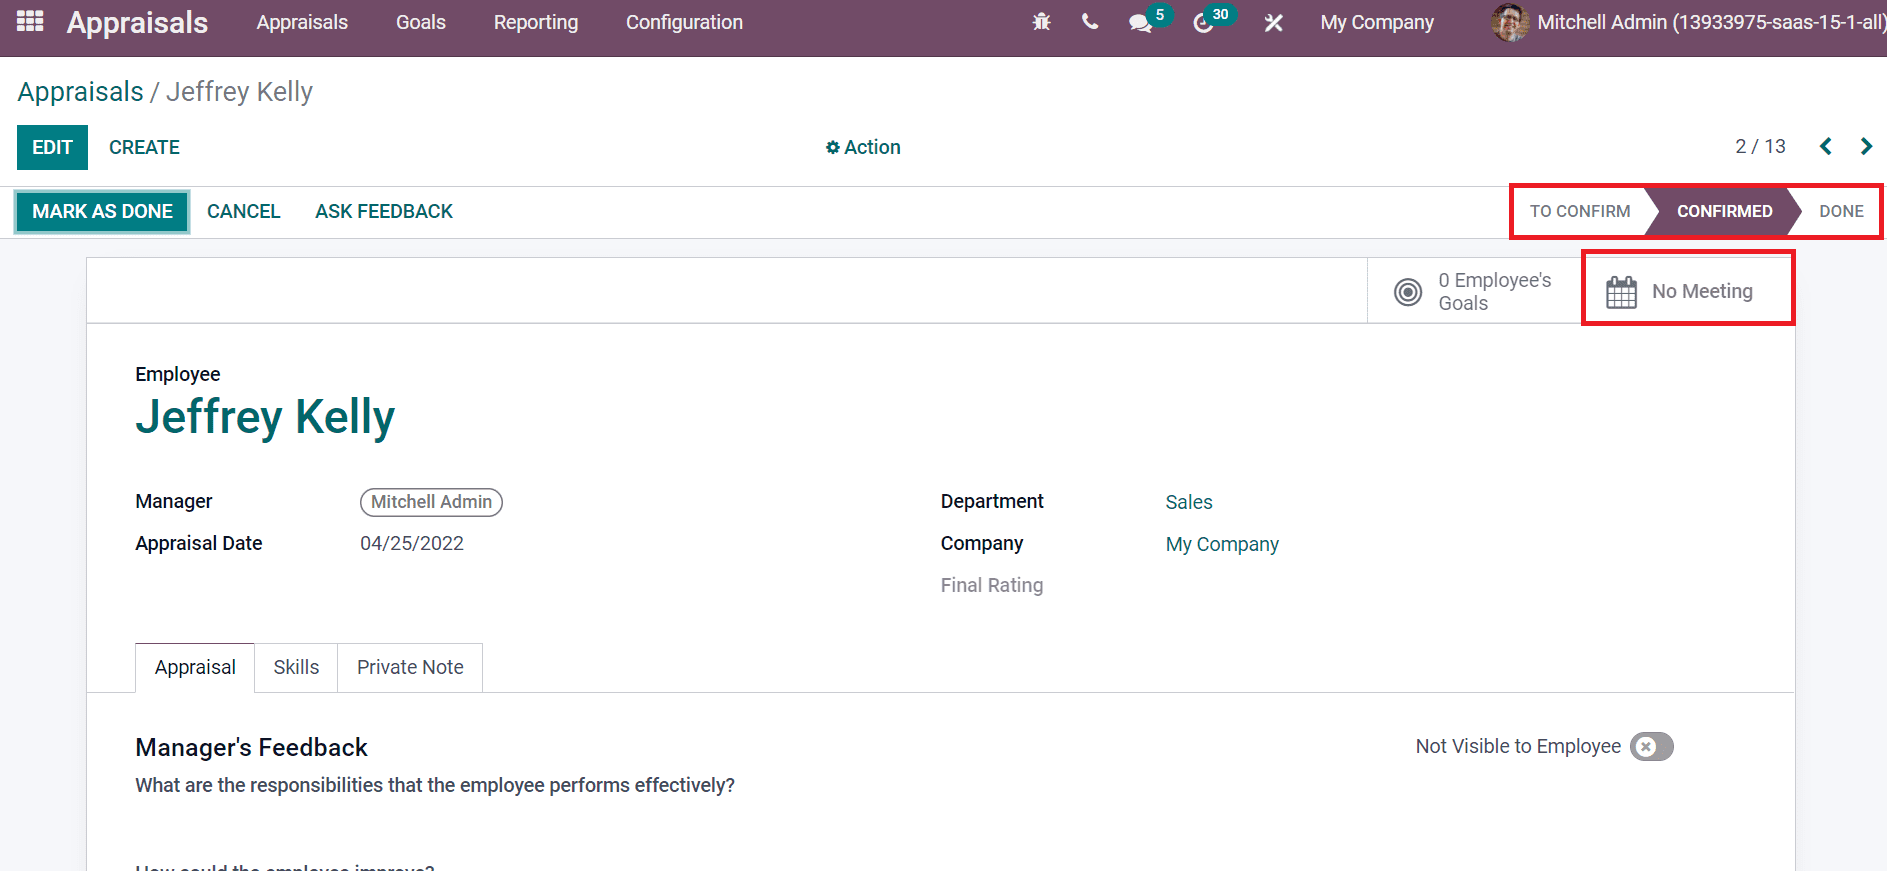
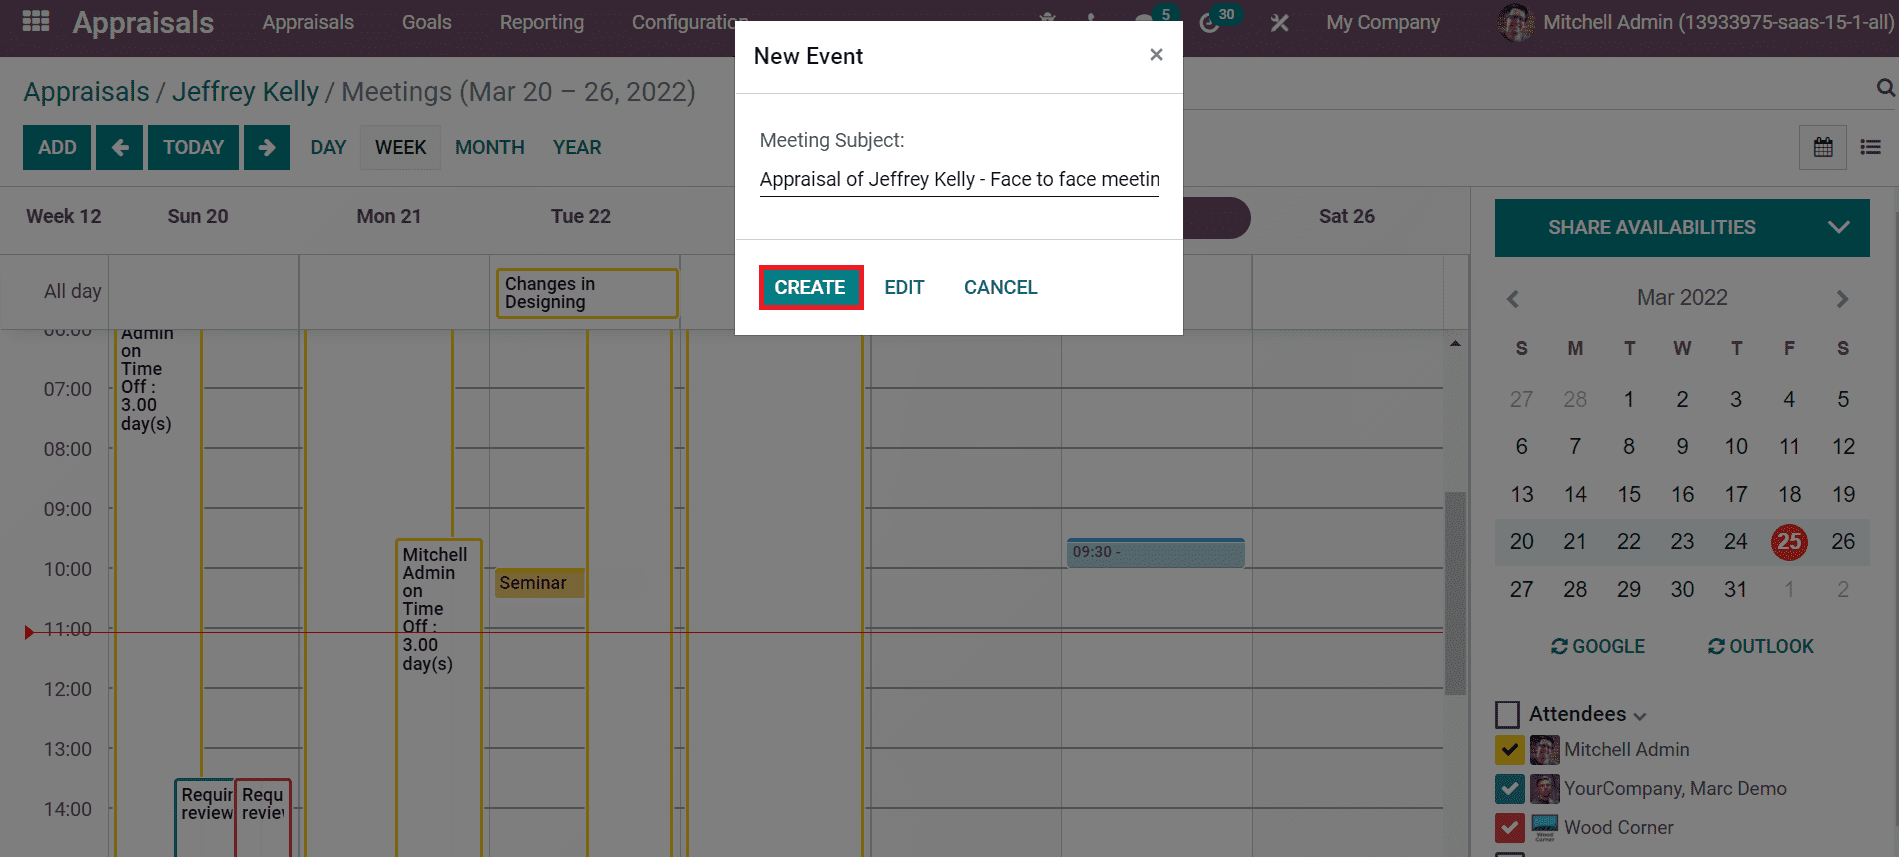
A calendar page is visible before you after clicking on the No Meeting icon. You can generate a meeting by selecting a particular date. In the New Event window, add Meeting Subject and click on Create icon as portrayed in the screenshot below.
You can change the time for the meeting by dragging the event to a specific time in the calendar. Now, let's go to the Appraisal dashboard, and you can see that the meeting is scheduled for Jeffrey Kelly.
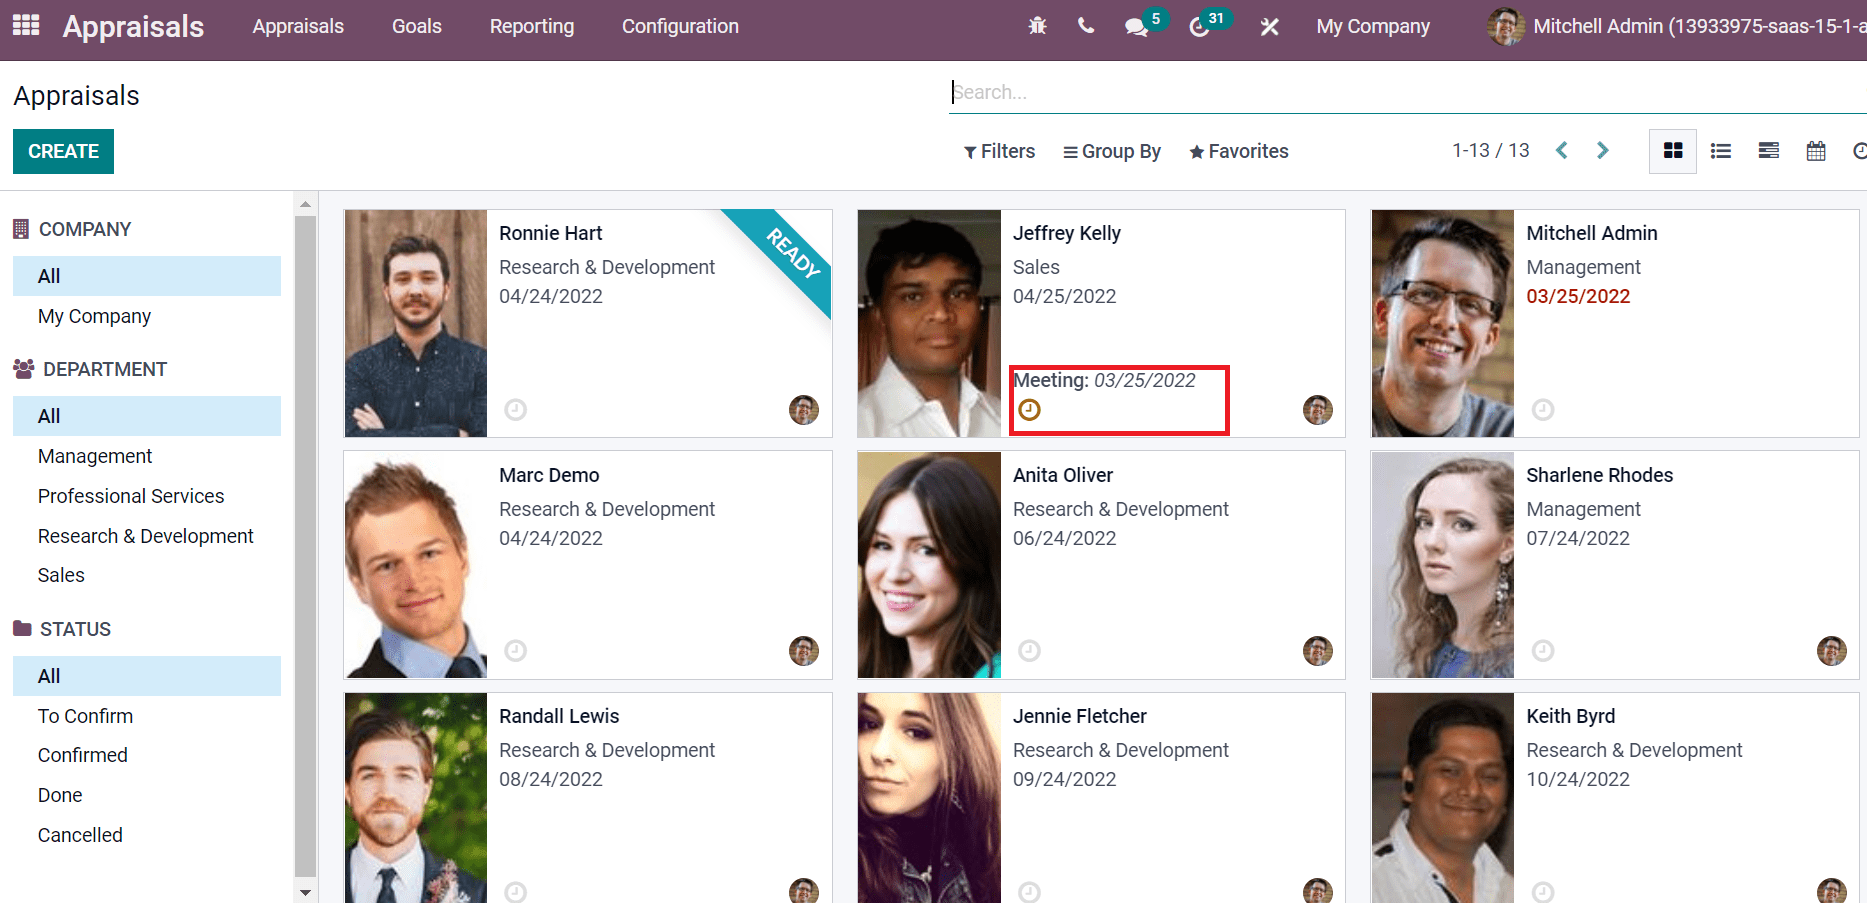
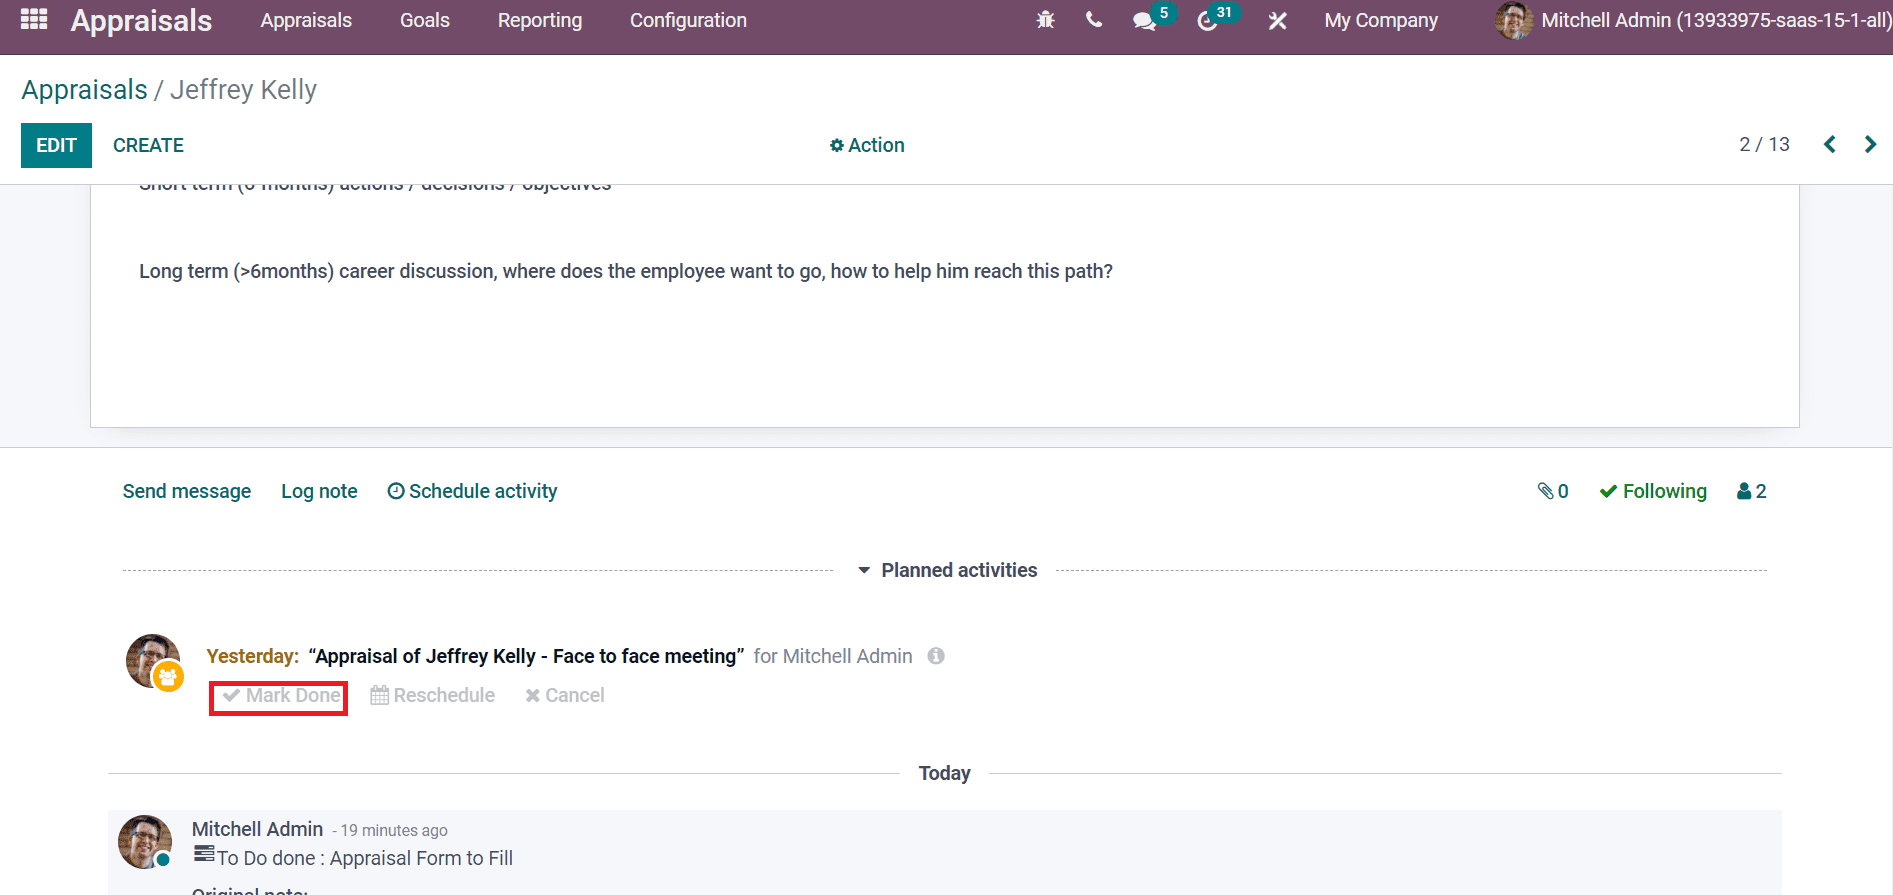
In the Appraisal window of Jeffrey Kelly, you can see the meeting information inside the Planned Activities at the end. After attending the meeting, click the option Mark Done inside the Planned Activities as depicted in the screenshot below.
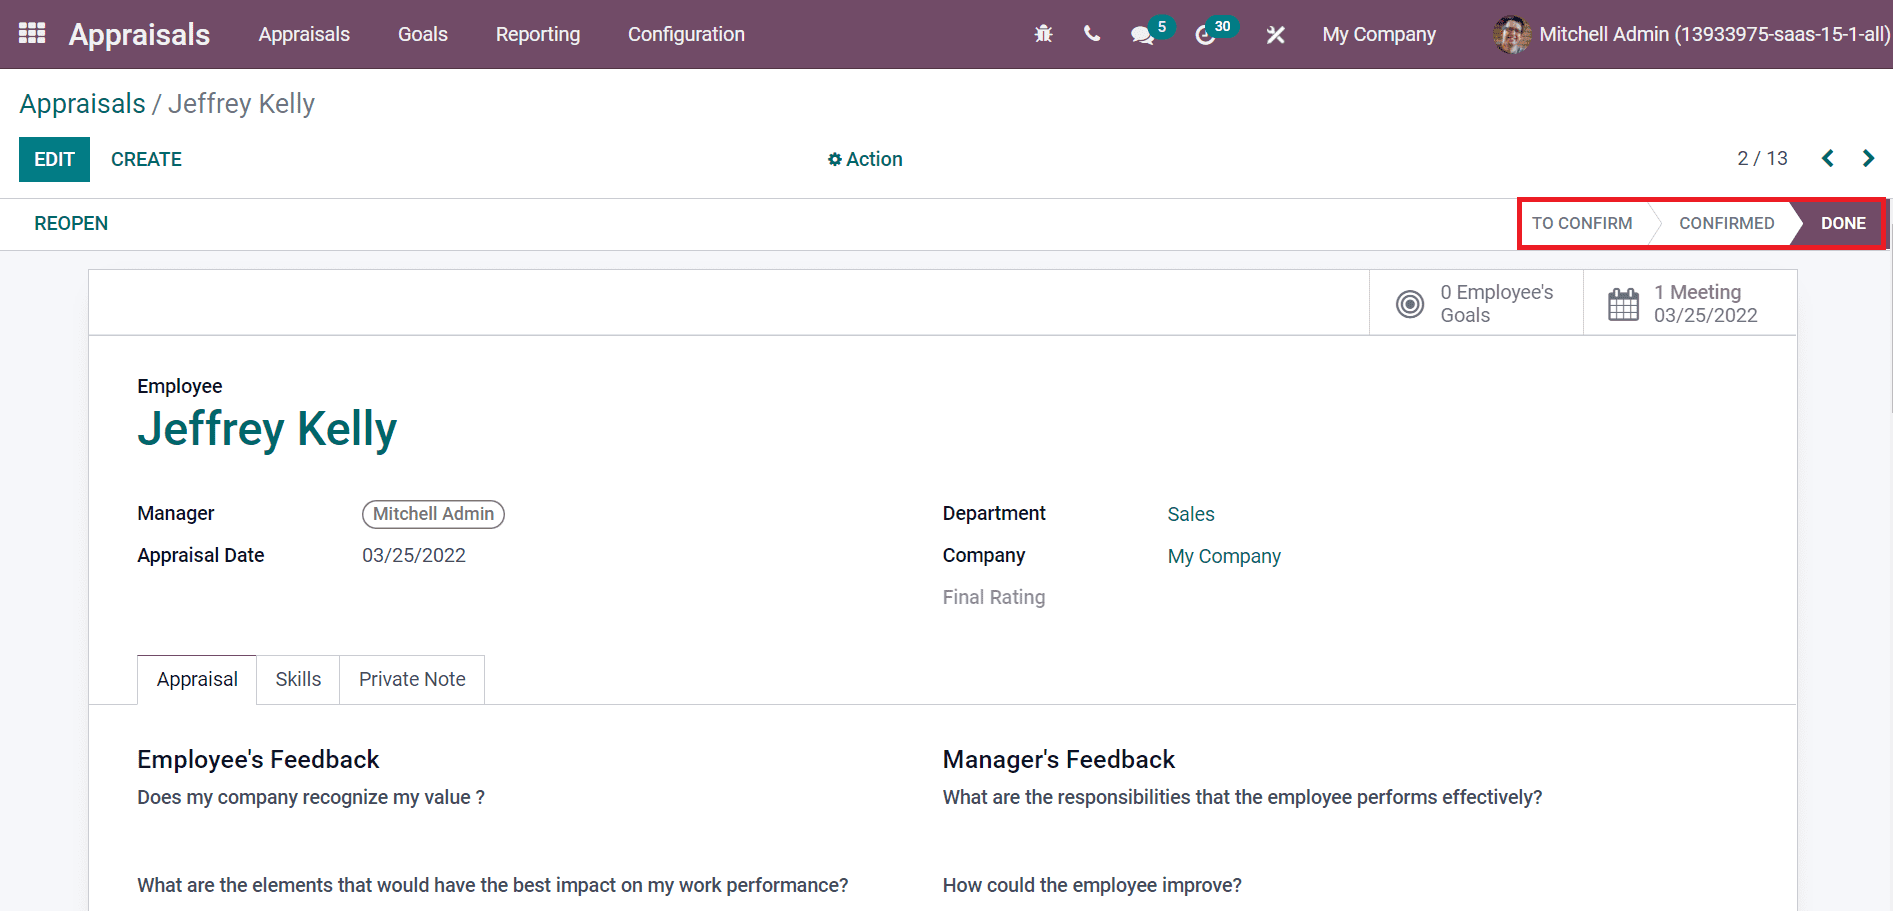
Now, click the Mark as Done button in the Appraisal window of Jeffrey Kelly. After clicking the Mark as a Done option, the appraisal stage is changed from Confirmed to Done, as displayed in the screenshot below.
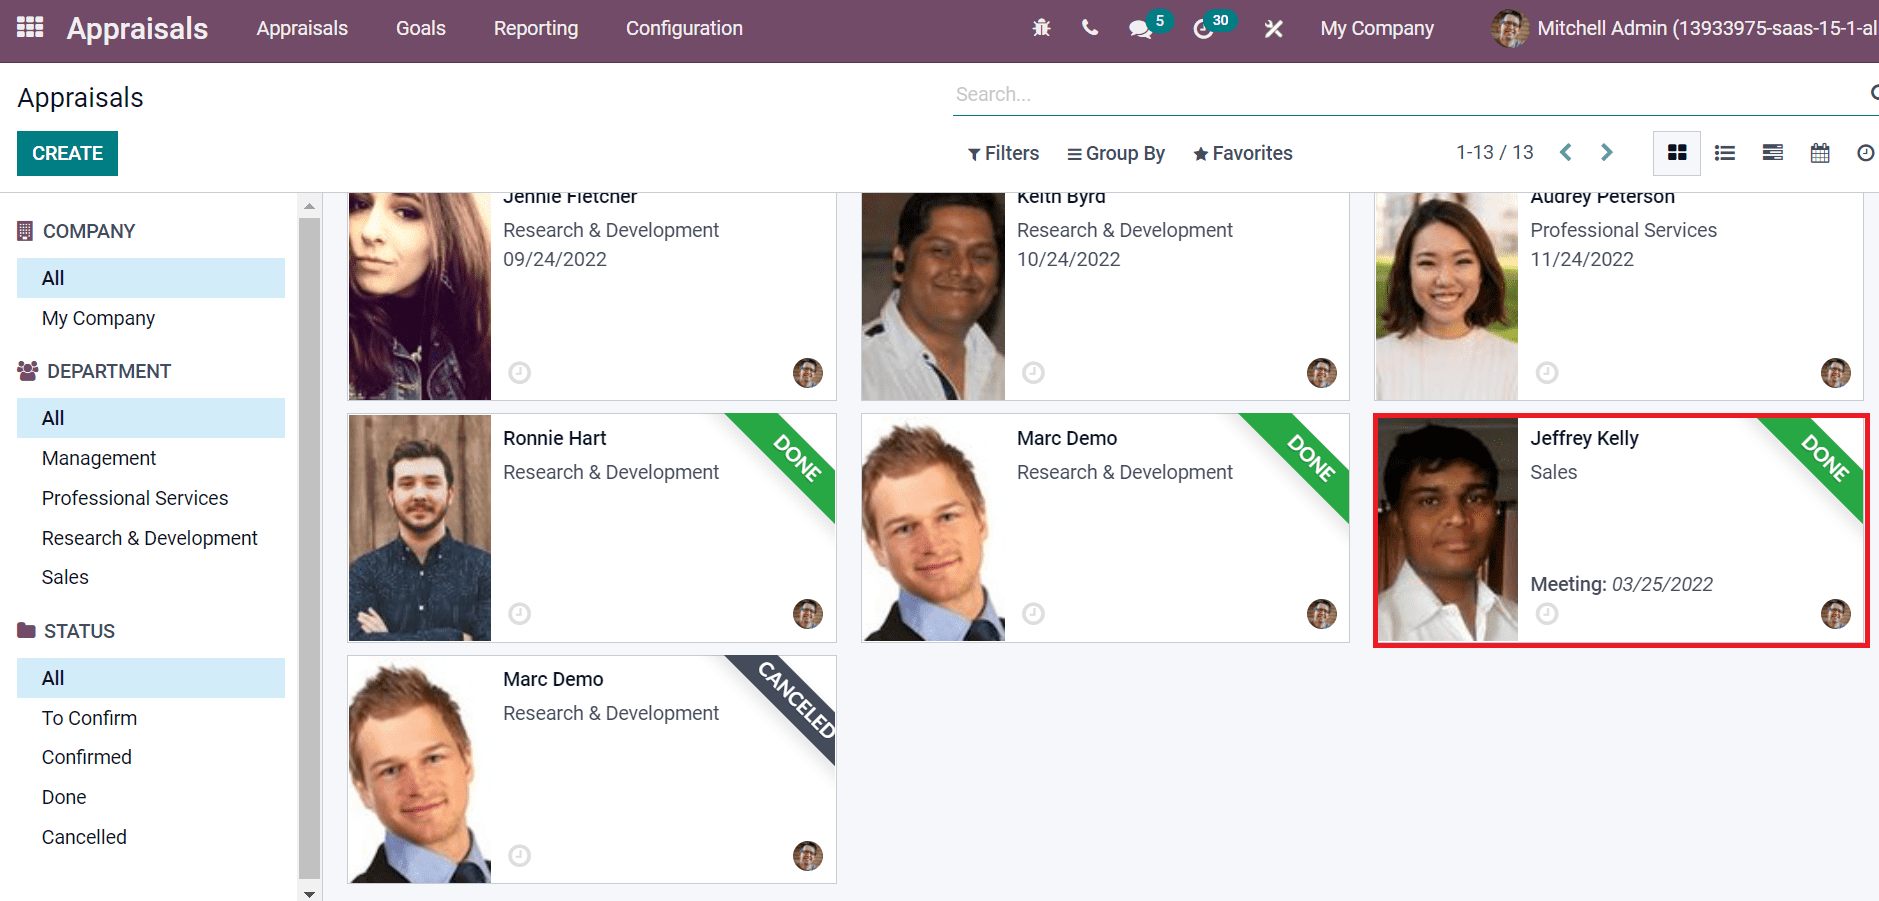
We completed a request for an appraisal efficiently through this process. You can see that the appraisal for Jeffrey Kelly is marked as Done in the Appraisal dashboard, as shown in the screenshot below.
Users can analyze the appraisal from the Reporting feature of the Odoo 15 Appraisal module. By applying Department from the Group By option, you can explore the appraisal details of Jeffrey Kelly from the Sales section, as displayed in the screenshot below.
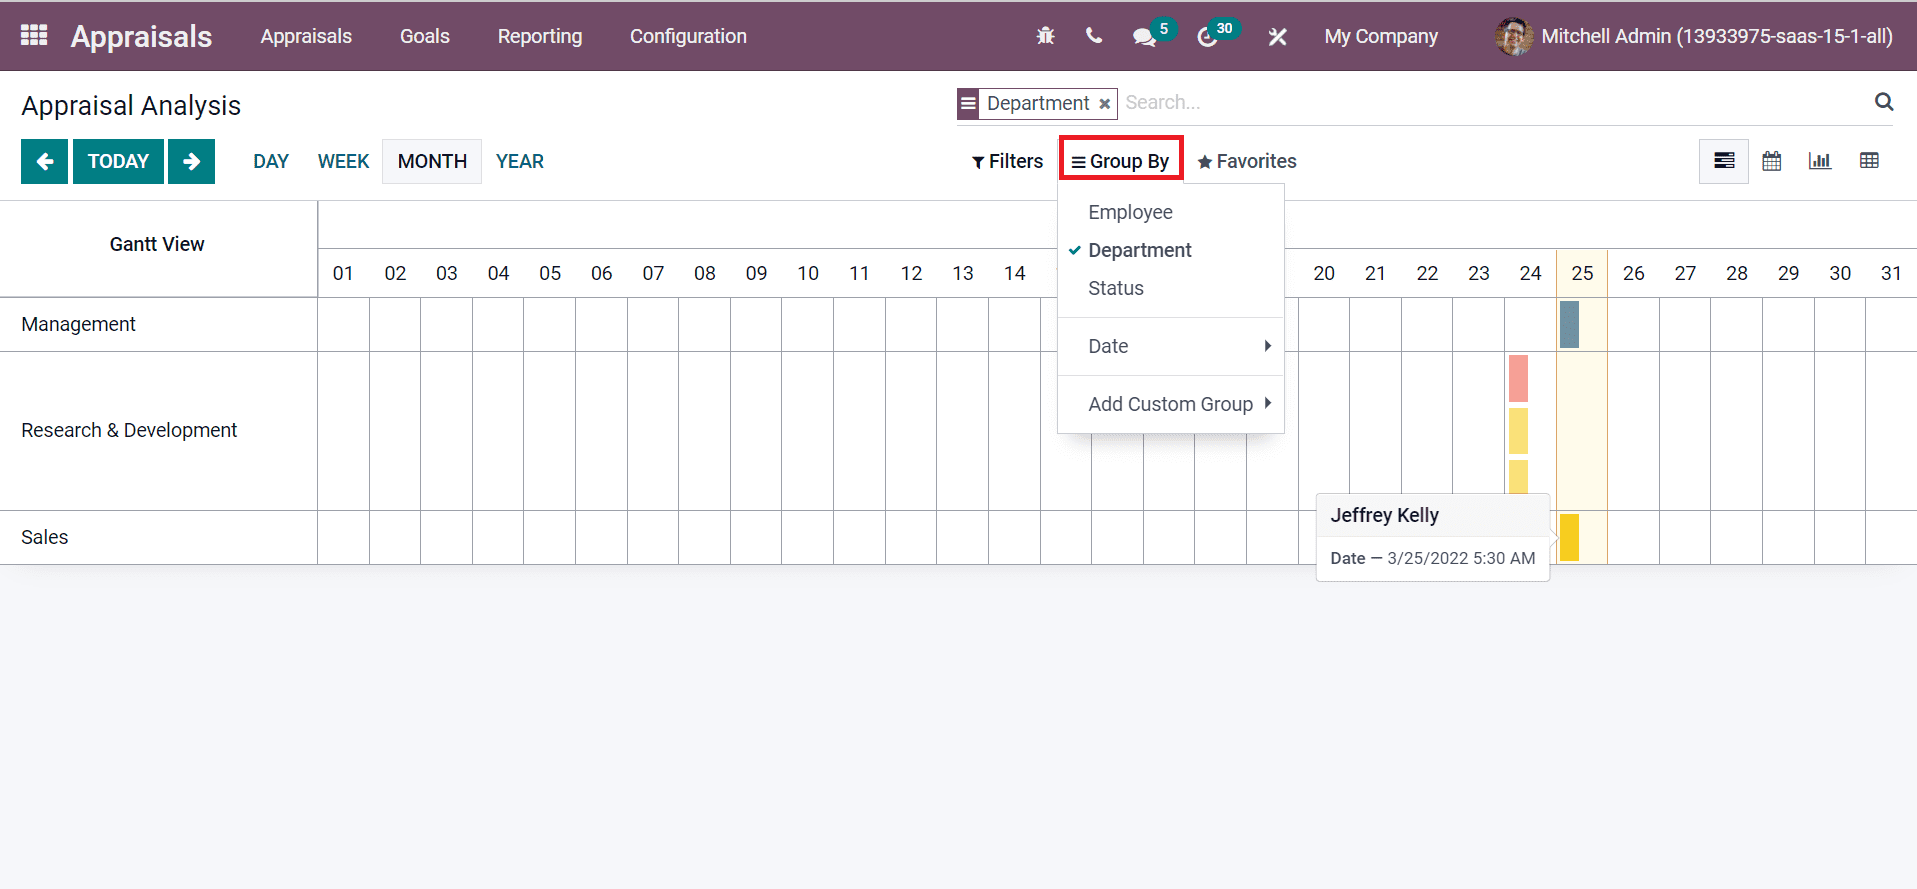
In this way, you can analyze all appraisals from the Reporting tab of the Odoo 15 Calendar module. The Appraisal window is viewable in several formats: Kanban, Graph, List, and more. In the Kanban view, you can see the all created appraisals that contain employee names, departments, dates and possible schedules for activity by selecting the clock icon.
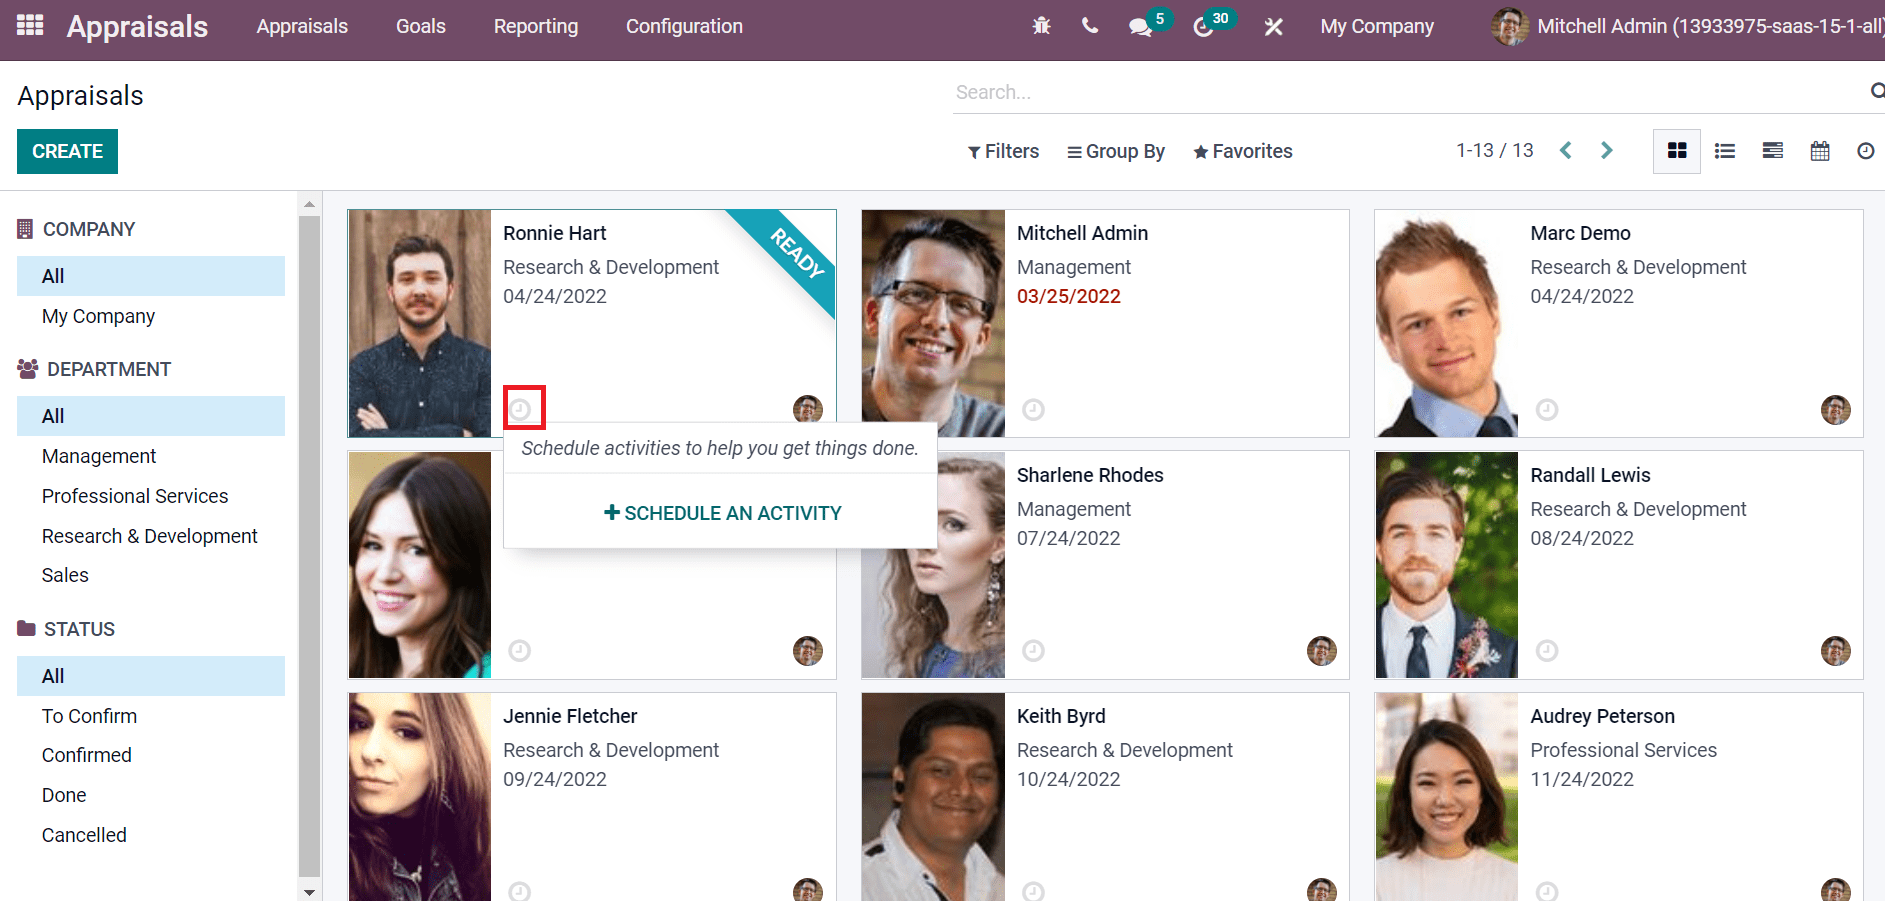
The left side of the Appraisals window displays the Company details, Departments and Status. Moreover, each employee's appraisal stages are marked here with different colours. We can also access the appraisals of employee details such as Name, Company, Appraisal Date, Status and Final Interview from the List view, as shown in the screenshot below.
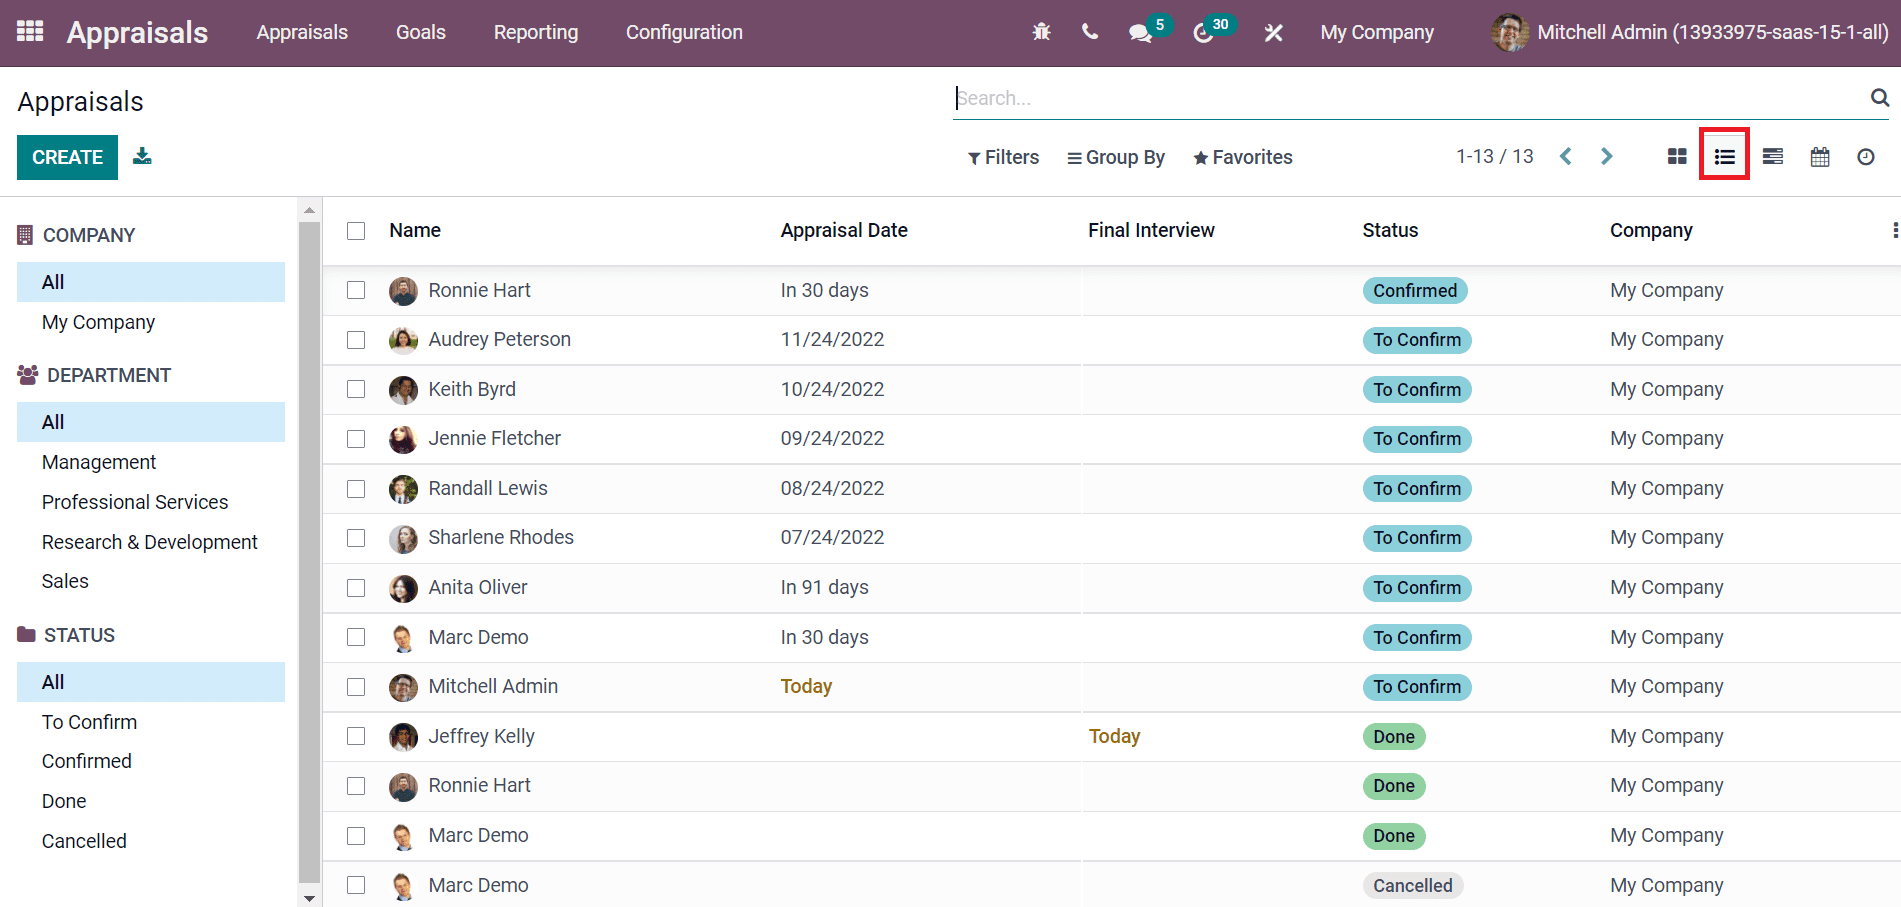
It is possible to request an appraisal from the Odoo Employees module and complete it with the Appraisal module. We can implement appraisal strategies to secure employee performance using the Odoo 15 Appraisal module. You can quickly develop a new appraisal request in the Odoo 15 Appraisal module.