Your clients can make payments on their customer portals or your eCommerce website thanks to the numerous payment providers embedded in Odoo. They can set up recurring payments for sales orders, invoices, or subscriptions using their preferred payment options, such as credit cards. By making it easier for your clients to pay using the payment method they prefer and are familiar with, having a variety of payment options boosts your likelihood of receiving payment on time or even instantly.
One can see all the payment providers in Accounting --> Configuration --> Payment Providers
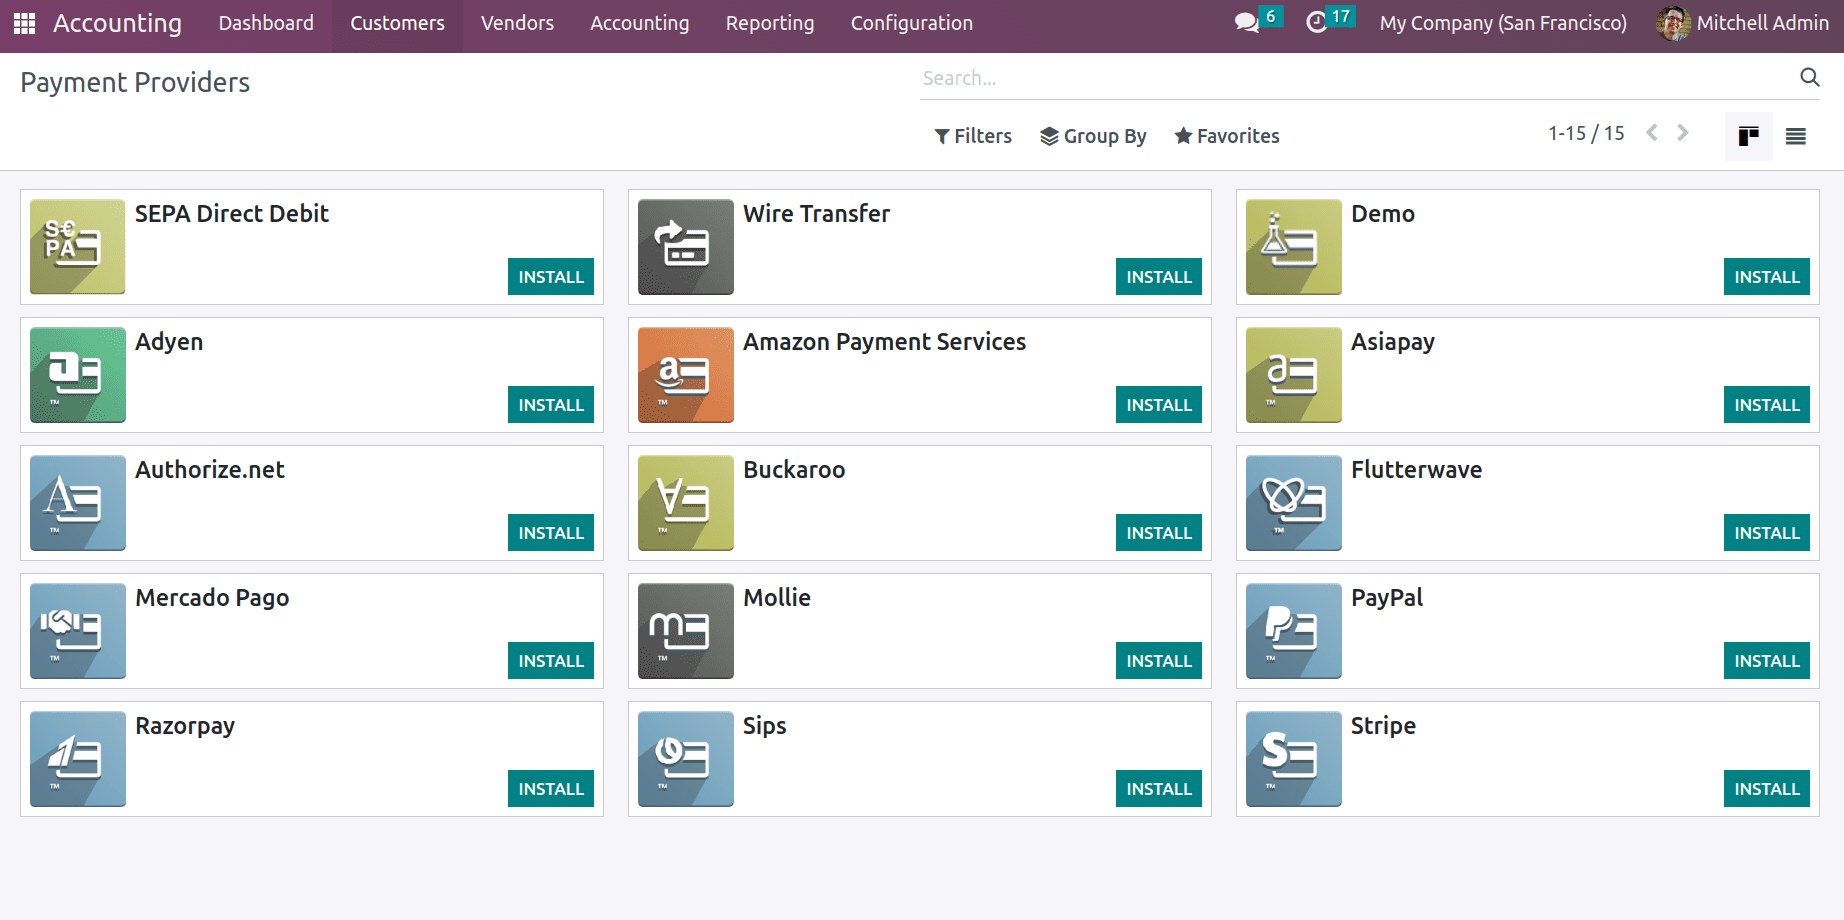
We can differentiate the payment providers into two types. some payment providers directly send the payments to the bank and then we will follow the bank reconciliation process as usual. The second method is that the payment providers are the third party that follows a separate accounting workflow.
Odoo provides lots of options for making payments including:
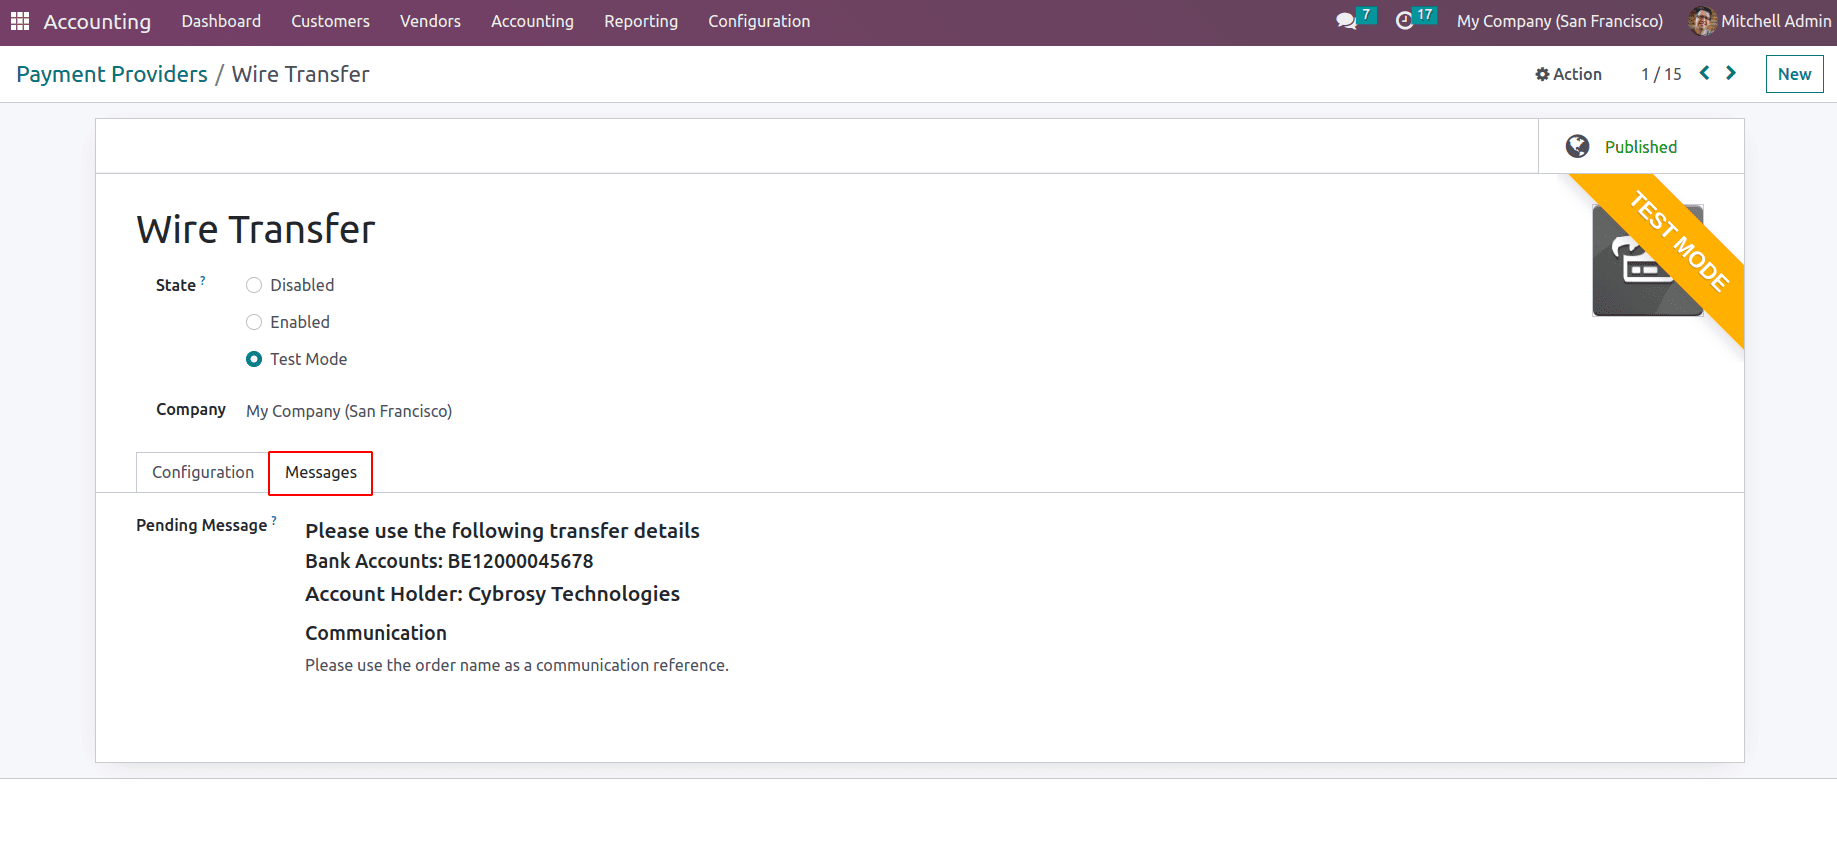
Wire transfers: You can give payment instructions to your customers such as the bank information and communication, using the wire transfer payment method.
When the consumer has chosen Wire transfer as their mode of payment and hits the Pay Now button at the end of the checkout, the payment instructions are displayed:
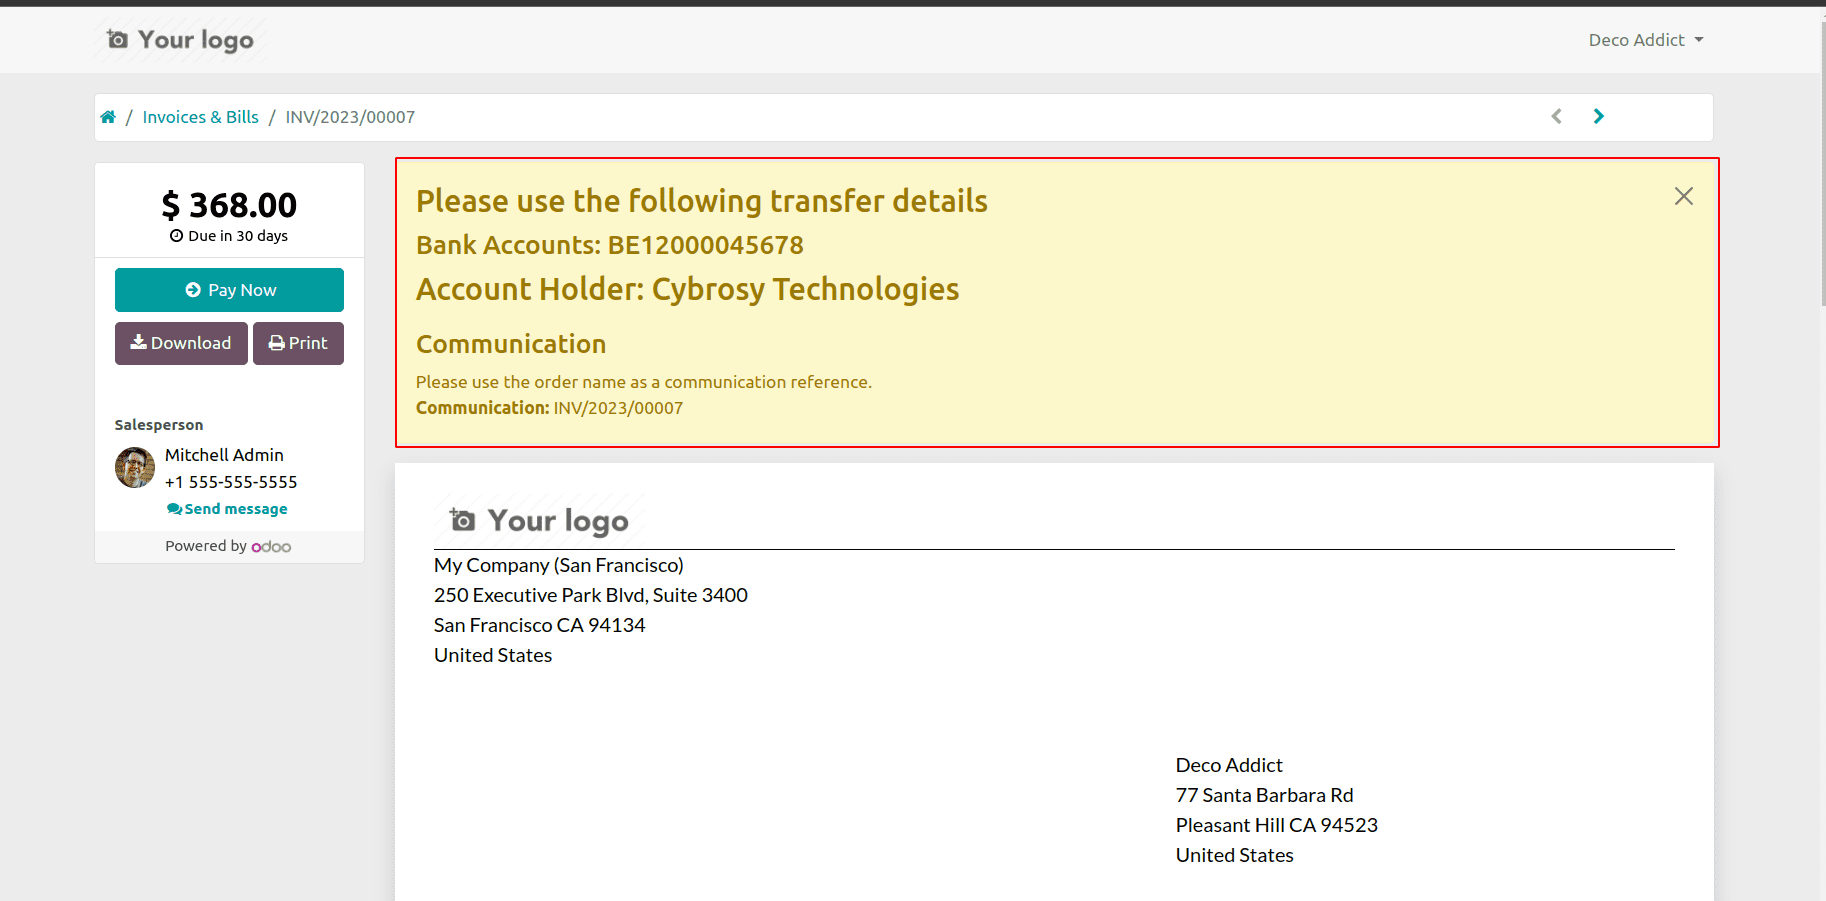
The message to be displayed to the customer can be updated in the payment provider configuration.
* Adyen: Another payment method, which is a Dutch company offers customers to pay online for their invoices. It supports tokenization, Manual capture, and Full and partial refunds.
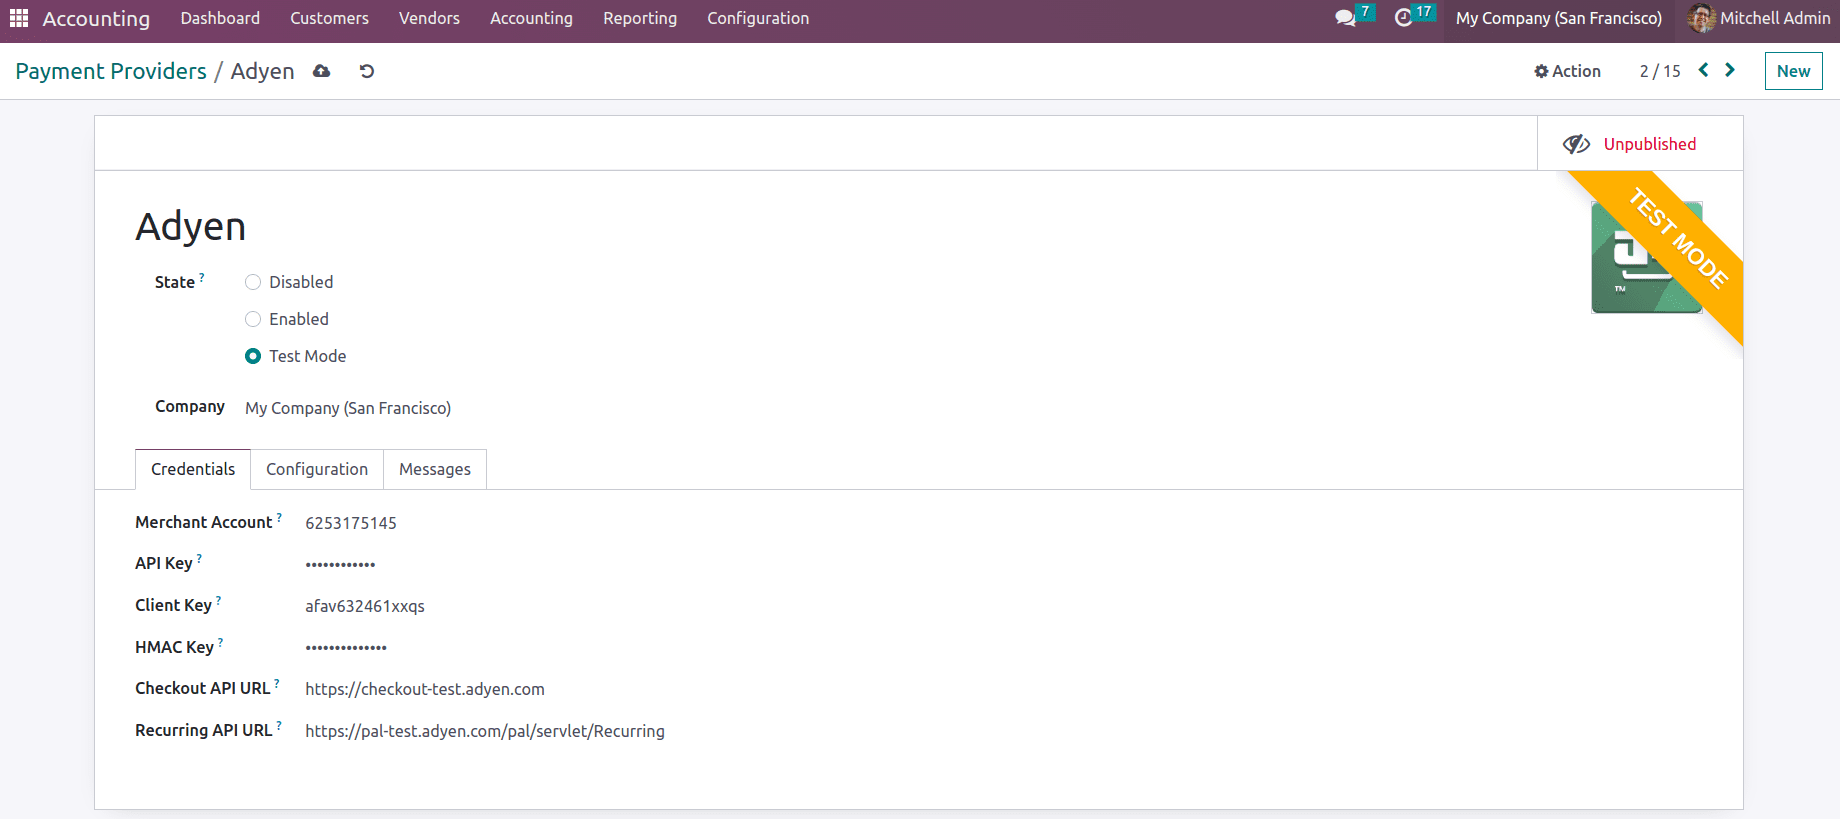
For the Adyen configuration, credentials need to be provided. Merchant Key is the code of the merchant account to use with this provider. API key of the web service user and the Client Key of the web service user can be provided in the respective field. You can generate the API key and Client key from the Adyen account. Next is the HMAC key of the webhook. HMAC key is also generated from the Adyen account. To generate the HMAC key you need to configure a ‘Standard Notification’ webhook for the Adyen account and then generate the HMAC key. Then the checkout API URL, which is the base URL for the checkout API endpoints, and Recurring API URL, which is the base URL for the checkout Recurring API checkpoints. One can copy the credentials from the Adyen account and add them to the credential tab of the Adyen configuration.
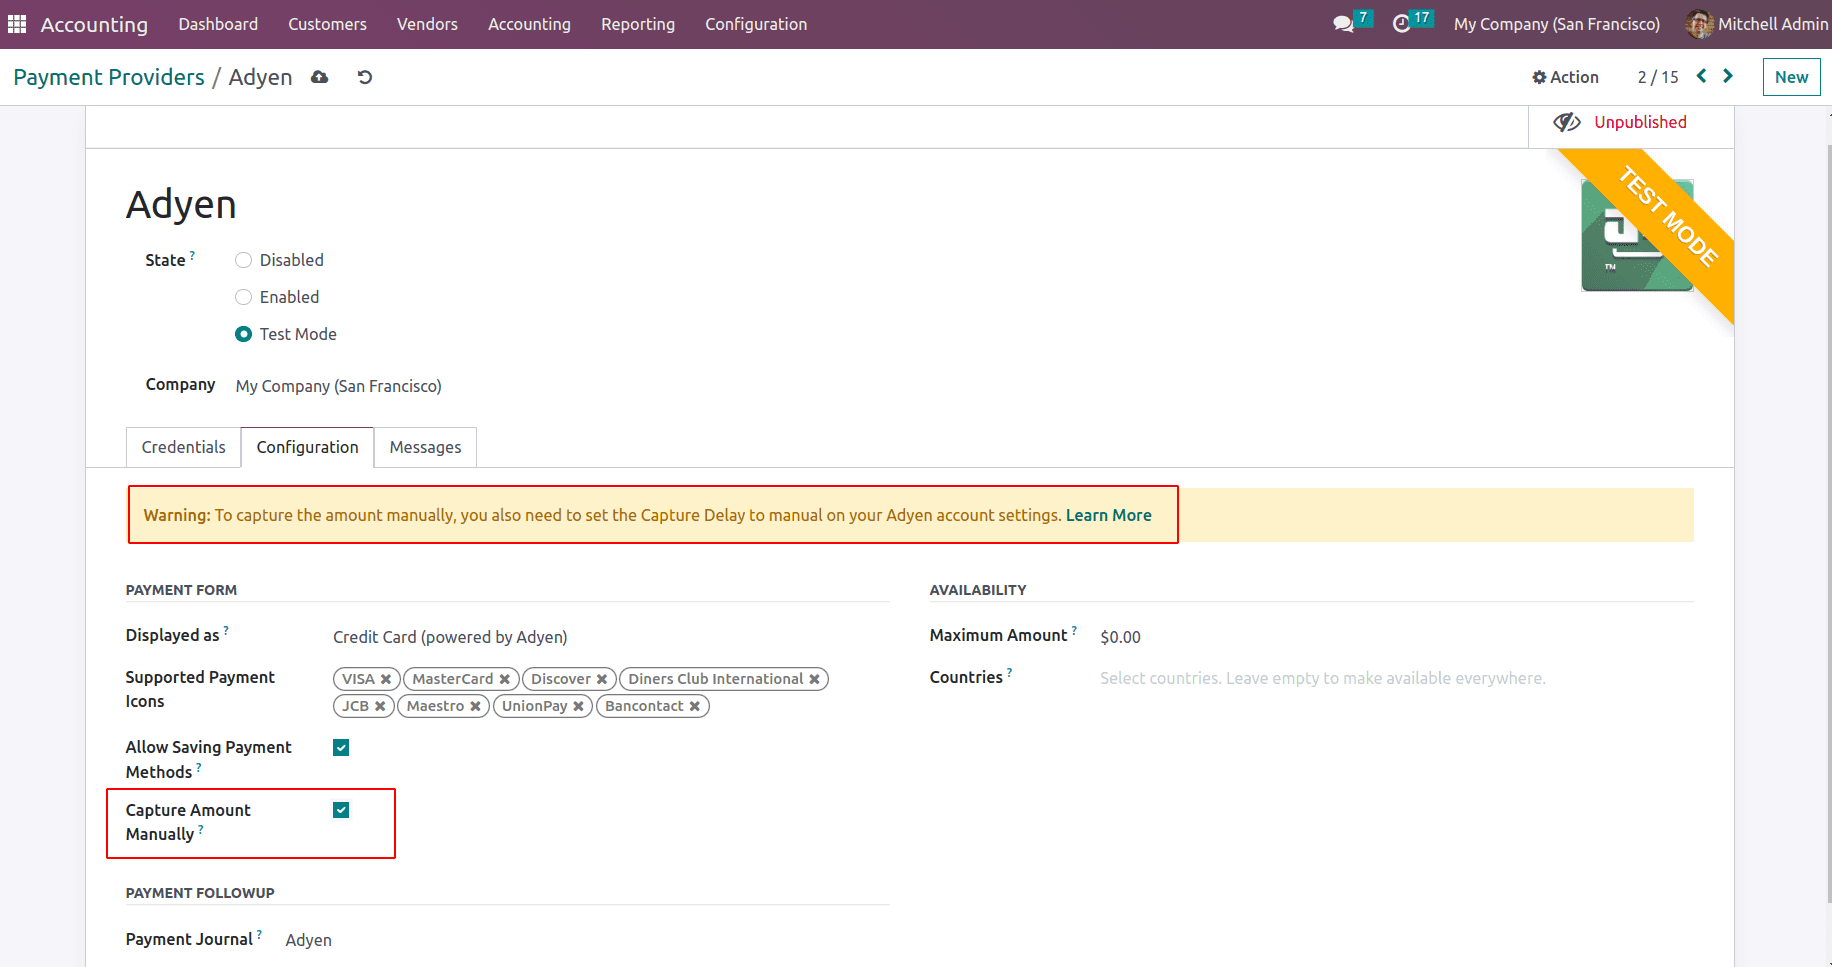
Under the ‘Configuration’ tab one can configure the Payment form details of how this payment provider is displayed in the payment form. If you fill ‘Displayed as’ field, that’s the payment provider name will be shown in the payment form. If you leave it empty it will take the payment provider name. The supported icons of this payment provider can be added as ‘Supported Payment Icons’. This allows you to save the card details of customers which can be used later as well. Odoo will generate a token to refer to the card details, not save the card details. Thus it will help to use the same card details for future payments. This process is what we called as tokenization. The capture Amount manually can be enabled, so that instead of completing payment all in one step, you can authorize and collect payments in two steps. The funds are reserved on the customer's payment method when you authorize a transaction, but they are not instantly charged. You can also revoke the authorization to release the reserved monies, which is the same as canceling the transaction. Go to the appropriate sales order or invoice and click the CAPTURE TRANSACTION button to record the payment after it has been authorized. Click the VOID TRANSACTION button to release the funds.
Under the messages tab, we can configure different messages that should be displayed to customers if the payment is done, canceled, failed or pending, etc.
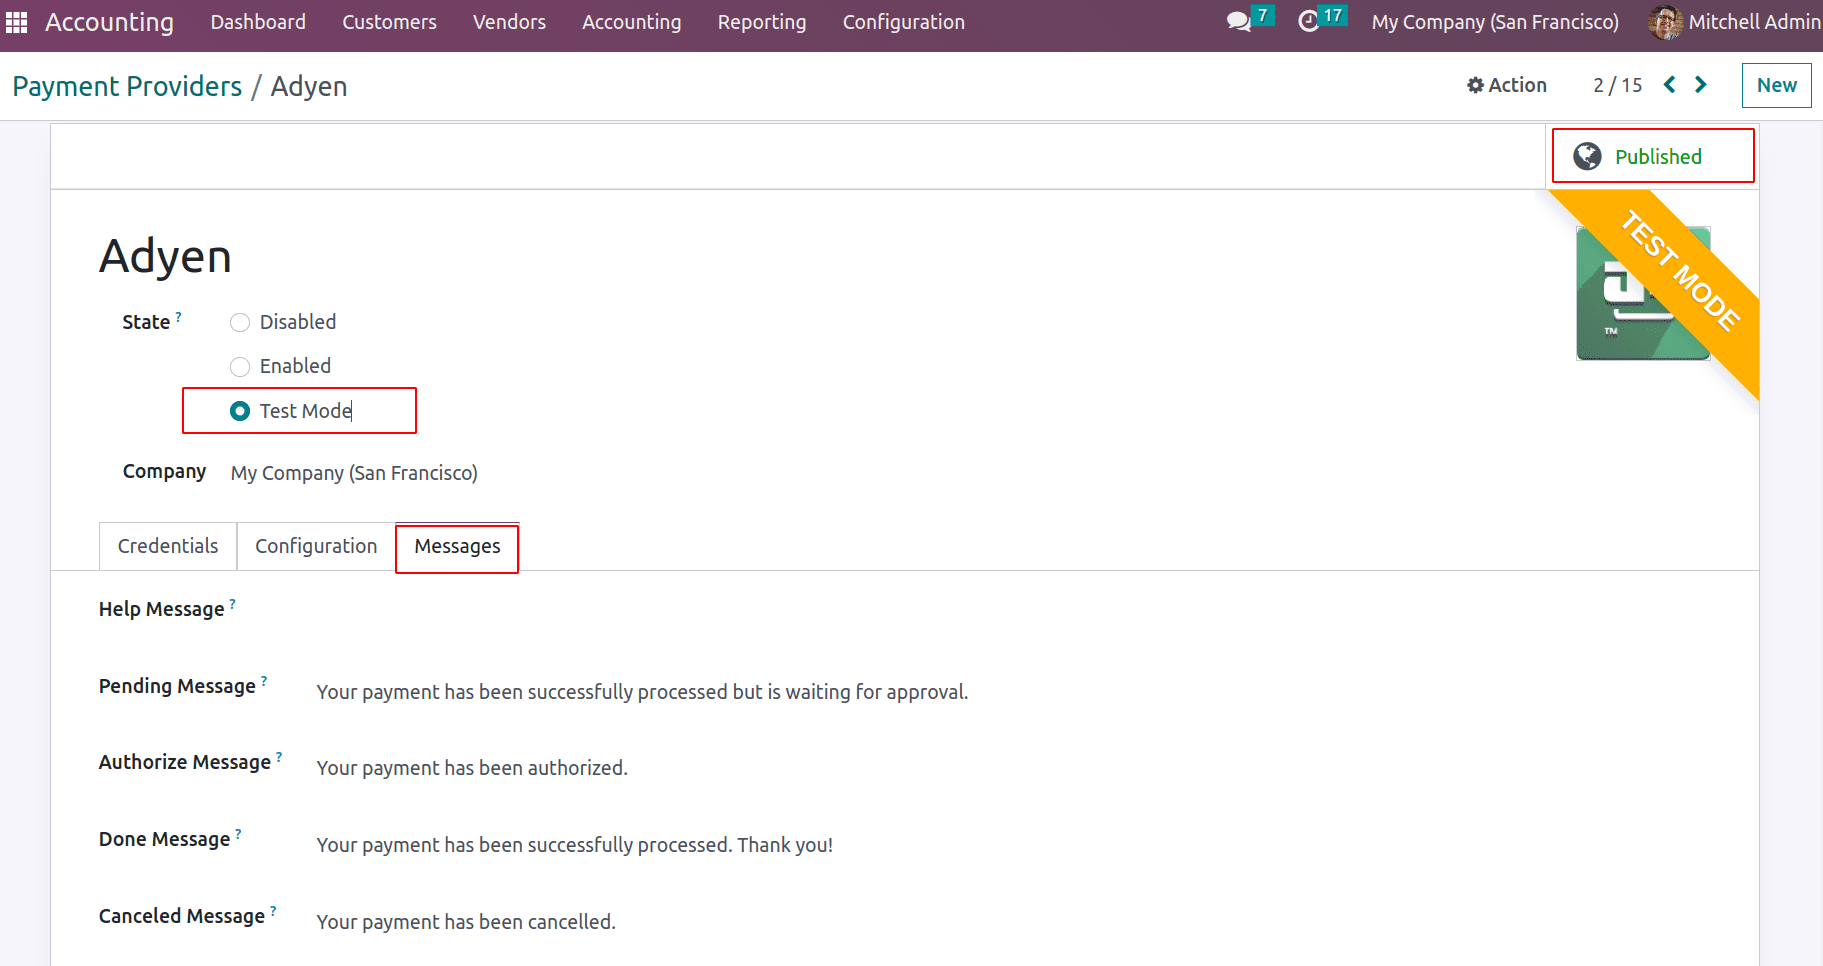
After that change the status to ‘Test’ mode and Publish the payment provider.
Thus when a customer makes a payment from the portal, they will be able to see the published payment providers make payment. The payment providers can be also able to restrict based on country.
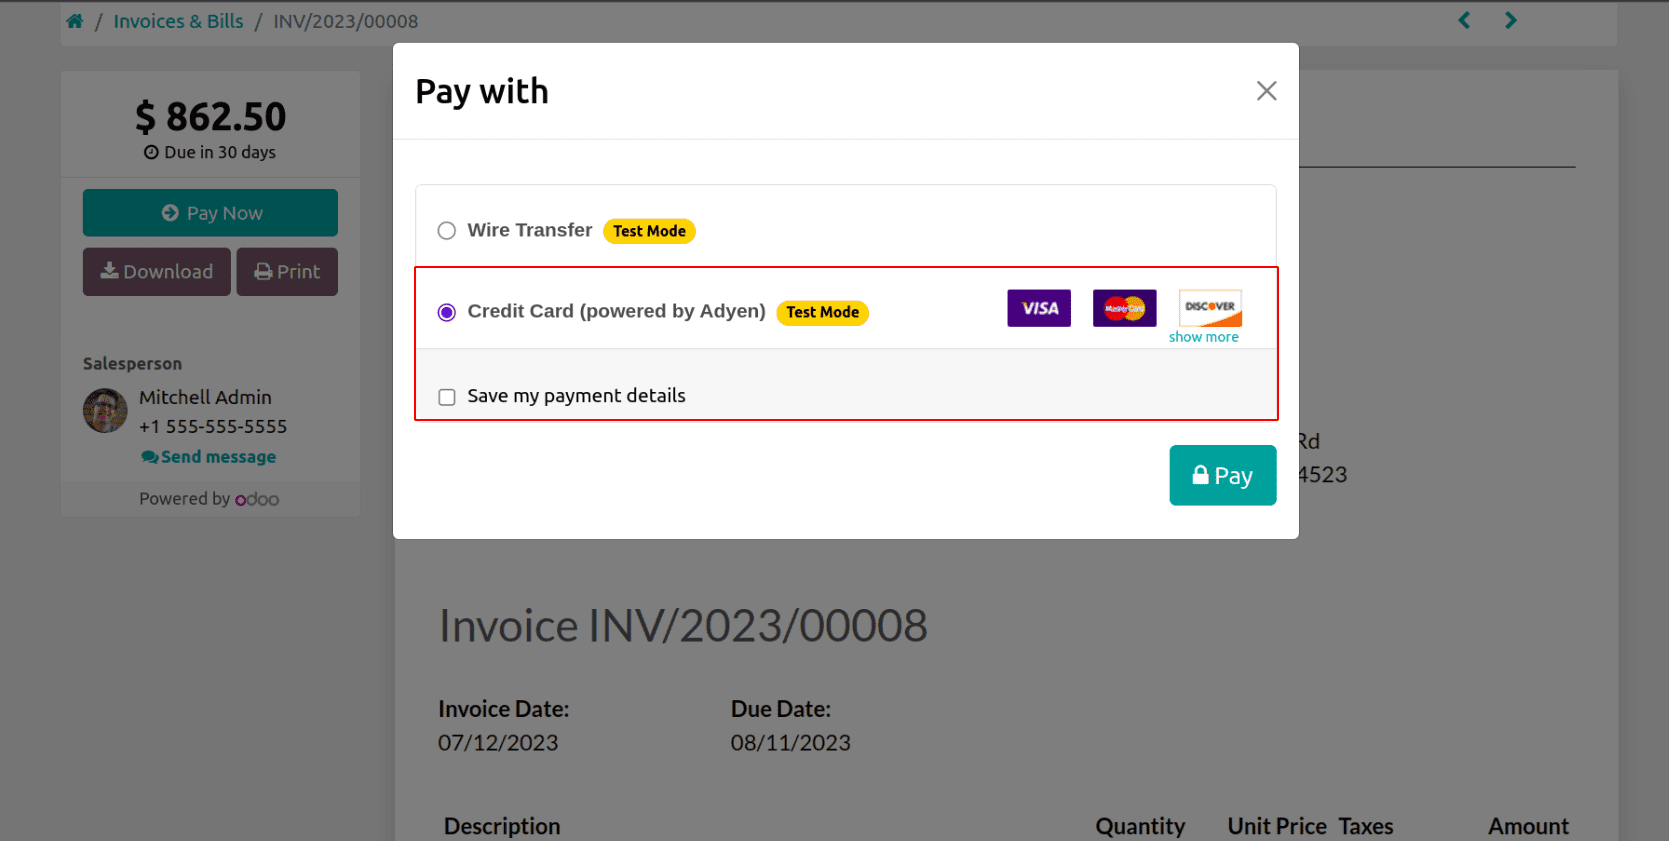
To save the payment details one can check ‘save my payment details.
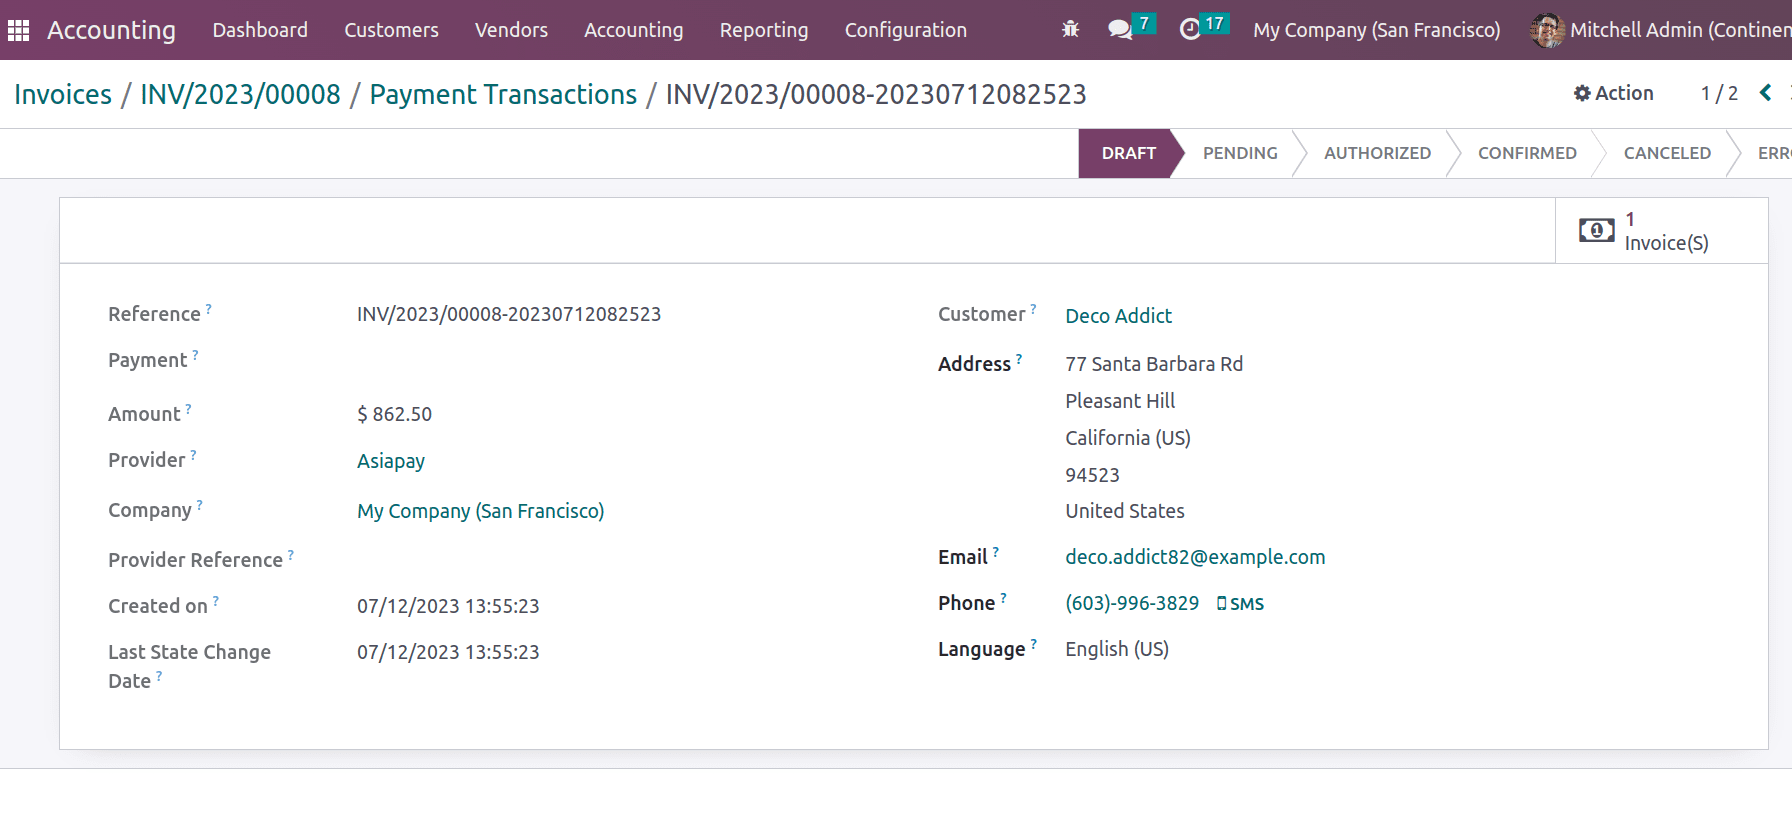
* AsiaPay: AsiaPay is a Hong Kong-based online payment company that serves many Asian nations and payment methods. This is a third-party provider where the payment flow will be from the provider website to Odoo. Thus when customers make payments with this payment provider and when they click on PAY, it will redirect to the website, and from there, users have to make payment.
Once the payment has been made for the invoice, it will show the payment transaction in Odoo.
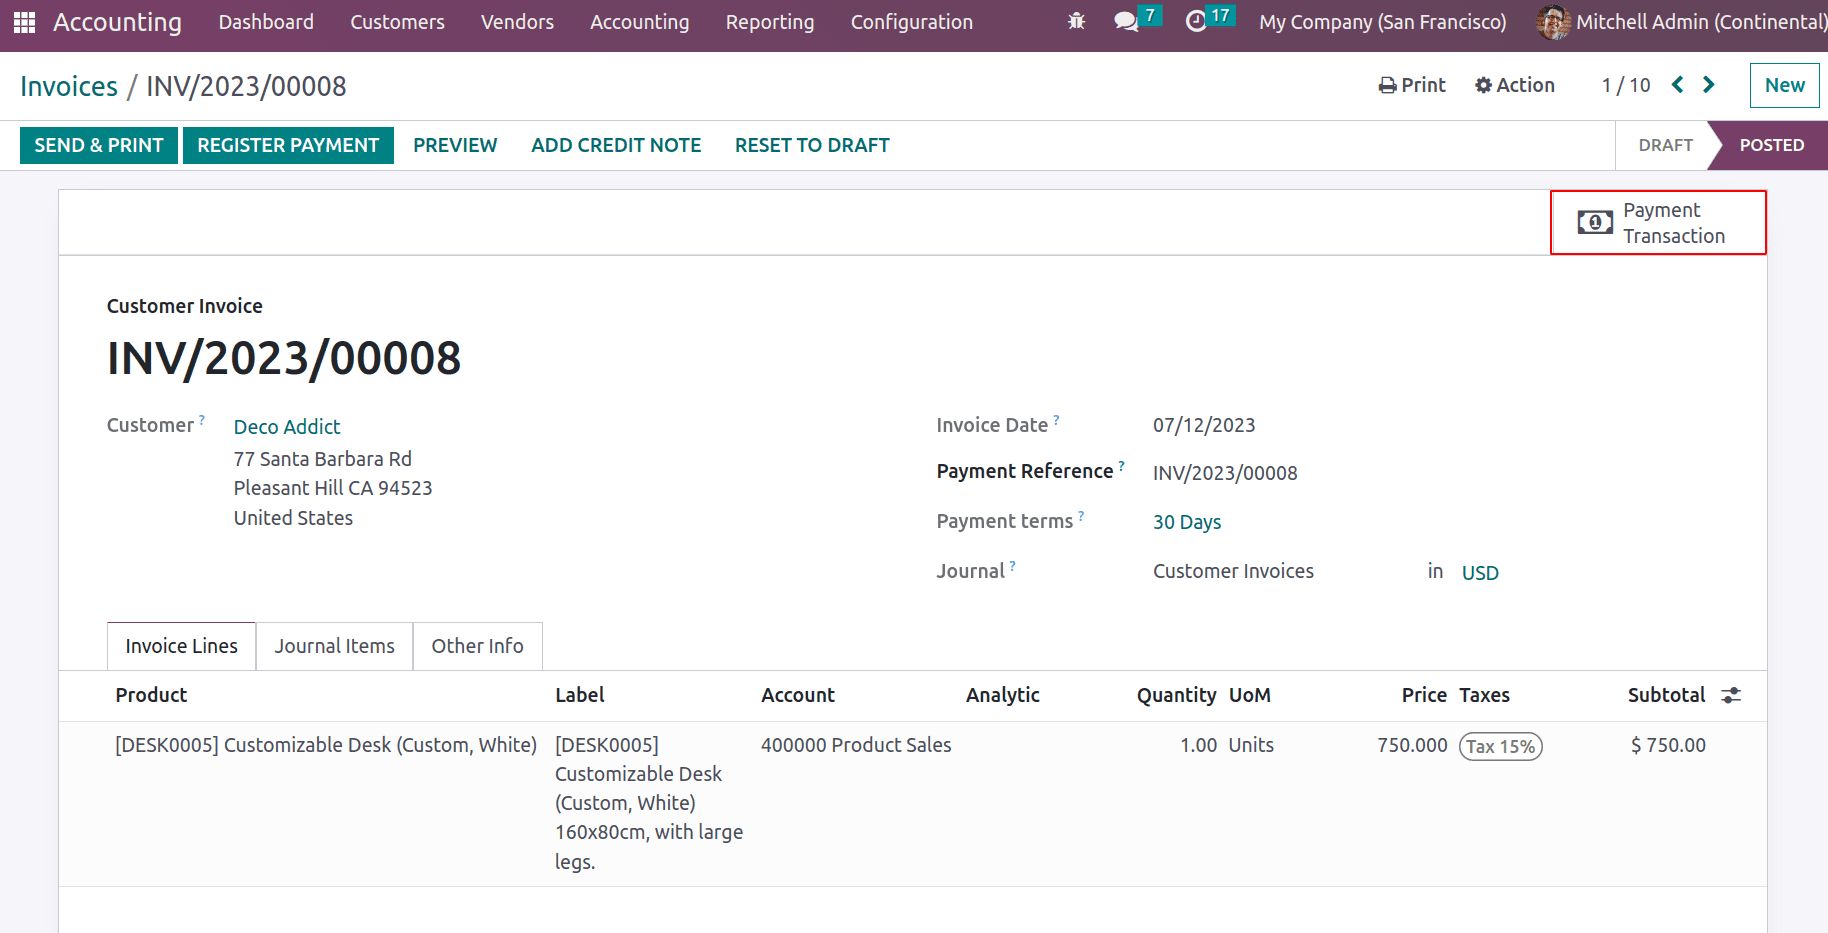
The transaction records the details of the payment.
* Authorize.Net: Authorize.Net is an online payment solution provider based in the United States that enables businesses to take credit cards. This provider also supports tokenization and manual capture. Here the payment flow is directly from Odoo. As previously mentioned these payment providers have their configuration.
* Buckaroo: Buckaroo is a Dutch company that provides a variety of online payment options. Odoo needs API Credentials, which include your Website Key and Secret Key, to connect with your Buckaroo account. You can copy your Buckaroo account credentials and paste them into the relevant sections on the Credentials tab.
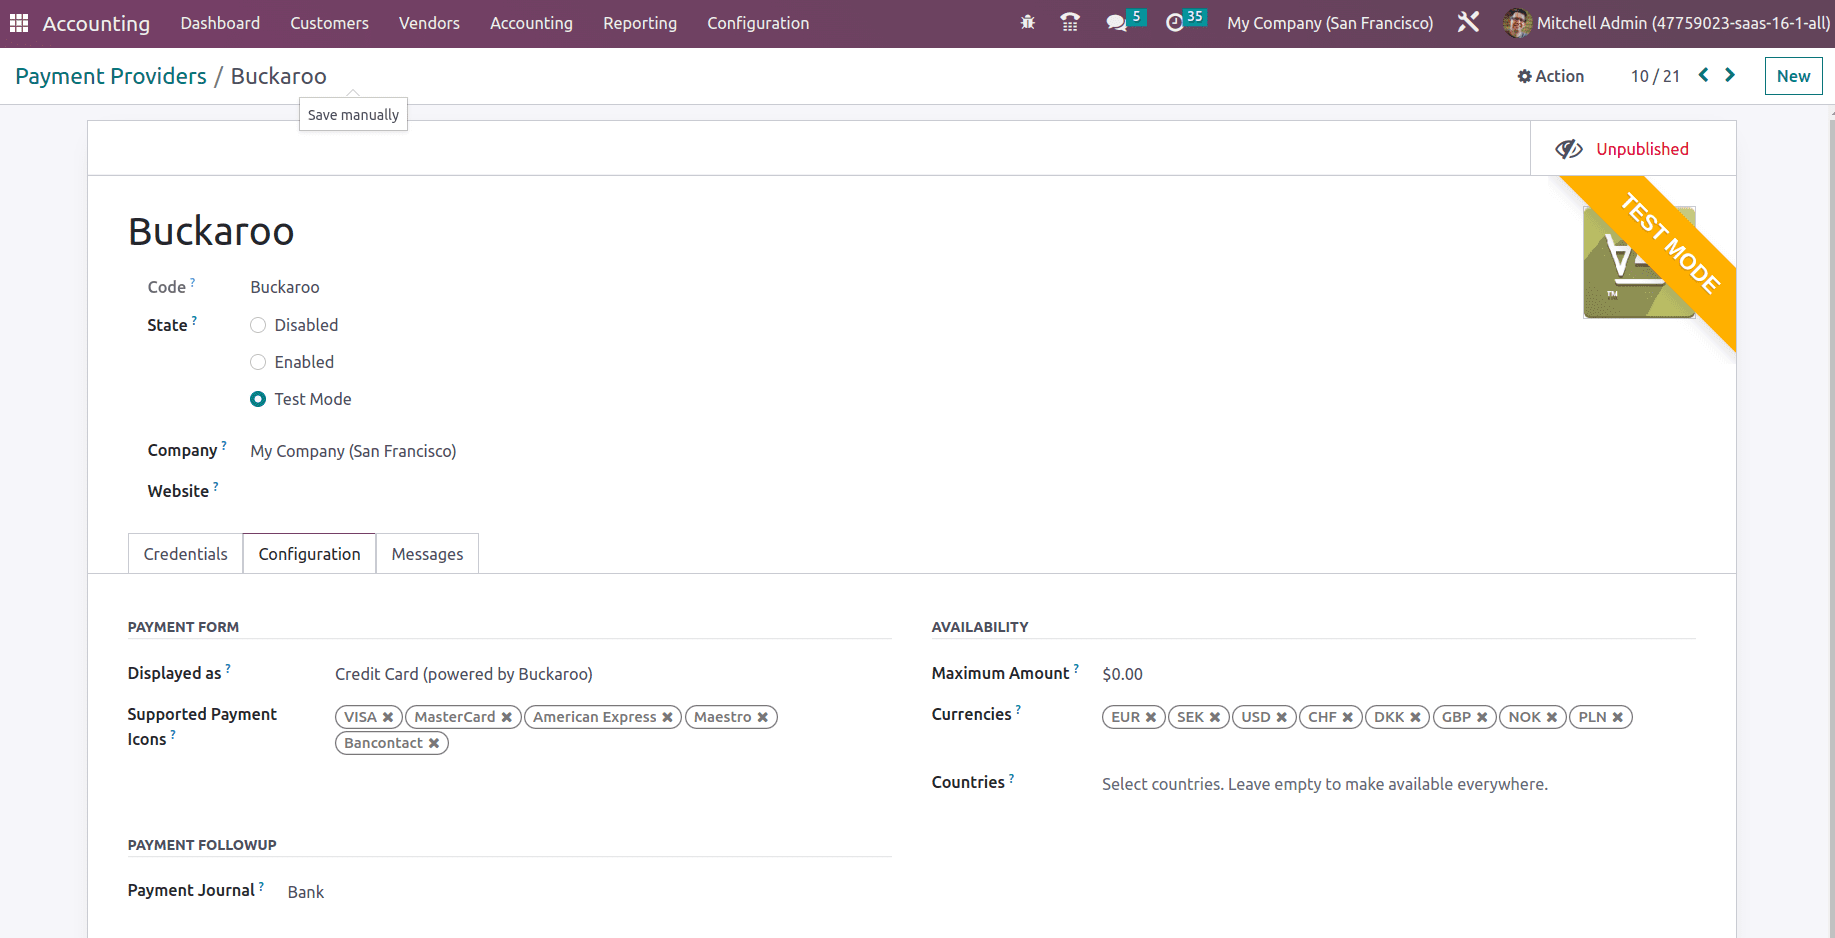
The currencies field can be filled with currencies, which means this provider allows to
make payments in the mentioned currencies.
* Mercado Pago: Mercado Pago is a Latin American online payment provider that accepts a variety of currencies and payment methods.
* Mollie: Mollie is a payment platform that was founded in the Netherlands. To activate the payment provider, one has to add the credentials from the Mollie account.
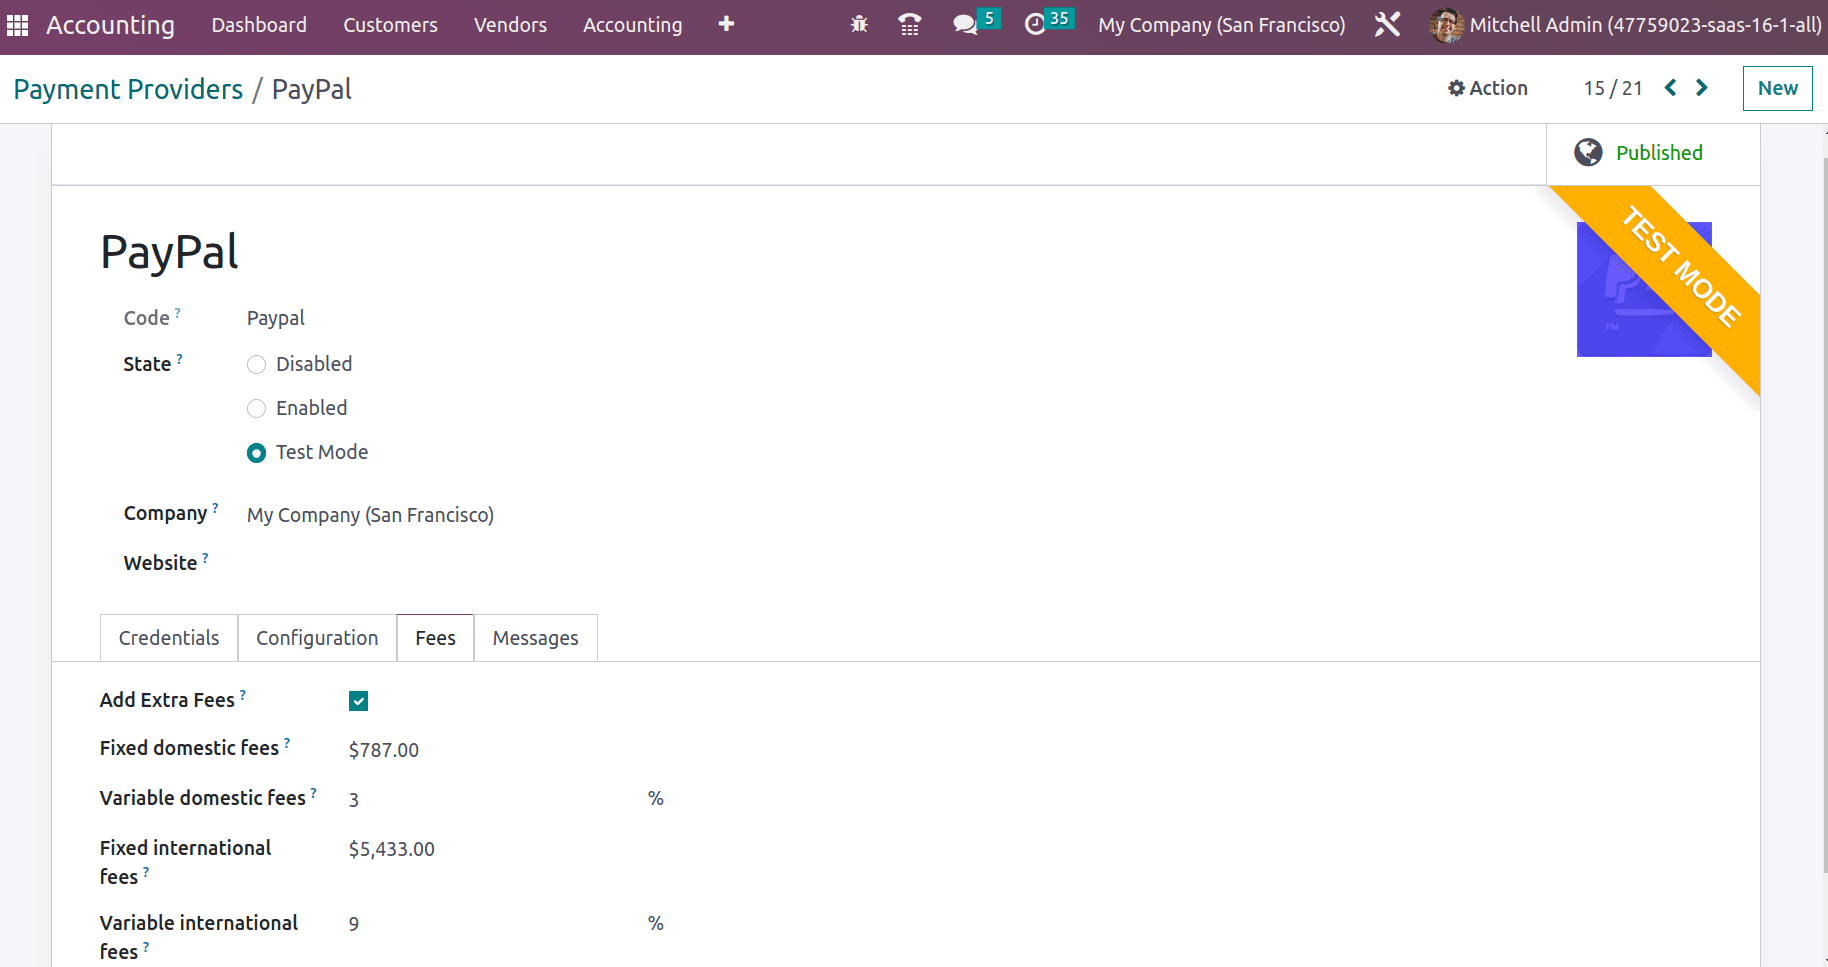
* PayPal: Paypal is a global online payment system based in the United States that does not impose a subscription fee. Customers who pay with PayPal can be charged additional fees to cover the transaction fees charged by PayPal.Traders in the EU are not permitted to charge additional fees for credit card payments.
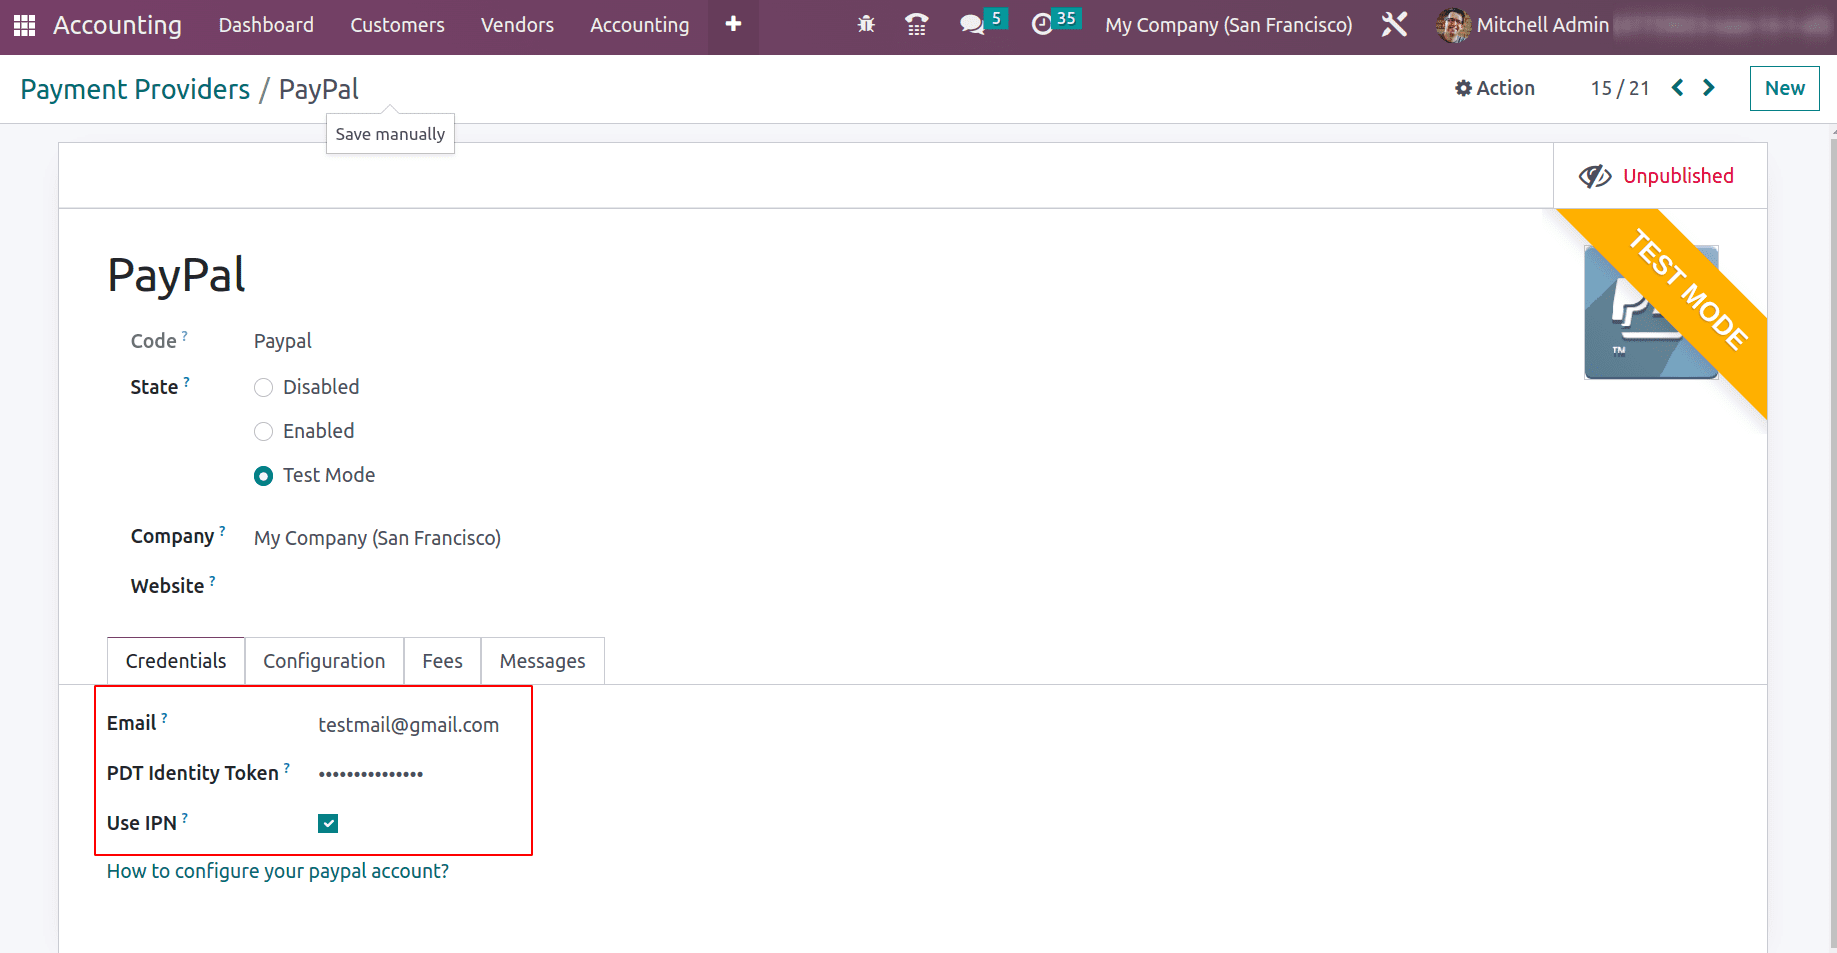
For the PayPal account, for PayPal to function in Odoo, the options Auto Return, PDT, and IPN must all be enabled. The fee tab enables adding the fee for domestic and international transactions.
* Razorpay: is an online payment provider based in India that accepts over 100 different payment methods. Log in to razor pay you can get the credential that can be pasted in Odoo.
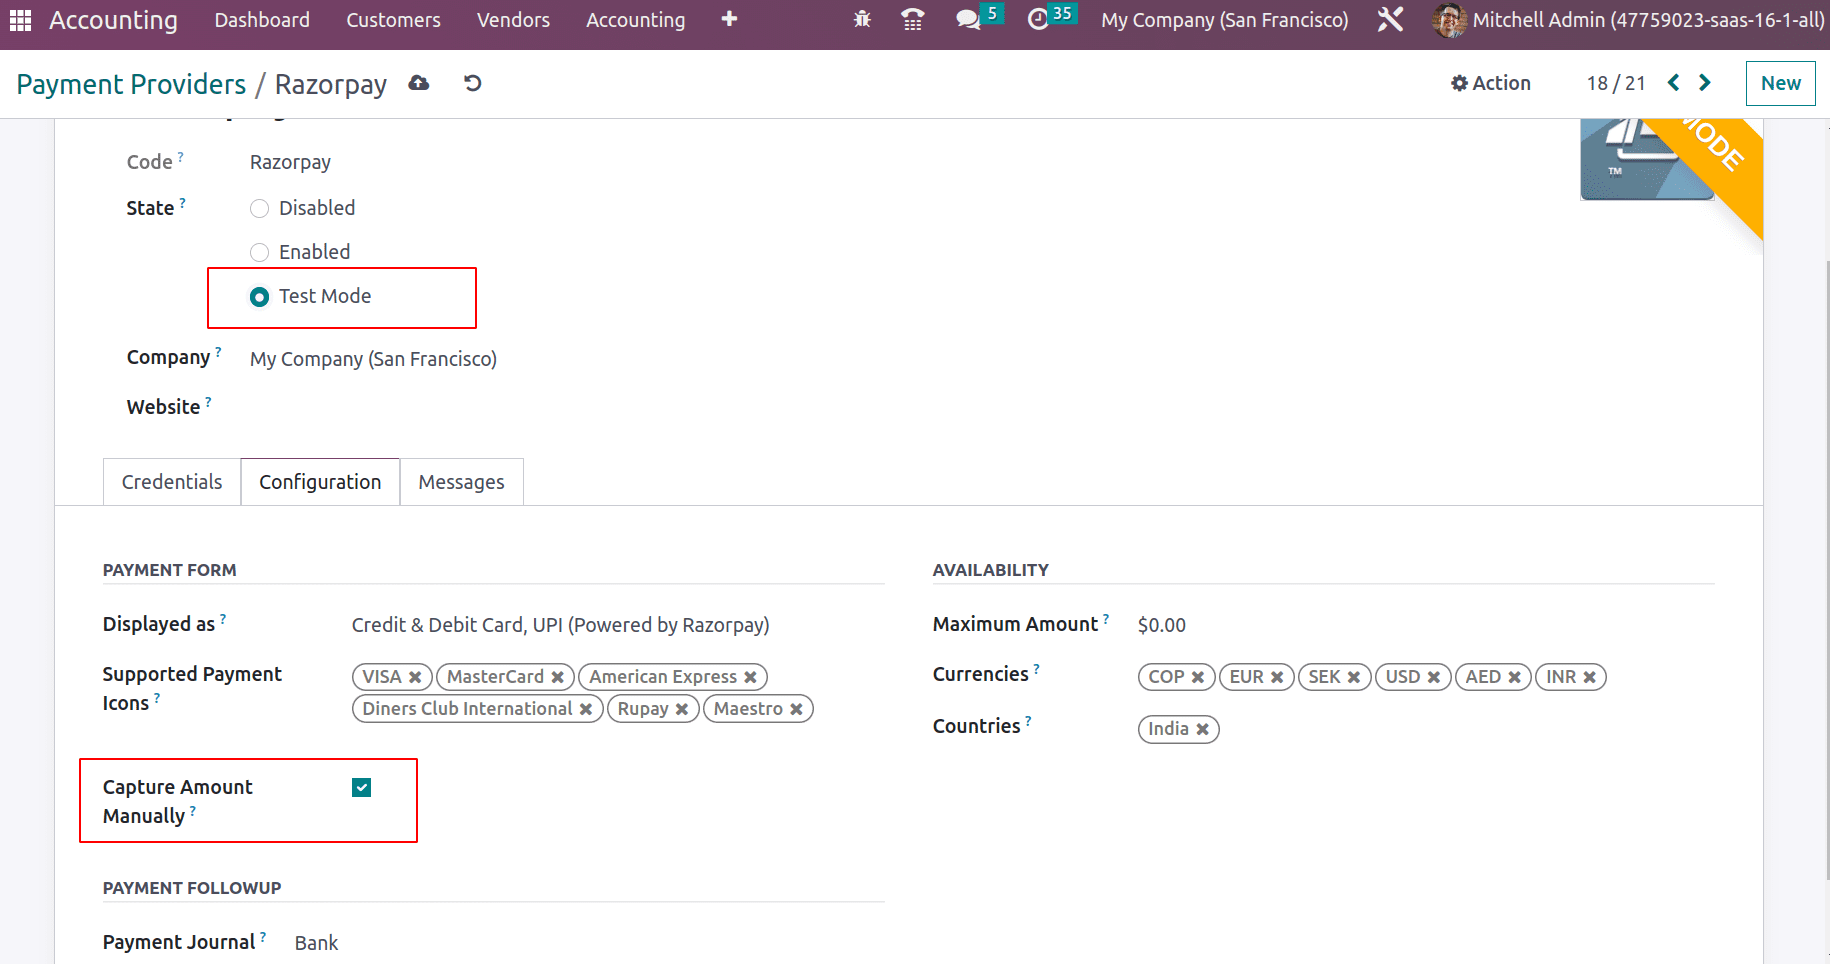
If you configure Odoo to collect amounts manually, be aware that Razorpay does not permit the manual voiding of a transaction. If the transaction has not been captured within five days, it will be automatically canceled.
* SIPS: The international company Worldline offers SIPS as an online payment solution. You are able to copy your credentials from the SIPS account and replace them with the relevant fields on the payment provider's Credentials tab.
* Stripe: A US-based company called Stripe offers online payment solutions that let companies take credit cards and other payment types.
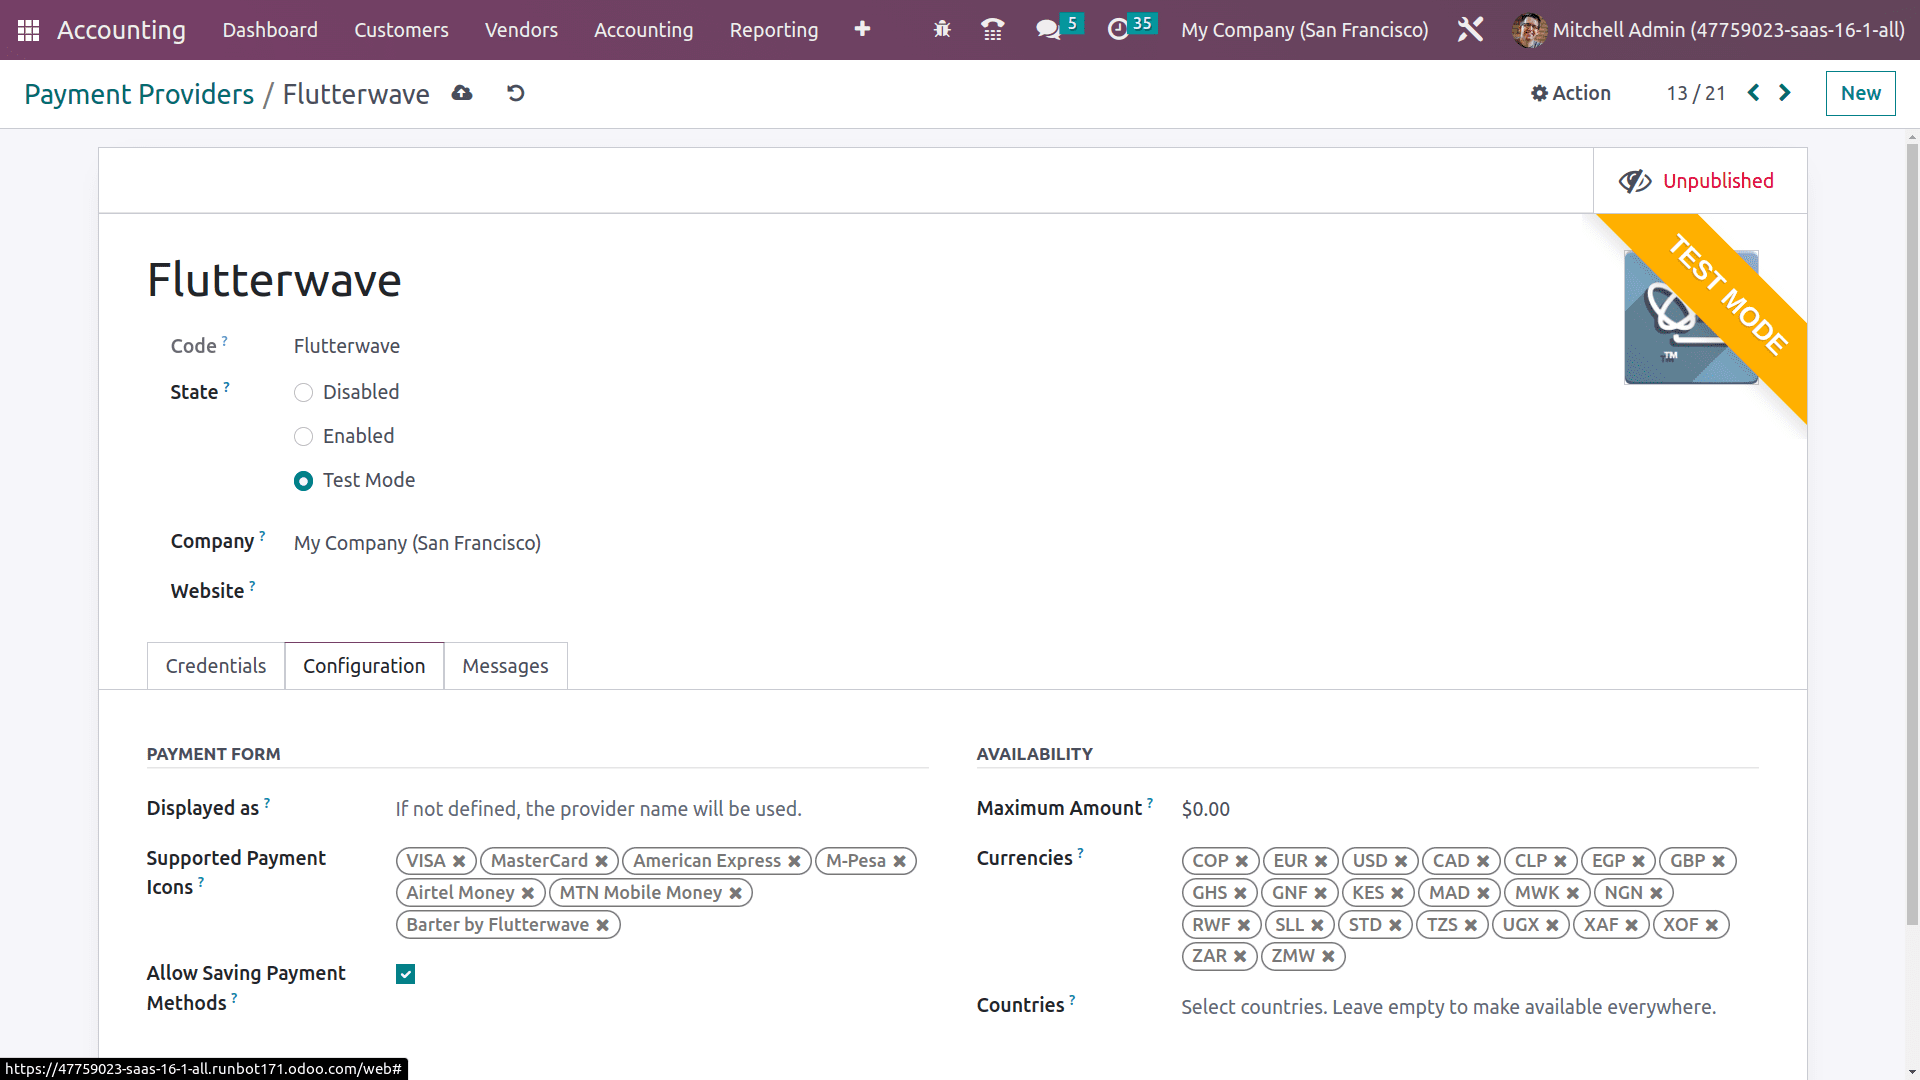
* Flutterwave: The Nigerian company Flutterwave offers online payments for a number of African nations and payment options. With the help of this provider, you can send money to individuals or businesses in more than 30 different currencies.
Under the Credentials tab can add the public key, secret key, and webhook secret that can be generated from the Flutterwave account.
* Amazon Payment Services: Online payment service Amazon Payment Services, often known as APS, was founded in Dubai and offers a number of online payment methods. From the APS Dashboard, you will be able to get the merchant id, Access code, SHA Request Phrase, and SHA Response Phrase that can be provided in the respective field and connect with odoo
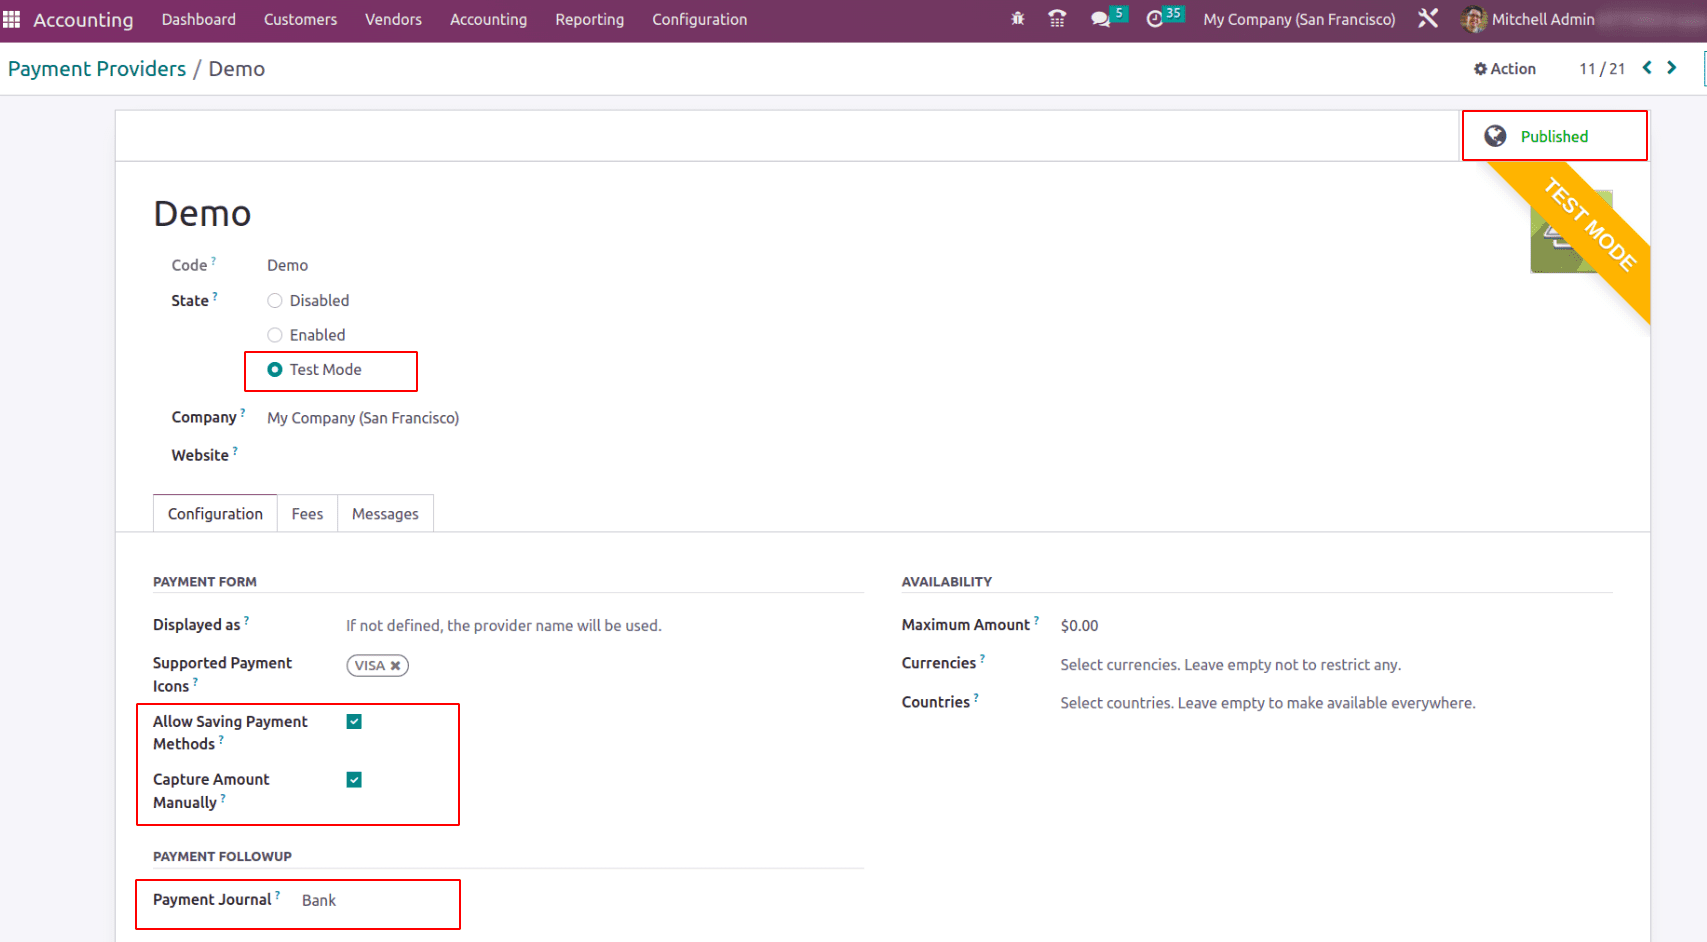
* Demo: You can test business processes involving online transactions with Odoo's Demo Payment Provider without needing actual banking credentials. You can activate the demo acquirer.
For the demo acquirer, the status changed to ‘Test Mode’ and enabled the features of ‘Allow Saving Payment Methods’ and ‘capture amount manually’. Also, fee details can be mentioned under the tab ‘Fees’ and finally publish this demo provider. Then we can test and analyse the payment flow using this demo payment provider, if an invoice is paid with the provider.
Now let us see how the payment can be done and where the payment tokens are stored in Odoo.
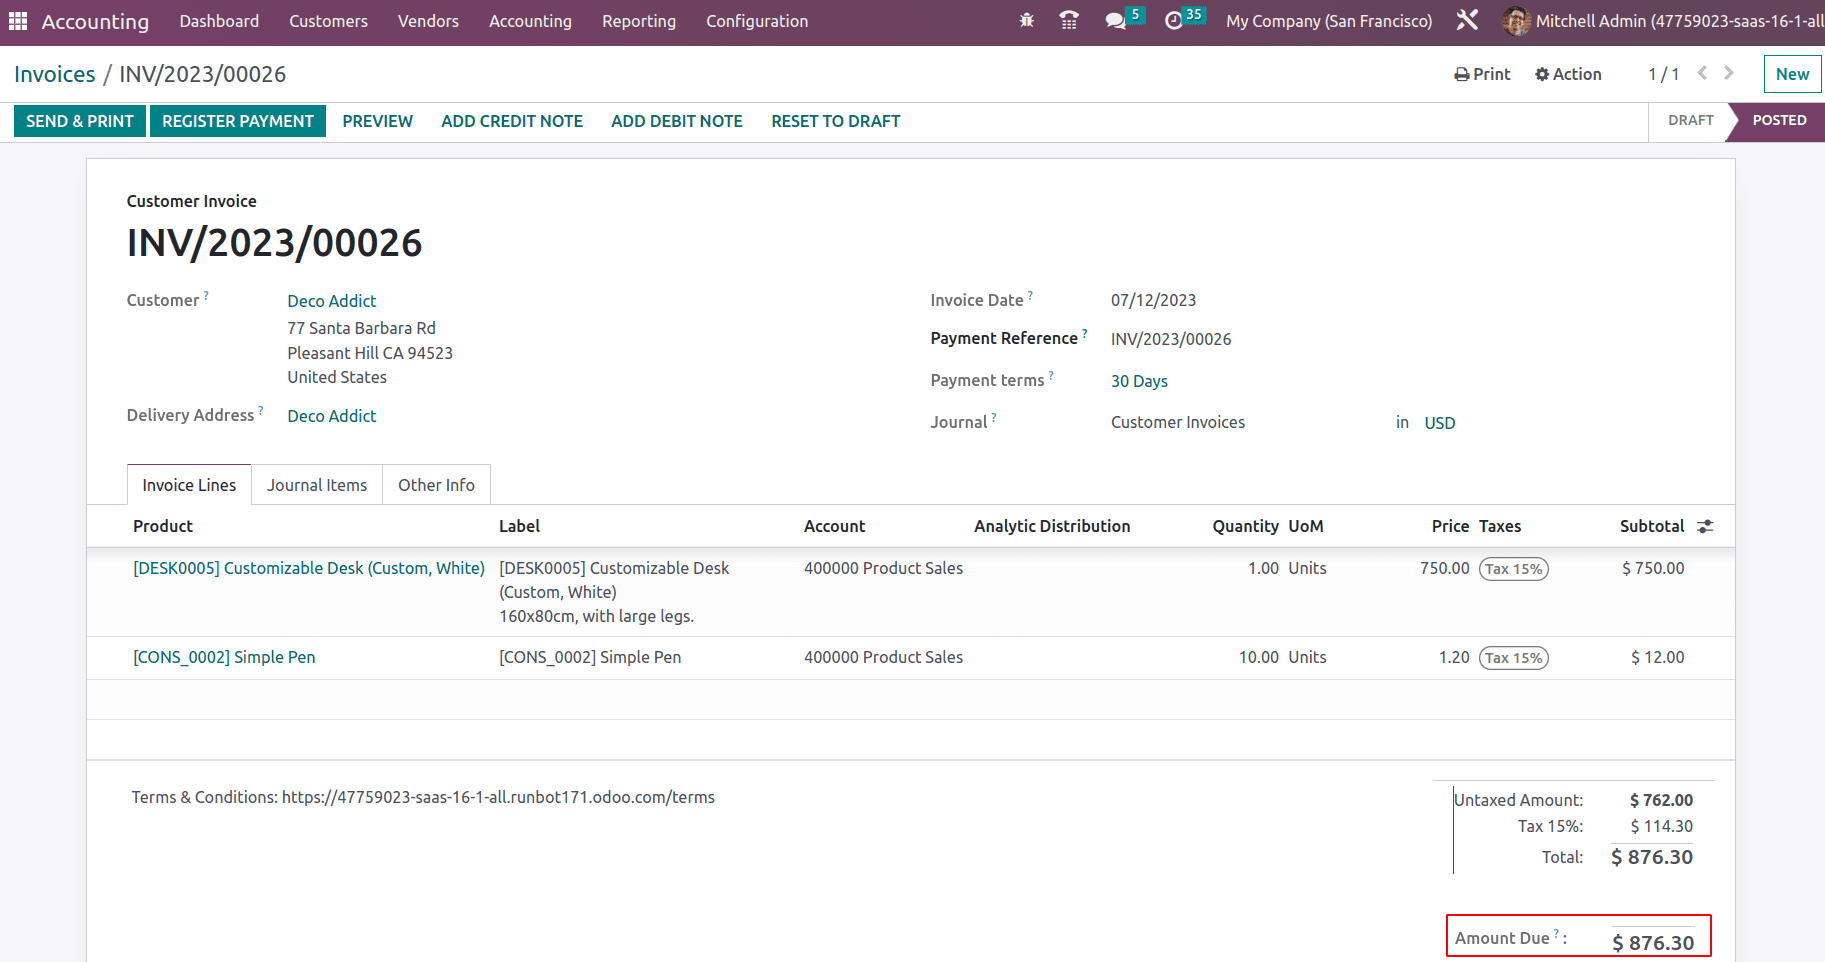
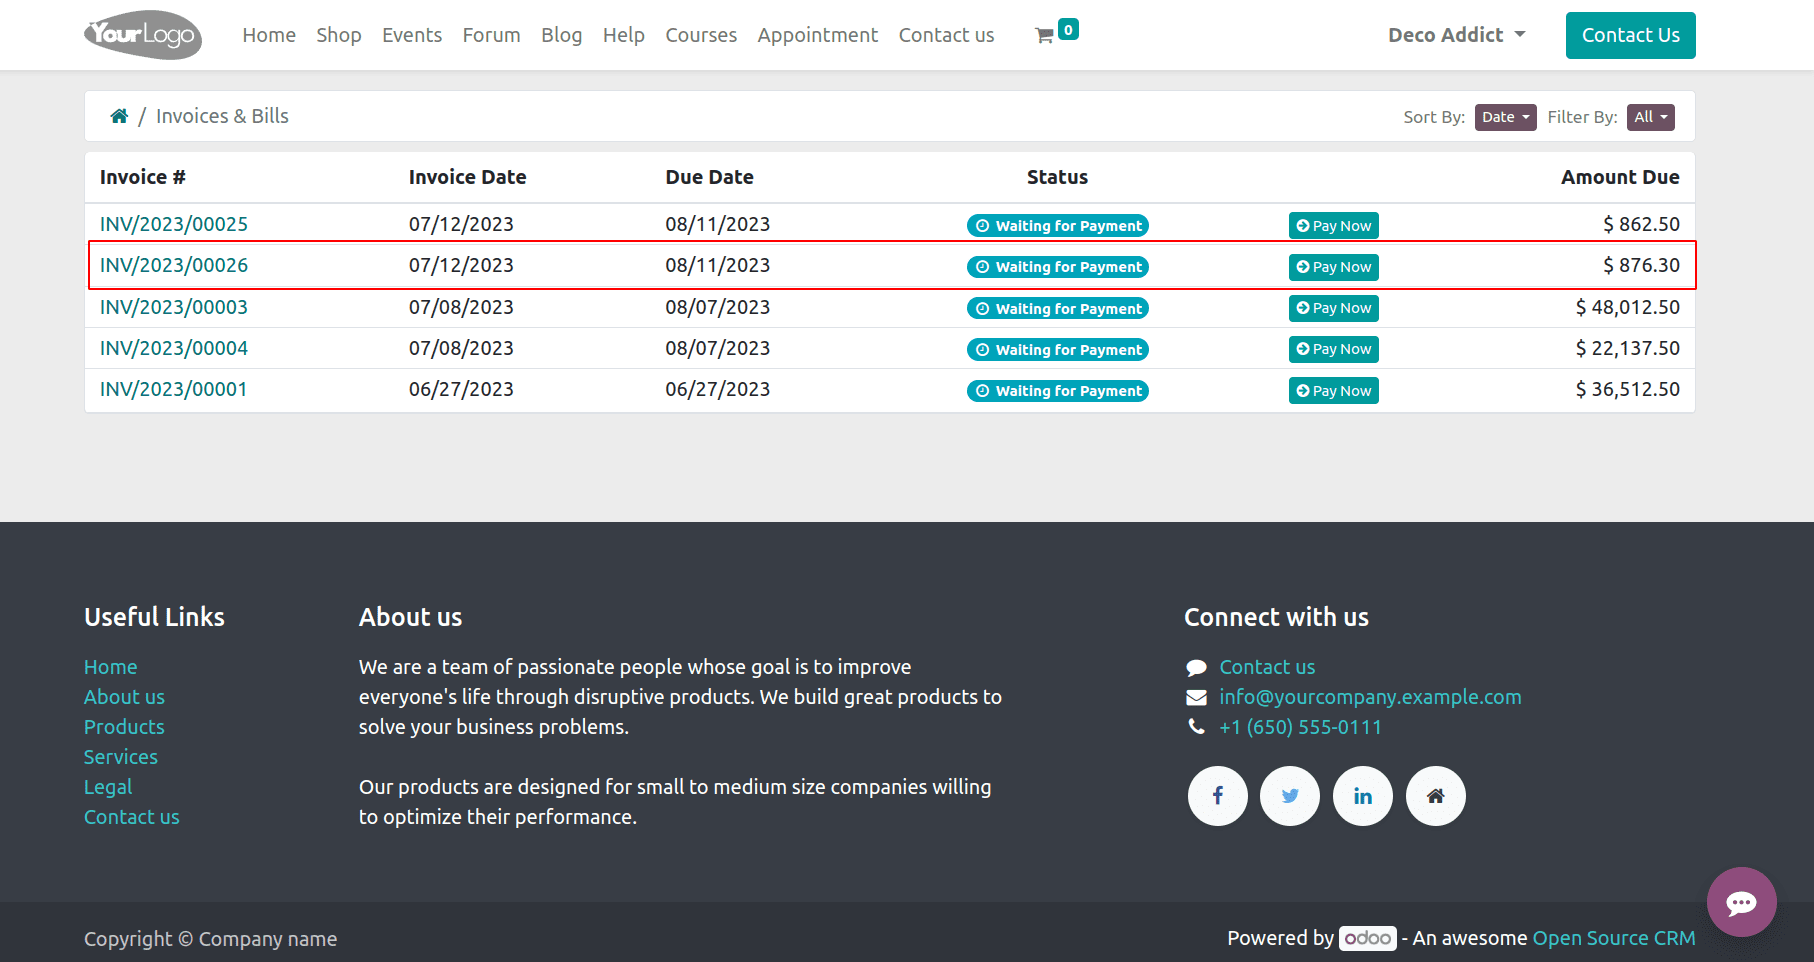
An invoice is posted and sent to the customer. Thus they can view their invoice details in Odoo. When Deco Addict log-in to his portal a button PAY appears only if the feature ‘Invoice Online Payment’ is enabled in the configuration settings of the Accounting Module.
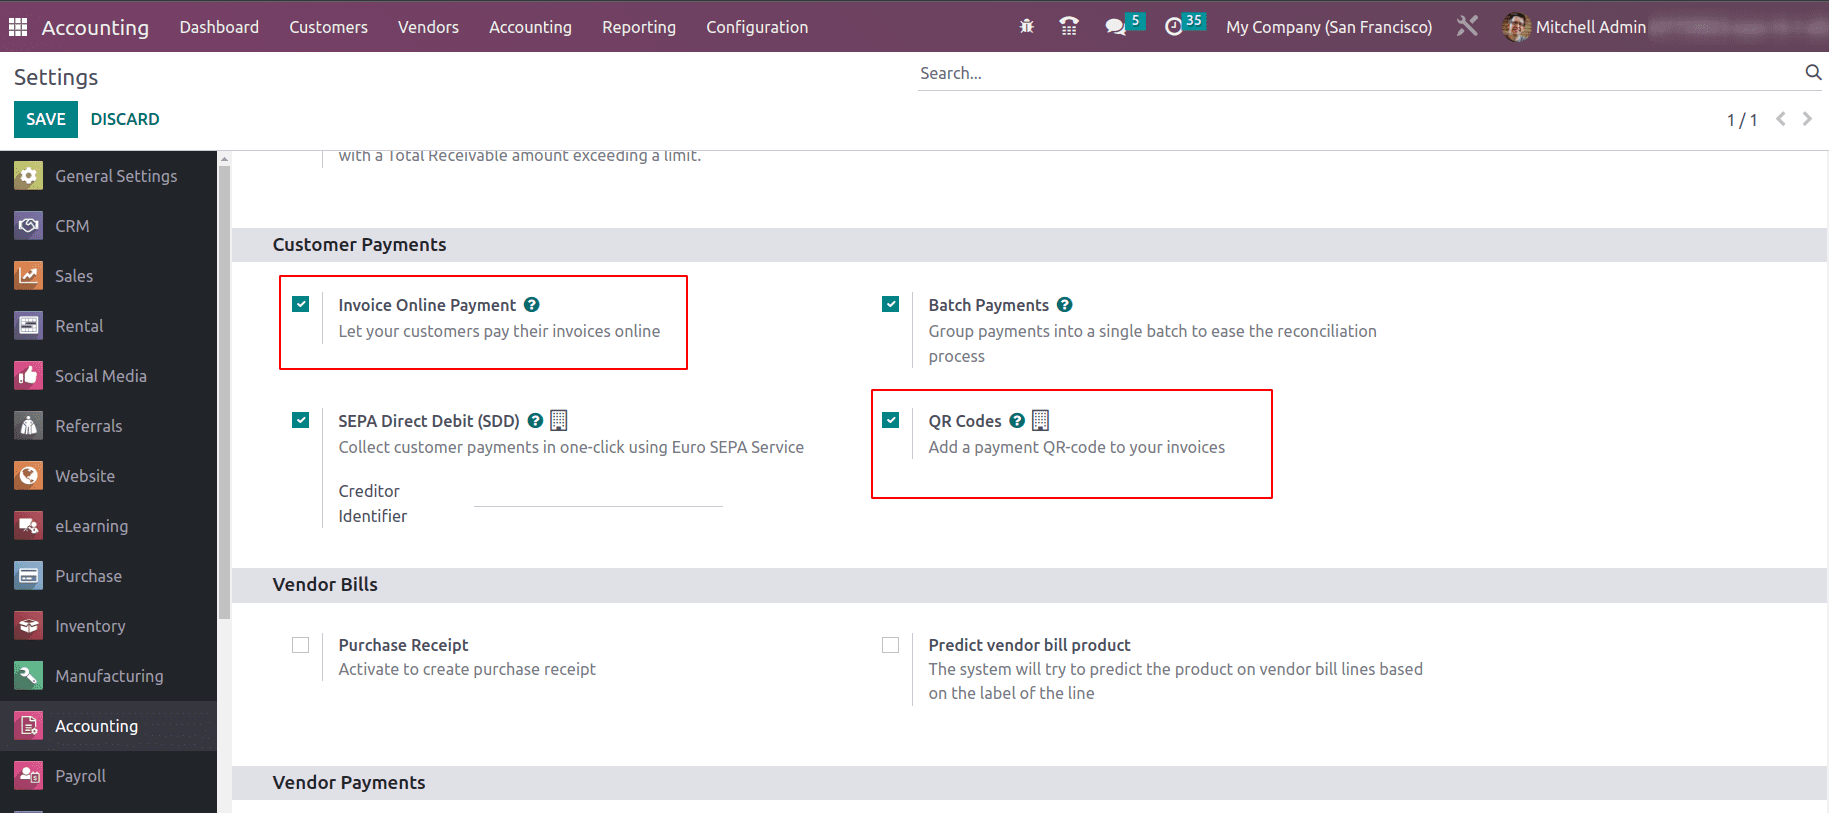
On enabling the feature ‘QR Codes’, a QR code will print on your invoice, which will help the customers to make payment by scanning the QR code.
Now log in as Deco Addict and make payment through his customer portal.
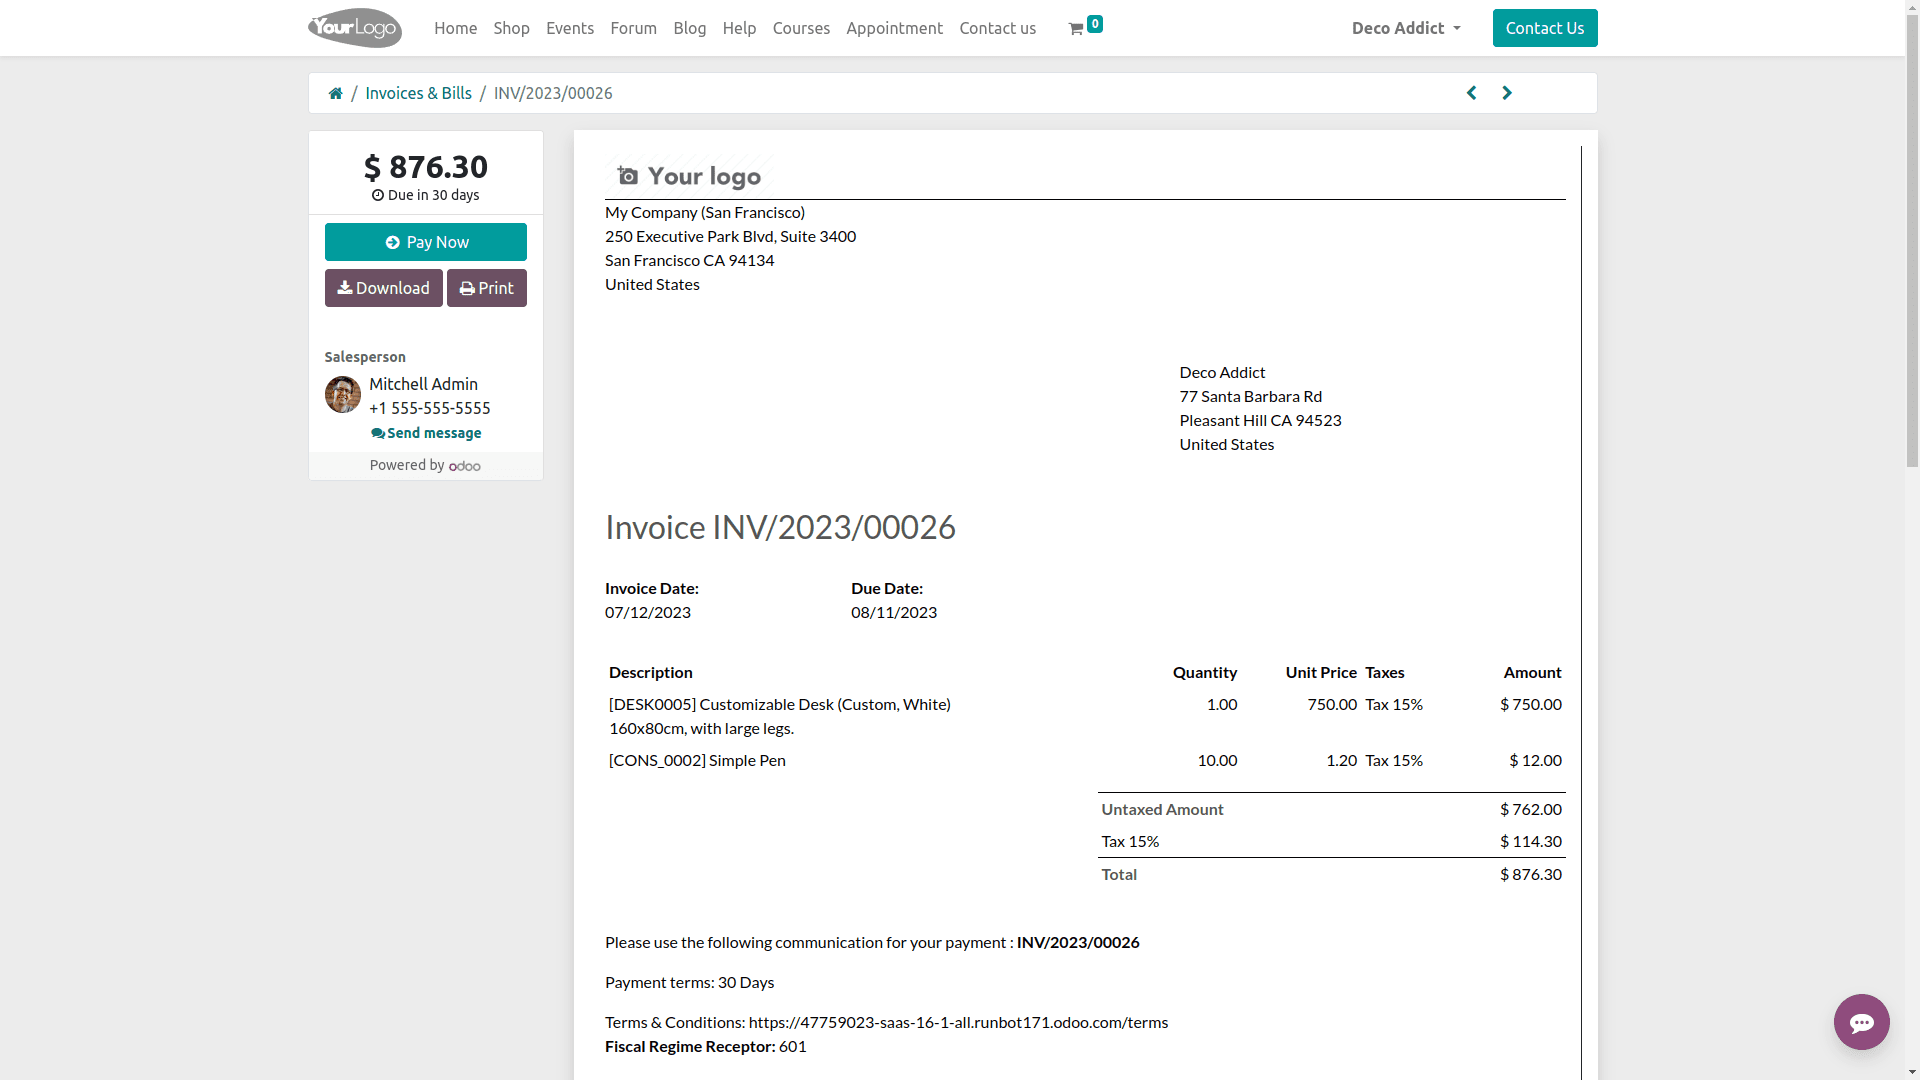
Open the invoice where you can find all the details of your invoice, including the address of buyer and seller, products, quantities, unit price, tax amount, and total. Apart from this the payment terms, terms & conditions, incoterm, etc will appear on the invoice document.
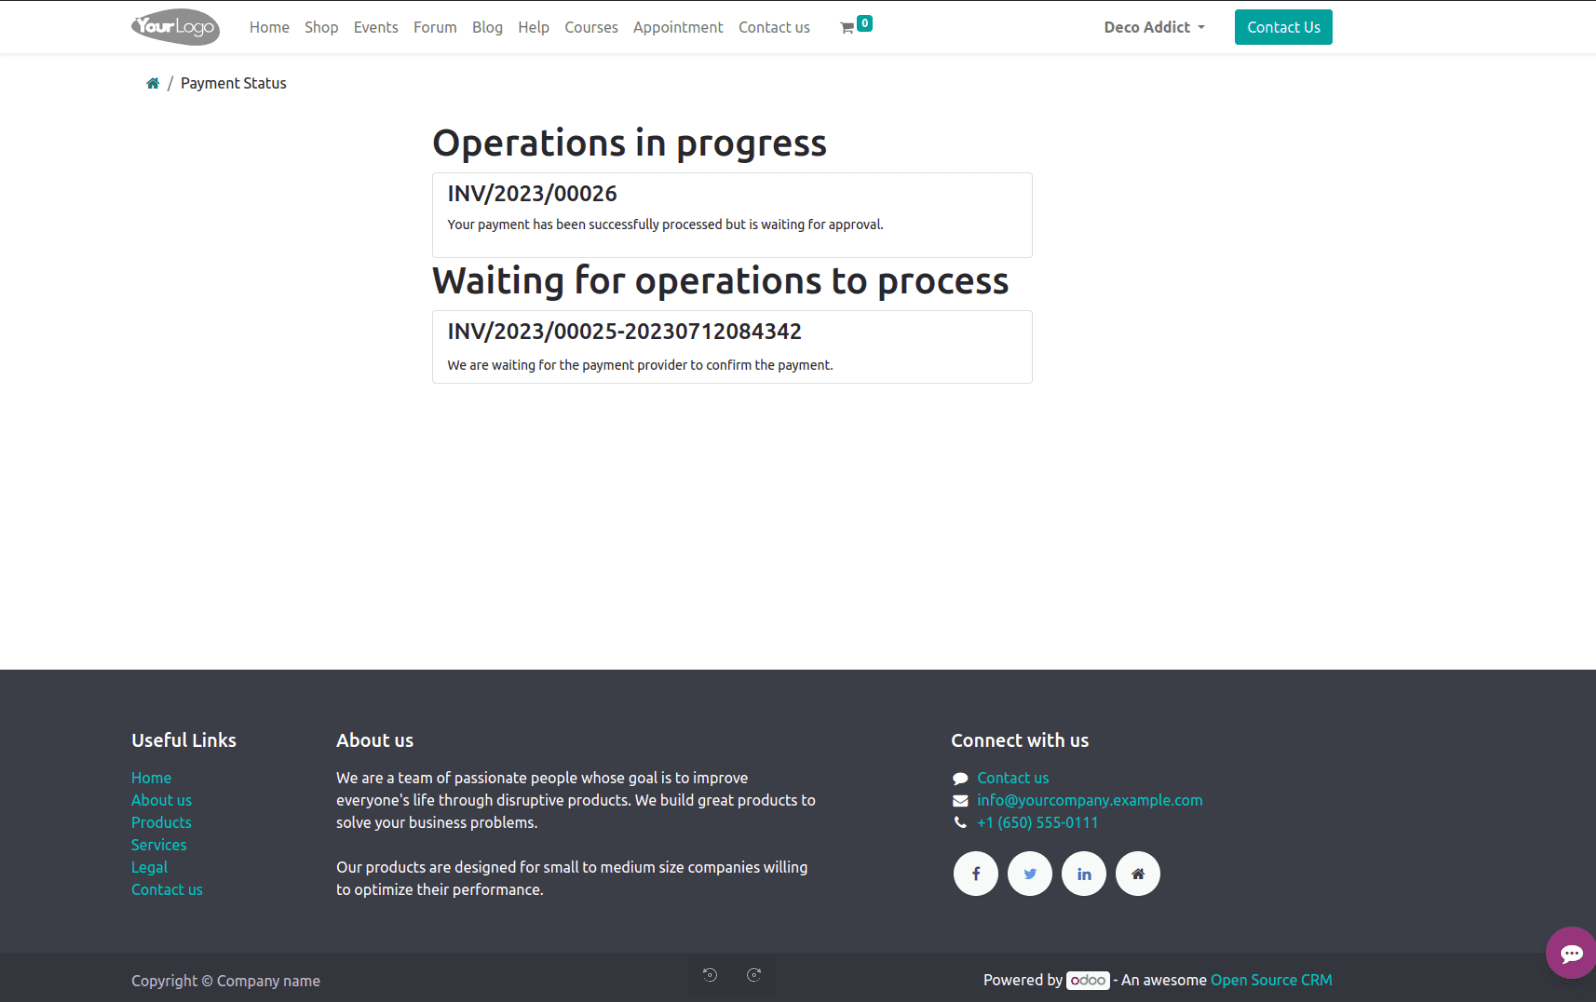
Now click on PAY NOW and then a pop-up will appear where you can choose the demo payment provider. Add the test card details and the payment status is pending. This will add an approval stage to the recorded payment transaction. If you want to save the payment details check the box ‘save my payment details’.
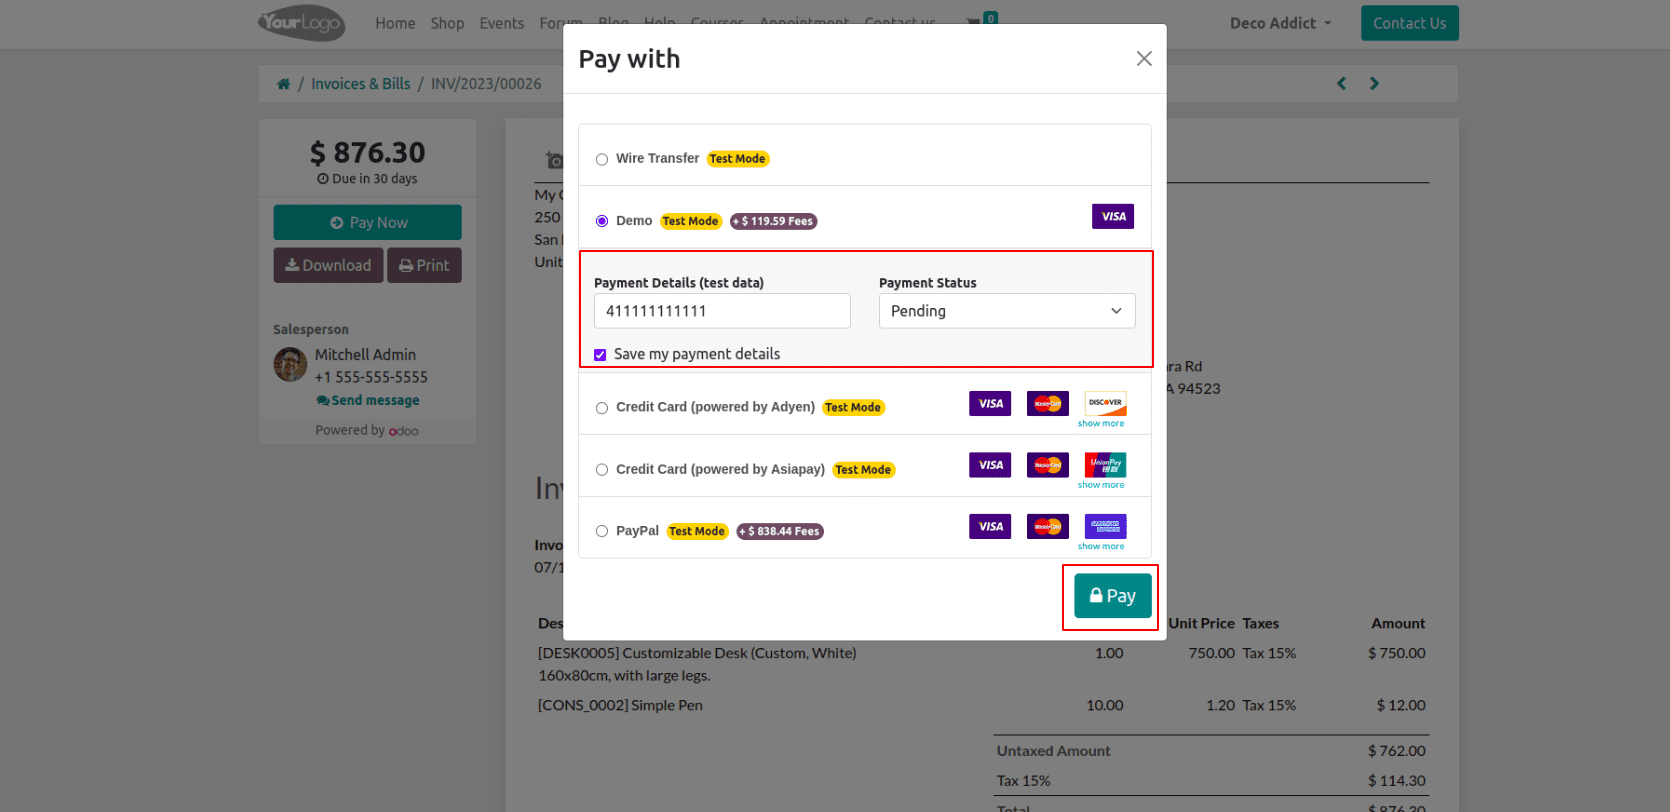
Click on PAY to make a payment. Once it is paid, it will show the payment status.
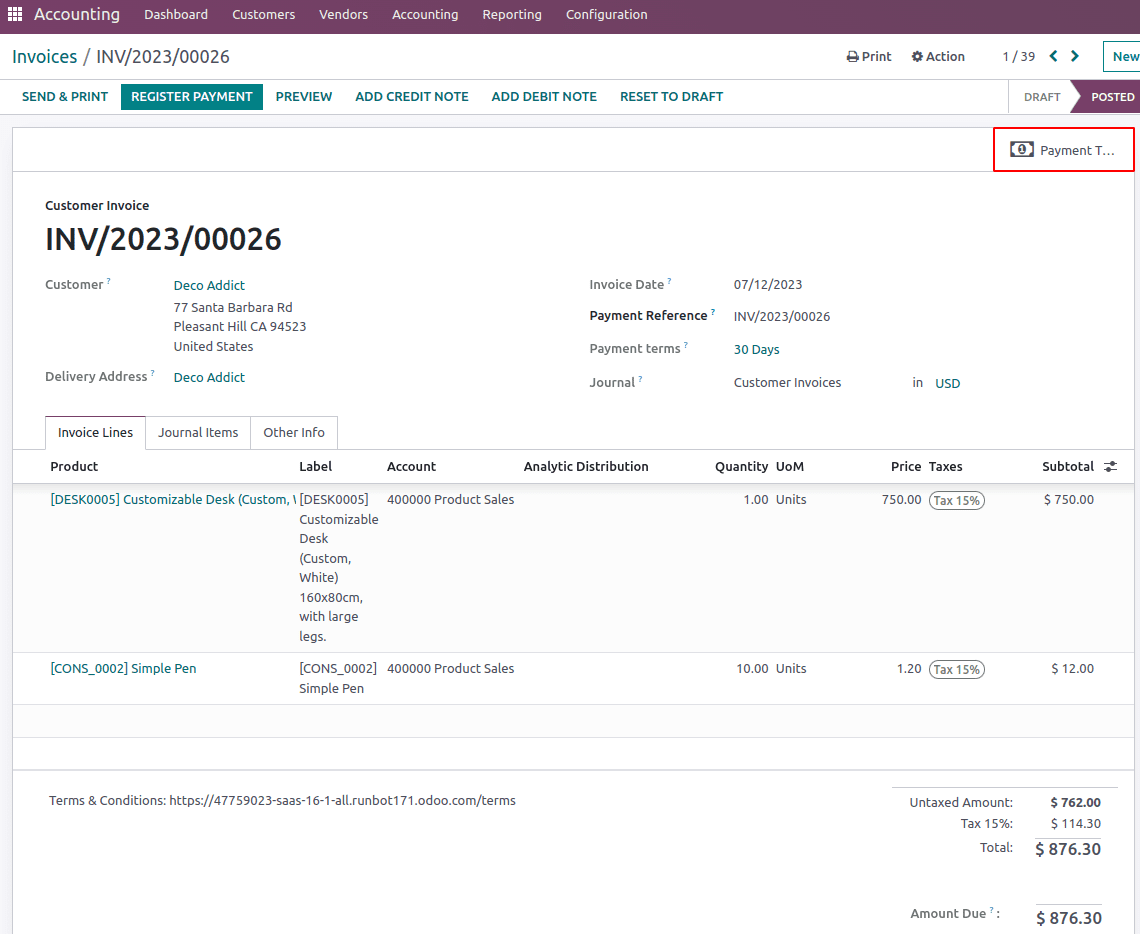
Now let us check the payment transaction from the back end. When you open the invoice you can find a smart tab appears as Payment transaction.
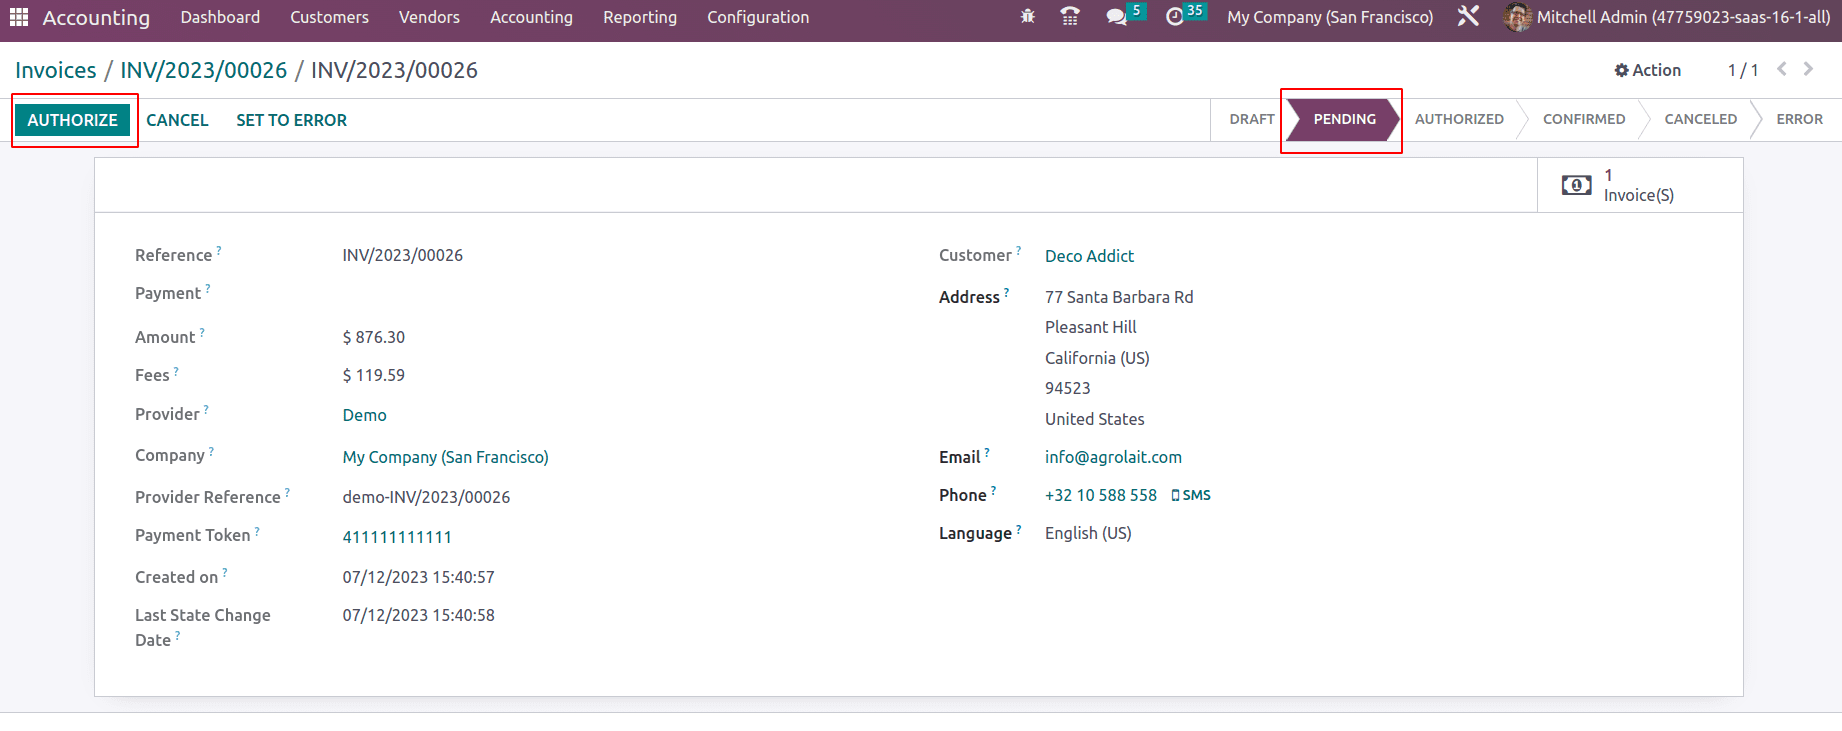
This payment transaction records all the details of your payment. The payment status is currently PENDING. On clicking AUTHORIZE will authorise the payment and status will move to AUTHORIZED.
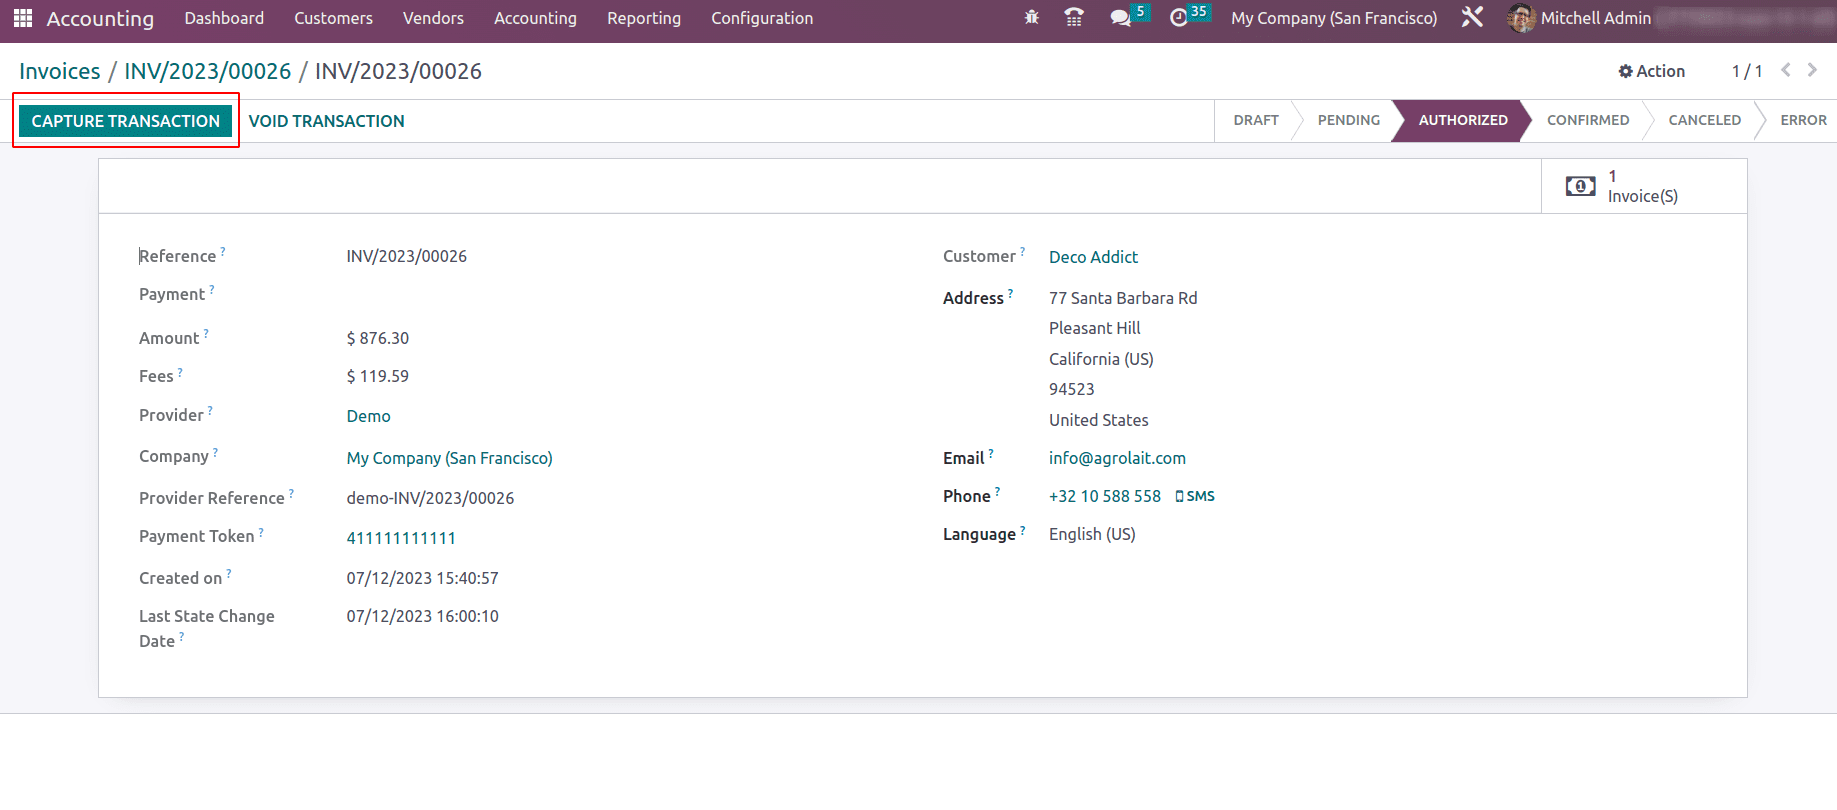
Later this transaction can be captured/confirmed by hitting on CAPTURE TRANSACTION or cancel when hitting on VOID TRANSACTION.
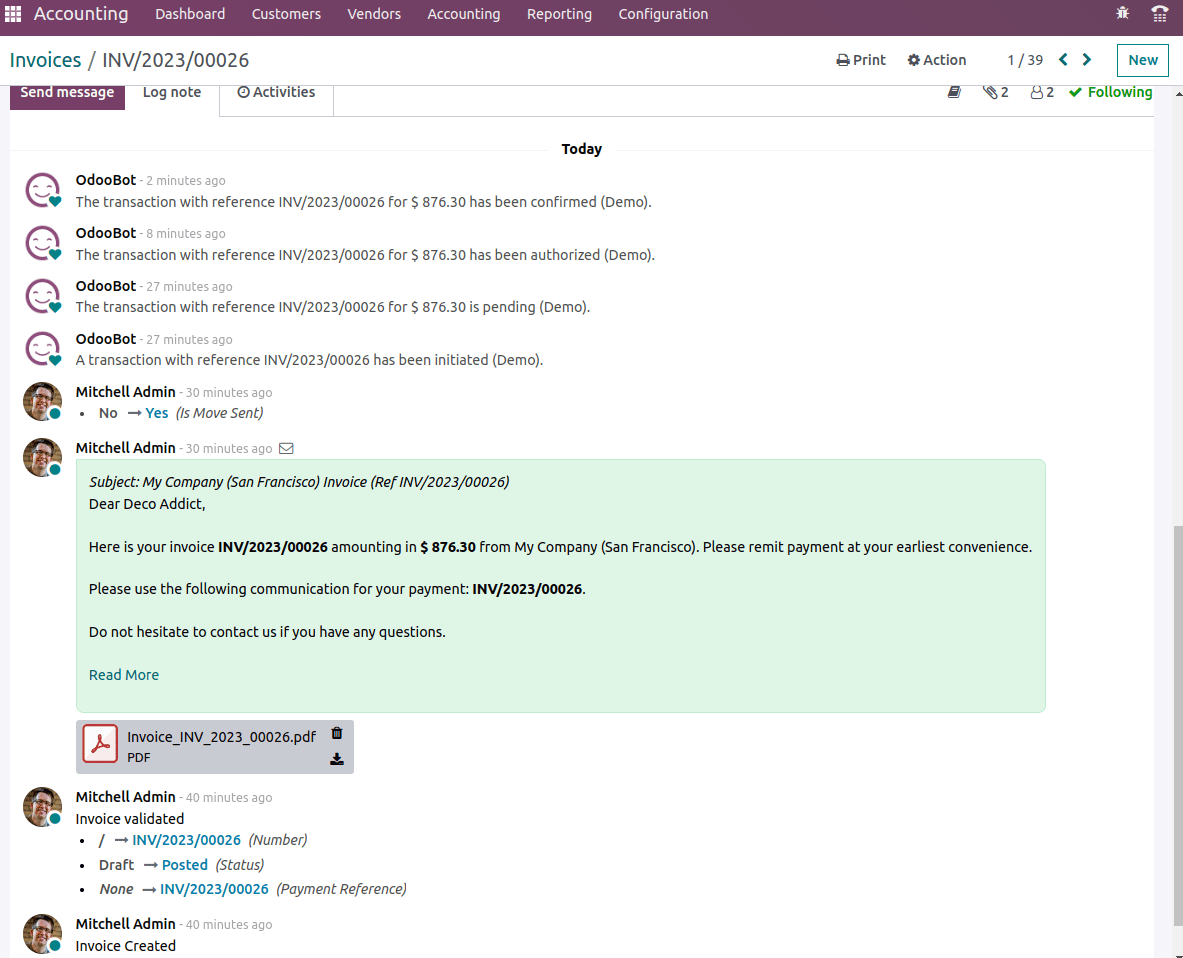
Thus the status moved to CONFIRMED when clicking on CAPTURE TRANSACTION. In the chatter of invoice, all the updates are recorded from the invoice creation to payment confirmation.
The payment tokens will generate corresponding to test card details, Odoo will not save your card details, instead, it will generate a payment token. You can see all the saved payment transactions and payment tokens under the configuration menu if you activated the developer mode.
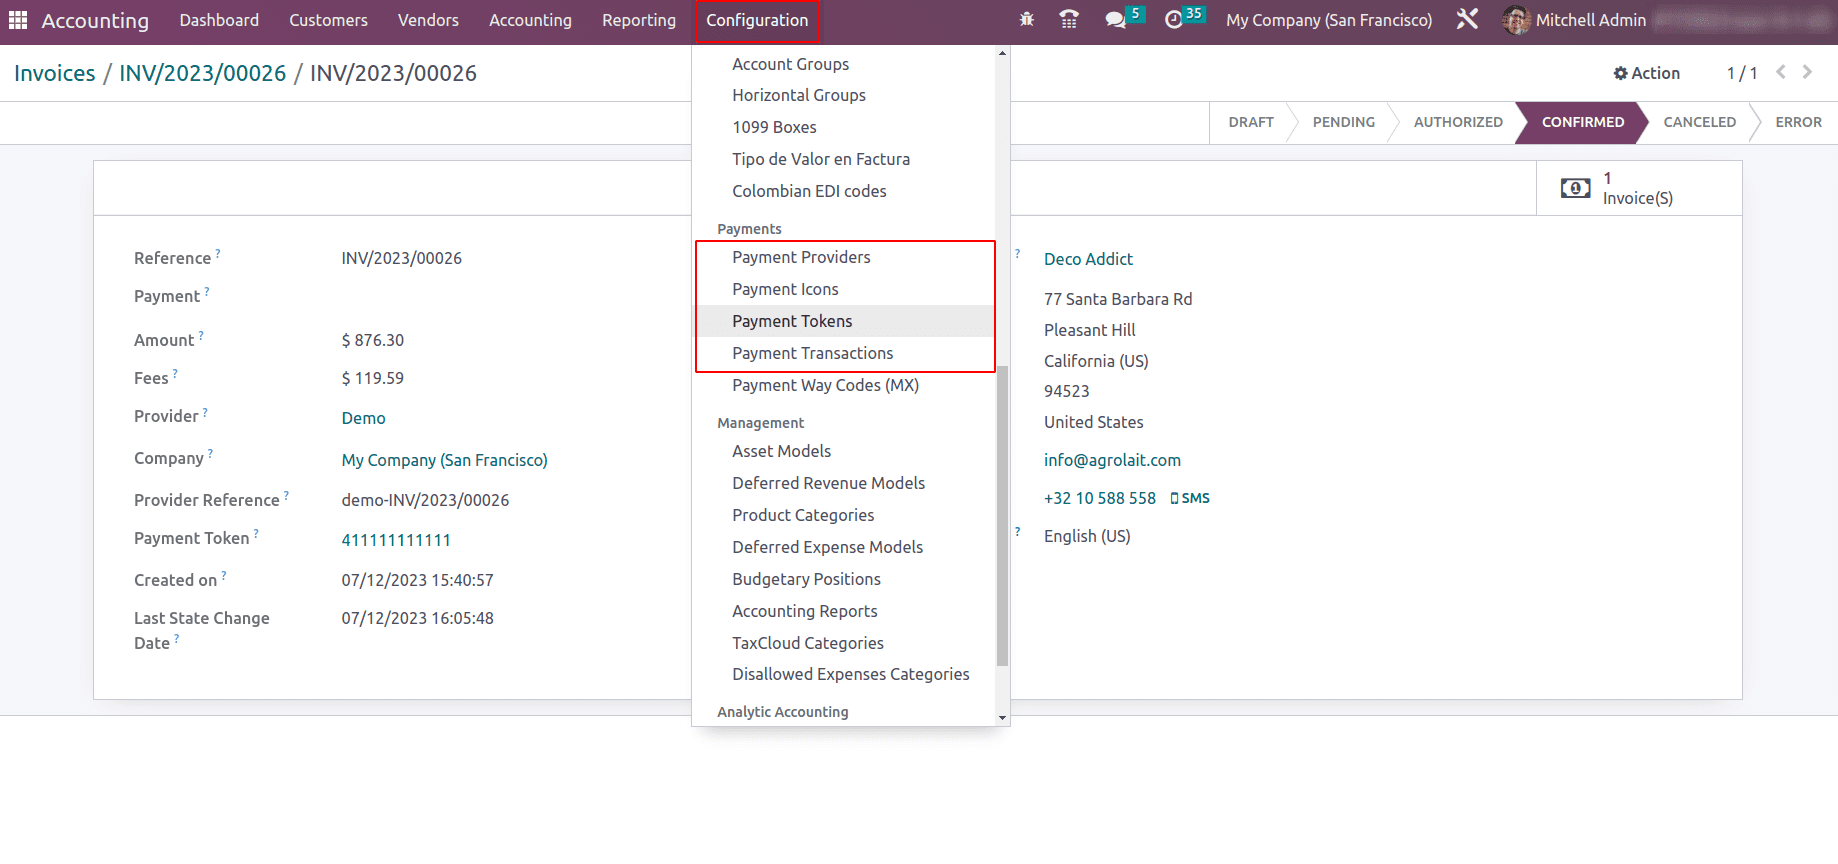
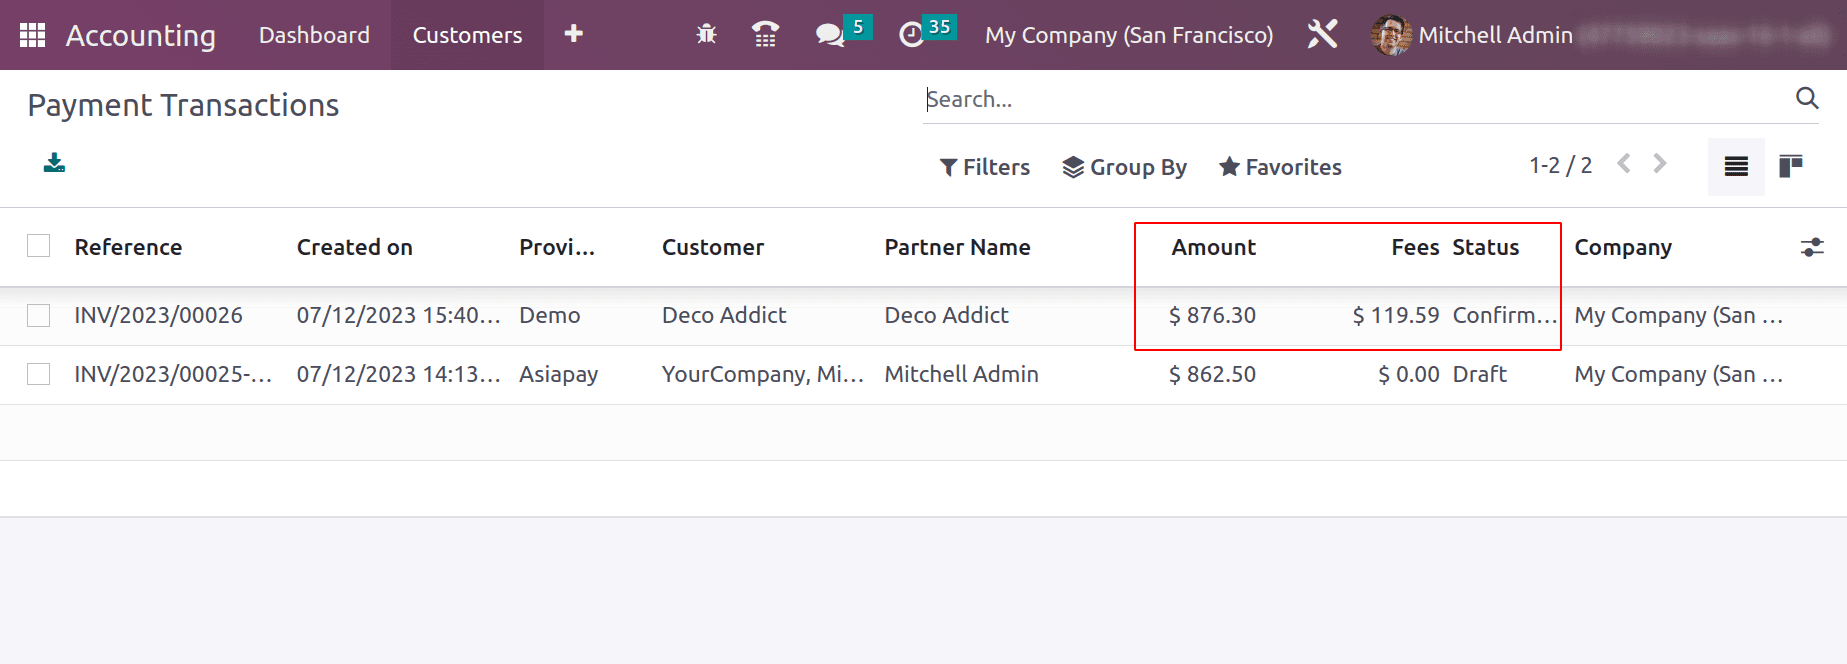
Open the payment token, where you can find all the payment token that has been generated. The payment transaction record all the payment transactions.
To read more about creating a new payment provider for online transactions in Odoo 16, refer to our blog How to Create a New Payment Provider for Online Transactions in Odoo 16