In Odoo 18's Point of Sale (PoS) module, users can efficiently manage products and their variants using the ‘Product’ menu. Odoo 18 introduces an upgraded Product and Product Variant window that provides enhanced functionalities for managing these items. Users can access these windows directly from the POS interface when adding or editing products. Furthermore, Odoo 18 allows users to create new products directly from the POS system.
Users can manage products for the Point of Sale (PoS) directly from the product form by enabling the Point of Sale option within the product settings. This allows the product to be available in the PoS system for transactions. By enabling this feature, the product becomes accessible in the PoS interface, making it easier for sales representatives to add it to the sales order during checkout.
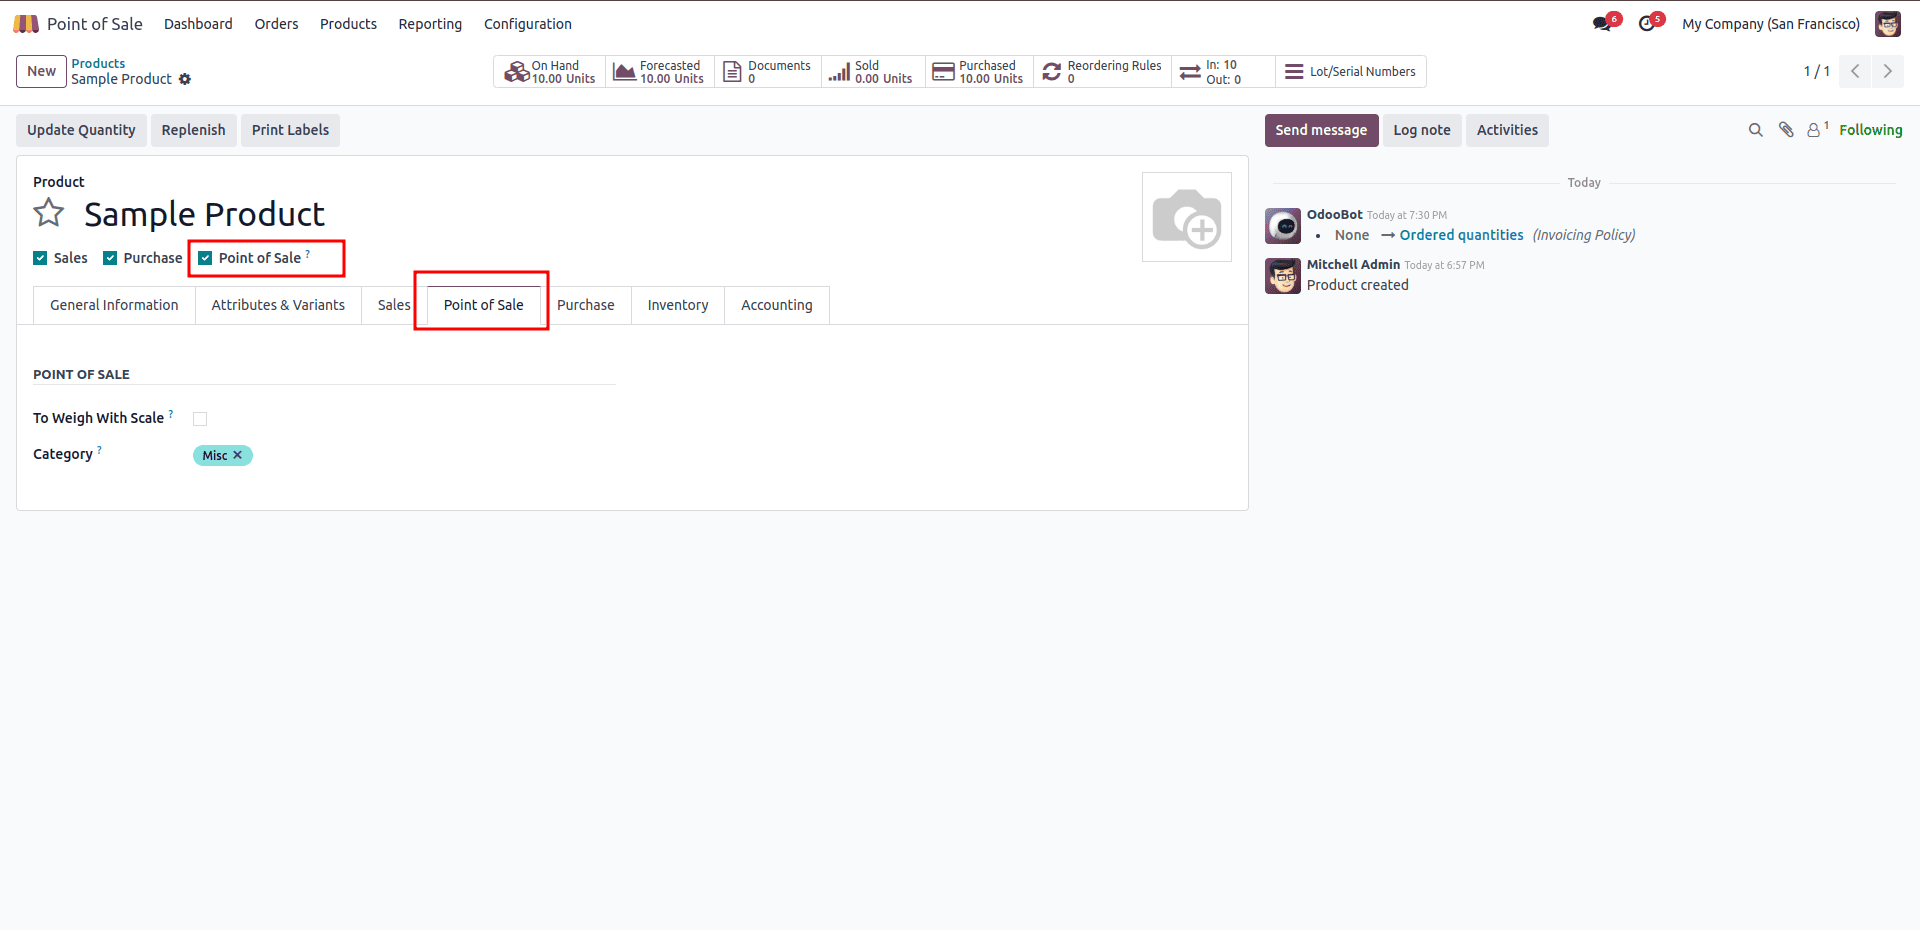
In the PoS tab of each product, users can adjust several options, such as setting the product category (PoS), and enabling the weight feature with scale.
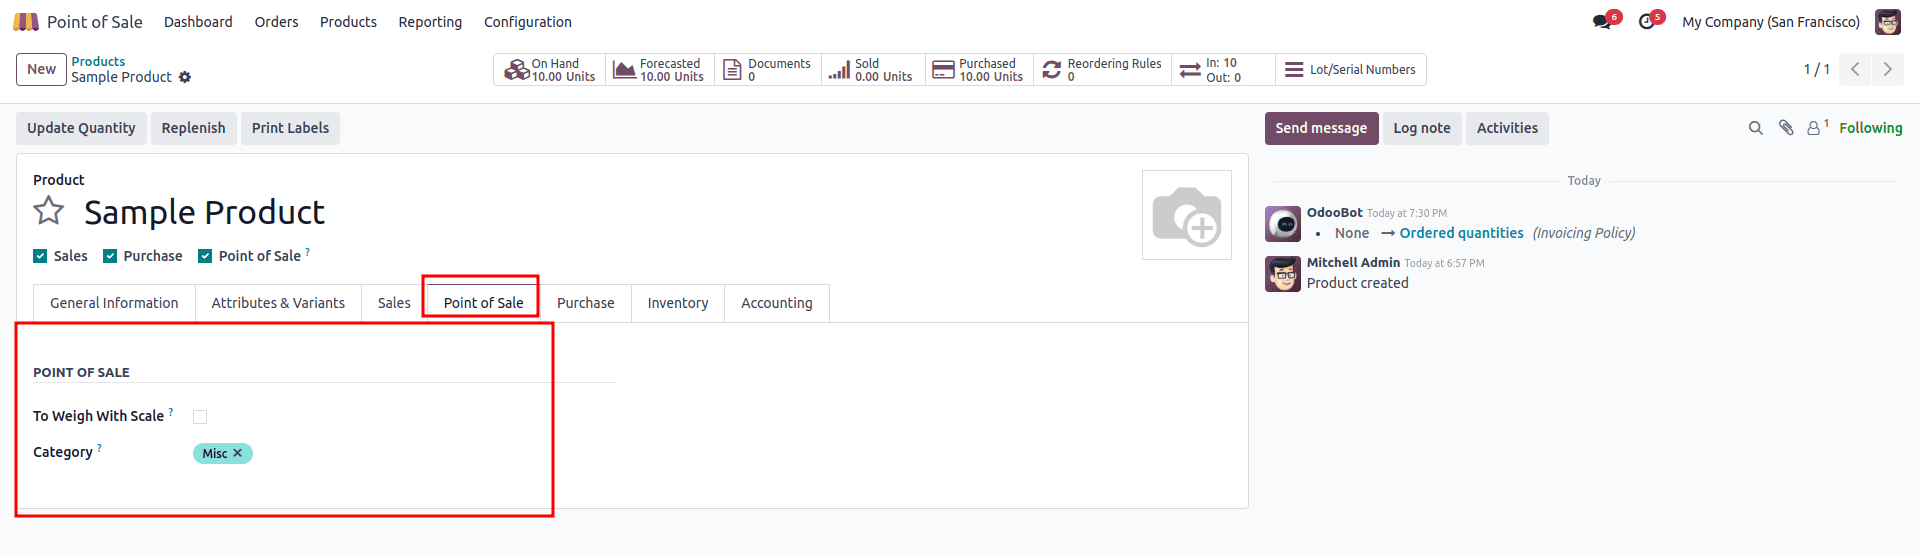
Users can customize various settings to manage the product’s behavior within the Point of Sale system. These options include:
* Product Category (PoS): Define the category the product belongs to, which helps organize items for faster access during transactions.
* Weight Feature with Scale: Enable this option if the product is sold by weight, allowing it to be integrated with a scale for automatic weight capture during sales.
These settings help streamline the sales process, enhance product management, and improve the customer experience at the Point of Sale.
Managing product variants in POS
In the Product Variant window, users can view and manage various attributes and options for each product variant. This includes defining key variant attributes, such as size, color, or style, allowing businesses to create multiple variations of a product. Additionally, users can set specific details for each variant, including individual prices, unique barcode numbers, and inventory quantities, ensuring accurate tracking and management of each variant in the system.
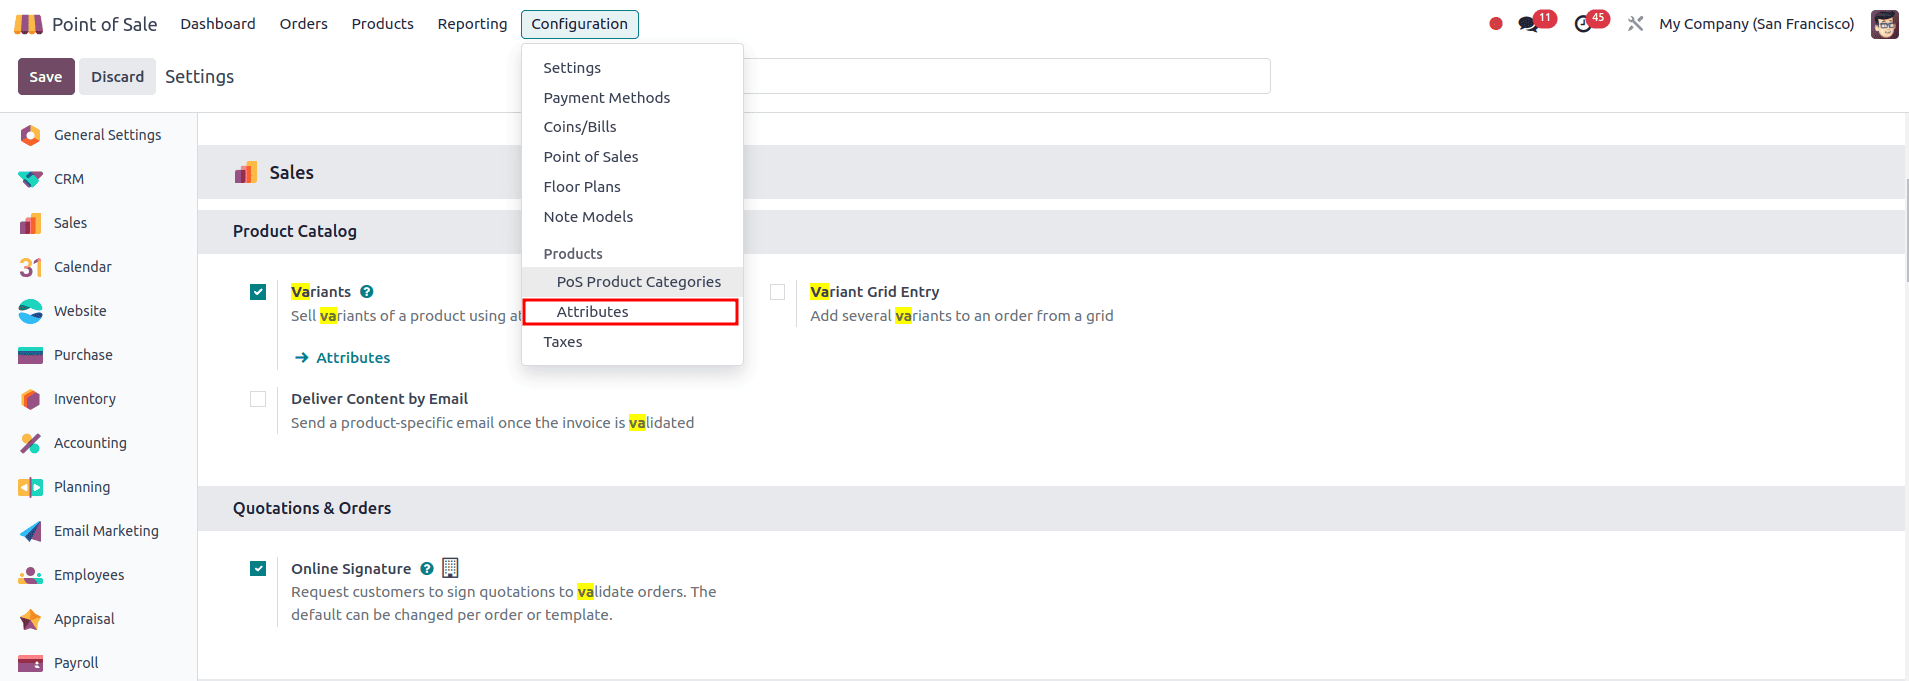
To create a new attribute, users must first enable the Variants option in the settings. Navigate to the Configuration tab in Settings to activate this feature before proceeding with attribute creation.

Once enabled, a new option called Attributes will appear under the Configuration tab in the Point of Sale module. Click on it to access and configure product attributes.
Let's explore how attributes are created. The Attributes window displays a list of existing attributes. Additionally, users can import attributes into the system or create a new one by clicking the New button.

In the Attribute Name field, enter the name of the attribute, such as Brand, Color, or Size. The Display Type field offers four options: Radio, Pills, Select, Color, and Multi-checkbox, which determine how attributes appear in the product configurator.
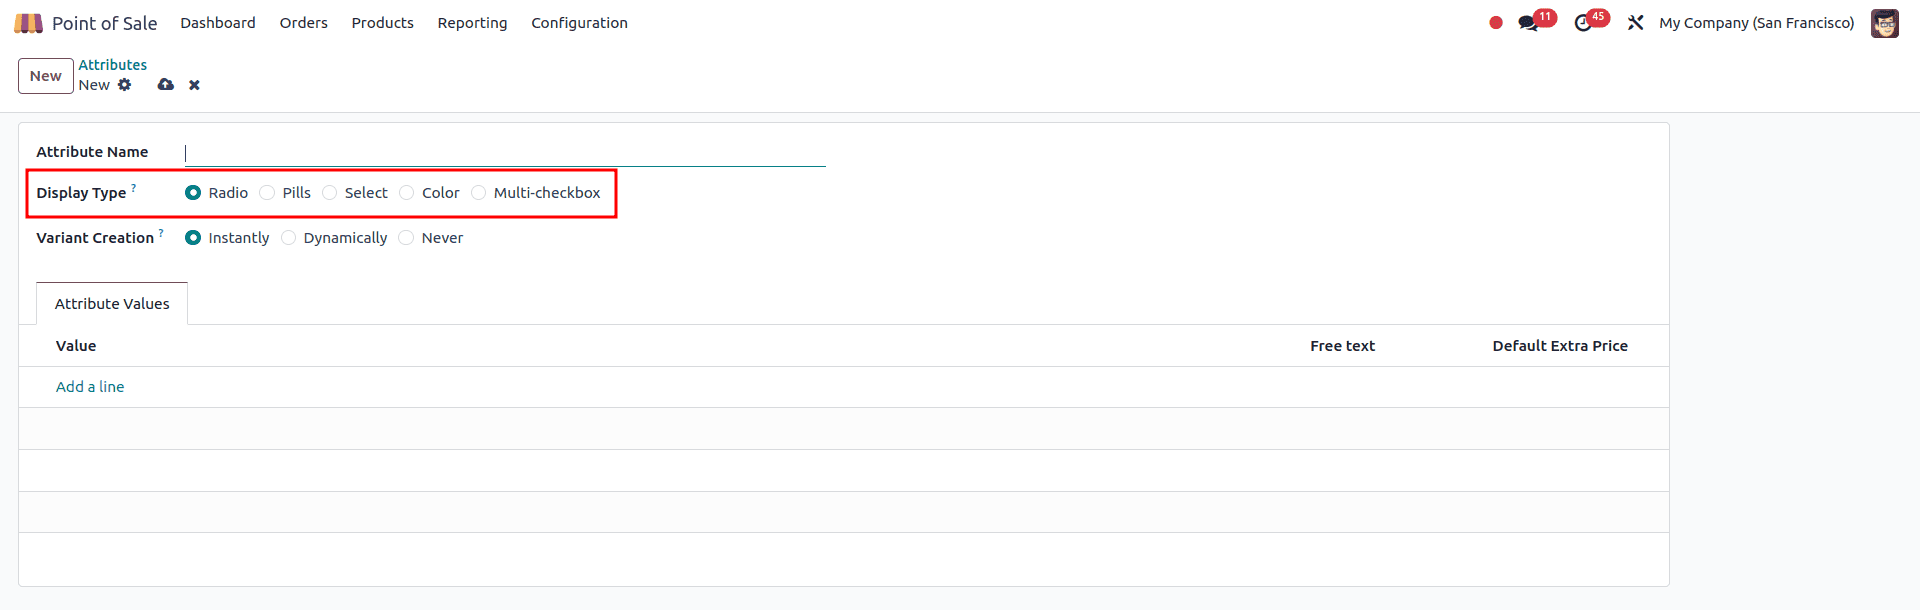
* Pills: Options are displayed as selectable buttons on the product page.
* Color: Options appear as small colored squares that support HTML color codes.
* Radio: Options are shown as a bullet-style list on the product page.
* Select: Options are presented in a drop-down menu for selection.
* Multi-checkbox (option): Options are displayed as checkboxes, allowing multiple selections.
Odoo 18 provides three different modes for generating product variants:
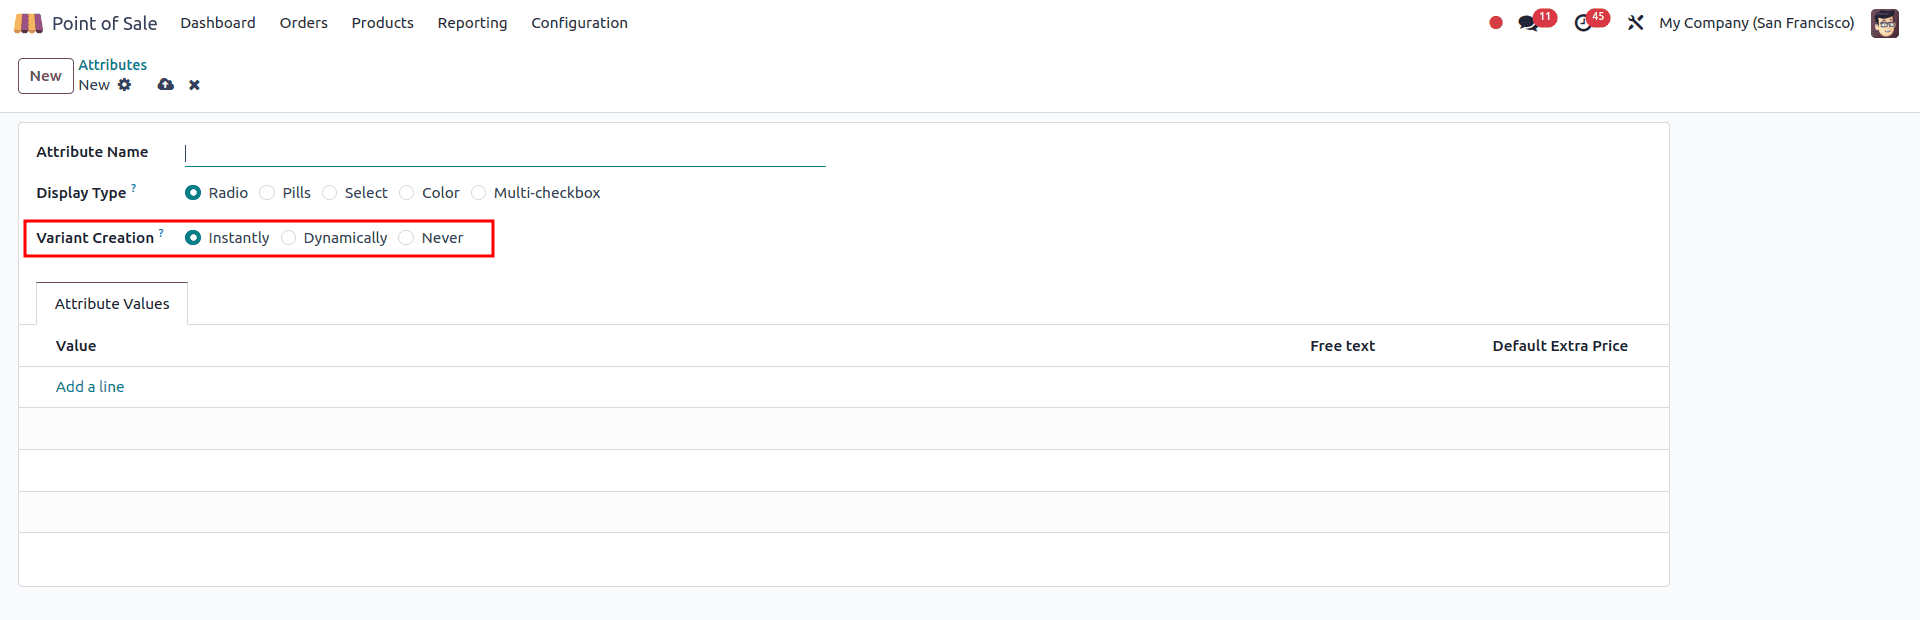
1. Instantly: When this mode is enabled, product variants are created automatically as soon as attributes and values are added to a product. After saving, a smart tab appears, displaying all the generated variants immediately.
2. Dynamically: In this mode, variants are not created immediately after adding attributes and values. Instead, the system generates a variant only when a sale or purchase transaction occurs. For example, if a product named Shirt has Color as an attribute with values Black and Blue, the system will only create a Black Shirt variant when it is sold or purchased. The Blue Shirt variant will only be created when a transaction involving that color takes place.
3. Never: With this setting, product variants are not generated in the system. However, users can still select attribute options when placing an order.
Attributes help differentiate between various variants of the same product. Users can manage these variant attributes directly in the Product Variant window. Common attributes include Brand, Legs, Color, Material, Size, and other customizable options. These attributes allow businesses to create multiple versions of a product with distinct features, ensuring each variant is easily identifiable and properly tracked in the system. Managing these attributes helps streamline inventory, sales, and reporting processes.
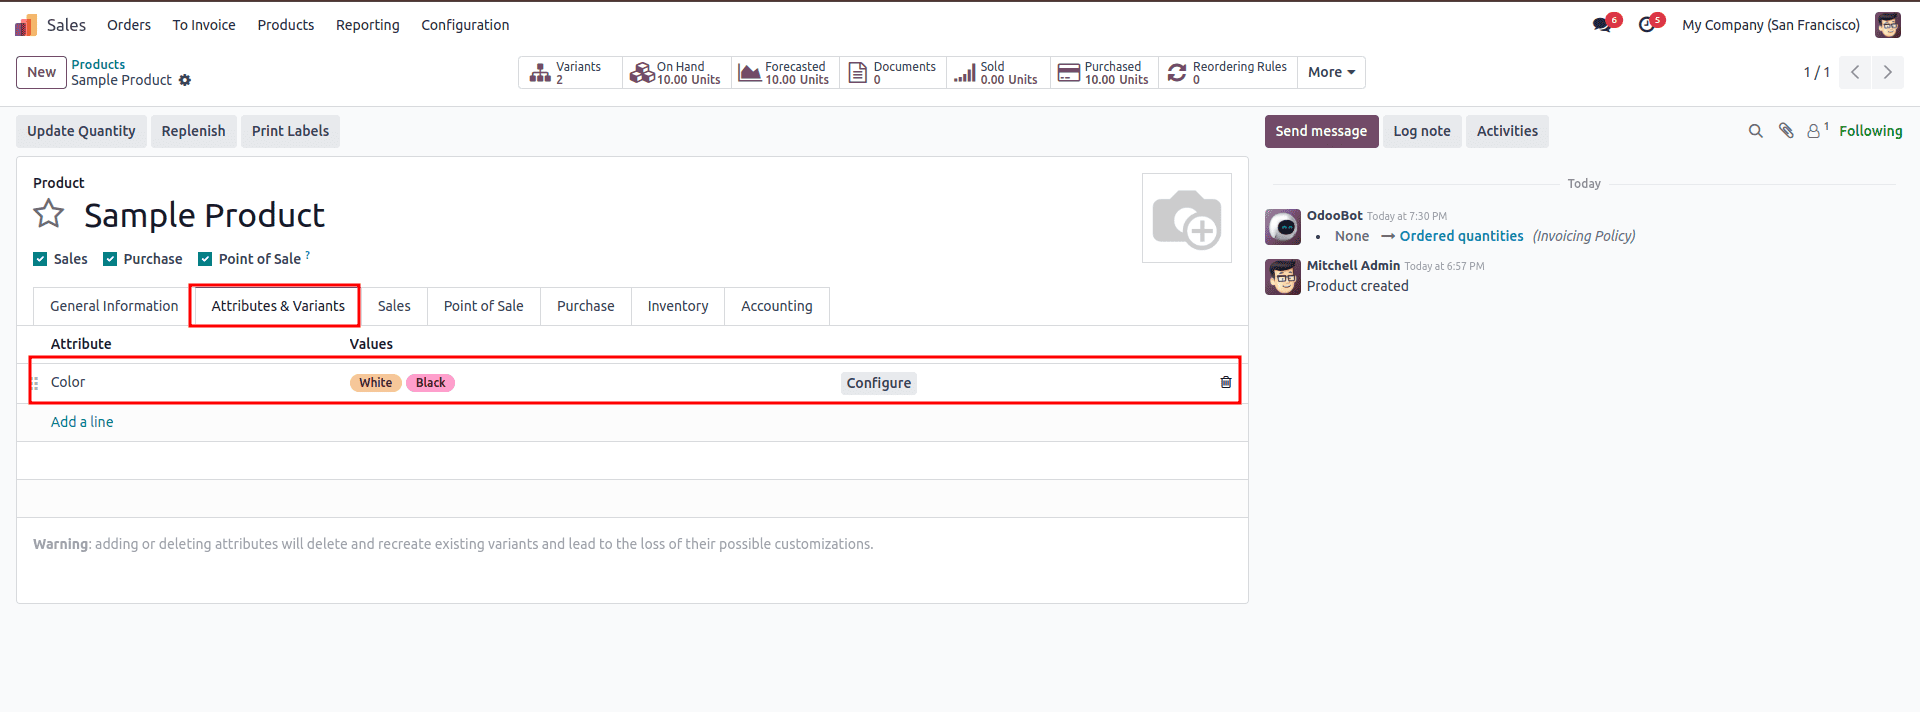
Additionally, you can set an extra price for each variant of the product. This allows you to apply specific pricing adjustments based on the variant’s attributes, such as size, color, or material. For example, you can set a higher price for larger sizes or premium materials, ensuring that each product variant is priced appropriately according to its unique features.
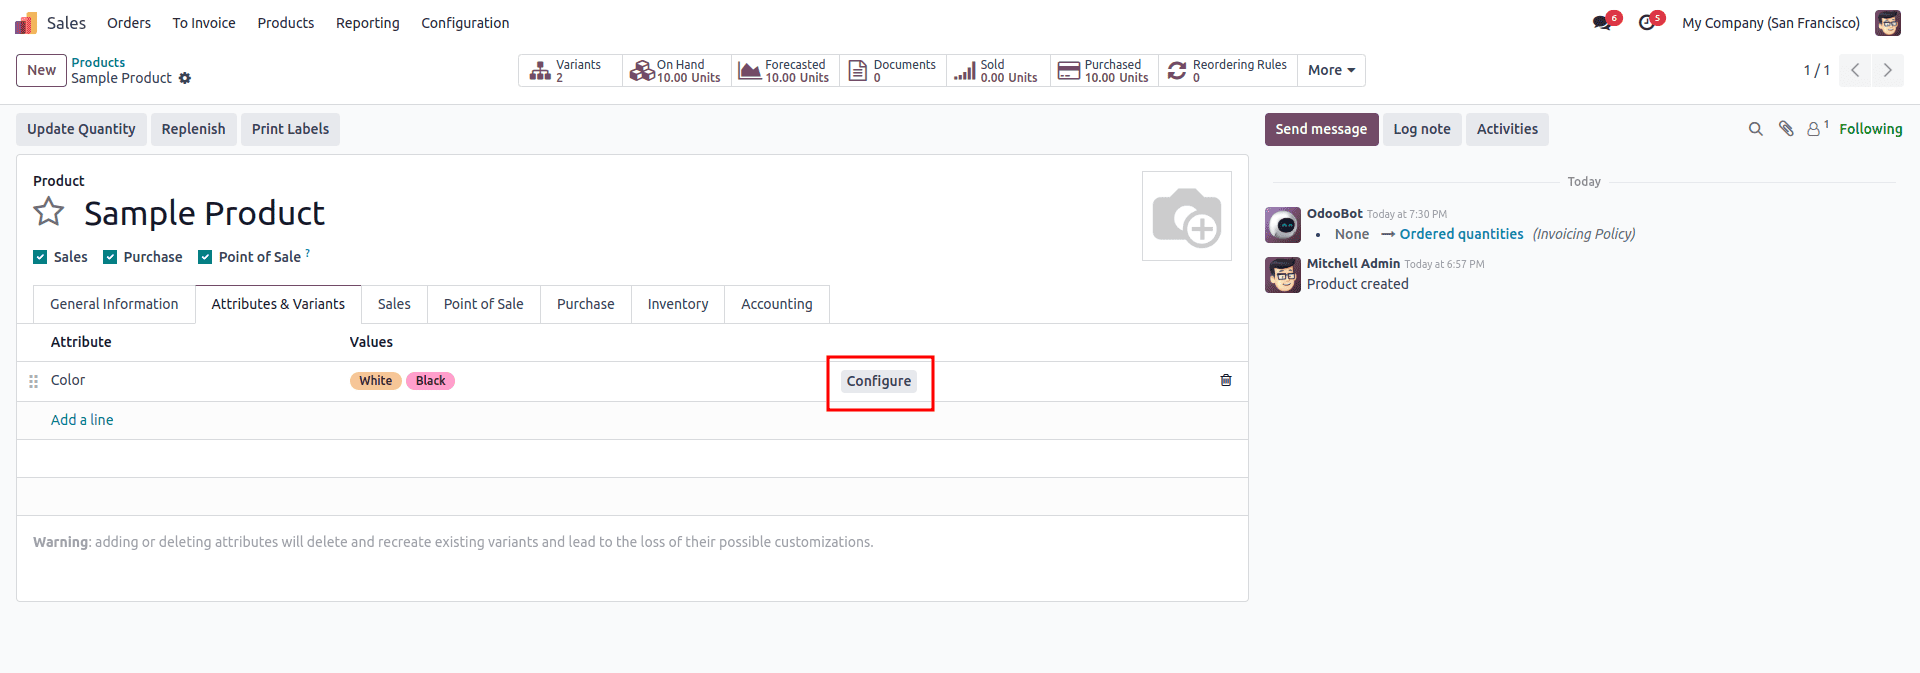
After setting up the attributes for the product, click the Configure button in the attribute line to adjust the details for each variant.
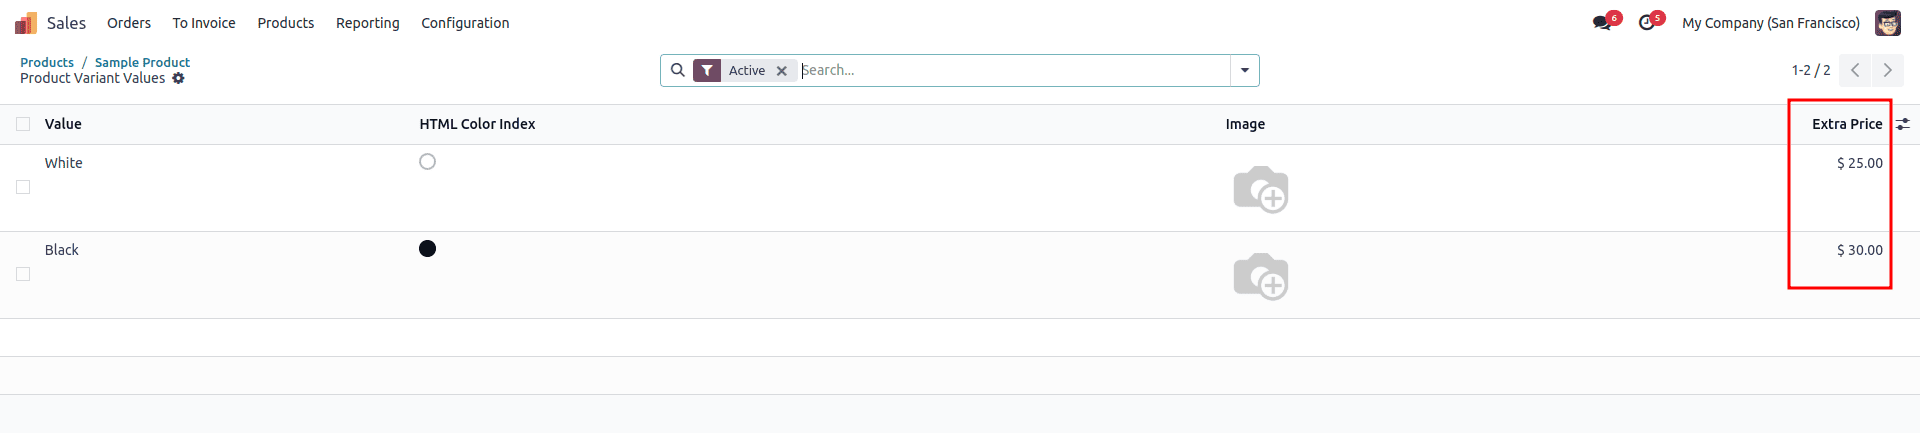
After clicking the Configure button, a list of the product’s attributes will appear. From there, you can set the extra price for each variant of the product based on its specific attributes.
After setting up the attributes, navigate to the Point of Sale and open the shop. From there, select the product you want to work with.
Once the product is selected, you will be able to view and choose its variants based on the defined attributes, such as size, color, or material. This allows you to quickly access and sell specific variants of the product directly from the POS system.
Managing Products with Lot/Serial Number in POS
In Odoo's Point of Sale (PoS), managing products with Lots and Serial Numbers allows businesses to track inventory more precisely, ensuring better control over stock movements and product details.
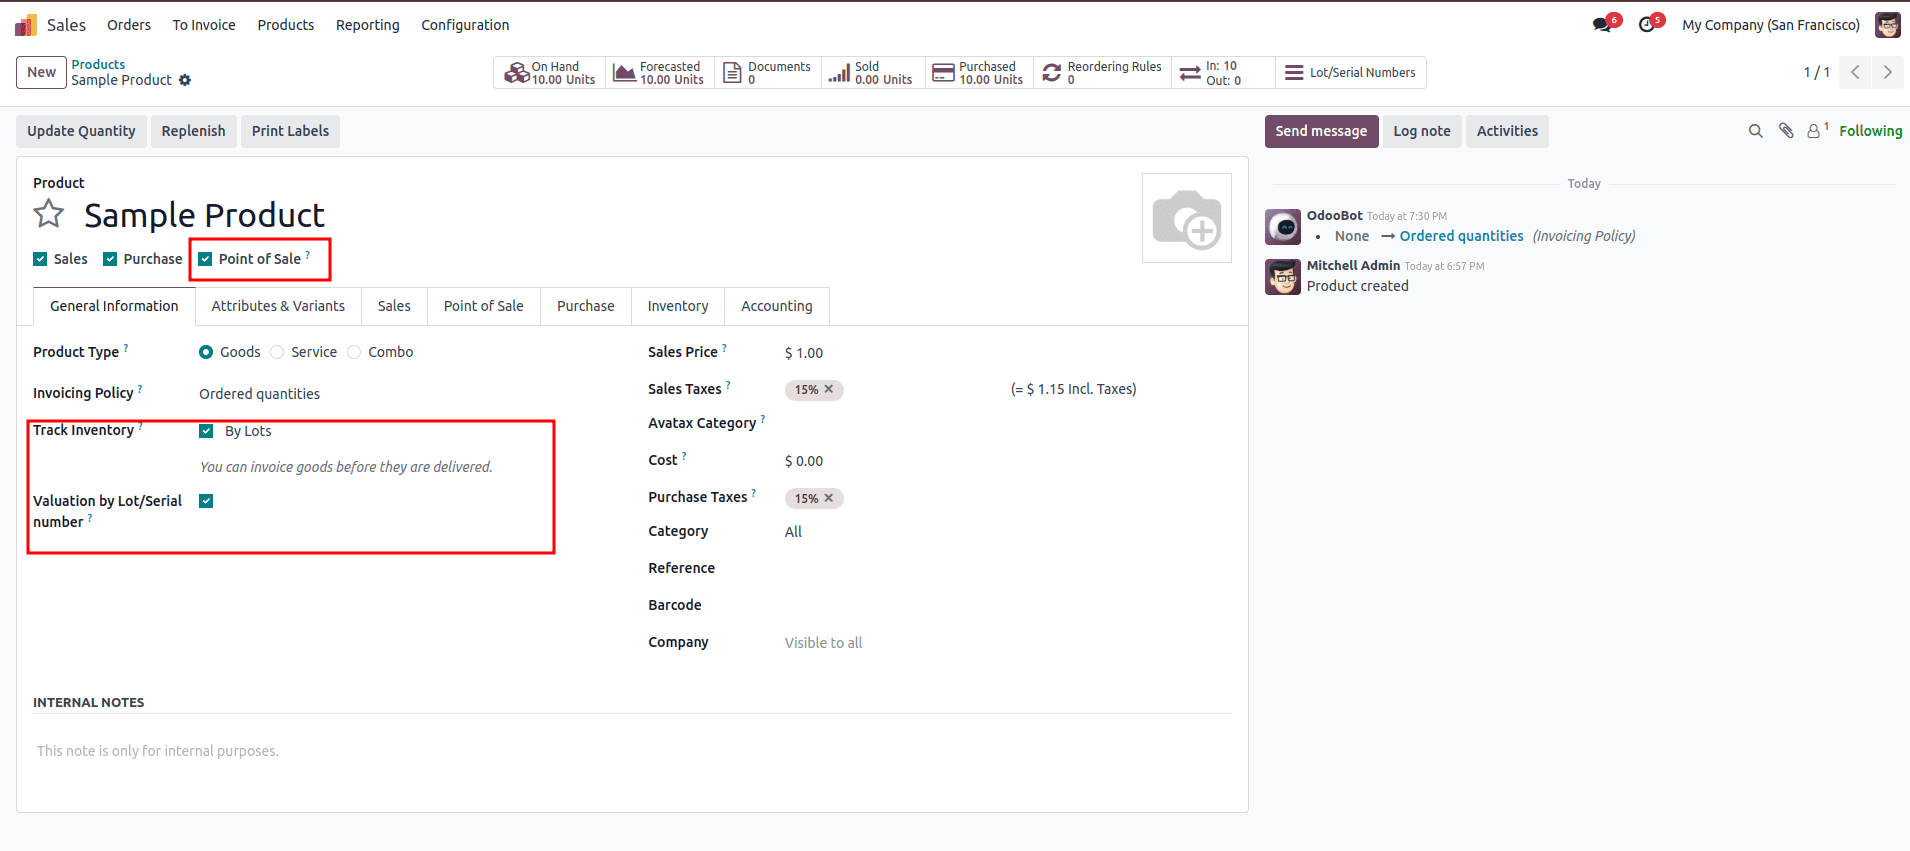
To demonstrate how to manage products with Lots and Serial Numbers, begin by creating a product. When setting up the product, make sure to enable Point of Sale and Track Inventory and set inventory tracking to By Lots. Also, enable the Validation by Lot/Serial Number option.
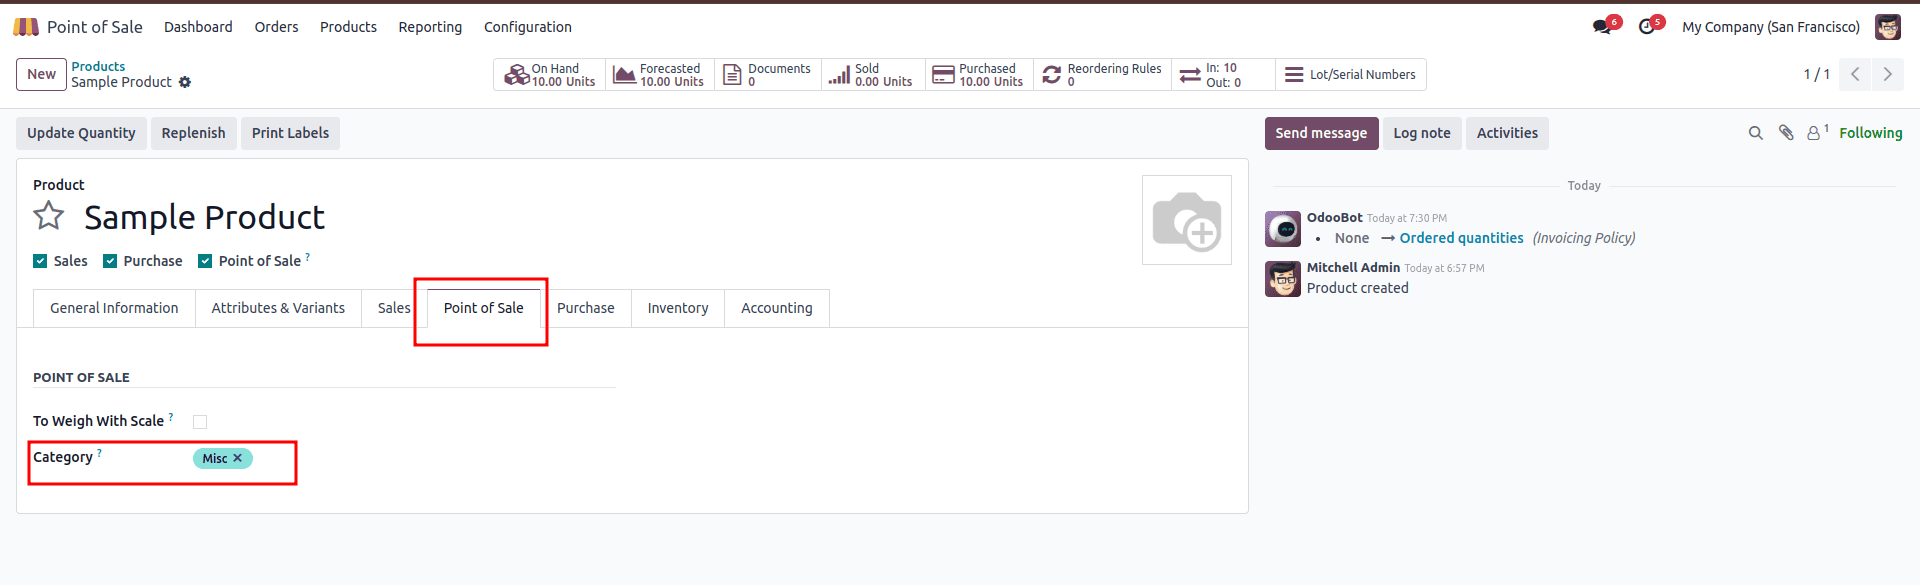
Next, choose a POS Category from the Point of Sale tab. The POS category helps organize your products within the Point of Sale system, making it easier to sort and filter items based on their type or usage. This step is important for ensuring that products are properly categorized and can be quickly accessed during sales transactions.
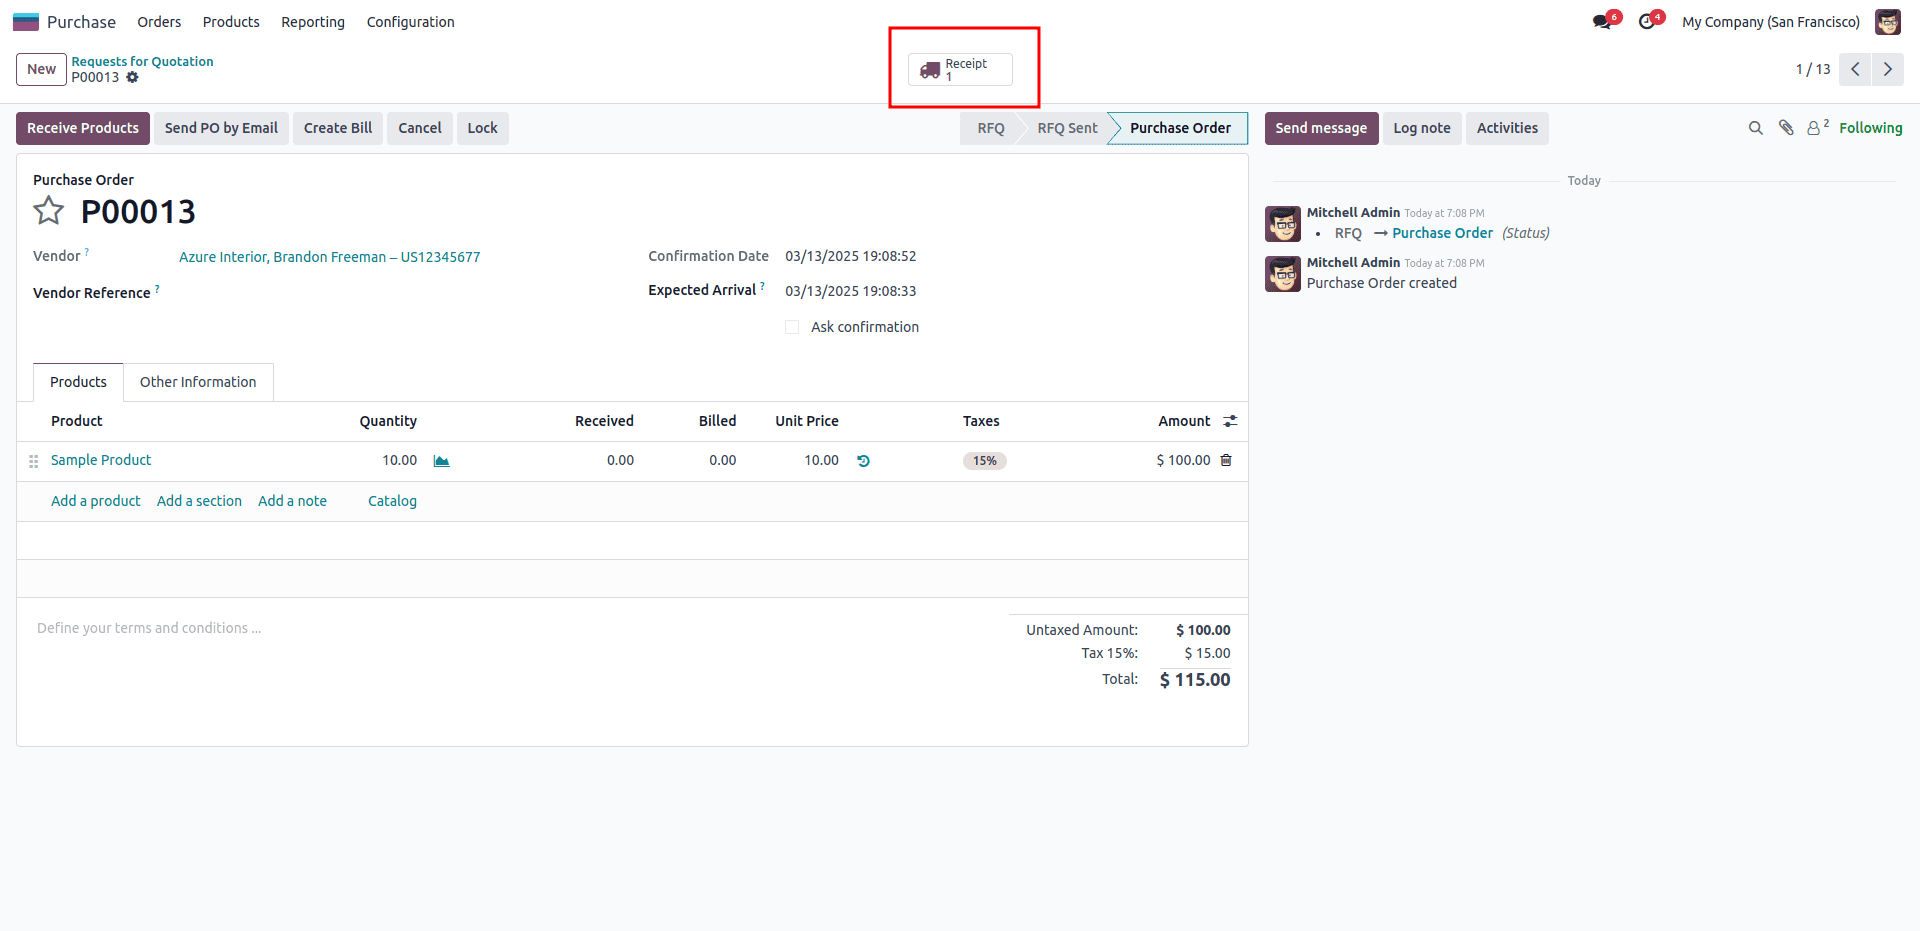
The next step is to purchase or manufacture the product. In this case, create a purchase order for the product with a quantity of 10 and confirm the order and click the Reciept smart button.
When validating the receipt order, make sure to create a Lot and Serial Number for each product; For that, click the hamburger icon.
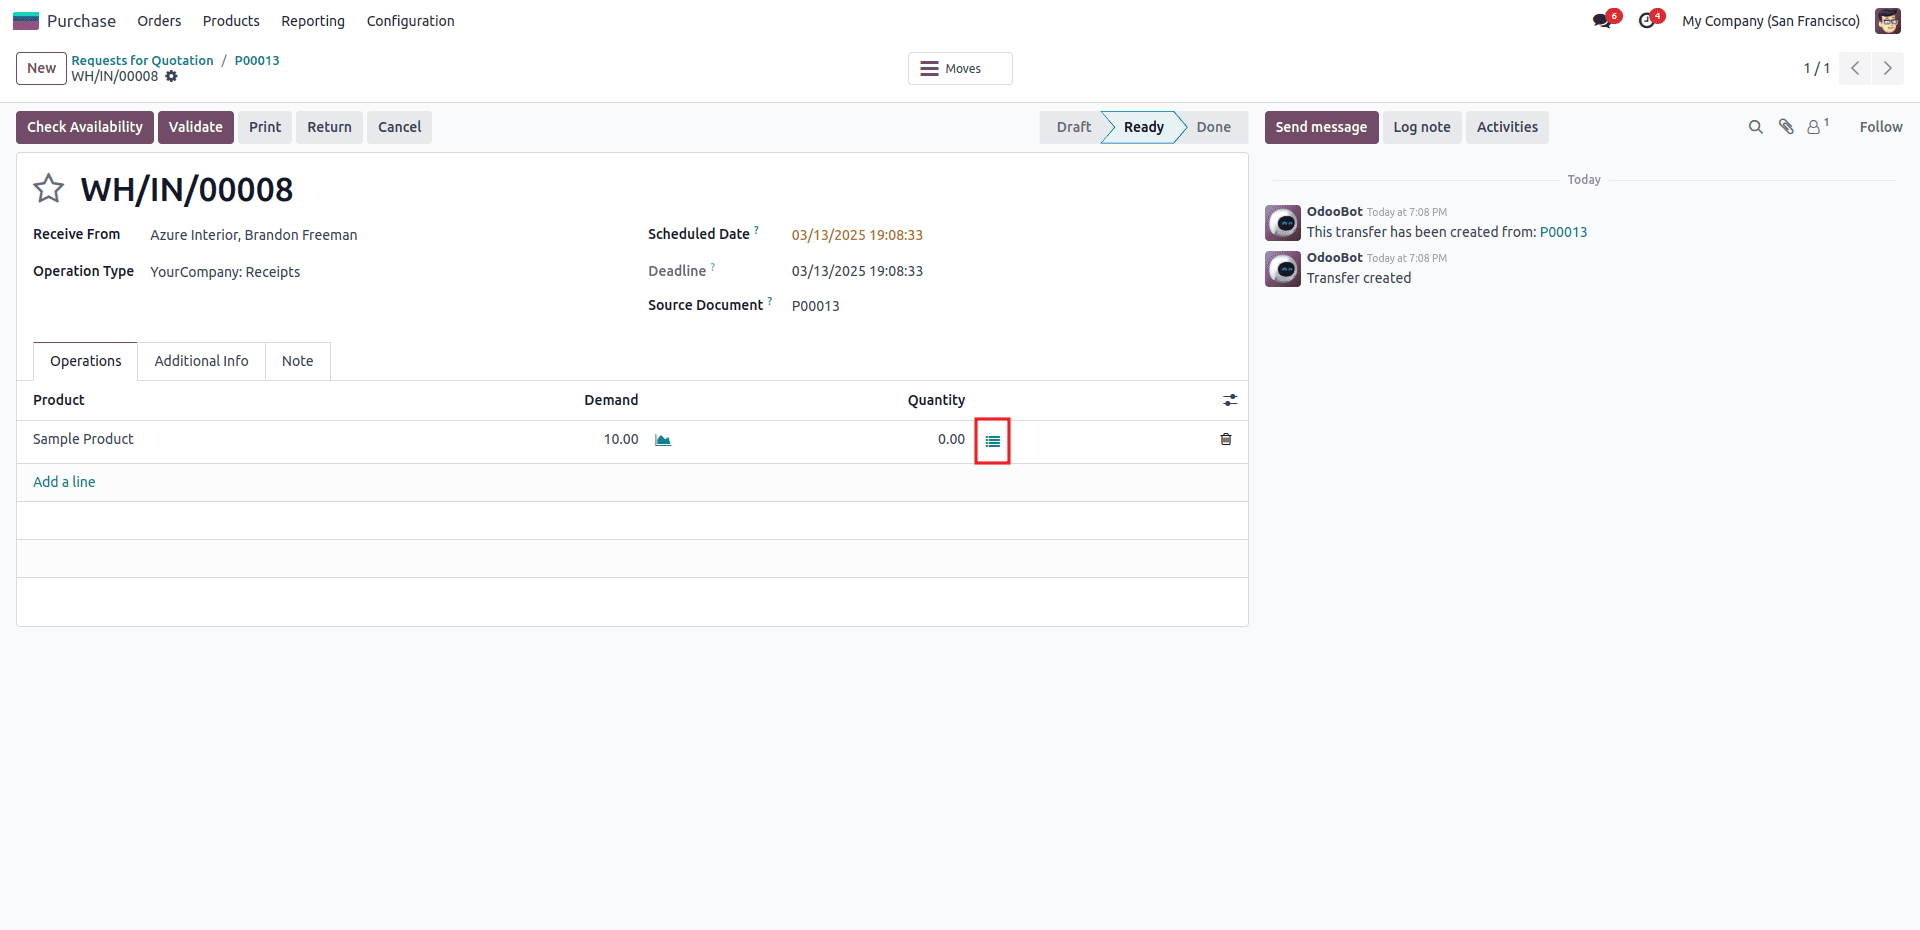
By clicking the icon, a pop-up will appear where you can add the Lot and Serial Numbers for the product.
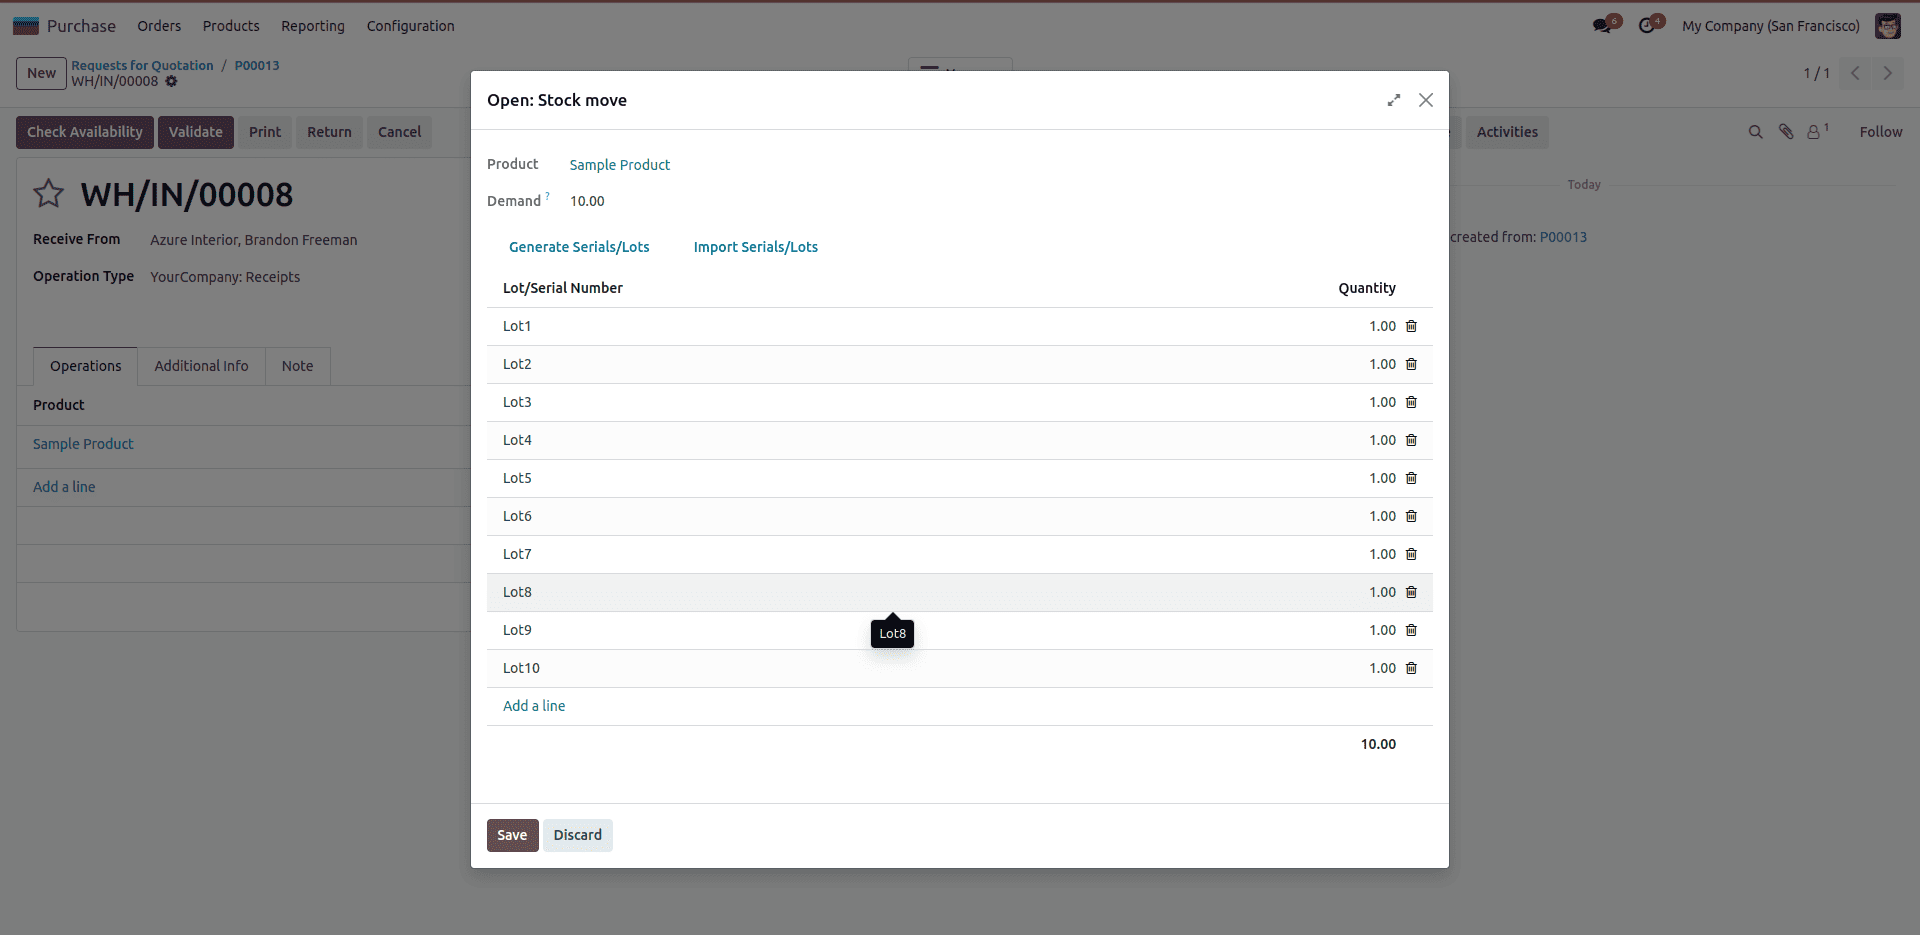
After validating the receipt order, the 10 products with unique serial numbers will be added to our stock.
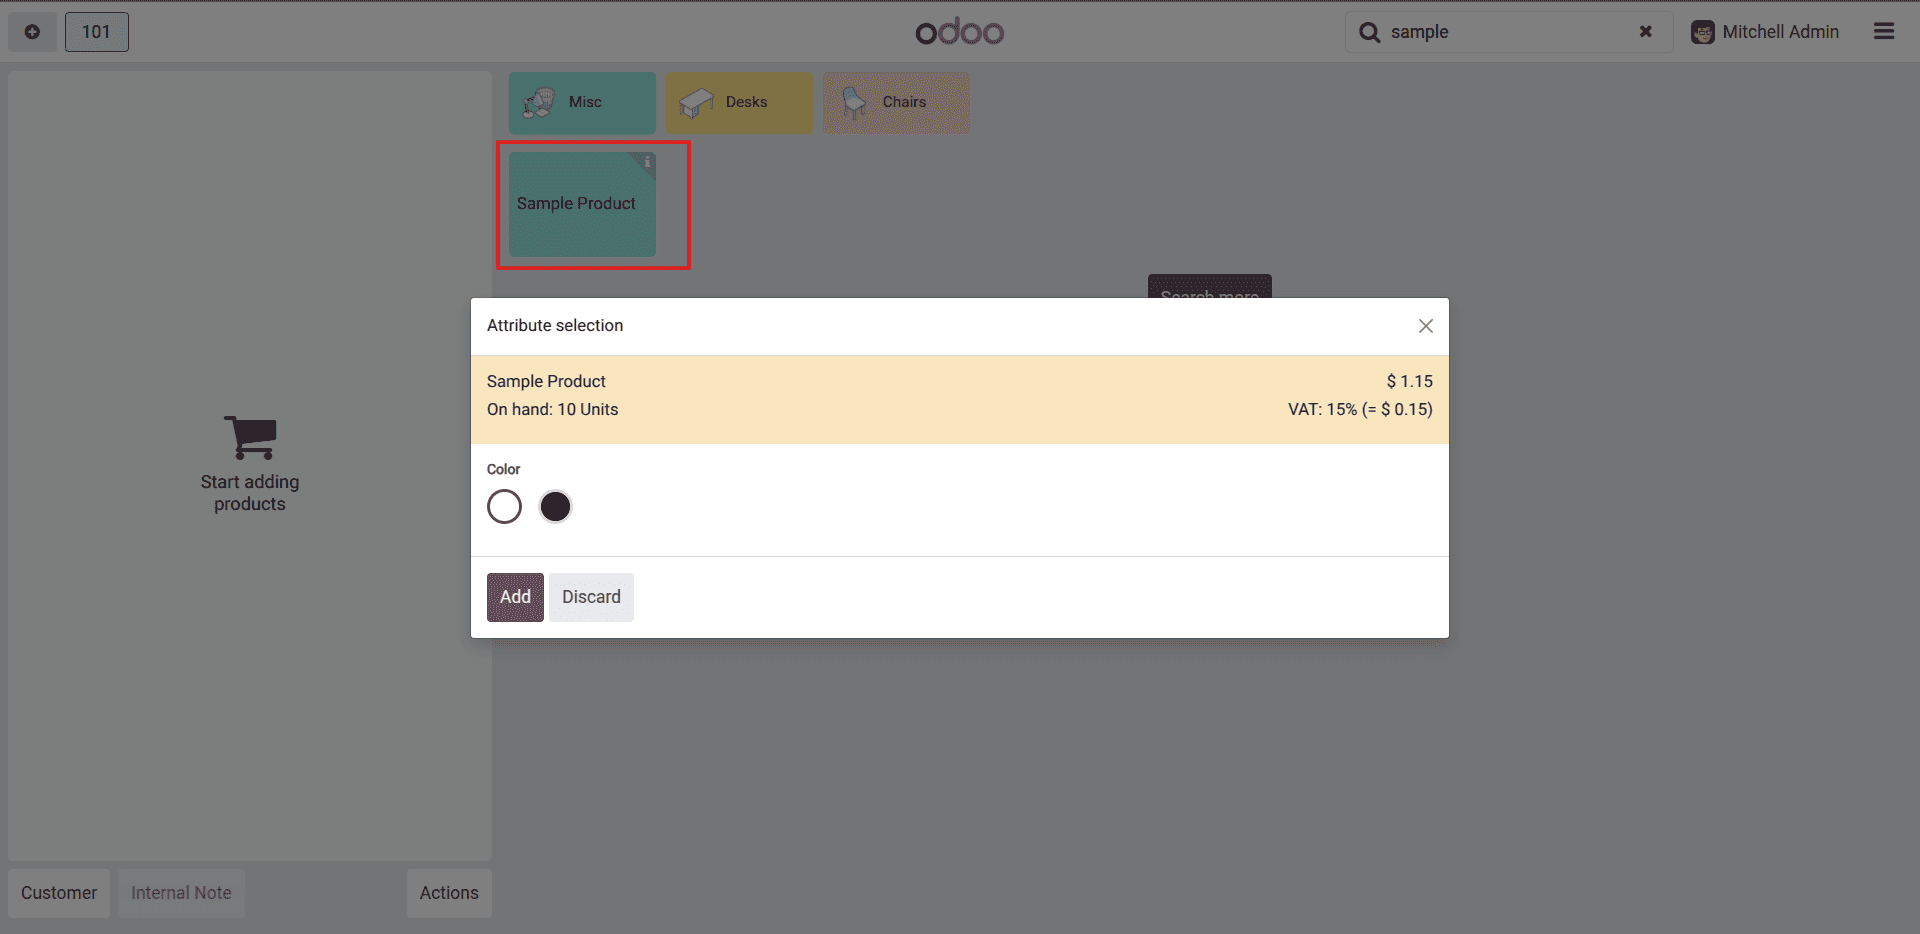
Now go to the POS >> open the shop and select the product that was created earlier.

From the pop-up, select the product lot that will be available for sale through the Point of Sale (POS). This allows you to specify which lot of the product is being sold, ensuring that inventory is tracked accurately and the correct lot is associated with the transaction. Once selected, the product lot will be linked to the sale, helping to maintain precise stock levels and traceability for each item sold.
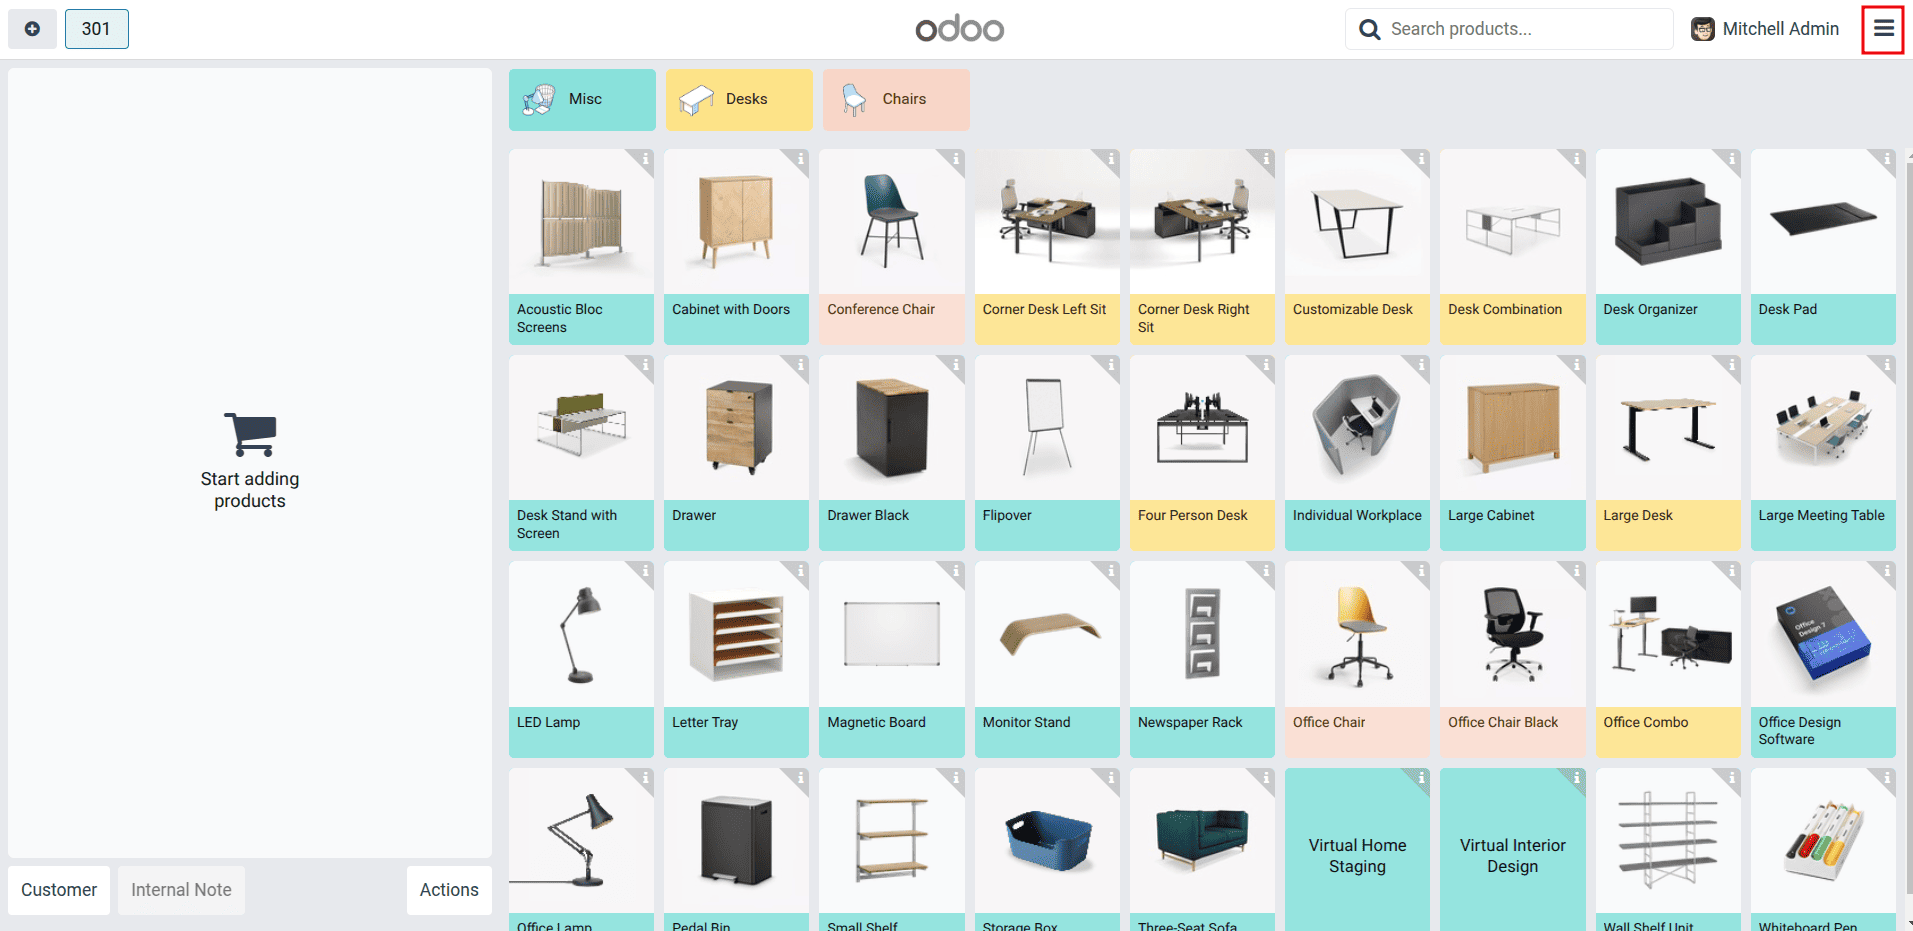
Creating product from POS
In Odoo 18, a new feature allows users to create products directly from the POS terminal. To add a new product, simply click the menu icon located in the top-right corner of the screen.
Next, select the "Create Product" option from the menu to create a new product.
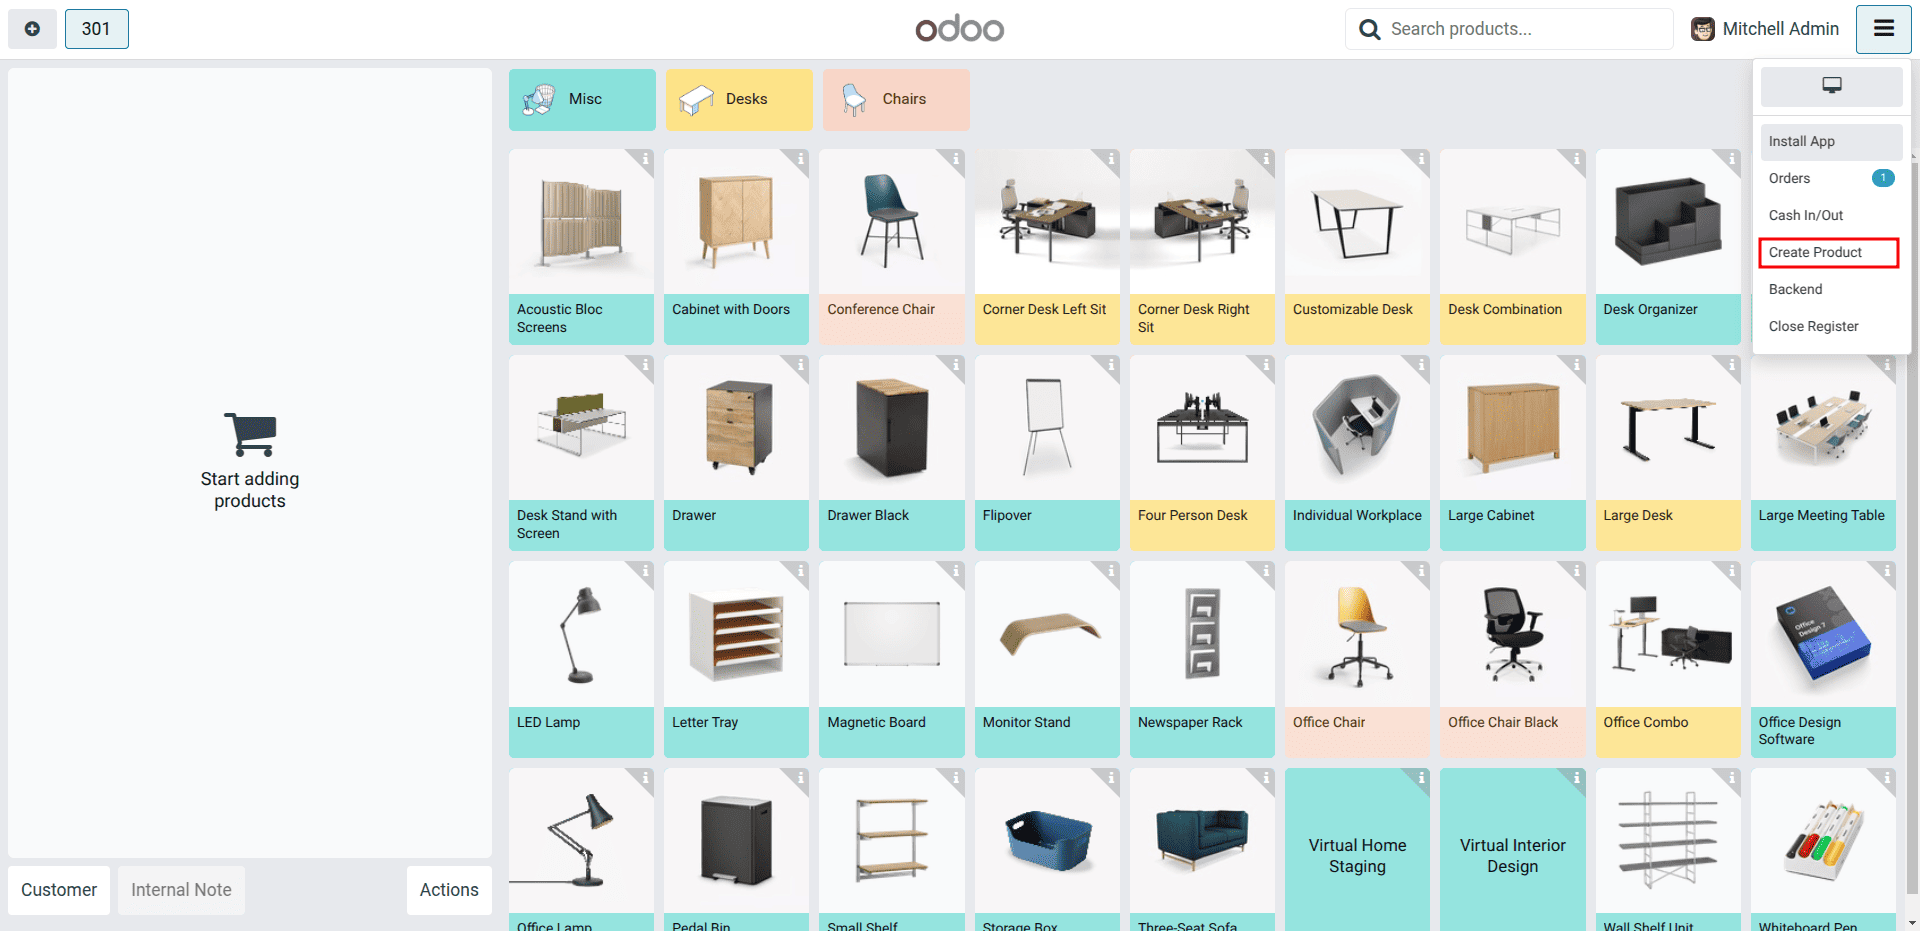
After clicking "Create Product," a new pop-up will appear where you can enter product details such as the name, barcode, sales price, pos category, and more.
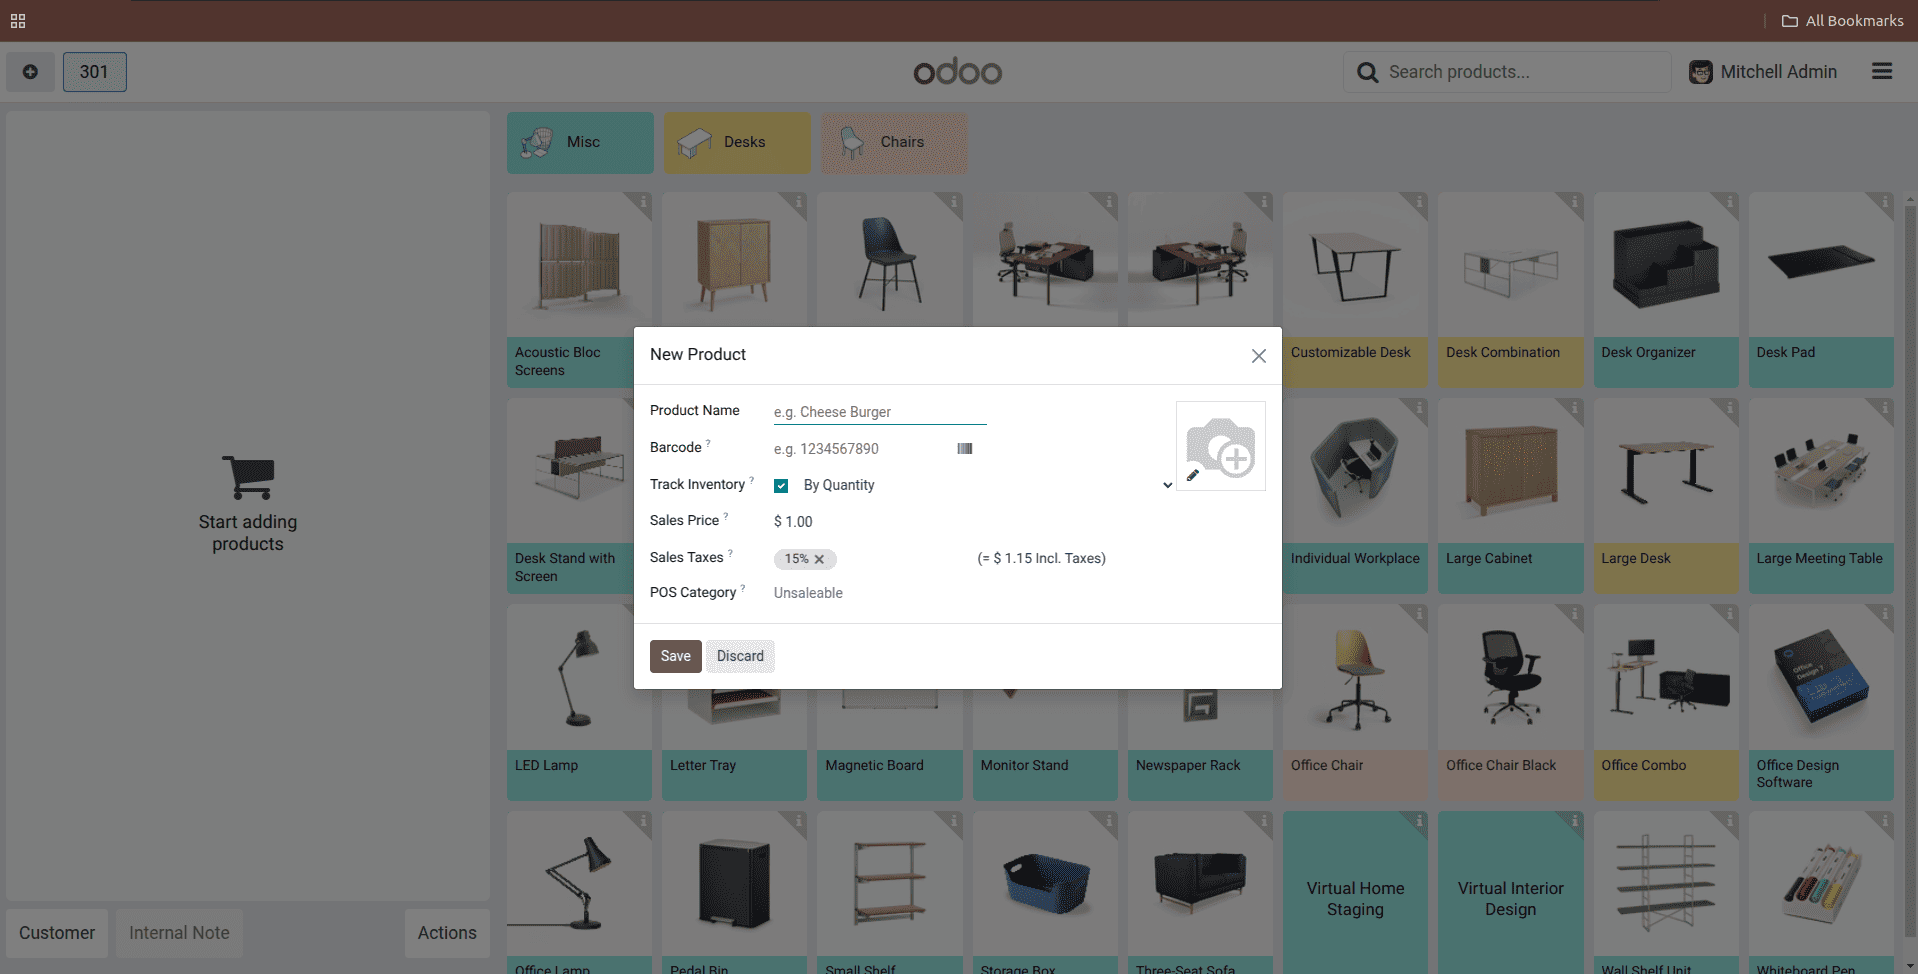
In this form, you can enter the product name and barcode, as well as choose the inventory tracking method—whether by quantity, by lots, or by unique serial number. You can also set the sales price and apply sales taxes. Finally, you can assign a POS Category to organize the product under a specific category; finally, click the save button to create the product.
UrbanPiper
UrbanPiper is an order management system that integrates with multiple food delivery platforms. It consolidates orders from various connected platforms into a single, unified interface, streamlining the order and delivery process. This integration helps businesses manage orders more efficiently, reducing the need to switch between different platforms. By centralizing orders in one place, UrbanPiper simplifies tracking, improves accuracy, and enhances overall operational efficiency for restaurants and delivery services.
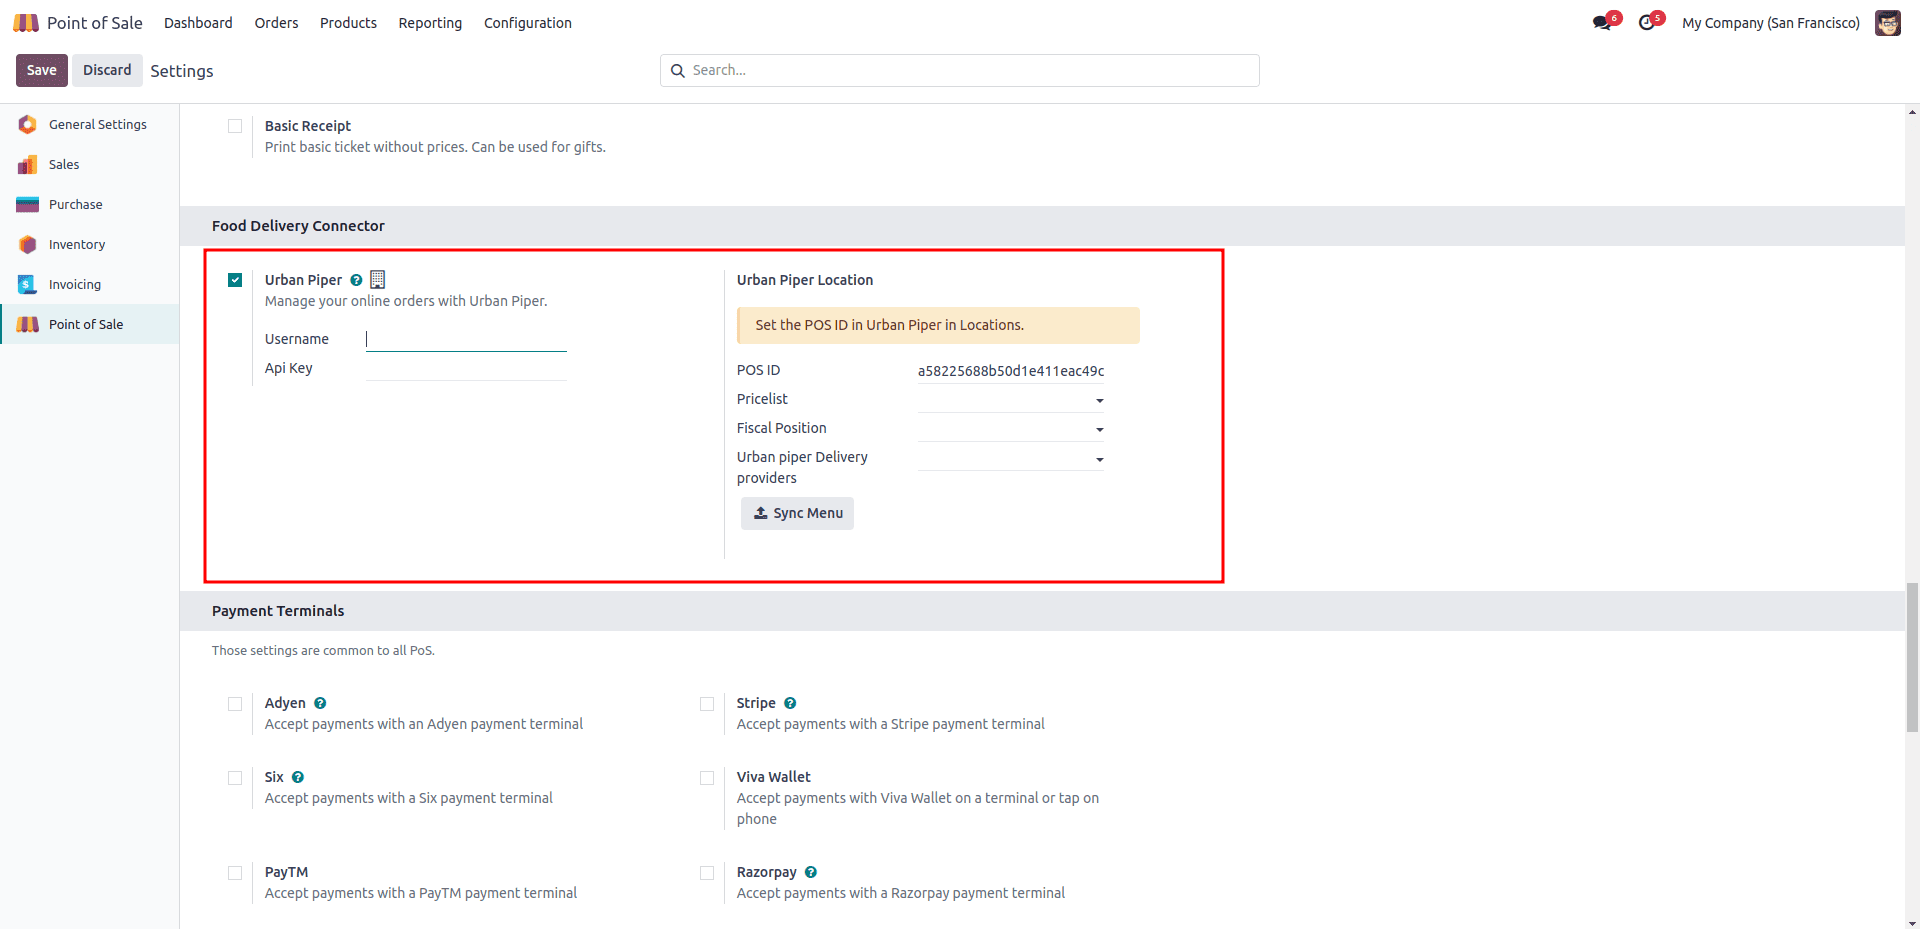
To enable the UrbanPiper feature, navigate to Point of Sale > Configuration > Settings. Under the Food Delivery Connector section, activate the UrbanPiper option. This will integrate the UrbanPiper system with your Point of Sale
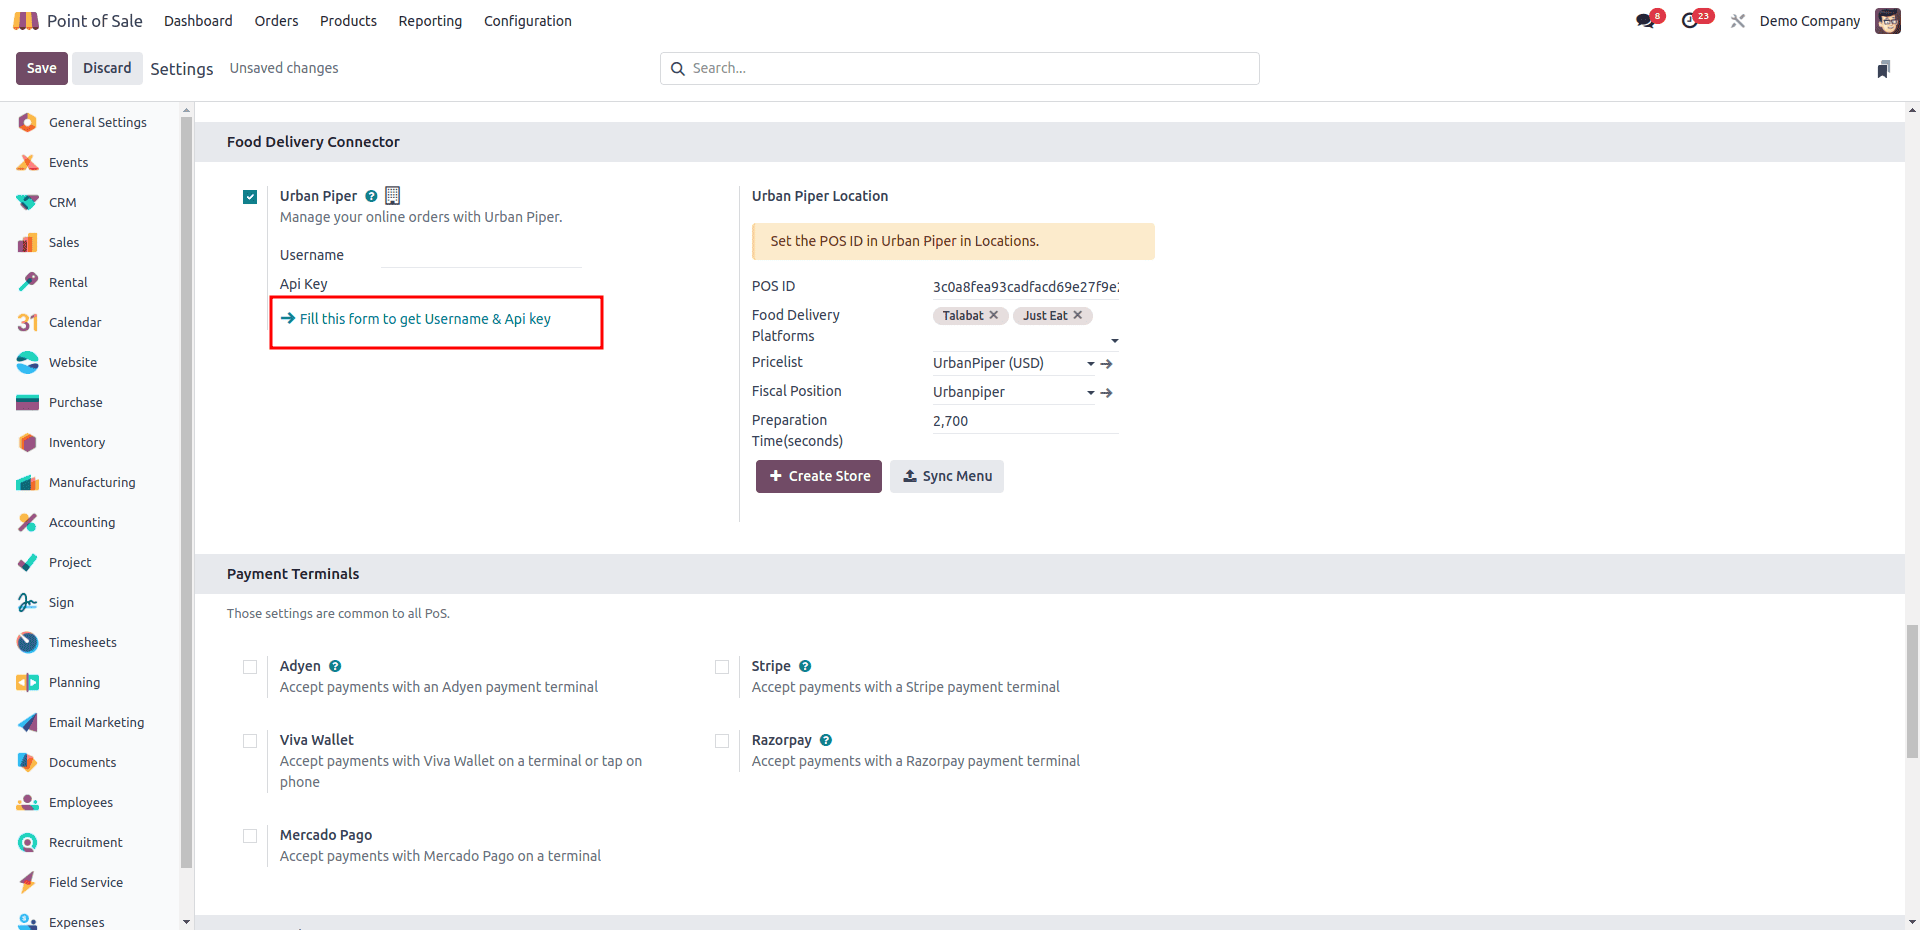
To set up the UrbanPiper credential, click the Fill this form to get Username & Api key and complete the survey
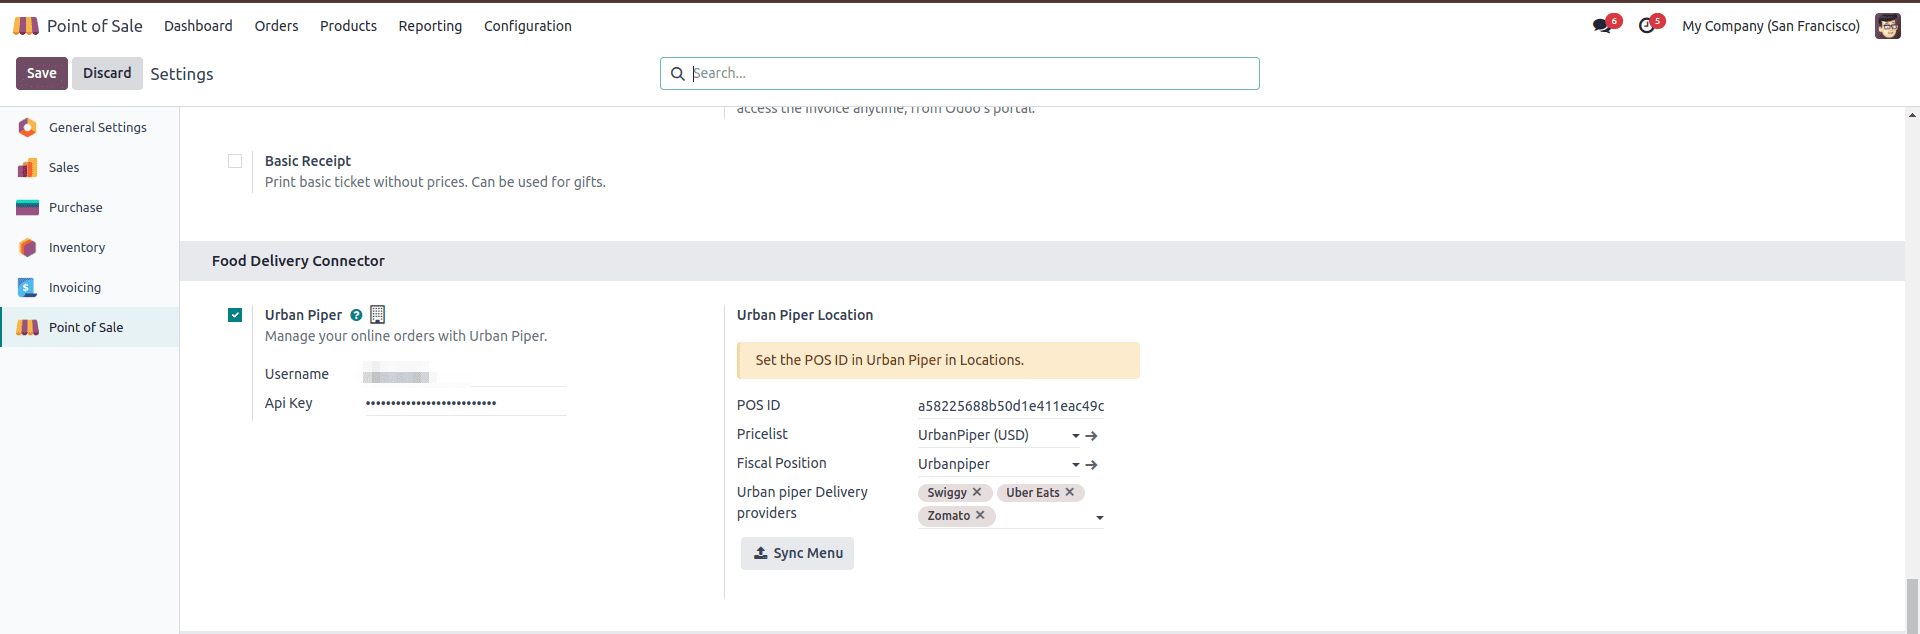
Get the credentials and apply the Api key and user name into the corresponding field; also select the desired food delivery providers from the Urban piper Delivery providers field under the Urban Piper Location section (i.e., Zomato, Uber Eats).
Click the + Create Store button to add a new location on the UrbanPiper Atlas platform. This action allows you to set up a new store or outlet.
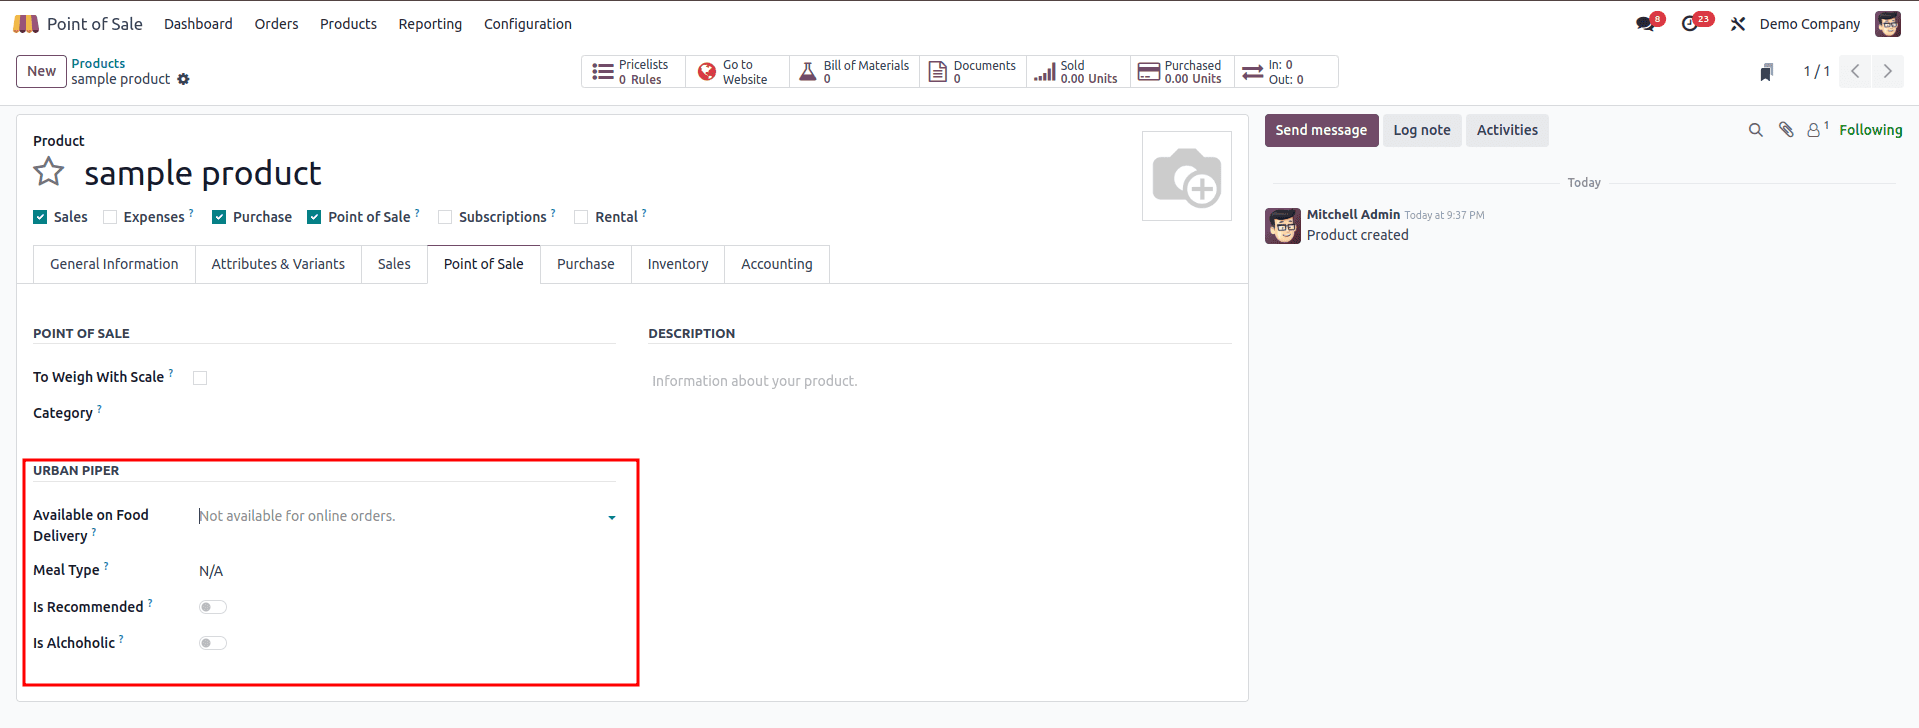
To make products available, navigate to Point of Sale > Products > Products, and select a product to open its product form. In the Point of Sale tab, complete the Urban Piper section. Here, fill in the Available on Food Delivery field with the desired POS system. Optionally, you can configure the Meal Type field and enable the Is Recommended and Is Alcoholic options to provide additional product details for customers ordering via food delivery platforms.
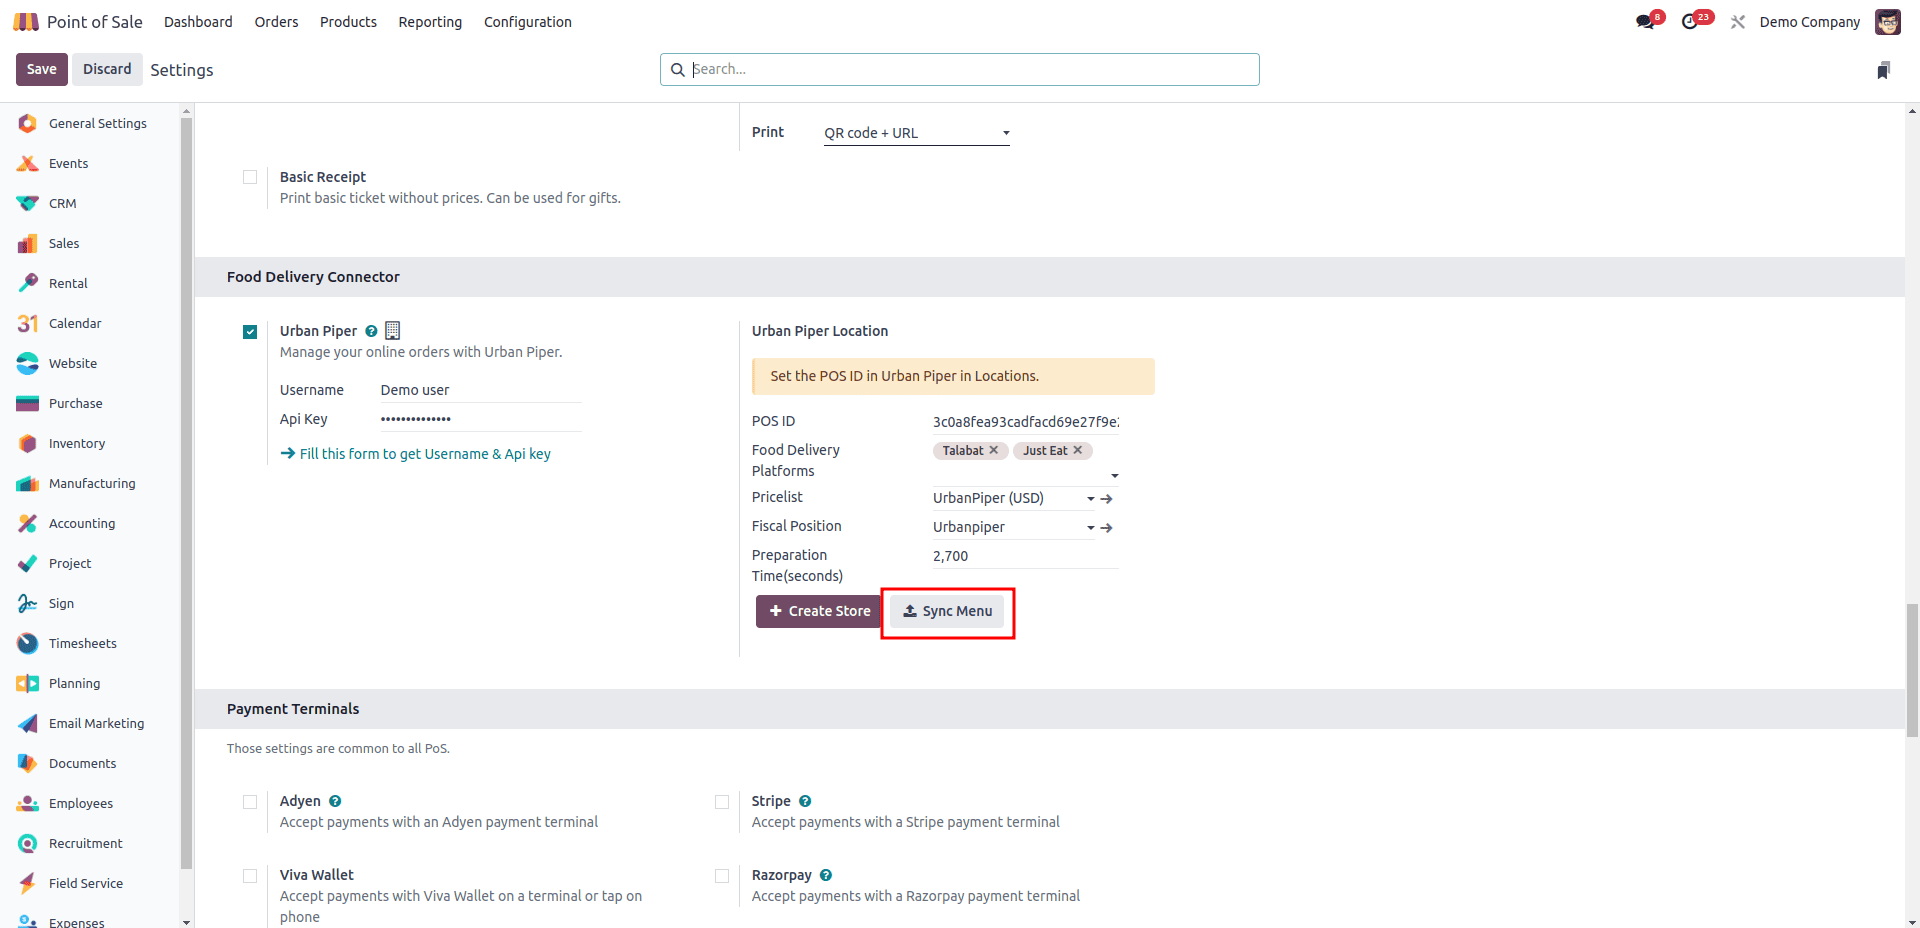
To make products available on food delivery platforms, synchronize your POS with your UrbanPiper account by following these steps:
First, navigate to the POS settings. Scroll down to the Food Delivery Connector section and click the Sync Menu button. Once the synchronization is complete, the Last Sync timestamp below the Create Store and Sync Menu buttons will update to reflect the most recent sync time.
Overall, the Product and Product Variant windows in Odoo 18’s Point of Sale provide users with an intuitive interface to manage and configure product variants directly within the POS system. This feature allows businesses to handle a wide range of product options, giving customers more choices and enhancing the shopping experience. By efficiently managing both products and their variants, businesses can optimize their POS transaction process, resulting in smoother sales operations and improved inventory management.
To read more about An Overview of Product Variant Management with Odoo 17 POS, refer to our blog An Overview of Product Variant Management with Odoo 17 POS.