Odoo 18 introduces many improvements and new features, making it easier than ever to customize your Point of Sale (PoS) system to meet your business needs. One of the common customizations that businesses often seek is to enhance the user interface by adding icons to the navigation bar (navbar) in the PoS interface. Adding icons can help improve user experience and make the interface more intuitive and visually appealing.
In this blog, we’ll walk you through the steps of adding an icon to the PoS navbar in Odoo 18.
To begin adding icons to the navbar, the first step is to create an XML file within the Static > Src > Xml directory.
<?xml version="1.0" encoding="UTF-8"?>
<templates id="template" xml:space="preserve">
    <t t-name="custom_blog.Navbar" t-inherit="point_of_sale.Navbar"
       t-inherit-mode="extension" owl="1">
        <xpath expr="//div[hasclass('status-buttons')]" position="inside">
            <button class="btn btn-light btn-lg lh-lg" t-on-click="onClick">
                <i class="fa fa-address-book" />
            </button>
        </xpath>
    </t>
</templates>
In this XML file, we have set up a template for our custom icon (NavIcon) and modified the default POS navbar (Navbar) to incorporate it.
Next, let's create the related JavaScript file to enable functionality for our custom icon
/** @odoo-module */
import { Navbar } from  "@point_of_sale/app/navbar/navbar";
import { patch } from "@web/core/utils/patch";
patch(Navbar.prototype, {
     onClick() {
        console.log("Custom icon clicked!");
    },
});
This JavaScript file defines the behavior for our custom icon. In this example, clicking the icon opens a sample popup as a demonstration.
The updated method is then returned for use within the application. Finally, all files are added to the "__manifest__.py" file for proper integration.
'assets': {
   'point_of_sale._assets_pos': [
      '/Module_name/static/src/**/*',
   ],
},
Once you are complete with your icon template, it should look like this.
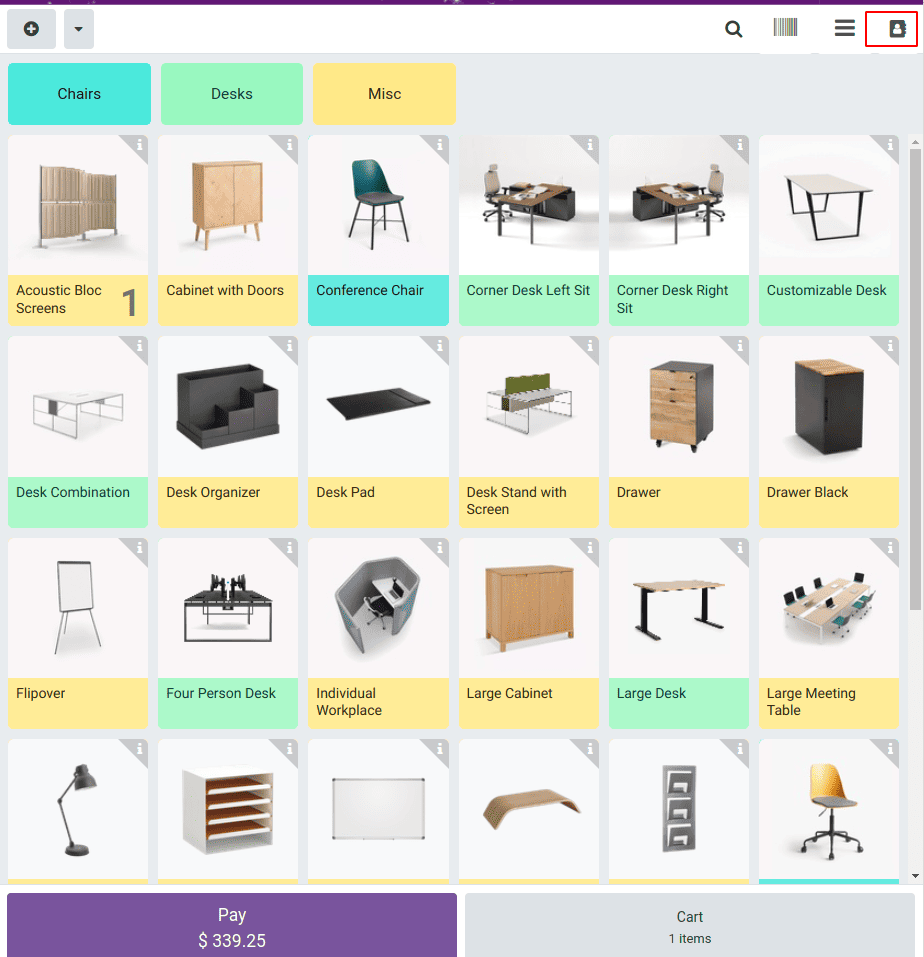
Adding an icon to the PoS navbar in Odoo 18 is a great way to enhance the user experience and make your Point of Sale interface more intuitive and visually appealing. With Odoo’s flexible framework, you can easily customize the navbar using QWeb templates and JavaScript.
By following the steps outlined in this blog, you can personalize your PoS interface to better meet your business’s needs. Whether you’re adding quick access to settings, promotions, or custom features, the ability to integrate icons gives you the flexibility to design an efficient and user-friendly PoS experience.
To read more about How to Add an Icon in Odoo 17 POS Navbar, refer to our blog How to Add an Icon in Odoo 17 POS Navbar.