Adding a status bar to the product form view in Odoo 16 using Studio allows for efficient management of the product's life cycle.
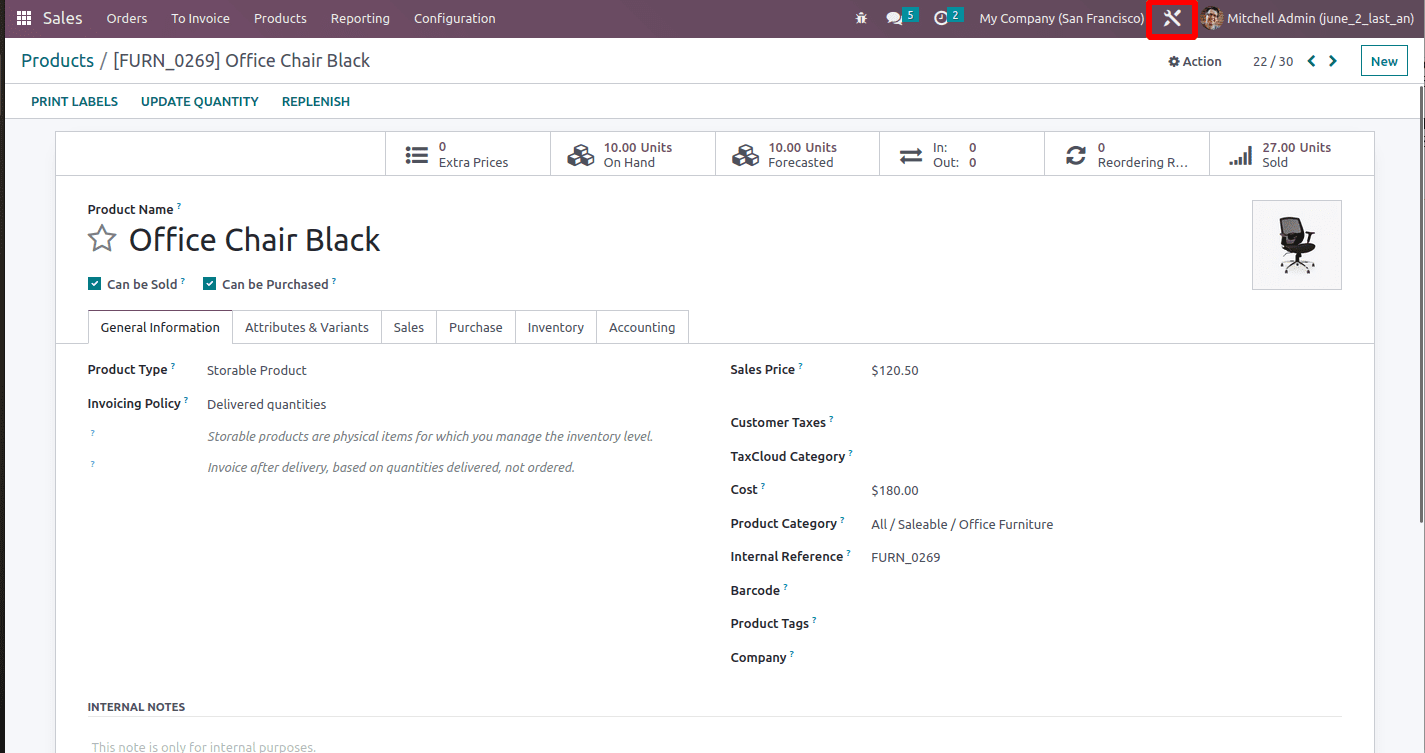
Now, let's explore the step-by-step process of incorporating a status bar into the product form view using Odoo Studio. To begin, enable the developer mode by following these instructions: Navigate to the sale module, click on the products menu, and select a specific product. Within the product form view, locate the studio icon situated in the top right corner, as illustrated in the accompanying image.
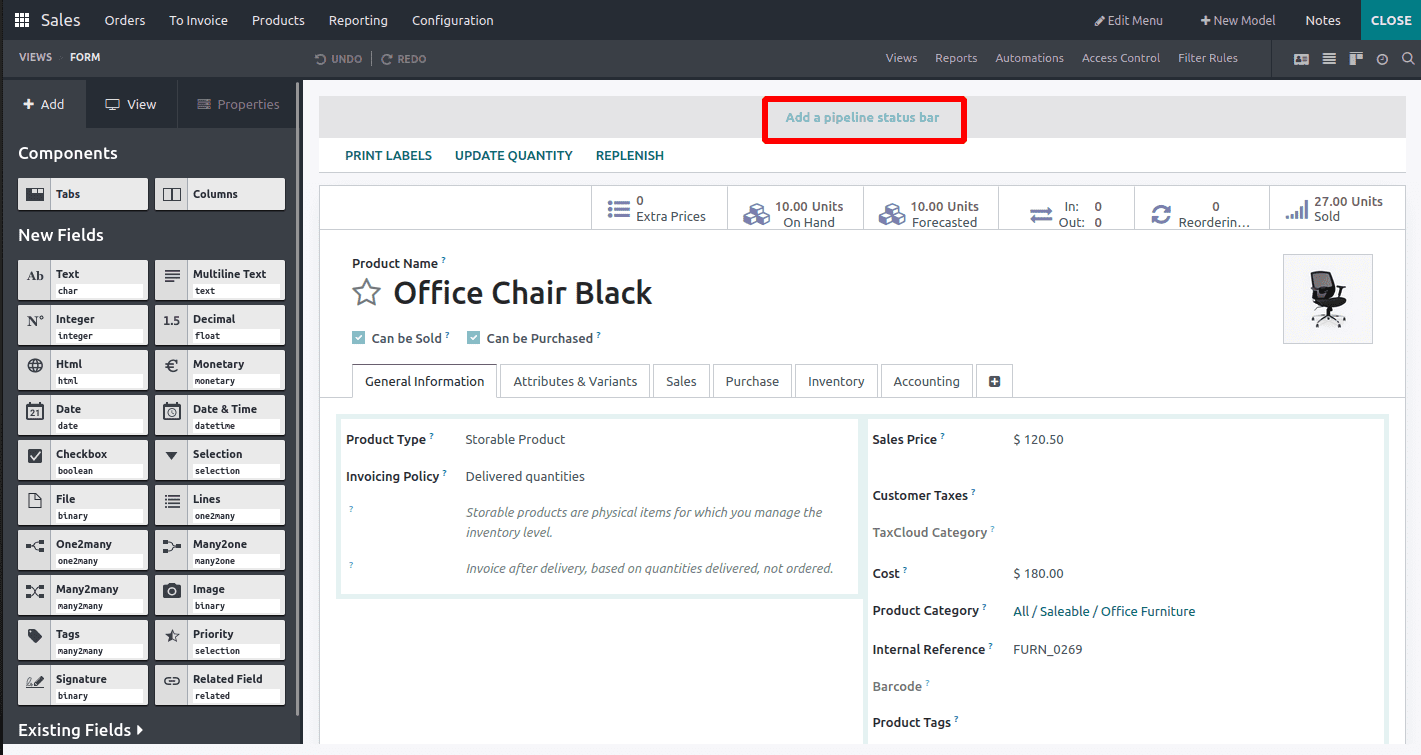
Once the studio edit mode is activated, you will notice the presence of an "Add a pipeline status bar" button at the top of the form view. Proceed by clicking on this button, which will grant you the ability to incorporate a status bar into the products.
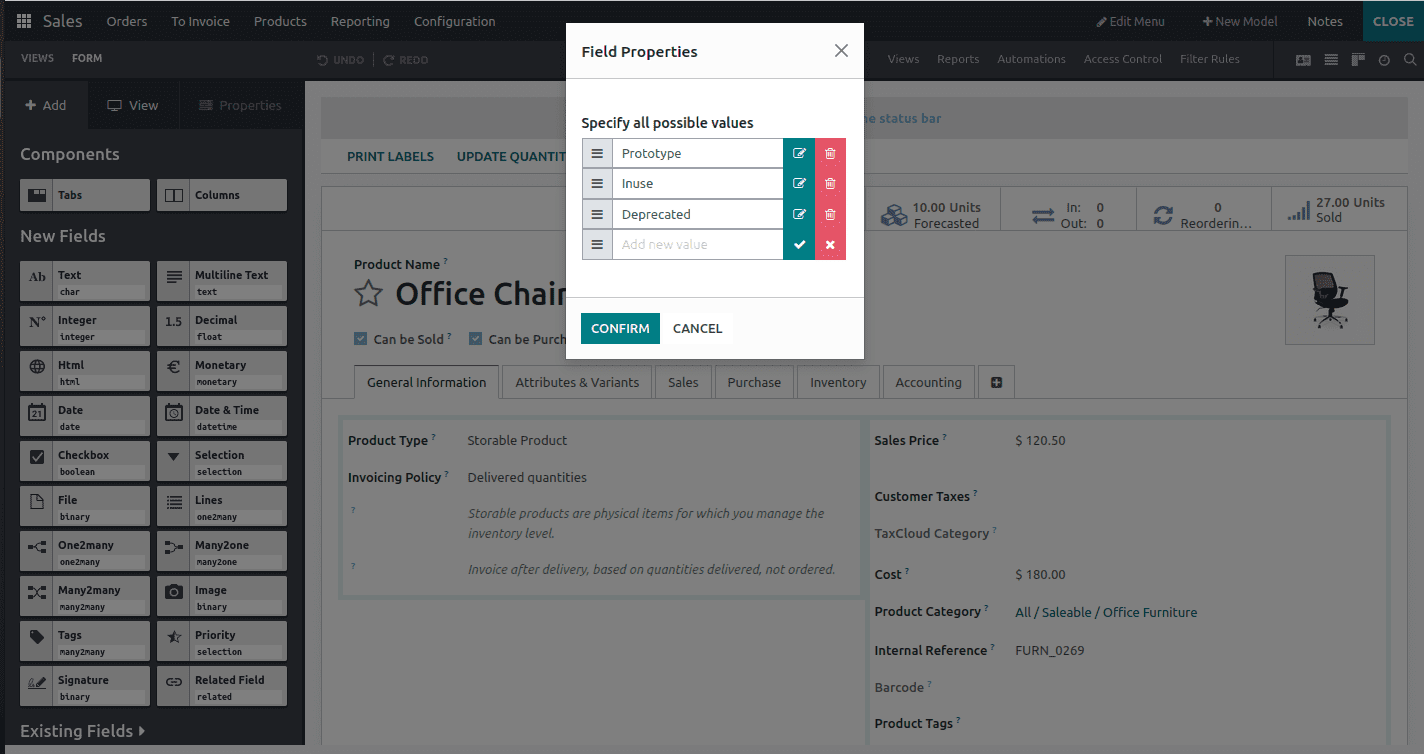
As depicted in the image below, you will have the option to edit and add different stage values or remove existing stages. When adding stage values, their labels will be automatically assigned based on the provided values.
Upon clicking the confirm button, the pipeline status bar with its associated stages will be generated in the product form view. This status bar empowers you to track and monitor the progress of each product within a designated flow. It proves highly valuable in visually representing the advancements made for individual products.
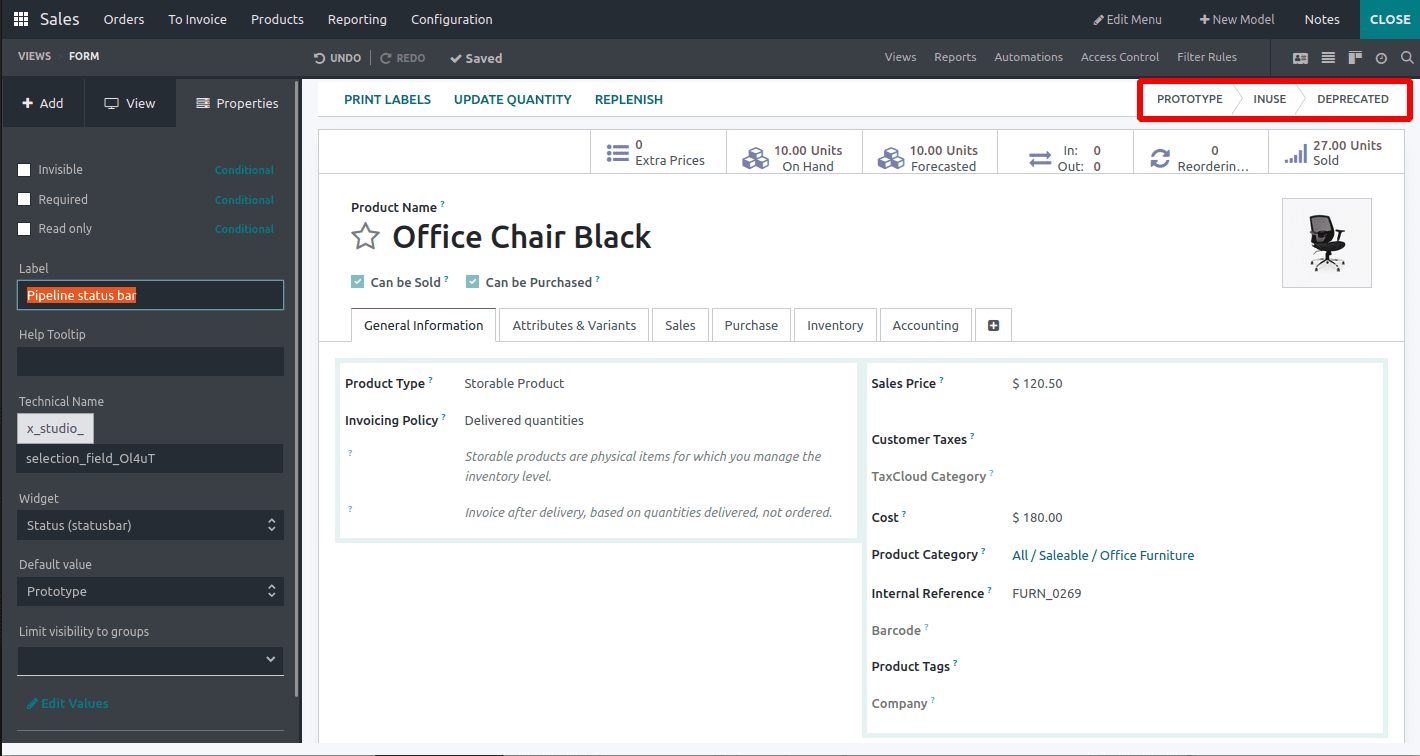
The status can be configured as demonstrated in the image provided below.
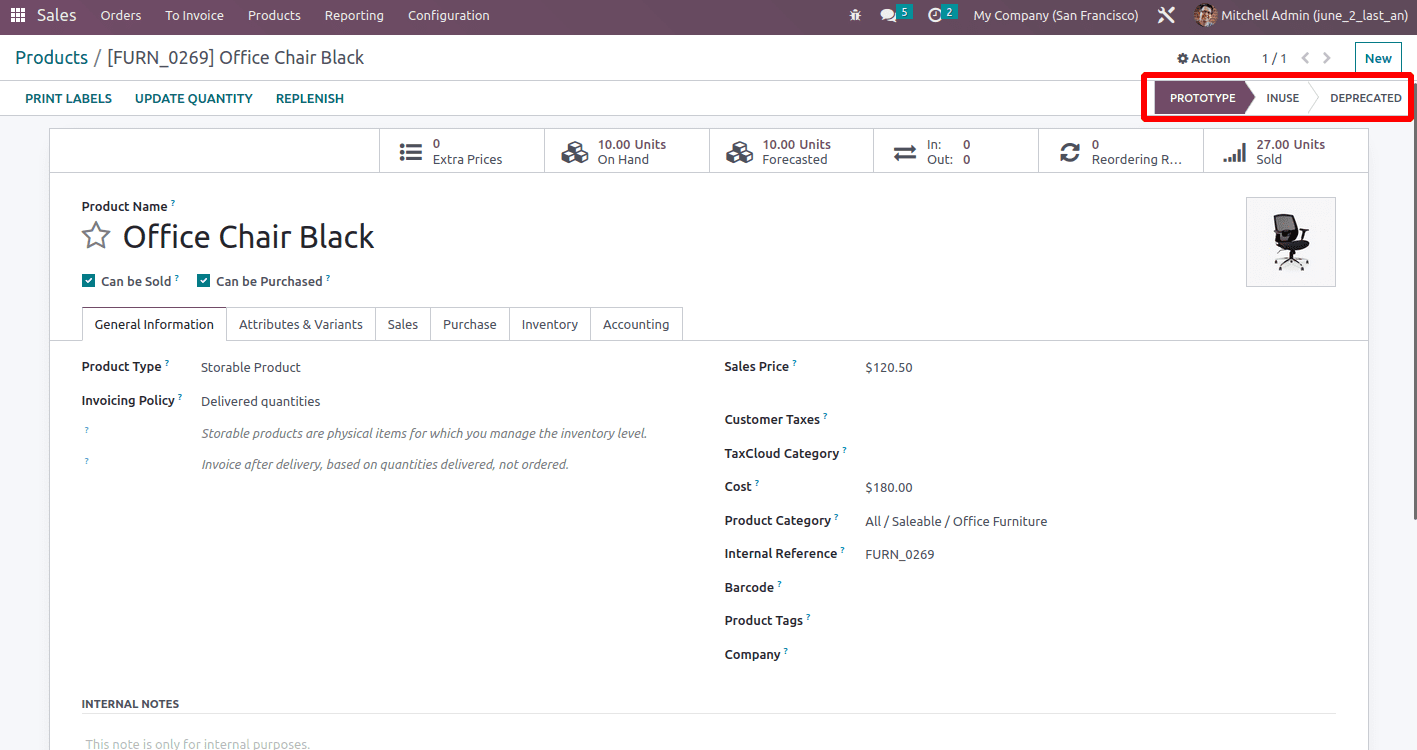
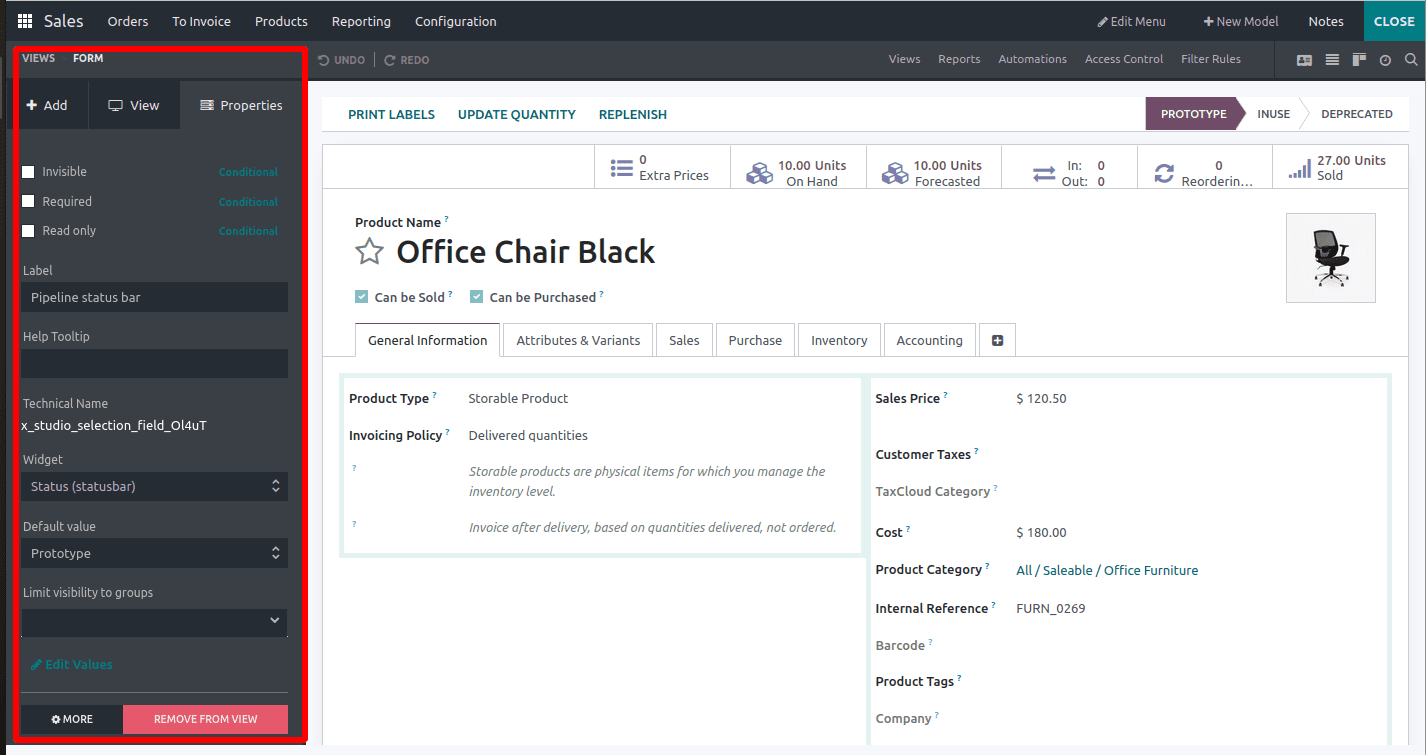
To enable the studio edit mode once again, navigate to the left side of the screen where you will find a panel containing various features. Just click on the status bar, and then you can see the properties tab in the panel. Once selected, you will observe the automatic display of its technical name and widget name in that section.
In this properties tab, you have the flexibility to add a help text, choose a default value, and restrict the visibility of the status bar to specific user groups as per your requirements.
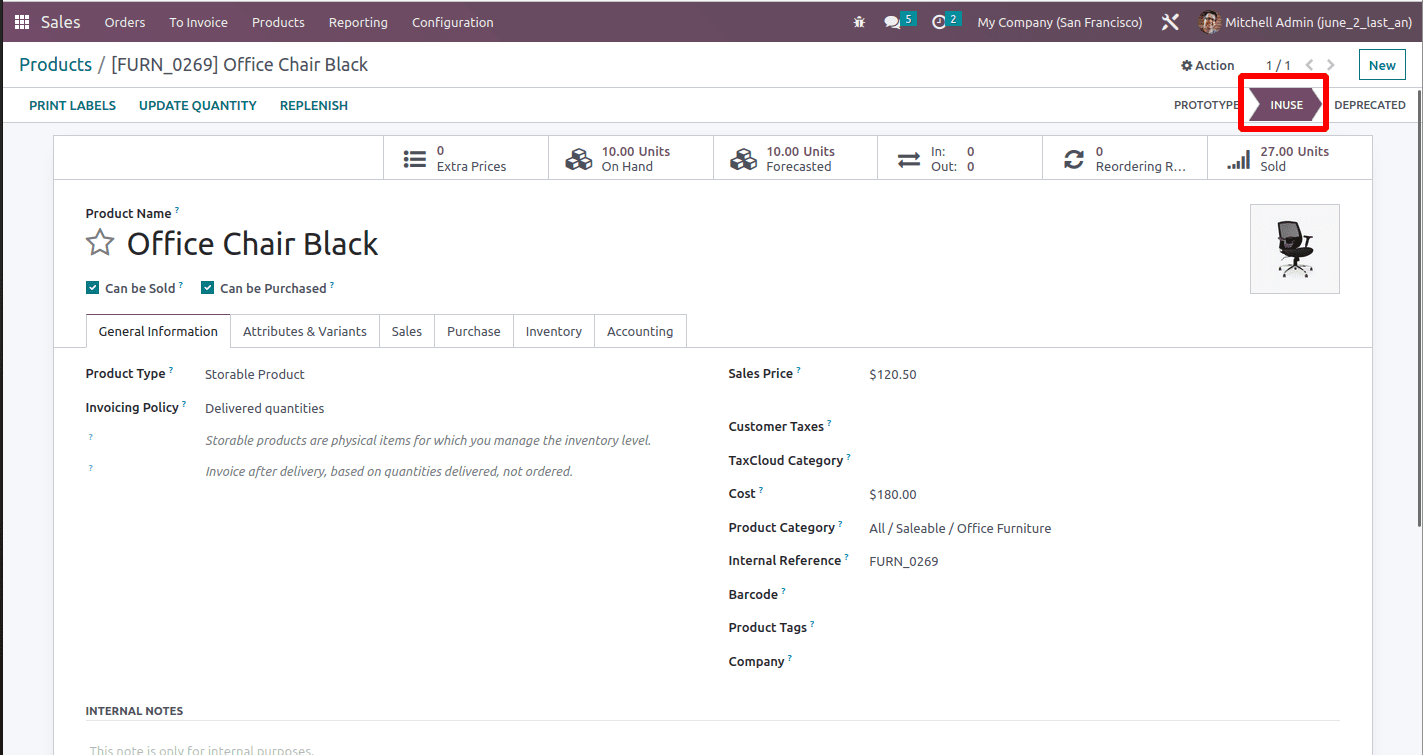
Also, one can change the stages of the product from the form view.
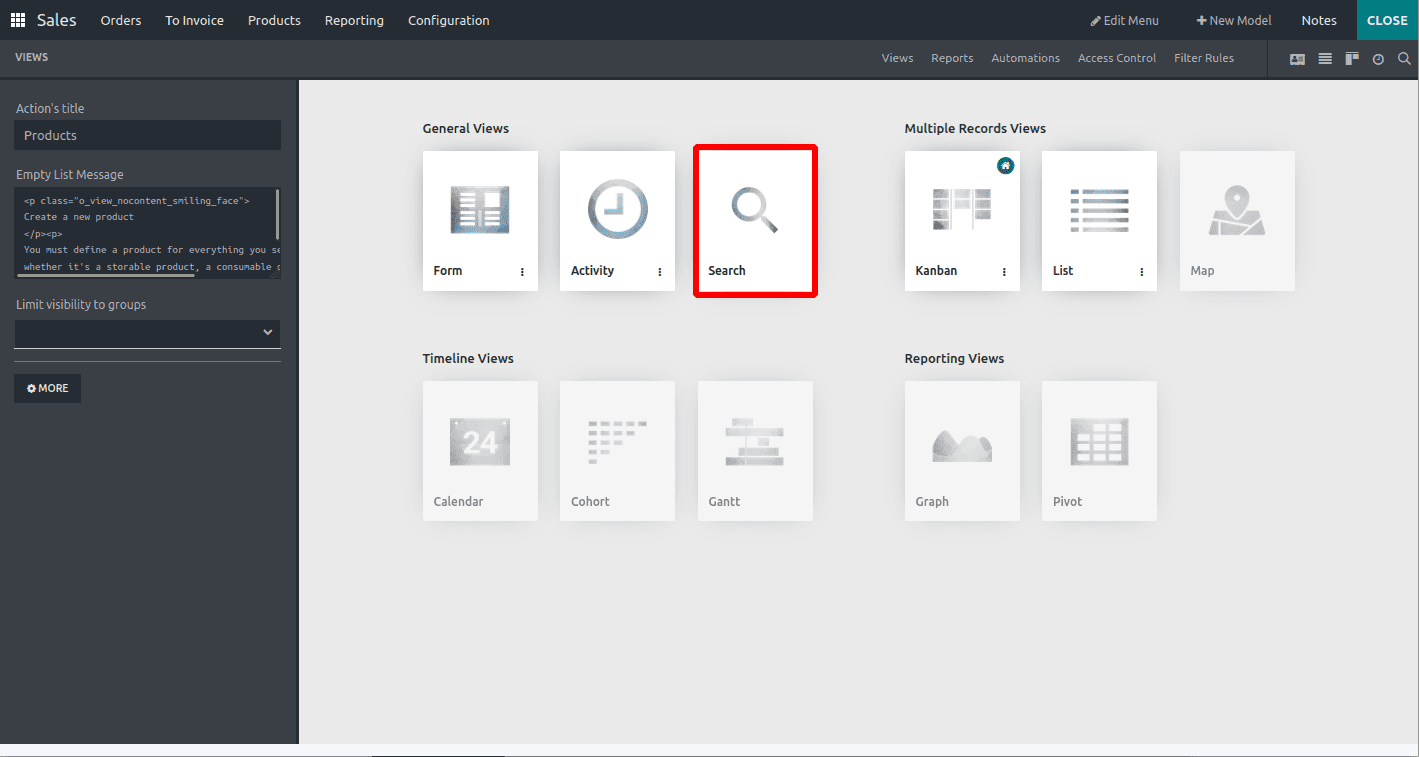
Now, let's explore how to categorize the products based on their status. Click on the Views button located at the top of the page, as depicted in the accompanying image.
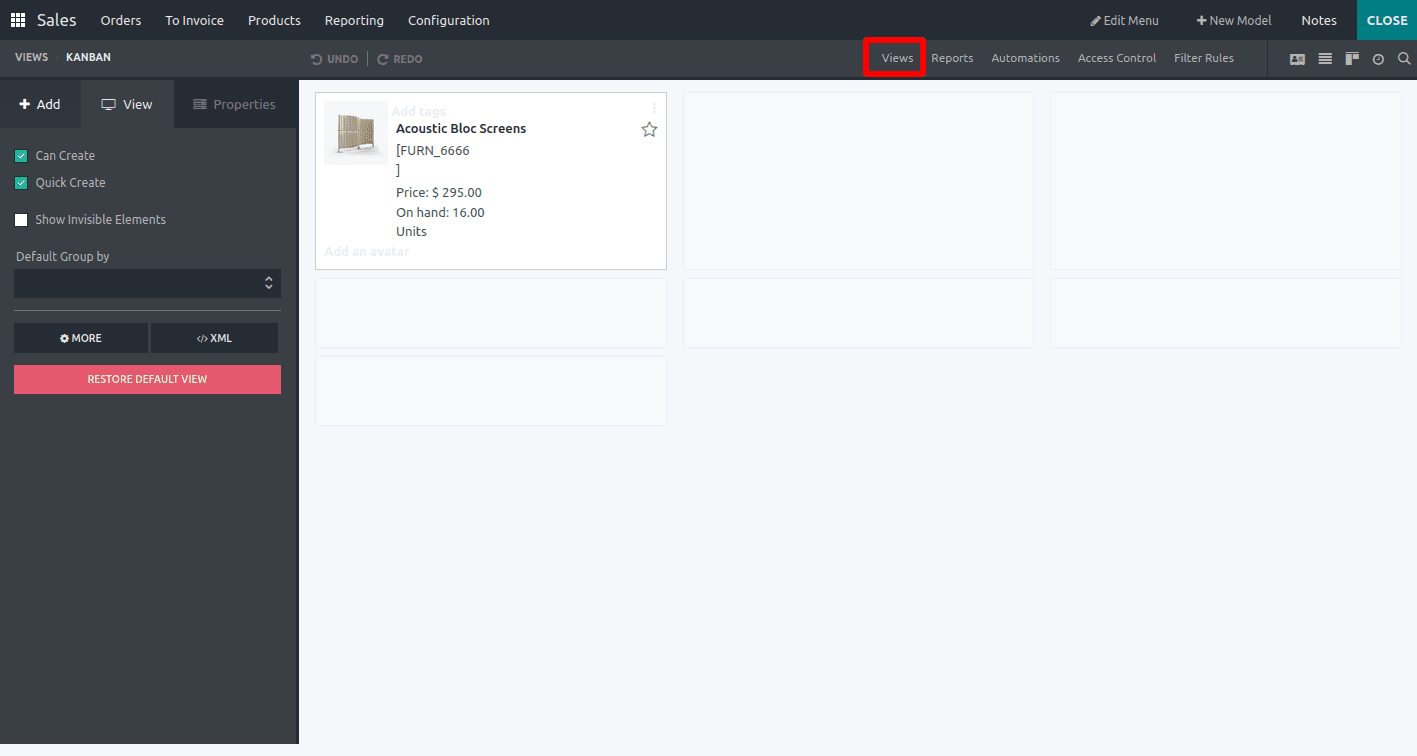
Then you can select the Search view among the various views displayed.
Next, we will view filters and GroupBy options, as illustrated in the second image provided below.
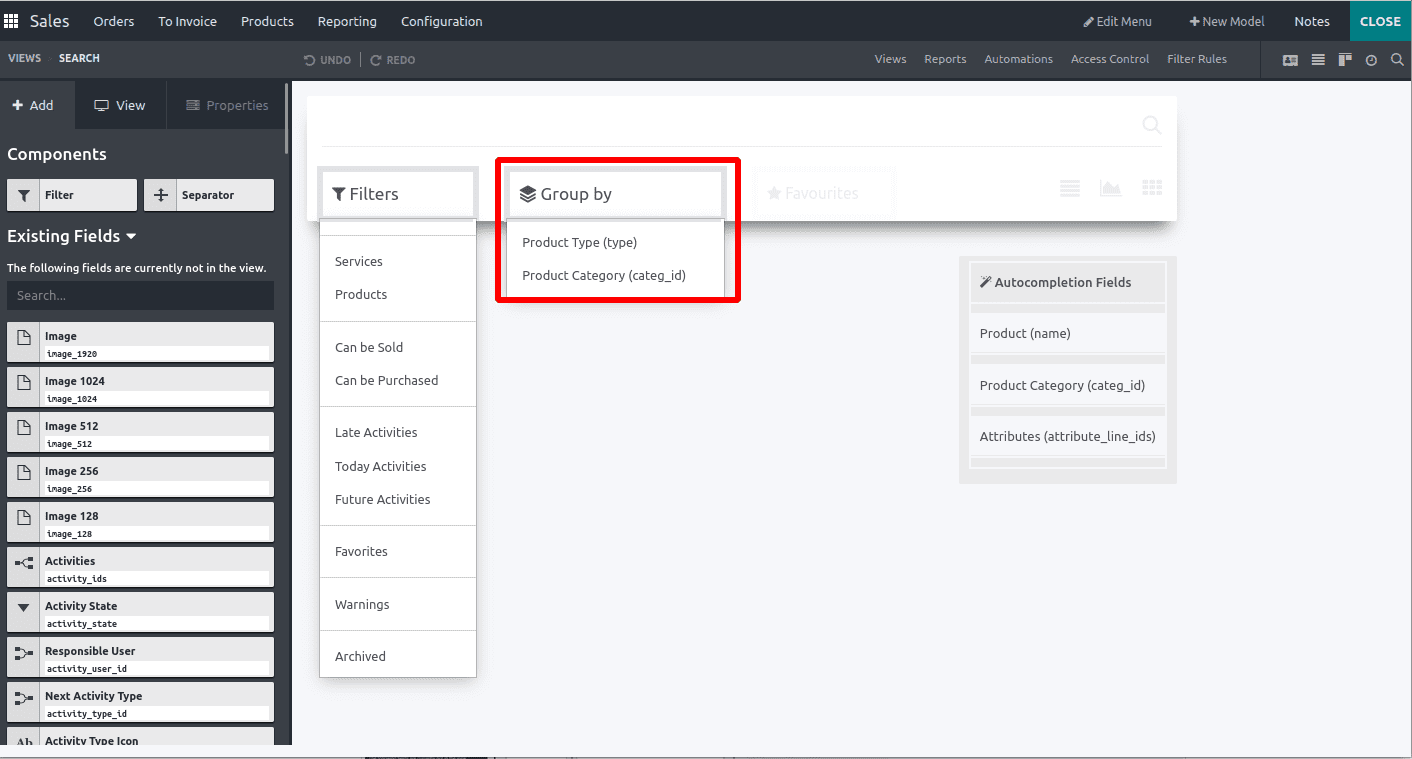
Search for the field ‘Pipeline status bar’ in the search field under the “Existing Fields”. Drag and drop the field under the Group by menu.
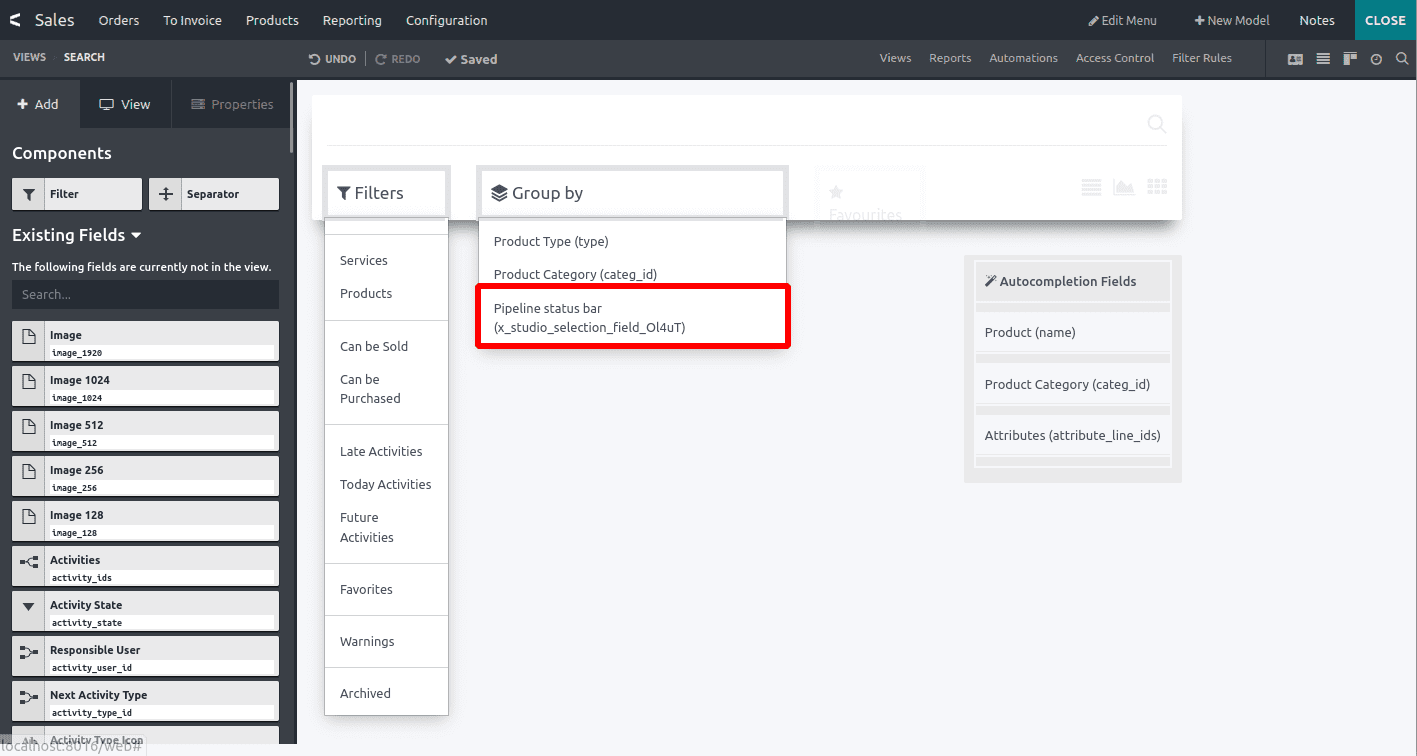
Now the Grouping is done. Then the next step is to go to the products and group the products by ‘pipeline status bar’. You can see that the product having different stages is displayed separately.
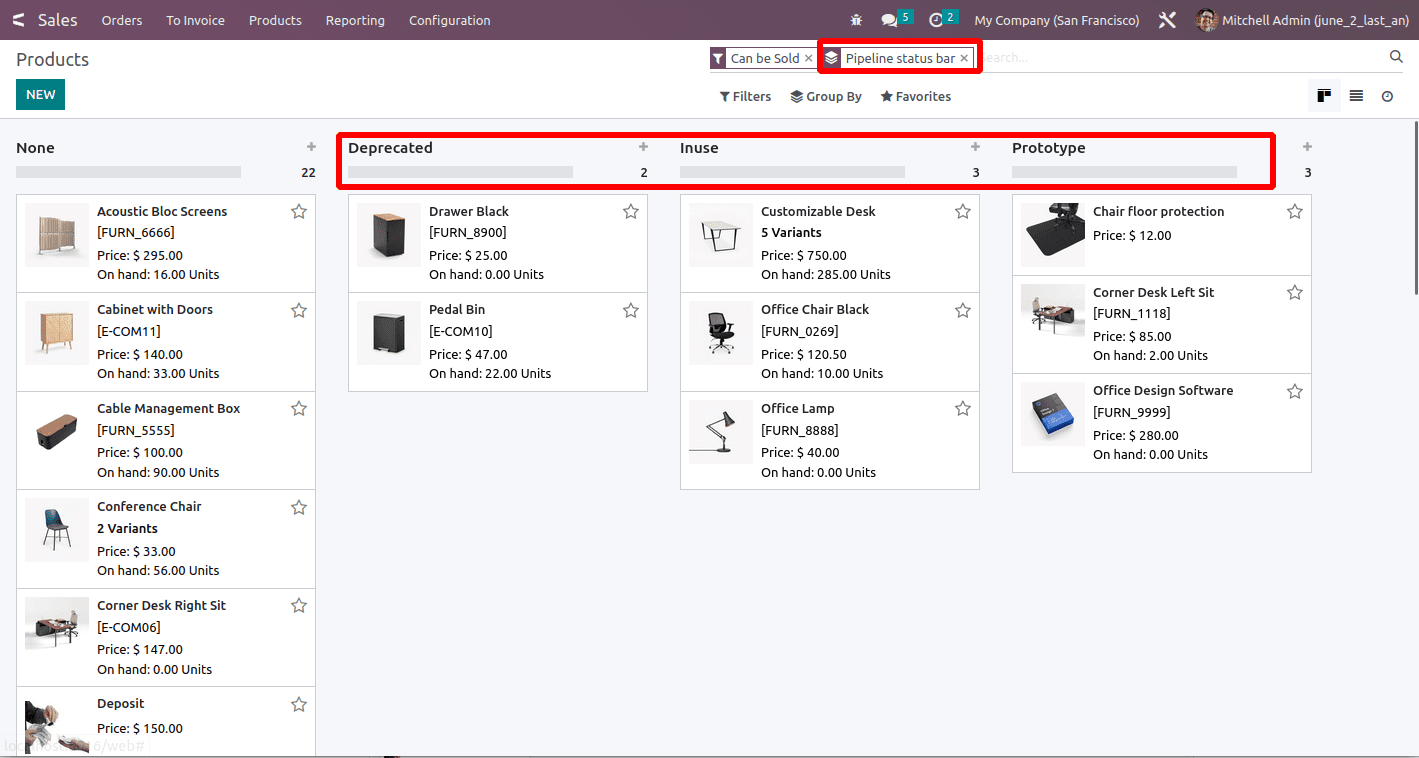
We can simply change the view by using the Studio as per our requirements.
Have a look at the following blog to learn more about how to add a status bar in Odoo 15. How to Add Status Bar in Odoo 15