The degree of courtesy extended towards the client underlines the success of any business. Therefore the relation between a client and company is regarded as the most pivotal segment of any business. A good and healthy relationship with the client is maintained by providing good and reliable service. It eventually helps in improving the business, no matter how big or small they are.
Odoo ERP never disappoints its end user. It provides an immense set of functionalities in all business sectors improving operational excellence and business productivity. Likewise providing excellent support towards the internal business operations, Odoo ERP also provides a website for the externals to get connected to their company. The website displays the products and other company details that helps the business in large. The website also provisions an access portal for the customers to get connected with the company. Customers via their account, can access their deals with the company like - a quotation, sales order, purchase order, etc and also make the payment, online confirmation and perform digital signature. The security is triggered as customers won’t be able to further edit any documents.
Configuration
First of all, the user needs to configure ‘External Email Server’ for directly sending the emails to the customers from Odoo ERP. One need not log in to their Gmail account separately, as we are configuring the Odoo mail server.
Later, the user needs to grant permission to each customer in the ‘Contacts’ module.
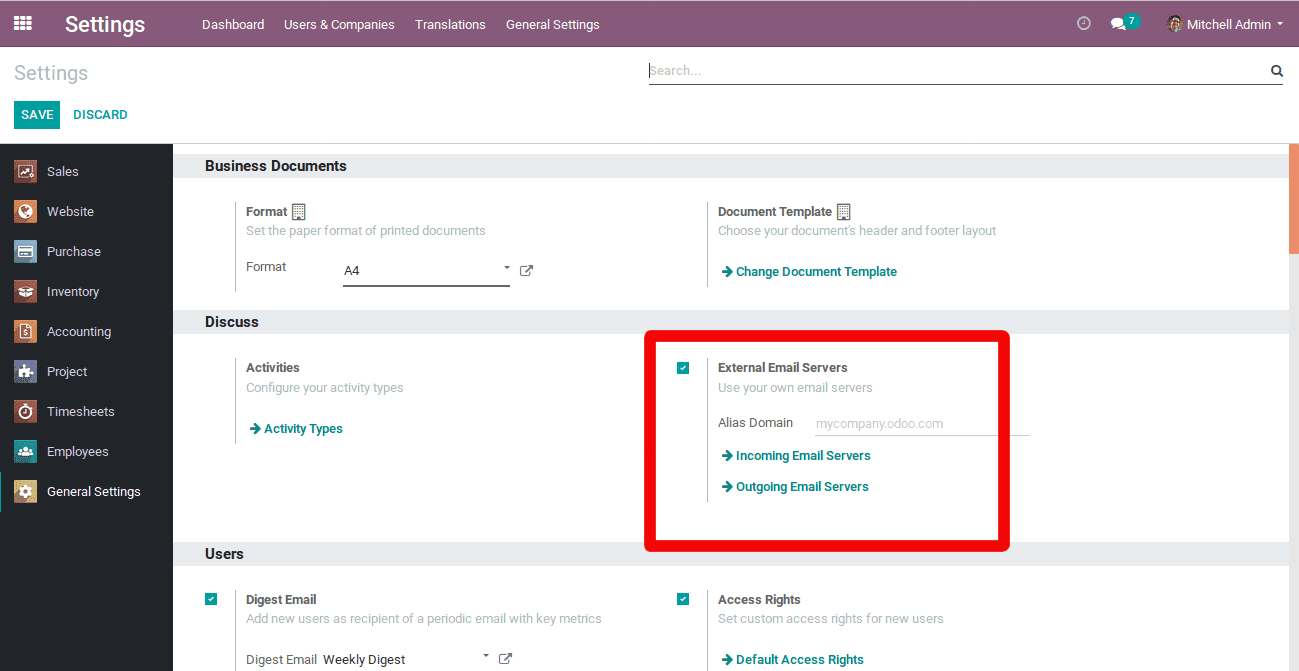
Checkout the External email server from the Option -> Settings -> General settings -> Discuss.
There are two options in the above screenshot such as ‘Outgoing Email Server’ and ‘Incoming Email Server’. The end user needs to configure both.
Configure Incoming Mail Server
While clicking on the link for the incoming mail server, a pop-up window will open giving certain values as shown in the screenshot.
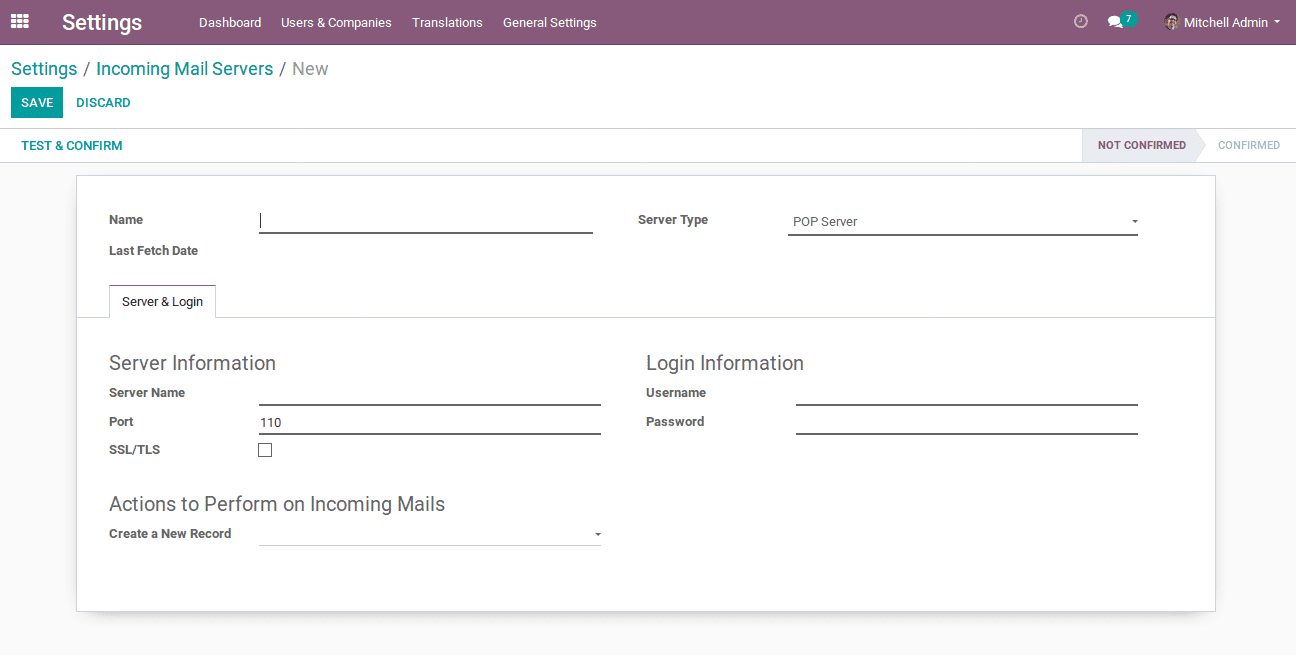
Server Type: Under the field, one can choose for POP/IMAP. POP is the widely used option for getting emails from server to a client.
Server Name: The name for the server. (pop.gmail.com)
Port: The port of the server.
SSL/TLS: Check this to encrypt messages.
Username: Your e-mail id.
Password: The password of your e-mail.
Configure Outgoing Mail Server
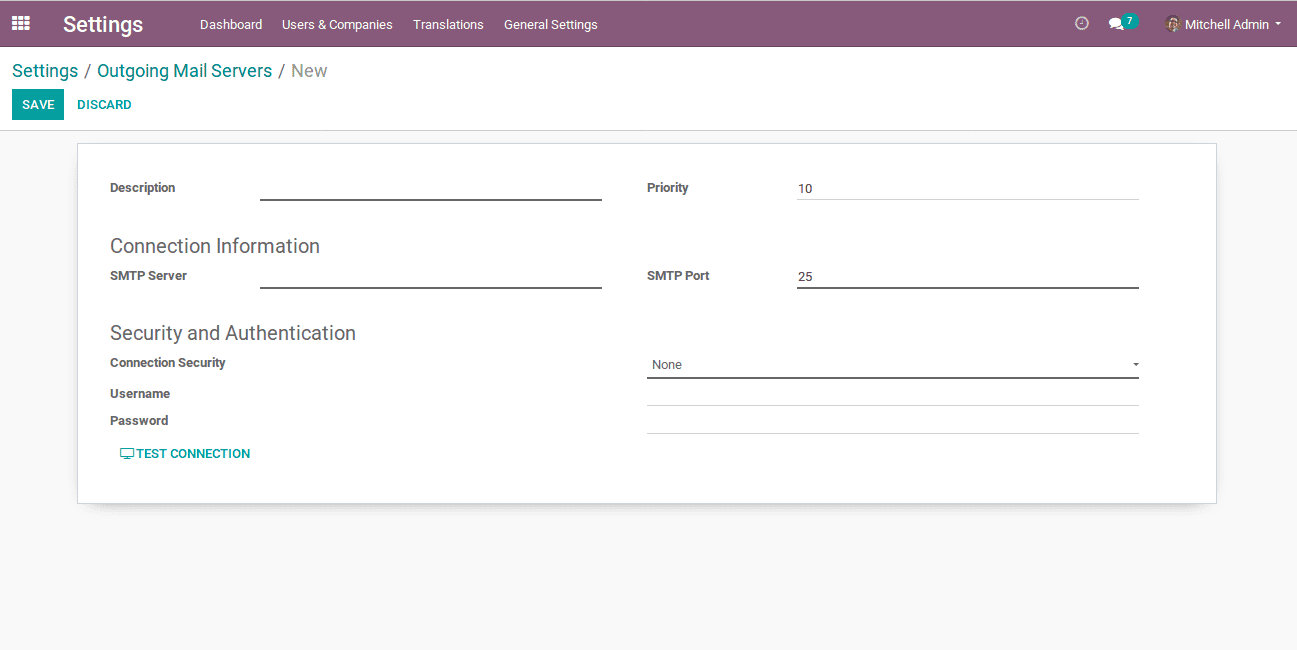
Give field values as shown in the screenshot.
SMTP Server: smtp.gmail.com.
Connection Security: SSL/TLS.
Username: Your mail account.
Password: Password of your email account.
Priority: The lower the number. the higher the priority.
SMTP Port: The port of your SMTP server.
Click on test connection, and the end user will be getting a connection success full message if testing turns successful.
How to enable ‘Portal Access’
For enabling portal access, one needs to install “Contacts” module from the apps.
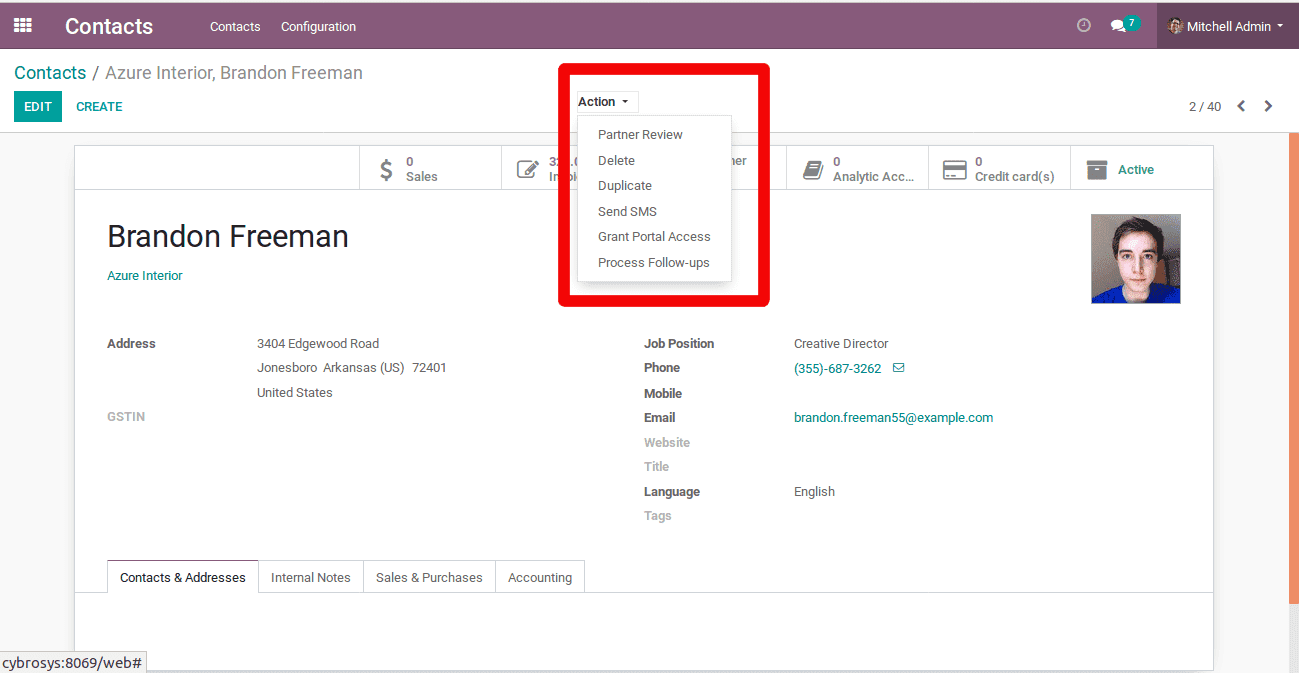
Under the module, every customer detail is listed. For enabling portal access,
select the customer or a group of customers, and click on the action menu to select grant portal access in the drop-down list.
Eventually, a pop-up window will open which contains the customer name, email id and a checkbox for granting permission. One can check out the checkbox and confirm the grant permission.
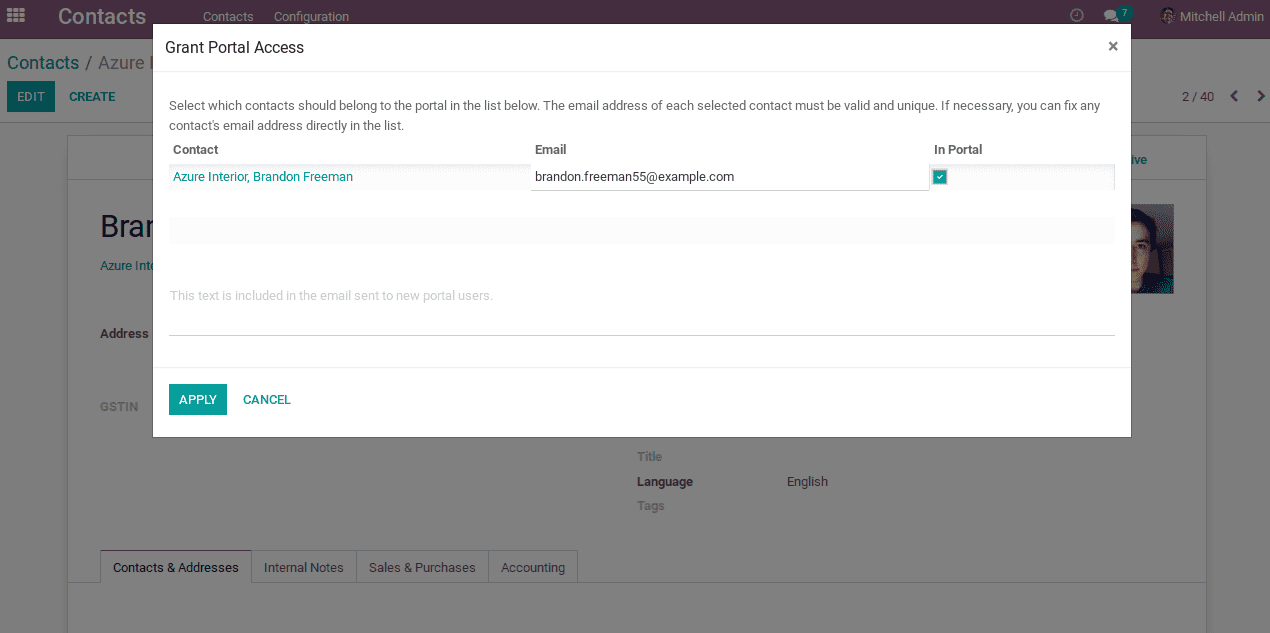
Under Odoo, there are two options for customer portal access such as:
Free Sign Up: Under the option, any customer can sign up to their portal.
On Invitation: Administrator can be sent an invitation link with the user id and password via mail to the customer portal interface.
In the home page of customer interface, one can see a menu on the top-right of the page. The first menu is the login button enabling to get logged into the customer portal. Once logged in, the customer can access the account via clicking My Account in the login drop-down menu.
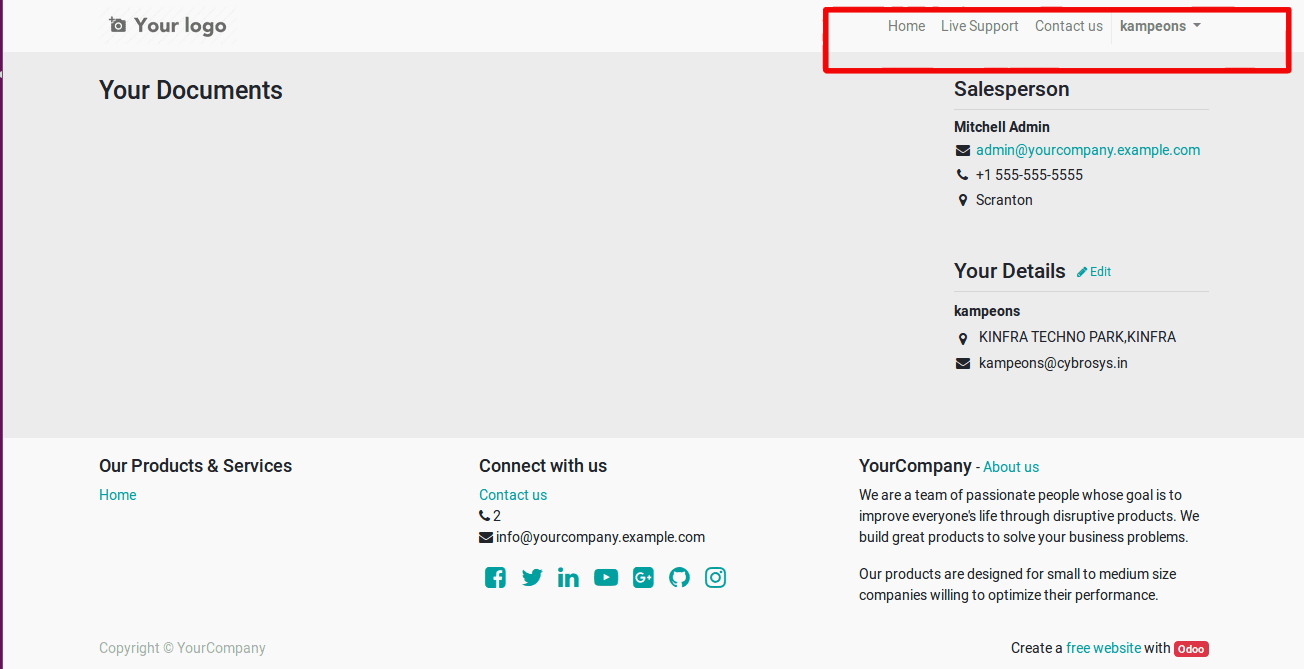
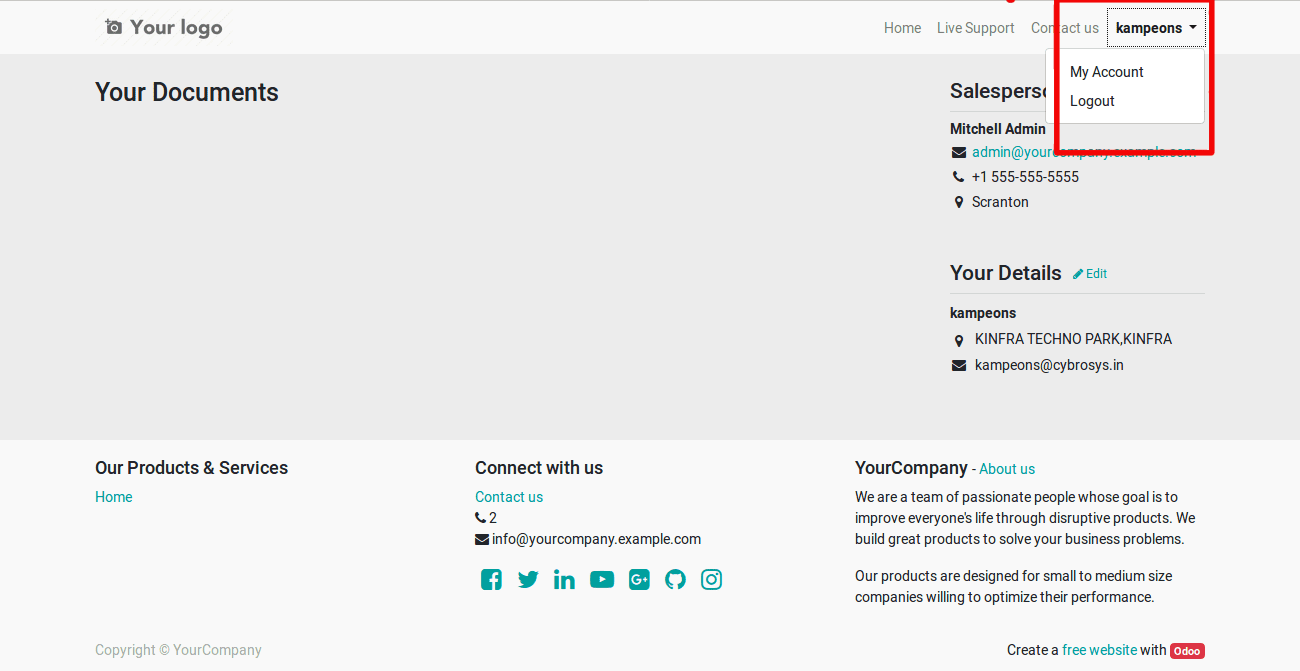
In the customer interface, there is a menu on top of the page, the first one is the username which is a drop-down menu which contains two options - “My Account” and “Logout .”
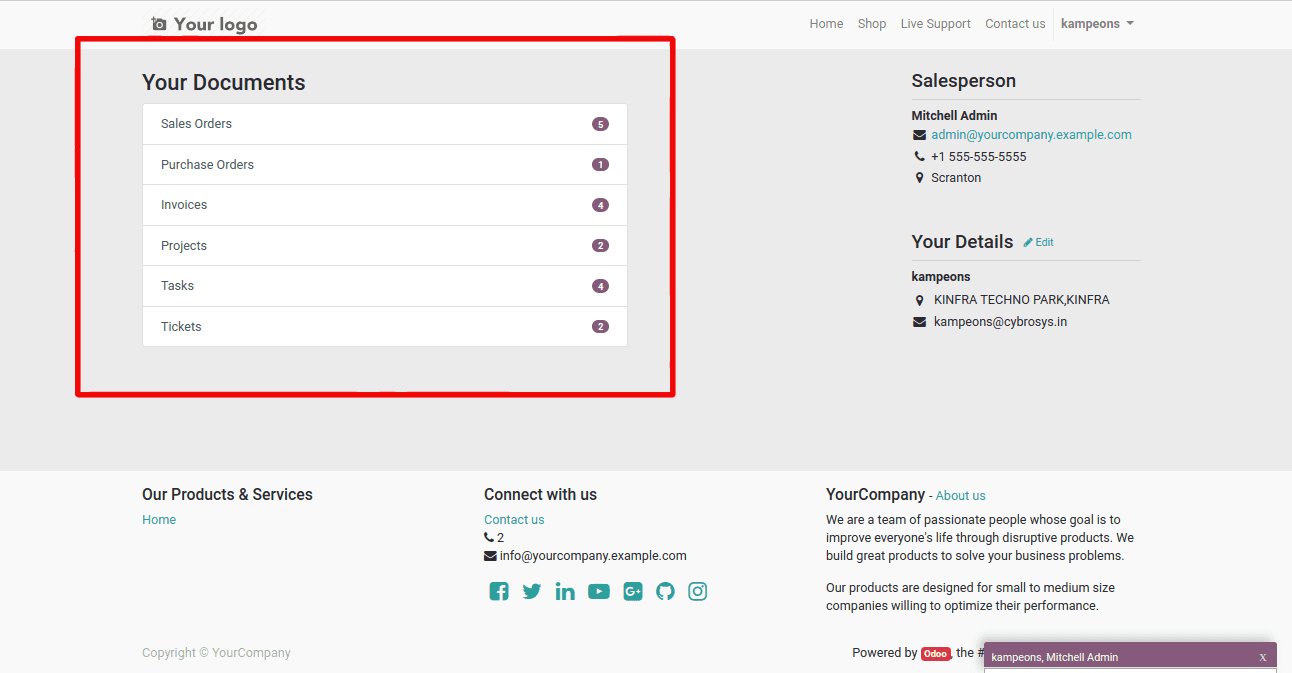
Under “My account ” one can access and do necessary action on their documents such as Sales Order, Purchase Order, Ticket, Task, Project Invoice, Bills and Online payment, Digital Signature and other information representing the business. (shown in the screenshot below)
Manage quotations
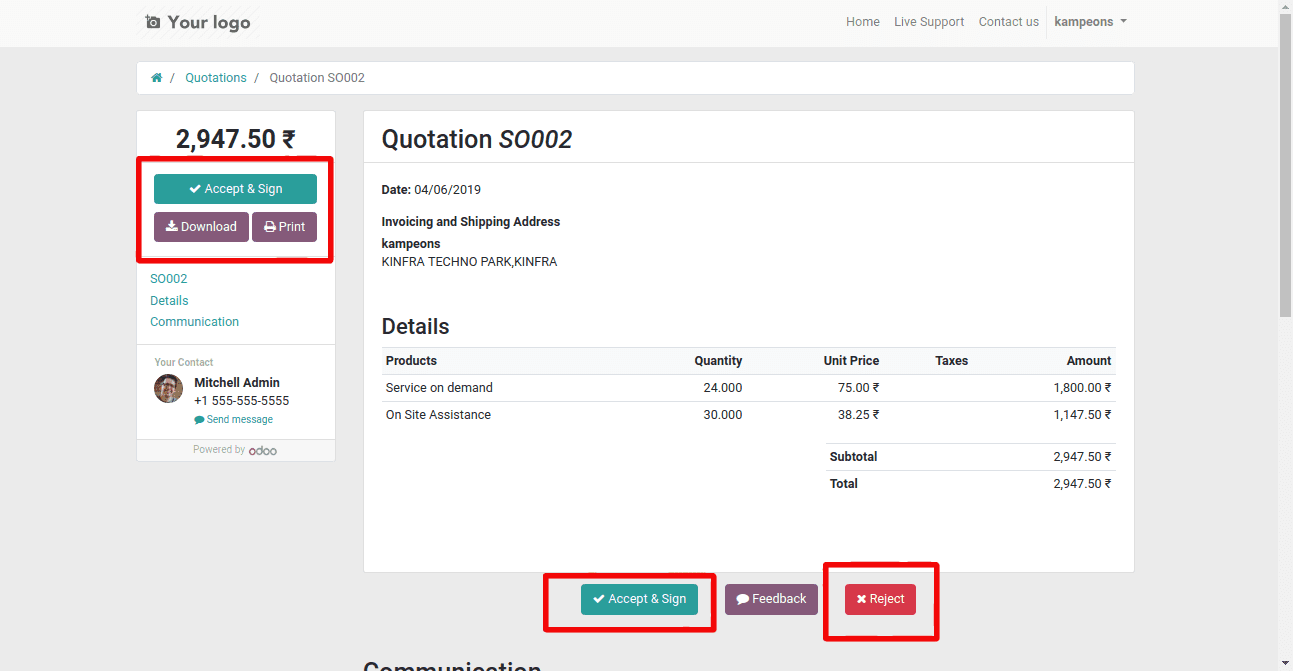
Customer can easily download, print, accept or reject their quotation in the portal, also write feedback about their quotation.
Upon clicking the accept and sign option, the customer can easily accept the quotation with the digital signature.
Sales Order, Invoice, Payment
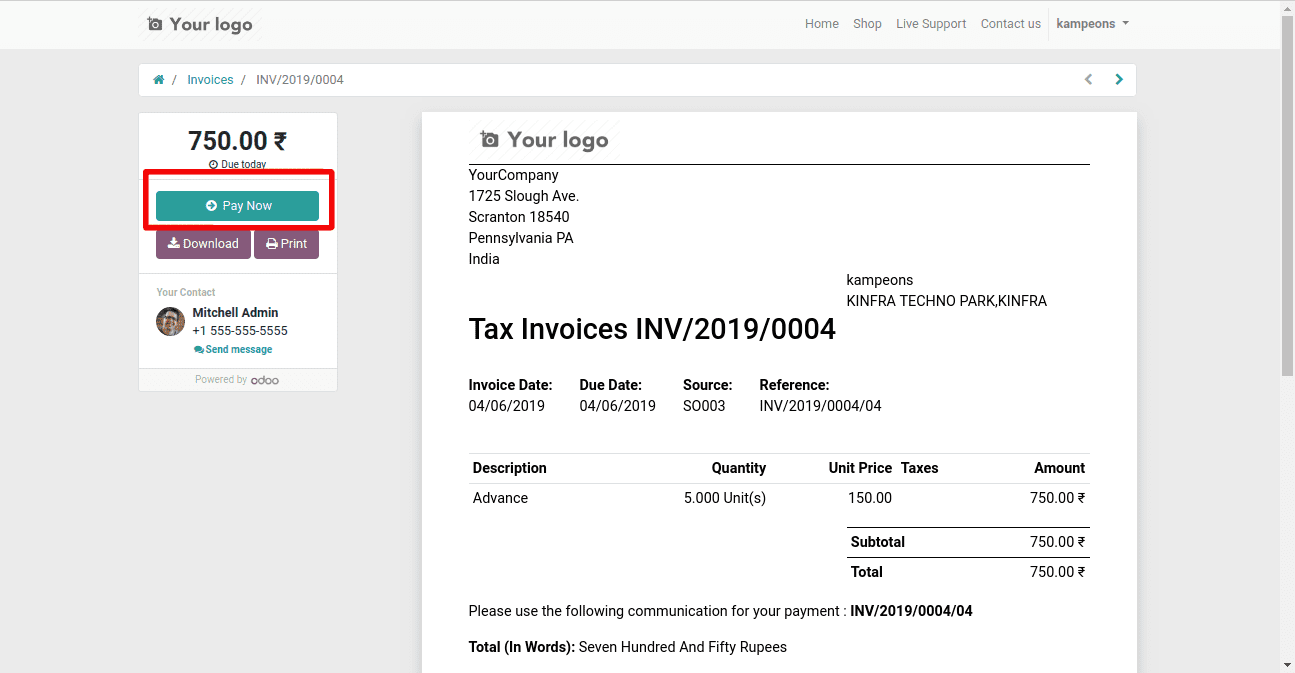
Under customer portal, one has got sales order and invoice and it can provide online payment.
Upon selecting the invoice, it shows the status of an order and the pertaining payment details if the payment is complete. If it’s awaiting the payment, it displays in the page “PAY NOW” or otherwise a link to pay online.
Shop
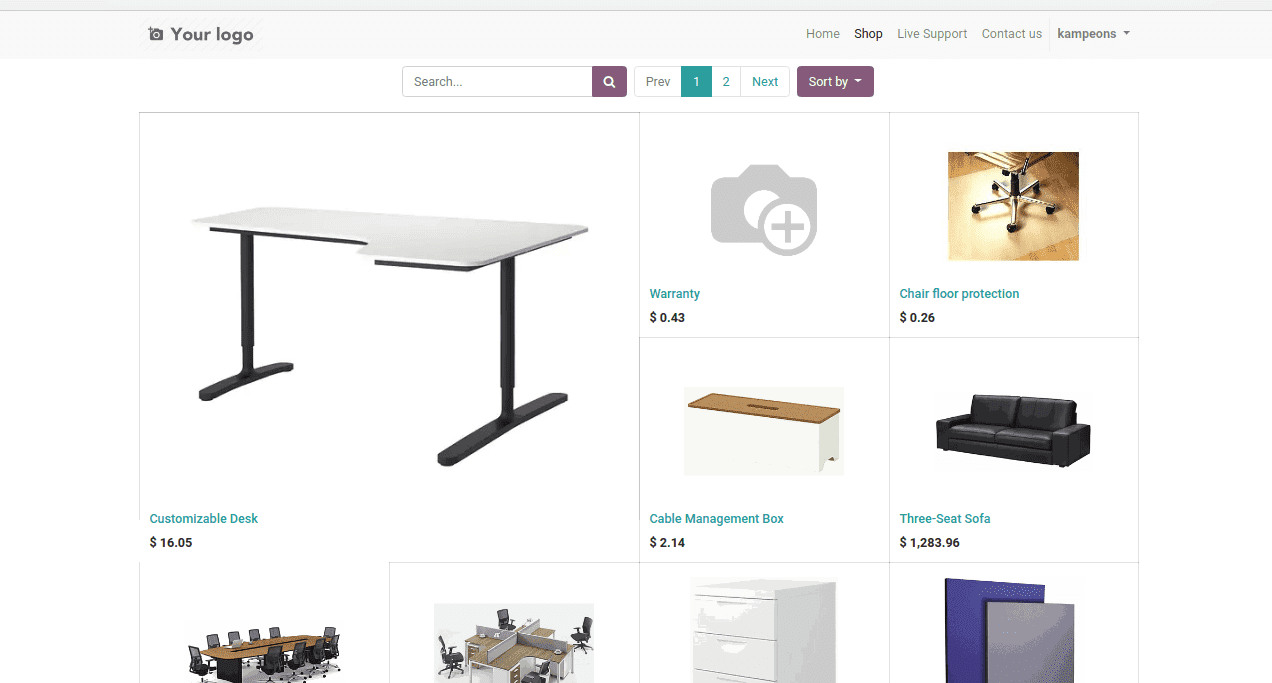
It is a page providing online shopping for customers. Initially, visitors must sign up for shopping online. In this page, all products are listed with price and pictures and provide a link to add cart and buy now, very much like other online shopping websites.
Odoo Live Chat
The Live Odoo live chat is a feature for customers to live communication with the company. Website live chat and Website live support are two useful add-ons in Odoo, which offers functionality to interact with visitors on the website and give support to them.
Configuration
First of all, one needs to install the add-on from Odoo apps. One need to install two add-ons from Odoo apps. Go to Apps -> search the term _live chat.
You will get a filtered result like below
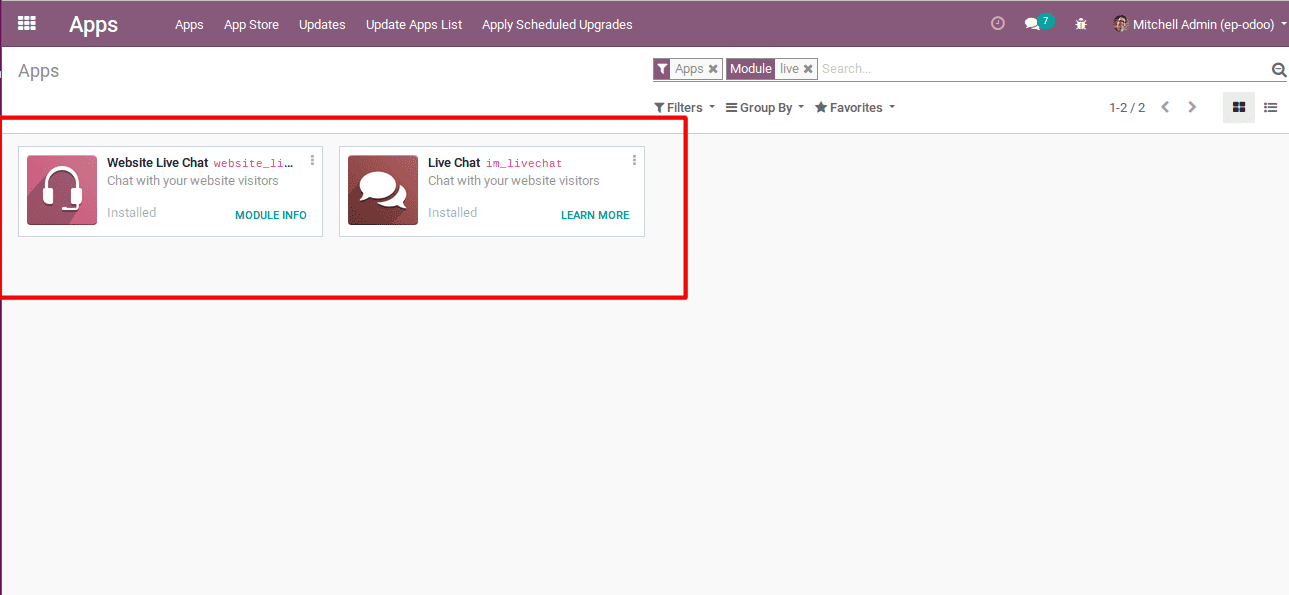
Install both add-on and which will make menu Live Chat in Odoo.
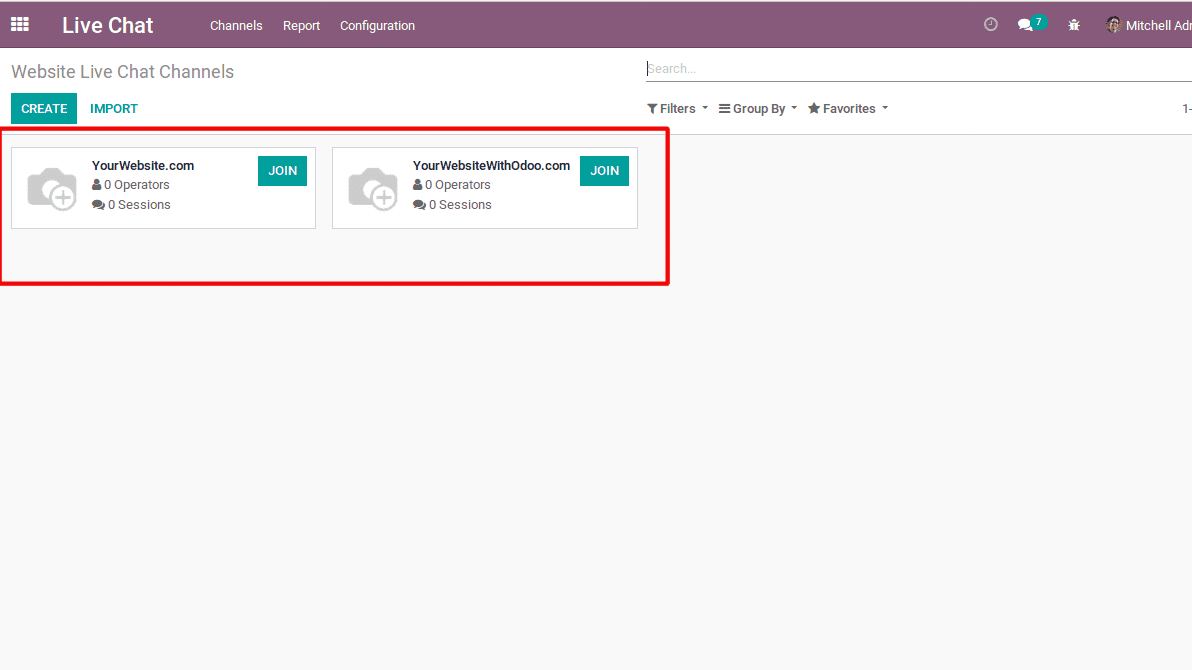
In the website Live chat channel, one will be embedded with menus like Channels, Report and Configuration. From the menu Channels, one can manage different channels. Click on ‘Create' to create a new chat channel. Click any session to view the details of the session.
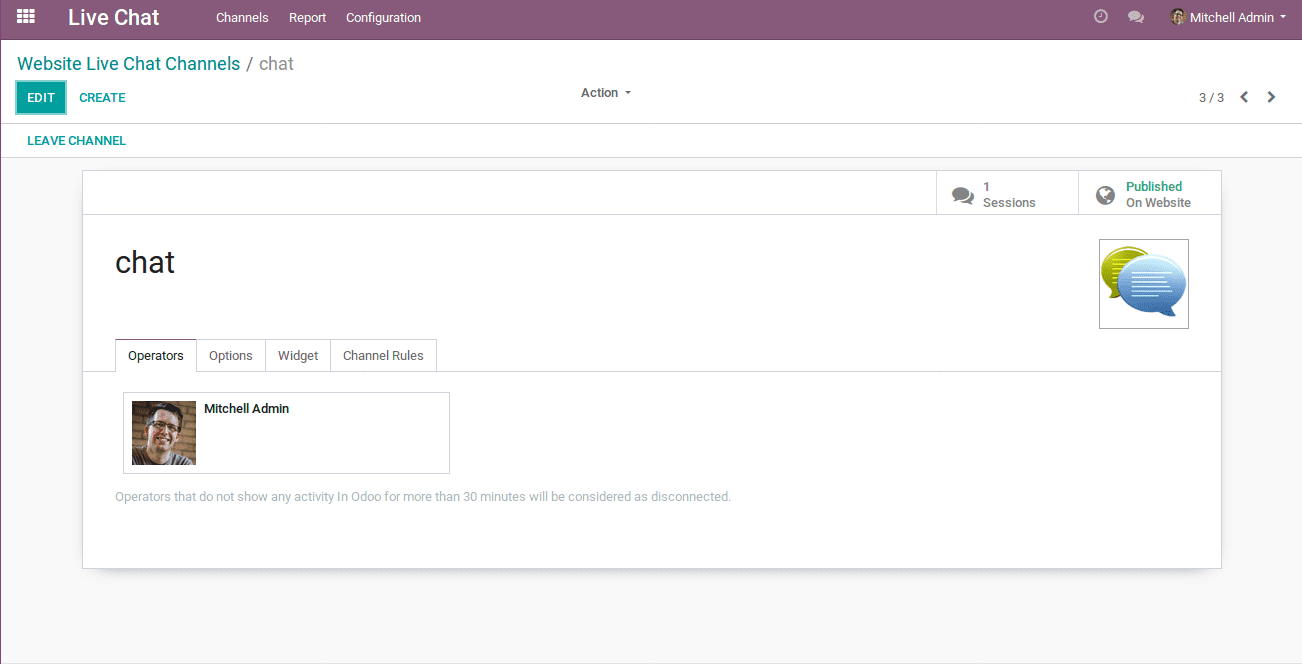
Here, under the option, one can configure the text of the button, which will be displayed on the website, and also can configure the Chat input placeholder and welcome message.
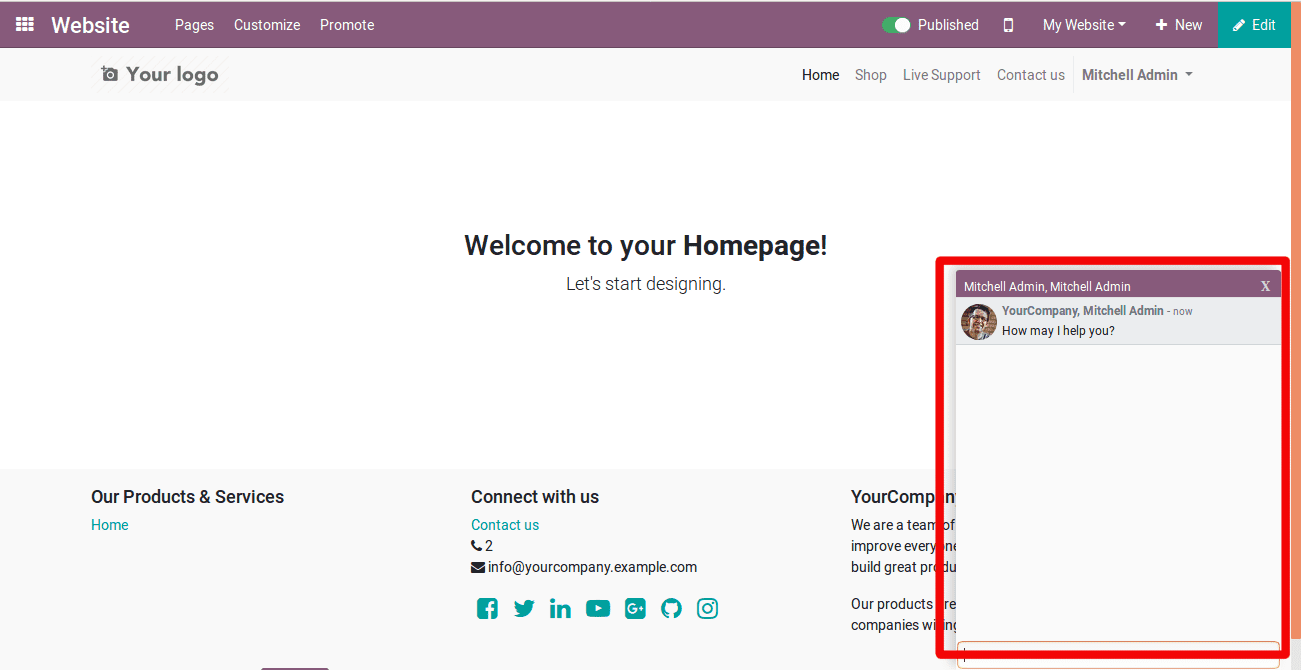
Here, one can see the welcome message and chat input placeholder. Visitors can ask their queries and the operators will reply back.
Live chat configuration in Odoo
1. Open the channel form and copy the script provided by the channel.
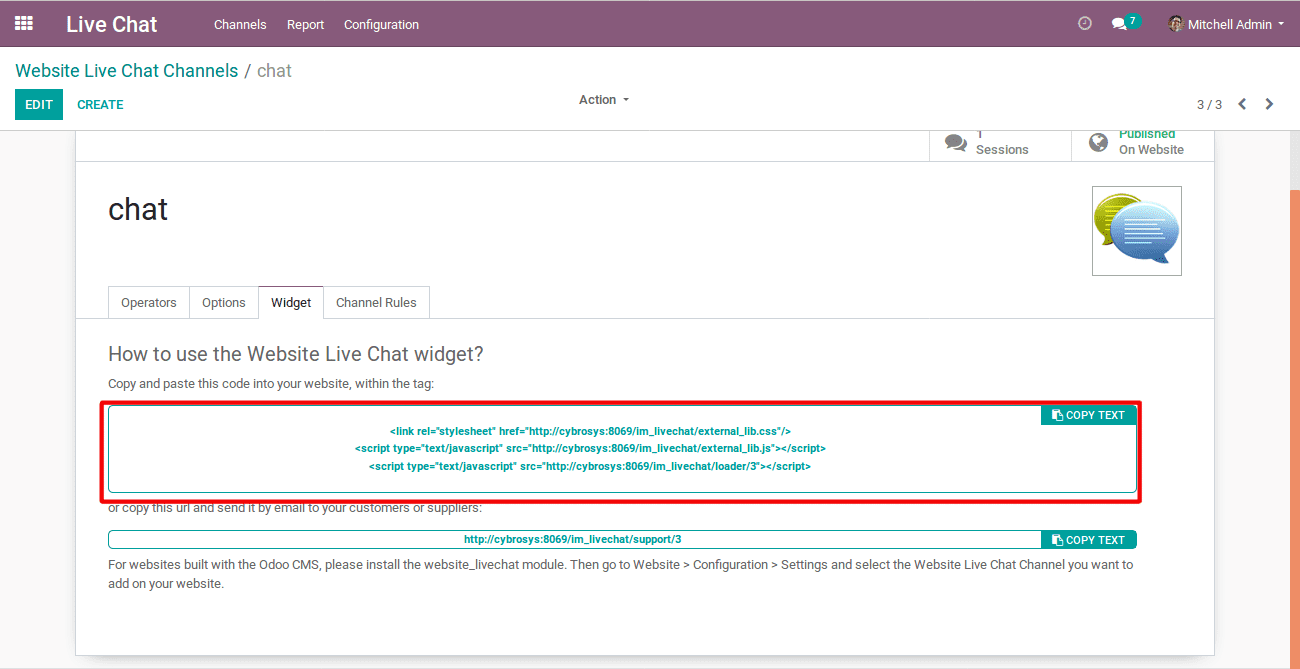
2. Go to website -> customize -> HTML/CSS Editor search term Main Layout.
3. Paste the code inside the header tag and save.
Refresh the website page and one can see the chatter button.
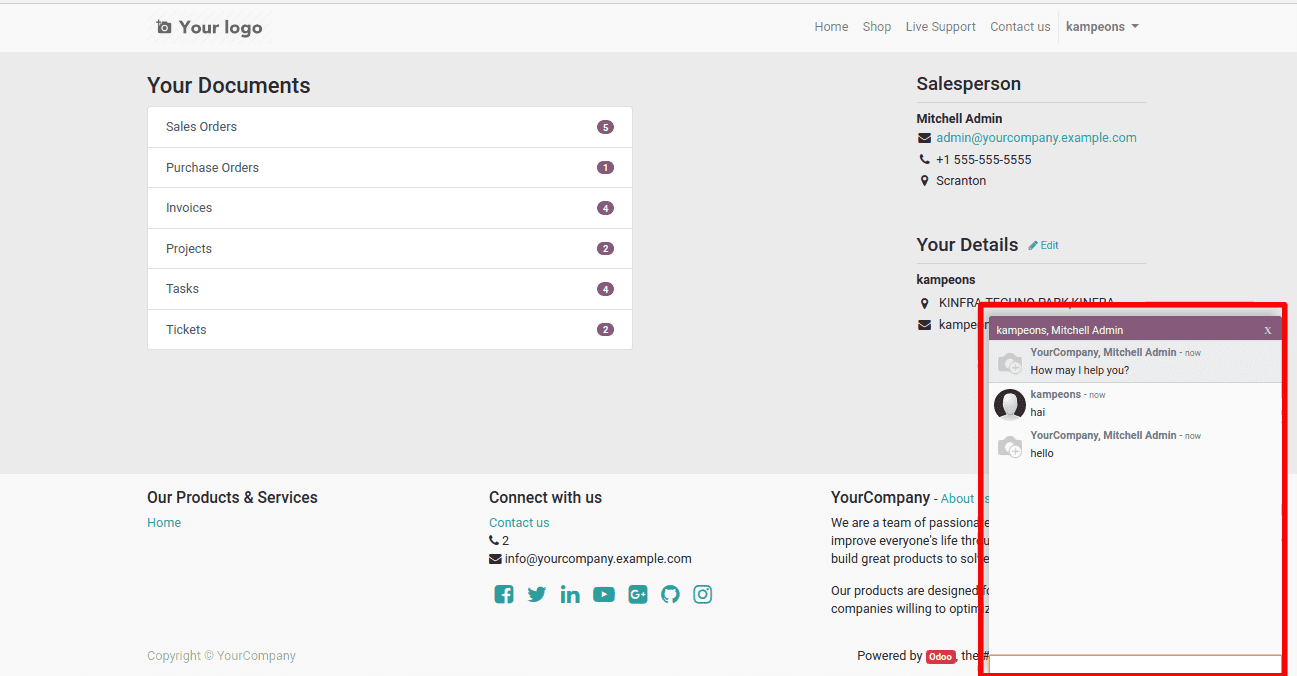
Here, the user can see a chat window for live chat with customers or website visitors.
Help Desk in Odoo12
Our customers are of different types. They may or may not have a good idea about their service or product. So customers may need the help of Odoo to provide a good feature “Help Desk” for customer support.
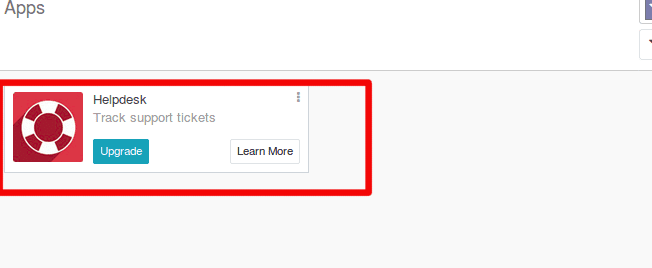
First of all, one can install an add-on Help Desk.
Creating the help desk team
Configuration -> Help Desk Team -> Create
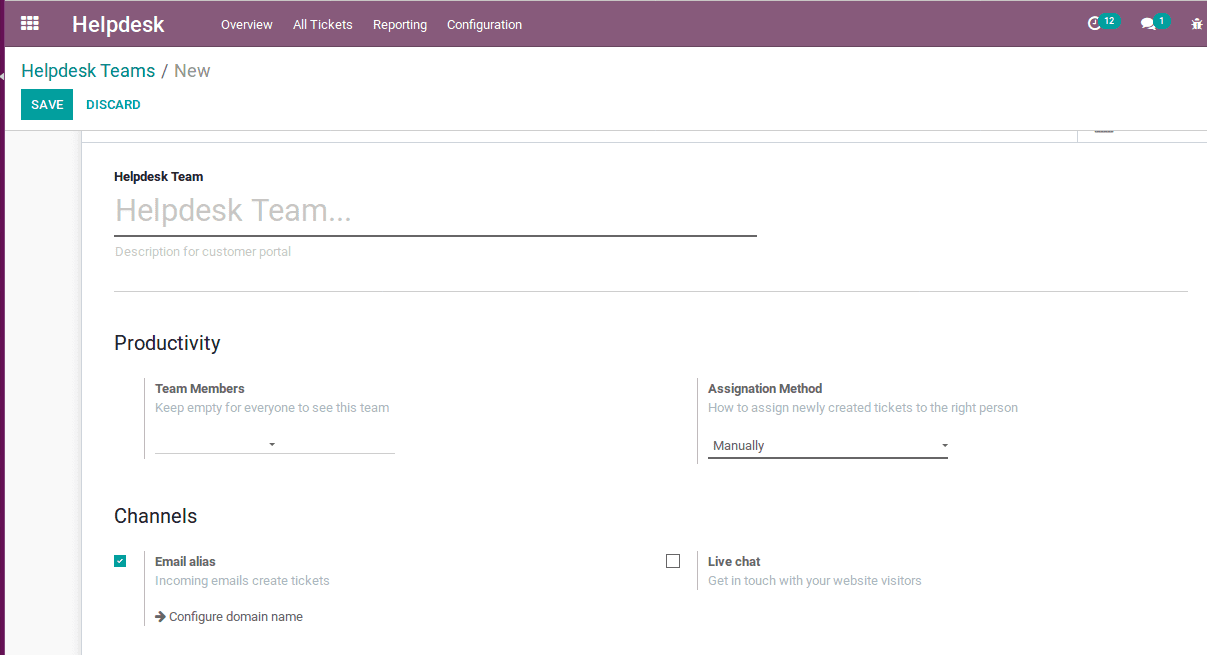
Configure Help Desk Team
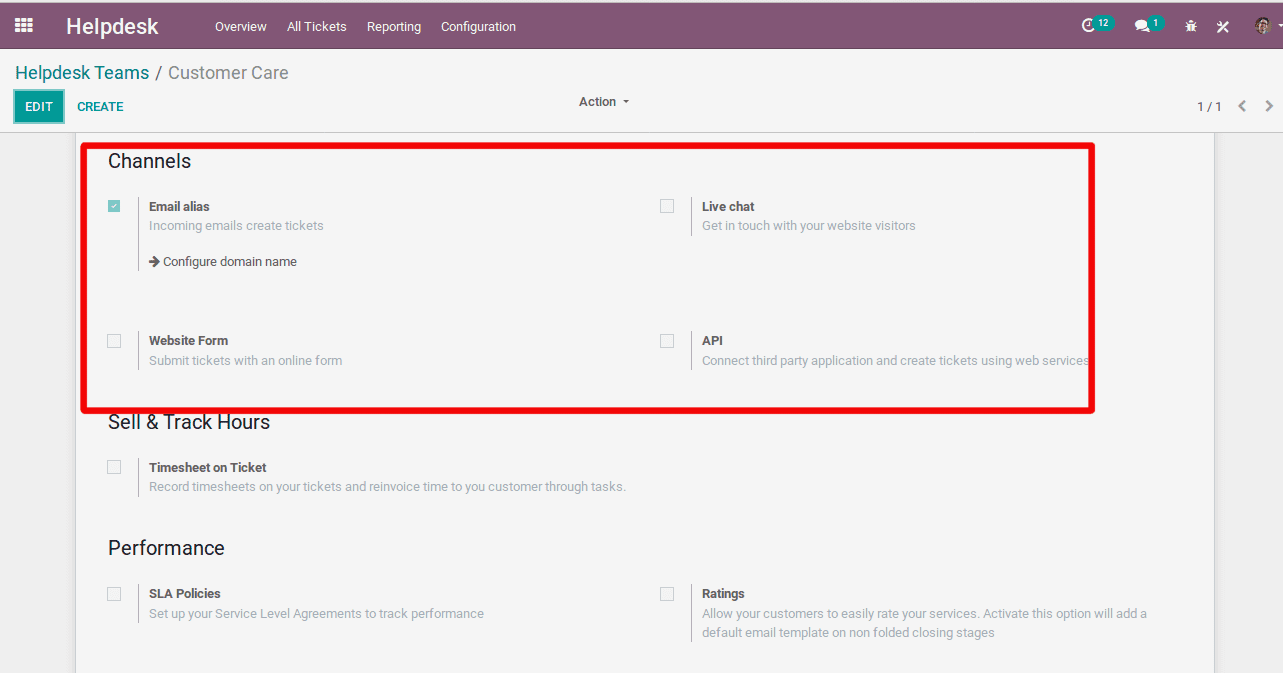
For configuration of the Help Desk Team, there are four channels like the below:
Email Alias: For emailing the alias which is used to create a ticket email alias.
Website Form: With the website form, customers can go to the website and can submit their ticket.
Live Chat: Through the live chat option, customers can submit their tickets. Customers can use live chat option and the live chat operator to create a ticket.
API: Tickets can be submitted through API connections also.
After that one can publish the team on the website.
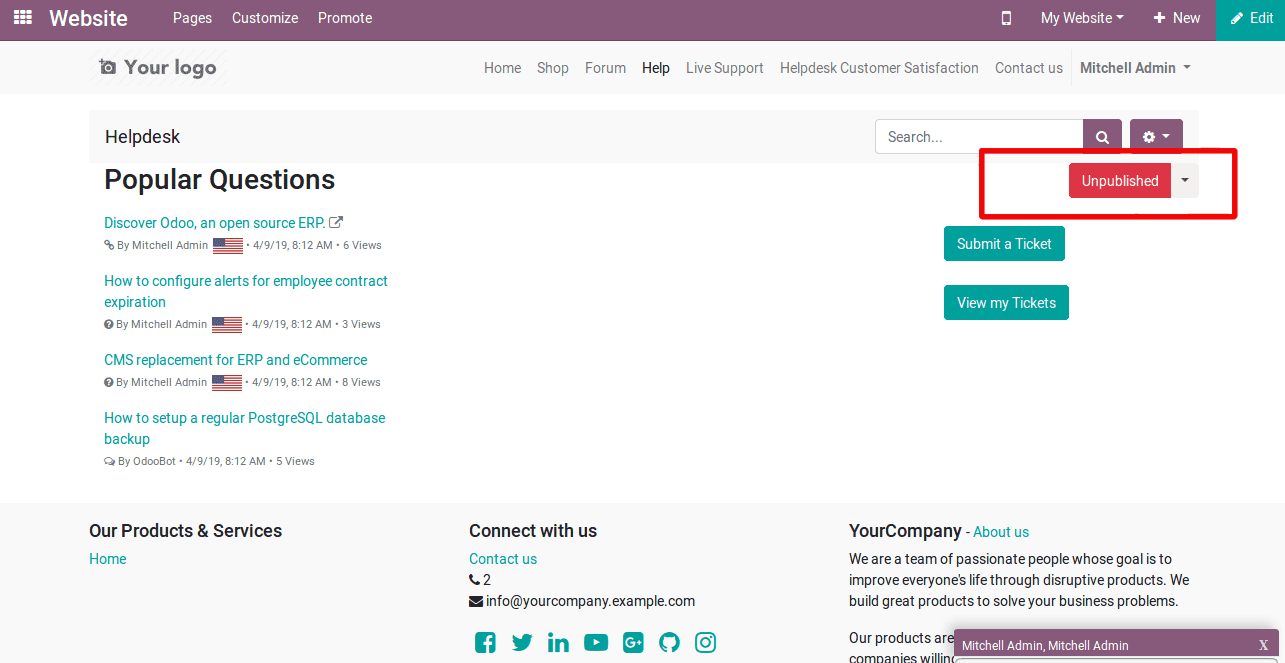
Open the website, go to help, there exists an option - published/unpublished for managing the help desk team on the website.
Help Desk in Customer Portal
The main need for help-desk is customers/ clients. Odoo provides a link in the customer portal for accessing the help desk (as shown below).
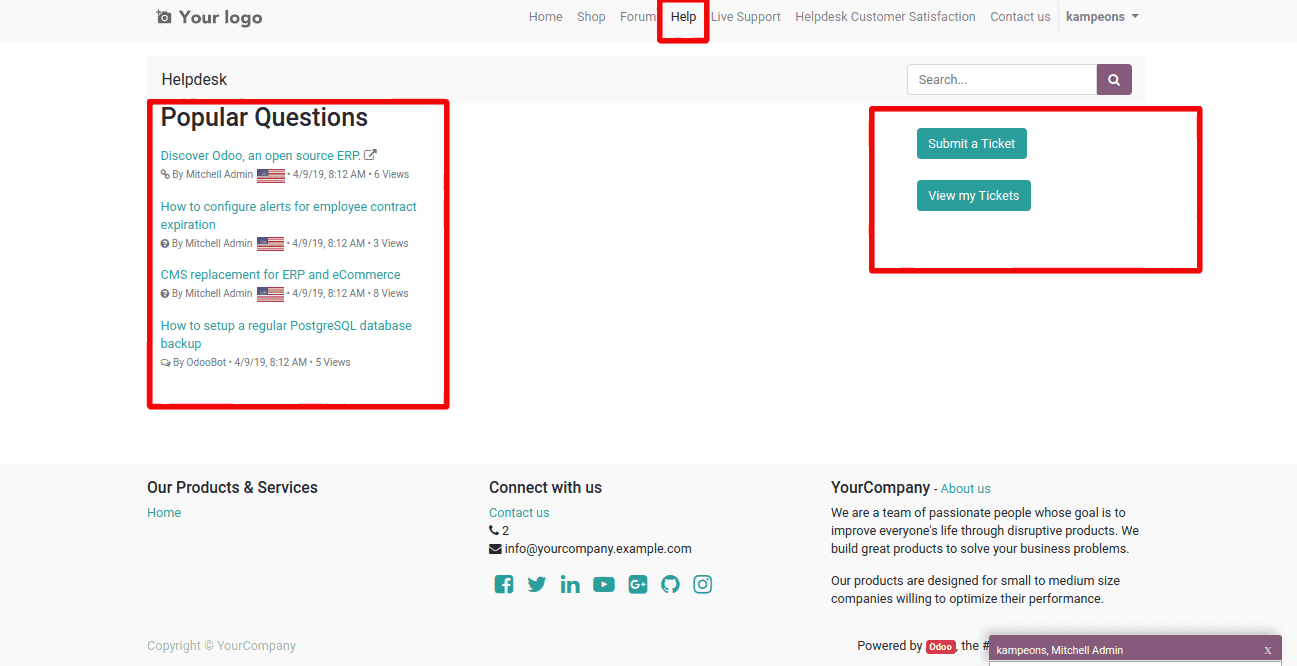
Here one can see the option to submit their tickets, view all tickets and popular questions.
Submit a ticket:
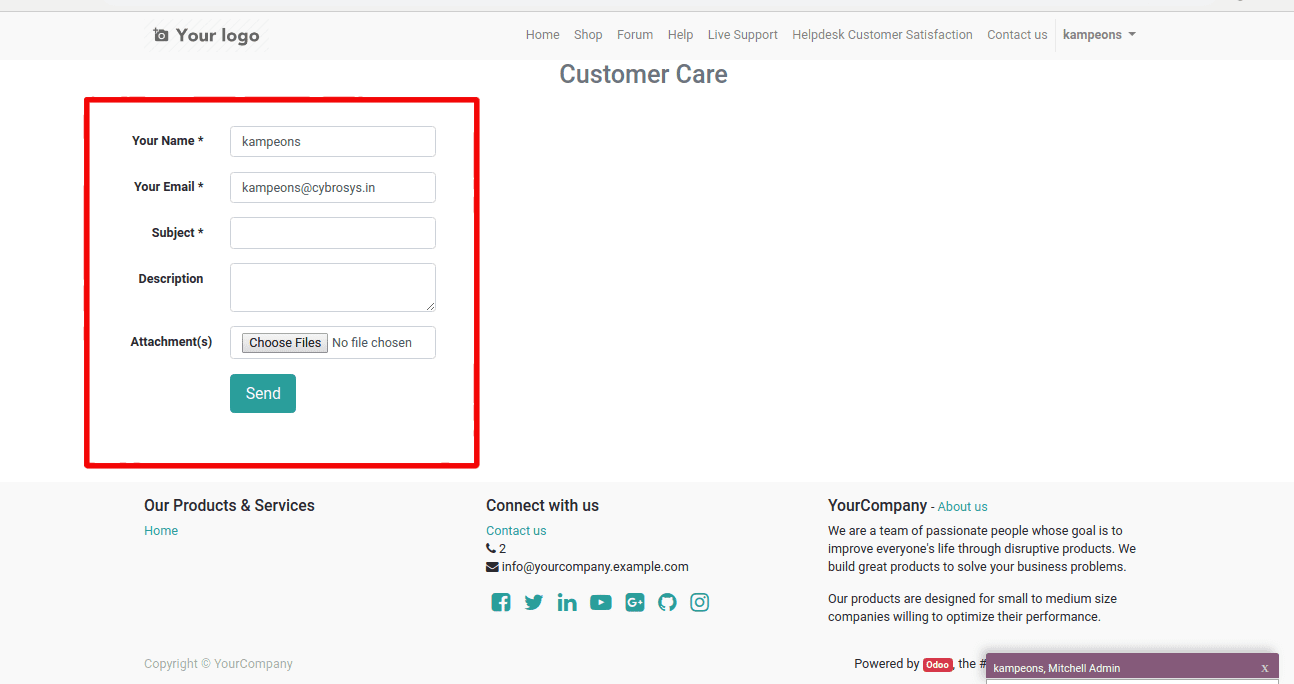
Here there is a form for submitting a ticket, one can fill customer details subject, description of bugs and attachments for uploading files.
View tickets:
Here, one can see all tickets and its status. If you need more details of the ticket, Click each ticket.
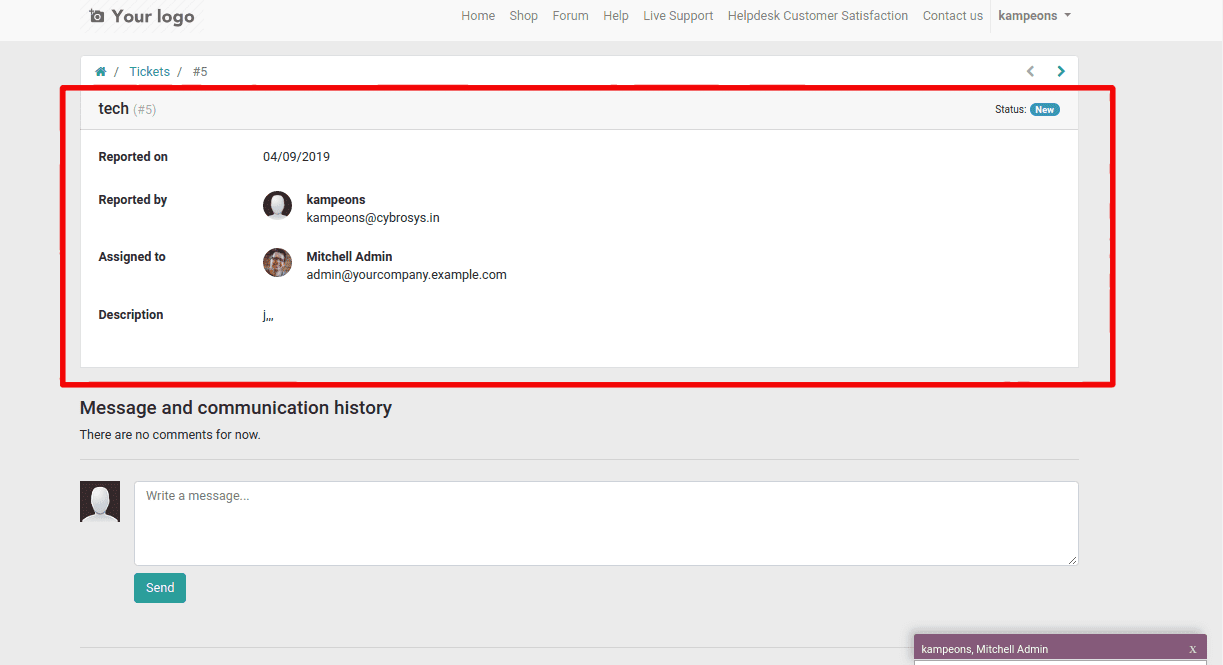
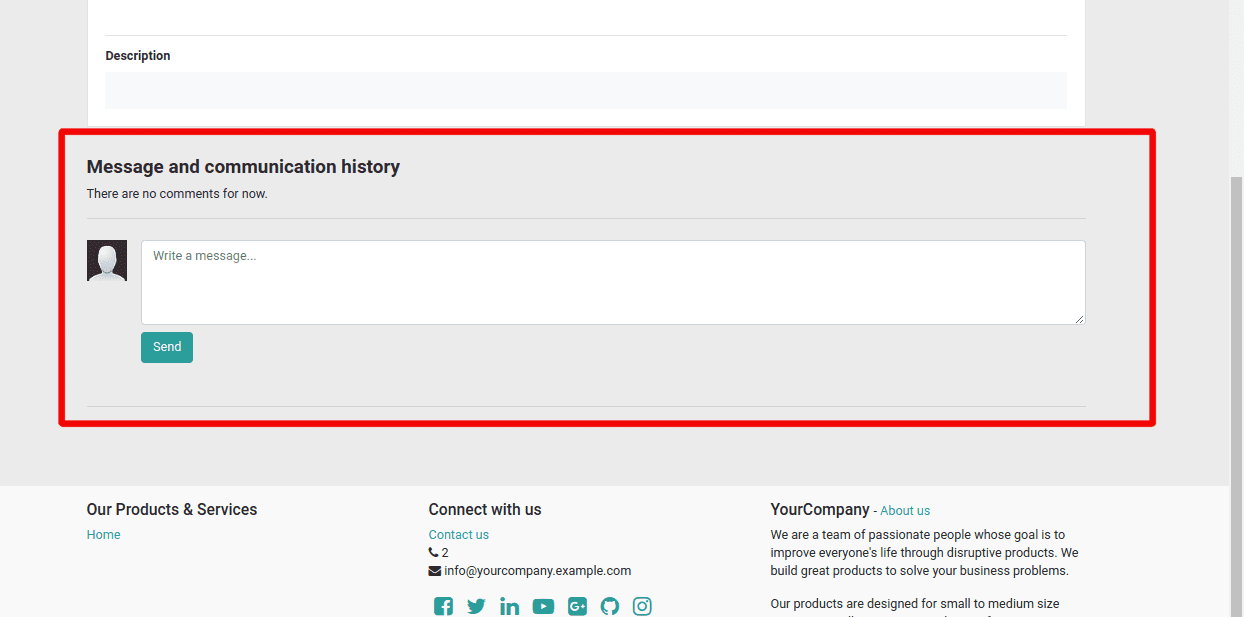
Here, one can see all the details of the ticket such as the name of the employee assigned, description and status of the ticket. One also gets a window, at the bottom of the page to communicate with employees.
Timesheet
The timesheet is an important feature in Odoo, which is closely associated with project management, it helps to track the working time of employees on each product and thereby assign the project to employees. One can easily input and manage activities, get useful statistics and we have the offline tracking mode here.
The timesheet shows complete details of a project such as how many employees are working on the project and how many hours are spent on the project etc. Employees can add timesheet but admin/manager should approve the timesheet lines of every employee.
Timesheet and Project details in the customer side
The customer portal is the portal of all details related to the entire client such as quotation, sales order, invoices, bills, project, and its progress. All project and its complete details are made available in this portal such as details of the employees worked on the project, timesheet etc. Timesheet shows how much time an employee worked over a project.
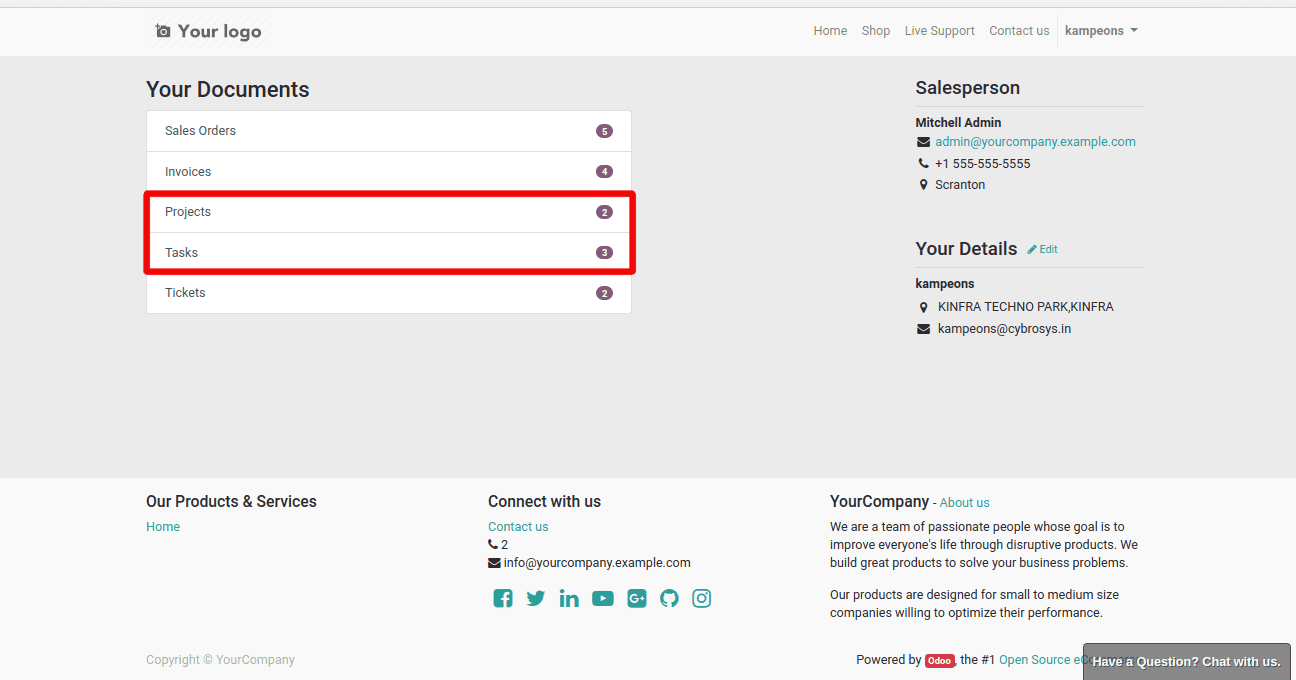
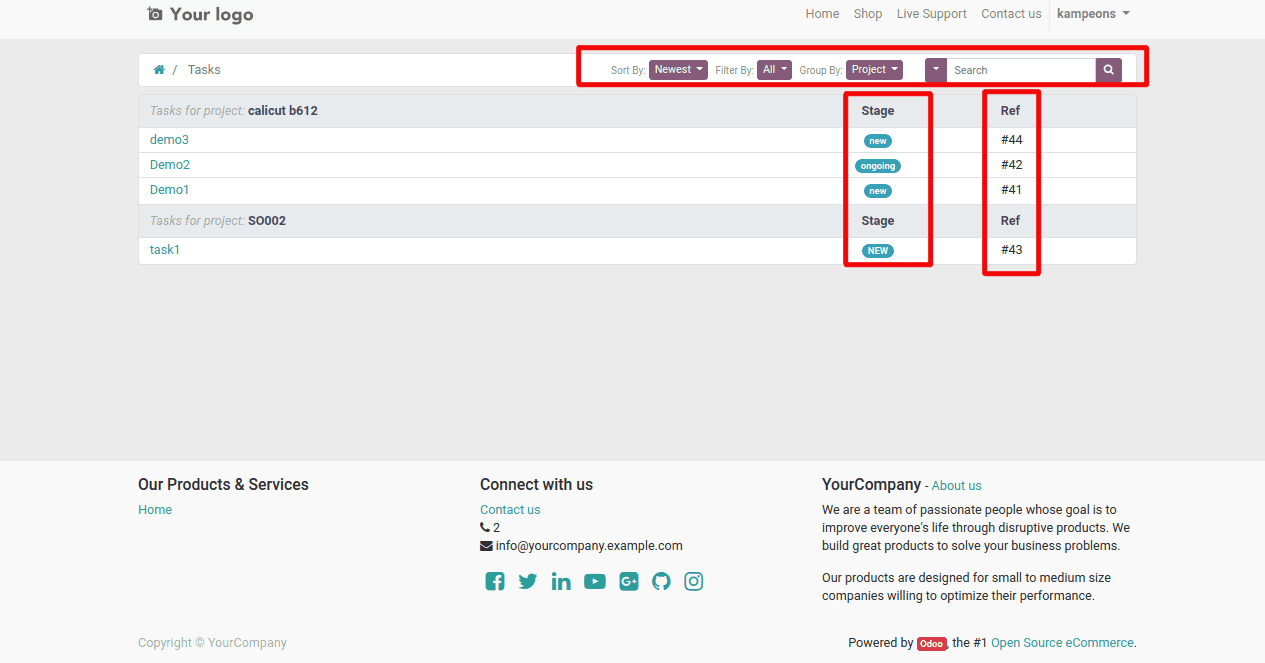
Here, one can see the number - Projects and task. All you need to do is open the link to show all tasks and its current stage, reference number. Also, there comes several options for sorting, grouping and filtering the given list.
One can open any of the tasks to see their complete details. ( As shown below)
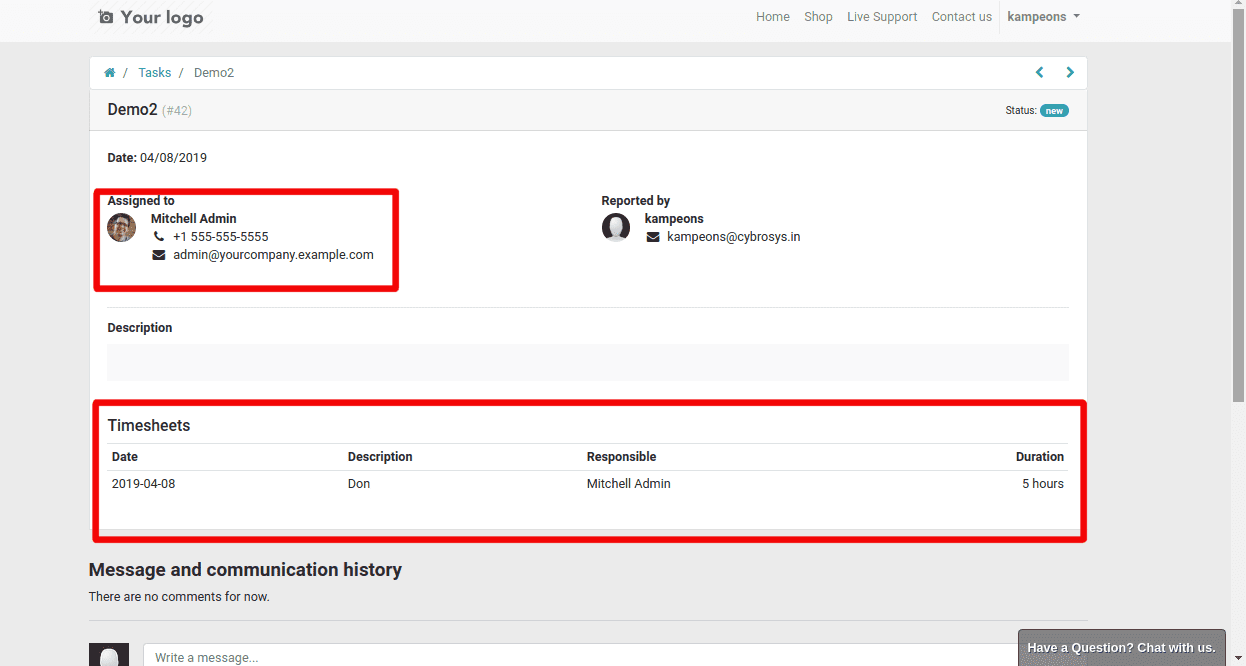
Here, one can see the name and contact of the employee, working on the project and also their time sheet. Timesheet shows the date on which the employee worked on the project and the duration spent by an employee on the project. Remark shows the most important details of the project and the top right of the page shows the current status of the project.
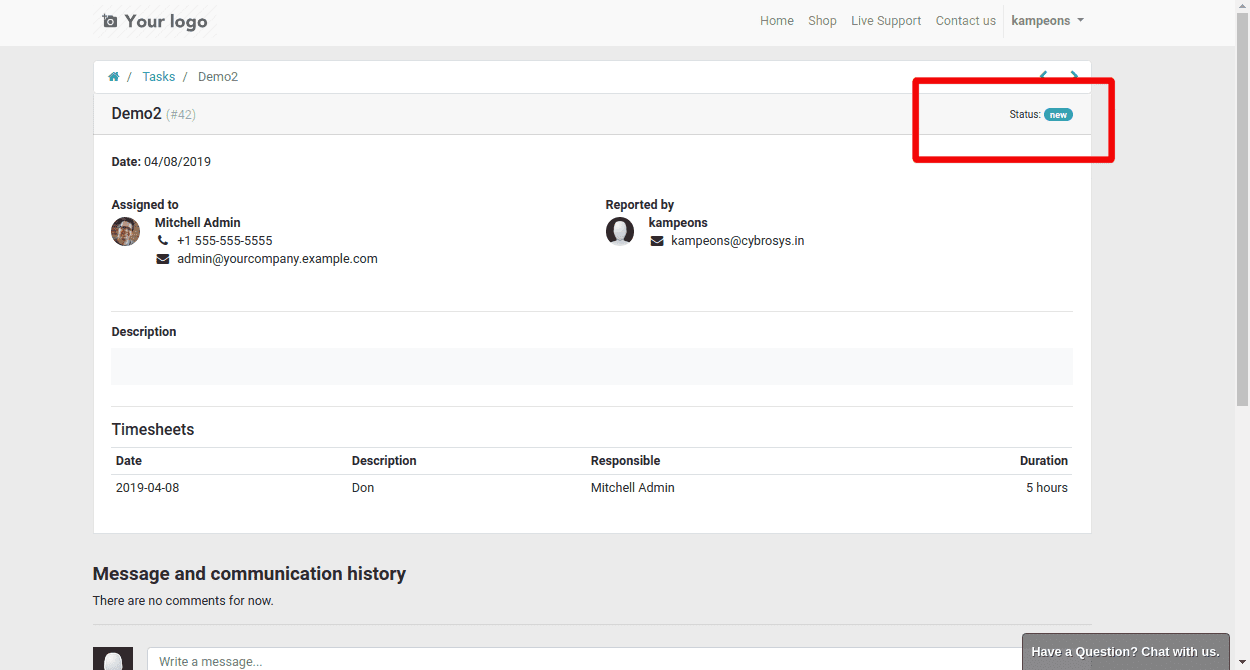
There exists a window in the bottom of the page for communicating with the employee via messages (As shown below).
Timesheet and project details from company side
At the time of project creation, one can see a checkbox option for allowing or disallowing the time sheet.
Under every task, Odoo enables the option to add timesheet for the task. One has to mark the planned hours, spent time on the task, name of the employee, work description and progress of the project in percentage.
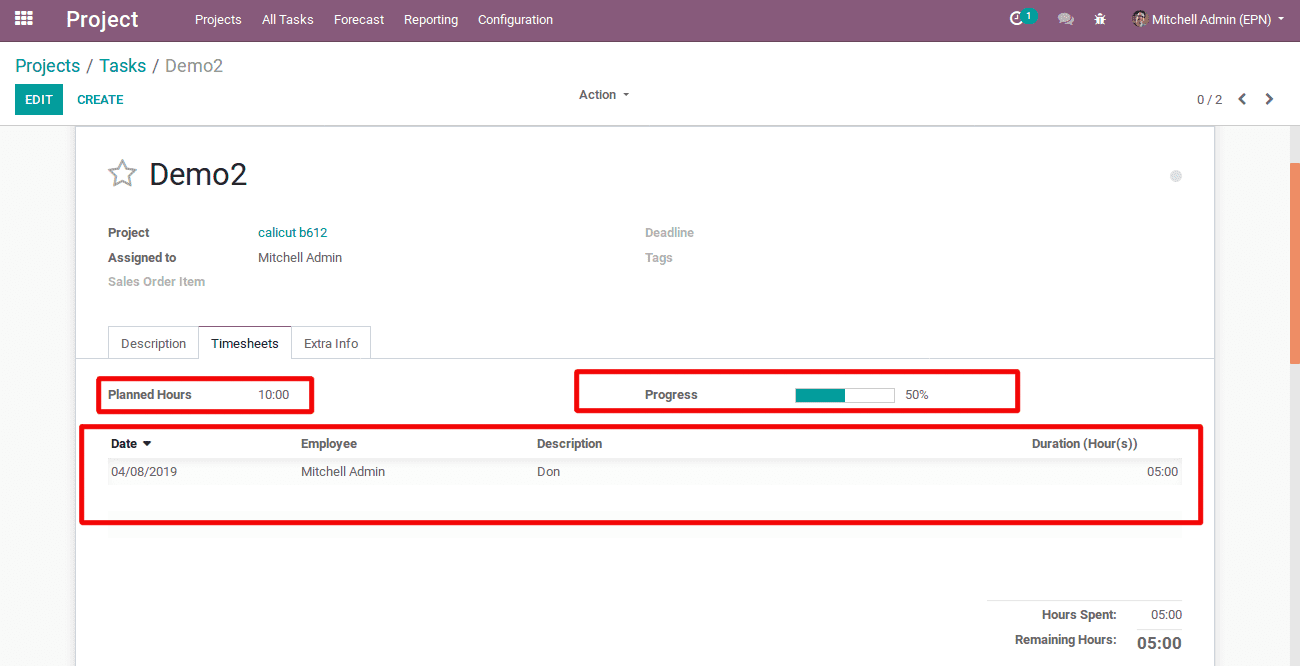
Any updates on the page will be shown in the customer portal. The added time sheets over every task are made visible under the timesheet module.
Timesheet -> All Timesheet.