The management of commercial vehicles for the advantage of a firm or a business is determined as Fleet Management. All vehicle operations came under this category, including crew management, repair, and maintenance works. Odoo Fleet Management module brings profit for an organization and removes the worries about Fleet operations. The allocation, tracking, registration process, repairs, services, and statuses cover in the Odoo Fleet Management module. Each minute description of a vehicle provides through the Odoo dashboard is helpful for users. It also links with other modules of Odoo like Project, Accounting, Expense, and Website.
This blog assists you in understanding Contracts and Services in Odoo 15 Fleet Management.
Odoo 15 Fleet Management
All areas of Fleet management covers through advanced options in the Odoo ERP system. The fuel consumption, driver details, records, status, odometer values, and data of a vehicle keeps in Odoo 15 Fleet Management. It is necessary to install the module from Odoo Apps to access the Fleet Management module. After that, click on the Fleet module in the Odoo dashboard.
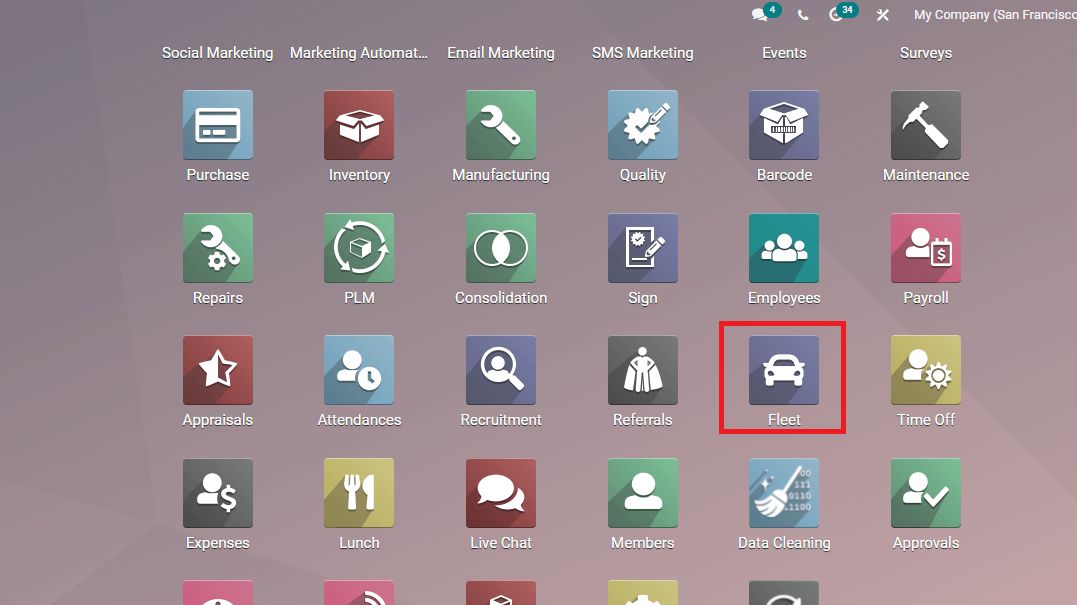
The home dashboard is available after clicking on Fleet Module. The main dashboard shows different stages of the vehicle depicted in the screenshot below.
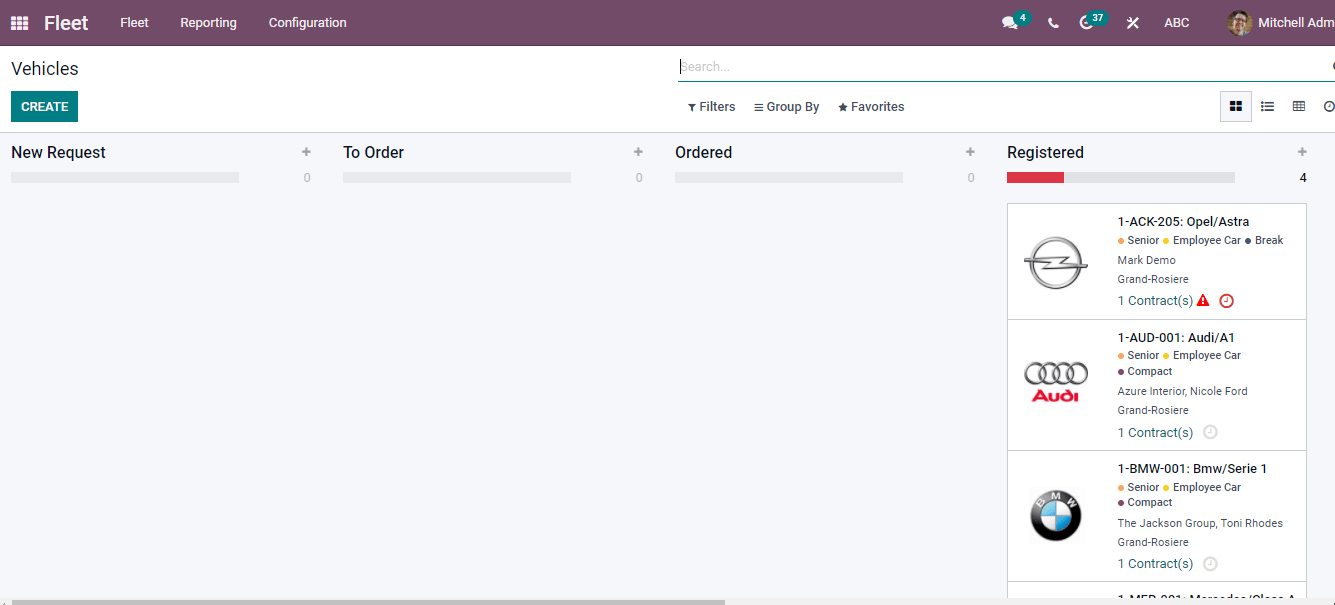
The stages are Registered, Ordered, To Order, Reserve, New Request, Waiting list, and Downgraded. A piece of complete information about the vehicle is visible here, and you can add more stages using the Add a Column button. The window is viewable in Kanban, Pivot, List forms, and Create icon enables developing a new vehicle model. You can add a new title by clicking on the + icon near each stage.
Contracts
The Fleet tab of the Odoo Fleet Management dashboard contains the Contracts menu. In the Contracts window, you can see the Contract Name, Driver, Start Date, Vendor, Status, Expiration Date, and vehicle details. It is feasible to add a new Contract list by clicking on Add Custom Field.
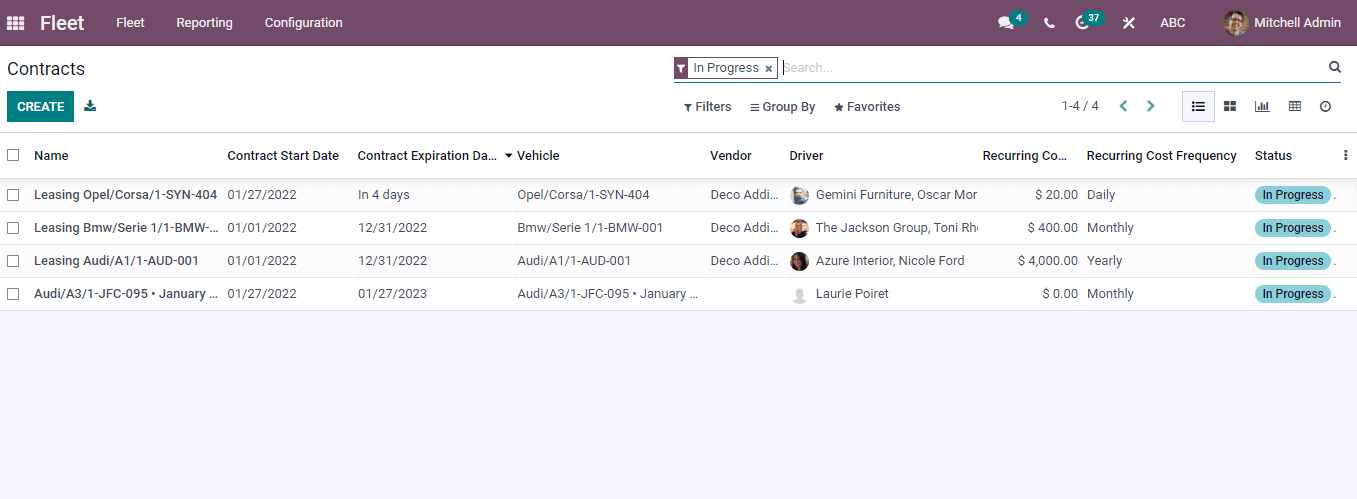
The detailed view is visible by selecting a particular title Name and contracts window describes vast details about a specific one displayed in the screenshot below.
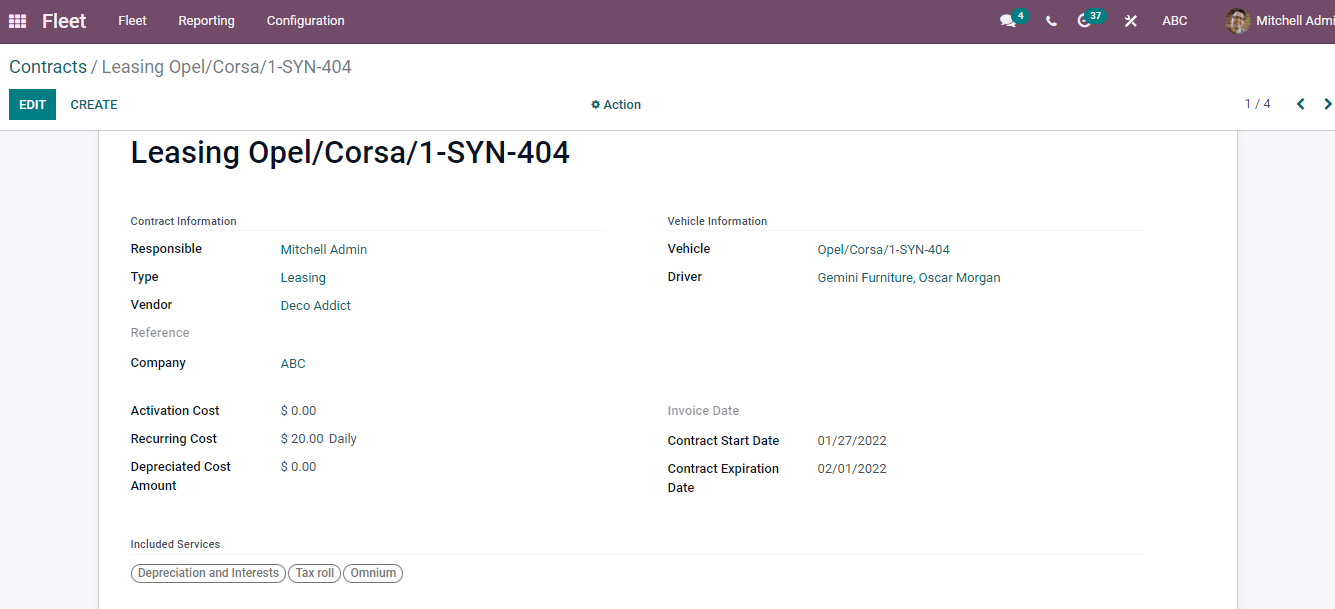
We can see the options like Contract information, Vehicle information, Invoice Date, and Included Services. The Responsible person, Activation Cost, Depreciated amount, Type, Company name, and Vendor covered in Contact Information. Name of Driver and Vehicle states in Vehicle Information section. In addition, the Start Date and Expiration Date of Contract rely on the Invoice Date option. The Tax roll, Interests, and Depreciation depict in Included Services. You can make changes in Contract by clicking on the Edit button, and stages of a vehicle are also visible on this page.
To Create a New Contract
The Create icon helps create a new Contract, evident in the Contracts window. A new Contracts window opens by clicking on Create button shown in the screenshot below.
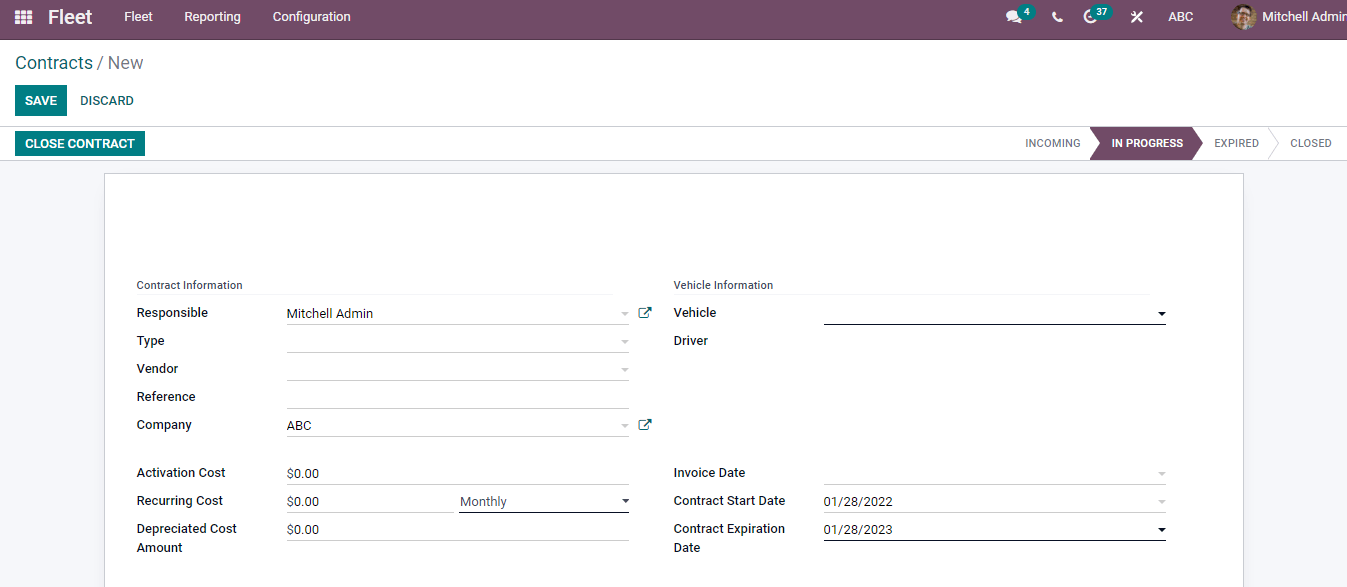
In the Contact information, you can add the name of the Responsible Person, Company, Vendor, Recurring Cost in Monthly/Weekly/Yearly, Vehicle type, and Activation/Depreciation Cost. We can specify the name of the Vehicle and Driver inside the Vehicle information and add the Expiration, Invoice, and Start date of the Contract. At the end of the window, you can tag the available services provided to the vehicle and describe terms/conditions relates to the Contract. After entering the necessary details, press the Save button to store your Contract information and the name of created ContractContract visible in the main window. The Close Contract icon assists in finishing the entire details of the Contract.
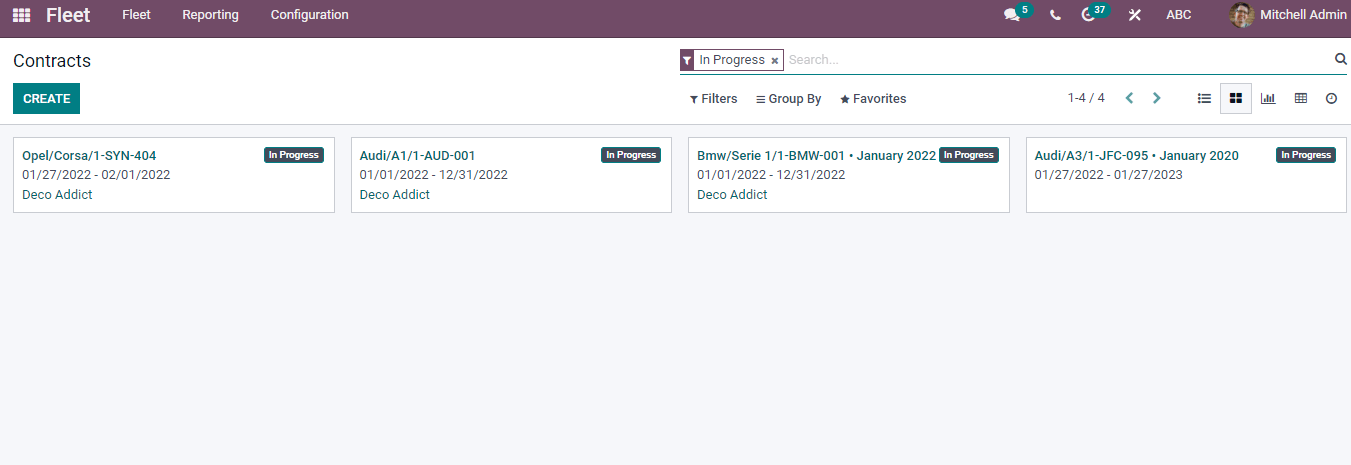
The Kanban view provides Contract details of existing vehicles. You can see the start/end date of the contract and whether it is in Progress, Incoming, Closed, or Expired.
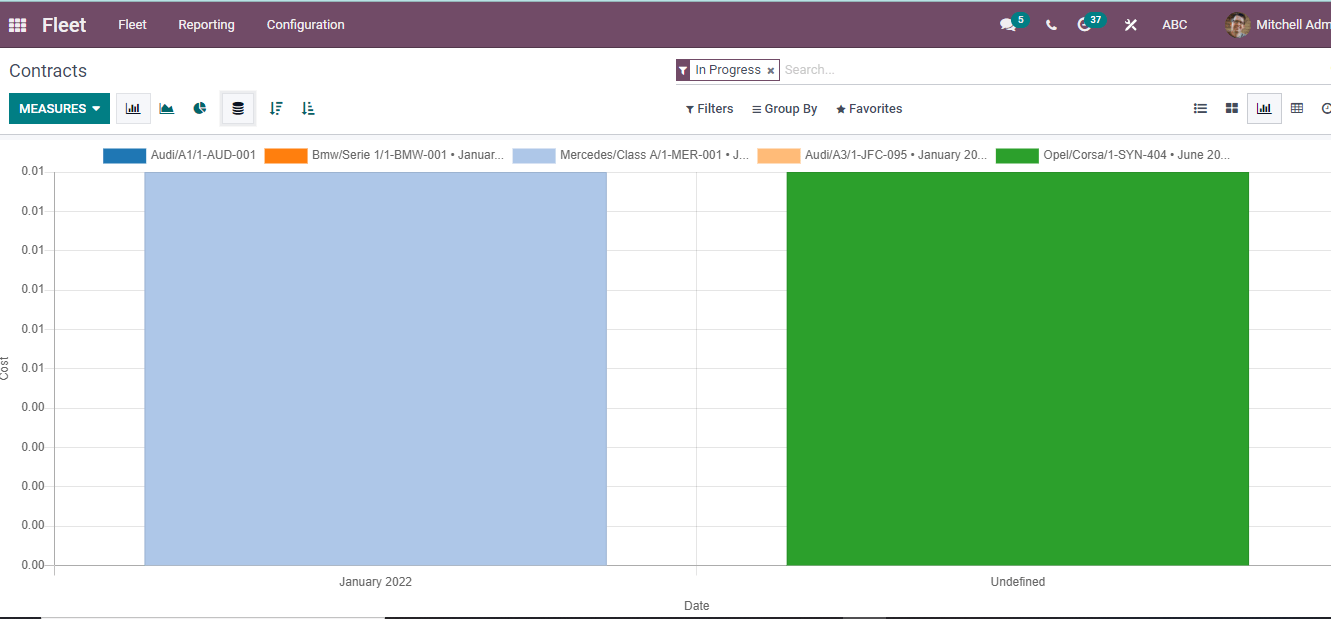
Graph view depicts the Cost of the Vehicle on X-axis and Date on Y-axis. You can view the Graph in Bar, Line, or Pie form and the cost seen by clicking on a particular color of each vehicle. The Contracts of each automobile are present in solid colors on the Graphical view.
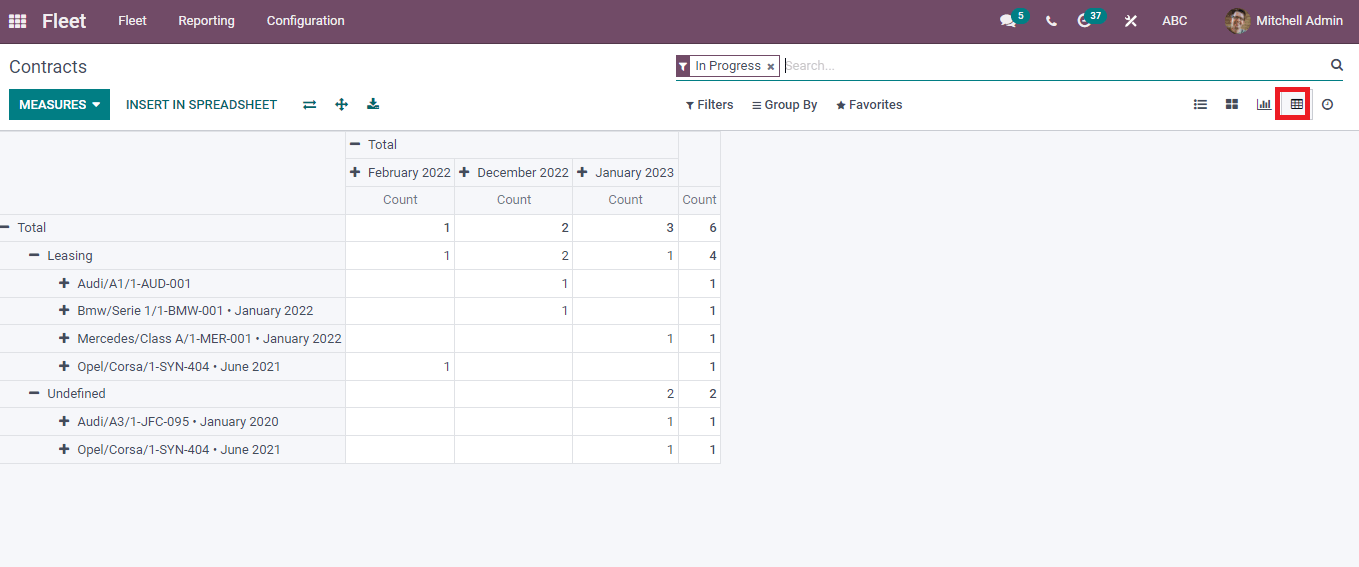
The Pivot view depicts the total Count of each vehicle in a specific year, and you can enable Depreciation Cost, Recurring Cost by clicking on the Measures icon. These changes are viewable in the Pivotical view of the Contract window. Insert in Spreadsheet button assist in adding a New/Untitled/Partner Spreadsheet in the Pivot sheet.
The Activity button helps schedule a new activity relating to the vehicle Contract. We can design an Activity type using Call, Reminder, Email, and meeting. Additionally, you can set a Reminder, Contract revenue date, To Do, Upload document, and request Reconciliation. The Filters option helps to apply Add Custom Filter and know about expired/progressing Contracts.

Services
The Services menu is visible under the Fleet tab of the Odoo Fleet management module. Each Service takes place in the platform visual in this window. You can see the name of Driver, Vehicle, Vendor, Date, Cost, processing Stage, and Service type in the List view of a window.

By clicking on the title of a particular Service, you can see detailed information about vehicles shown in the screenshot below.
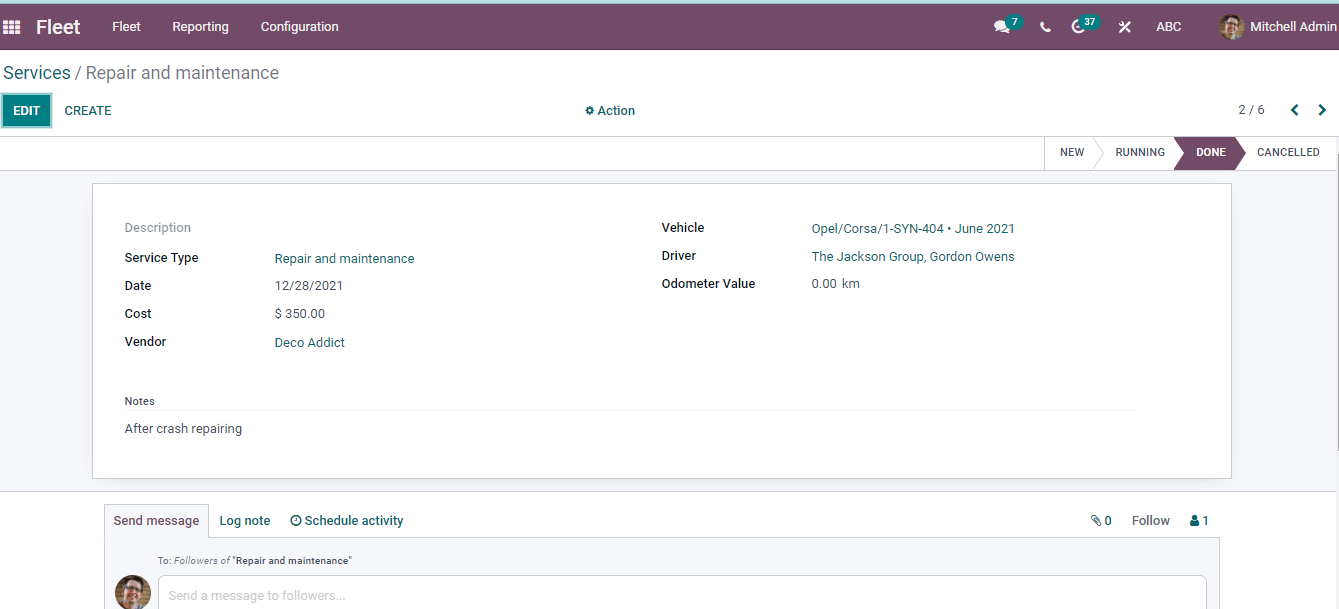
The new window provides Date, Vendor, Cost, Vehicle name, Odometer Value, and Service type. Service progress of a Fleet is also visible like New, Done, Running, and Canceled. You can also Send a message, and Log notes to followers of Service Type.
To Create a New Service
In the Services window, the Create icon designs a new Service. A new Service window opens after clicking on Create button, depicted in the screenshot below.
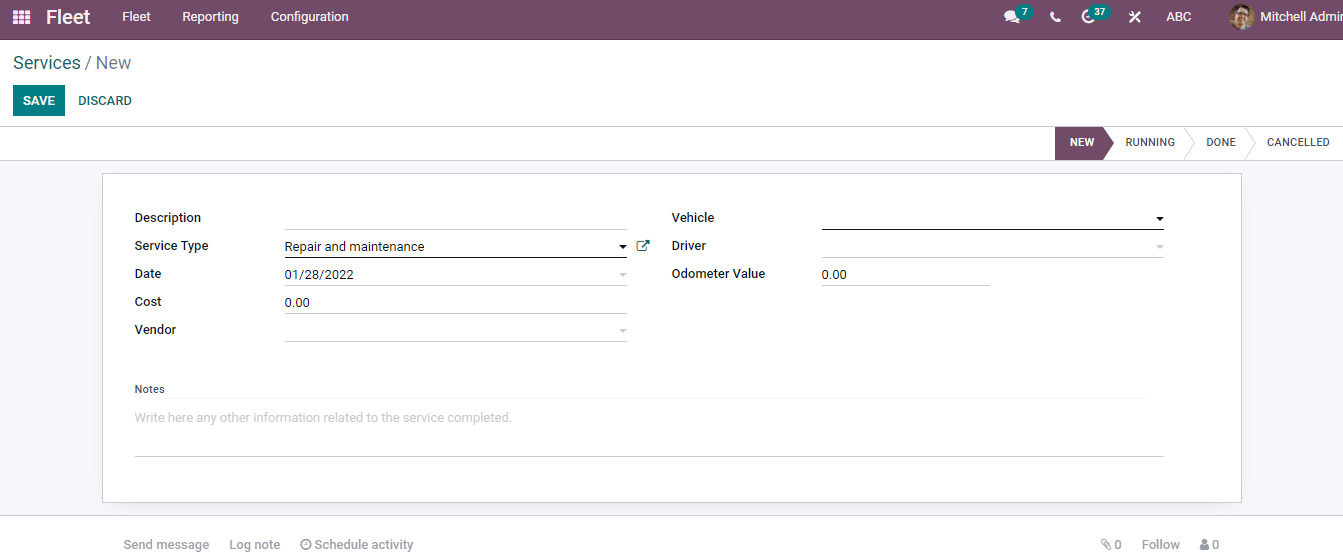
You can enter Description, Vehicle, Service type, Cost, Deliver, and Vendor details. Apart from these, the Notes section allows users to add additional information about the Service. Press on the save button after entering all details about vehicle Service. The newly created Service is visible in the Services window of the Odoo Fleet dashboard.
The record of created Services in a respective stage is viewable in the Kanban View of the window. Stages are classified into New, Done, Cancelled, and Running shows in the image below.
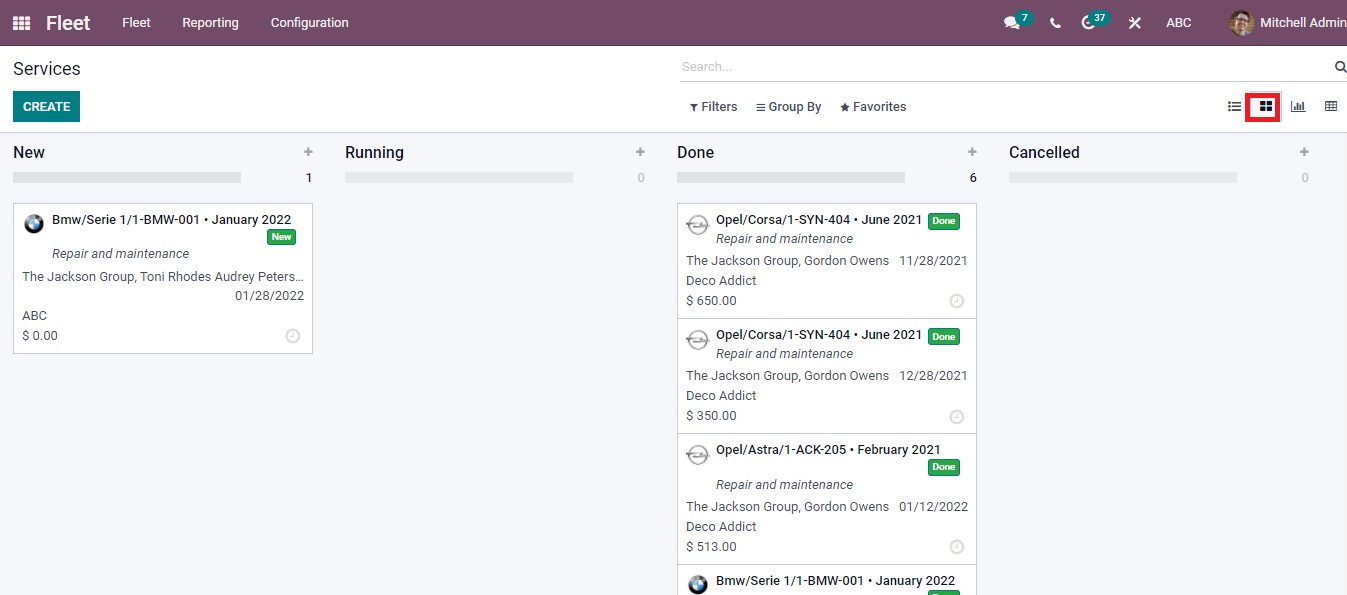
You can produce a new Service by clicking on + icon near to Stage title. Click on Add button after entering the title. Thus, a new service is visible in the Kanban view of the Services window. The cost, service name, and due date are set forth inside each Service title.