In the evolving landscape of digital marketing, email remains a cornerstone strategy for businesses aiming to connect with their audience in a personalized and impactful way. Odoo 17, the latest iteration of the versatile Odoo ERP, brings a plethora of advanced features tailored to elevate email marketing efforts. This comprehensive guide delves into the nuances of leveraging Odoo 17 for a robust email marketing strategy, ensuring your campaigns are not only effective but also seamlessly integrated within your business processes.
Email marketing is far from obsolete; in fact, it's a powerful tool for nurturing leads, retaining customers, and driving conversions. The key to success lies in crafting compelling content, segmenting your audience, and analyzing performance metrics. Odoo 17 enhances these aspects with its intuitive interface and advanced functionalities.
The Odoo Email Marketing app offers robust tools, including drag-and-drop design features, pre-built templates, and interactive elements to craft engaging email campaigns. It also provides detailed reporting metrics to measure the effectiveness of your campaigns.
Getting Started
After installing the application, click the Email Marketing app icon on the main Odoo dashboard to access the Mailings dashboard, which opens in the default list view.

Initially, the search bar shows the "My Mailings" filter, displaying all mailings related to the current user. To see all mailings in the database, click the ? icon next to the filter which will remove the current filter.
Mailings Dashboard Views
The Mailings dashboard offers four distinct view options, accessible via icons in the upper-right corner:
1. List View (default)
2. Kanban View
3. Calendar View
4. Graph View

List View

The List view, represented by the ? icon, displays emails in a tabular format with columns for:
* Date: The date the email was sent.
* Subject: The email's subject.
* Responsible: The user who created or is assigned to the email.
* Sent: The number of times the email has been sent.
* Delivered (%): The percentage of successfully delivered emails.
* Opened (%): The percentage of opened emails.
* Clicked (%): The percentage of emails that have been clicked.
* Replied (%): The percentage of emails that received replies.
* Status: The current status (Draft, In Queue, or Sent).
To customize columns, click the Additional Options icon (two horizontal lines with dots) next to the column titles to access a drop-down menu of additional column options.

Kanban View
The Kanban view, accessed via the inverted bar graph icon, organizes emails into stages:
* Draft: Email is being created.
* In Queue: Email is scheduled for future sending.
* Sending: Email is currently being sent.
* Sent: Email has been sent.

Each email is represented as a card within these stages. Hovering over the upper-right corner of a card reveals a ? icon, which, when clicked, offers options to color-code, delete, or archive the email.

Calendar View
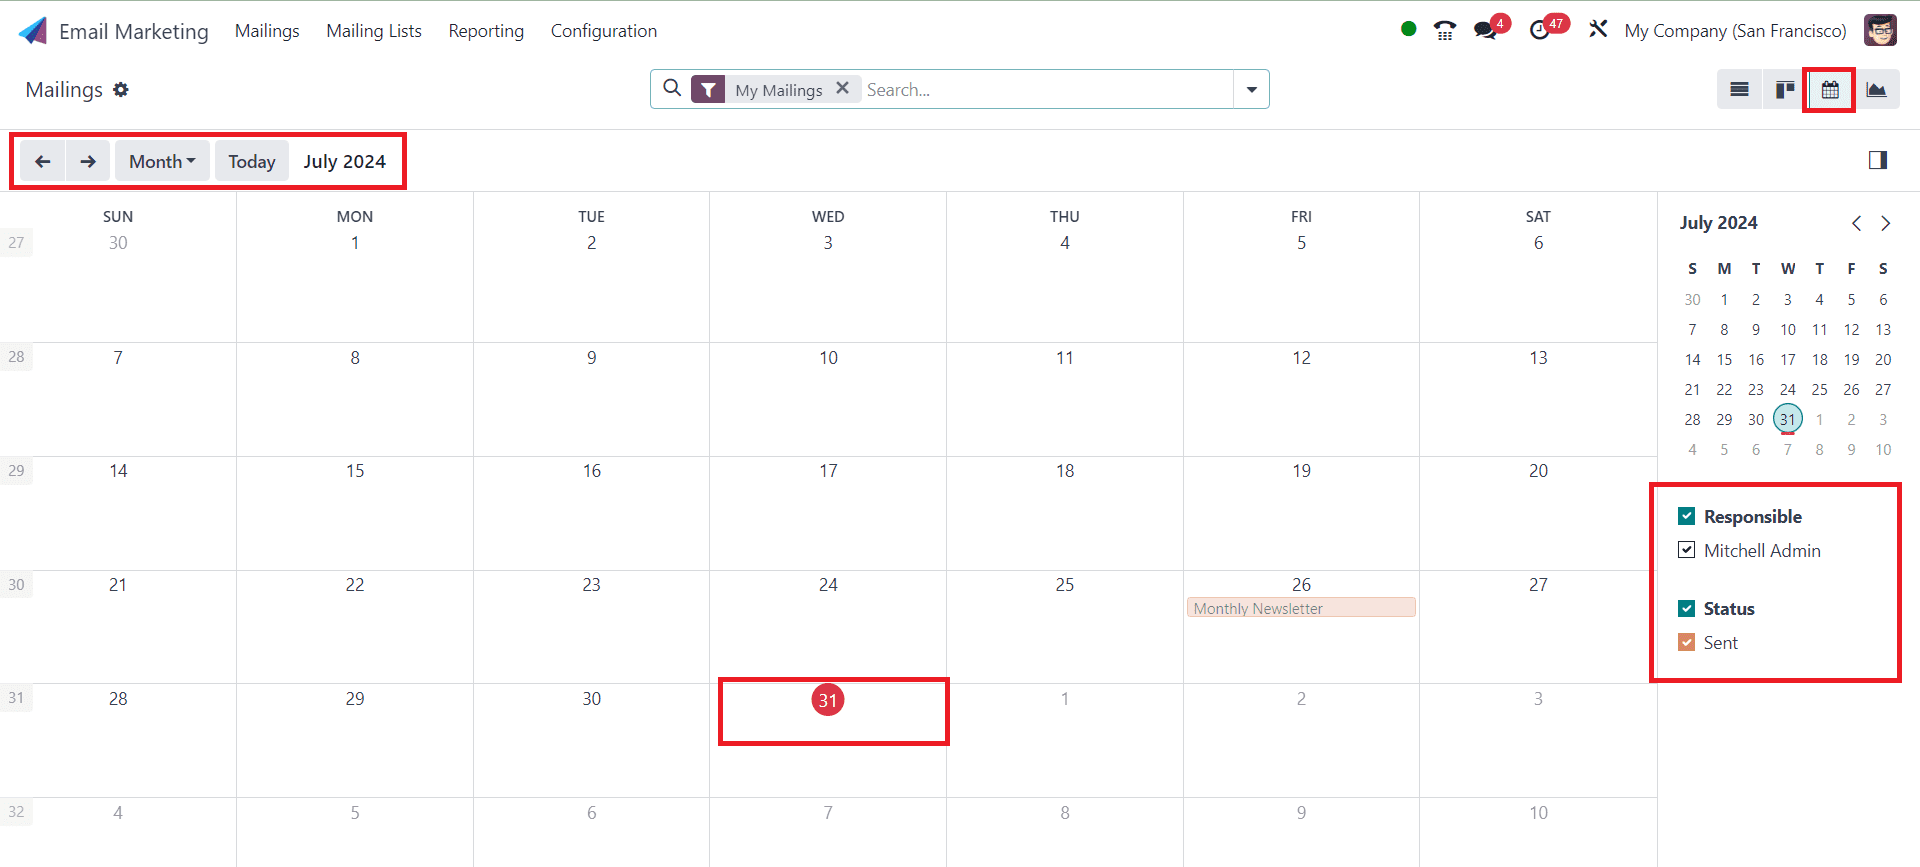
The Calendar view, represented by the ?? icon, displays a monthly calendar showing the dates emails were sent or scheduled to be sent. The current date is highlighted with a ?? icon.

To the right, filter options allow sorting by Responsible and Status. Above the calendar, you can change the displayed time period (Day, Week, Month, Year) and toggle the inclusion of weekends. Use the ?? and ?? icons to navigate through different time periods, and click the Today button to return to the current date.
Graph View
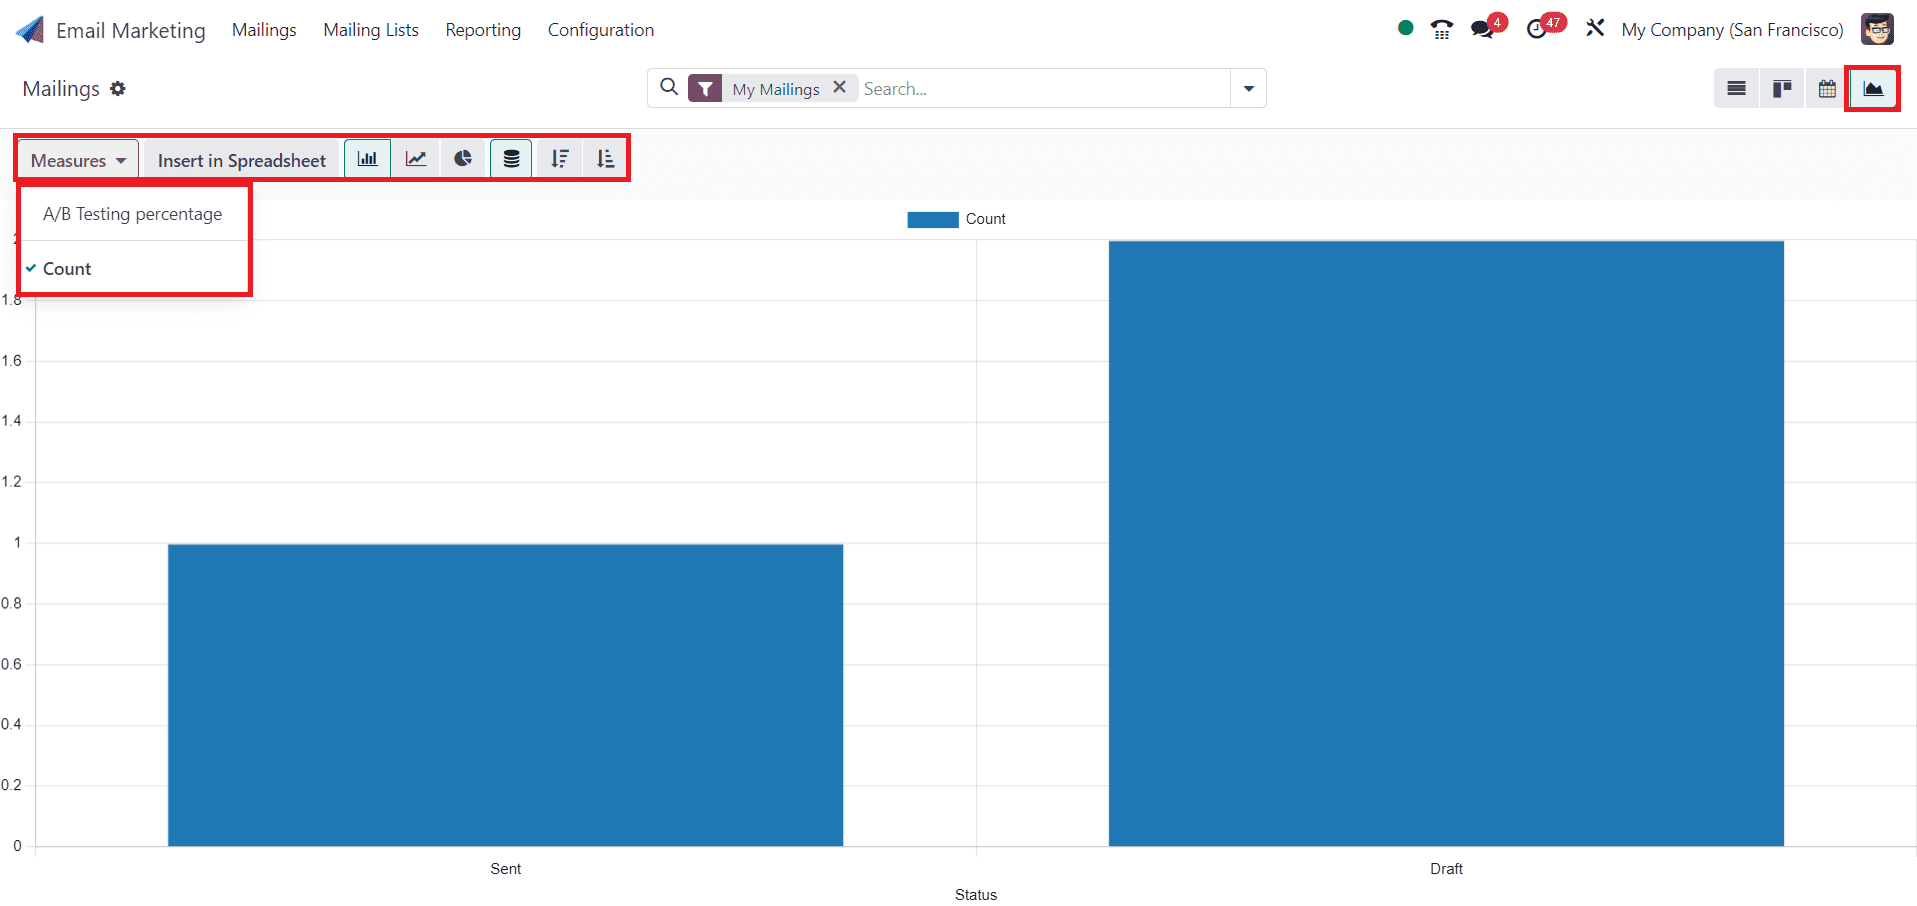
The Graph view, accessed via the line graph icon, visualizes email statuses in a bar graph by default. The Measures drop-down menu, located in the upper-left corner, allows filtering by A/B Testing percentage and Count (default).

To insert the graph into a spreadsheet, click the Insert in Spreadsheet button (available if the Documents application is installed). You can also switch between bar, line, and pie chart views using icons next to the Measures drop-down menu.
Customizing the Dashboard
Regardless of the view, the Filters, Group by, and Favorites options are always available to refine the displayed information. Access these options by clicking the downward arrow icon next to the search bar.

The Filters option includes:
* My Mailings
* Sent Date
* A/B Tests
* A/B Tests to review
* Archived
* Add Custom Filter
The Group By option includes:
* Status
* Sent By
* Sent Period
Selecting Add Custom Filter and Custom Group opens a pop-up window where you can define specific criteria to tailor the displayed results.
The Odoo Email Marketing module is a versatile tool that simplifies creating, managing, and analyzing email campaigns. By utilizing its various views and customization options, you can efficiently handle all aspects of your email marketing strategy.
Email marketing in Odoo 17 combines powerful features with intuitive design, making it an indispensable tool for any business. By harnessing the capabilities of this platform, you can create targeted, personalized, and effective email campaigns that drive engagement and conversions. Stay ahead of the competition by continuously refining your strategies based on analytics and industry best practices, ensuring your email marketing efforts yield substantial returns.
To read more about An Overview of the Odoo 16 Email Marketing Module, refer to our blog An Overview of the Odoo 16 Email Marketing Module.