Surveys play a considerable role in generating more efficiency in business management. Surveys act as direct reports from the customers or the general public on how well your business is doing. An active participation strategy like a survey can lure in more information and data to develop the company or the industry more customer-centered. The process is proven to be highly effective in collecting customer data.
This blog will provide you with a note on creating and managing Surveys with the Odoo 15 Survey module.
Traditionally, Survey management is one of the most difficult to operate functions of any business. Getting the most accurate data is necessary for more accurate data management. The Odoo 15 survey module is the best solution for efficient survey management. The dedicated Survey module of Odoo is designed and filled with advanced features and tools to manage survey procedures quickly and efficiently.
Initial configuration
The initial survey configuration with the modules is easy and convenient. The image given below shows the dashboard of the Survey module.
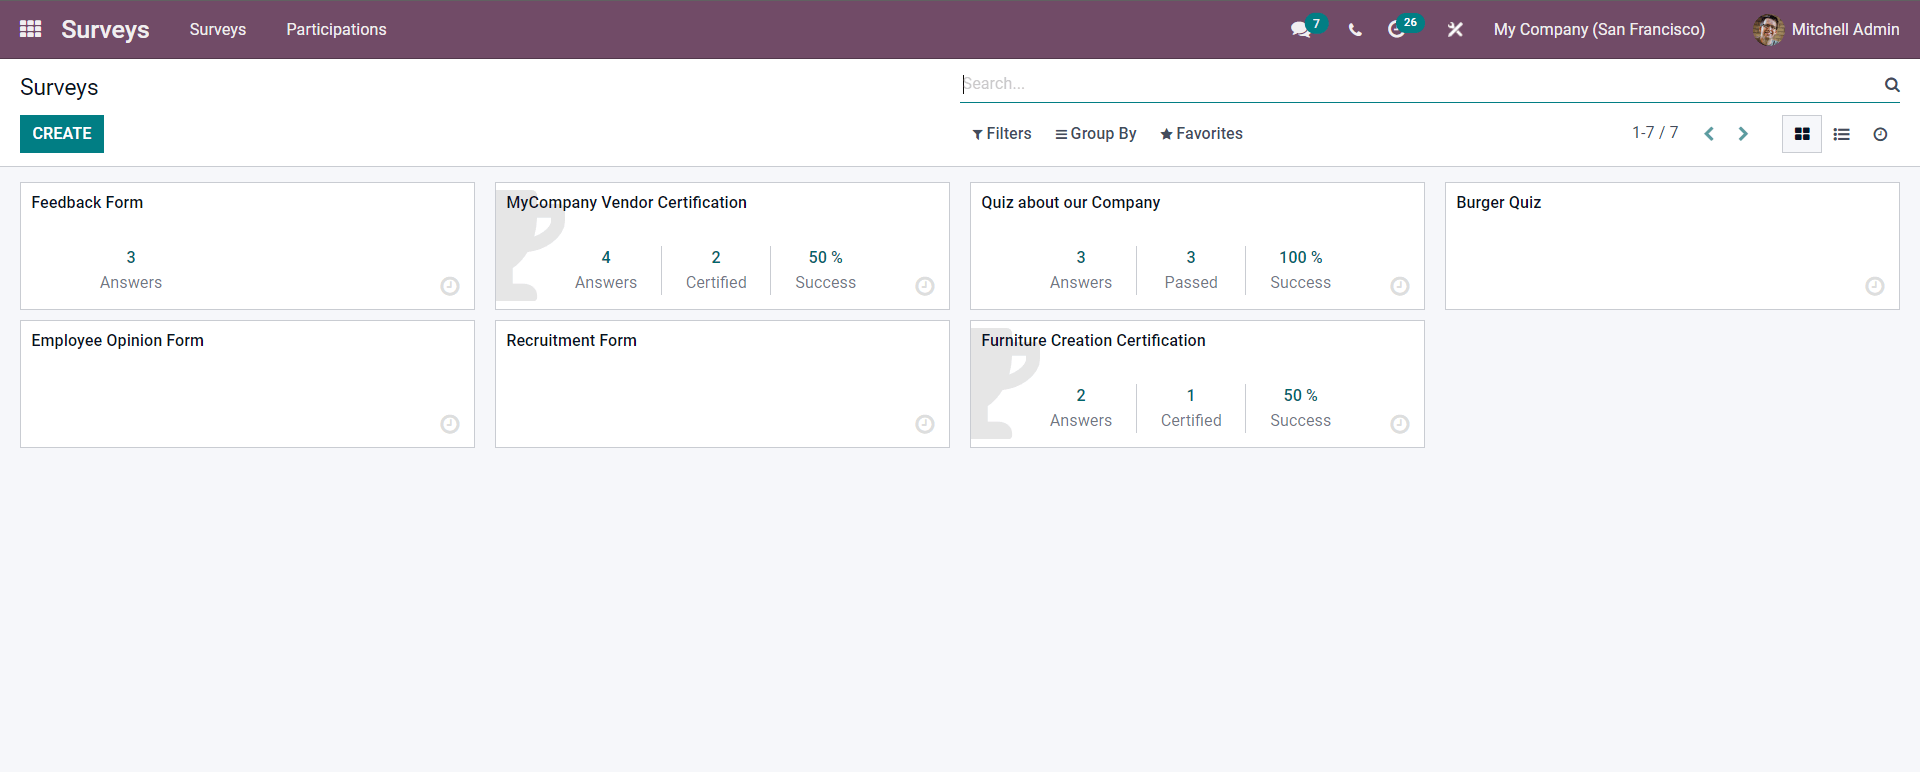
The survey dashboard will display all ongoing surveys under your business, as shown above. Click on any of the surveys to view and manage them. The survey dashboard allows you to manage the ongoing surveys easily. The section will allow you to multiple surveys easily and has active and up-to-date info on the survey procedures. With the survey module, you can instantly create a Survey from the module's dashboard. The CREATE button can let you create a new Survey. A configuration page, as shown below, will open for Creating the new survey.
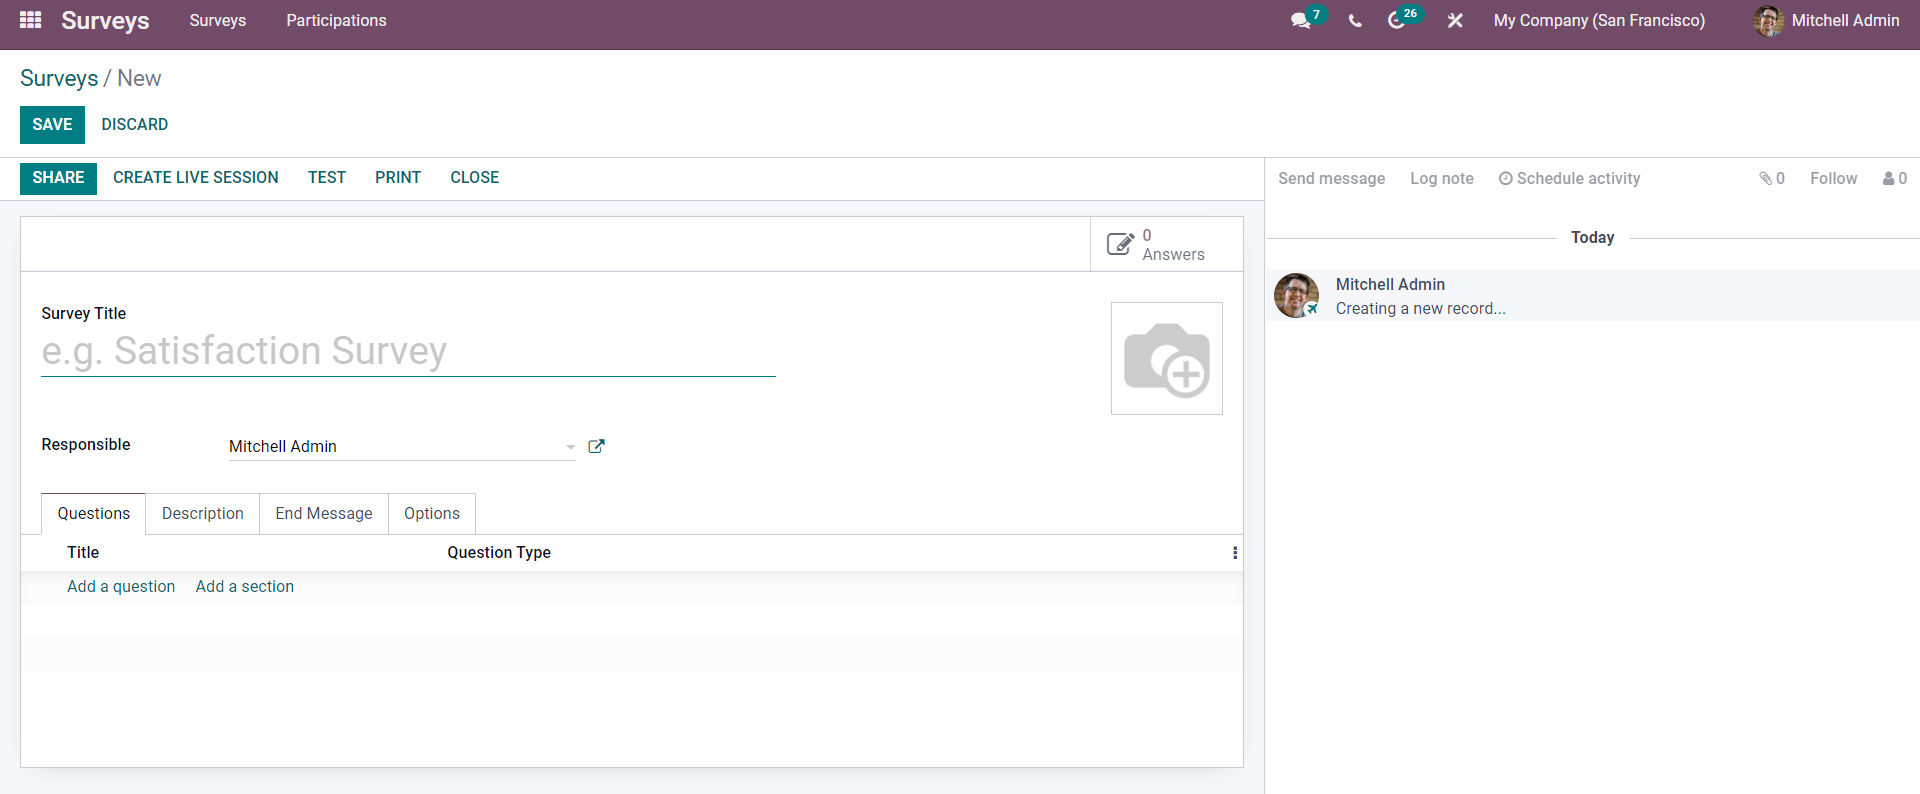
The survey configuration page is easy to use. Give the title of the Survey, and this is the initial step of the survey configuration process. Giving titles to the Surveys enables it easy to manage them and identify them from multiple surveys. An individual can be appointed as the responsible for the Survey from the Responsible section. The person responsible for managing the Survey has to manage the survey procedures. You can nominate any capable hand from your organisation to manage the surveys.
Under the questions section, you can add the questions for the Survey. To add the question, click on the Add a question button, and a tab to type in the query will open up, as shown below.
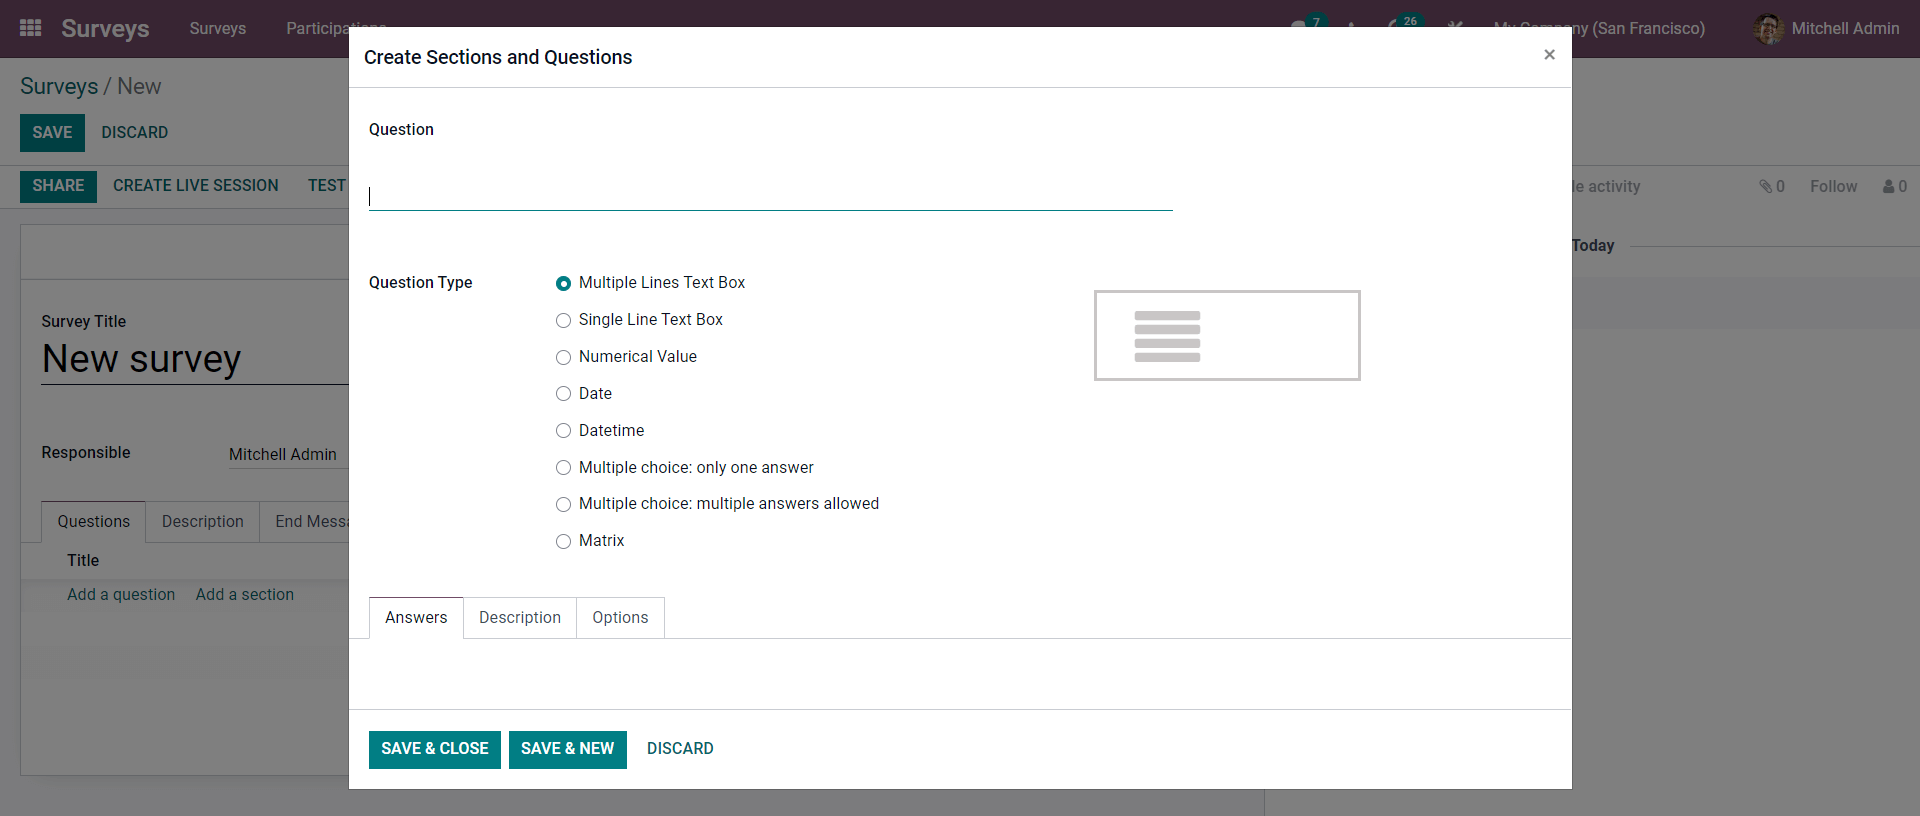
You can fill in the question in the Question field and choose the type from the question type. There are multiple question types that you can opt from. Each question type represents the various question themes for the surveys. You can choose from the options, and the question will be structured according to your preferred type. Under the question section, you can add a description to the question to give more information or what you are expecting from the Question. After adding the description, click on the Options tab to have more advanced options on the questions, as shown below.
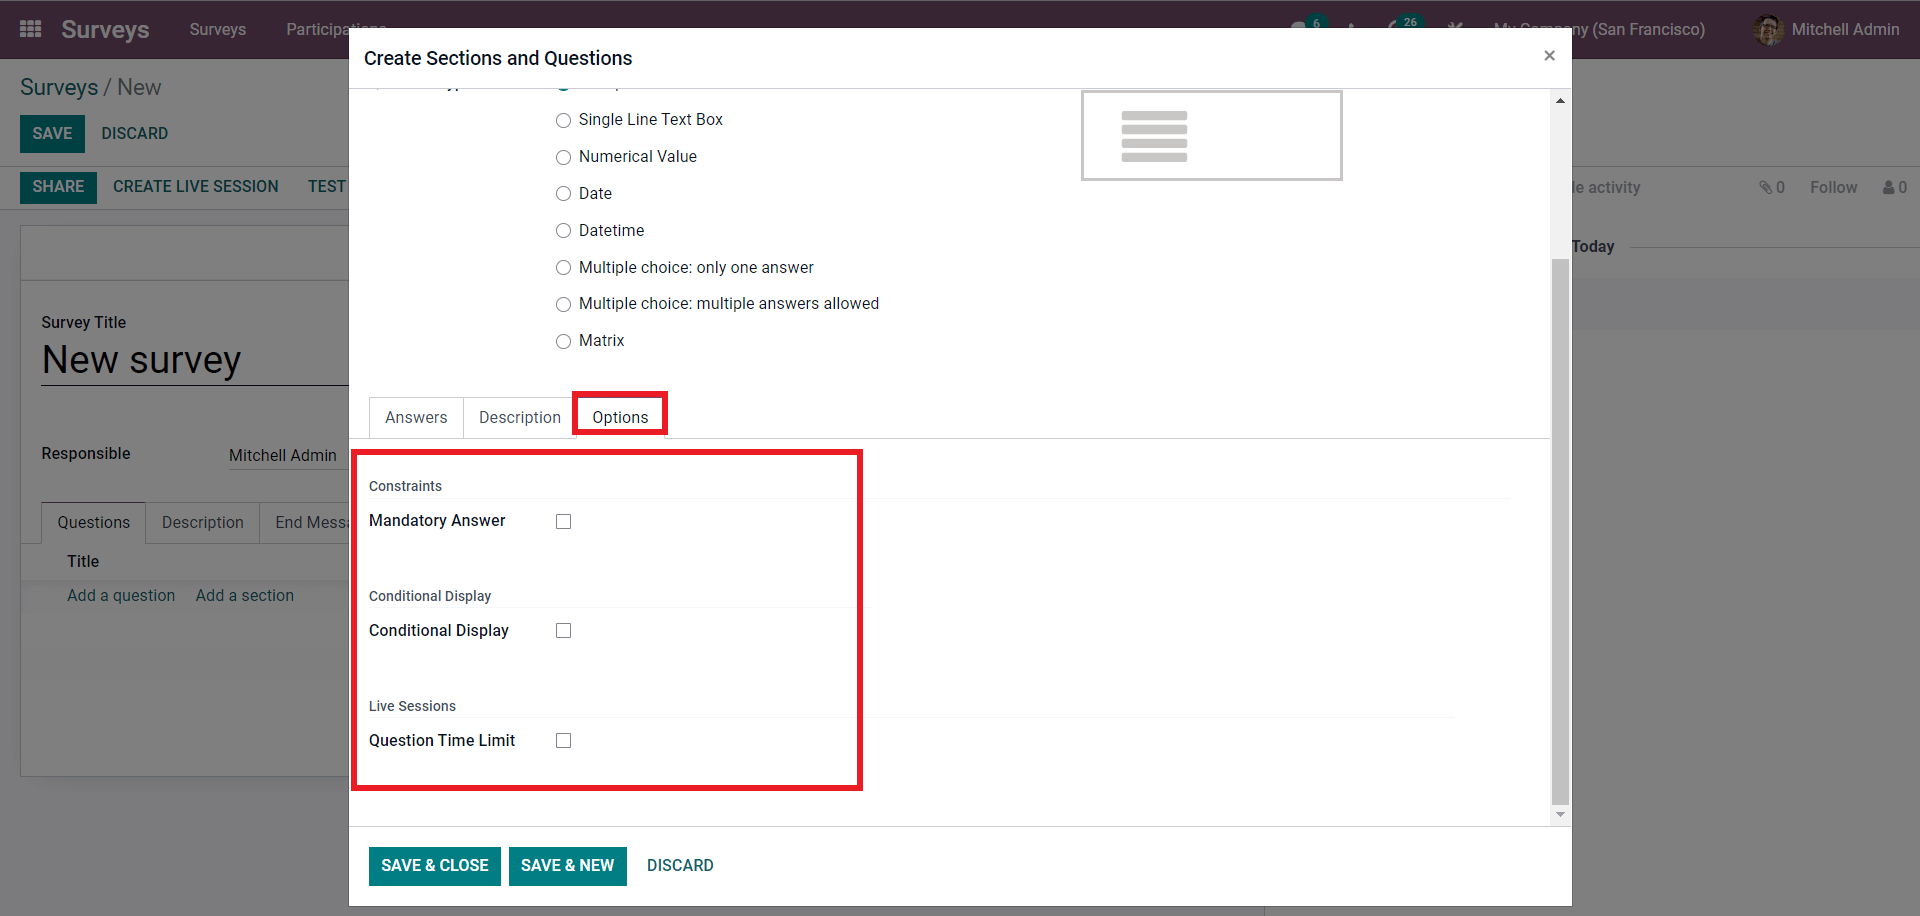
The advanced options include Mandatory Answer, Conditional display, and Question time limit. You can choose whether to set the question as mandatory to answer or not. If you click on the checkbox next to the Mandatory answer to activate the functionality. After activating the feature a file will open up to type in the error message that will popup every time the mandatory answer to the question is skipped as shown below.
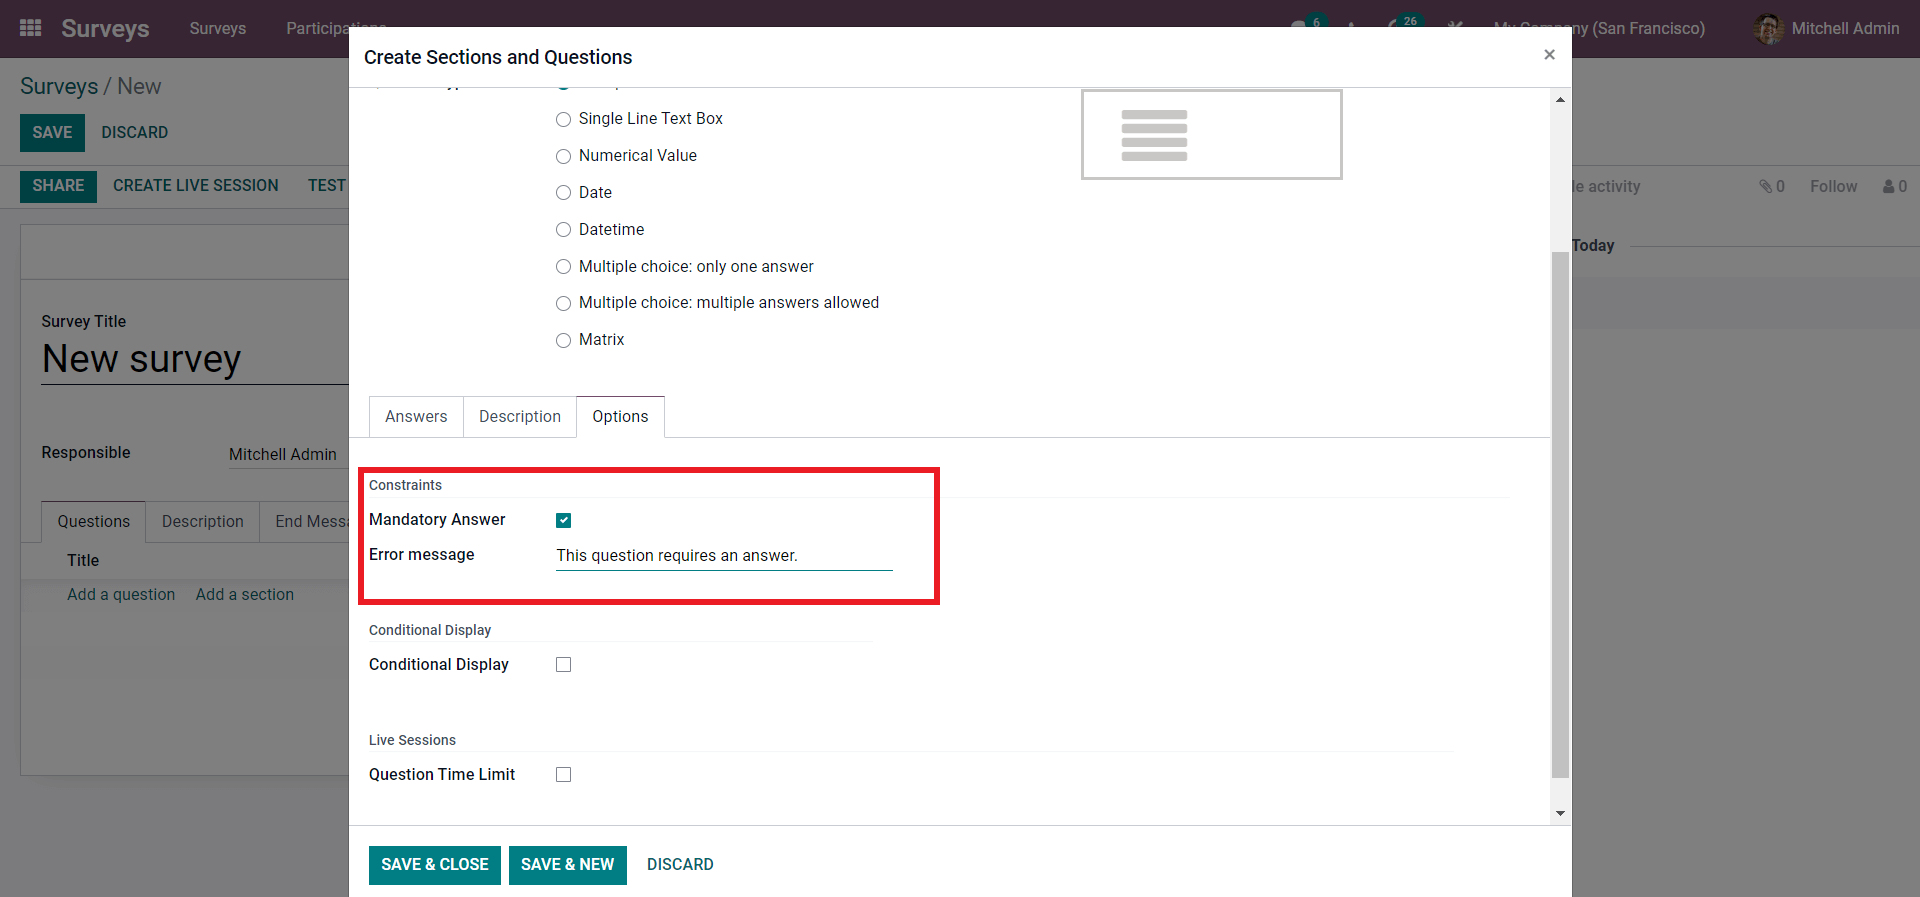
You can type in the error message to pop up every time the question is skipped during the process. The conditional display is optional, and you can activate it by clicking on the checkbox.
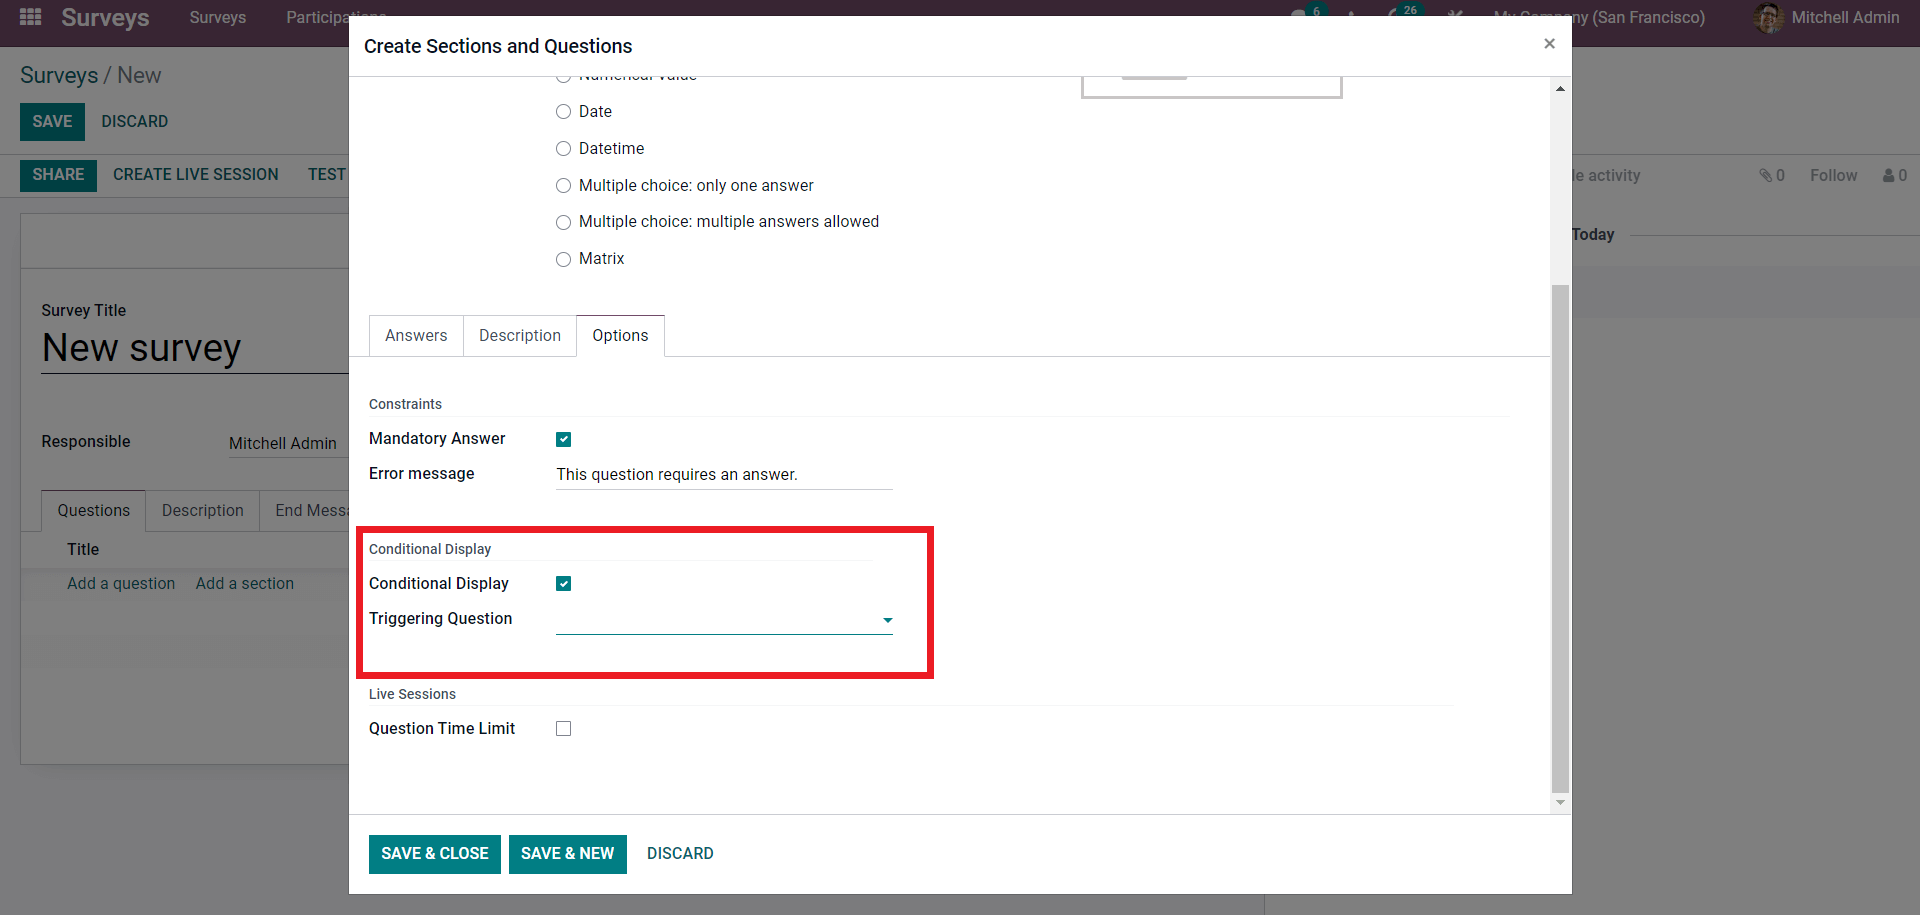
The conditional display will allow you to automatically trigger another question as a response to the main question. The question will automatically be triggered when the corresponding main question is answered during the survey process. Under the Live sessions, click on the Question time limit, which lets you set up a time limit for each question to be answered, allowing the survey process to be carried out quickly without wasting essential time. As shown below, activating the option will give you a field to add the time.
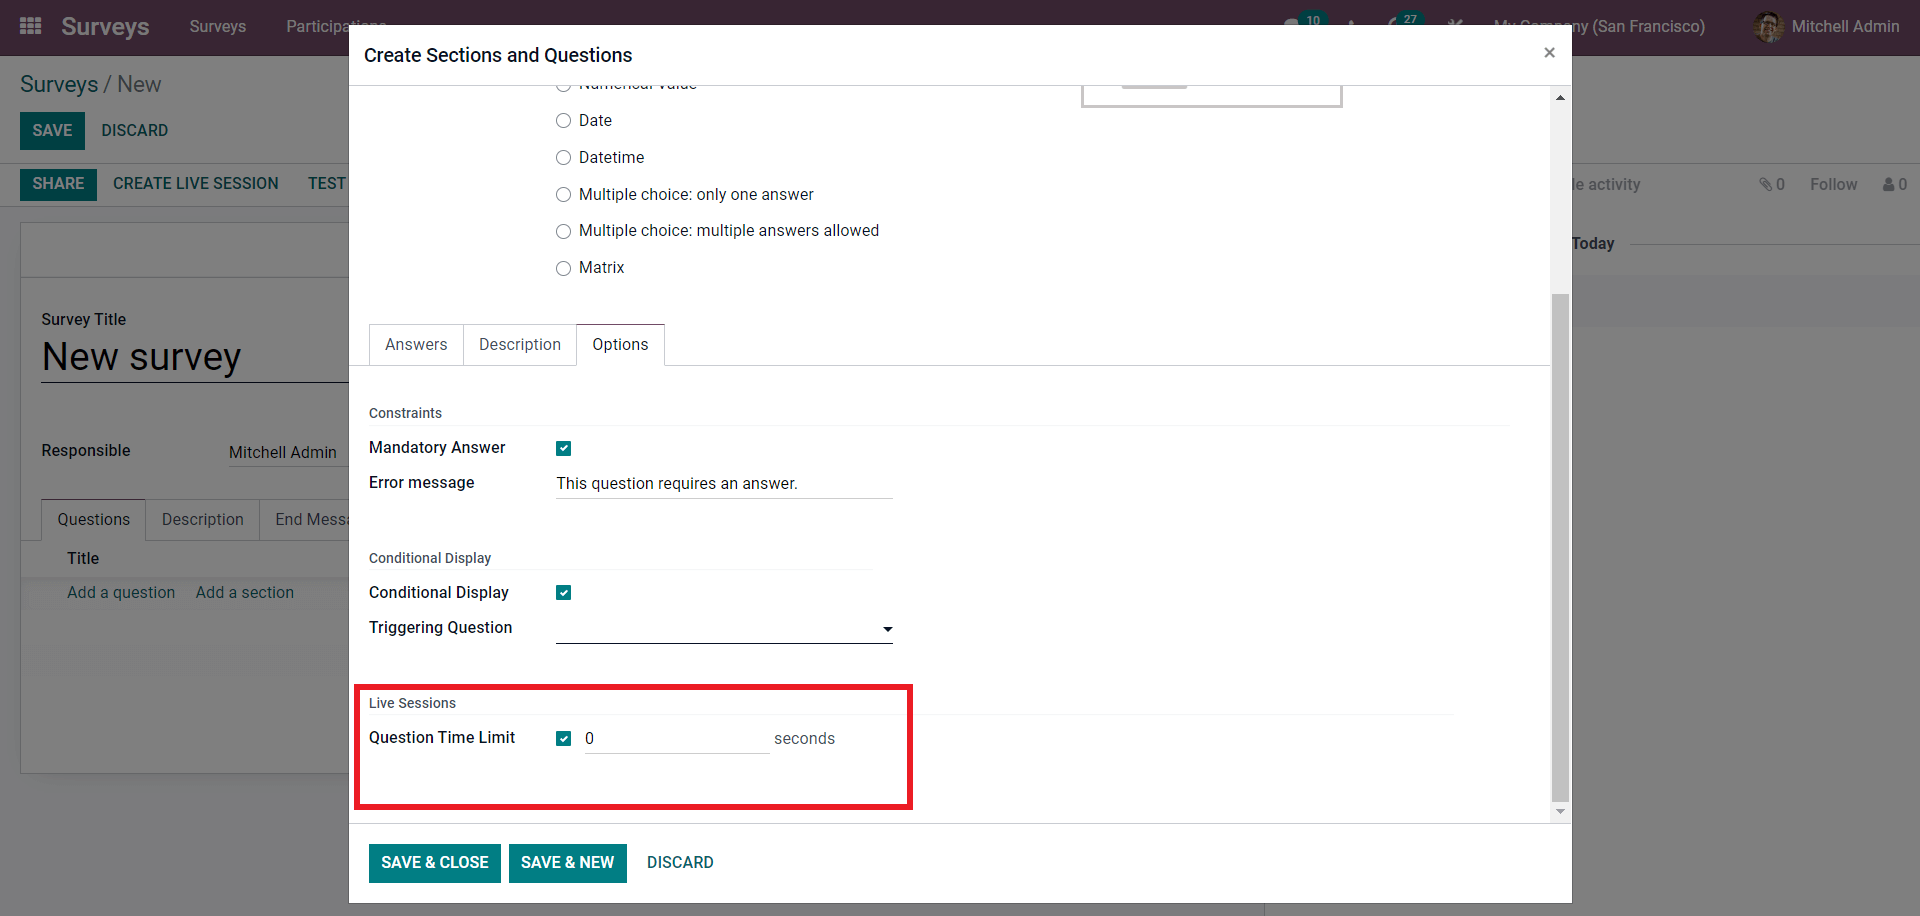
After the time limit, the question will be skipped to the next question. As the survey questioning is automated, the process will continue with the next person after this configuration.
After the configuration, you can either click on the SAVE&CLOSE button or the SAVE&NEW button to close or create a new Survey question. Click on the Add a section button under the Questions tab to add a new section to the fields from the survey configuration section. You can give the description and an end message on the newly created survey from the configuration page. Click on the Options tab to have more advanced options on the survey configurations, as shown below.
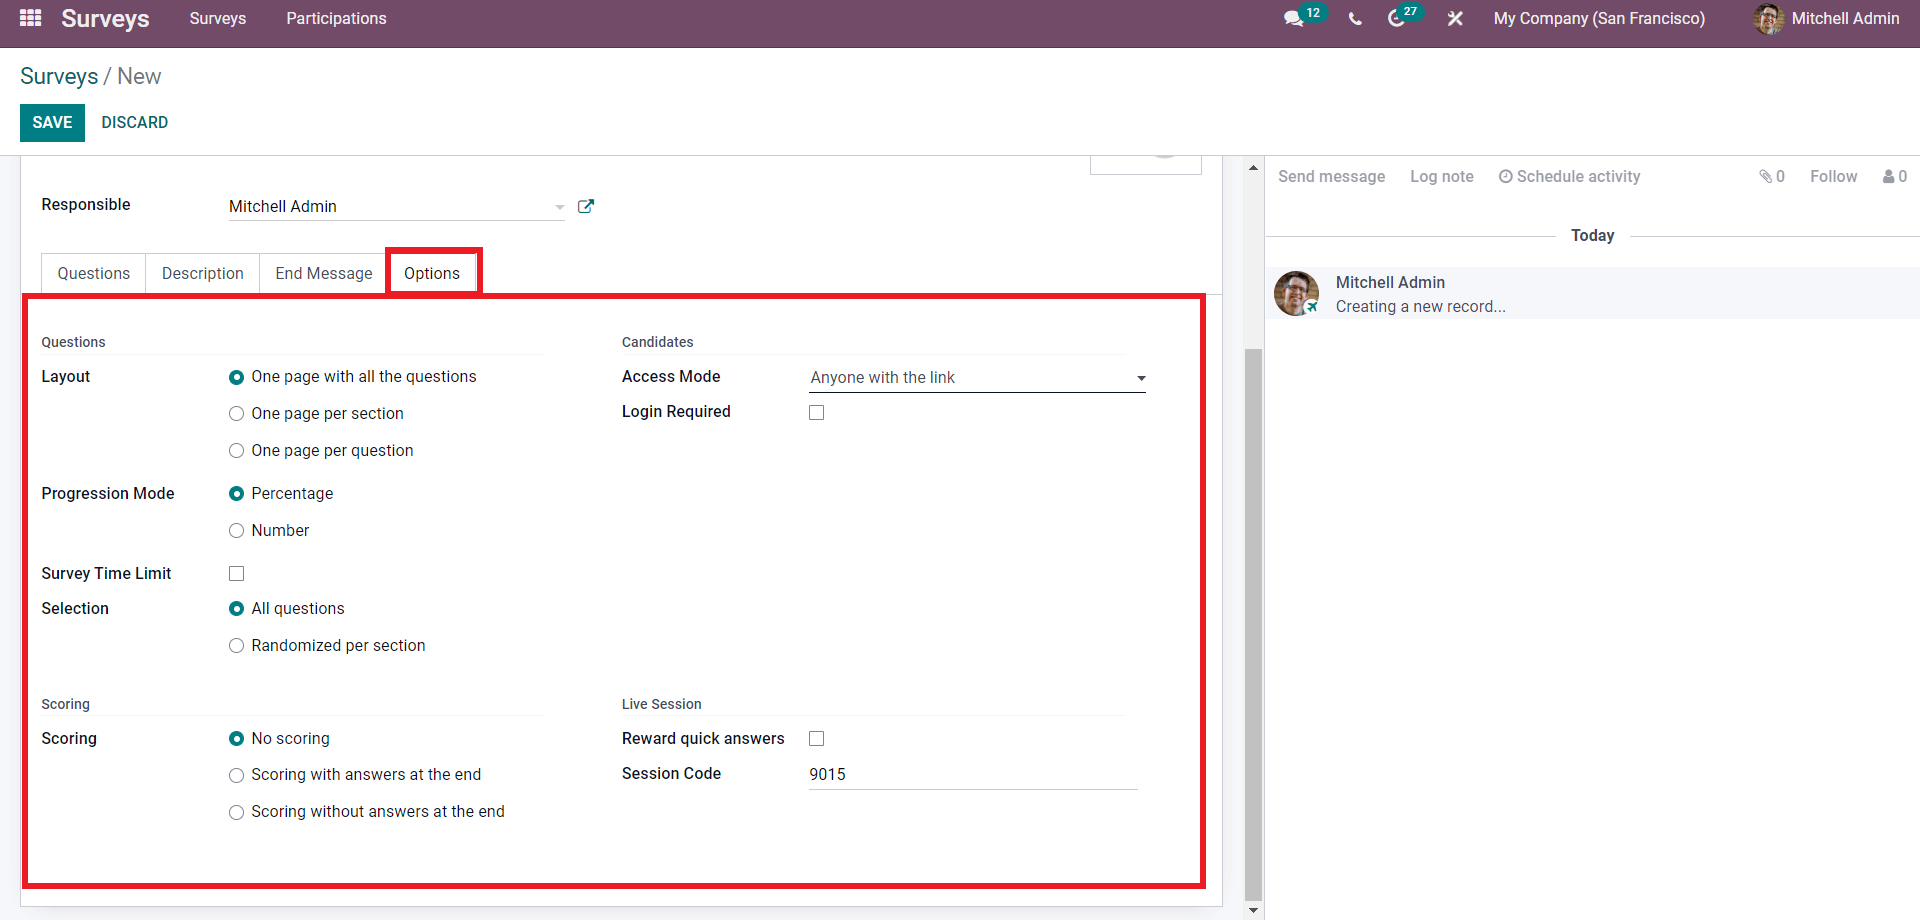
The advanced features let you add more configurations to the Survey. In the Options section, you can choose from the Layout of the Survey. There are three main layout options, One page with all the questions, One page per section, and one page per question. Choose from the layout options to apply them to the Survey. In the Candidates section, you can control the access to the Survey link. By default, the option is Anyone with the link, and the other option is to invited people only. Click on the Log in Required button to control the Survey to the registered members only. Choose from any of the options to manage the surveys.
From the Progression Mode section, you can choose from the progression data representation of the Survey. The two progression modes are Percentage and Number. Choose from the options that suit you the best in data viewing and management.
After setting up the Progression mode, you can set the time limit on the Survey from the Survey time limit section of the configuration page, as shown below.
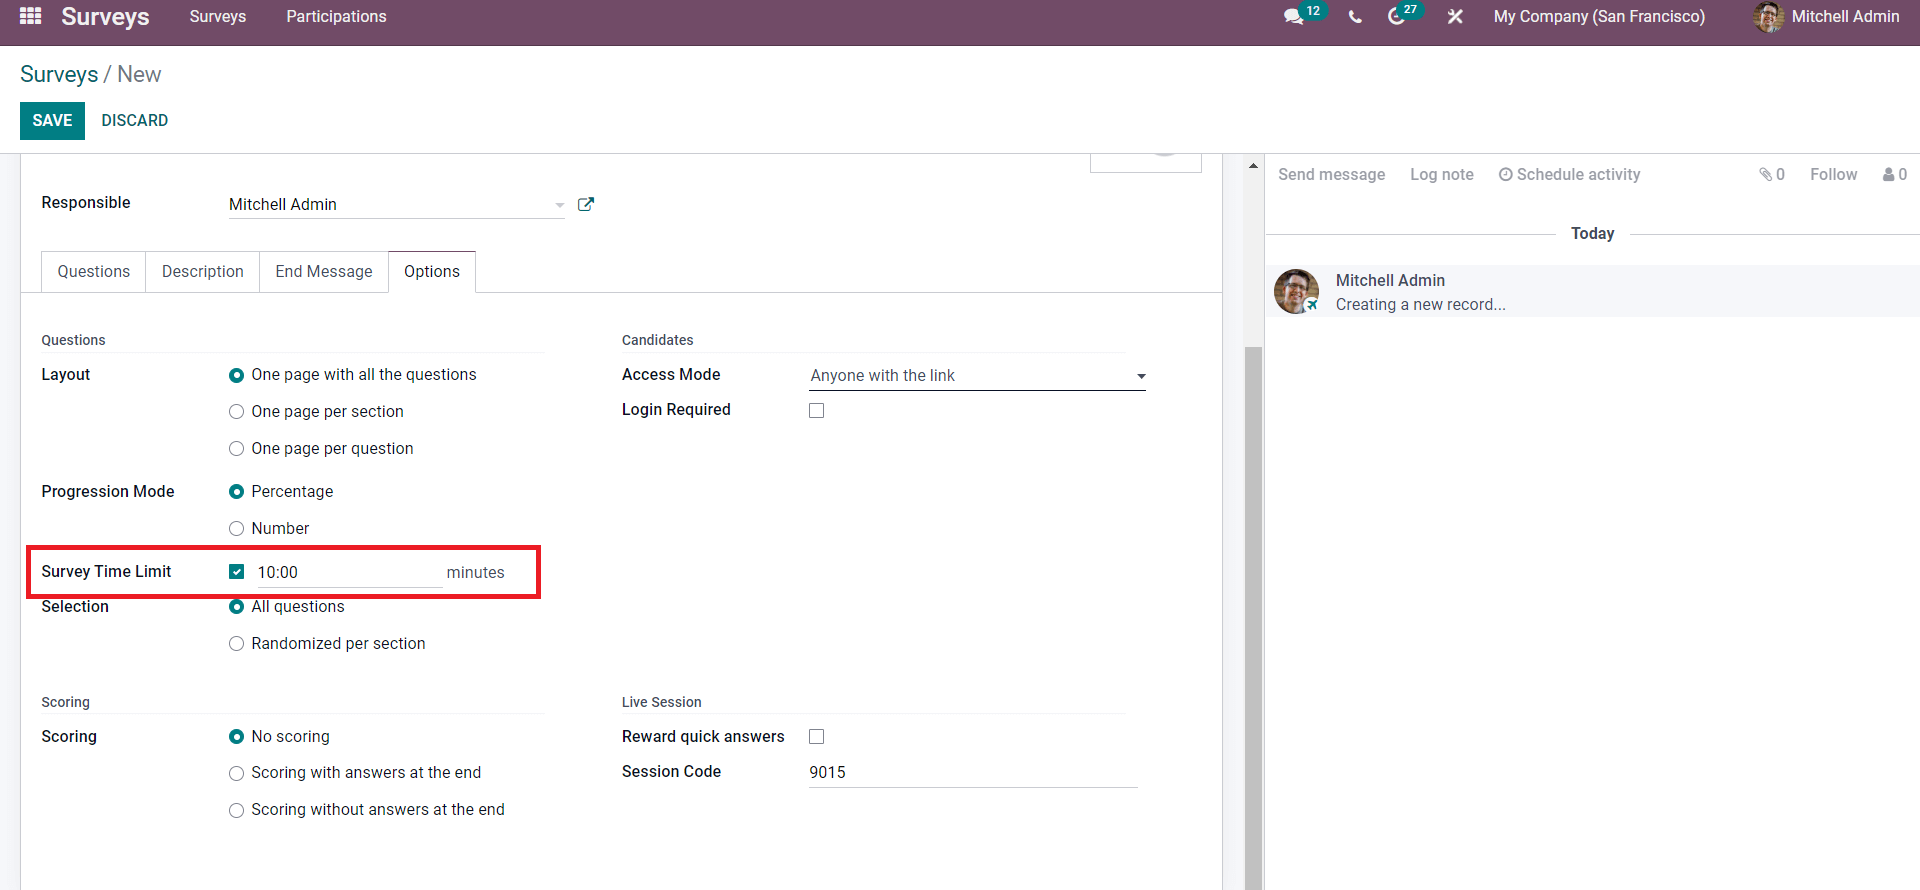
Activating this option will let you to set the time limit on the Survey. Setting the time limit to the Survey will automatically close the Survey after the survey time limit. Setting the time limit will also let you collect more public data. After setting up the time limit on the Survey, you can choose the question order from the Selection section. The two options include All questions and Randomised per section. The question will order and rearrange itself based on the chosen option.
Under the scoring section, you can choose between the options to Score your surveyors, as shown below.
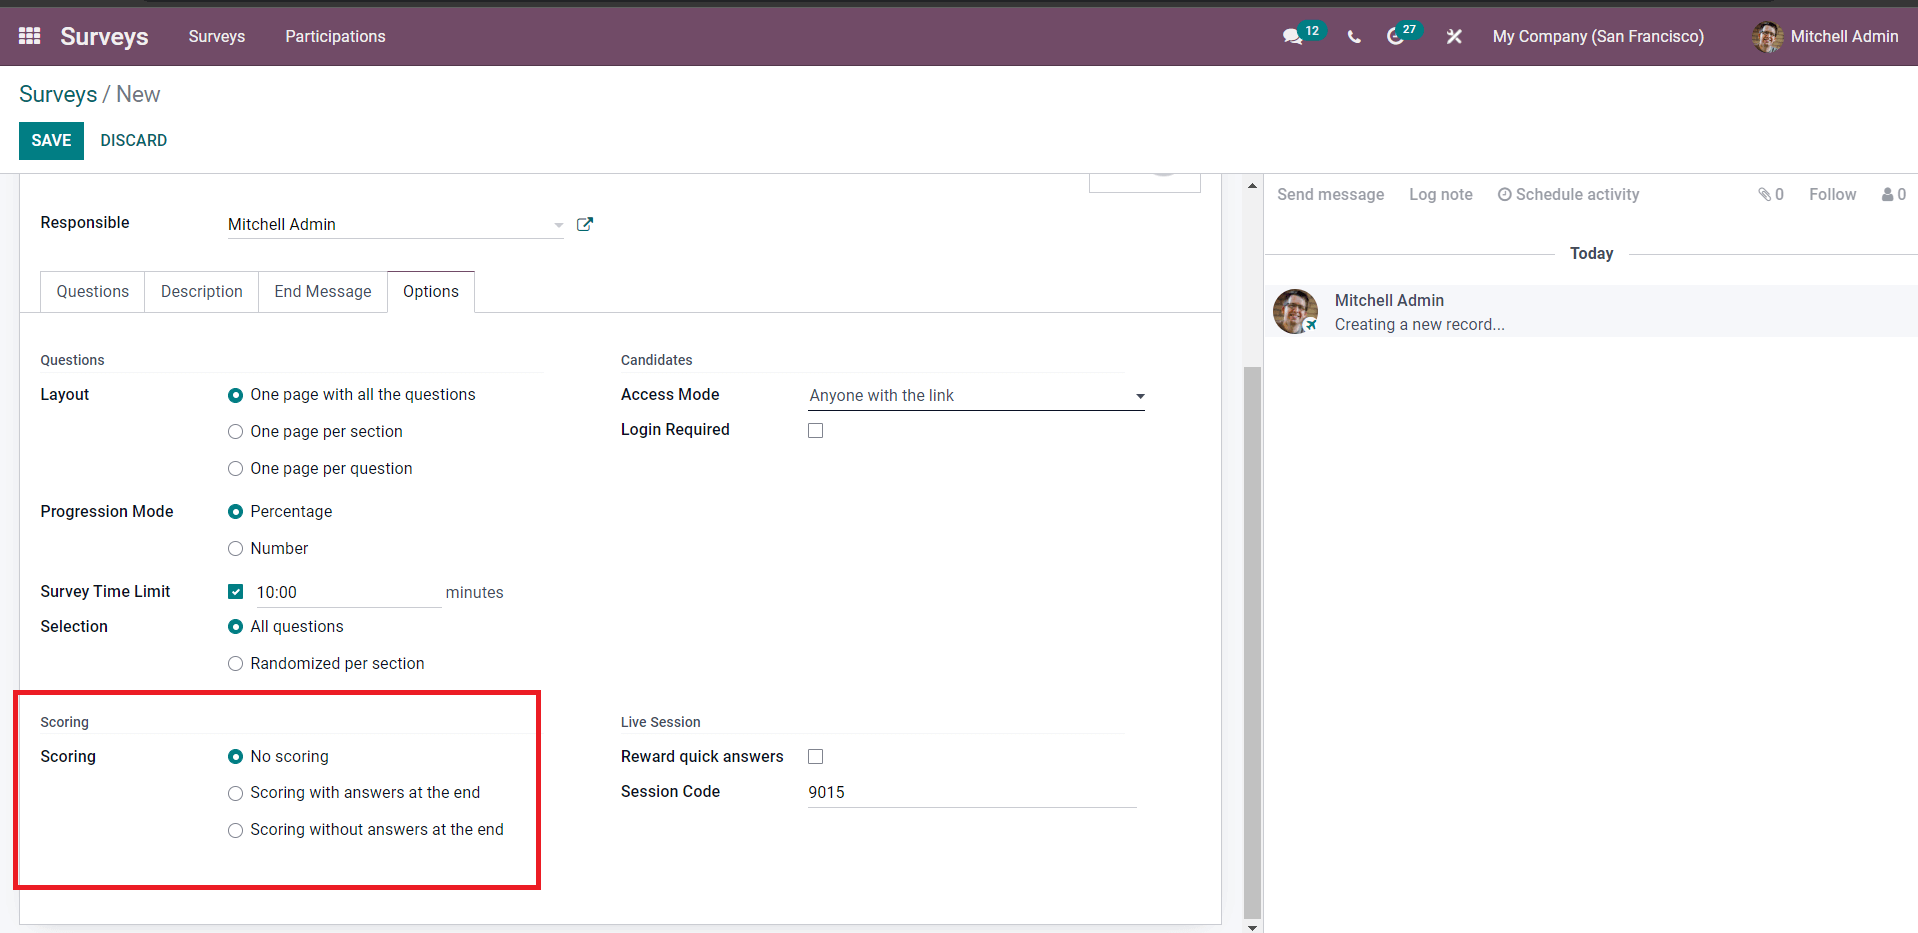
There are three scoring options to score the survey. The three survey scoring options include No scoring, Scoring with answers at the end, and Scoring without answers at the end. You can choose from the three options according to the nature of business or survey management.
You can control the live survey sessions from the Live sessions section, as highlighted in the image given below.
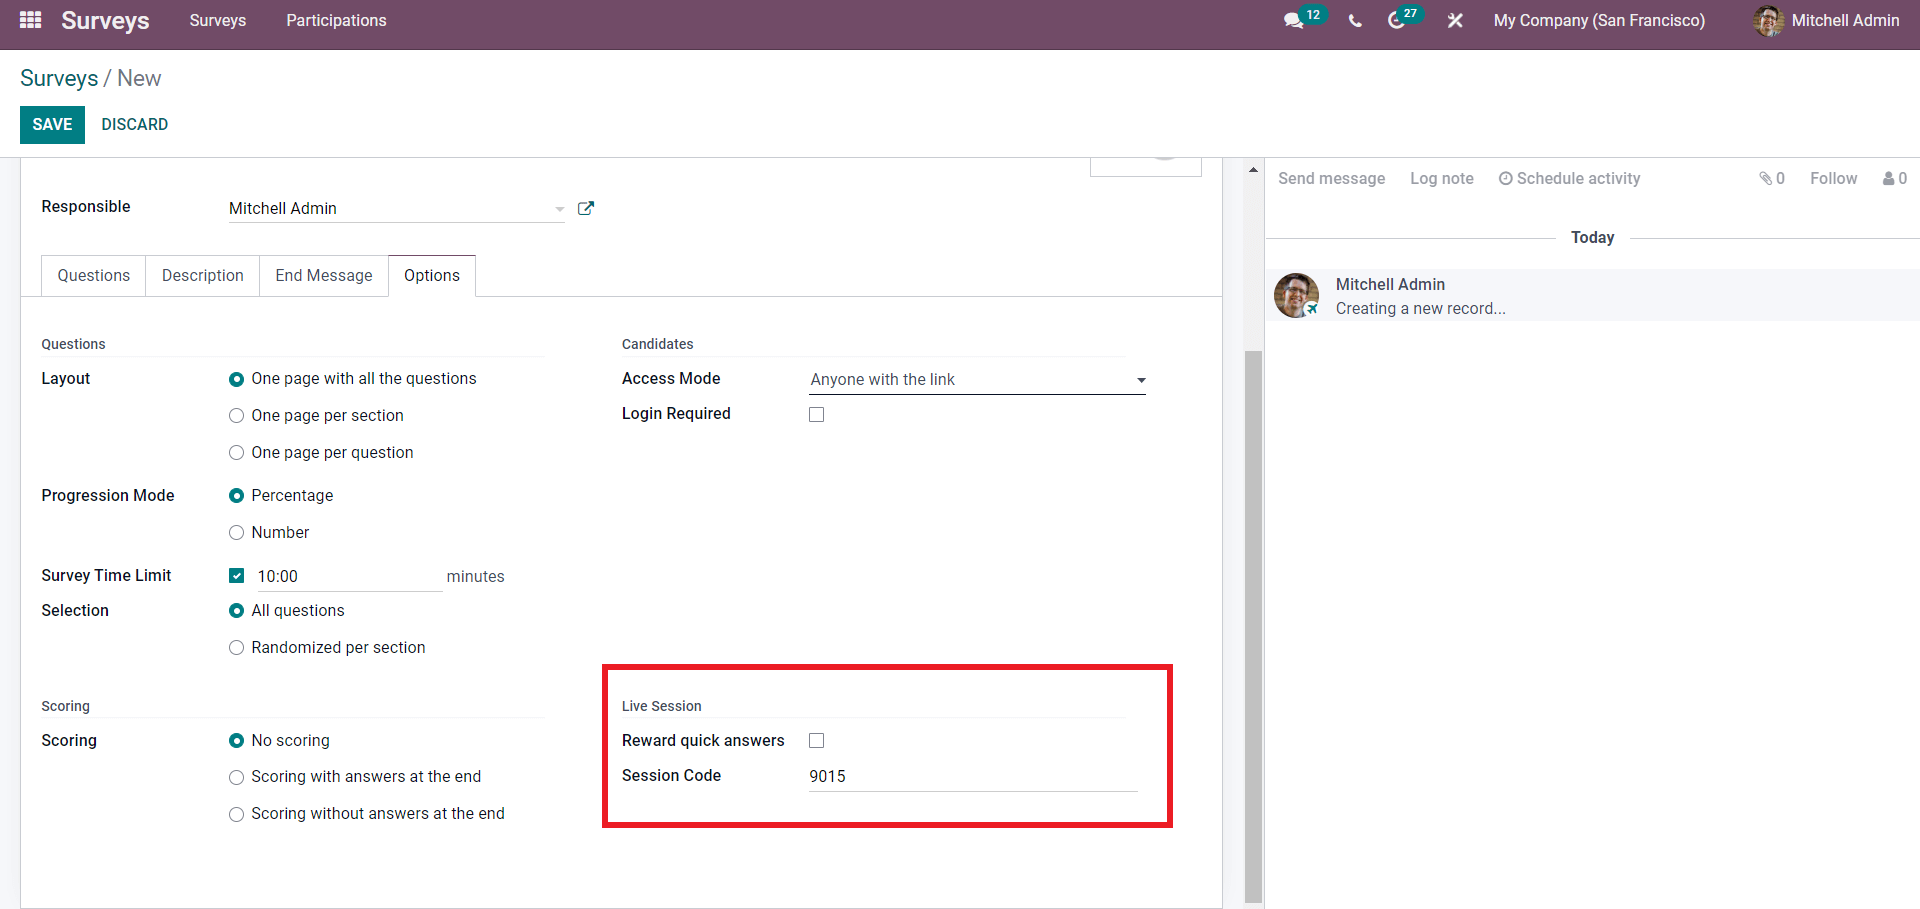
You have the option to answer by clicking on the Reward quick answers checkbox, and you can also provide a unique code to each live section for easy management. You can use the CREATE LIVE SESSION to start the live session of the Survey. If you want to test the Survey, press the TEST button to test Survey. After the configurations on the Survey, click on the SAVE button to save the Survey, and you can access it from the dashboard of the modules easily for managing. The below-given image is the result of a survey conducted earlier, and we can use it for reference.
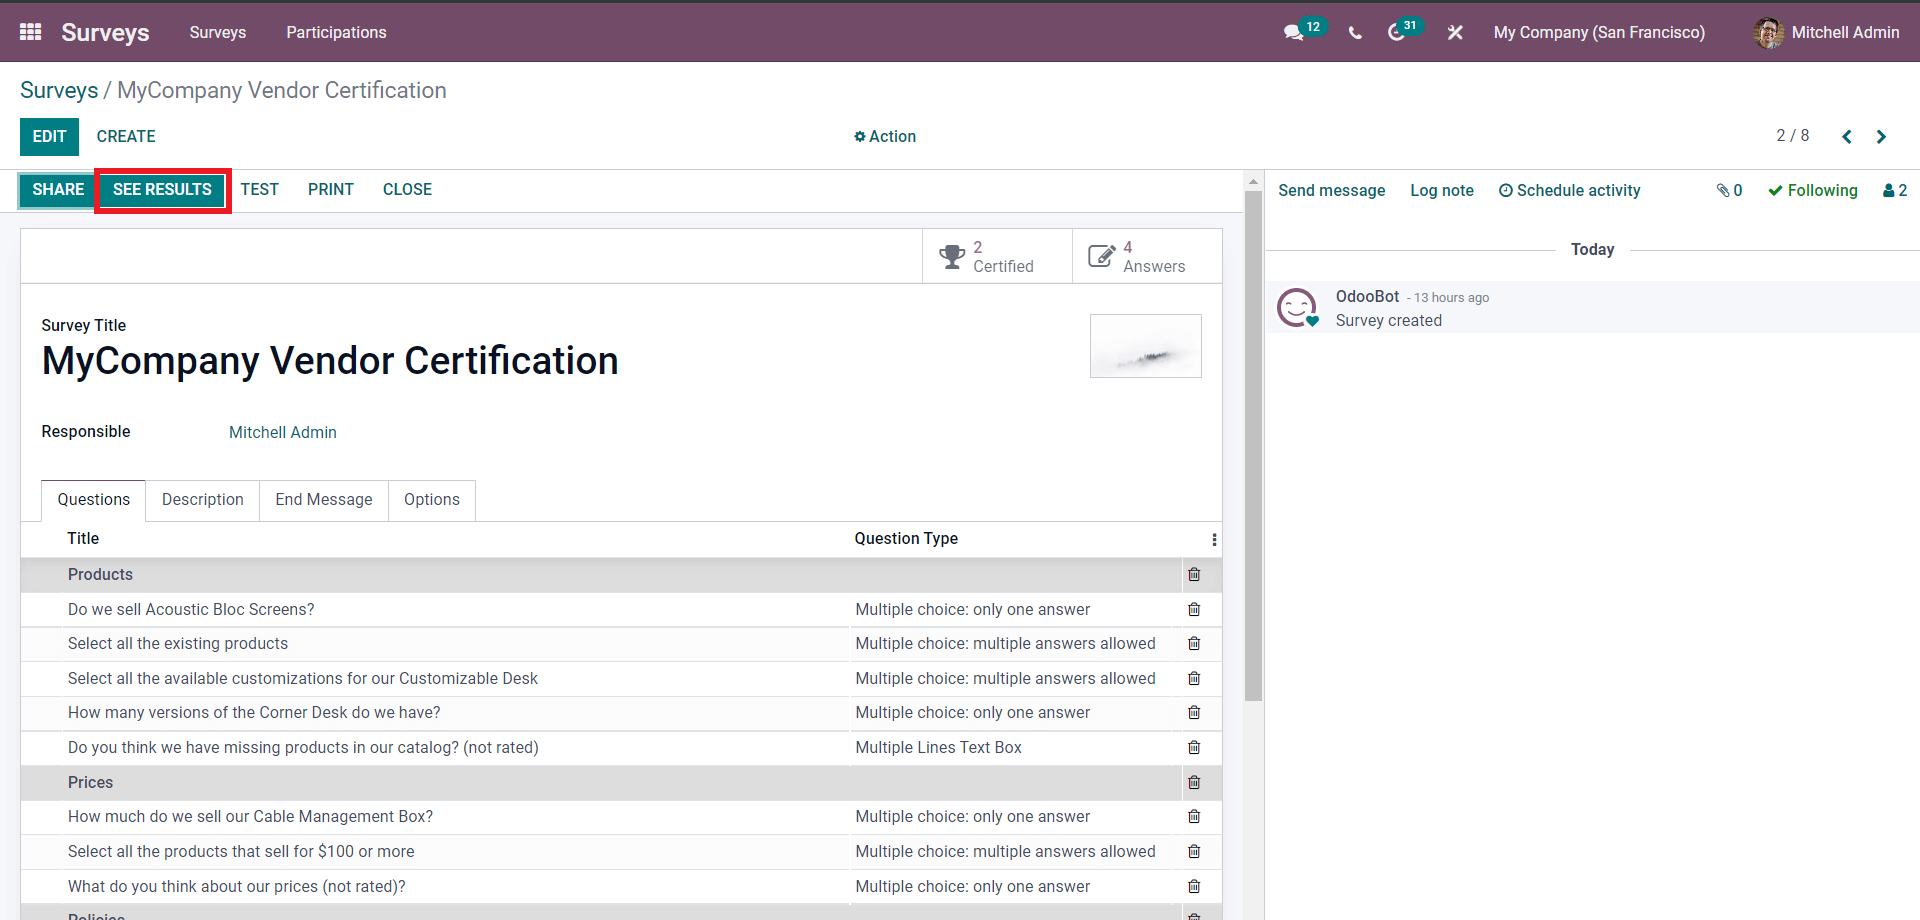
Click on the SEE RESULTS button to view the results of the survey, as shown below.
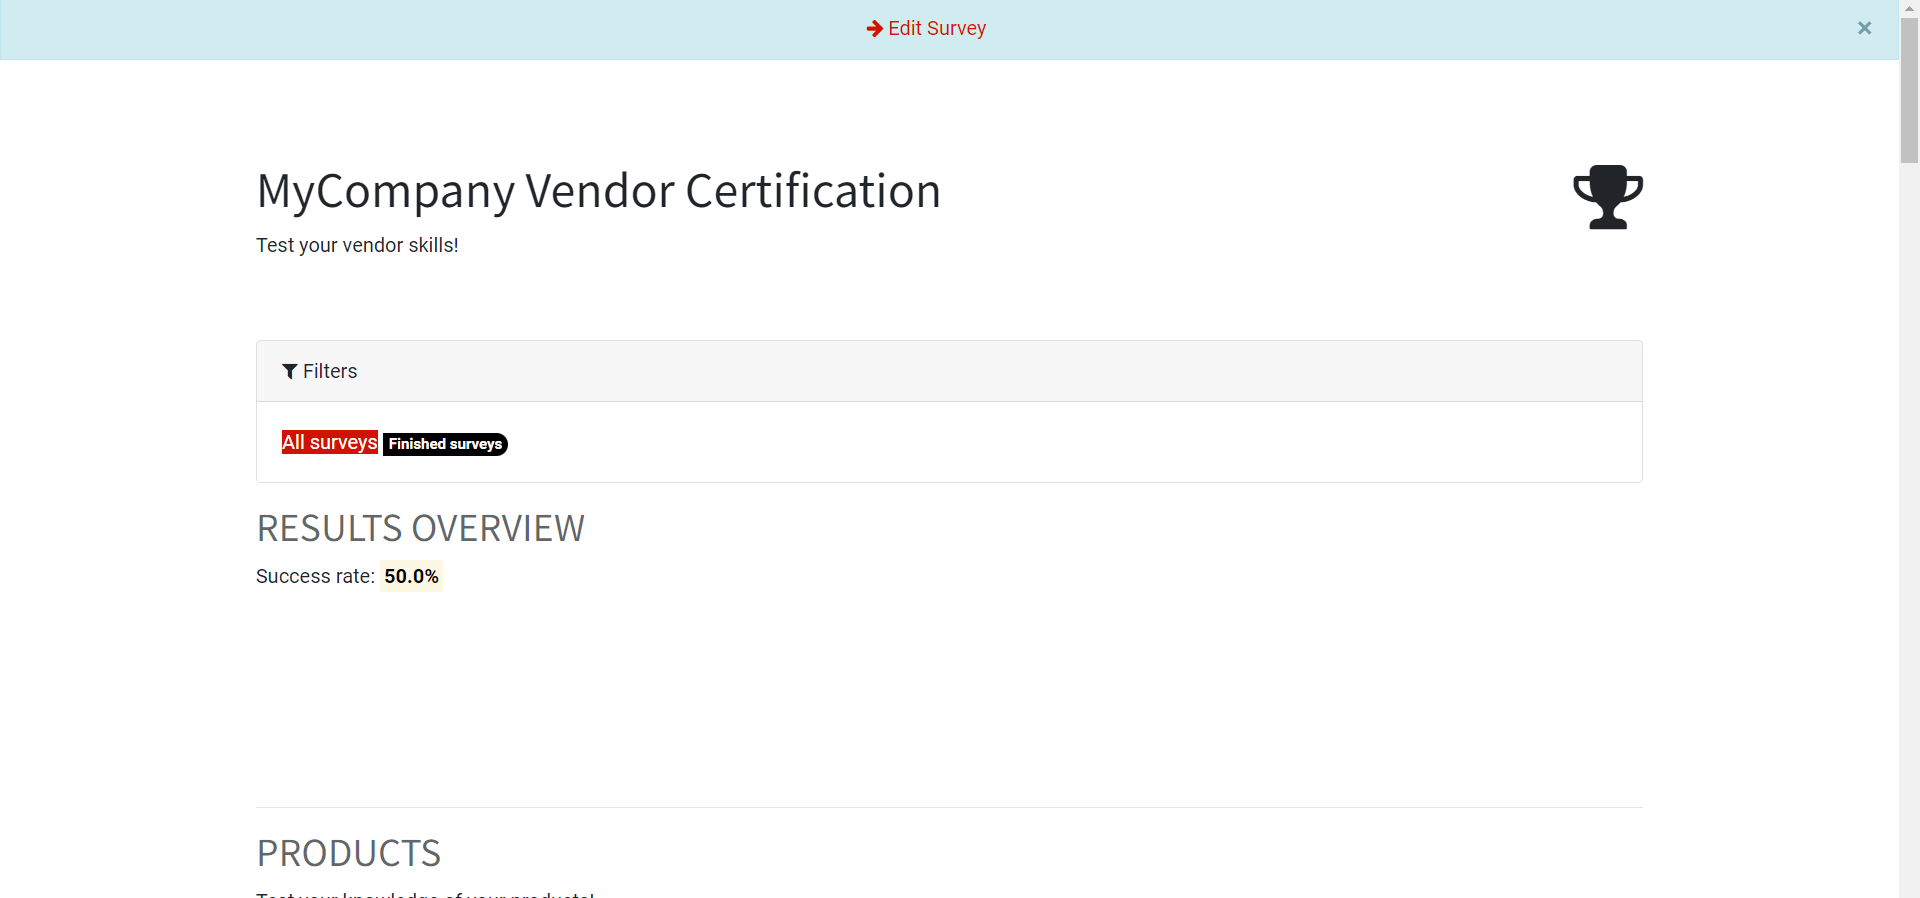
You can scroll down on this page to view the complete data on the results of the Survey. This is how you create and manage the surveys with the Odoo 15 Surveys module.
It is important to note that Odoo will manage the survey procedures based on the configurations. As the process is highly automated and data-centered, you can get all of the data on the Survey without any loss for accurate survey data representation.