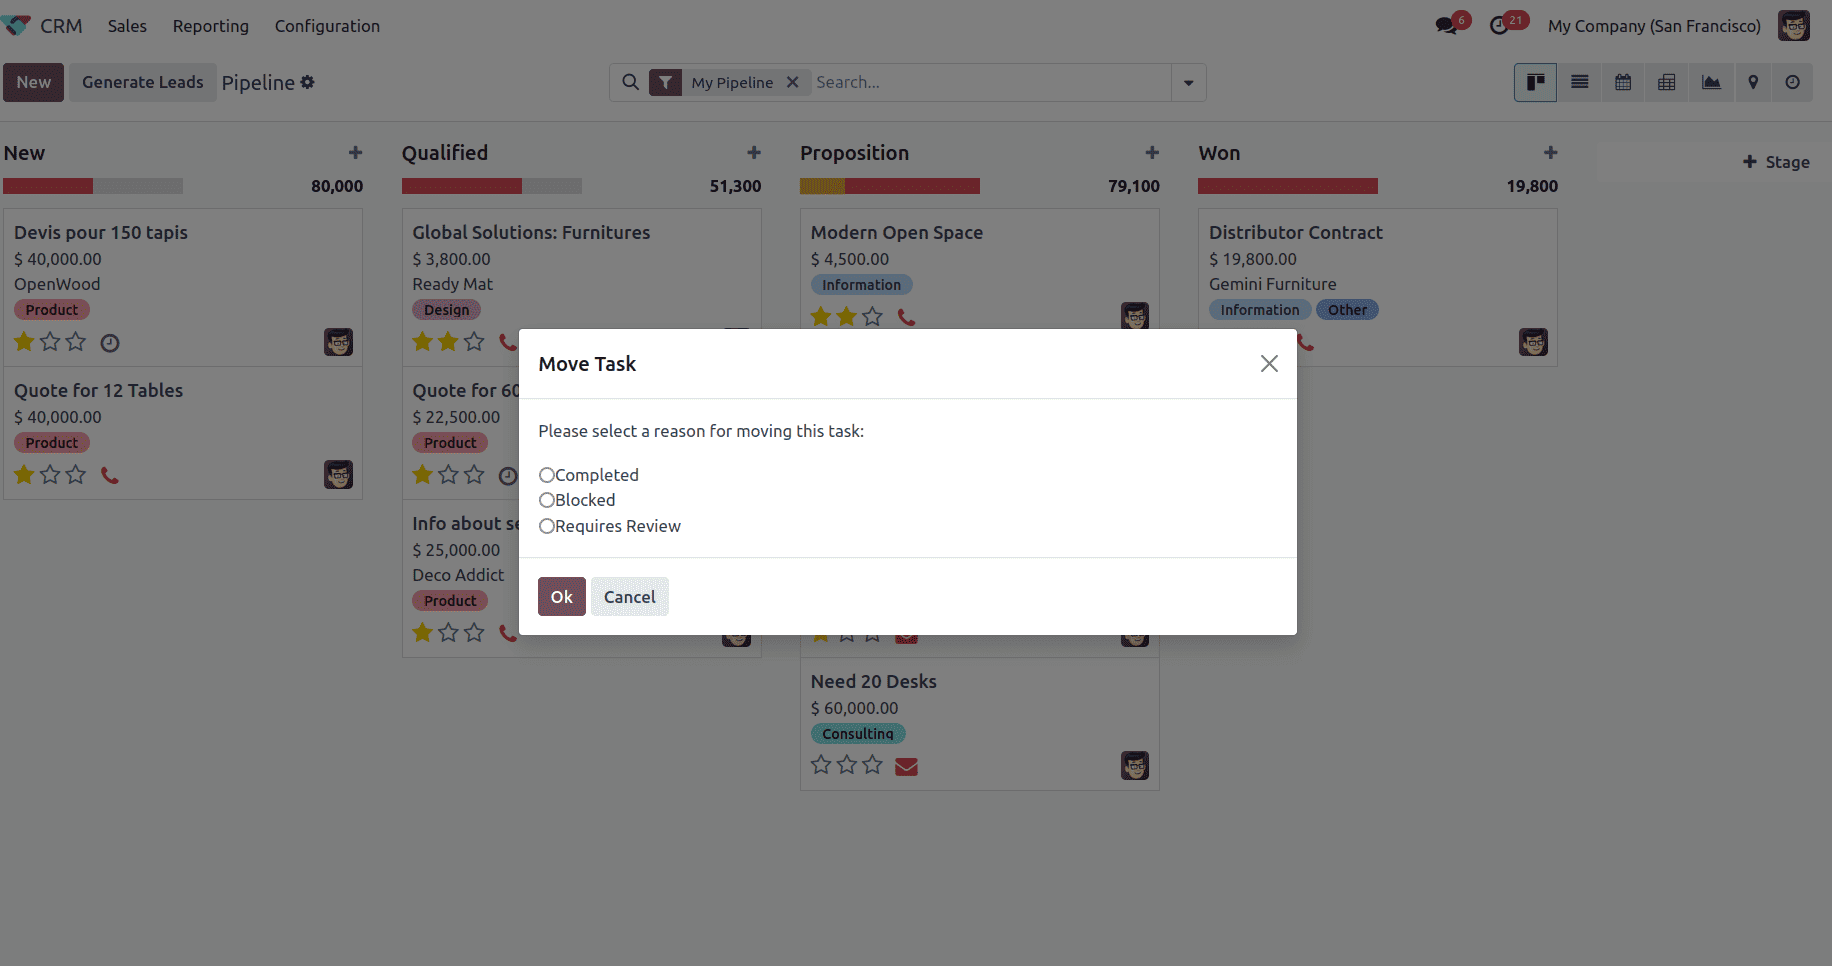
Dialog boxes, also known as pop-ups, are essential for displaying messages, confirming actions, and issuing alerts or warnings. They appear as small windows over the main interface when triggered by events such as button clicks, field changes, or interactions with Many2many fields. These dialogs can function as confirmation prompts, alerts, or warnings and may be displayed as modals or pop-ups.
In this blog, we will explore how to customize JS Dialog boxes in Odoo 18 to enhance their appearance, behavior, and functionality. Let’s see a simple confirmation dialogue here where we want to ask the user to select a reason before moving a task from one stage to another.
To achieve this, we will patch the KanbanRenderer and modify the sortRecordDrop() function, which manages dragging and dropping Kanban cards.
Modify KanbanRenderer to Show a Confirmation Dialog
Create a new JavaScript file: static/src/js/custom_kanban.js
/** @odoo-module **/
import { patch } from "@web/core/utils/patch";
import { KanbanRenderer } from "@web/views/kanban/kanban_renderer";
import { _t } from "@web/core/l10n/translation";
import { ConfirmationDialog } from "@web/core/confirmation_dialog/confirmation_dialog";
patch(KanbanRenderer.prototype, {
    async sortRecordDrop(dataRecordId, dataGroupId, { element, parent, previous }) {
        element.classList.remove("o_record_draggable");
        if (
            !this.props.list.isGrouped ||
            parent.classList.contains("o_kanban_hover") ||
            parent.dataset.id === element.parentElement.dataset.id
        ) {
            if (parent && parent.classList) {
                parent.classList.remove("o_kanban_hover");
            }
            while (previous && !previous.dataset.id) {
                previous = previous.previousElementSibling;
            }
            const refId = previous ? previous.dataset.id : null;
            const targetGroupId = parent && parent.dataset.id;
            // **Show the confirmation dialog before moving the record**
            this.dialog.add(ConfirmationDialog, {
                title: _t("Move Task"),
                body: _t("Please select a reason for moving this task:"),
                options: ["Completed", "Blocked", "Requires Review"],  // Options for user selection
                confirm: (selectedReason) => {
                    if (selectedReason) {
                        console.log("User selected reason:", selectedReason);
                        // Move the record only if a reason is selected
                        this.props.list.moveRecord(dataRecordId, dataGroupId, refId, targetGroupId);
                    }
                },
                cancel: () => {
                    console.log("Stage change canceled.");
                },
            });
        }
        element.classList.add("o_record_draggable");
    },
});
When a user drags a Kanban card to another stage, a confirmation dialog appears.
The user must select a reason (e.g., "Completed" or "Blocked") before confirming the move.
If canceled, the task does not move.
By default, Odoo’s ConfirmationDialog does not store selected values. We need to patch it to manage the state and return the selected value when the user clicks confirm.
Create another JS file:
static/src/js/custom_confirmation_dialog.js
/** @odoo-module **/
import { useState } from "@odoo/owl";
import { ConfirmationDialog } from "@web/core/confirmation_dialog/confirmation_dialog";
import { patch } from "@web/core/utils/patch";
ConfirmationDialog.props = {
    ...ConfirmationDialog.props,
    options: { type: Array, optional: true }, // Array of options for selection
};
patch(ConfirmationDialog.prototype, {
    setup() {
        super.setup();
        this.state = useState({
            selectedOption: null,  // Store selected reason
        });
    },
    // Update state when user selects an option
    onOptionChange(ev) {
        this.state.selectedOption = ev.target.value;
    },
    async execButton(callback) {
        if (this.isProcess) {
            return;
        }
        this.setButtonsDisabled(true);
        let returnValue = this.state.selectedOption; // Get selected value
        if (callback) {
            let shouldClose;
            try {
                shouldClose = await callback(returnValue); // Pass selected option
            } catch (e) {
                this.props.close();
                throw e;
            }
            if (shouldClose === false) {
                this.setButtonsDisabled(false);
                return returnValue;
            }
        }
        this.props.close();
        return returnValue;
    },
    async _confirm() {
        const selectedOption = await this.execButton(this.props.confirm);
        return selectedOption;
    }
});
To make sure the user sees radio buttons for selecting a reason, modify the XML template.
static/src/xml/custom_confirmation_dialog.xml
<?xml version="1.0" encoding="UTF-8" ?>
<templates xml:space="preserve">
    <t t-name="custom_dialog_modification.CustomConfirmationDialog" t-inherit="web.ConfirmationDialog" t-inherit-mode="extension">
        <xpath expr="//p[@class='text-prewrap']" position="after">
            <div class="custom-dialog-content">
                <!-- Poll or selection options -->
                <t t-if="props.options">
                    <t t-foreach="props.options" t-as="option" t-key="option">
                        <div>
                            <label>
                                <input type="radio"
                                       name="selection"
                                       t-att-value="option"
                                       t-on-change="onOptionChange"
                                       t-att-checked="selectedOption === option" />
                                <t t-esc="option" />
                            </label>
                        </div>
                    </t>
                </t>
            </div>
        </xpath>
    </t>
</templates>
Finally, we need to add these files in __manifest__.py file.
Now, when a user drags a Kanban card to another stage, a confirmation dialog appears, prompting them to select a reason before proceeding. If the user selects a reason and clicks "OK," the task moves to the new stage. If they cancel, the task remains in its original position.

This is how you can modify and enhance dialog boxes in Odoo 18 to improve the user experience and enforce business rules efficiently.
To read more about How to Create Odoo JS Dialog/Popup in Odoo 17, refer to our blog How to Create Odoo JS Dialog/Popup in Odoo 17.