Managing projects effectively is crucial to maintaining profitability and client satisfaction. One of the key aspects of project management is billing, particularly when it comes to fixed-price projects. A fixed-price project means the client agrees to pay a set amount for the completion of a project, regardless of the actual costs incurred by the business. This model provides predictability for both the client and the service provider but requires careful management to ensure the project remains profitable.
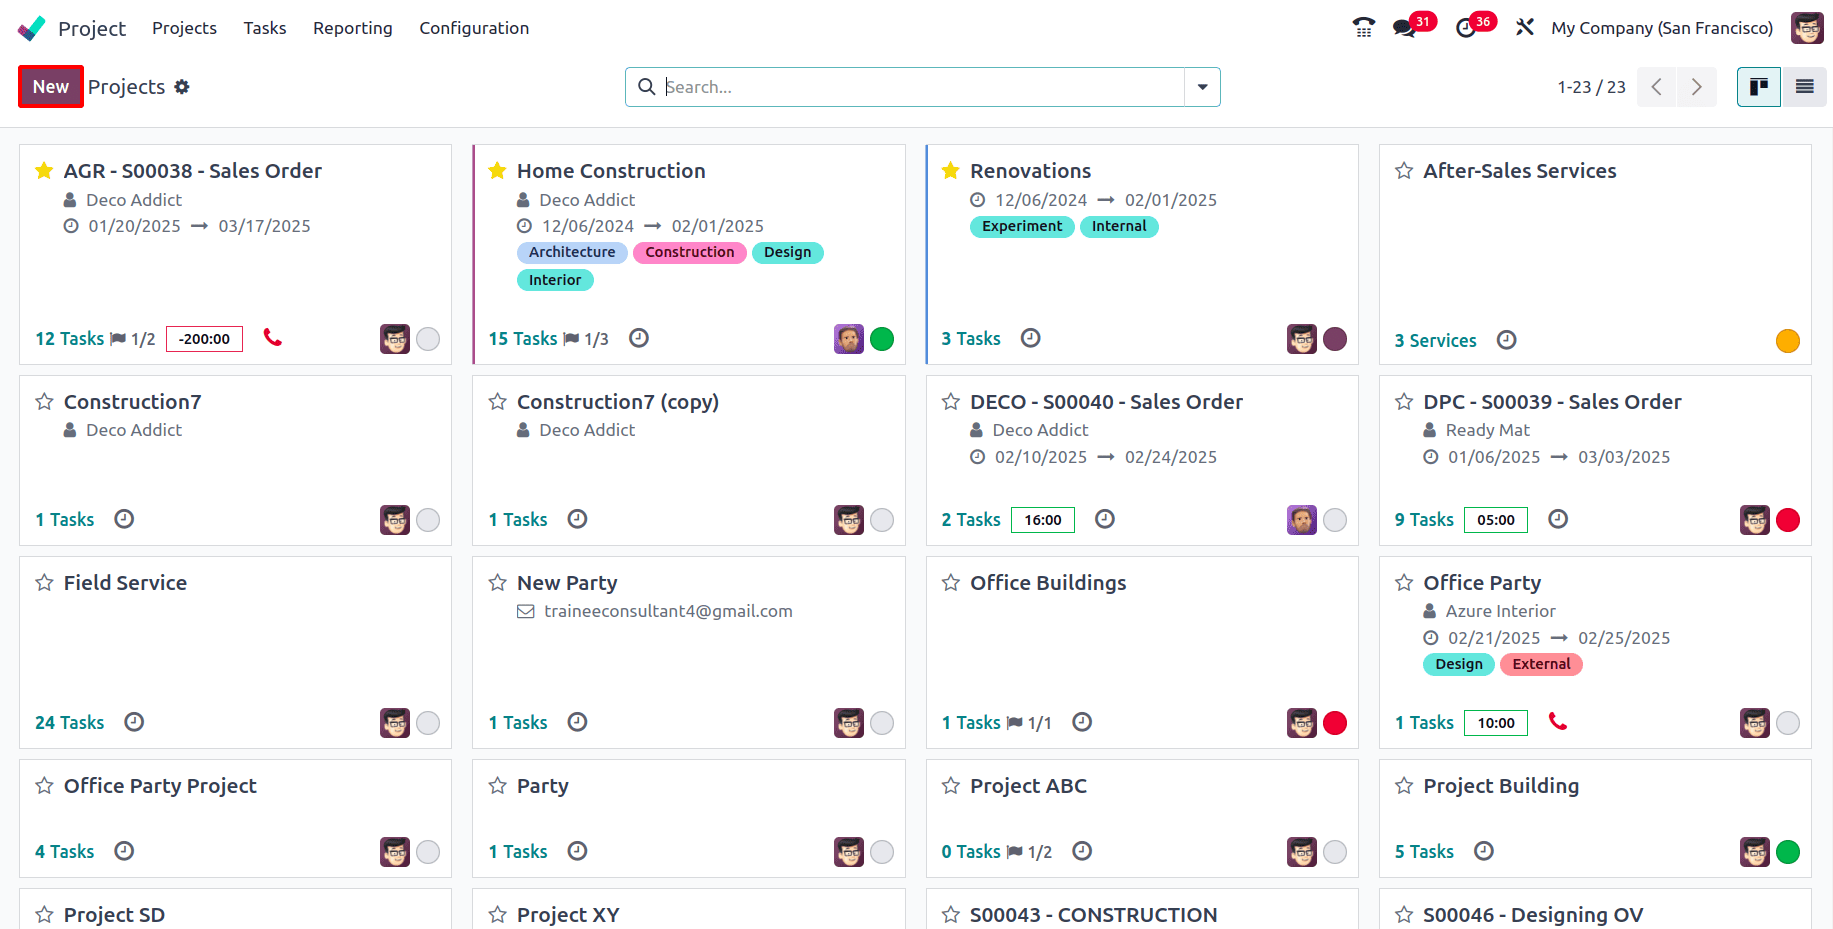
The first step in billing a project at a fixed price is to ensure that the project is set up correctly within Odoo. The project created should track all tasks, activities, and costs associated with it. Go to the Project module, and from the dashboard, click on the New button to create a new project.
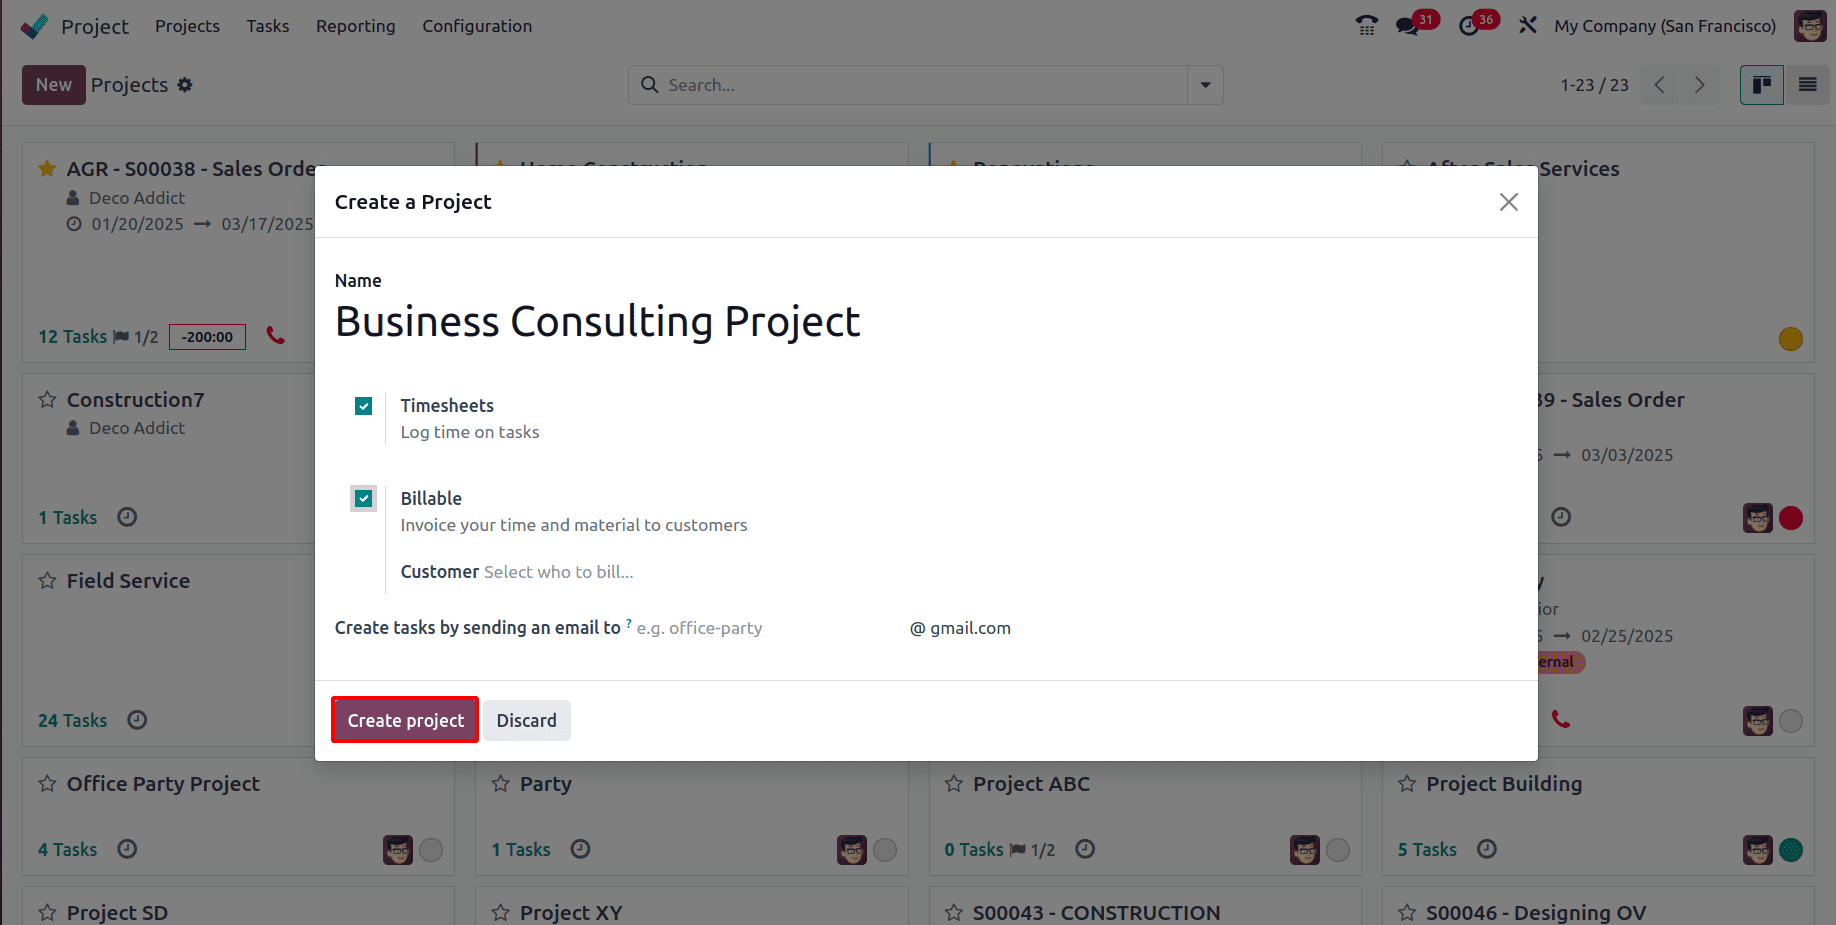
In the project creation form, add the name of the project in the Name field, enable Timesheet so that the time spent on the tasks gets logged, and also enable Billable so that it will be possible to invoice time and materials to customers. Also, there is an option to add the customer for the project, and in the Create tasks by sending an email to field an email alias can be added so that when an email is sent to that email alias a task will be created.
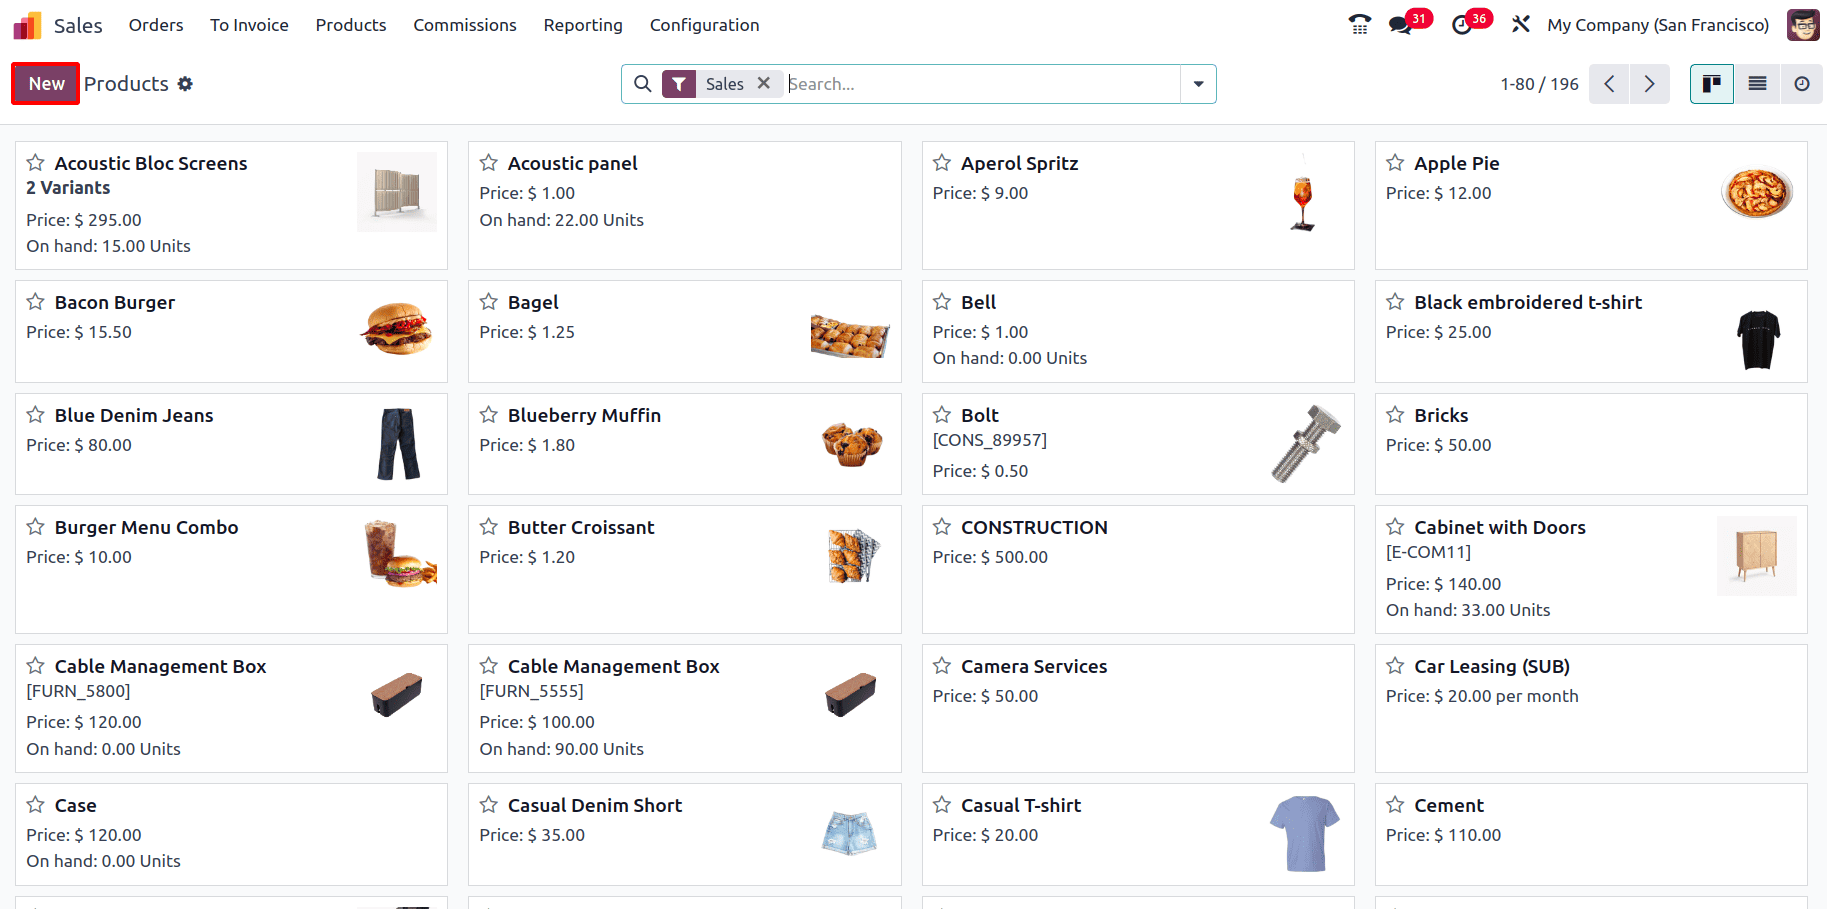
Once the project has been created, add stages to the project. Now, navigate to Sales > Products > Products and click on the New button to create a new product.
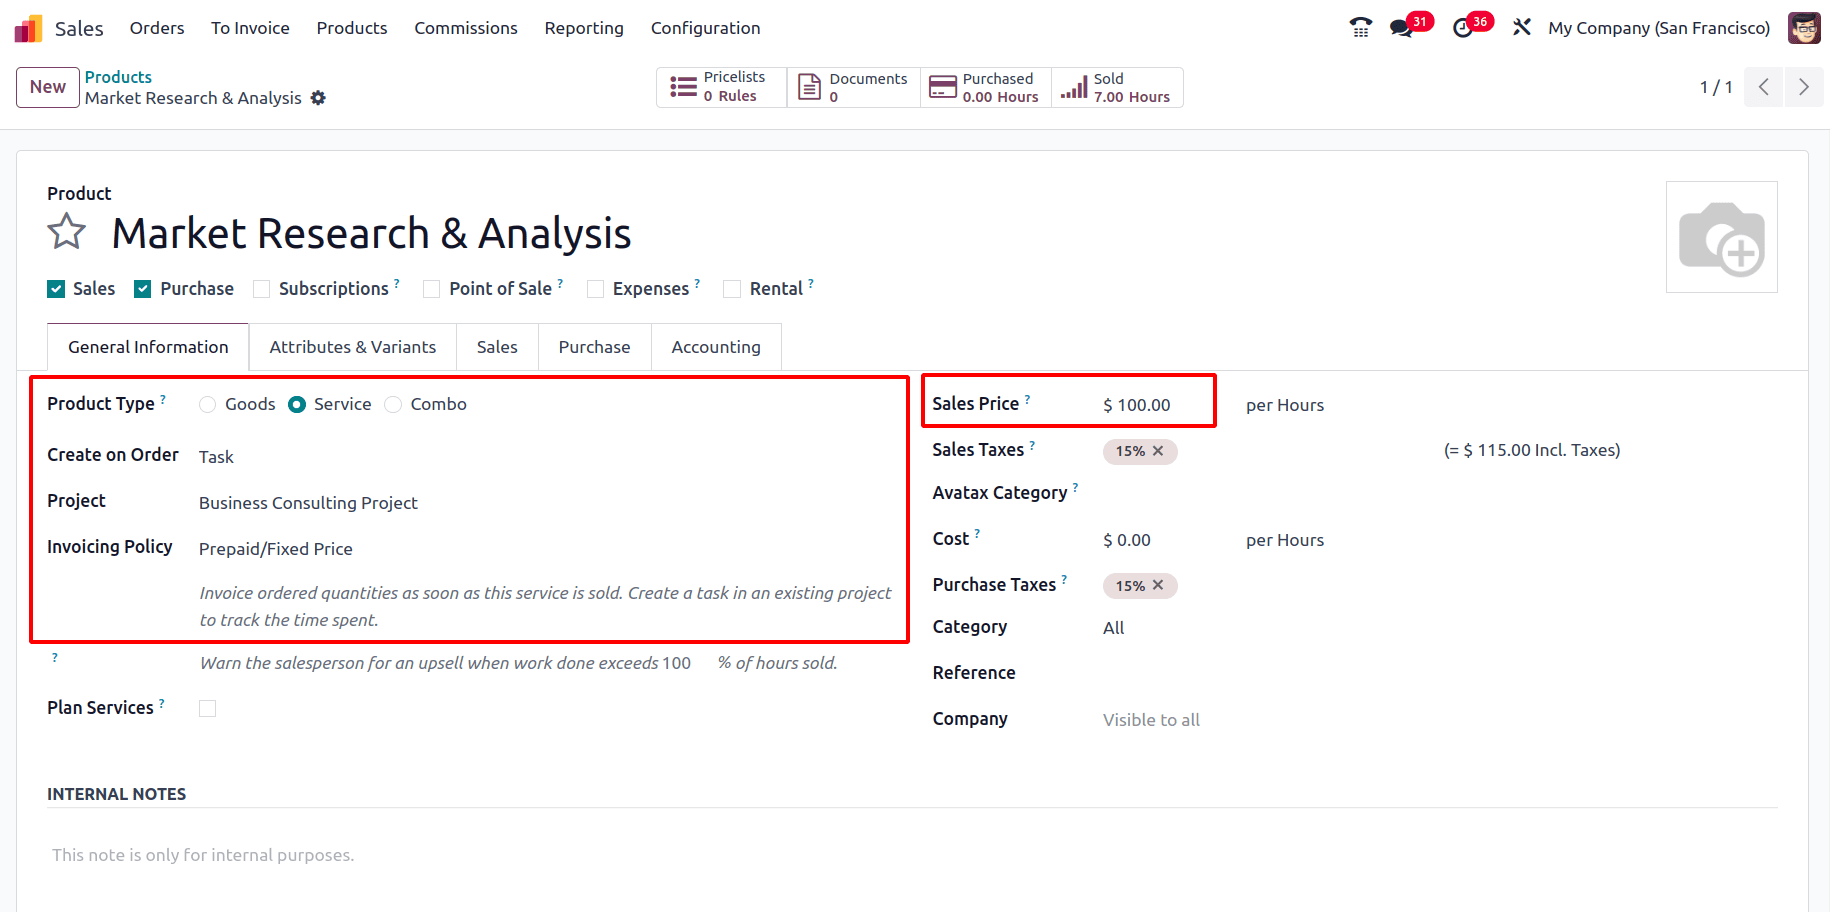
In the Product form, add the product name, set the product type to Service, and configure the Create to Order as a Task. When it has been selected as a task, an extra field for the ‘Project’ is added where the project can be mentioned under which the task will be created. Also, set the invoicing policy as Prepaid/Fixed Price, this enables the creation of invoices and the payment before any timesheets have been added for the tasks.
Here since the create-on order is given as a task, a task will be created when a sale order with this product is confirmed.
To create a sale order, navigate to Orders > Quotations and click on the New button to create a new quotation.
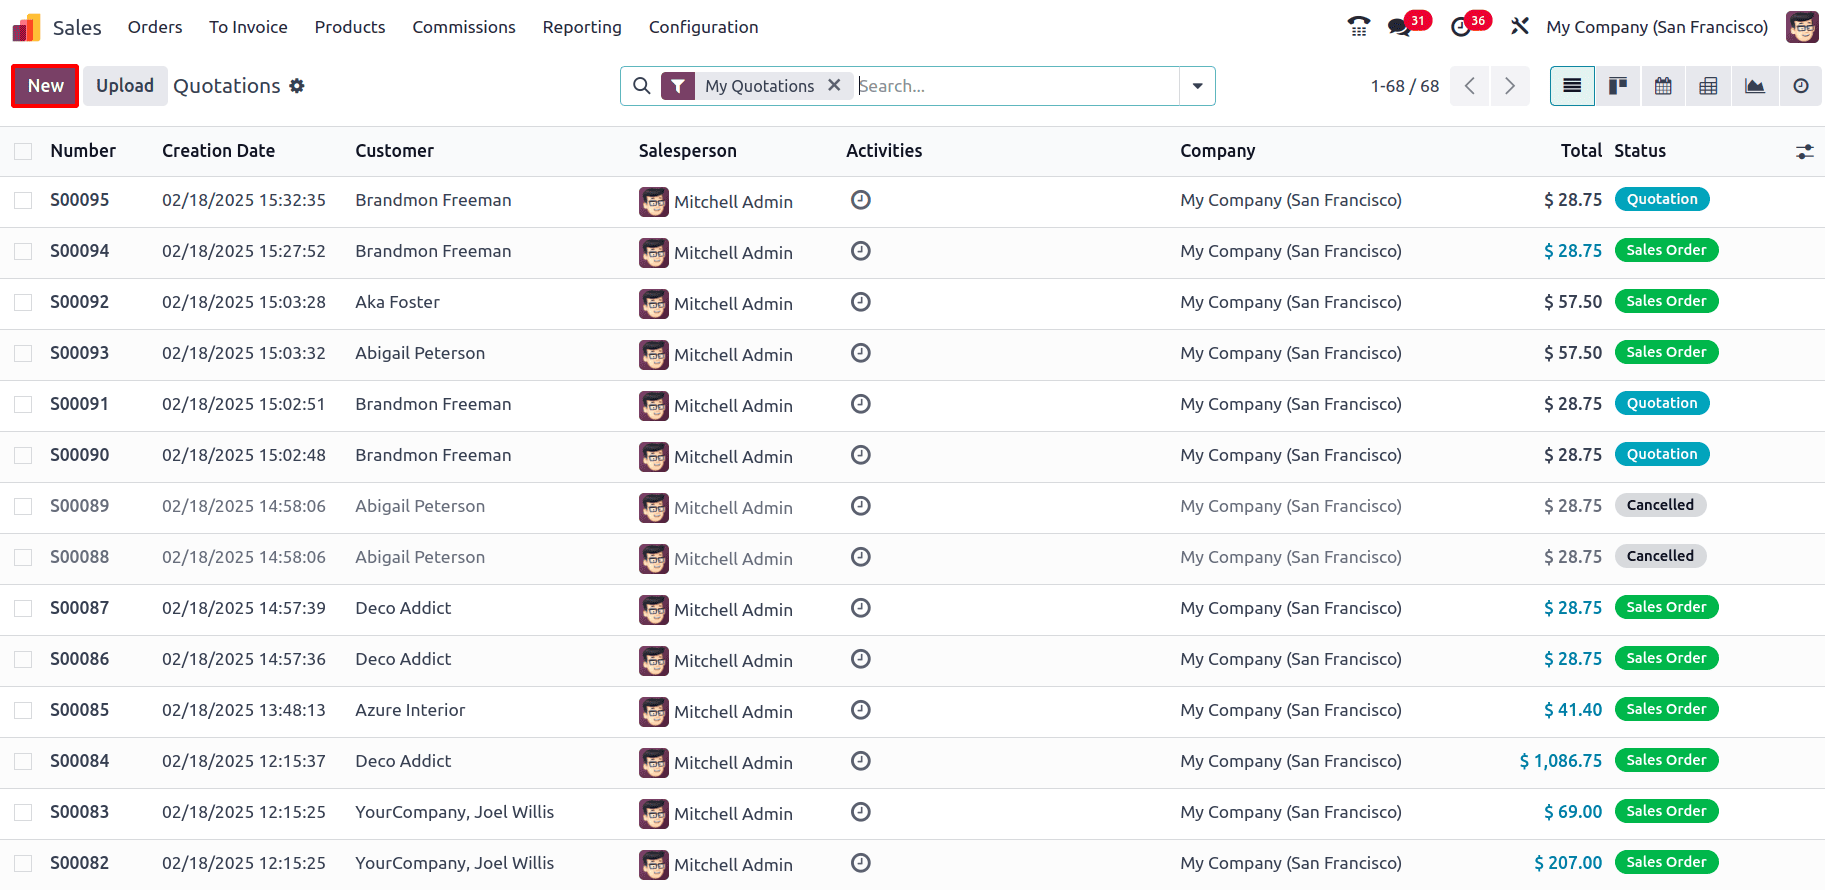
In the quotation form add the customer and other relevant details and confirm the order.
Once the order has been confirmed the Tasks smart button appears.
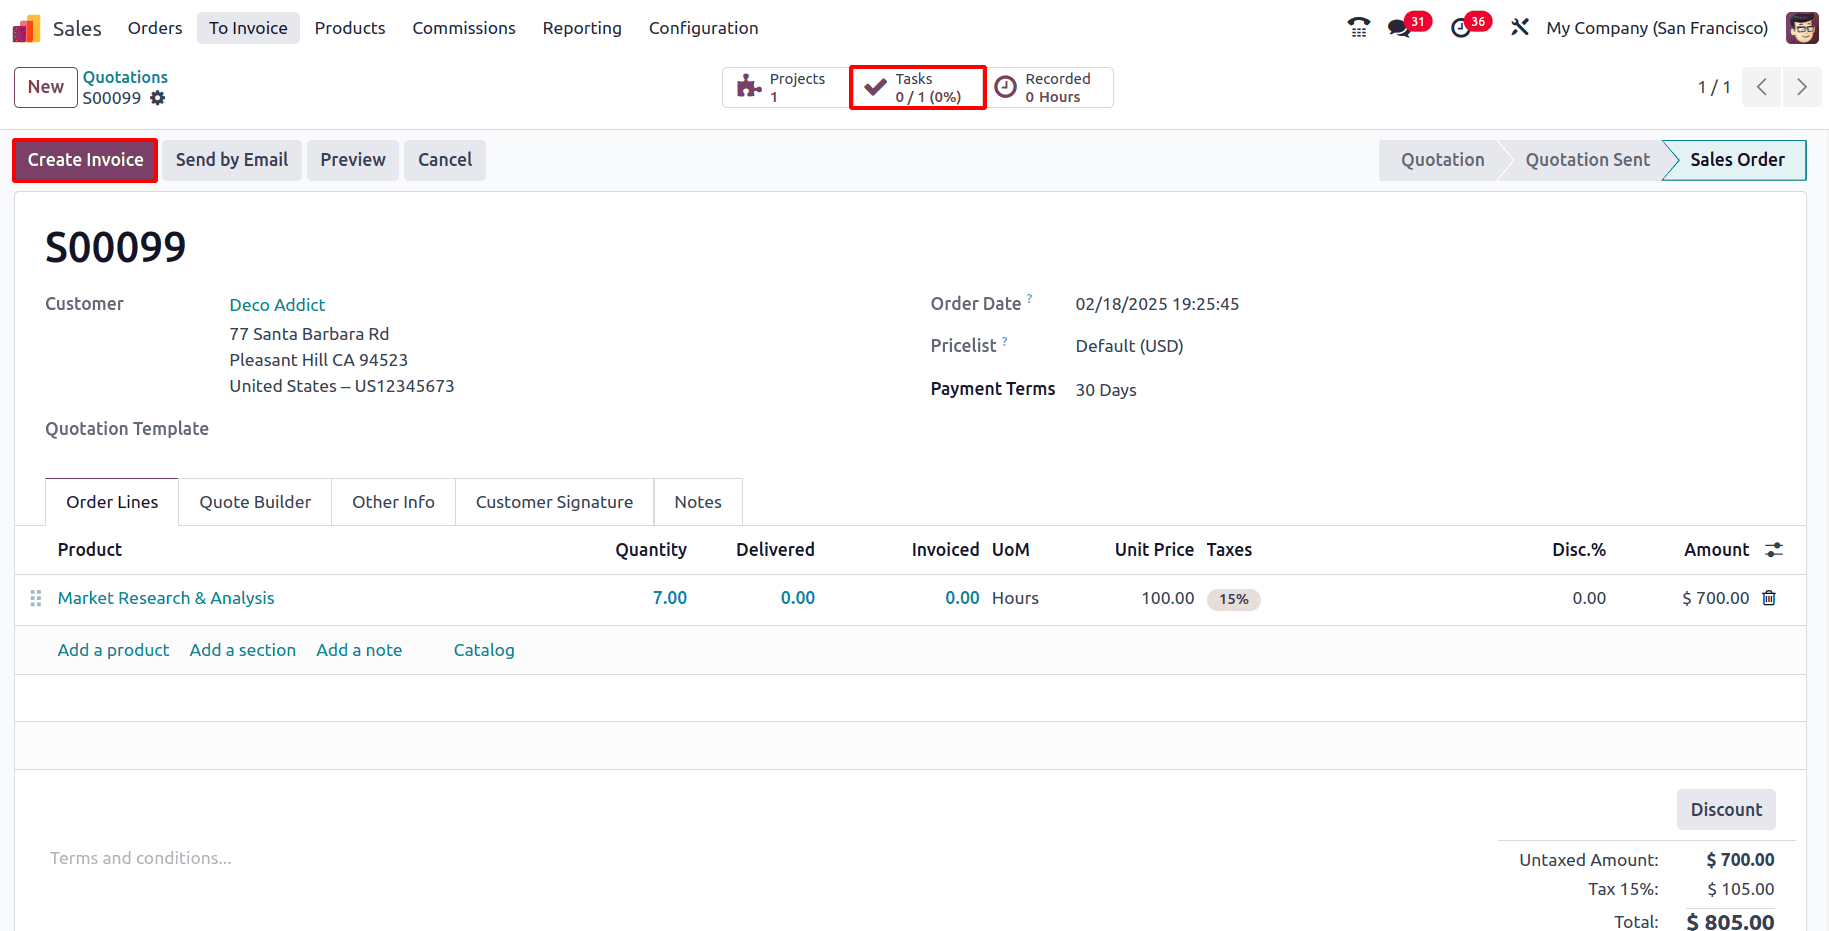
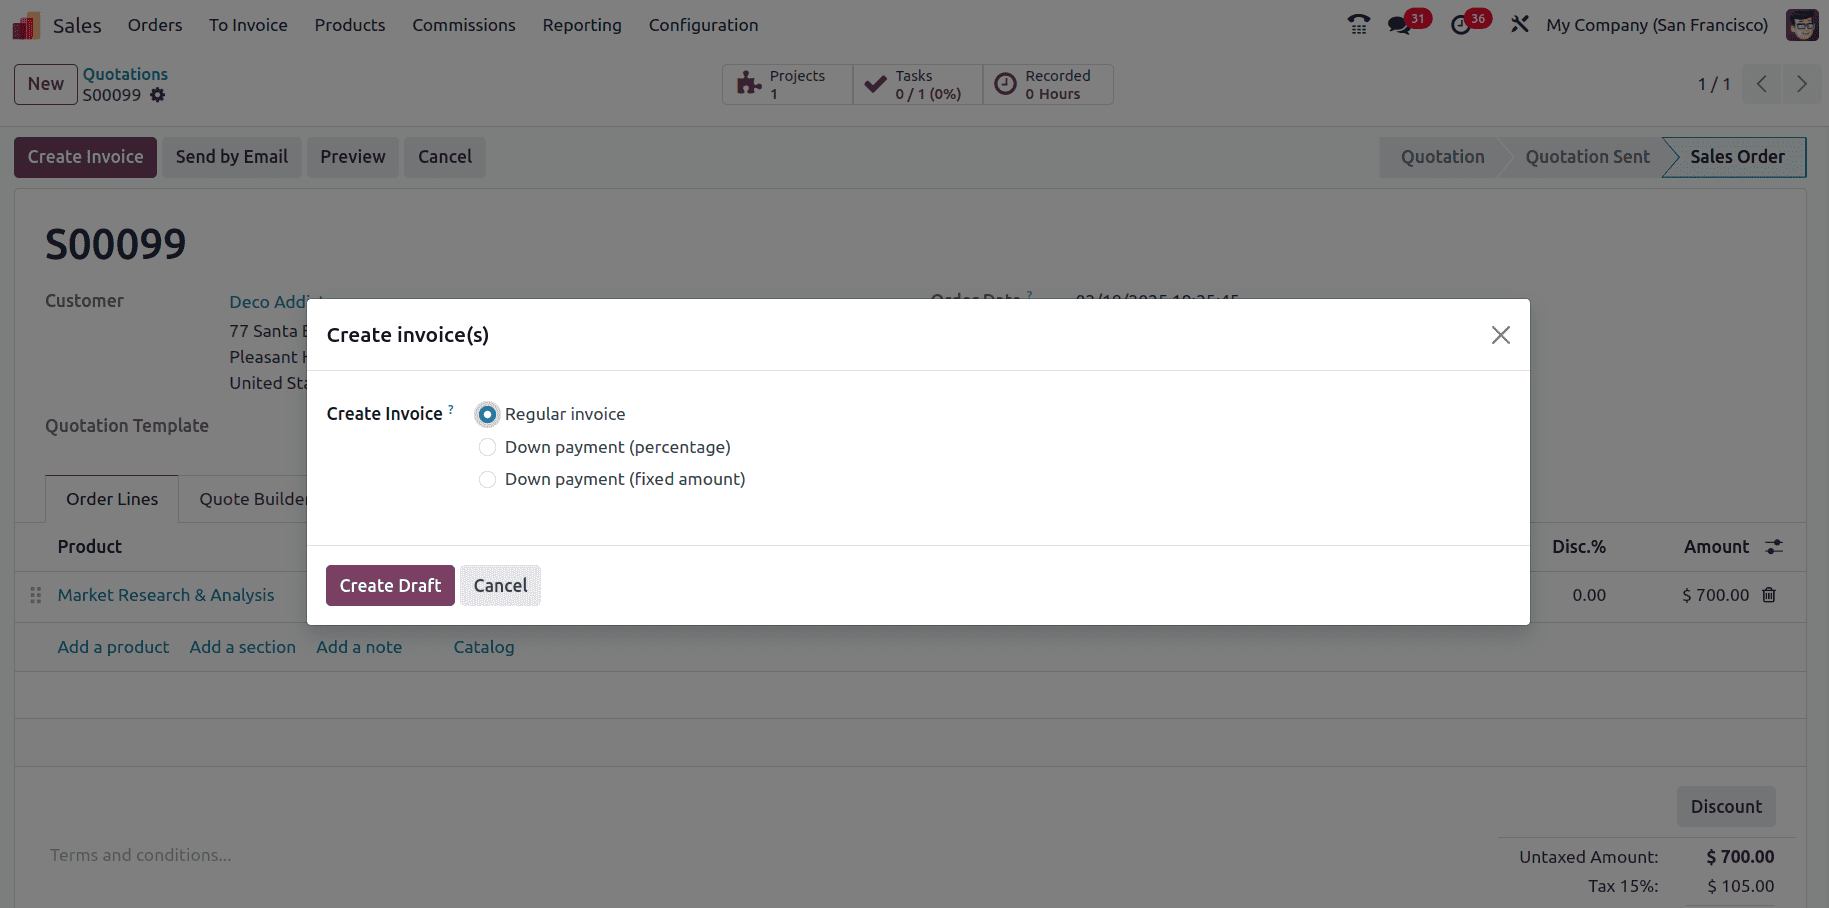
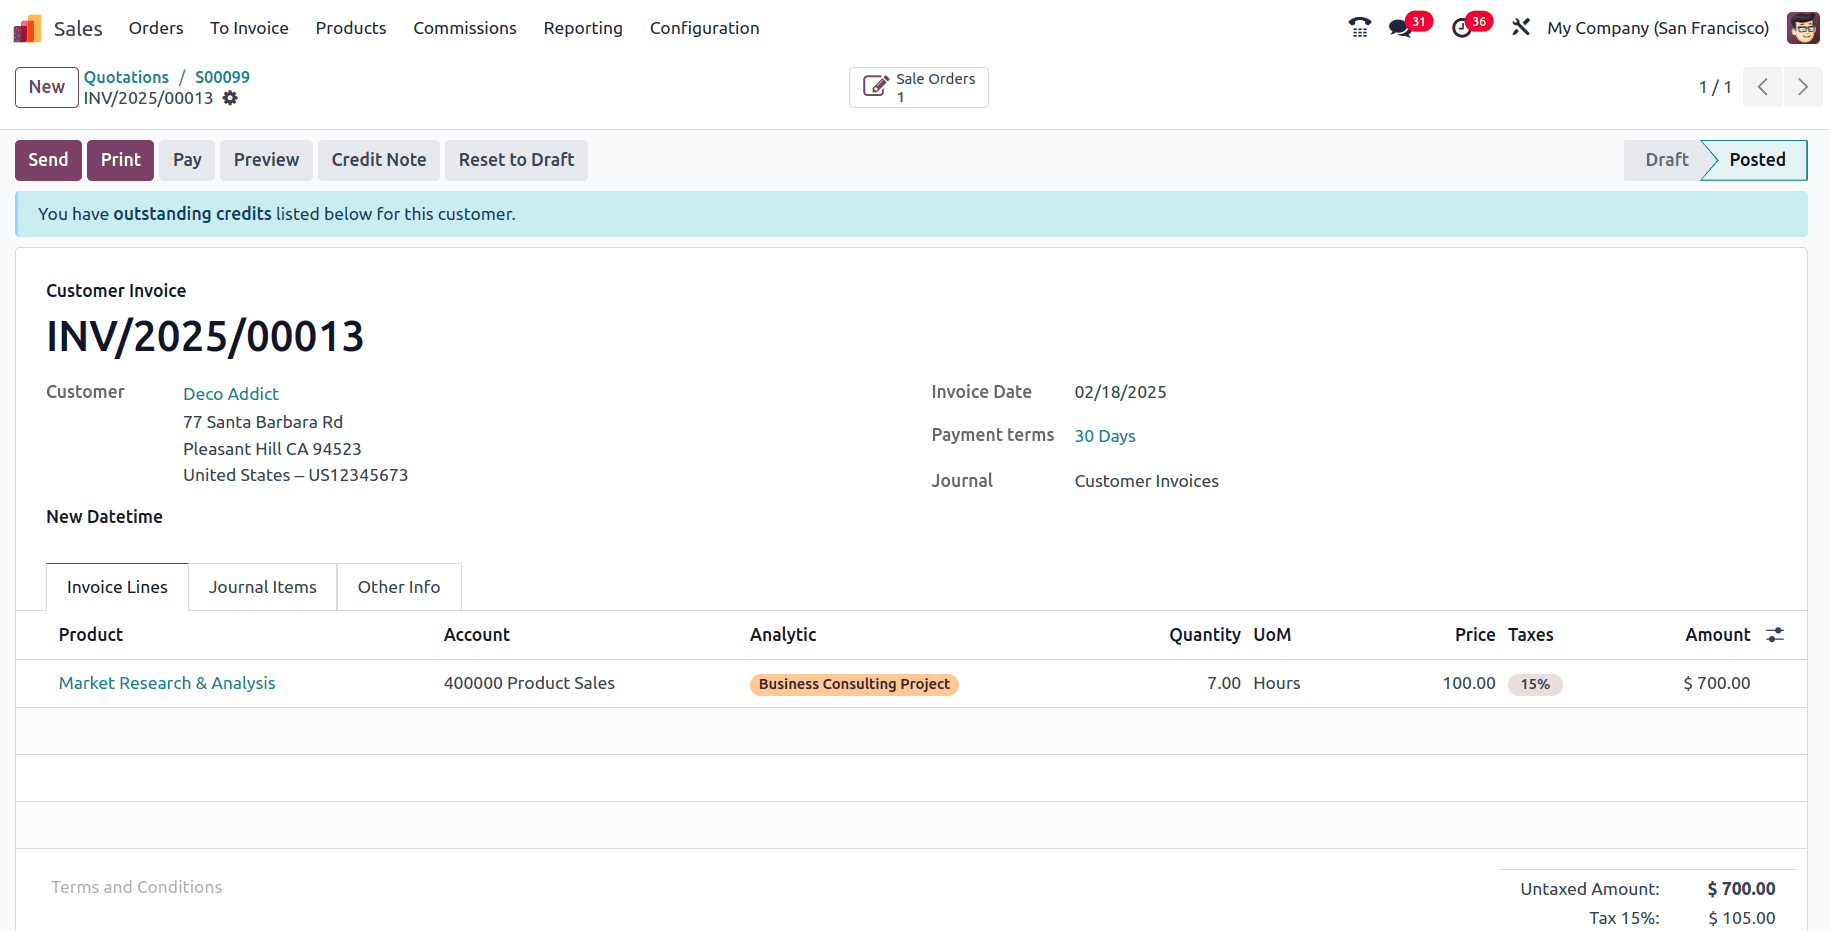
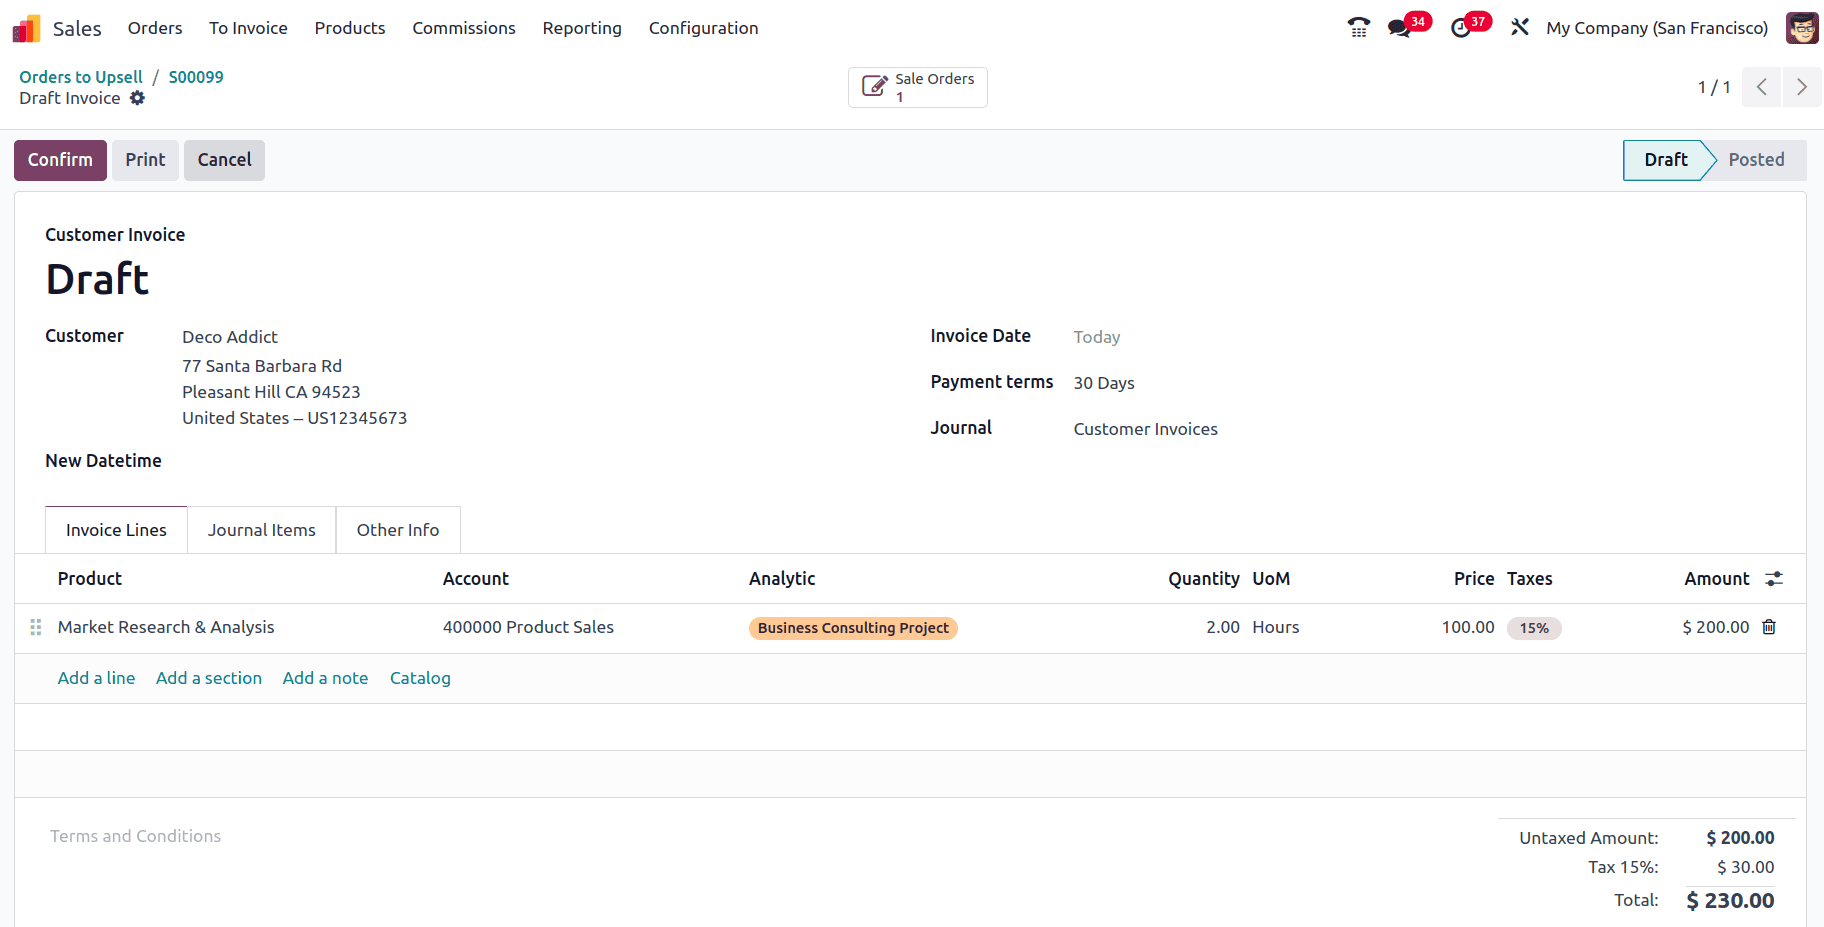
Now since the invoicing policy has been set as Fixed/Prepaid, the invoice of the product can be created. Click on the Create Invoice button, and if it is a regular invoice, select regular invoice or if any down payment is made, it can be chosen; then click on the Create Draft button to create a draft invoice.
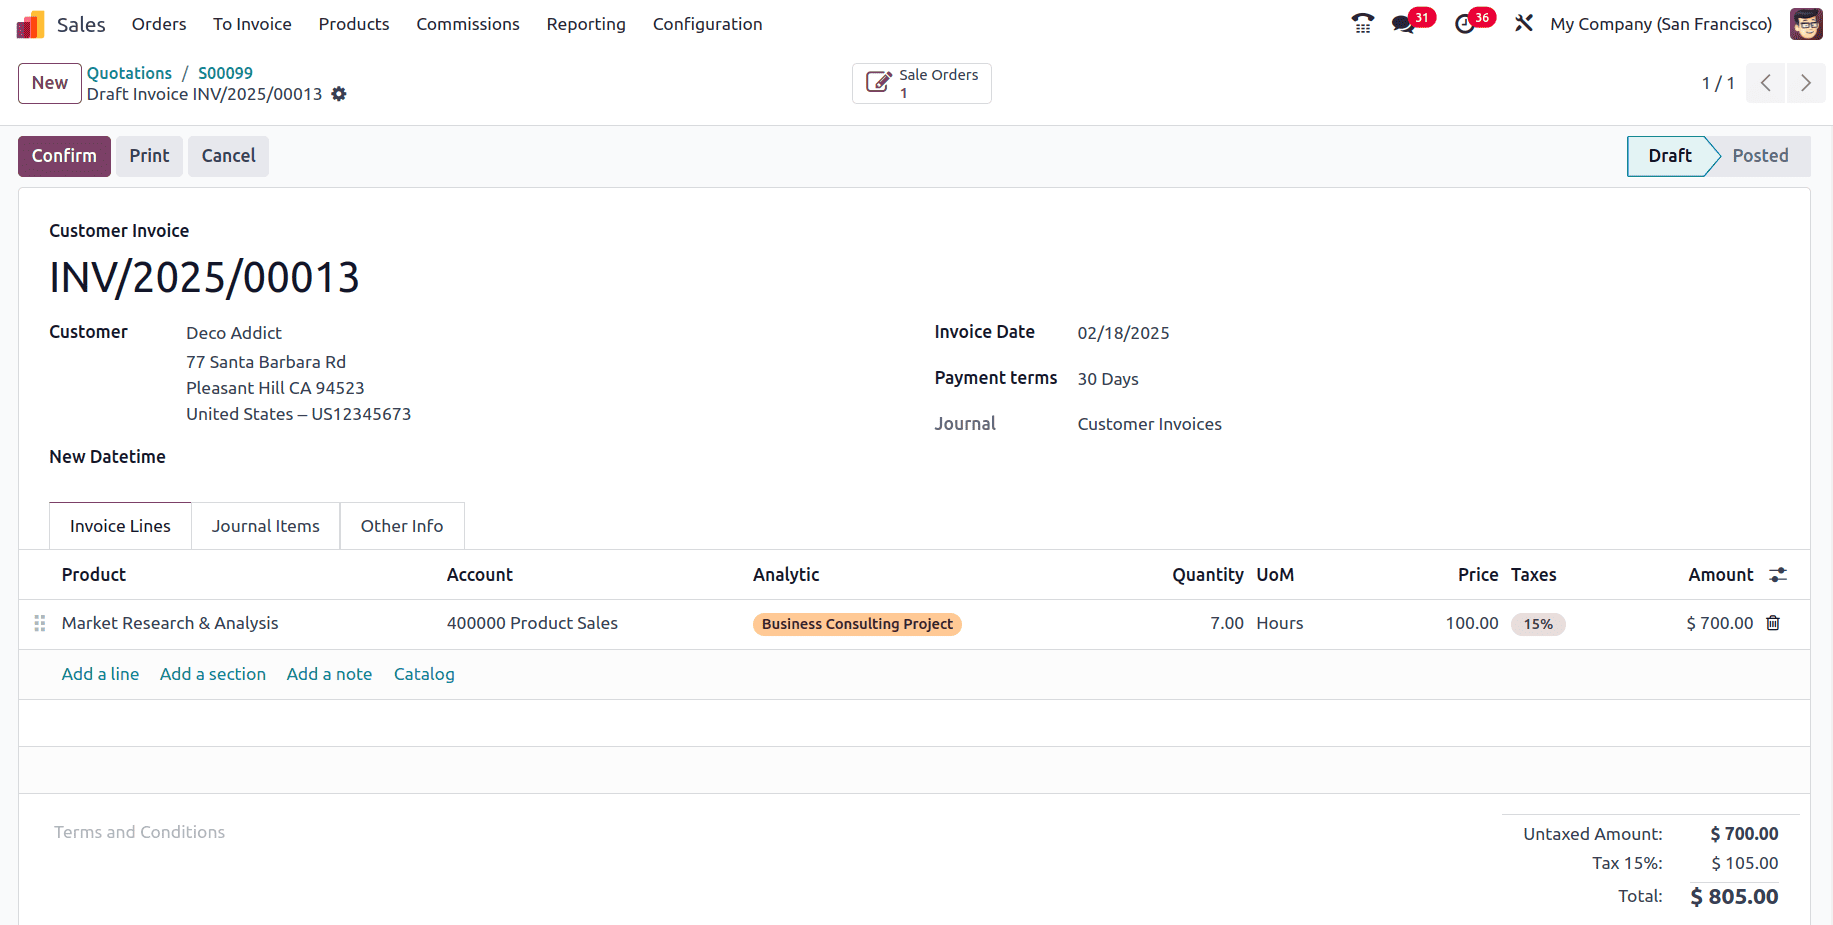
In the draft invoice, it can be seen the invoice has been created for the quantity that was given while creating the order.
Now the invoice can be confirmed and the payment can be made.
Now go back to the Project module and select the project that was created or go to the project through the smart tab. In the project, the task will be created.
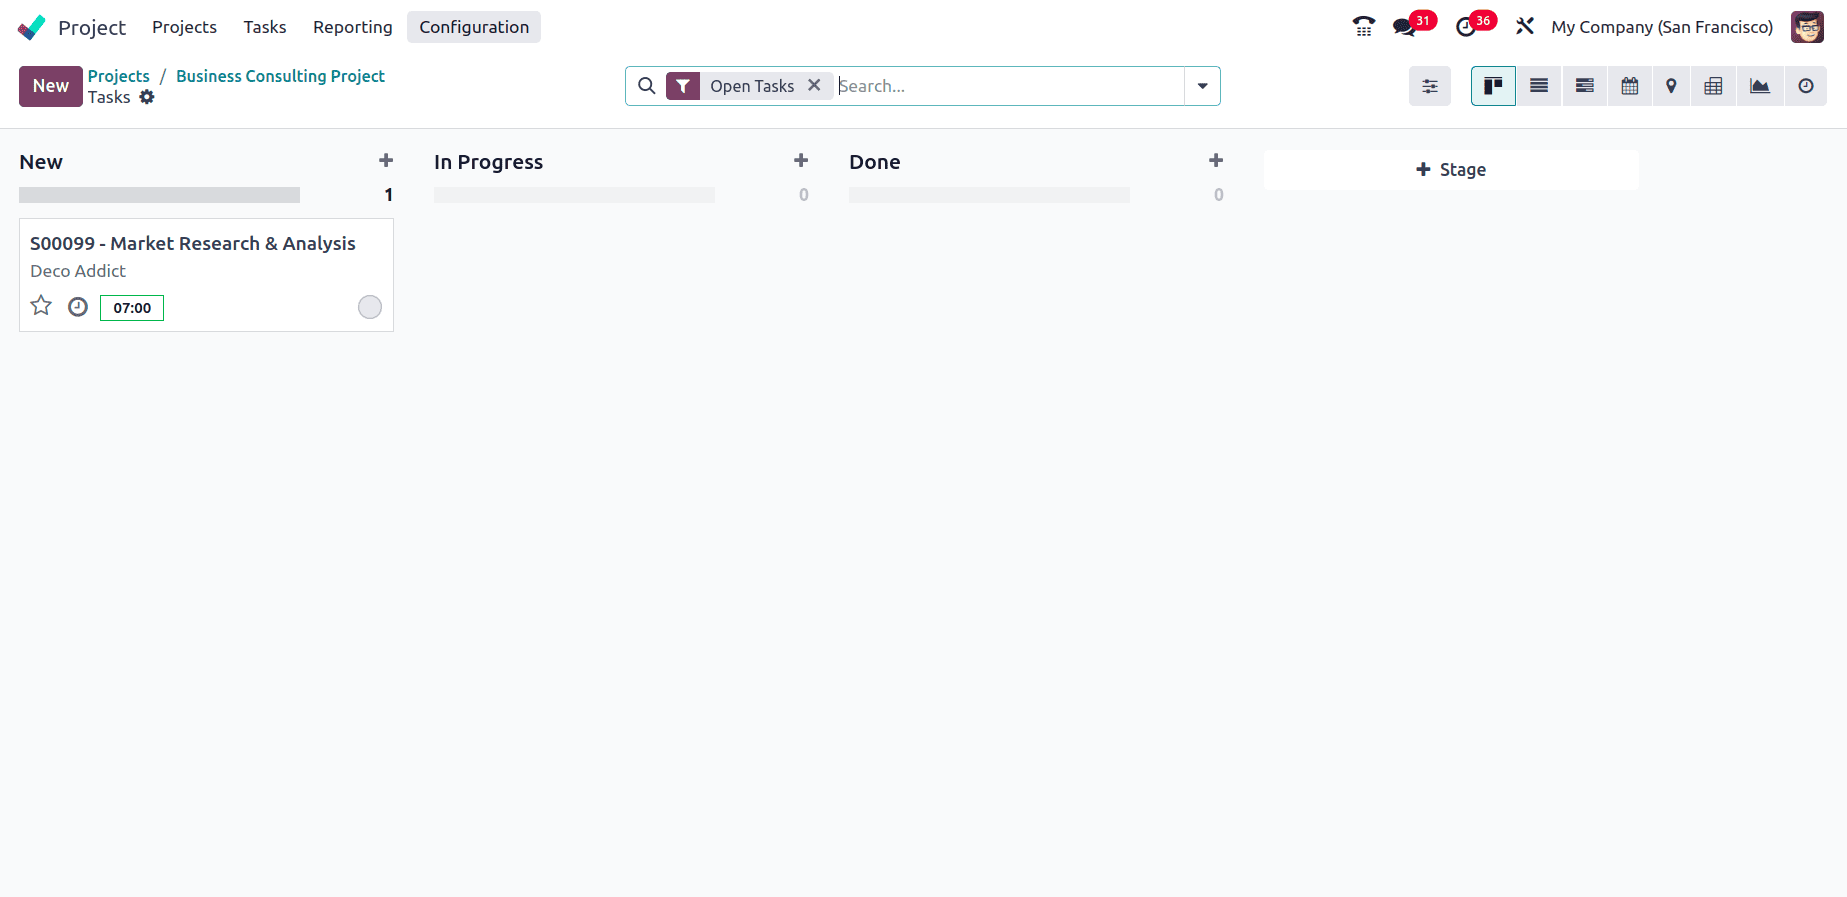
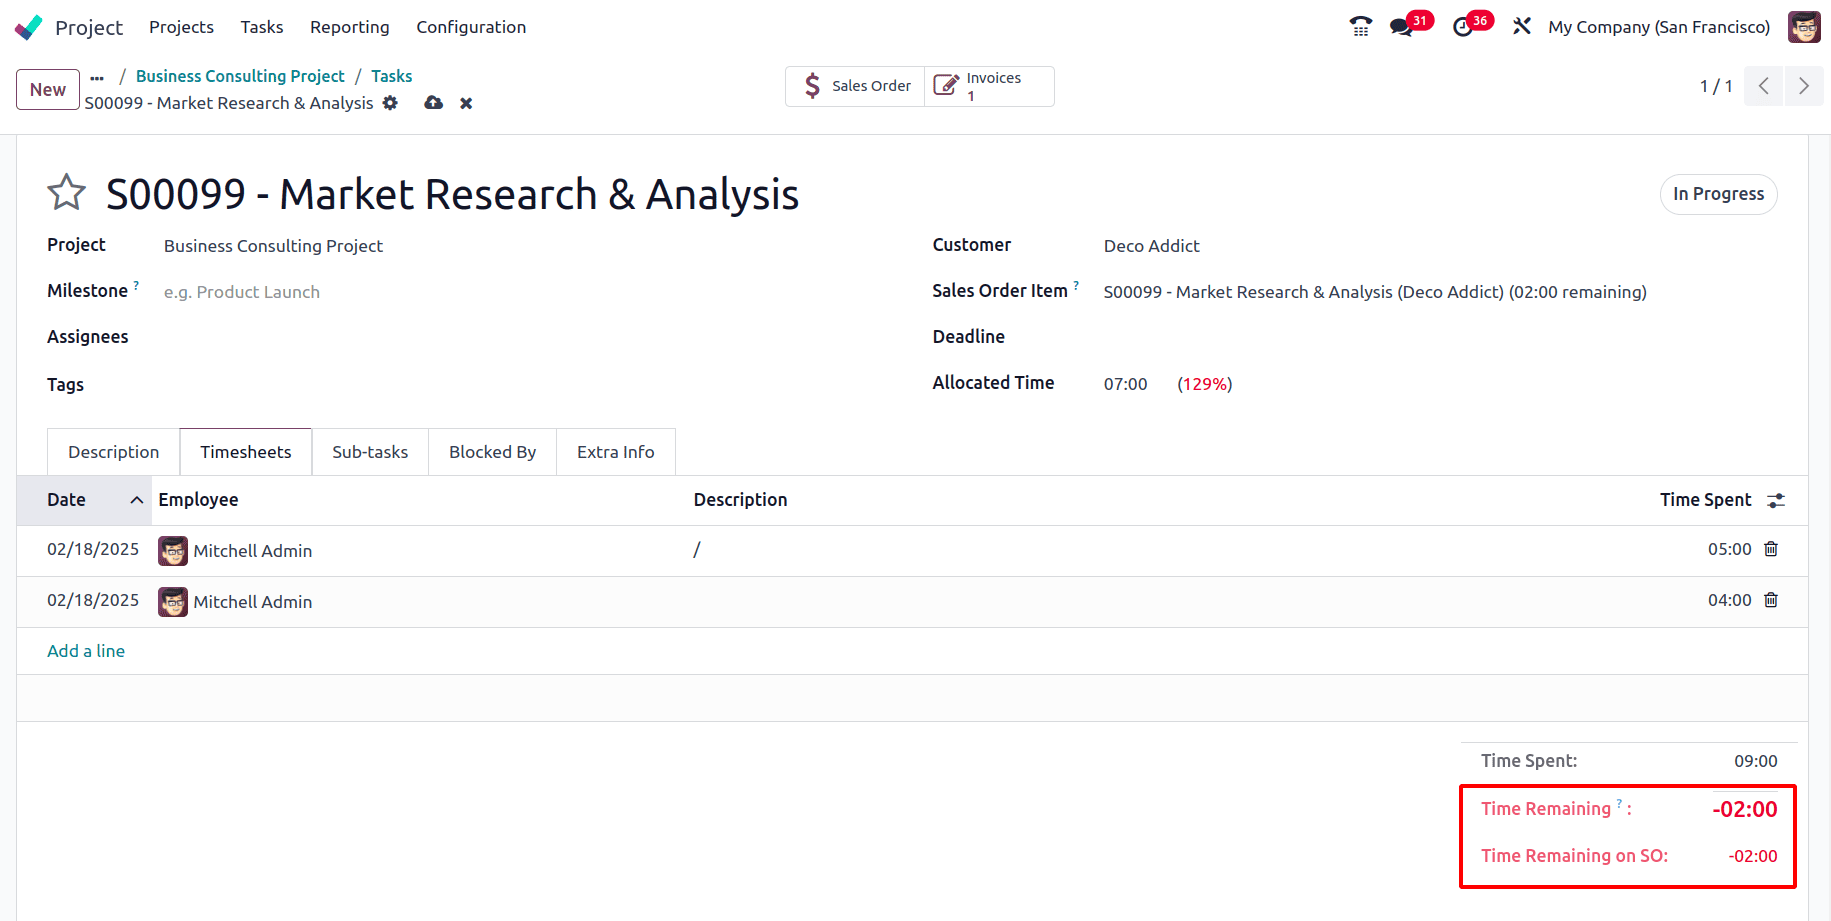
Since it is a Fixed Price/ Prepaid service, the invoice has been generated for the service. Now from the task, the time that has been spent on the project can be logged in the timesheets tab of the task. In the task, the Allocated Time has been given as the time for which the sale order has been created and for which, the invoice has been created.
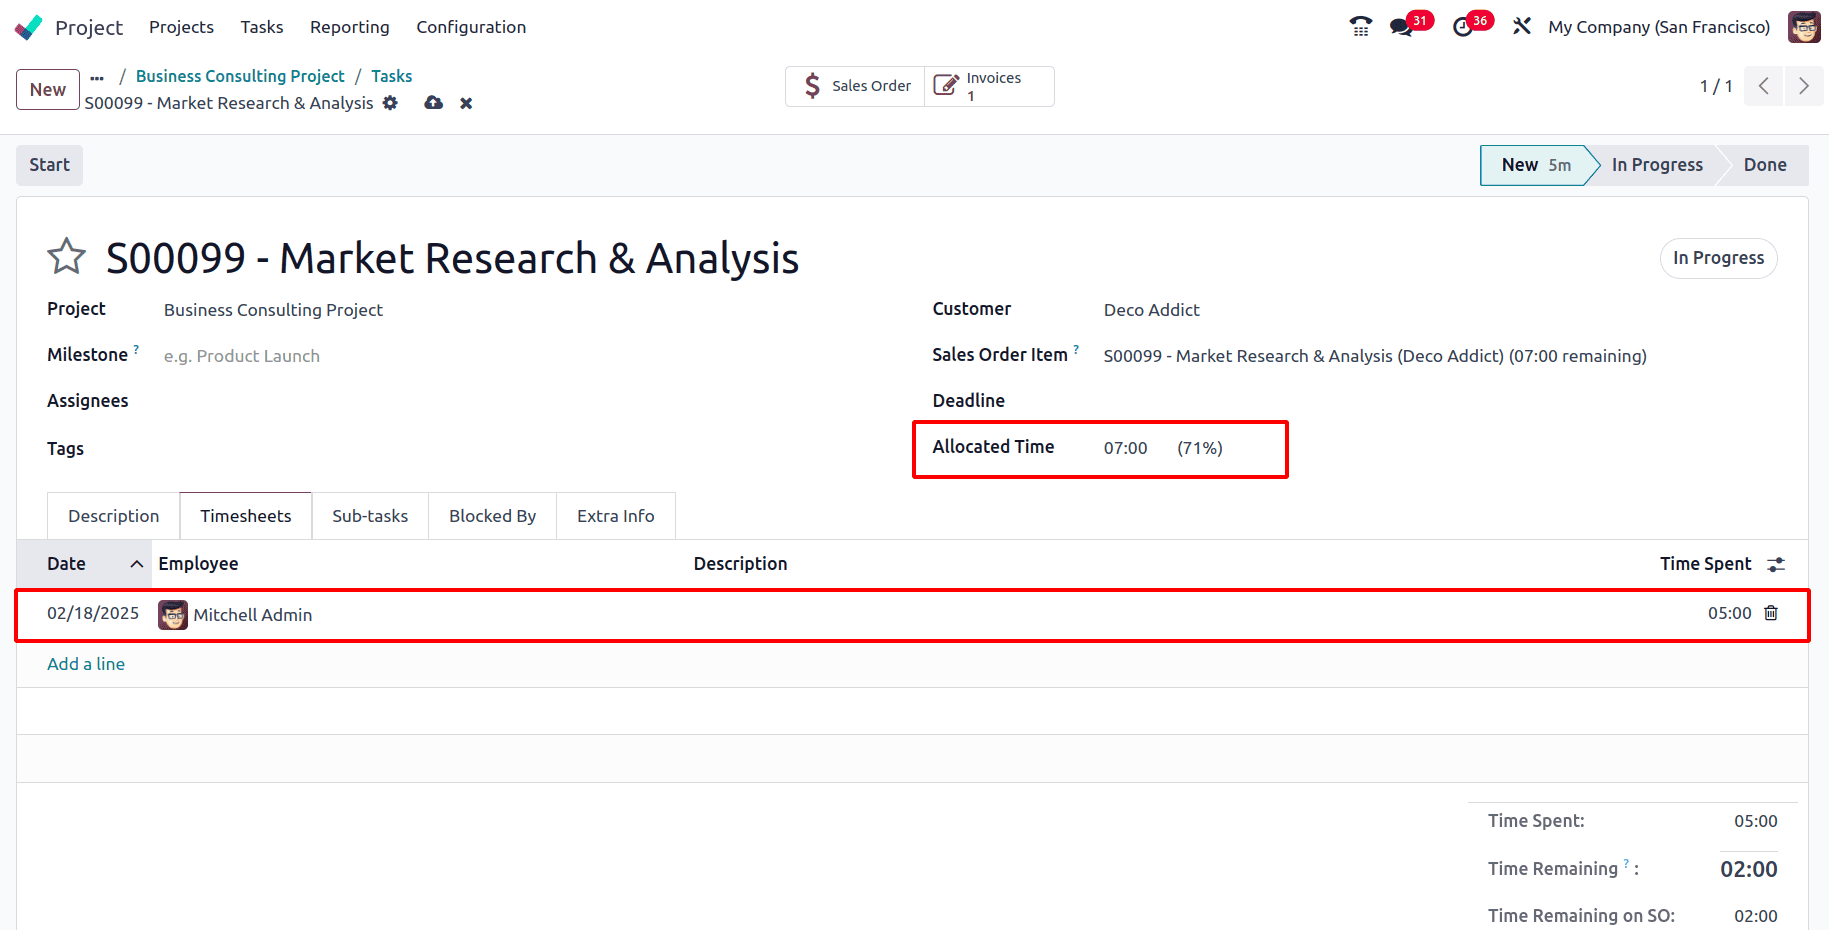
When the time that has been logged exceeds the time that has been allocated the Time Remaining and Time Remaining on SO are shown in red and in negative quantity.
Also, since the invoice has already been generated for the allocated time for any extra time that has been added an invoice has to be generated again. This is an upselling opportunity, and the invoice can be generated from the Orders to Upsell menu from the sales module. For that, navigate to Sales Module > To Invoice > Orders to Upsell.
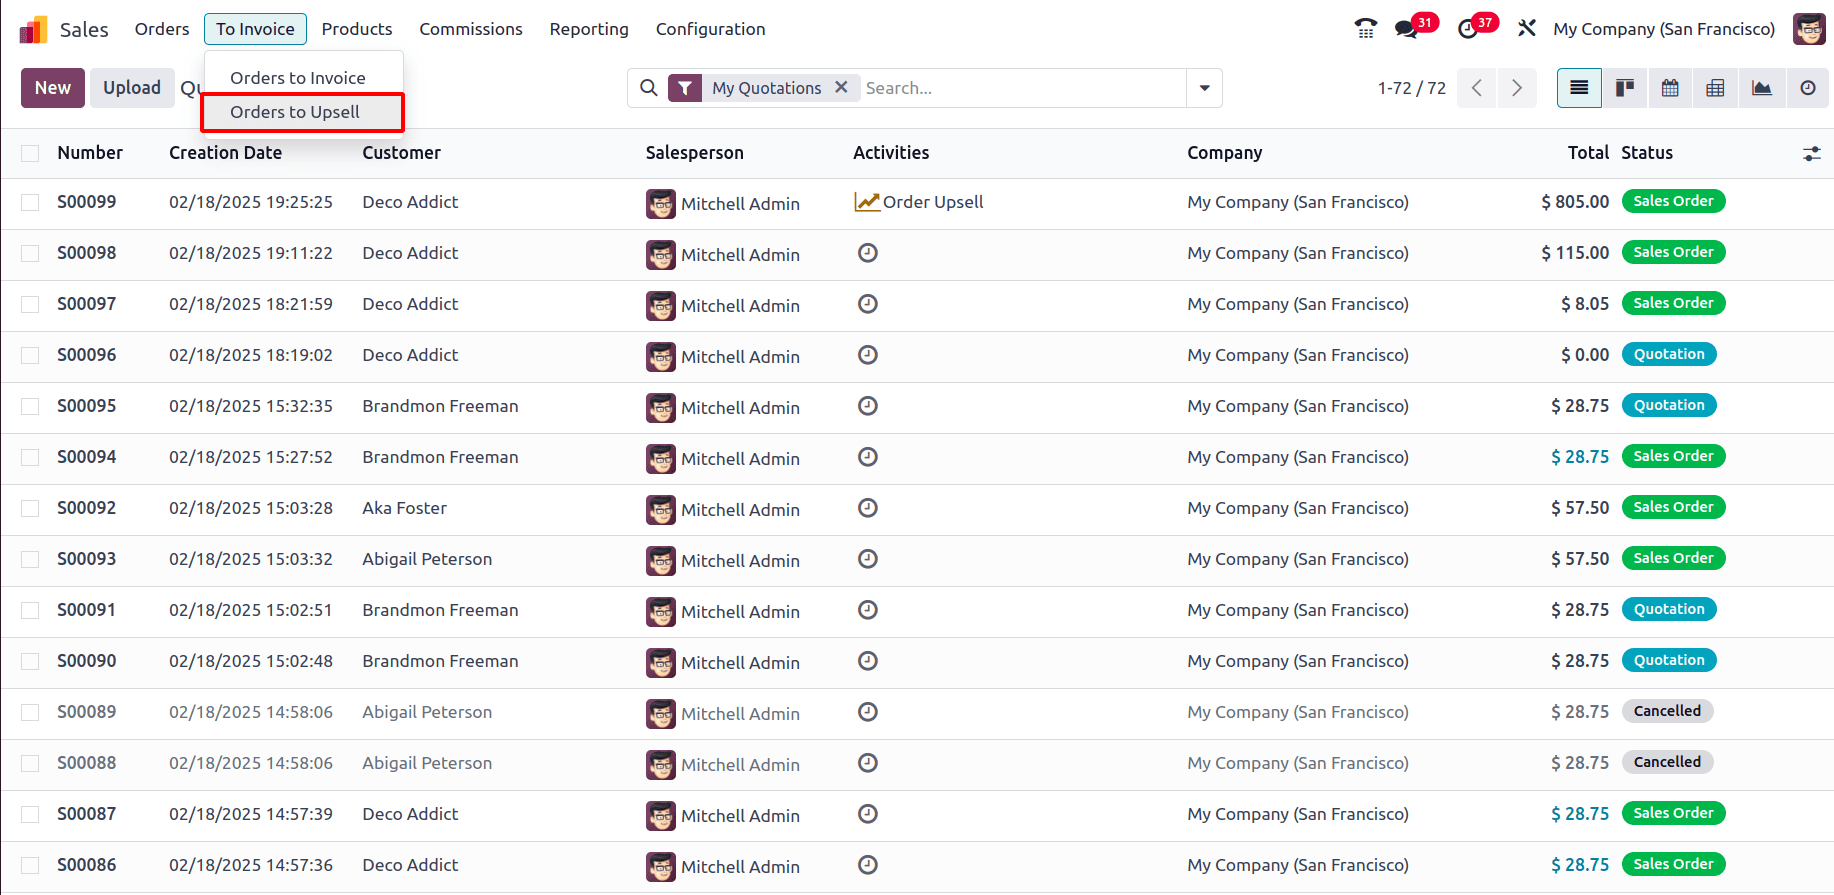
Here, all the orders to upsell can be viewed.
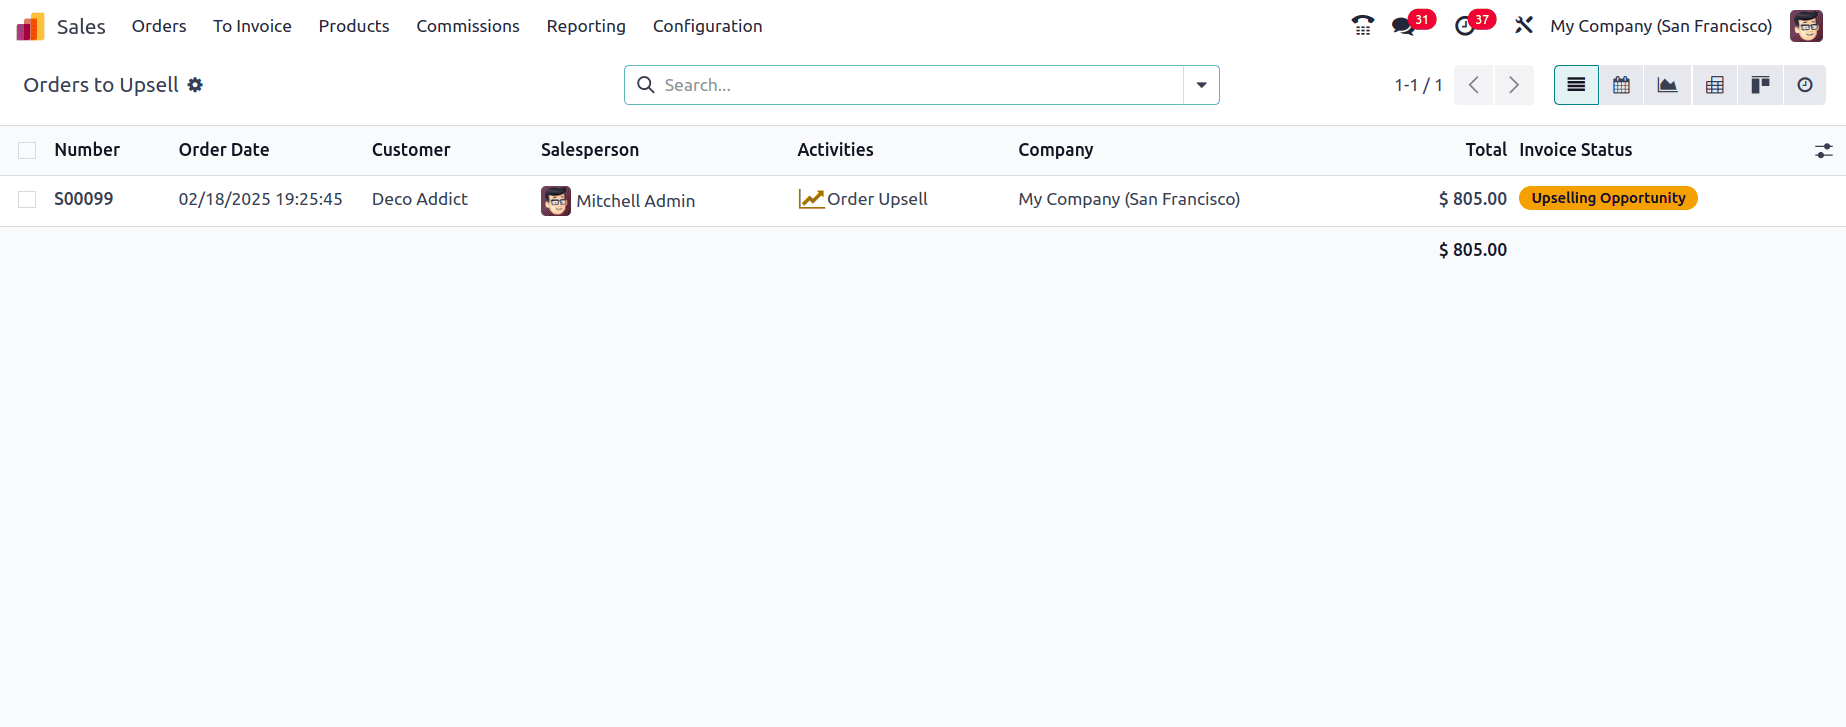
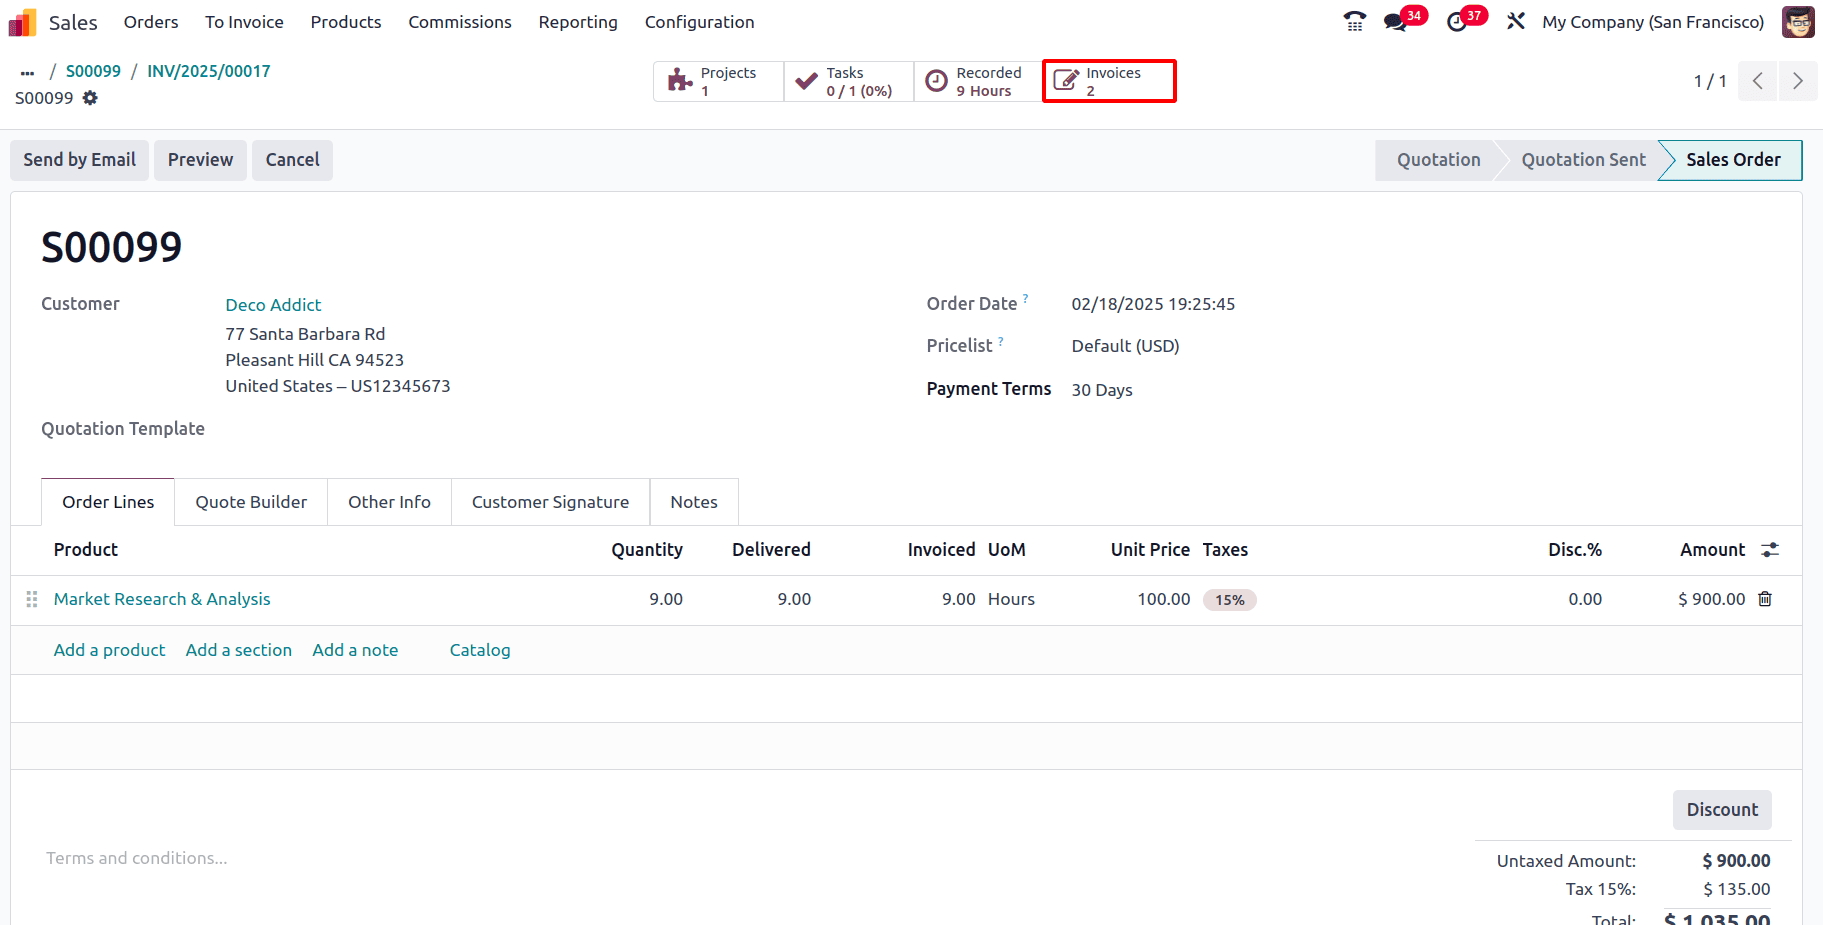
Click on that, and the order can be viewed. From there, the ordered quantity, delivered quantity and invoiced quantity can be viewed.
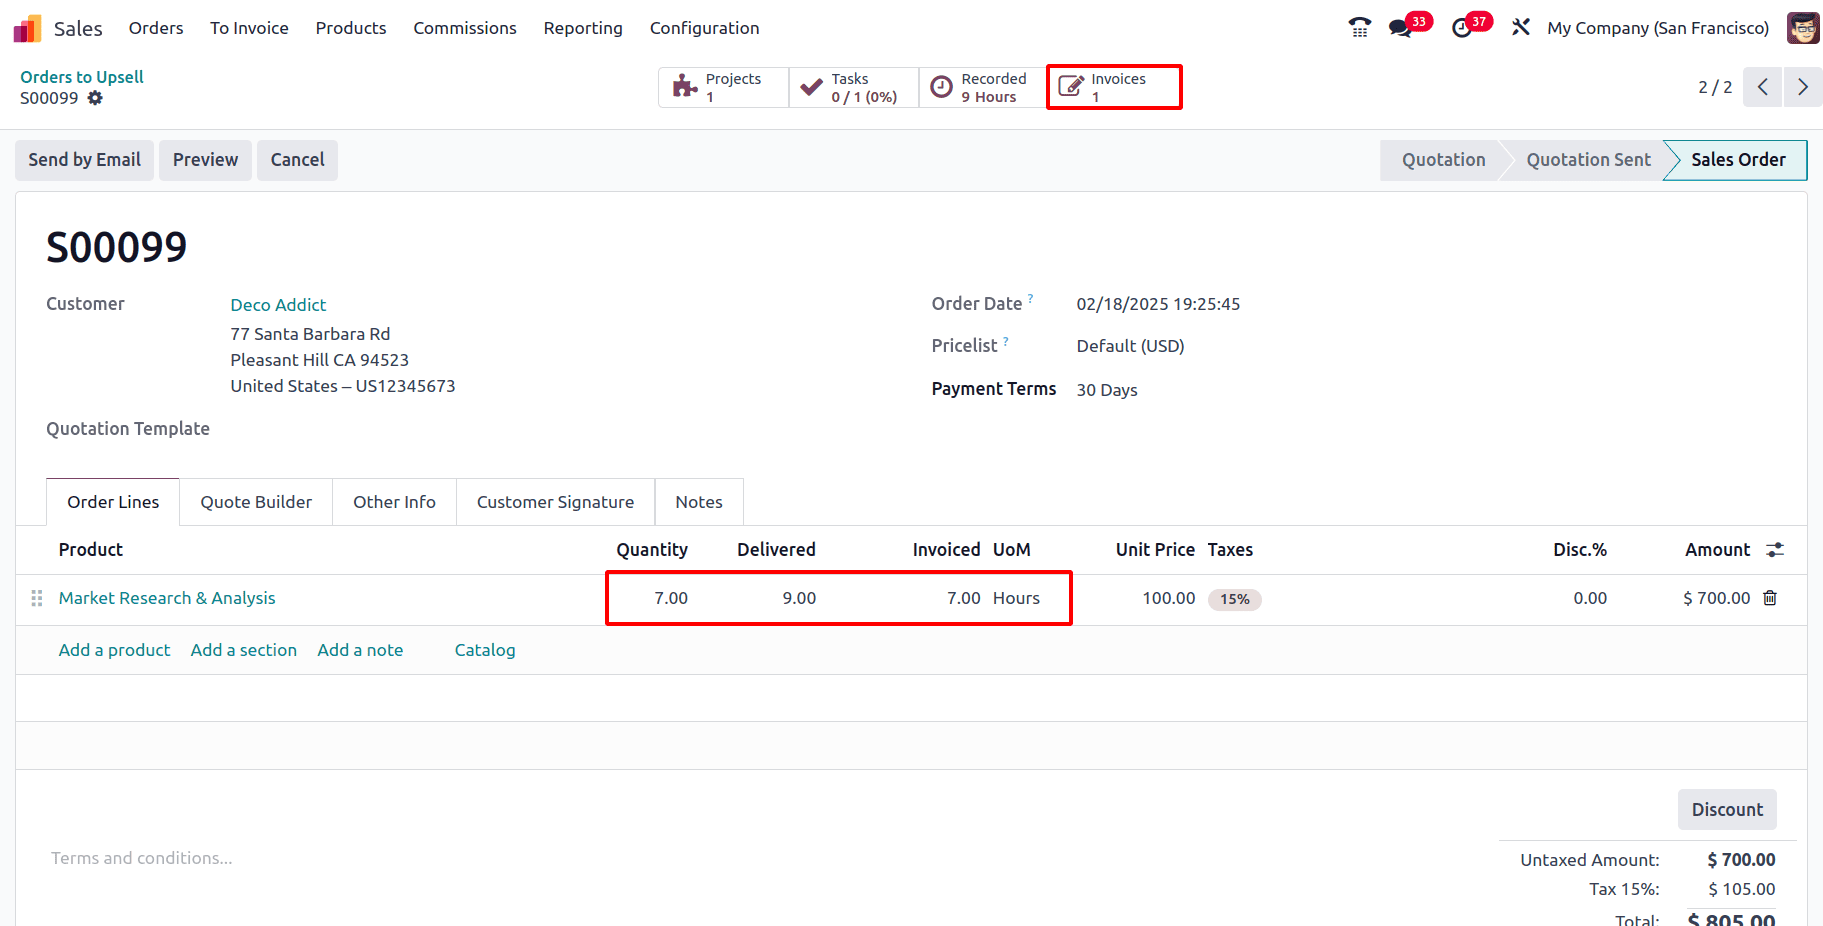
Now the invoice can be created for the remaining hours that have been delivered. Change the quantity to the delivered quantity itself and save. Once the quantity has been updated, the Create Invoice button appears.
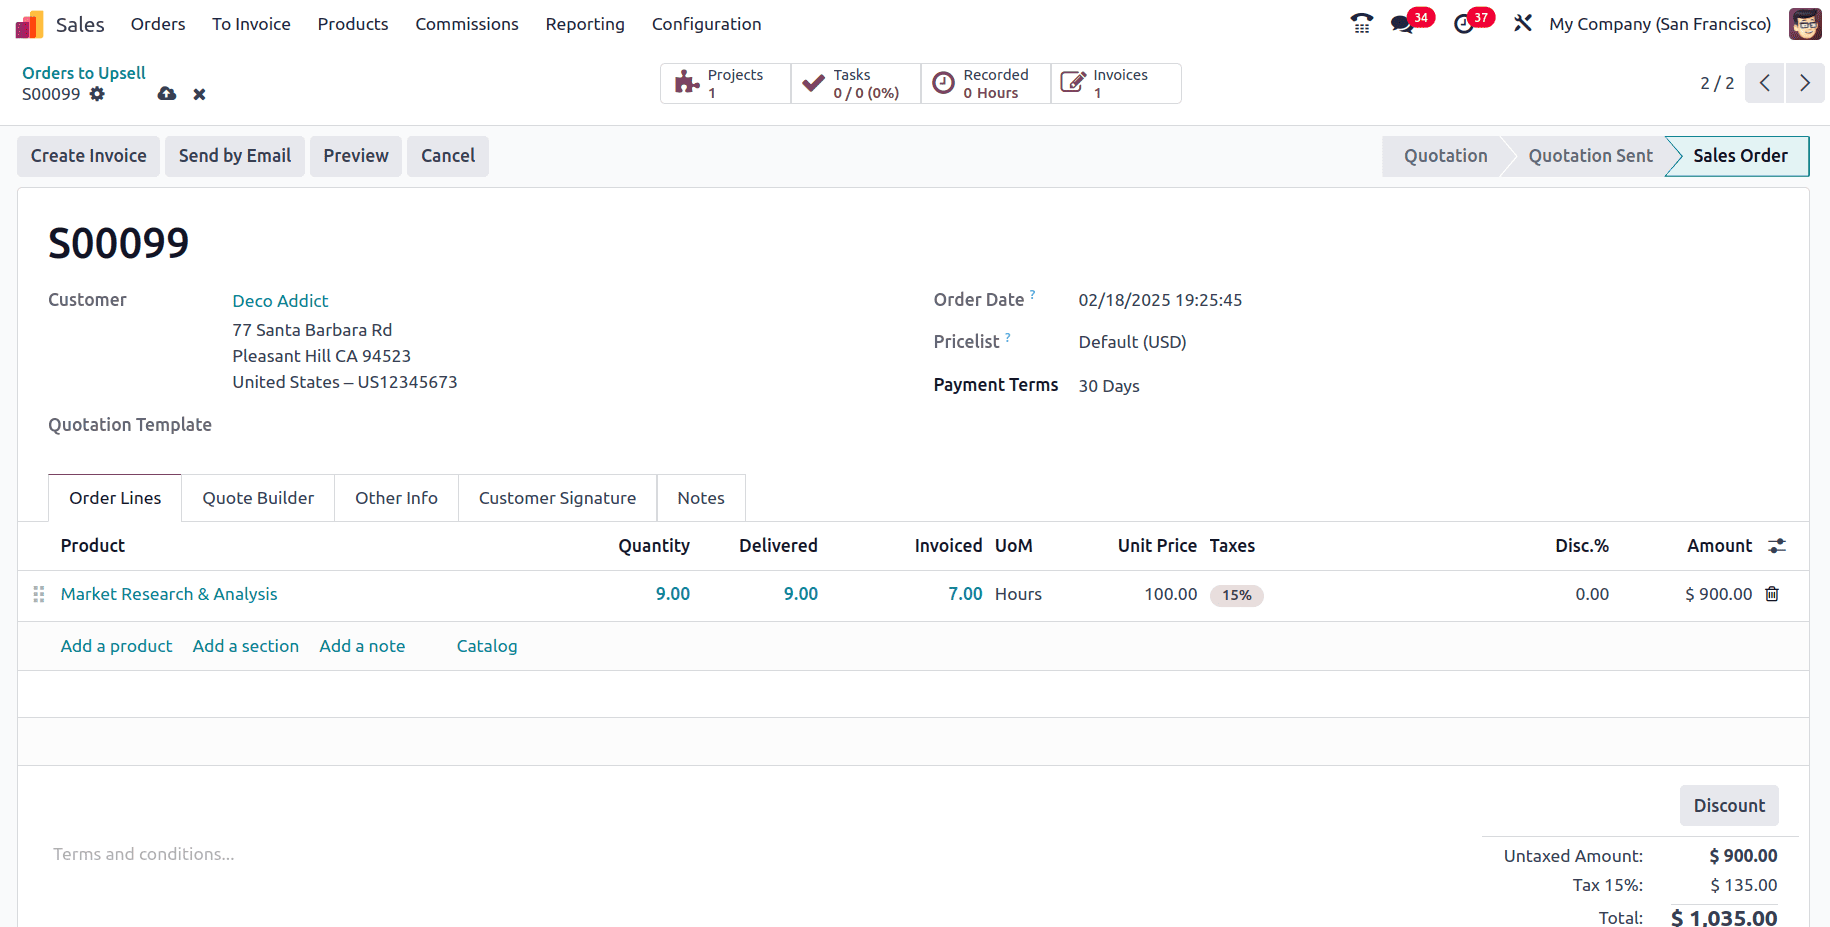
Click on Create Invoice and a draft invoice gets created for the remaining quantities.
Click on the Confirm button to confirm the invoice. Now go back to the Sale order through the smart tab, and from the sale order, the invoice tab is visible, and ‘2’ will be given since two invoices have been generated.
So this is how the billing at a fixed price can be managed in Odoo 18. Billing a project at a fixed price in Odoo 18 is an effective way to maintain financial predictability and ensure smooth cash flow for your business. The system’s seamless integration between Project Management and Invoicing makes it easy to create, manage, and bill fixed-price projects. With tools for cost tracking, milestone-based invoicing, and detailed profitability reports, Odoo 18 provides the necessary functionalities to help businesses stay on top of their projects, ensuring they remain profitable while meeting client expectations. By effectively utilizing these features, businesses can streamline their project management and invoicing processes, reduce administrative overhead, and focus on delivering high-quality results to clients.
To read more about How Project Can Be Billed Based on Milestones in Odoo 18, refer to our blog How Project Can Be Billed Based on Milestones in Odoo 18.