Negotiate with a supplier about sales price, hours of a purchase order, and delivery date included in the purchase order confirmation. A receipt reminder assists to remind the receipt date for your vendor. It sends an email automatically to the vendor assuring the receipt date. So, it is easy to preserve time and make it easier for a purchase order. Purchase order receipts are generated for various purposes and ensure settlement of purchase accounts when processing vendor invoices. Odoo 15 Purchase module is the best way to do the receipt confirmation of your purchase order in a company.
This blog highlights the receipt confirmation of a purchase order with the Odoo 15 Platform.
Users can quickly develop purchase orders, quotations, products, vendor pricelists, and more using Odoo 15 Purchase module. Purchase management for a business becomes effective by implementing Odoo ERP. Stock update, vendor management, reporting, and configuration are other features of the Odoo 15 Purchase module. Let’s see the receipt confirmation of a Purchase Order with the Odoo 15 Platform.
To Activate Receipt Reminder Feature in Odoo 15
We want to activate Custom Email Servers from Odoo 15 Settings to configure your email servers. After activating the Custom Email Servers field, the Alias Domain option is visible before you, as displayed in the screenshot.
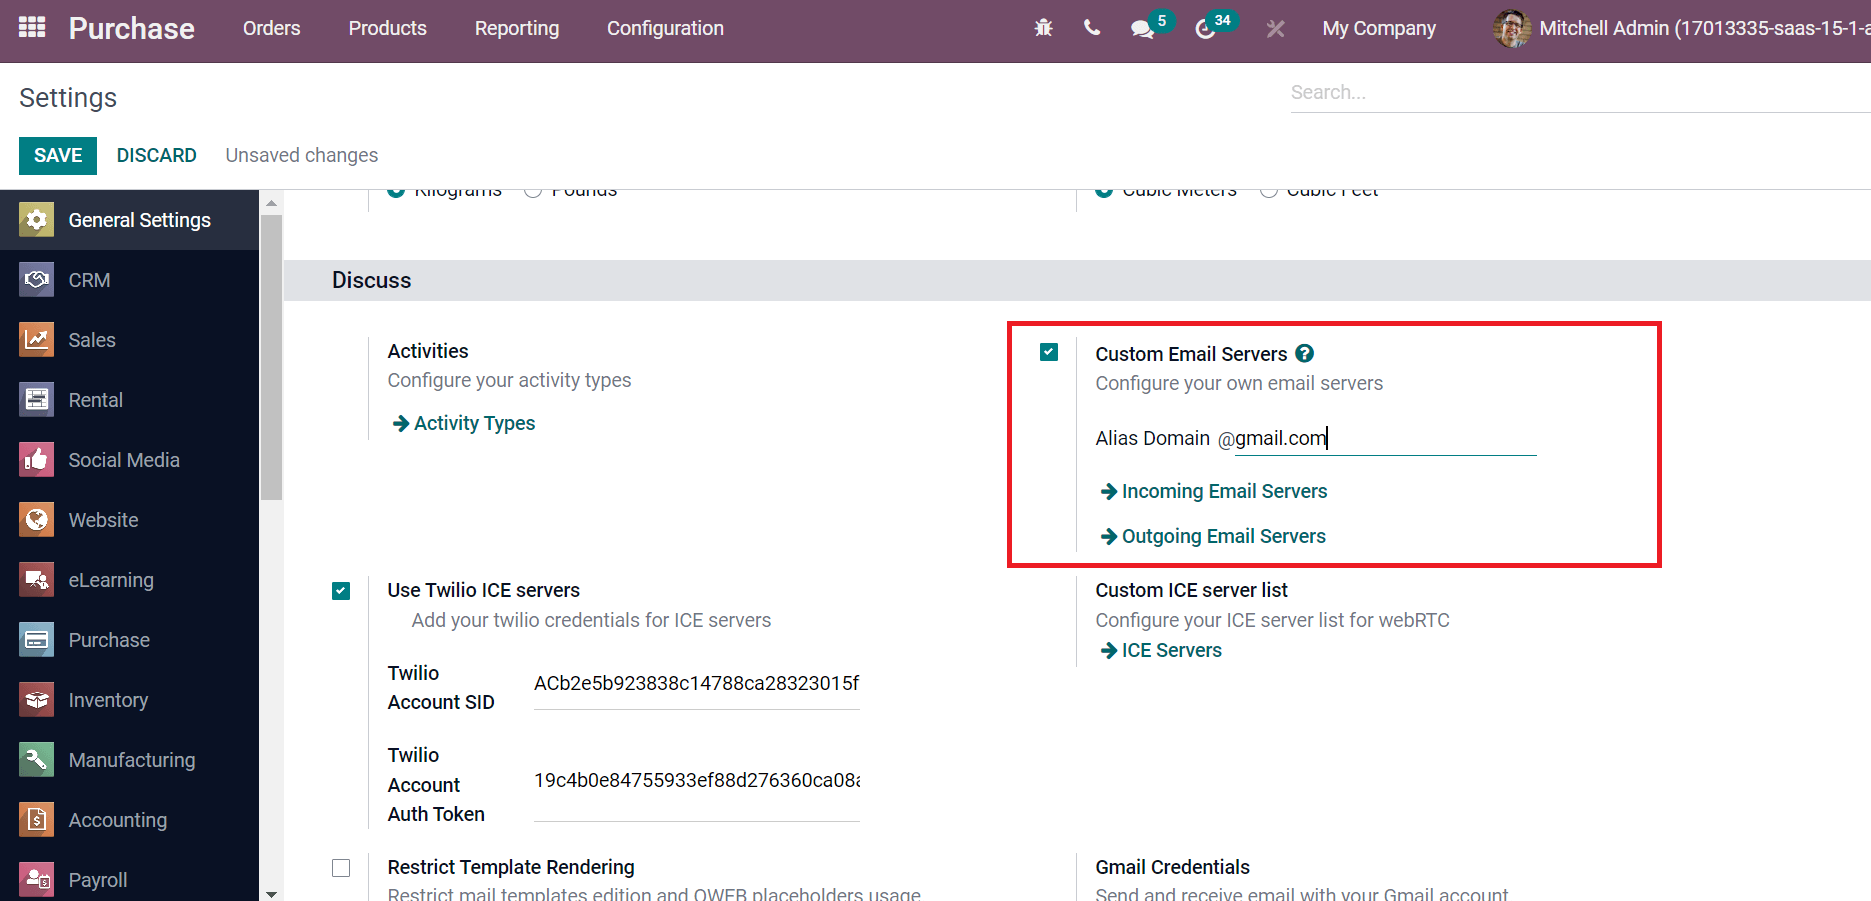
Add ‘@gmail.com’ inside the Alias Domain field as in the above screenshot. Later, select the Outgoing Email Servers to set a new one to send emails. In the new window, enter the Name, and set a Priority. Below the Authentication section, you can authenticate with a Username or SSL Certificate, as demonstrated in the screenshot below.
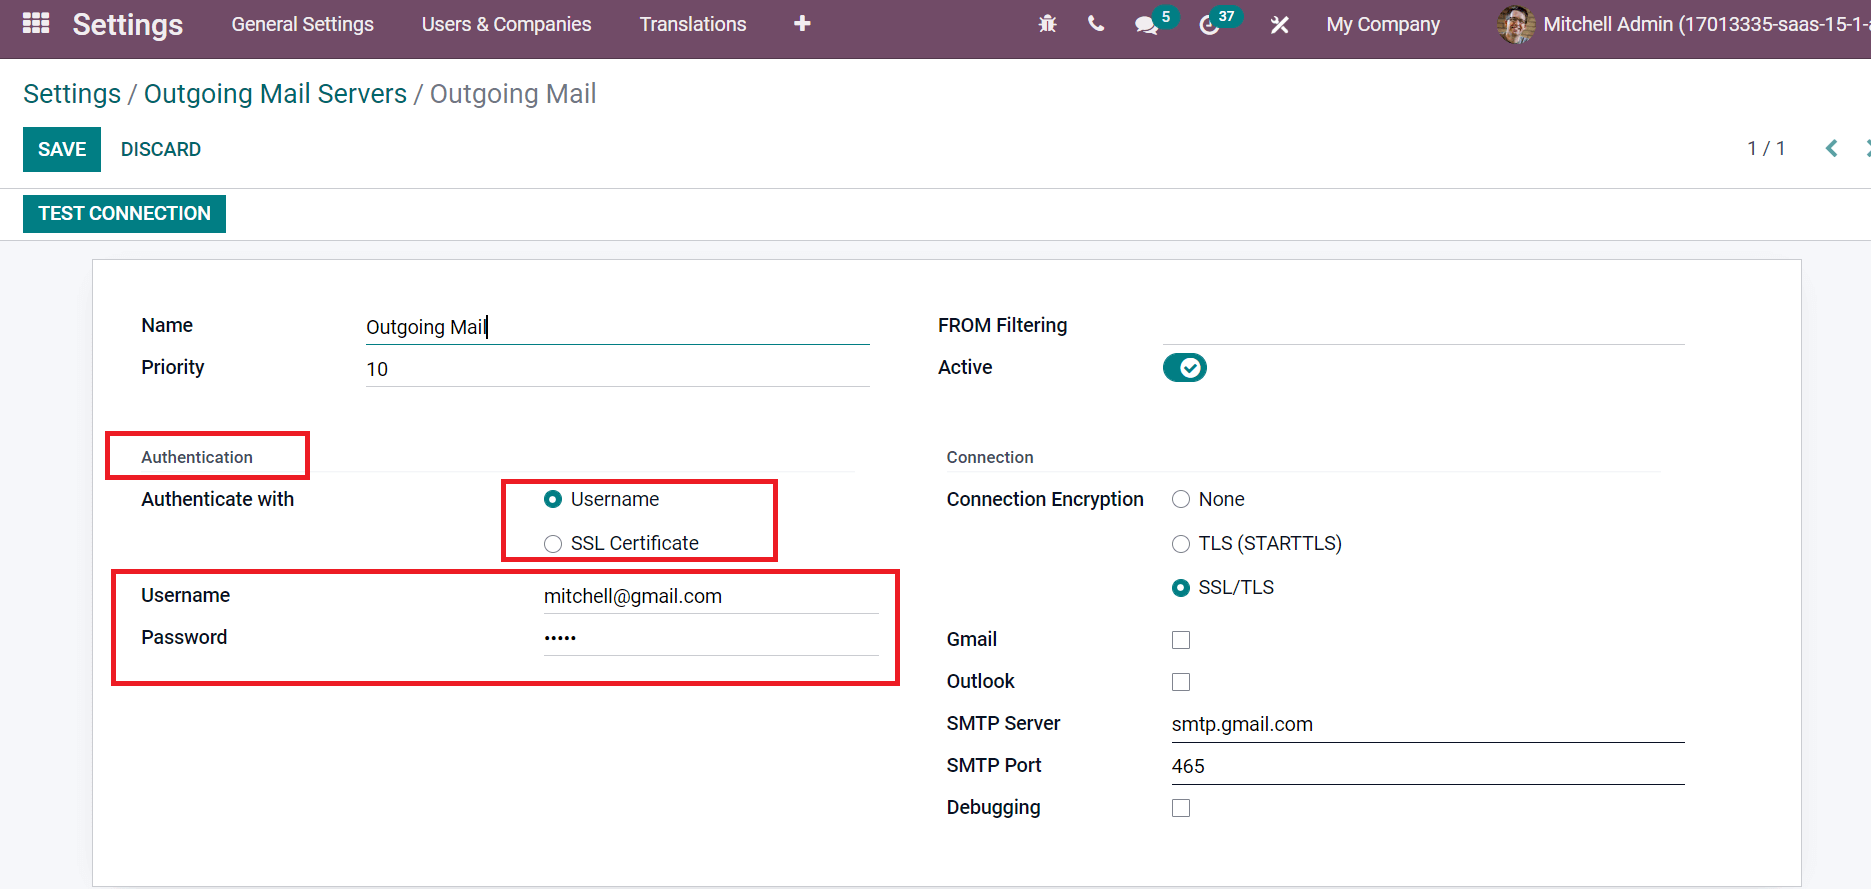
Here, we selected the Authenticate with Username and entered the email id in the Username field. You must choose a Connection Encryption scheme such as None, TLS, or SSL/TLS. TLS scheme was requested at the beginning of the SMTP session. SMTP sessions are done in clear text by choosing the None option. By selecting SSL/TLS, SMTP sessions are encrypted through a dedicated port, as specified in the screenshot below.
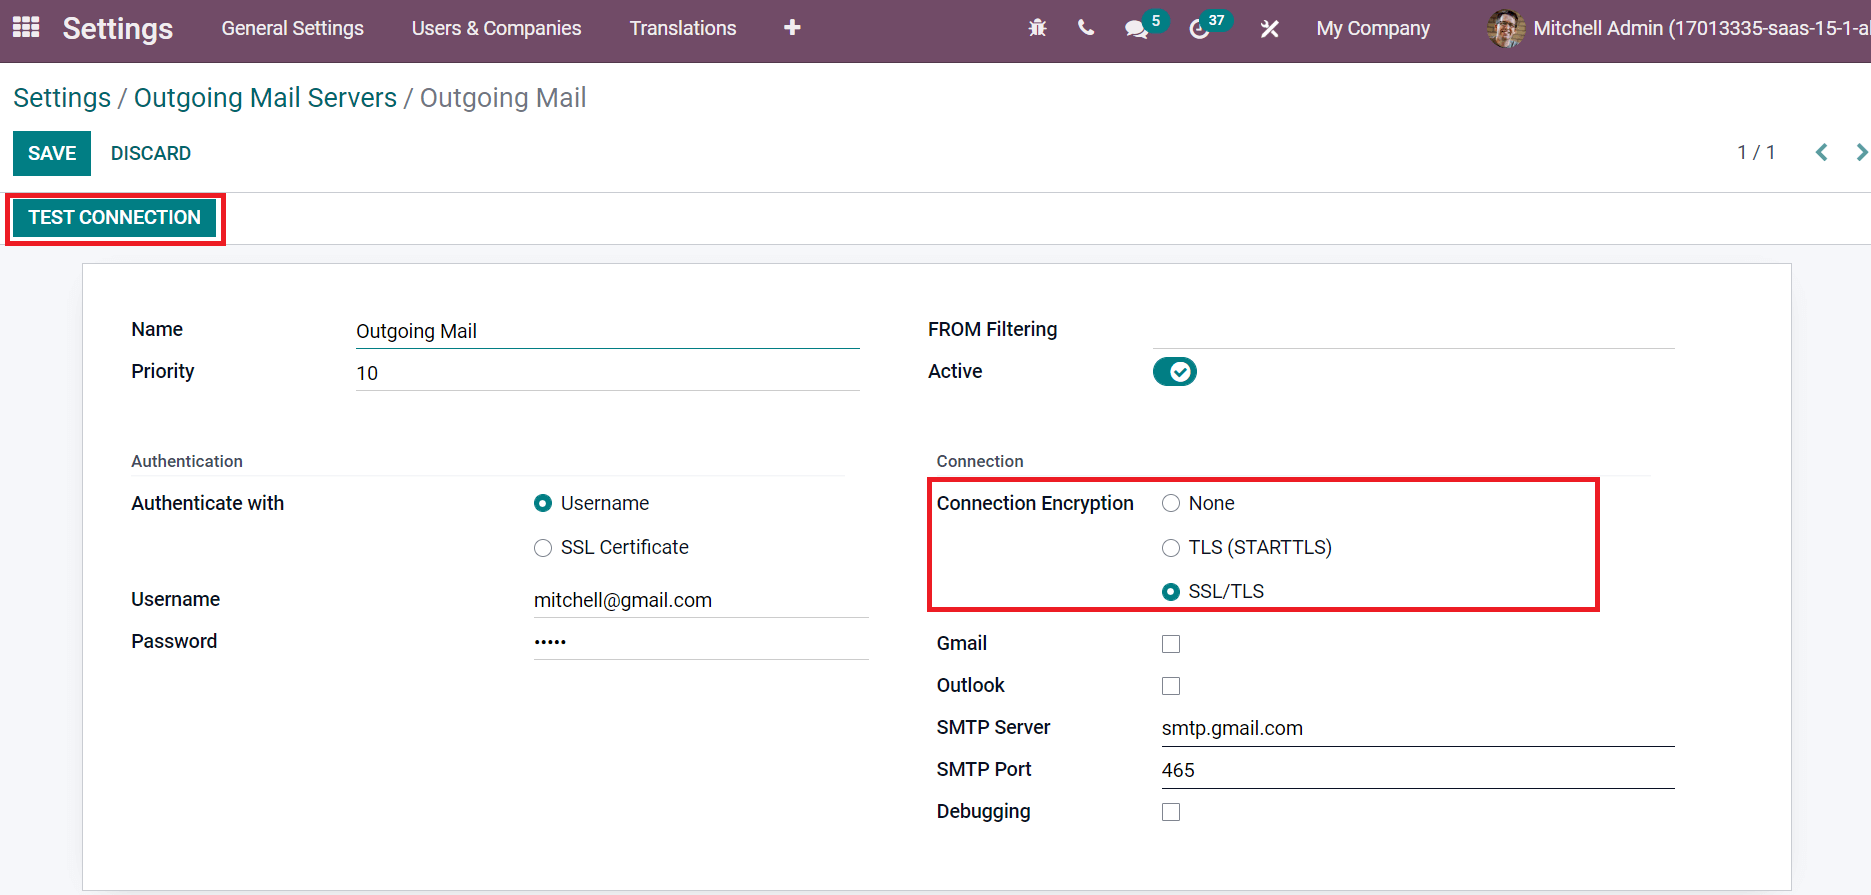
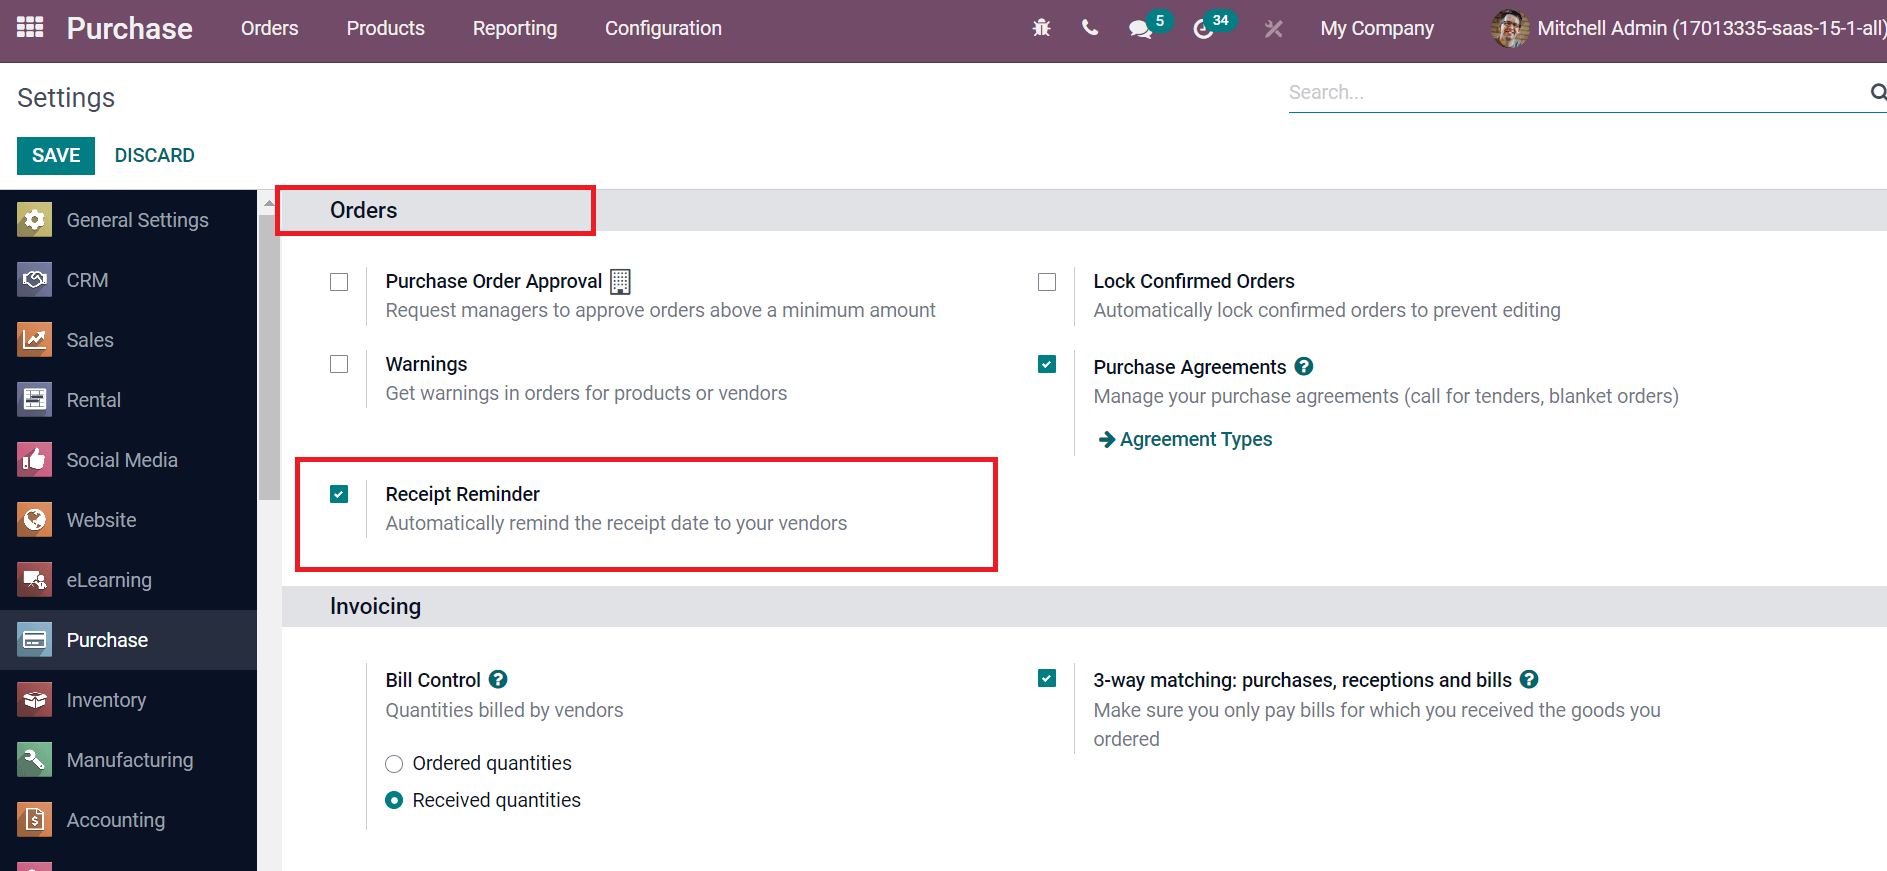
After saving the details, click on the TEST CONNECTION icon in the Settings window. Hence you can confirm the email connectivity with Odoo. Next, we must enable the receipt reminder feature from the Odoo 15 database. For that, pick up the Settings menu in the Configuration tab of the Odoo 15 Purchase module. Activate the Receipt Reminder field below the Orders section to remember the receipt date for your vendors spontaneously, as denoted in the screenshot below.
Next, let’s generate a purchase order in Odoo 15 Purchase module.
To Create a New Purchase Order for a Receipt Confirmation
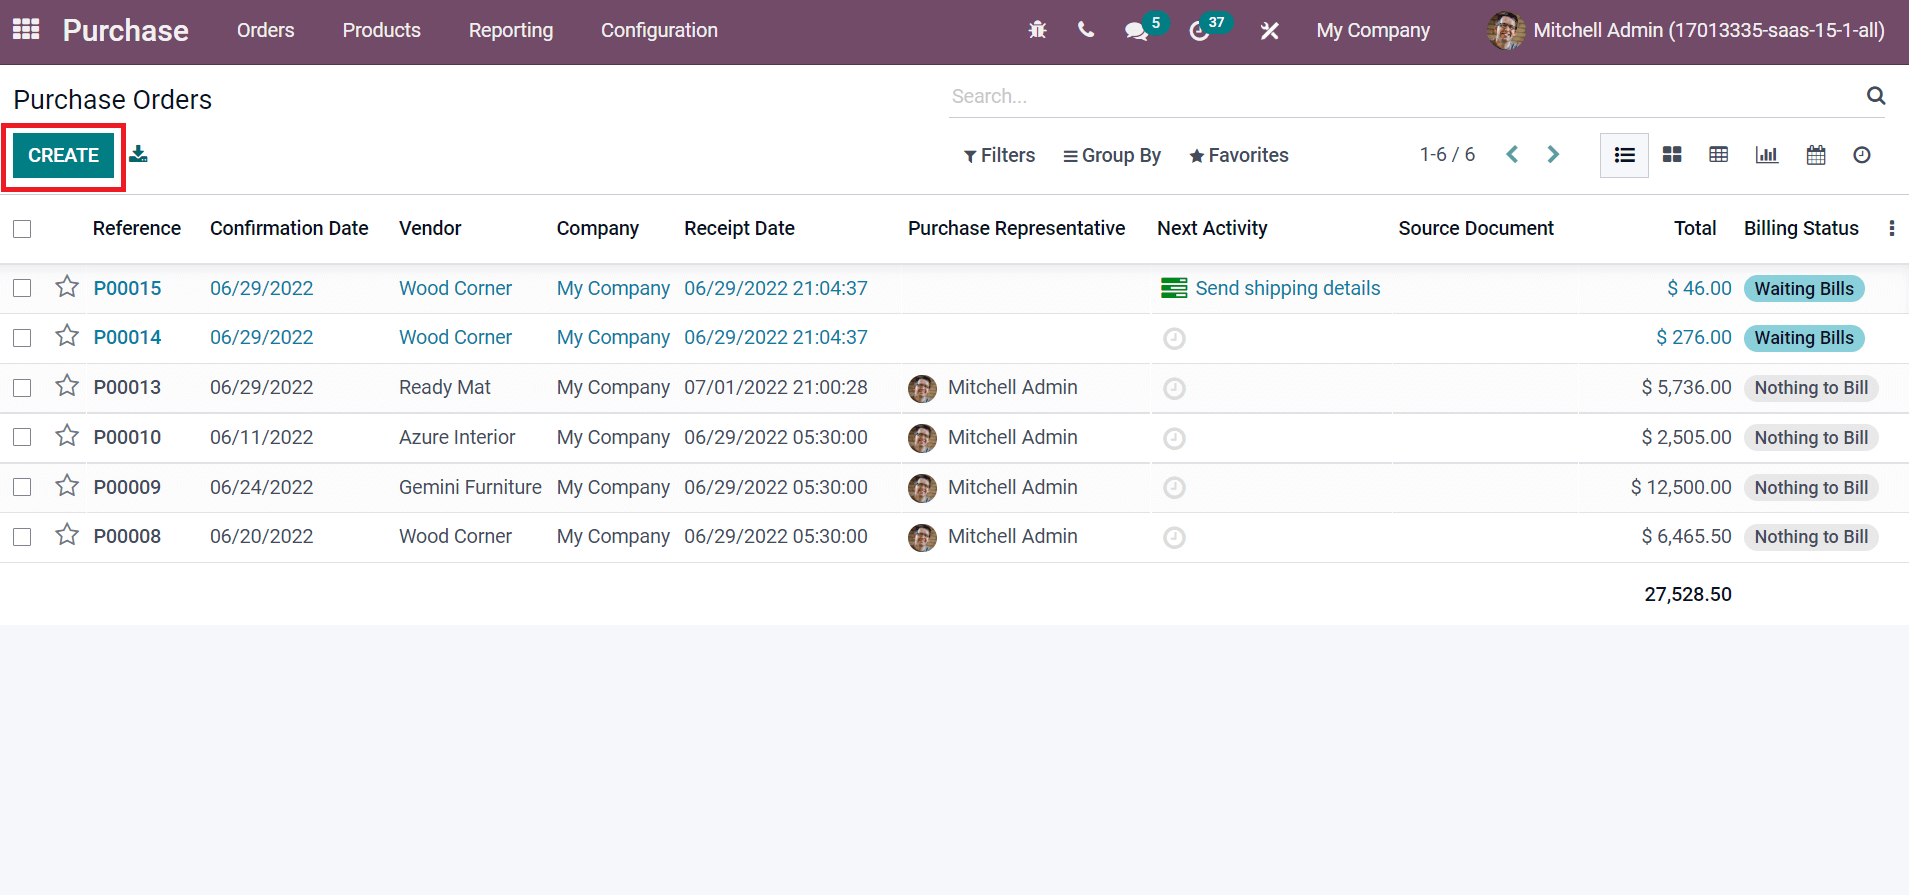
We can formulate a purchase order by selecting the Purchase Orders menu inside the Orders tab. The Purchase Orders window shows data such as Confirmation Date, Vendor, Receipt Date, Total, Billing Status, and more. Choose the CREATE icon to impart a new purchase order, as represented in the screenshot below.
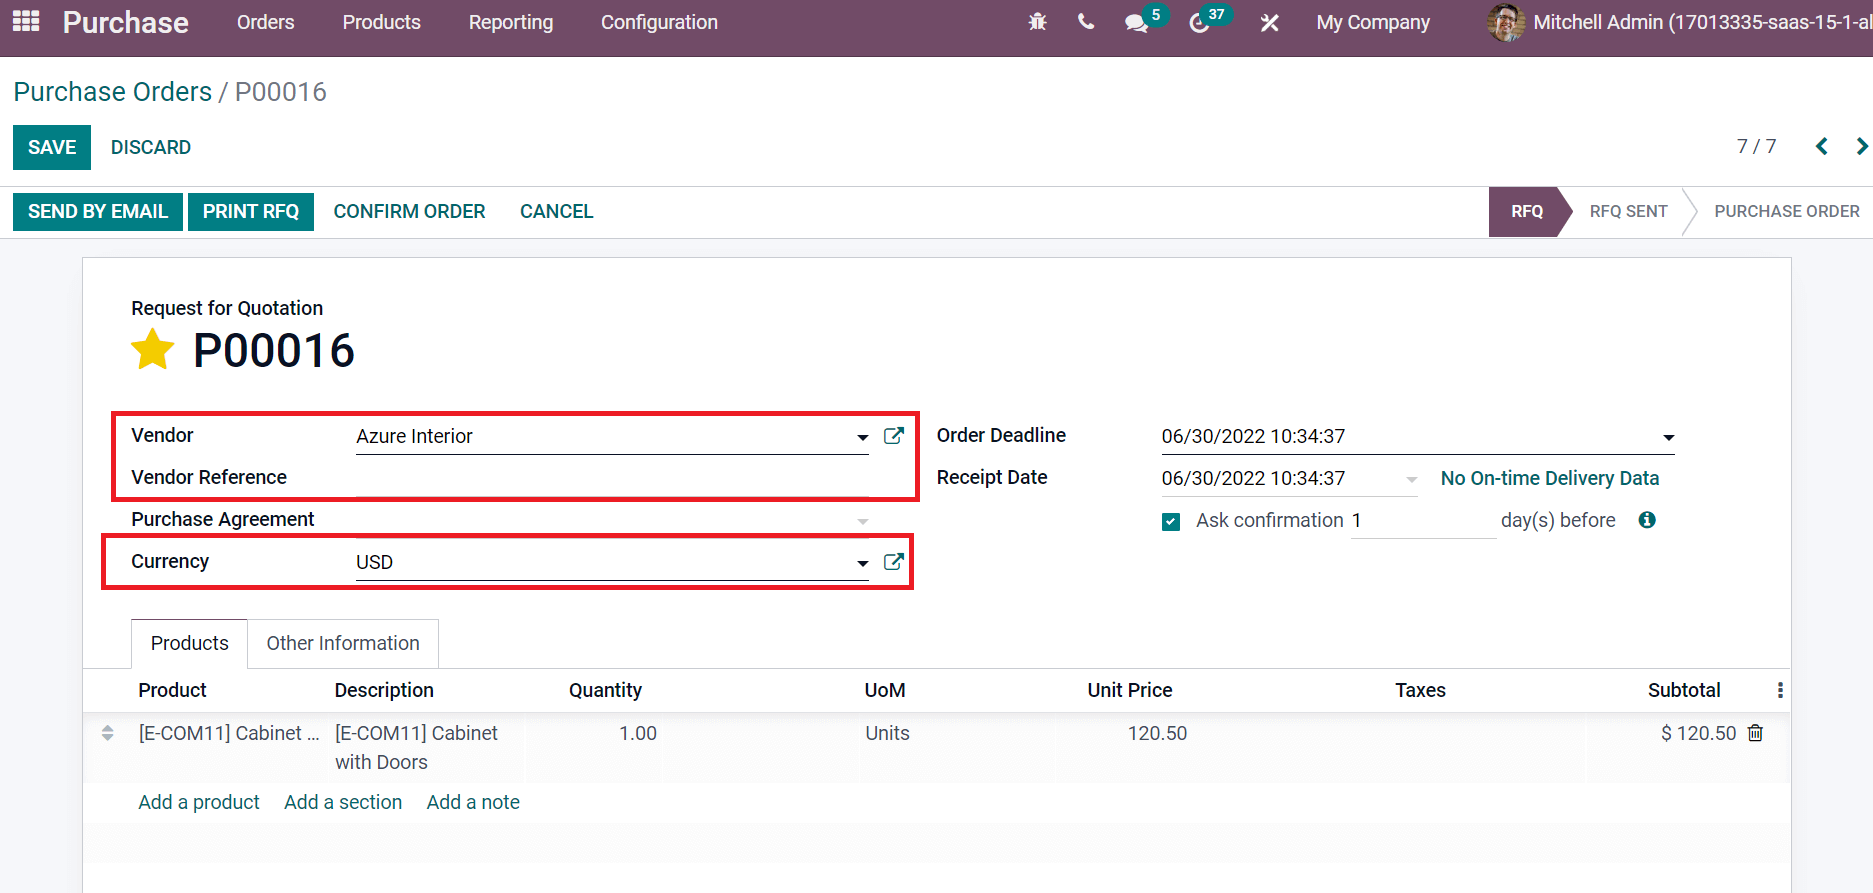
In the new Purchase Order window, choose the vendor from which you decided to purchase products inside the Vendor field, Currency, and reference of sales order in Vendor Reference. This reference is visible on the delivery order sent by the vendor.
Later, apply Order Deadline is the confirmed date of quotation and changes into a purchase order. Then, set your Receipt Date is a promised delivery date by the vendor to determine the expected arrival of the product. For example, a vendor is supposed to deliver a product on 06/01/2022, as indicated in the screenshot below.
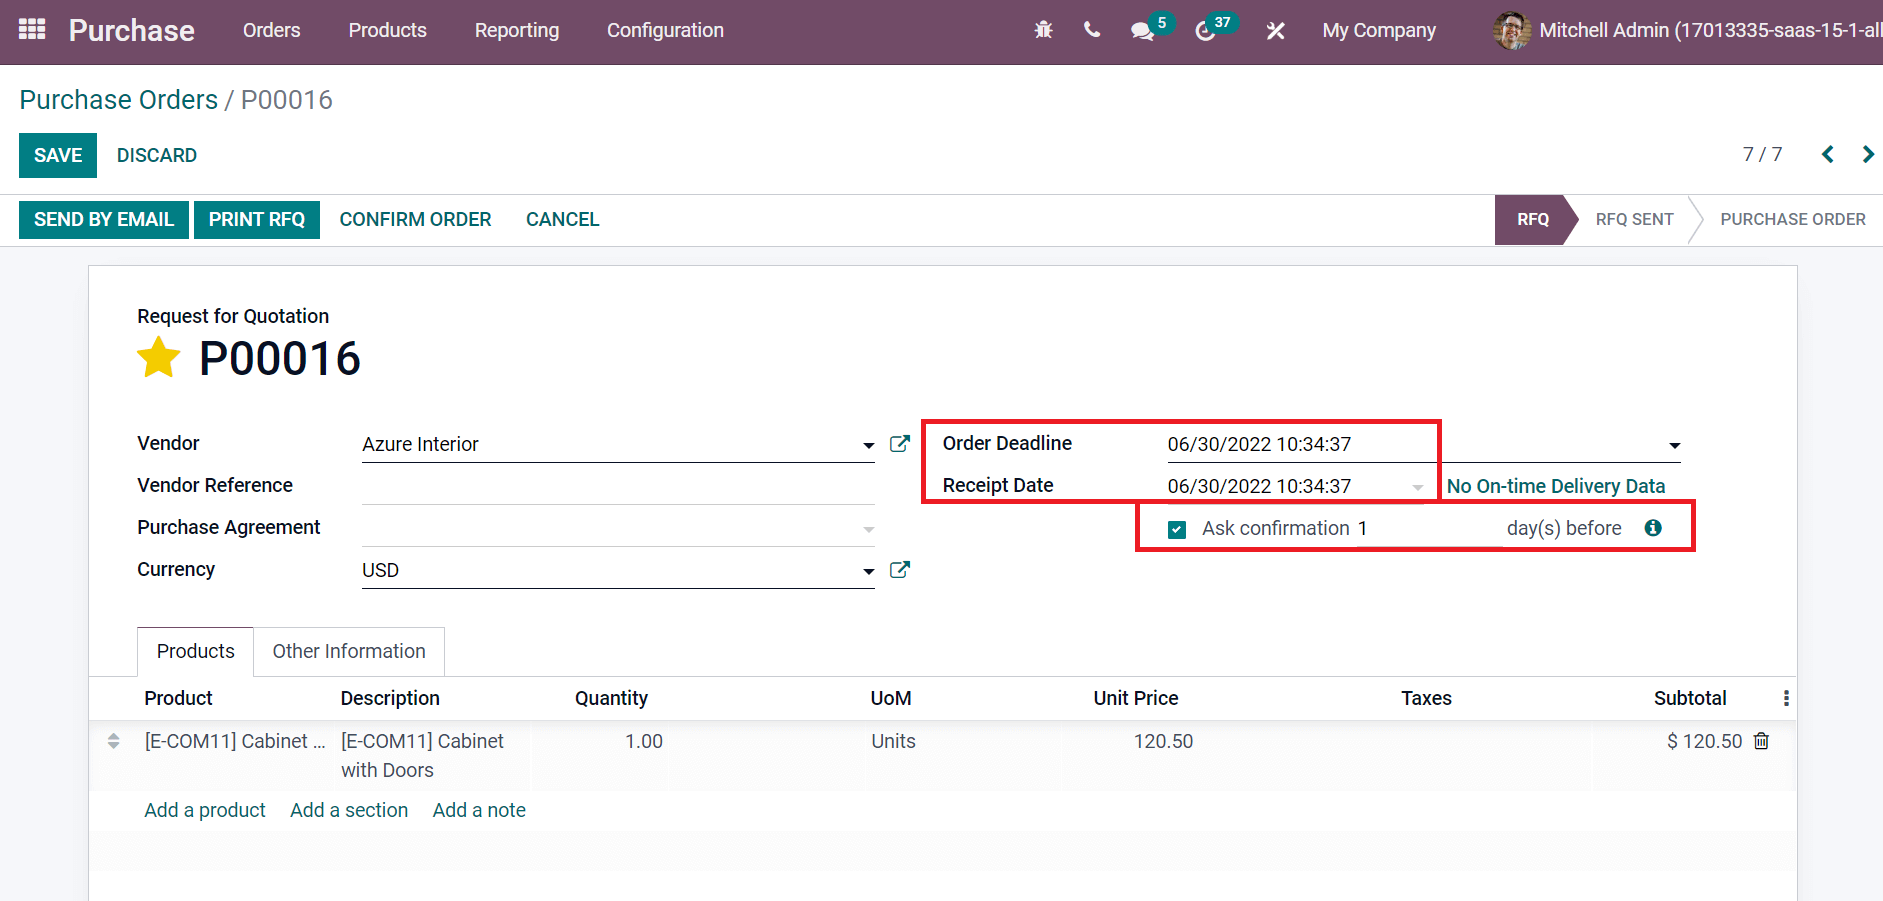
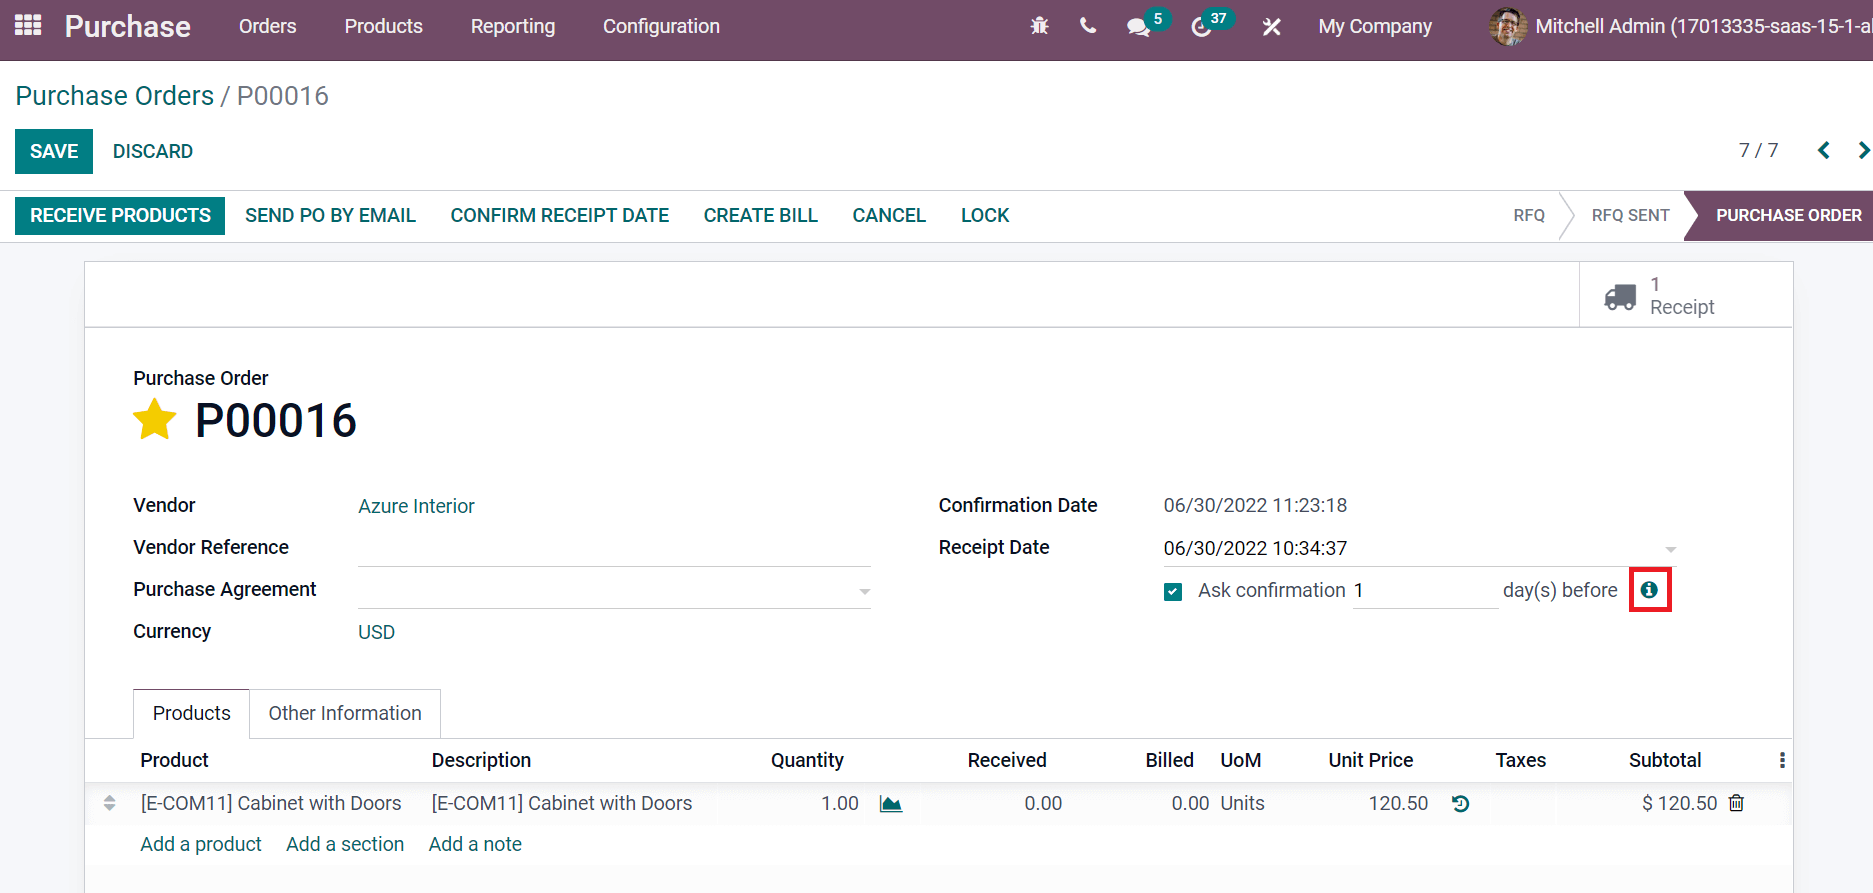
Users can enable the Ask confirmation option to send a confirmation email to the vendor fewer days before the expected date. It used to ask for the exact date confirmation from you. For example, if you set one day in the Ask Confirmation field, a confirmation email is sent to the receiver one day before the received date to assure a delivery date. So, the vendor needs to confirm a receipt date. Next, choose your product by selecting the Add a product option inside the Products field, as portrayed in the screenshot below.
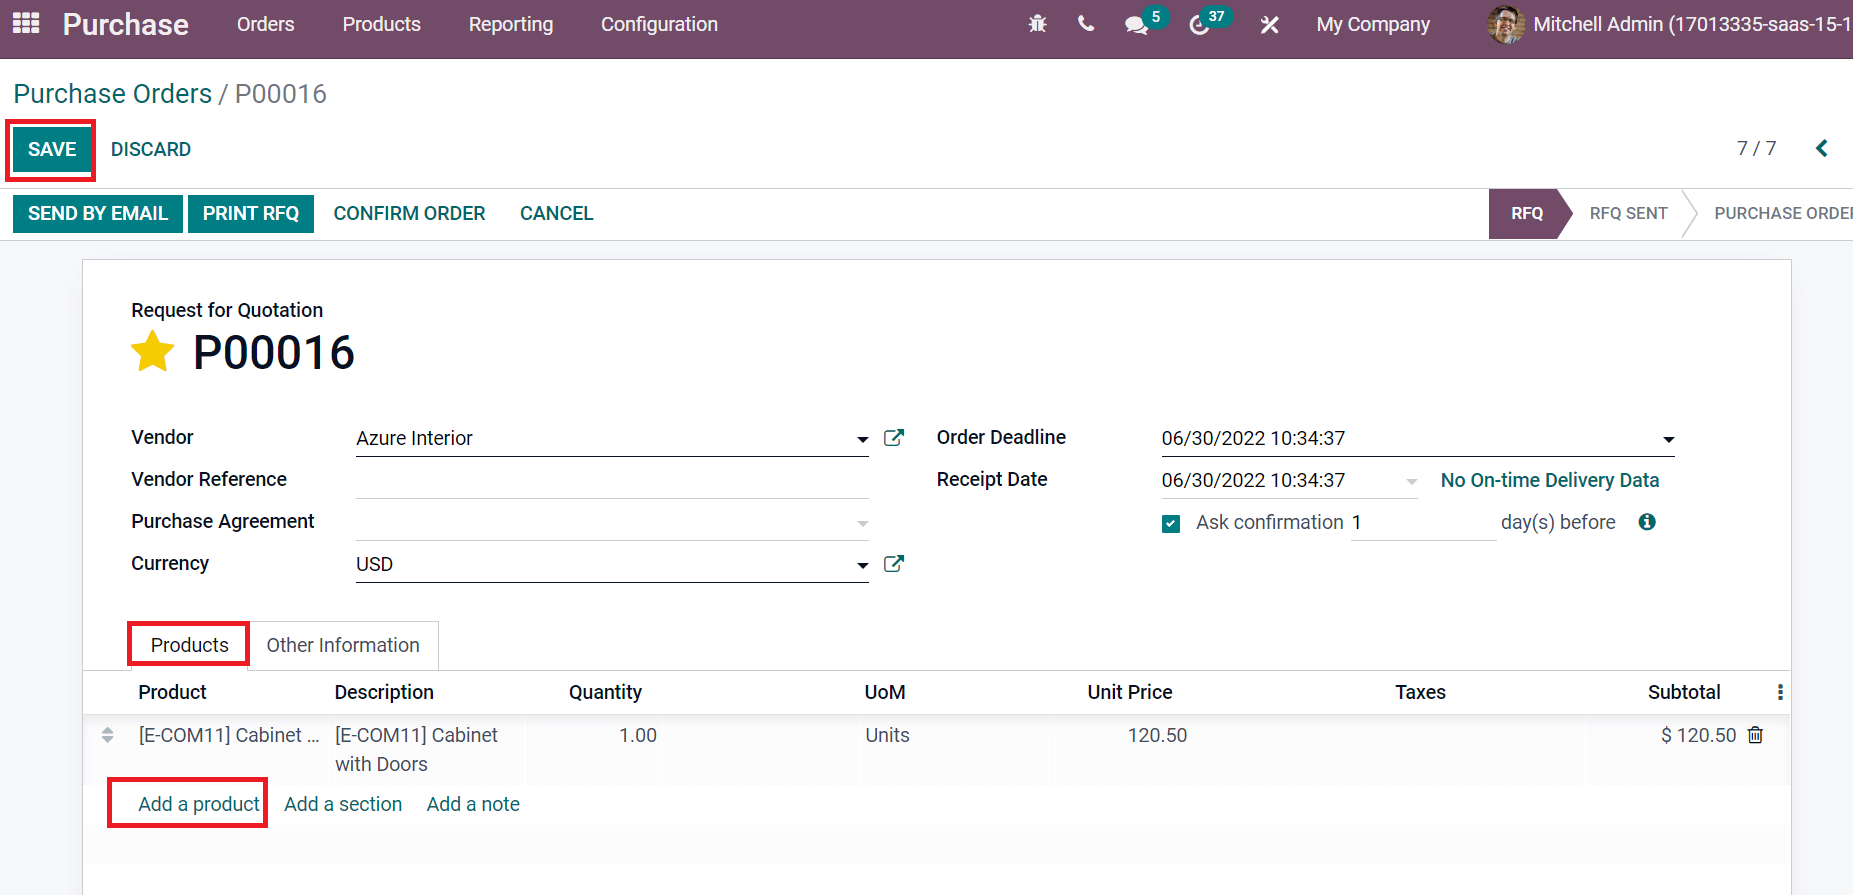
Press the SAVE icon after adding all data regarding your purchase order. After confirming the order, an email will be sent to the vendor. Hence, the vendor can confirm the receipt date inside an email. In addition, you can preview the reminder email by clicking on the icon at the end of the Ask confirmation field, as illustrated in the screenshot below.
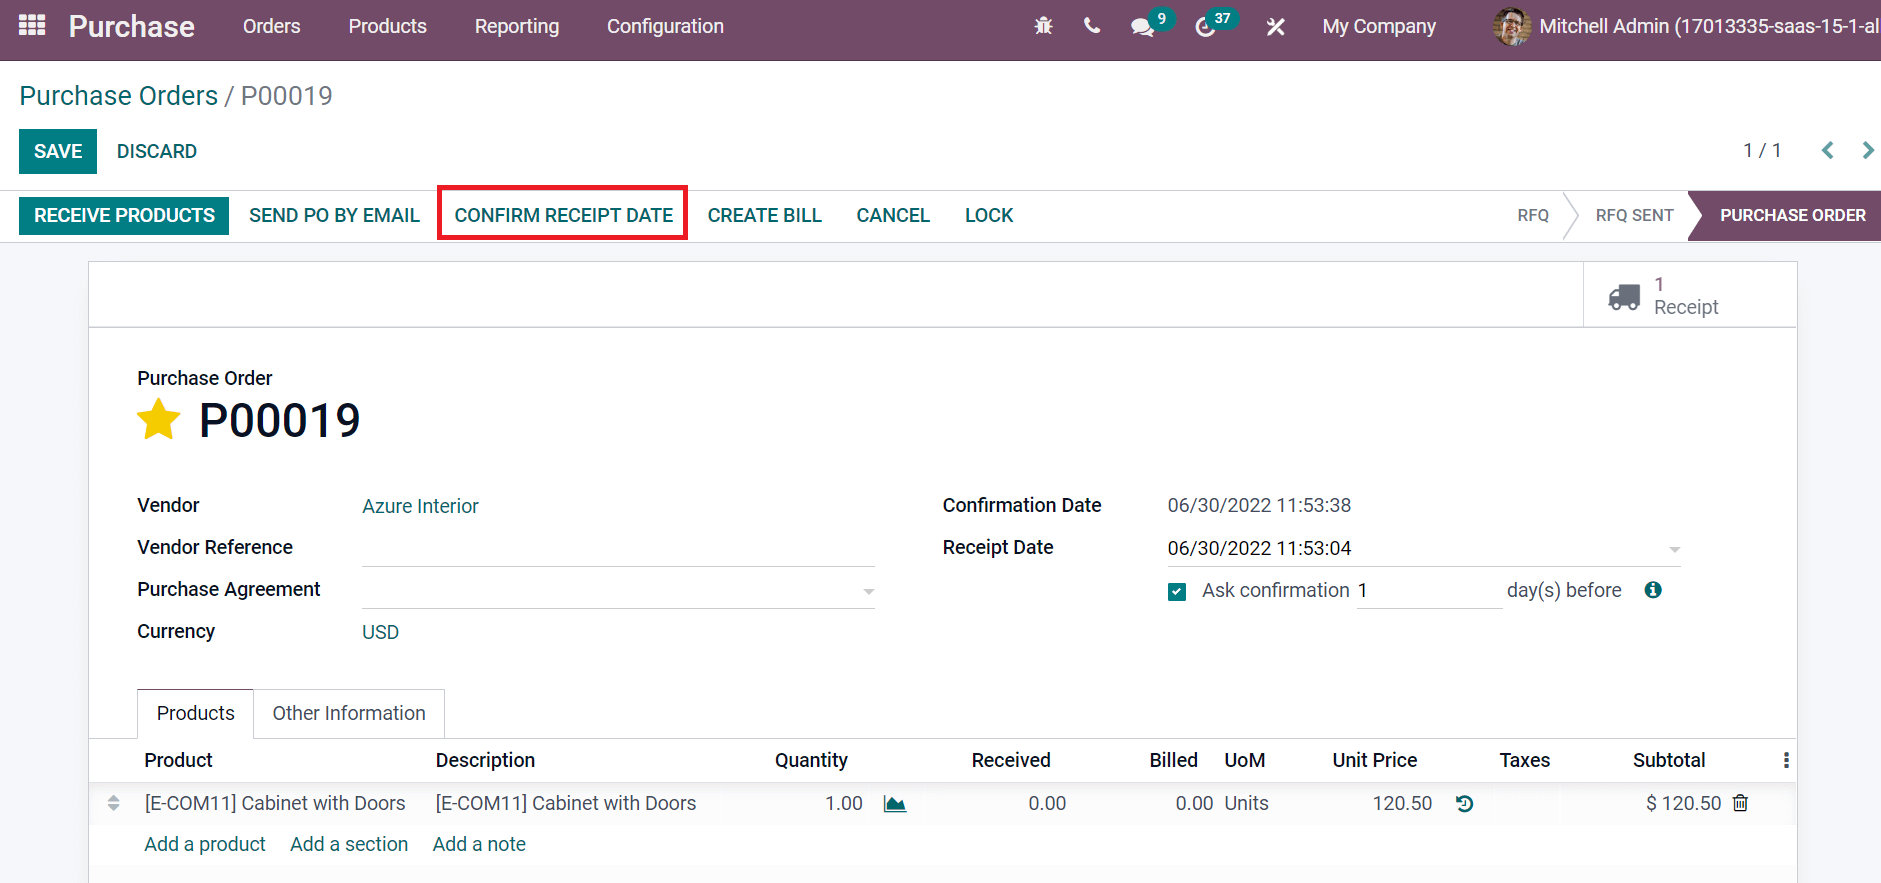
After the confirmation by the vendor, the user can see the icon CONFIRM RECEIPT DATE in the Purchase Orders window.
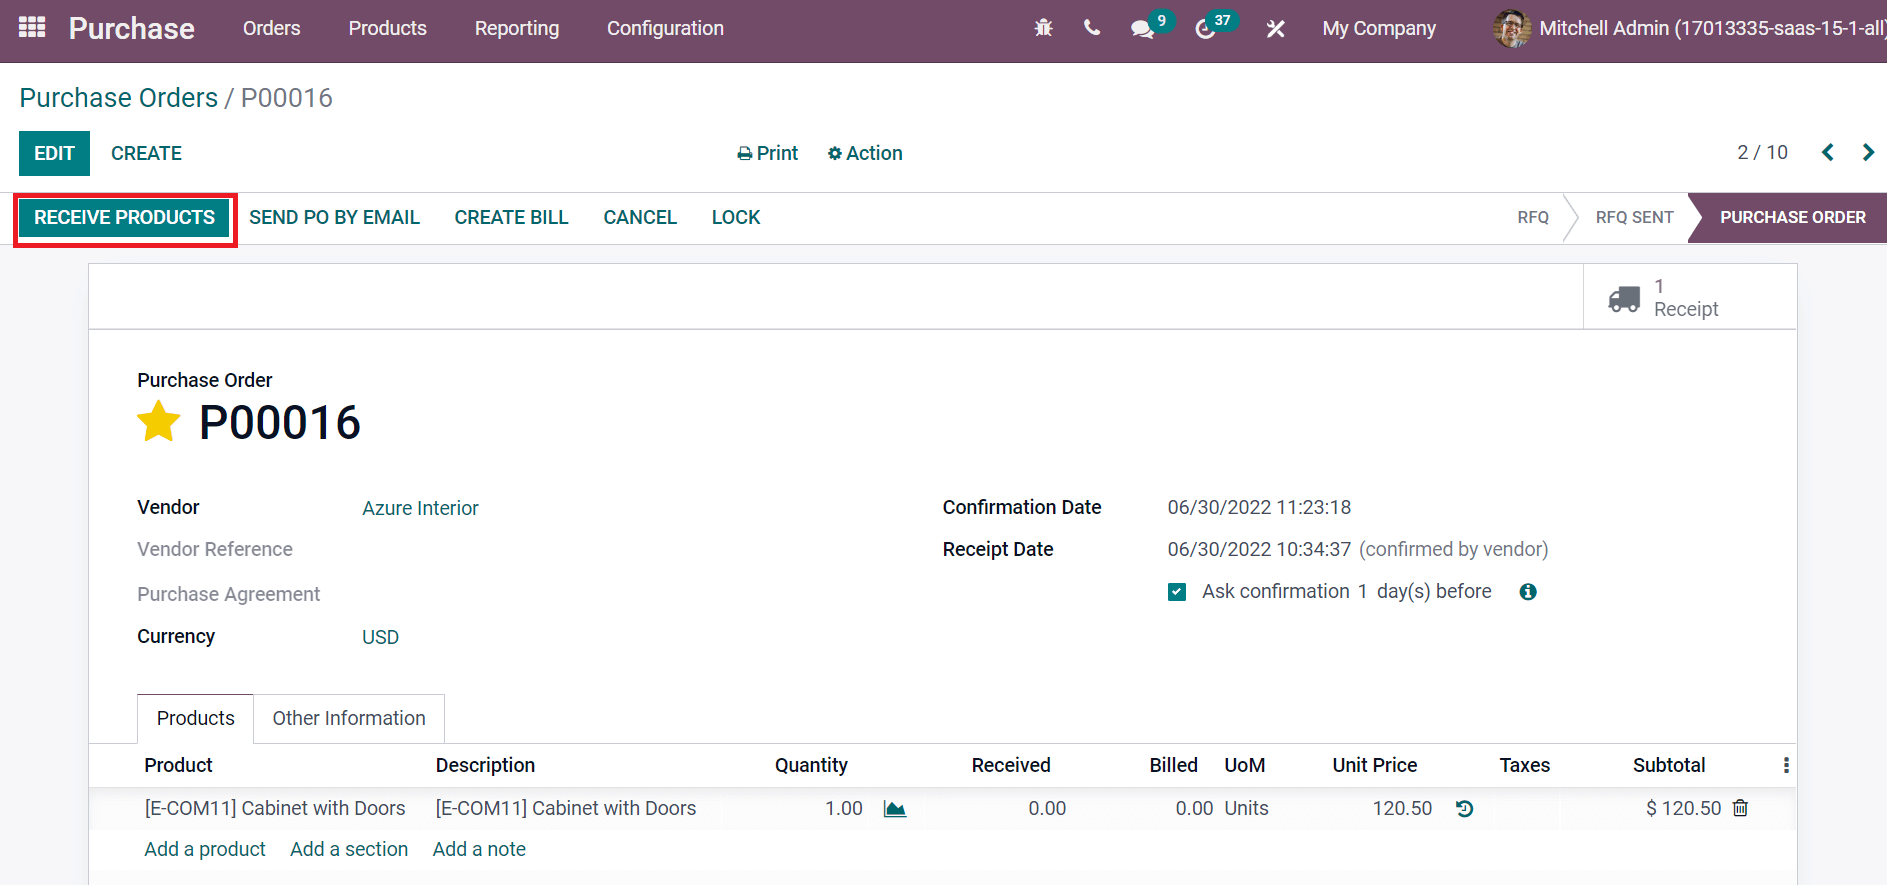
Later, you can accept the products by clicking on RECEIVE PRODUCTS icon as in the screenshot below.
In the new window, click on VALIDATE icon to make your purchase order ready.
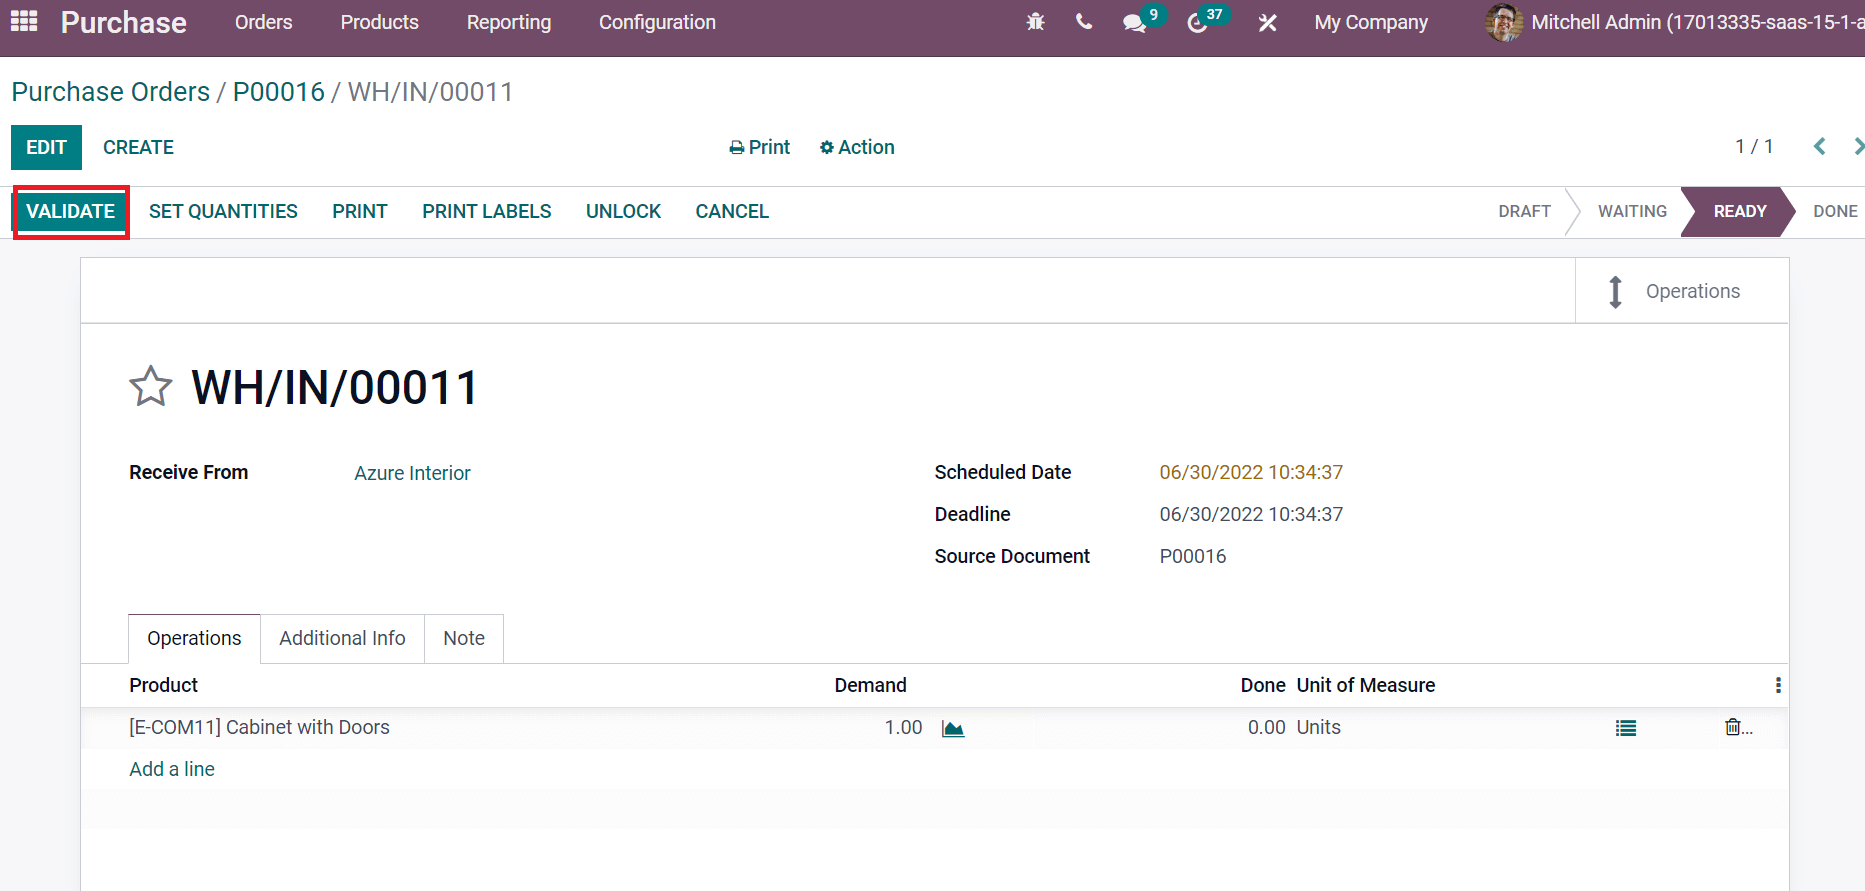
In this method, you can confirm and validate a purchase order in Odoo 15 Purchase module. Check out the given below link to learn about Purchase Order Creation
How to Develop a Bill for your Purchase Order?
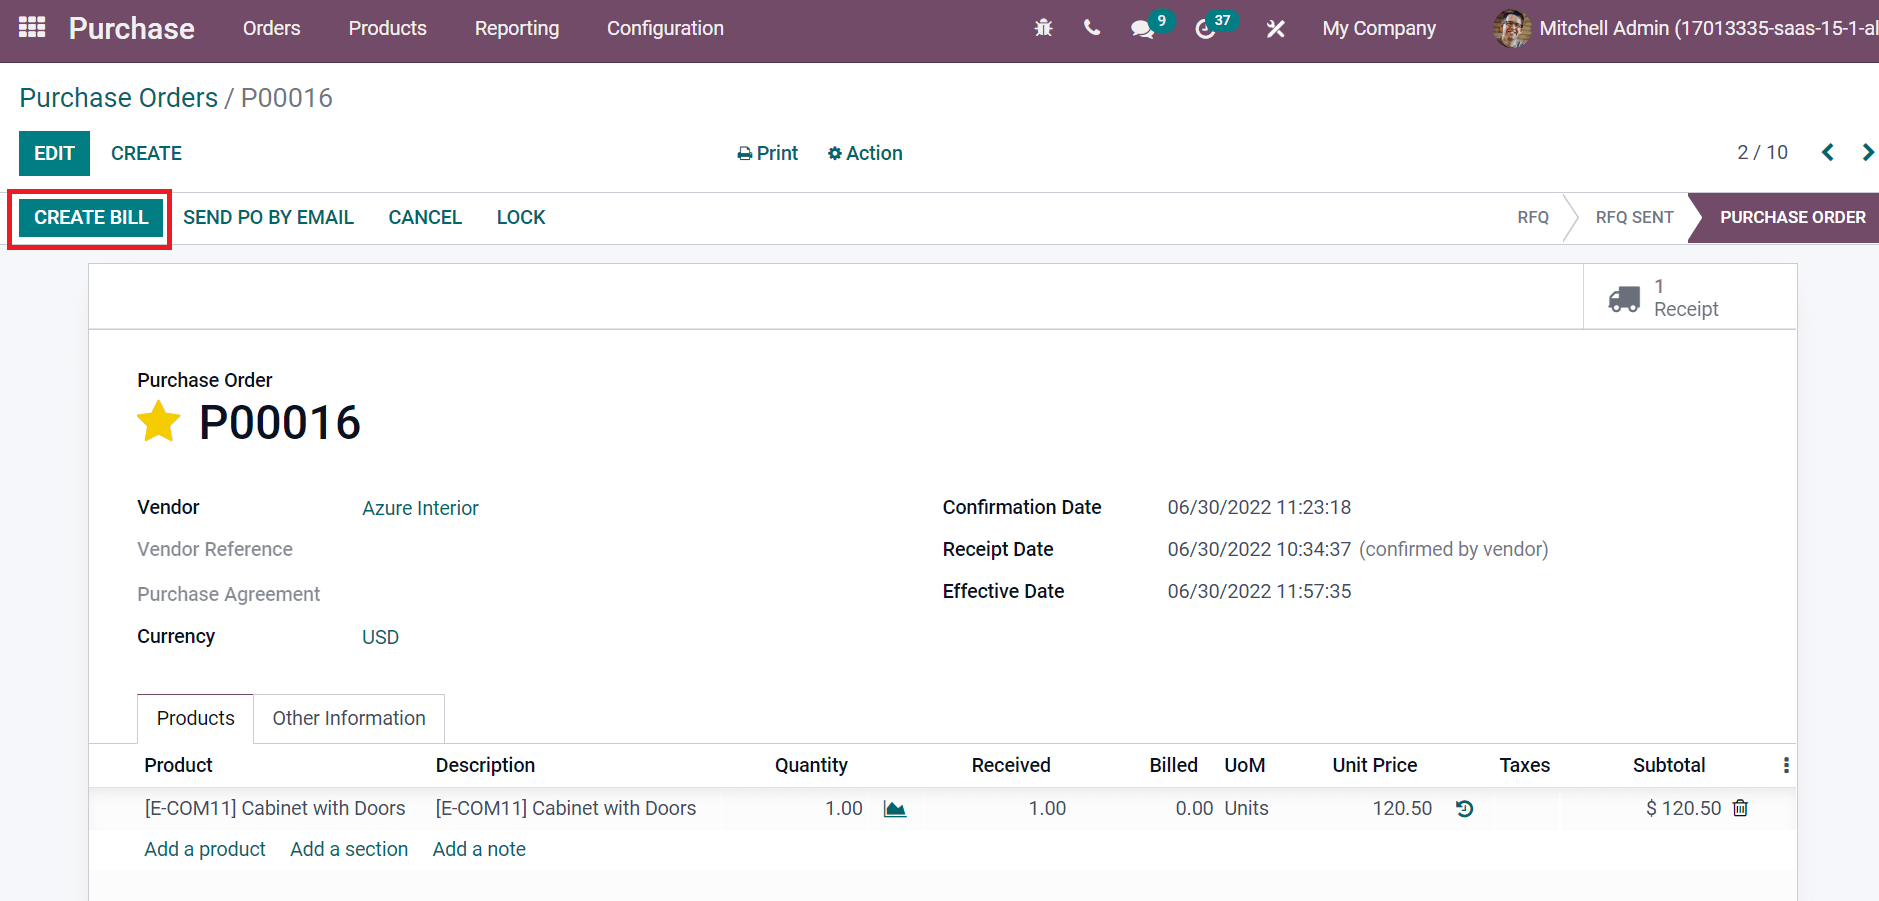
We can generate a bill for a purchase order after receiving the products. Choose the CREATE BILL icon on the Purchase Orders page, as speculated in the screenshot below.
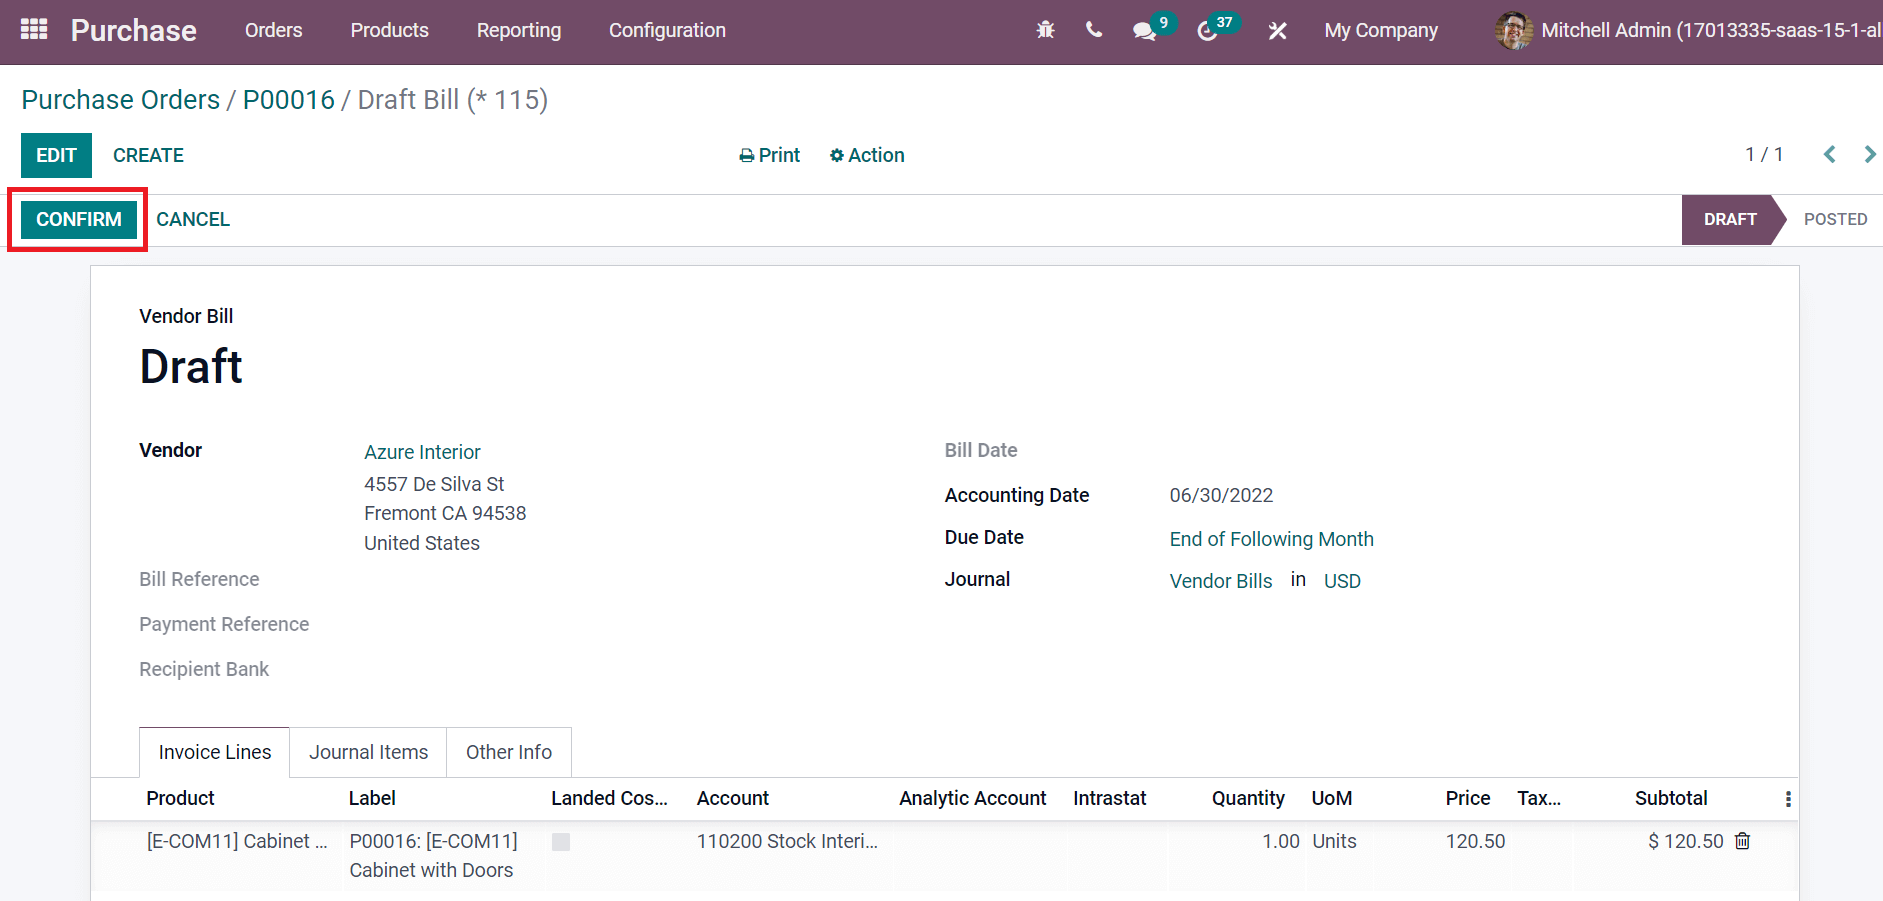
A draft bill that appears before you consist of details such as Accounting Date, Journal, Bill Date, and Confirm Date. Select the CONFIRM option in the Draft bill window as presented in the screenshot below.
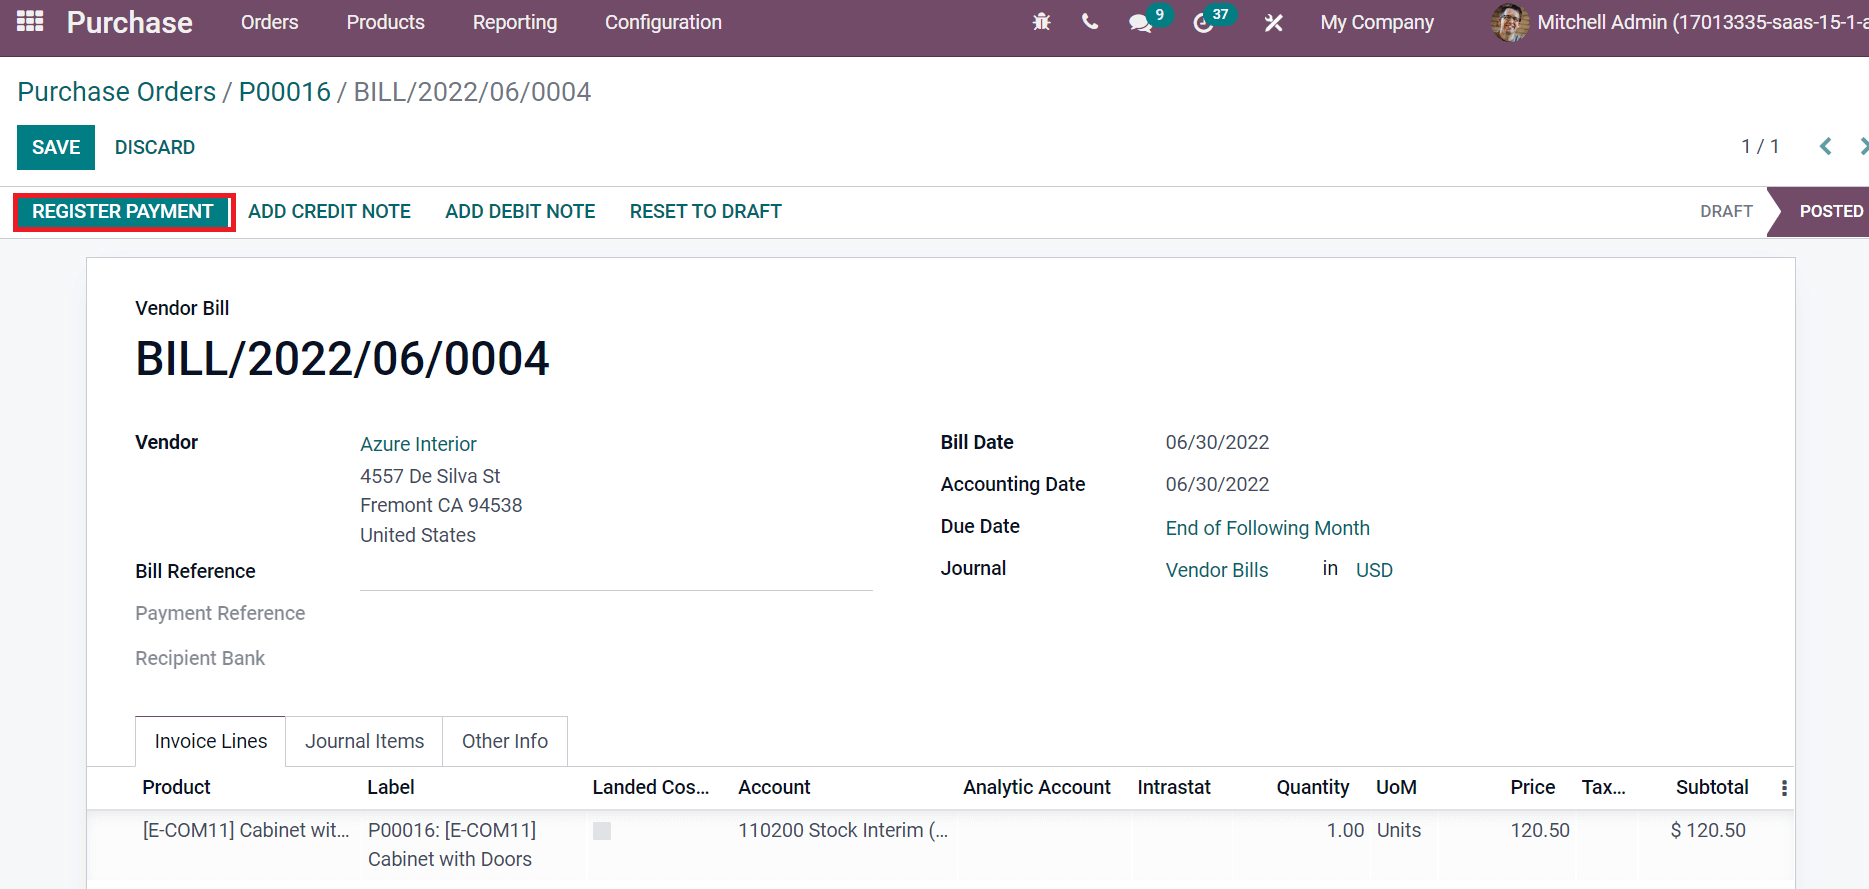
Now, we can register payment for the vendor bill by clicking on the REGISTER PAYMENT icon.
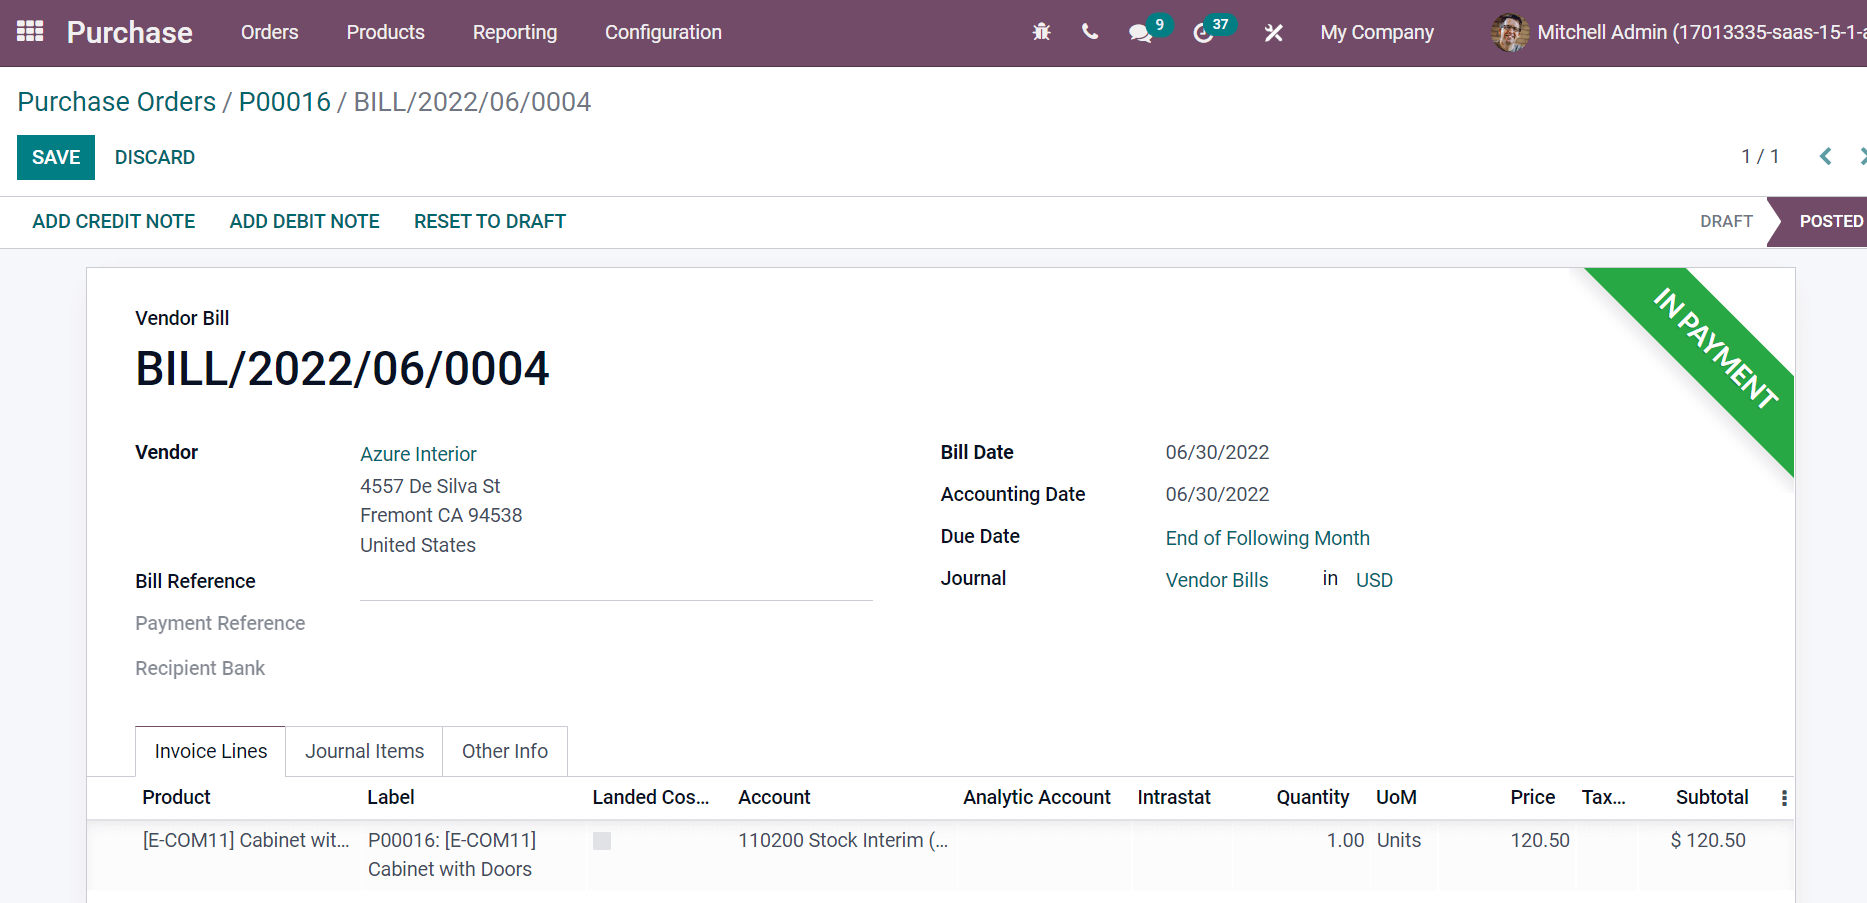
Users can see IN PAYMENT icon in the Purchase Orders after creating the bill.
We can quickly create receipts and bills for a purchase order within the Odoo 15 Purchase module.
Odoo 15 Purchase module ensures users get receipt confirmation of a purchase order efficiently. Apart from these, creating purchase orders by receipt and bills for a company using Odoo ERP is easy. Refer to the given blog link to learn about Odoo 15 Purchase Module