Barcodes are a powerful tool that enhances the efficiency of business operations across various domains, including inventory management, sales, procurement, and logistics. They enable faster data entry, reduce manual errors, and streamline processes, making them indispensable in modern business environments. Odoo 18 provides a robust platform for integrating barcode functionality into its models, allowing businesses to customize and utilize barcodes to suit their unique requirements.
In this blog, we’ll walk through the steps to dynamically create and print barcodes in Odoo 18. While this example demonstrates the process using the Sale Order model, the same principles apply to other models.
Barcodes provide significant advantages, such as:
* Automation: Simplifying data entry during operations like stock picking or order processing.
* Accuracy: Reducing errors by eliminating manual input.
* Efficiency: Speeding up workflows and saving time.
* Traceability: Allowing quick identification and tracking of records.
The following example shows how to generate barcodes in Odoo 18 for Sale Orders by combining the order date and reference number into a unique identifier. You can easily adapt this to other models or use different logic for barcode generation.
Step 1: Extend the Model to Include a Barcode Field
To add barcode functionality, we first inherit the desired model and include a new barcode field. The barcode value will be dynamically generated upon record creation.
from odoo import models, fields, api
class SaleOrder(models.Model):
    _inherit = 'sale.order'
    barcode = fields.Char(string="Barcode")
Key Points:
* The barcode field is a Char field to store the generated barcode.
* The create method ensures the barcode is automatically generated when a new Sale Order is created.
* The logic combines the date_order and name fields to create a unique identifier. You can modify this logic as needed.
Step 2: Add the Barcode Field to the Form View
To display the barcode field in the user interface, we extend the existing form view of the Sale Order model and add the field.
<?xml version="1.0" encoding="utf-8"?>
<odoo>
    <record id="sale_order_form_inherit" model="ir.ui.view">
        <field name="name">sale.order.form.barcode</field>
        <field name="model">sale.order</field>
        <field name="inherit_id" ref="sale.view_order_form"/>
        <field name="arch" type="xml">
            <xpath expr="//field[@name='payment_term_id']" position="after">
                <field name="barcode"/>
            </xpath>
        </field>
    </record>
</odoo>
Explanation:
The inherit_id attribute refers to the original form view of the Sale Order model.
The xpath expression places the barcode field directly after the payment_term_id field. Modify this as needed to position the field elsewhere.
Step 3: Create an Action for Printing Barcodes
To print barcodes, you need to define a report action that links to a QWeb template. This report action is used to generate PDF documents containing the barcodes.
<record id="action_report_sale_barcode" model="ir.actions.report">
    <field name="name">Sale Order Barcode</field>
    <field name="model">sale.order</field>
    <field name="report_type">qweb-pdf</field>
    <field name="report_name">your_module.barcode_template</field>
    <field name="report_file">your_module.barcode_template</field>
    <field name="print_report_name">'Sale Order Barcode (PDF)'</field>
    <field name="binding_model_id" ref="sale_management.model_sale_order"/>
    <field name="binding_type">report</field>
</record>
Explanation:
Replace your_module with the actual technical name of your module.
The report_name and report_file fields specify the QWeb template to be used for the report.
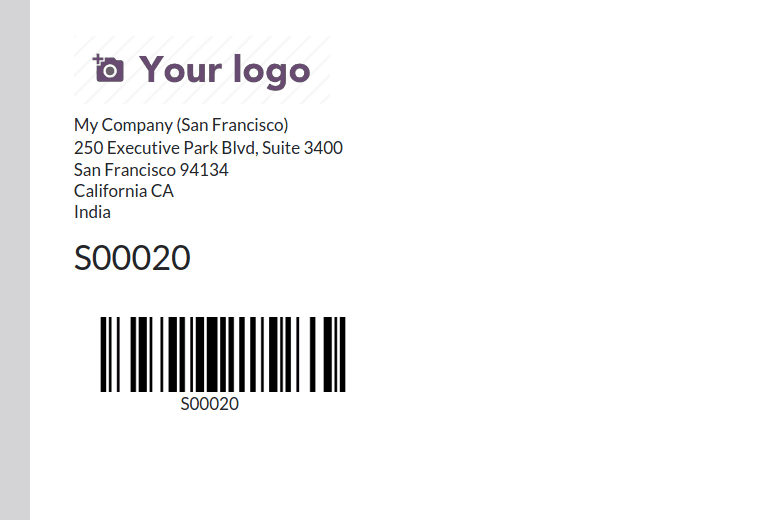
Step 4: Define a QWeb Template for the Barcode Report
The template controls the layout and design of the barcode in the generated PDF. Odoo’s built-in barcode rendering engine is used to display the barcode as an image.
<template id="barcode_template">
<t t-call="web.html_container">
<t t-foreach="docs" t-as="doc">
<t t-call="web.external_layout">
<div class="page">
<div class="oe_structure"/>
<div>
<div class="col-5">
<h2><span t-field="doc.name"/></h2><br/>
<span style="margin-left:-60px;">
<img t-if="doc.barcode"
style="width:400px;height:70px;"
t-att-src="'/report/barcode/?barcode_type=%s&value=%s&width=%s&height=%s' % ('EAN13', doc.barcode, 265, 80)"/>
</span>
<div style="margin-left:100px" t-field="doc.barcode"/>
</div>
</div>
</div>
</t>
</t>
</t>
</template>
Explanation:
The <img> tag generates a barcode image dynamically using Odoo’s barcode engine.
Final Output
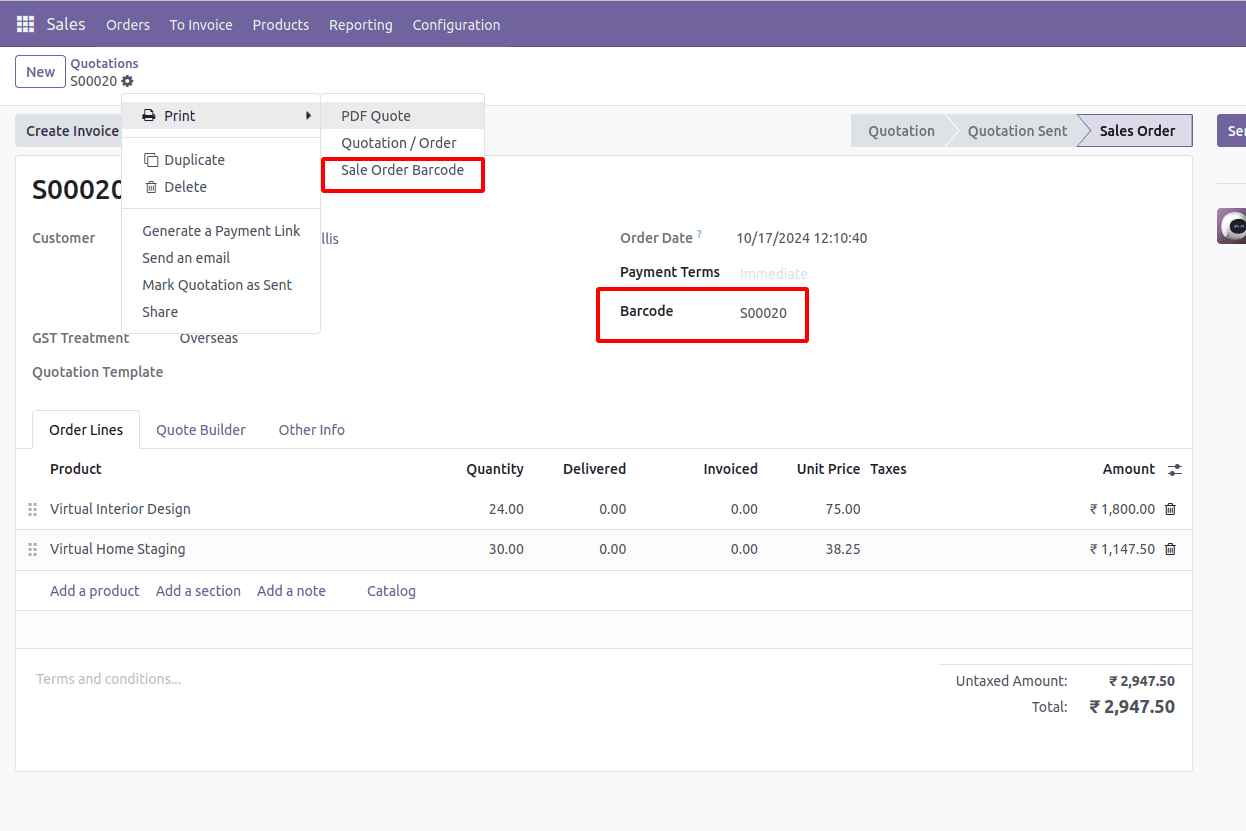
In the Sale Order, we have added a barcode to the Barcode field. After this, the barcode can be printed by navigating to Actions -> Print -> Sale Order Barcode.
Barcodes simplify and accelerate business operations, making them an essential component in any modern system. This blog uses the Sale Order model as an example to demonstrate how to dynamically create and print barcodes in Odoo 18. By following the steps outlined here, you can integrate barcode functionality into any model in Odoo, enhancing accuracy and efficiency across your organization.
Whether you're tracking inventory, processing orders, or handling shipments, barcodes provide a reliable and scalable solution for your operational needs. Take this guide as a foundation and adapt it to create a tailored barcode system for your business.
To read more about How to Create Barcode in Odoo 17, refer to our blog How to Create Barcode in Odoo 17.