Product category management and product attribute management helps the business to categorise the products and manage their variants in an effective way. These two features are significant for inventory management and business operations. Odoo offers the two features in a refined format. In Odoo 14 inventory product categories and attributes can be configured with ease.
We can discuss product categories first.
To configure Product Category we can move to Inventory> Configuration> Products> Product Category
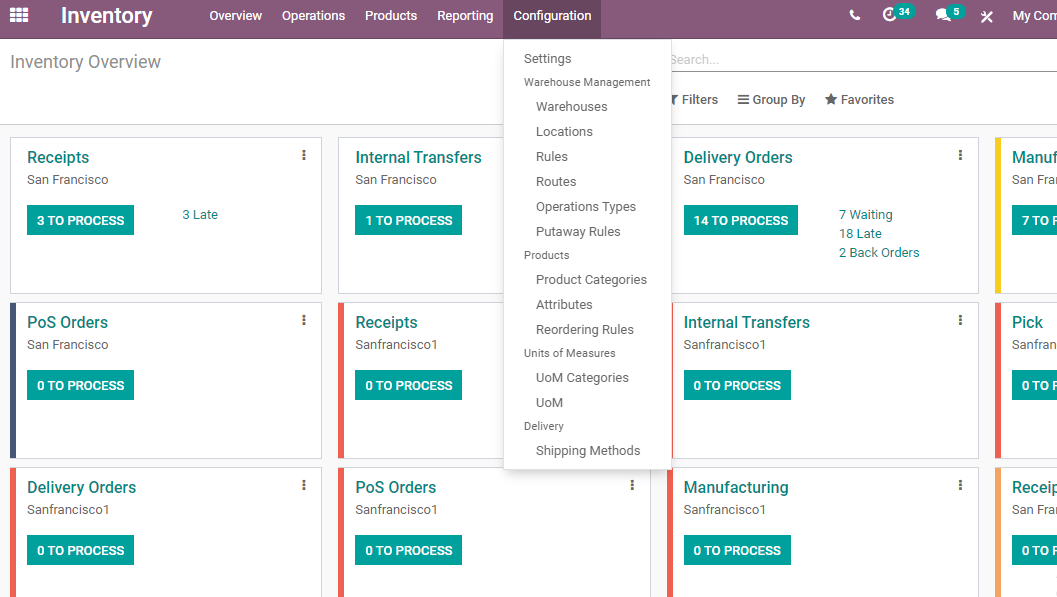
Clicking on Product Category we can find the product categories listed out.
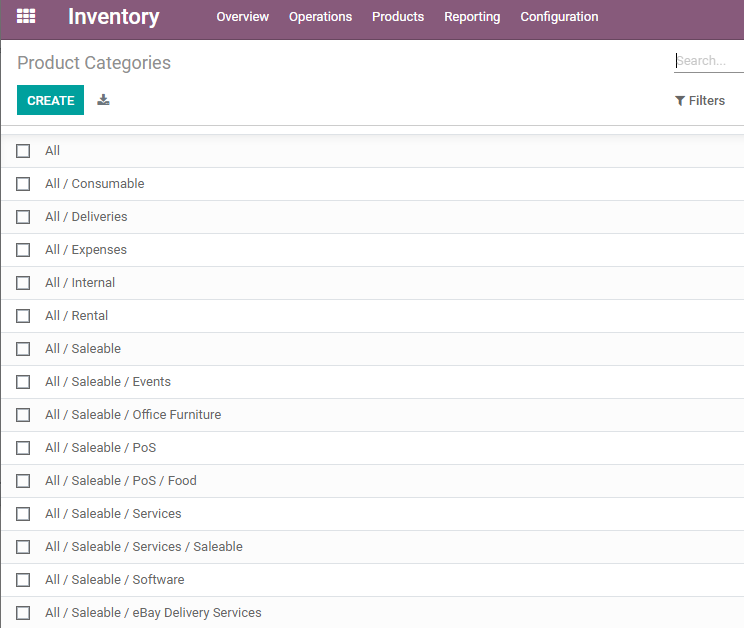
These are the pre-configured product categories. The categories here are consumables, expenses, Rental, Internal, Saleable, Deliveries, etc. We can configure new categories easily. The product categories are usually managed following a hierarchical structure.
Here, we can configure parent category and child category to set the hierarchy.
We can check the method to create product categories and set the hierarchical structure.
Click Create to get the Product Category Creation form.
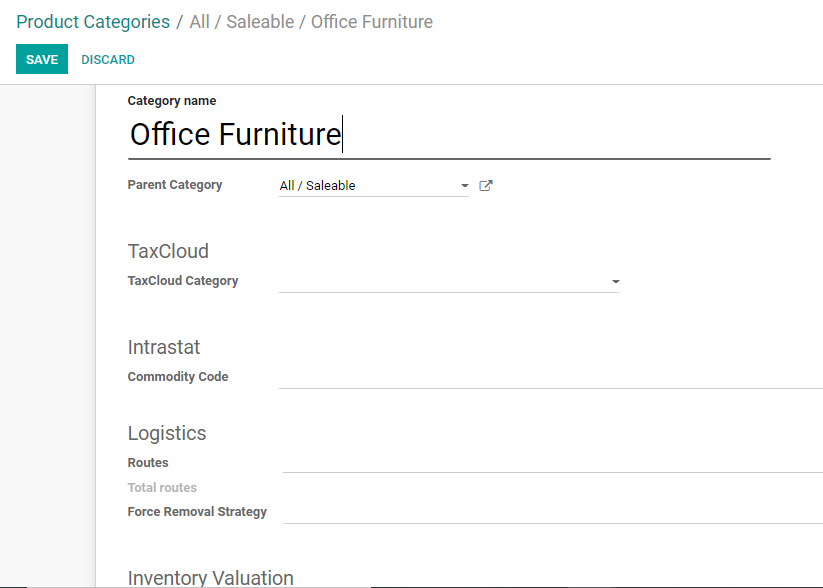
The different fields can be filled to configure a new product category.
Category Name: Add the category name that you want to add to the field.
Parent Category: We can manage the product category on the basis of hierarchy. This can be done by arranging some categories under the other categories. If we are creating a sub-category, the subcategory can be arranged below a parent category. The sub-category will also be known as the child category.
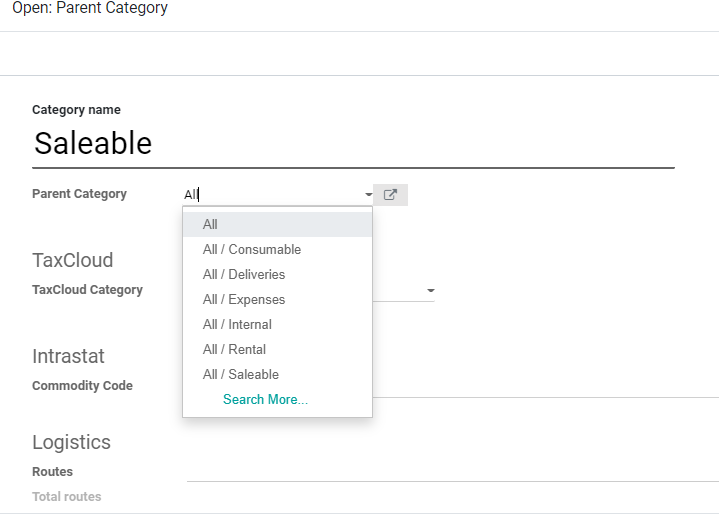
Clicking the Parent Category field we get a new page to select the parent category.
Here we can view all already existing parent categories. Usually, an inventory will maintain parent categories like Deliveries, Expenses, Internal, Rental, Saleable, etc. Besides, the most important parent category will be all. All the earlier mentioned parent categories will be included as the child category of All.
Then we can choose the tax cloud category below the tax cloud section.
Then we have other segments like Logistics.
Logistics allows us to provide the routes of the product. The warehouse details and shipment details can be found here.
We can also find out the total routes from here.

Force Removal Strategy: This helps us to set a set of removal strategies that can be used irrespective of the source location. In the below image we can find two options: Last in First Out (LIFO) and First Expiry First Out (FEFO).

Inventory Valuation
This section will help us for inventory valuation of the product category. We can find two measures here. They are the costing method and inventory valuation.
The costing Method is of three types. They are

1. Standard Price: Here the products can be valued based on the standard cost of the product.
2. Average Cost: Here product value is decided on the basis of average cost.
3. First in First Out: In this case, the product value is assessed assuming that the products entering the company or warehouse first will be taken away first.
Inventory Valuation

The two methods offered by Odoo 14 are Manual and Automated.
The accounting entries which are used to value the inventory will not be posted automatically if we choose a manual method.
On choosing automated inventory valuation we can create the accounting entries automatically and value the inventory. Inventory valuation is done whenever a product reaches a company and is taken out of the company for any transaction.
Accounting Properties
In this section, we can manage income accounts and expense accounts.
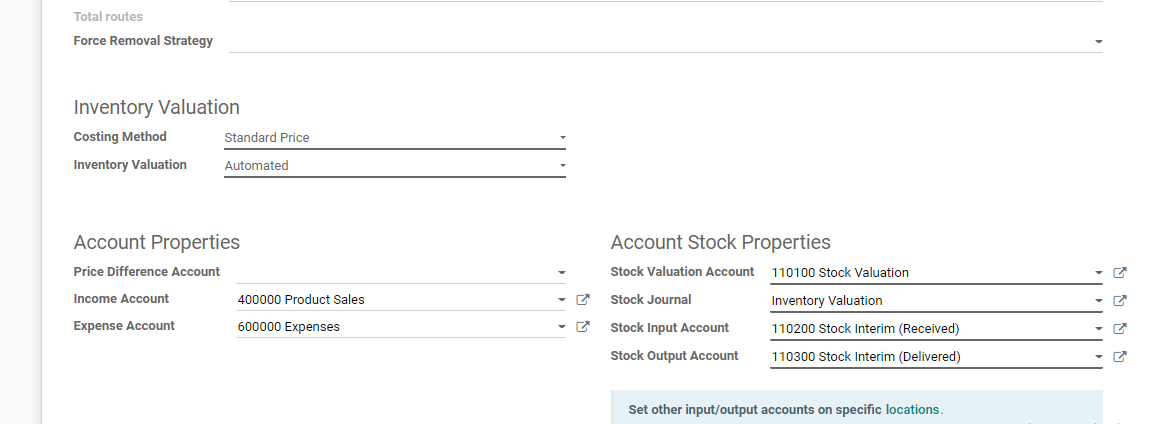
Here the inventory valuation method has been selected as Automated hence we get accounting properties in detail.
We have two sections
Account Properties
Account stock properties
Account properties
Price difference account: This account will help us to find the price difference between the purchase price and accounting cost.
Income Account: This has to be used to validate the invoices of the customer
Expense Account: This comes to use when the vendor bill is prepared.
Account stock properties
Stock valuation account: Represent the current value of the product using this account
Stock Journal: When we process stock moves the entries get posted in this journal automatically.
Stock Input Account: All incoming stock details can be entered here.
Stock output account: This is the account used to record outgoing stock movements
Hierarchy of accounting
We can manage the hierarchy of accounting using product categories. We can set an income account and expense account for products and product categories. But if the account is set for both the product and the product category only the items set for the product will be taken into account while managing the operation. If there is no account set for the product the system will automatically choose the income and expense account set for the product category.
Product Attribute
Now we can configure product attributes.
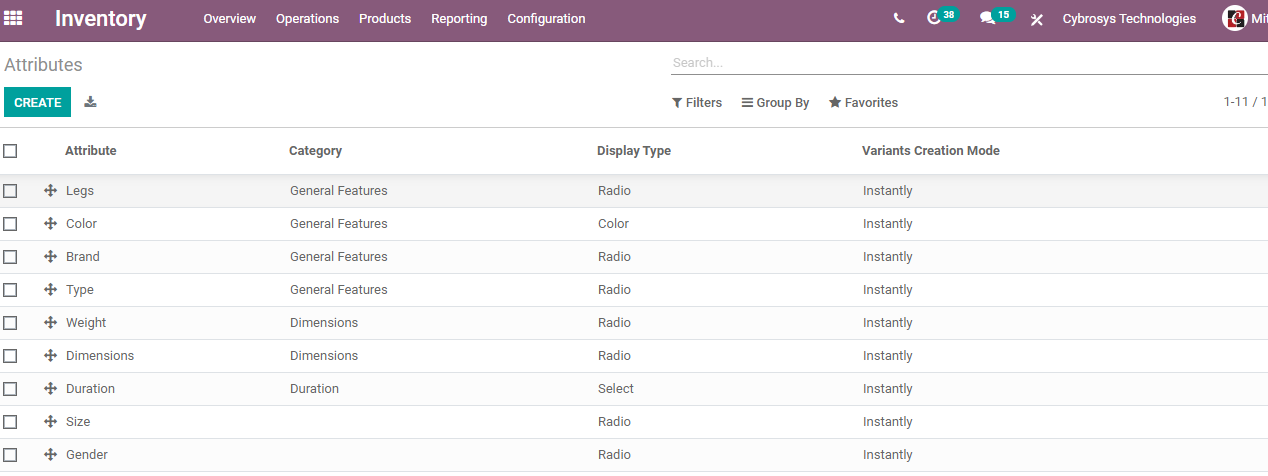
This also can be managed from the Configuration menu. Below Products we can find attributes.
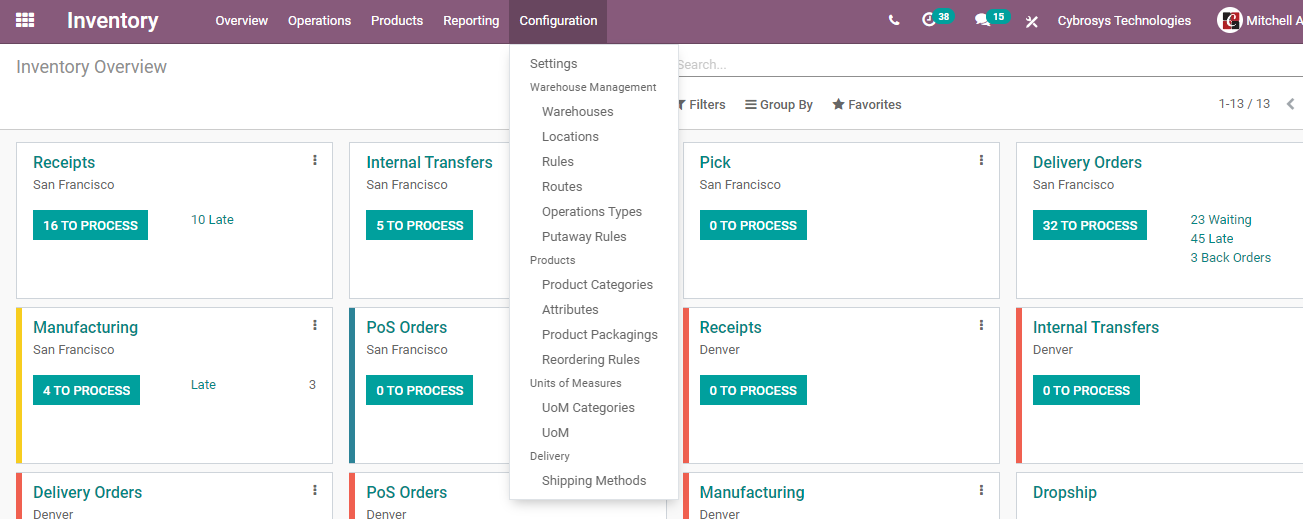
We can configure different attributes suiting our products from here.
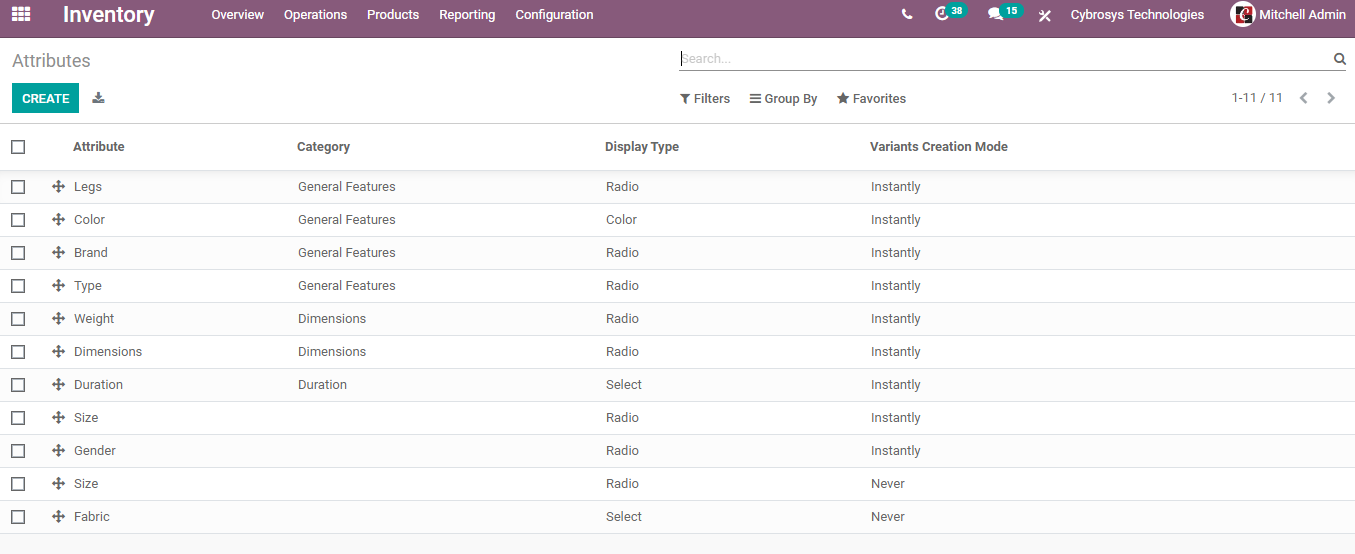
Pre-configured attributes are listed above. Now we can see how to configure attributes.
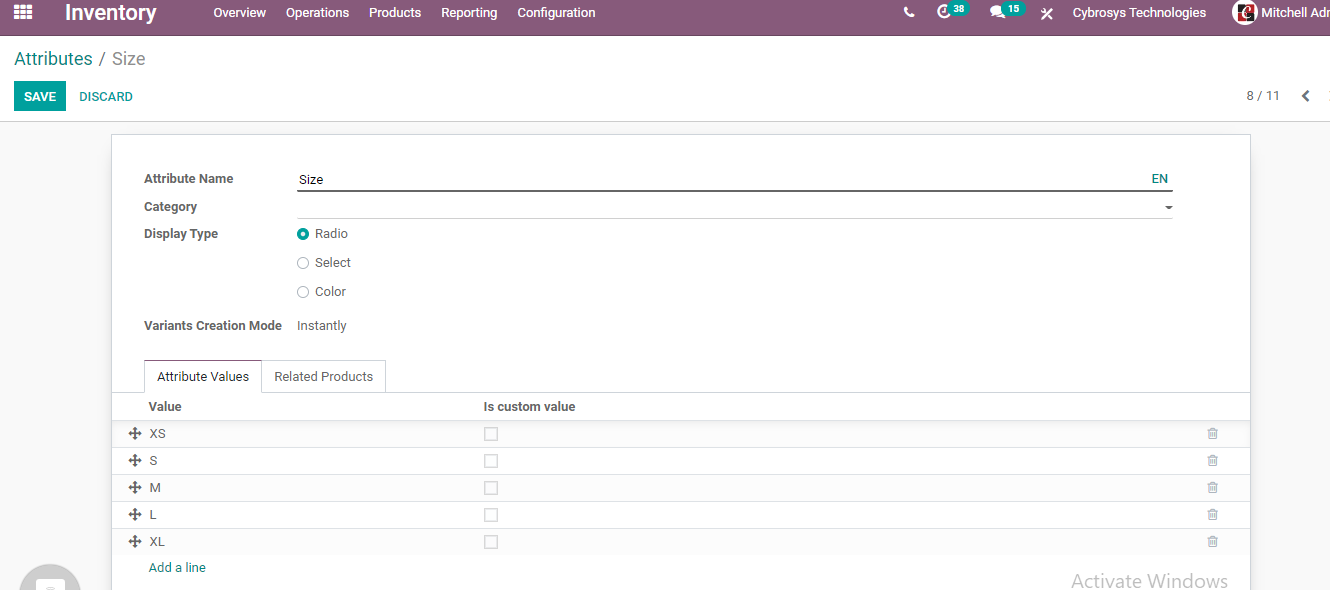
This form will help us to edit or add new attributes. The Edit button that we get on opening any of the attributes will help us to change the attributes, the create button will help to create new attributes.
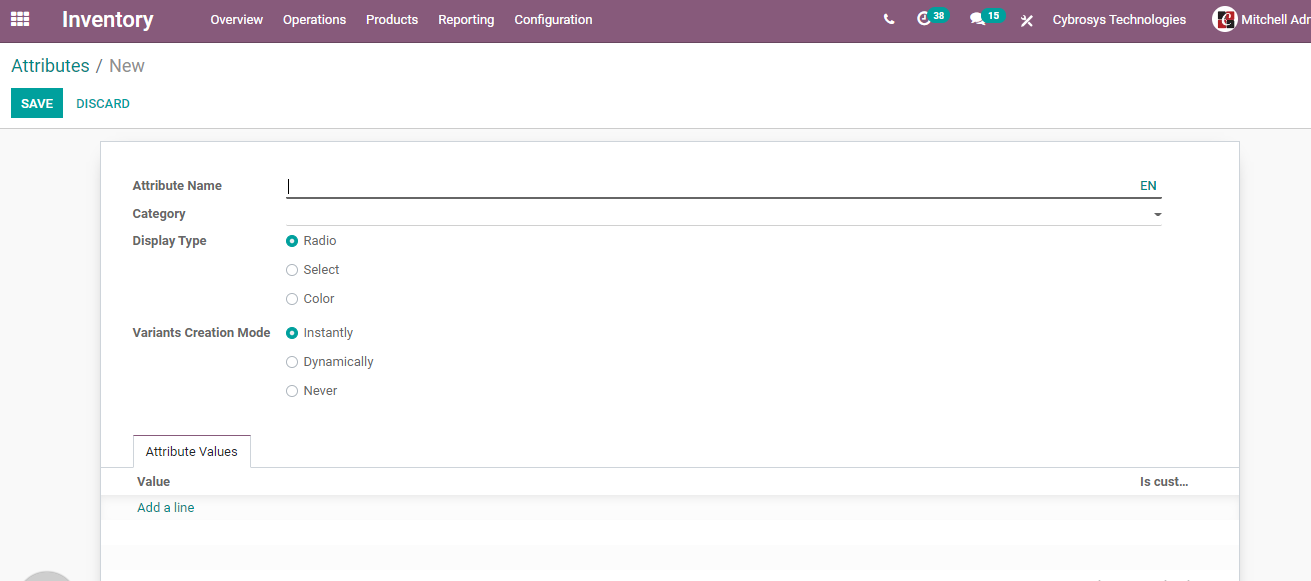
We can find many fields here. They are
Attribute name: This helps to identify the attribute. The name can be dimension size, color etc
Category: Can choose a category that was created earlier.
Display Type: It can be Radio, Colour, etc
Variant creation mode: There are three options instantly, dynamically, or never.
Attribute Value: The attribute value can be chosen based on the attribute selected.

As I have chosen Colour as the Attribute I have selected different colours as attribute values.
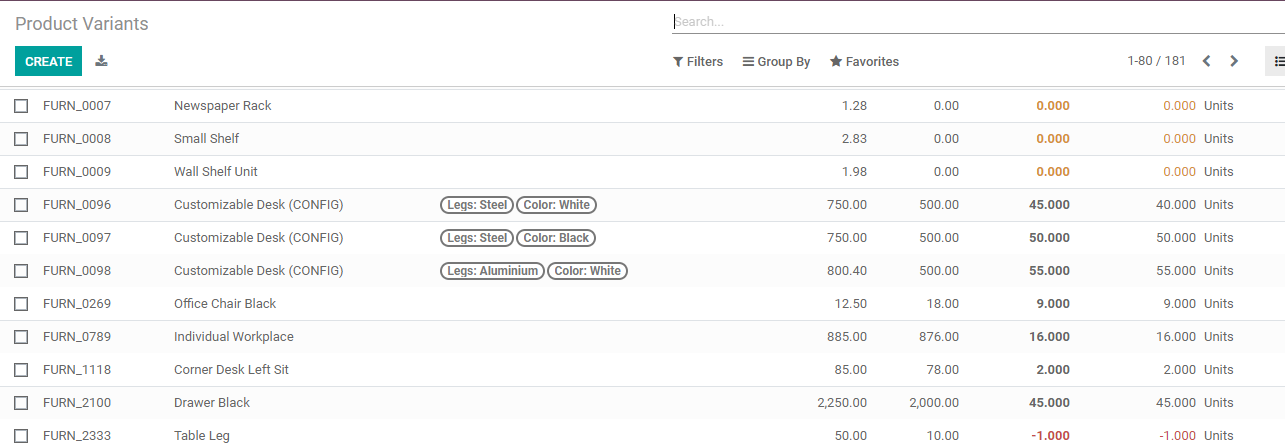
These attributes can be seen when we go to the product variants page after saving the changes.

Here in the above picture, we can find that the customizable desk is available with different variants. The attributes here are leg and colour. The Attribute values for the leg are Steel and Aluminium. The attribute values for the attribute colour are White and Black.
How to use Product Category and Product variant to create a product?
We create products with the help of product categories and product attributes. To create product variants we have to go to Inventory> Products> Products
Let us create a product.

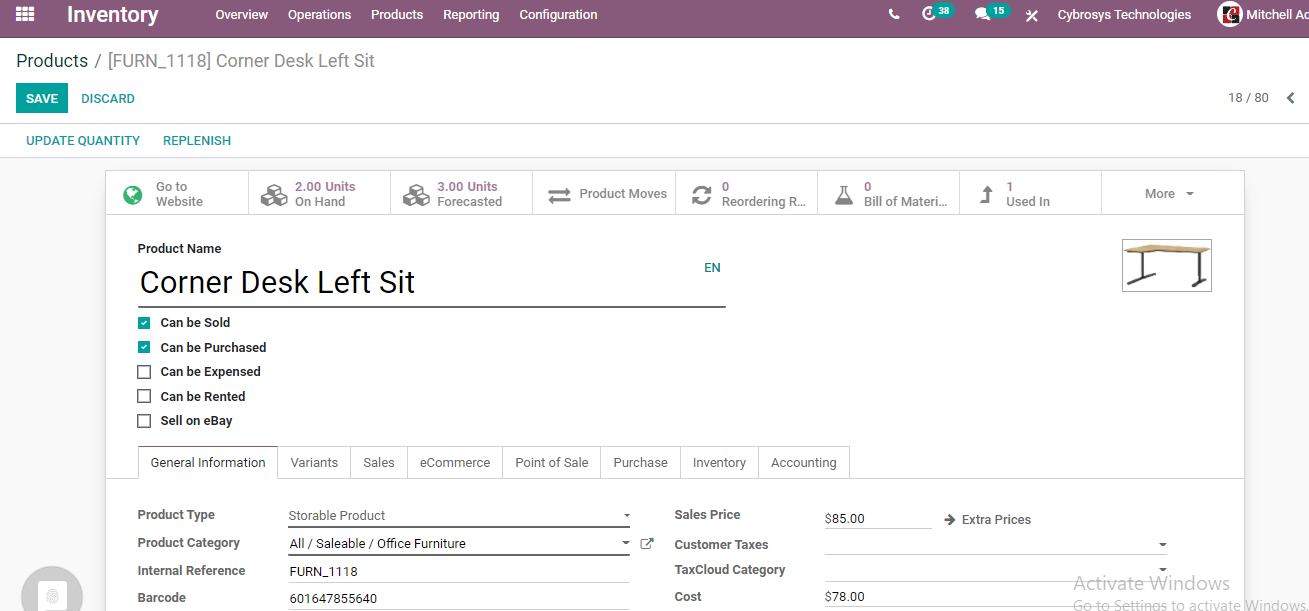
We have an option to select product categories. Here we have selected All/Saleable/ Office Furniture. This was one of the product categories created earlier.
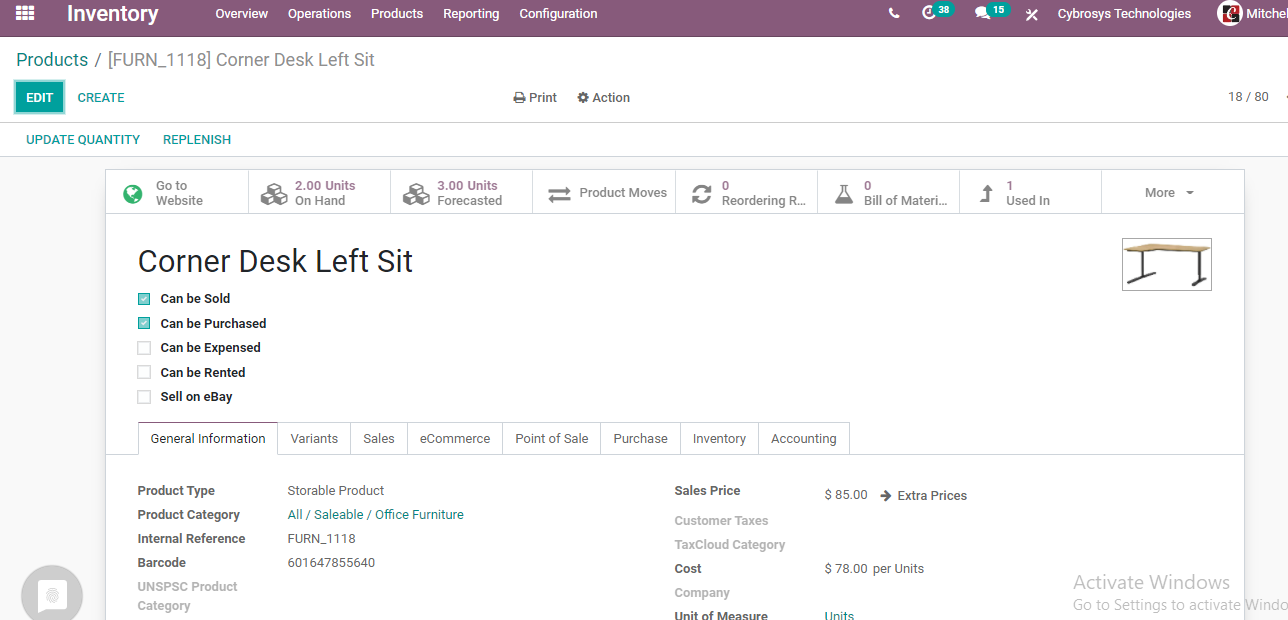
We can also add the product name and product type.
Internal references and other details can also be added.
We have other tabs like Variants, Sales, PoS etc.
Our priority is Variants Tab.
We can find attributes and values. Below attribute, we have to add attribute name and below value, we have to add attribute value.

We have to select the attribute from the list.

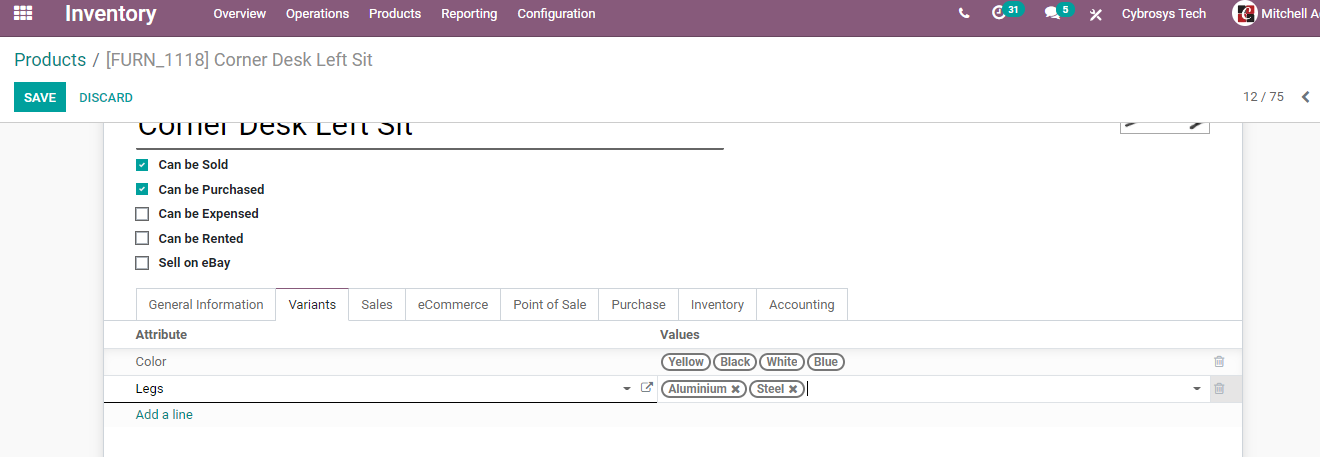
I have set Colour as the attribute in the first line. I have also chosen Yellow, Black, Blue and White as attribute values.
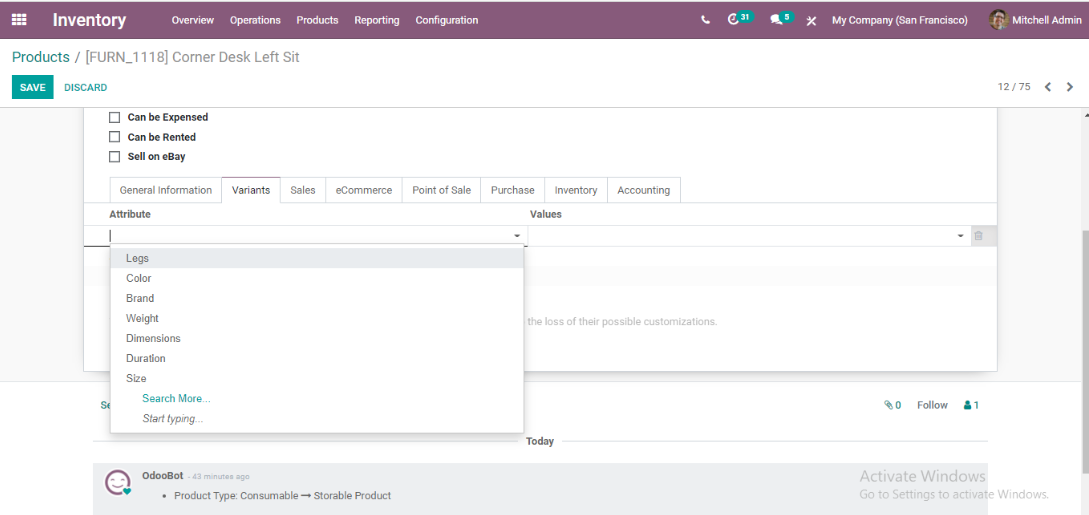
In the next line we can choose another attribute.

Let us choose Leg. Steel and Aluminium are selected as values. Thus we will have eight product variants for the Corner Desk as we multiply the number of values chosen for both the attributes. That is we have four colours and two leg types (4*2= 8).
We can offer 8 variants for corner desks to any customer. This is how Product Category and Product attributes are configured and used in Odoo 14 Inventory. You can find more information on www.cybrosys.com