Online appointments allow customers to plan services at their convenience, making their experience more convenient. Businesses benefit from this by having more effective booking management, fewer scheduling conflicts, and better resource allocation.
Restaurants may streamline client management and table allocation by integrating online reservations with their POS system with Odoo 18 Point of Sale. This function guarantees seamless coordination between front-of-house and kitchen staff, increases operational efficiency, and improves customer experience. This in Odoo 18 is made feasible by the combination of the Odoo 18 Calendar and Point of Sale modules. Now let's examine the connections between those modules in this blog.
* Configuring Floors and Tables
First go to the point of sale module, here a restaurant is shown in the dashboard. So it is a restaurant, as the name indicates.

So the restaurant may contain several floors and tables. Let's configure floors and tables for this particular restaurant. Go to the Configuration and click on the Floor Plans button as shown below.
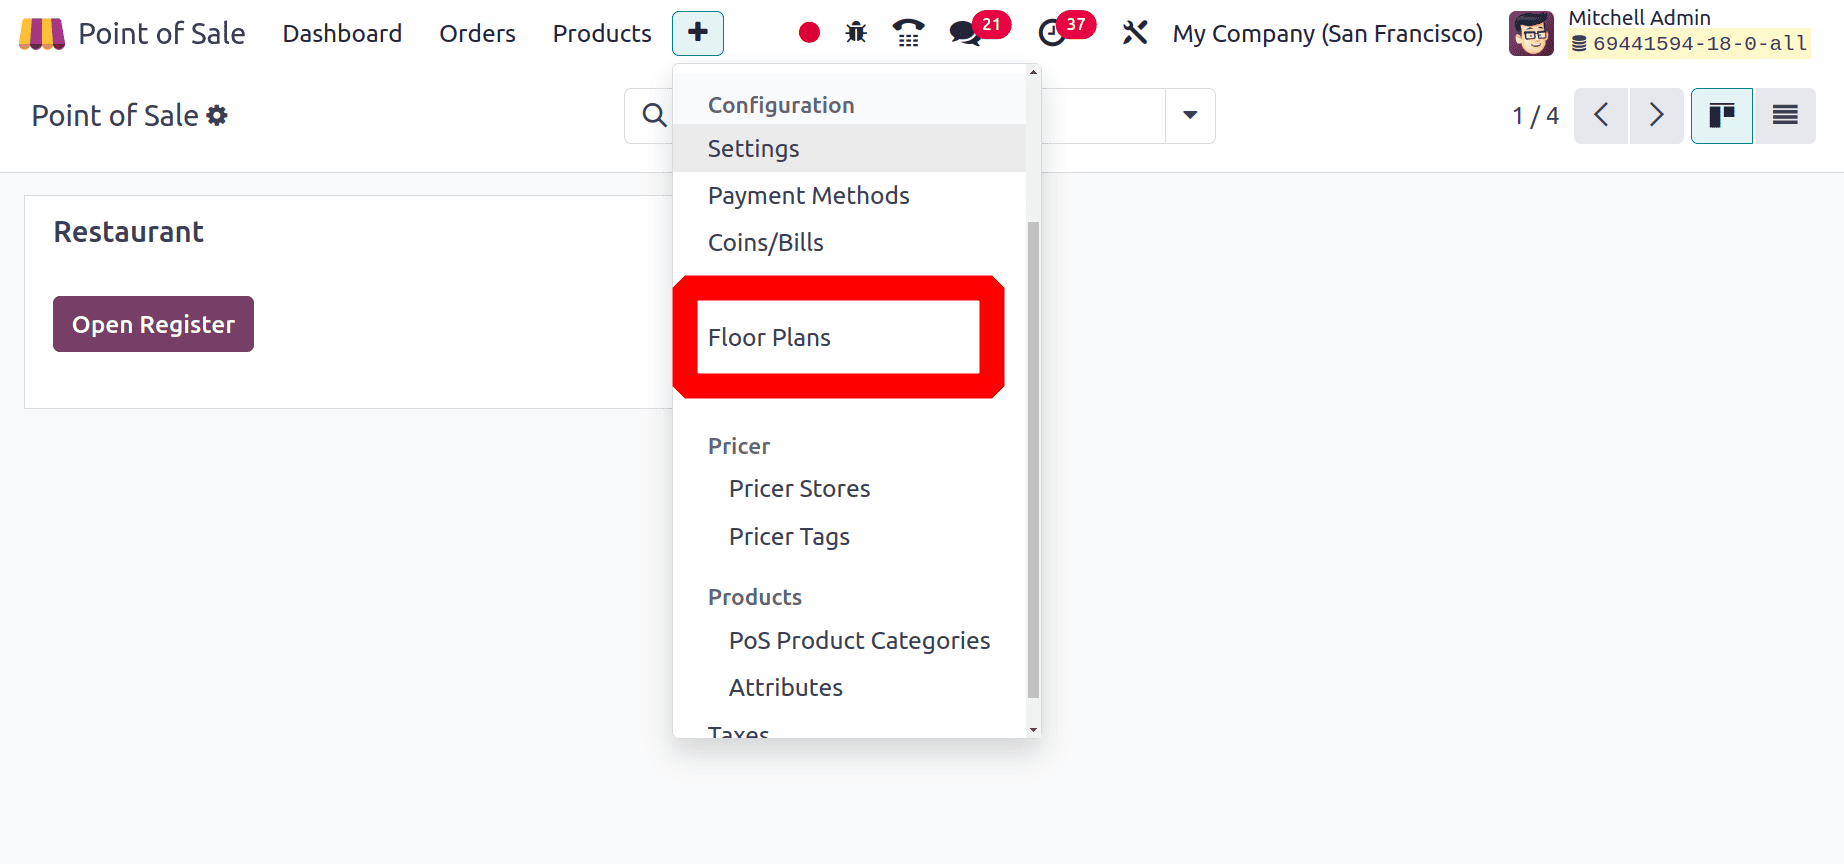
This contains a list of previously configured Floors. Just the floor name and point of sale name are included in this list. To add a new one, click on the New button.
Add the Floor name first, then mention the point of sale name on which this floor belongs. Then the background color can also be possible to choose from there.
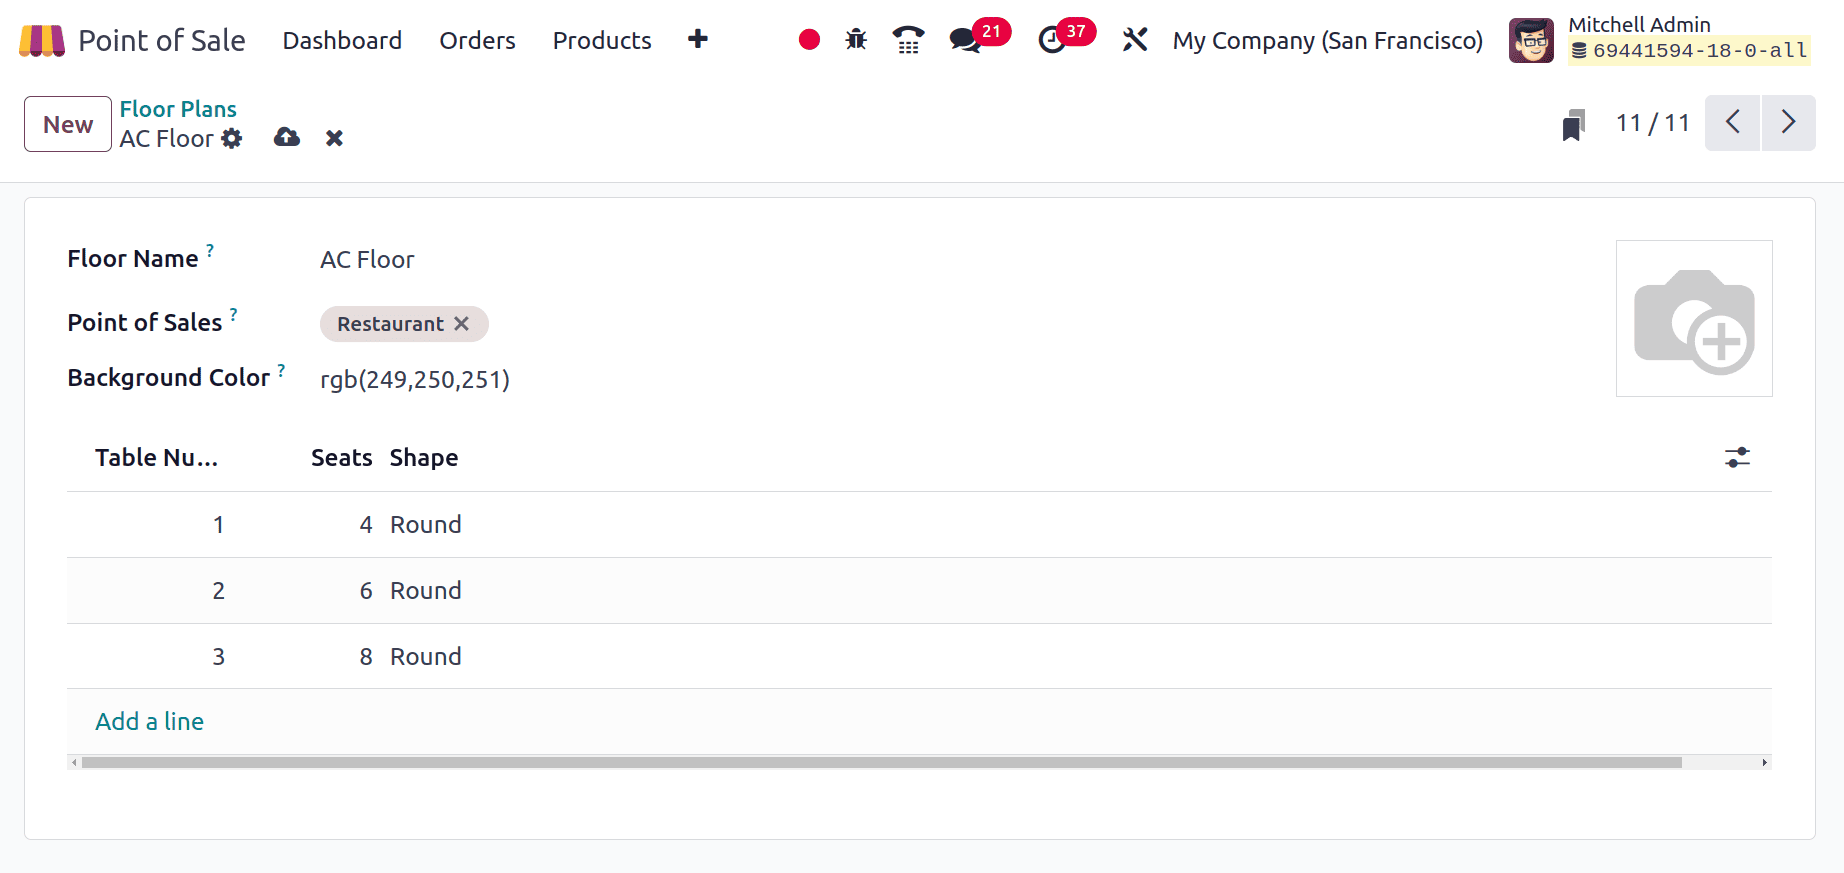
Then the table details can be added by clicking on the Add a line, a line will open there, and from there the users can specify the table name, number of seats, and shape of the table. Add the necessary number of tables there.
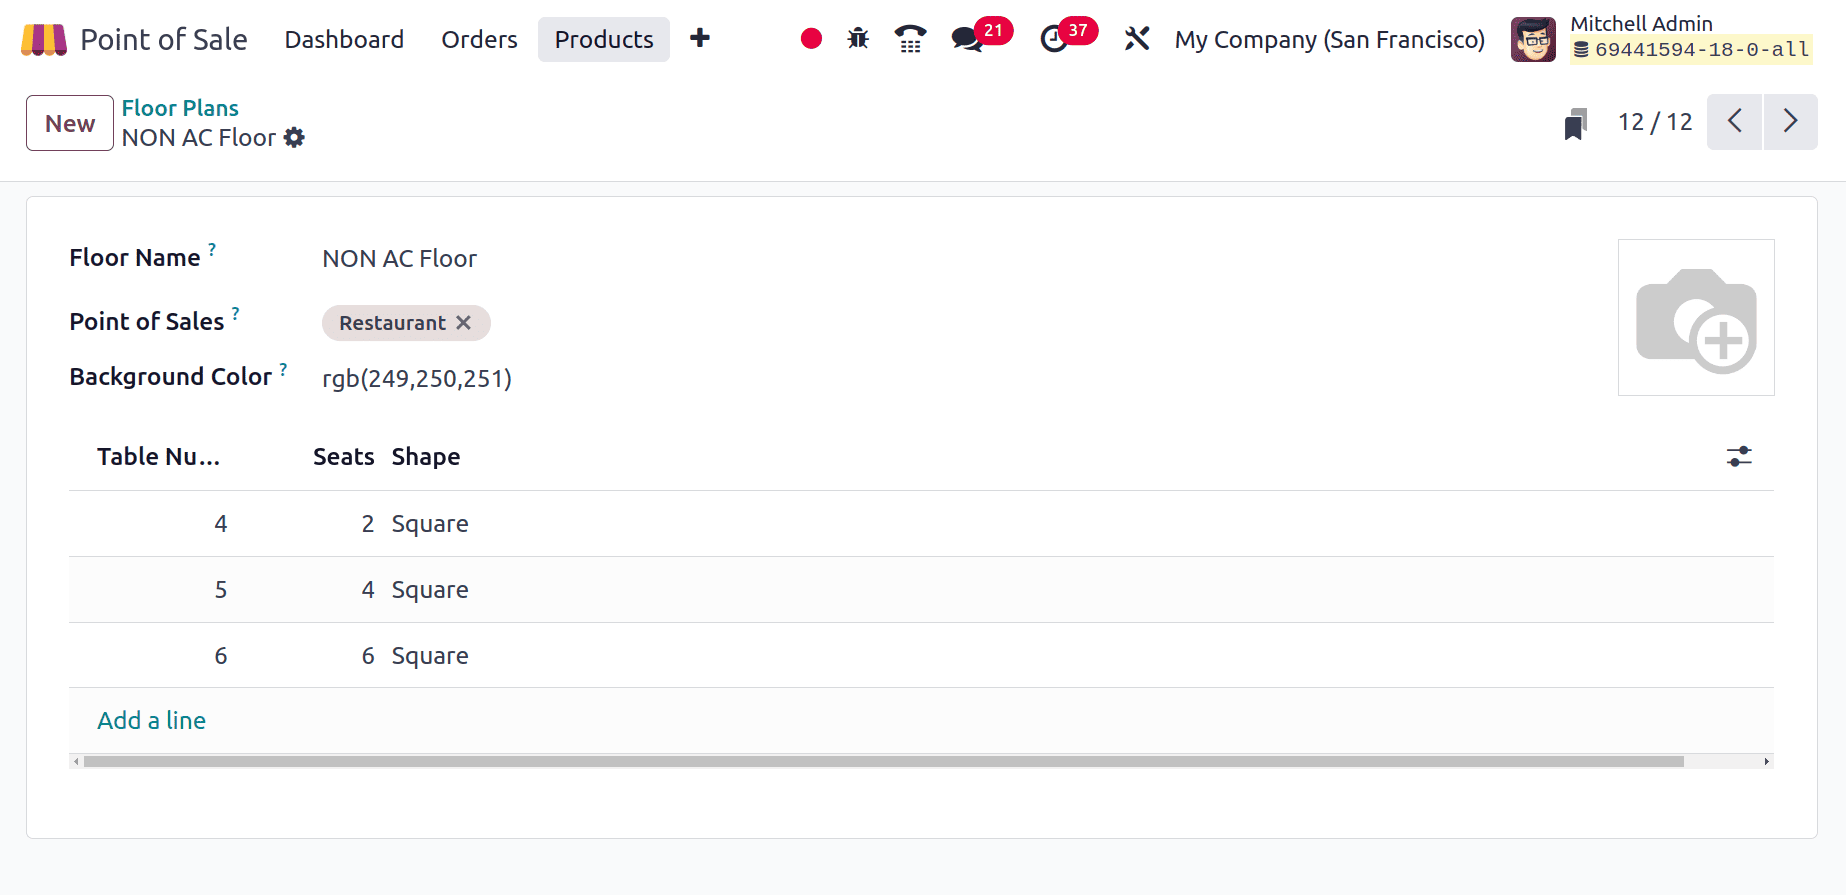
Then another food with the name, NON AC Floor is also configured with 3 tables as shown in the screenshot below.
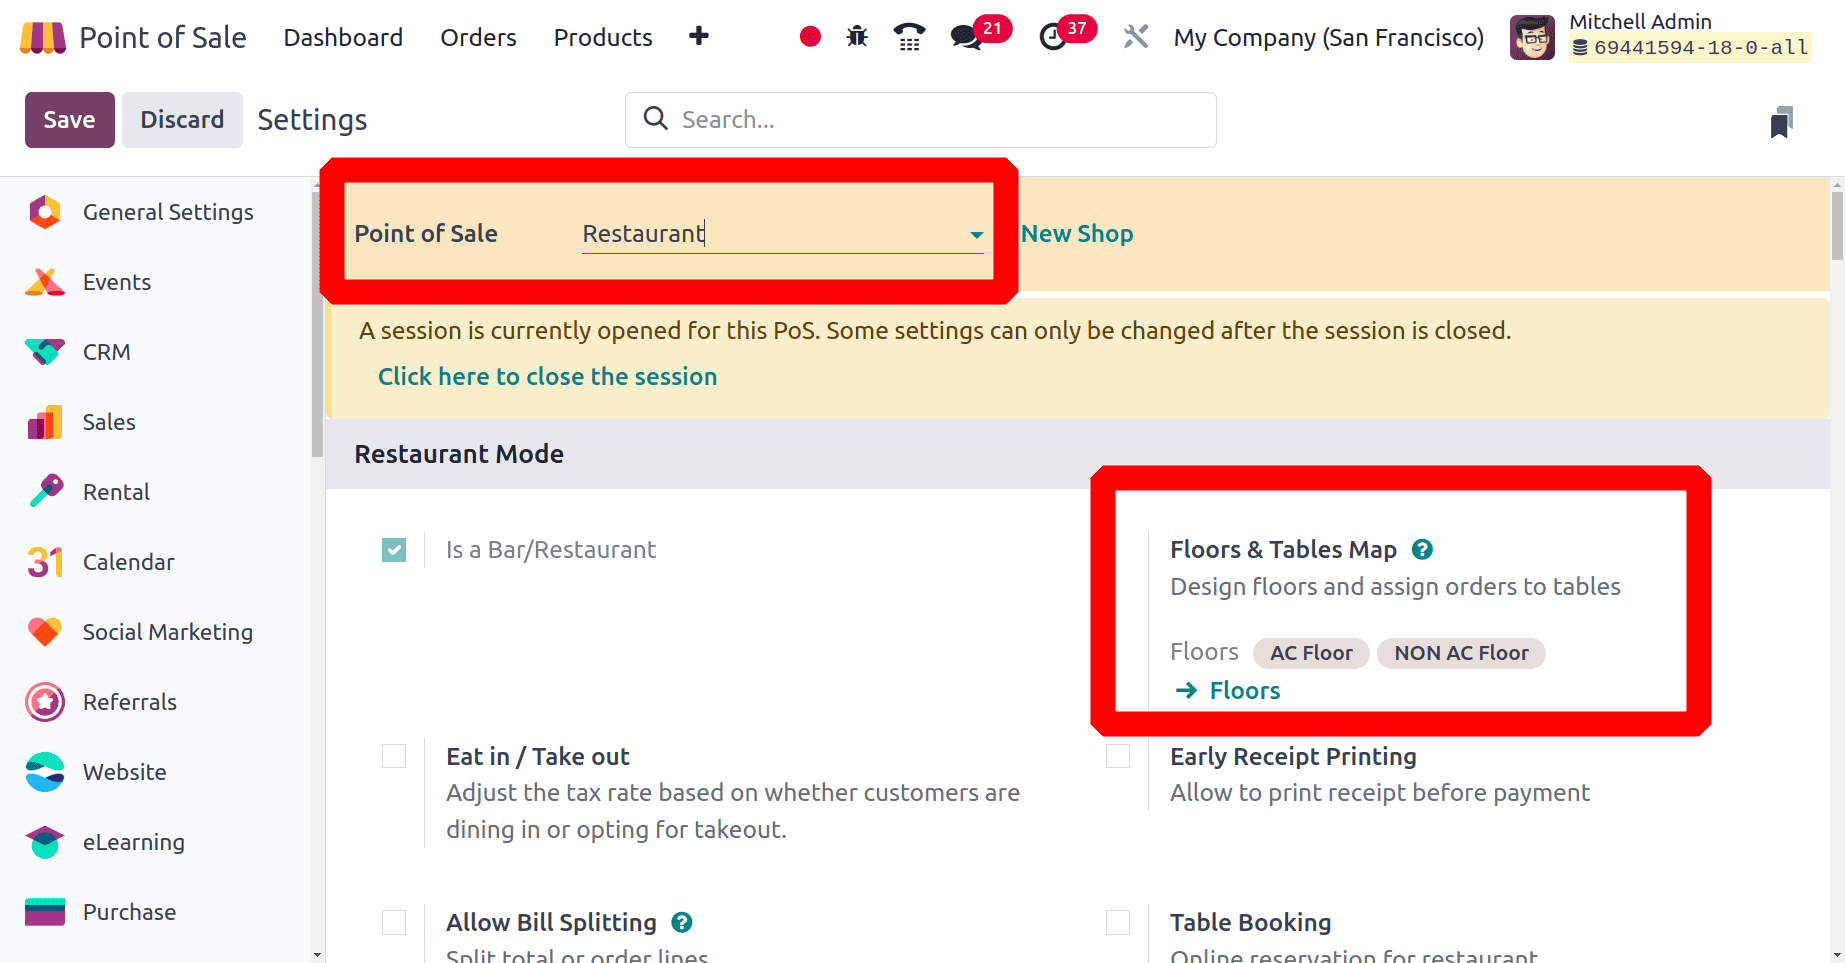
Next, navigate from the Configuration to the Settings menu. The Floors & Table Map, which is used to build floors and assign orders to the table, is visible from there under the Restaurant Mode. The Create Floors have already been added under that option.
* Configuring new Appointment Type
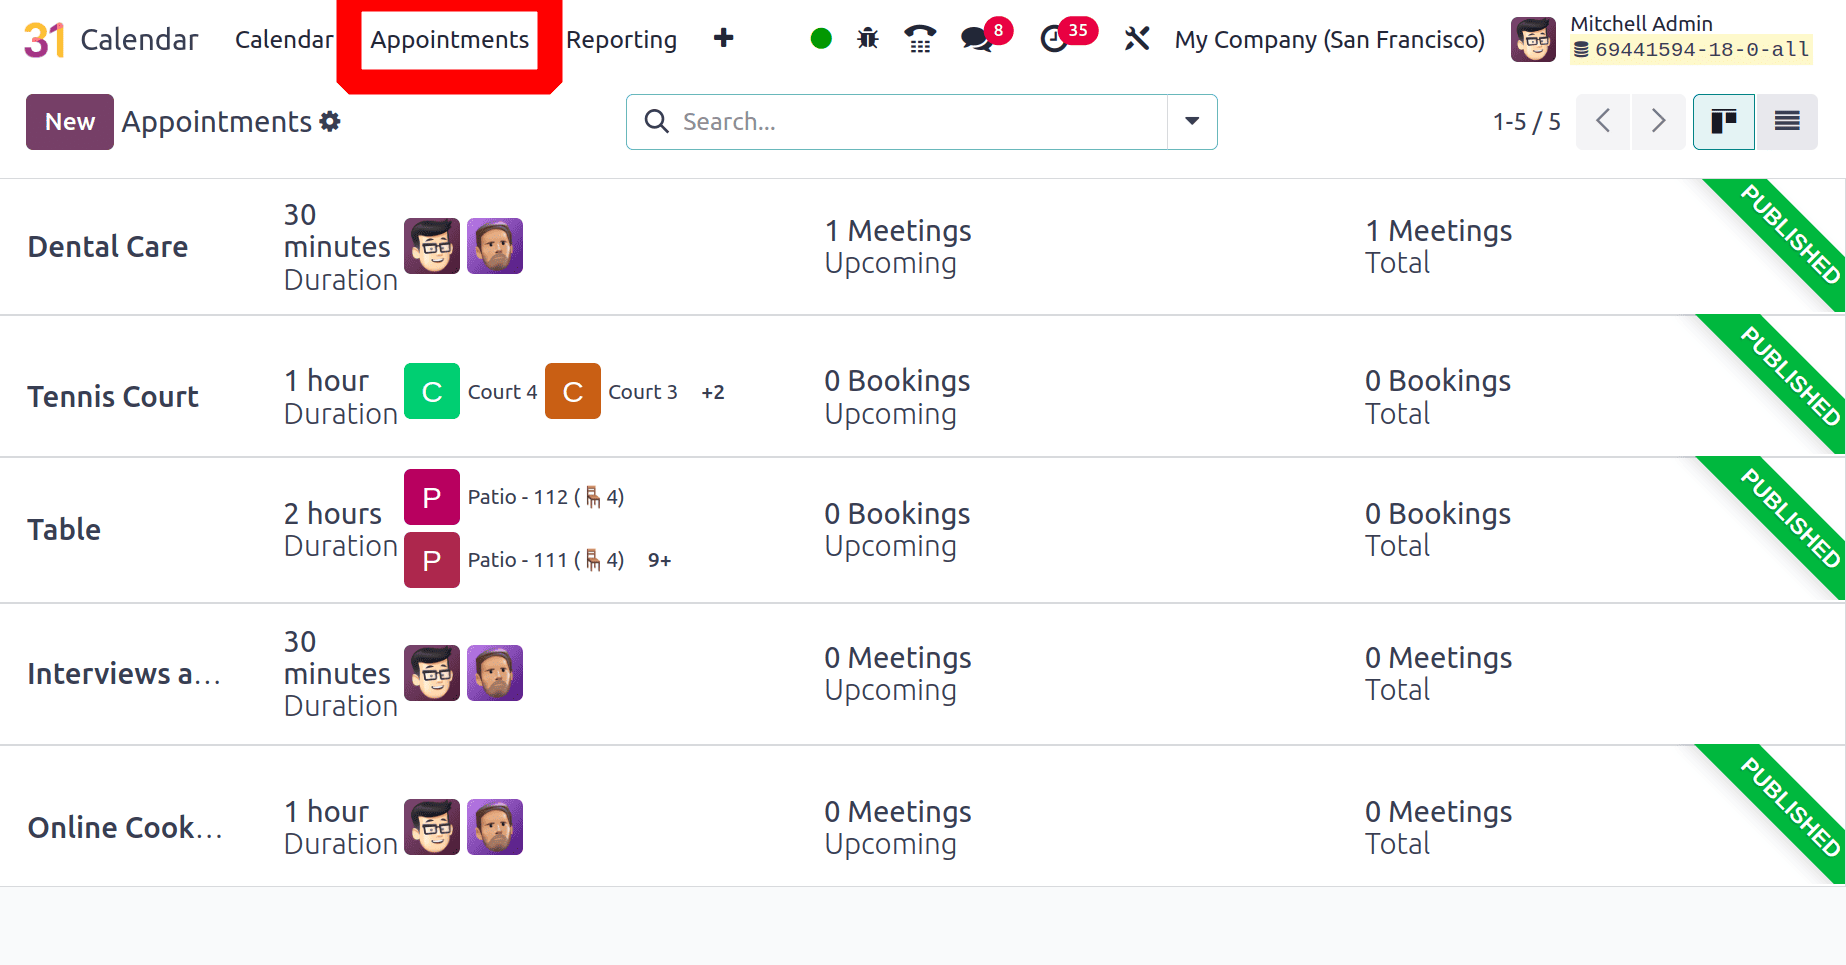
Let's configure the appointment type next. For that, go to the Calendar module first. Then go to the Appointments menu. All the created appointments are listed there in the Kanban view with details like name, duration, booking, etc.
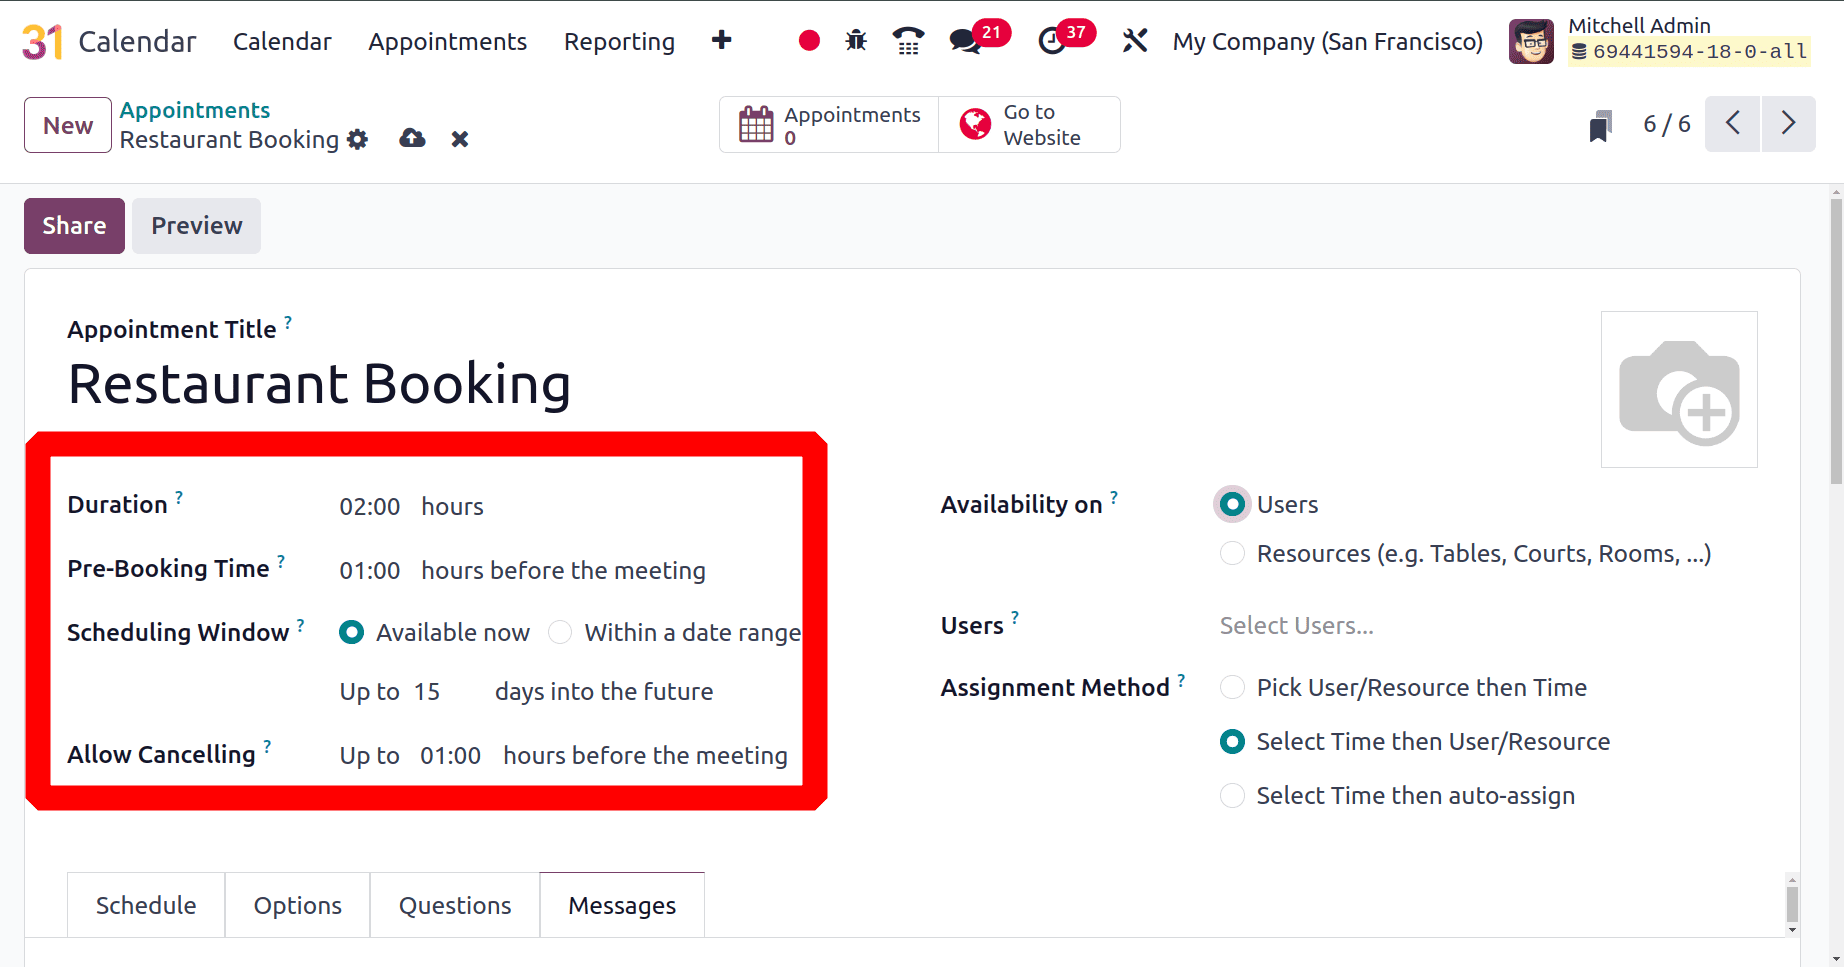
To create a new appointment, click on the New button, and then a new form will open there as shown below. First, user needs to specify the name of the appointment type, duration, prebooking time, scheduling window, and cancellation time.
The availability of the appointment can be either chosen on the basis of Users or on Resources, if users set it as Resources, then the resources can be mentioned below the Resources field. Here we create this appointment for a restaurant table booking purpose, which is based on the availability of resources. The resources are the tables. so we previously configured 3 tables on the AC Floor and all of them are chosen here as shown in the image above.
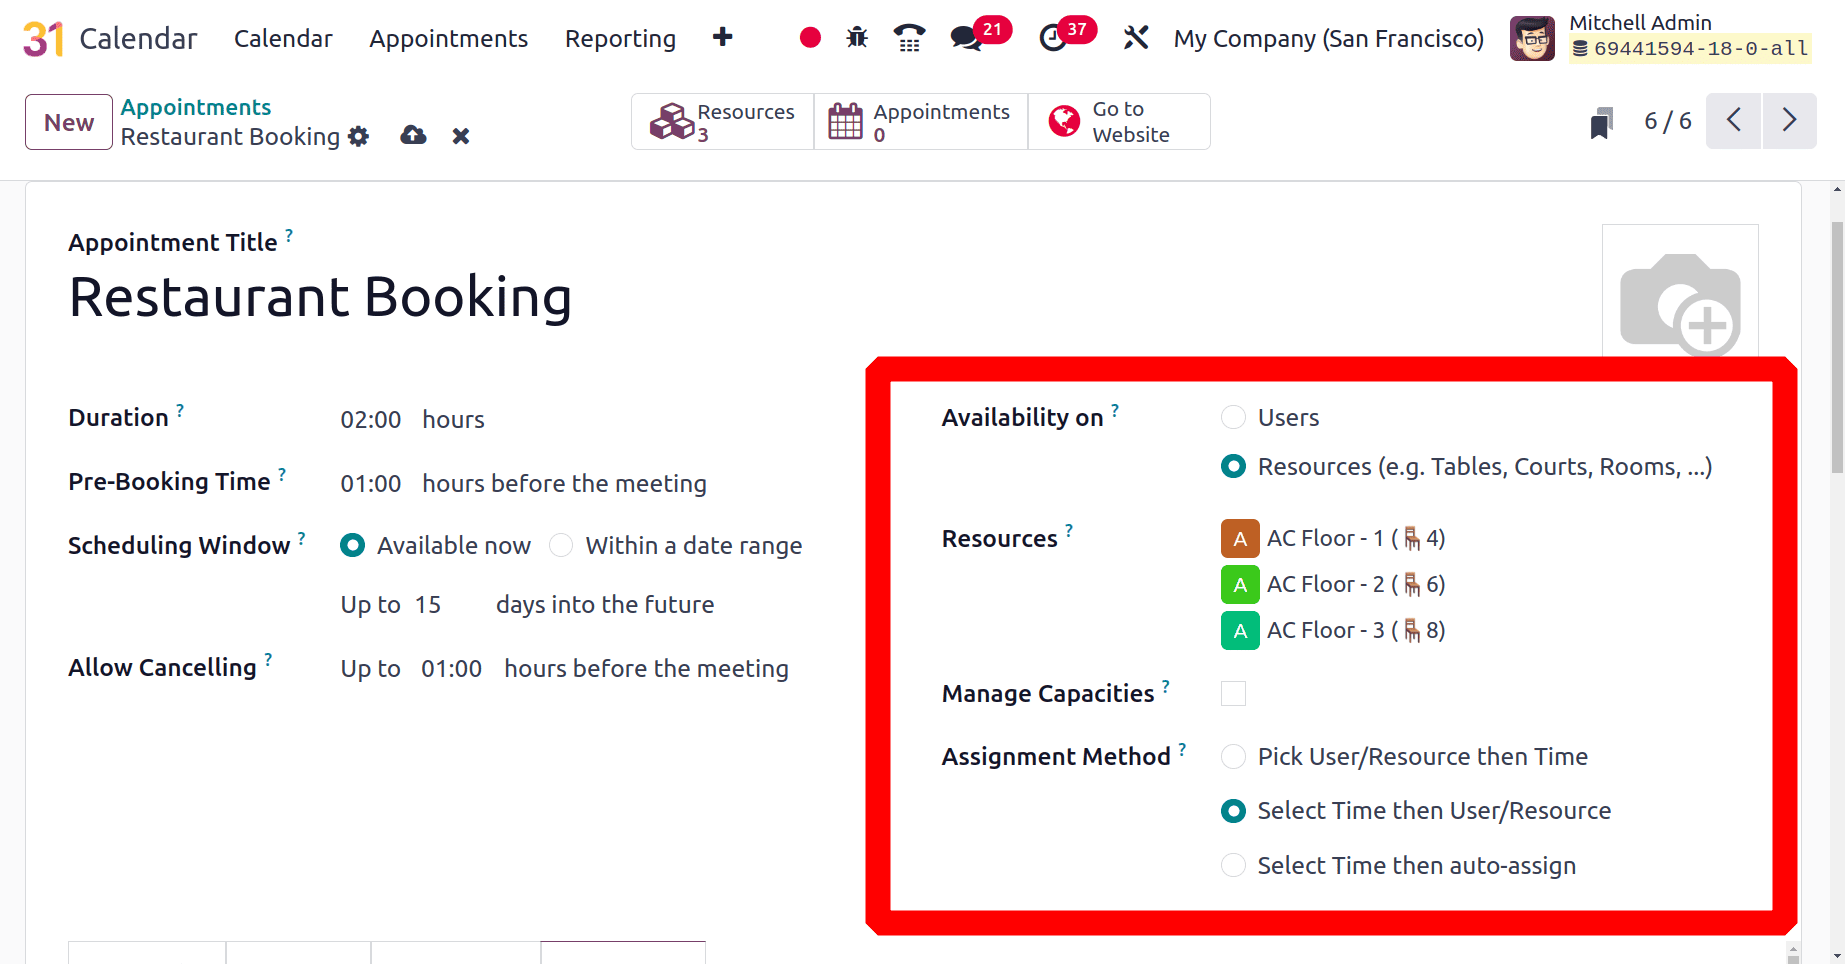
After that, the Manage Capabilities feature—which controls the most individuals a resource can accommodate—is enabled. First, the user and resources can be selected, followed by the assignment method.
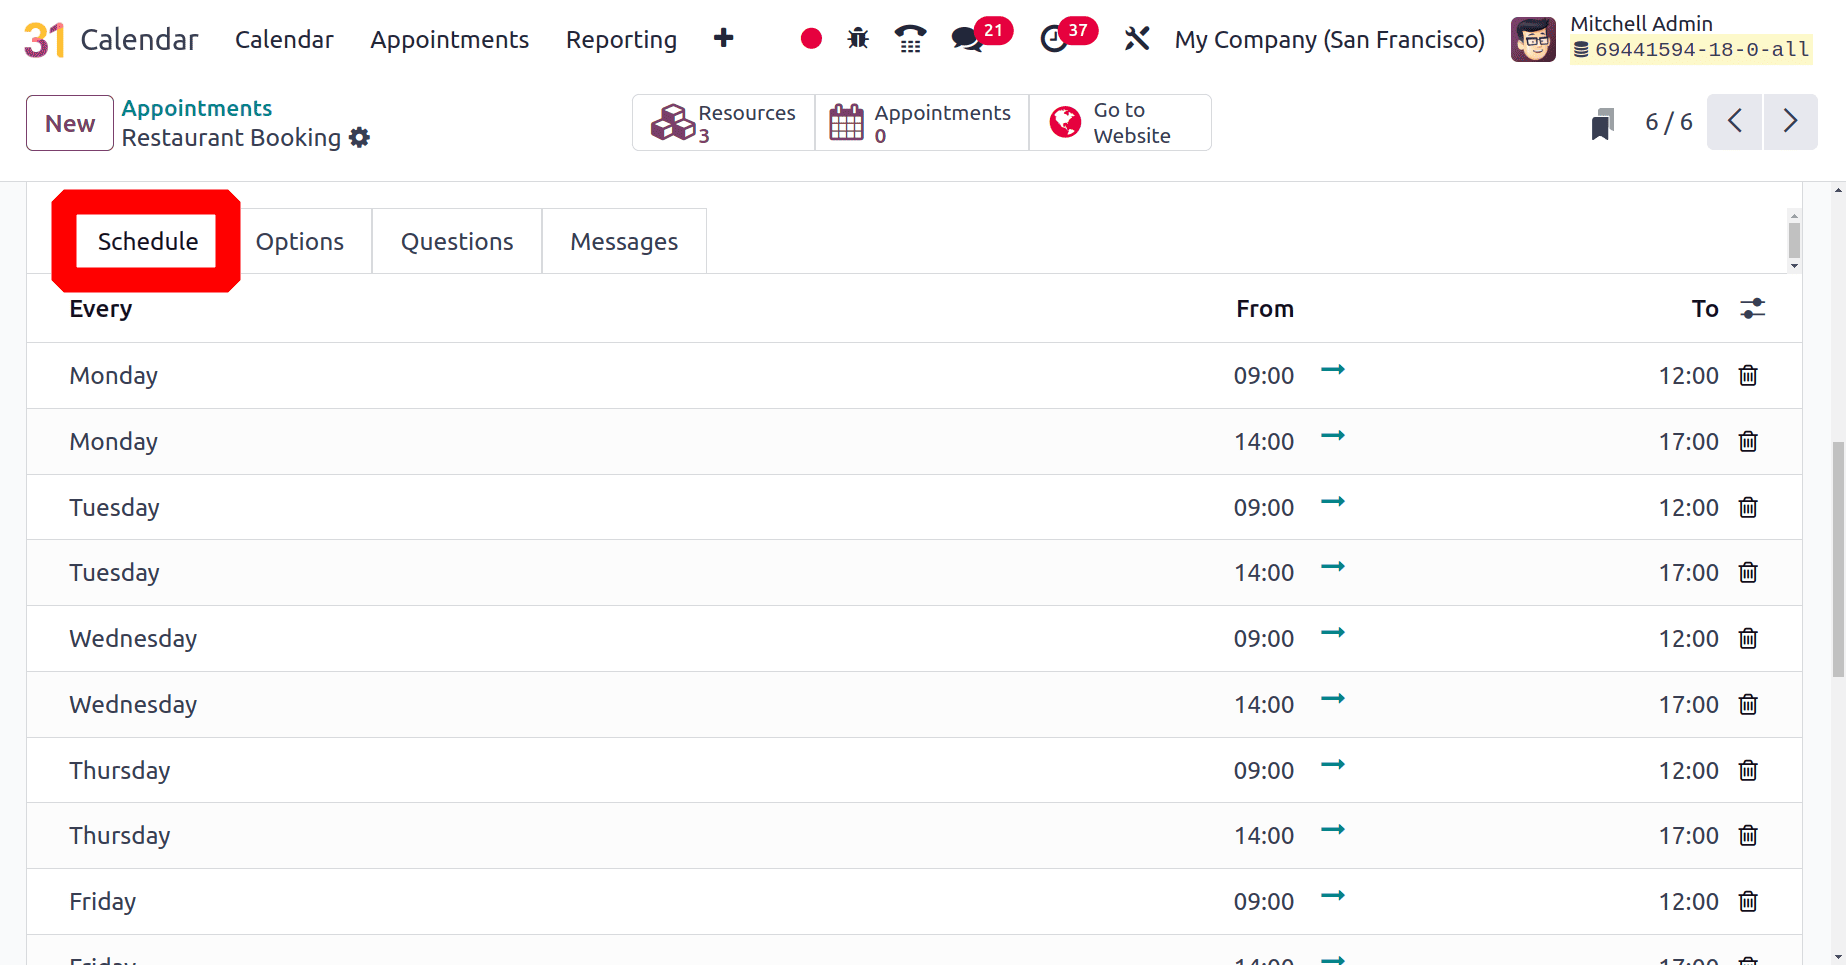
Mention the day and time that clients can make an appointment under the Schedule tab.
Then under the Options tab Front-End Display helps to display a picture of either the user or the resources, users can restrict some websites from this. Then set the timezone and location for the appointment. It's possible to specify any video conference link if necessary.
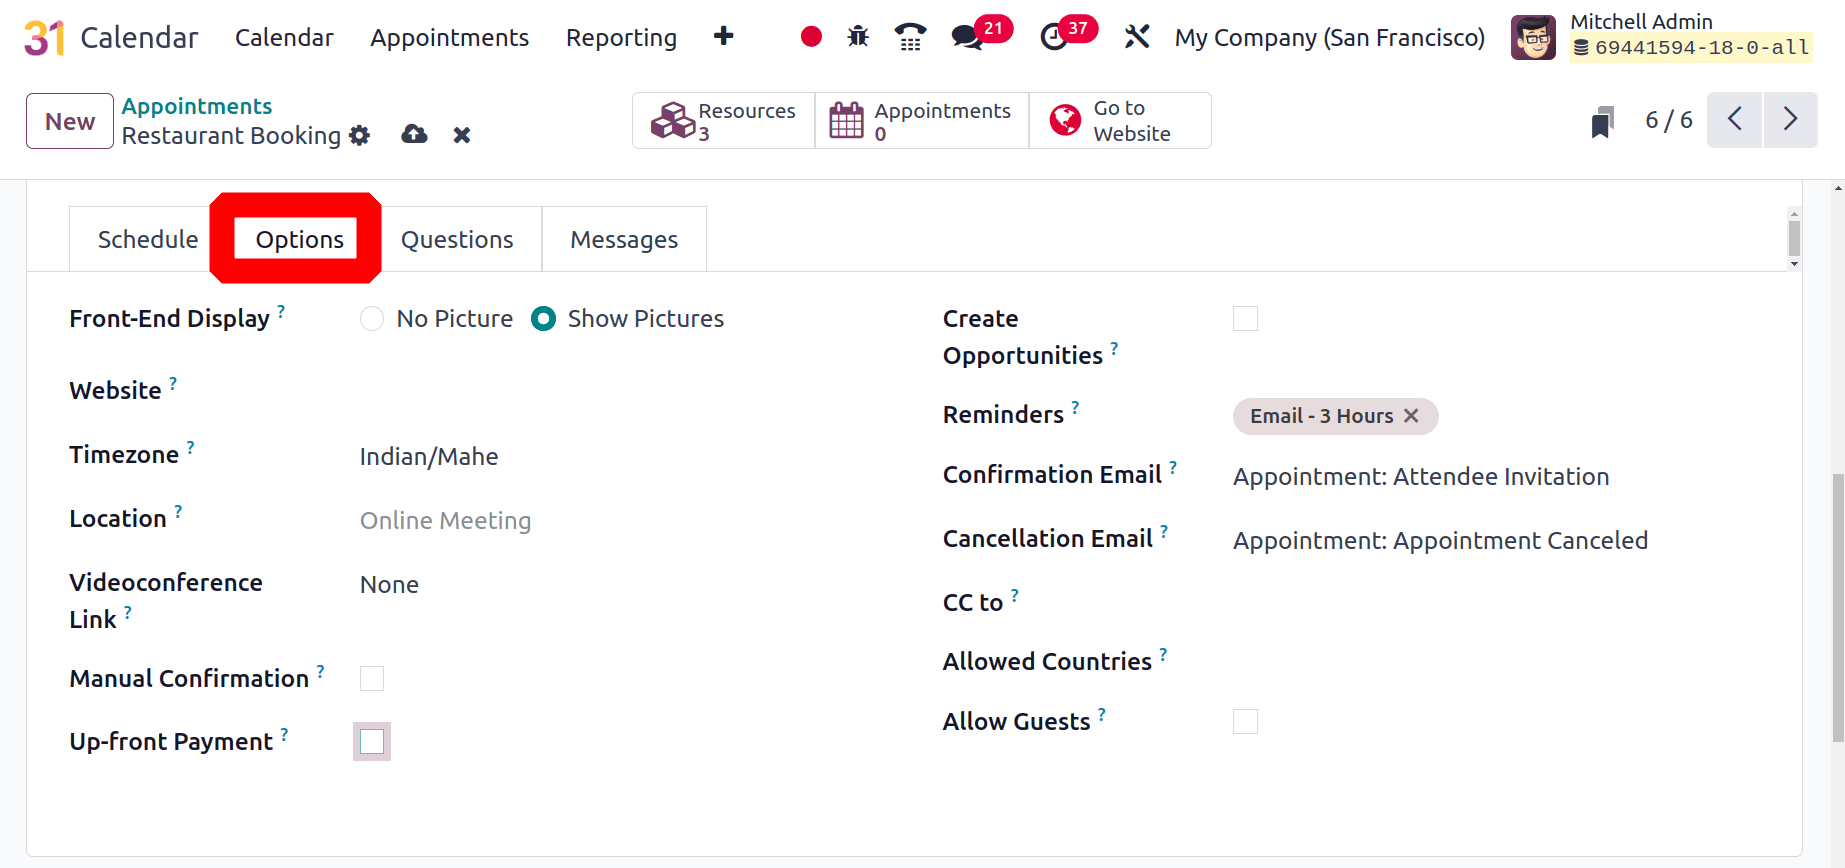
By turning on the Create Opportunity feature, users can start a new opportunity from an appointment. You may set up emails for reminders, confirmations, and cancellations there. Next, there is a checkbox labeled "Up-front Payment." If this checkbox is checked, visitors must make a payment in order to confirm their reservation.
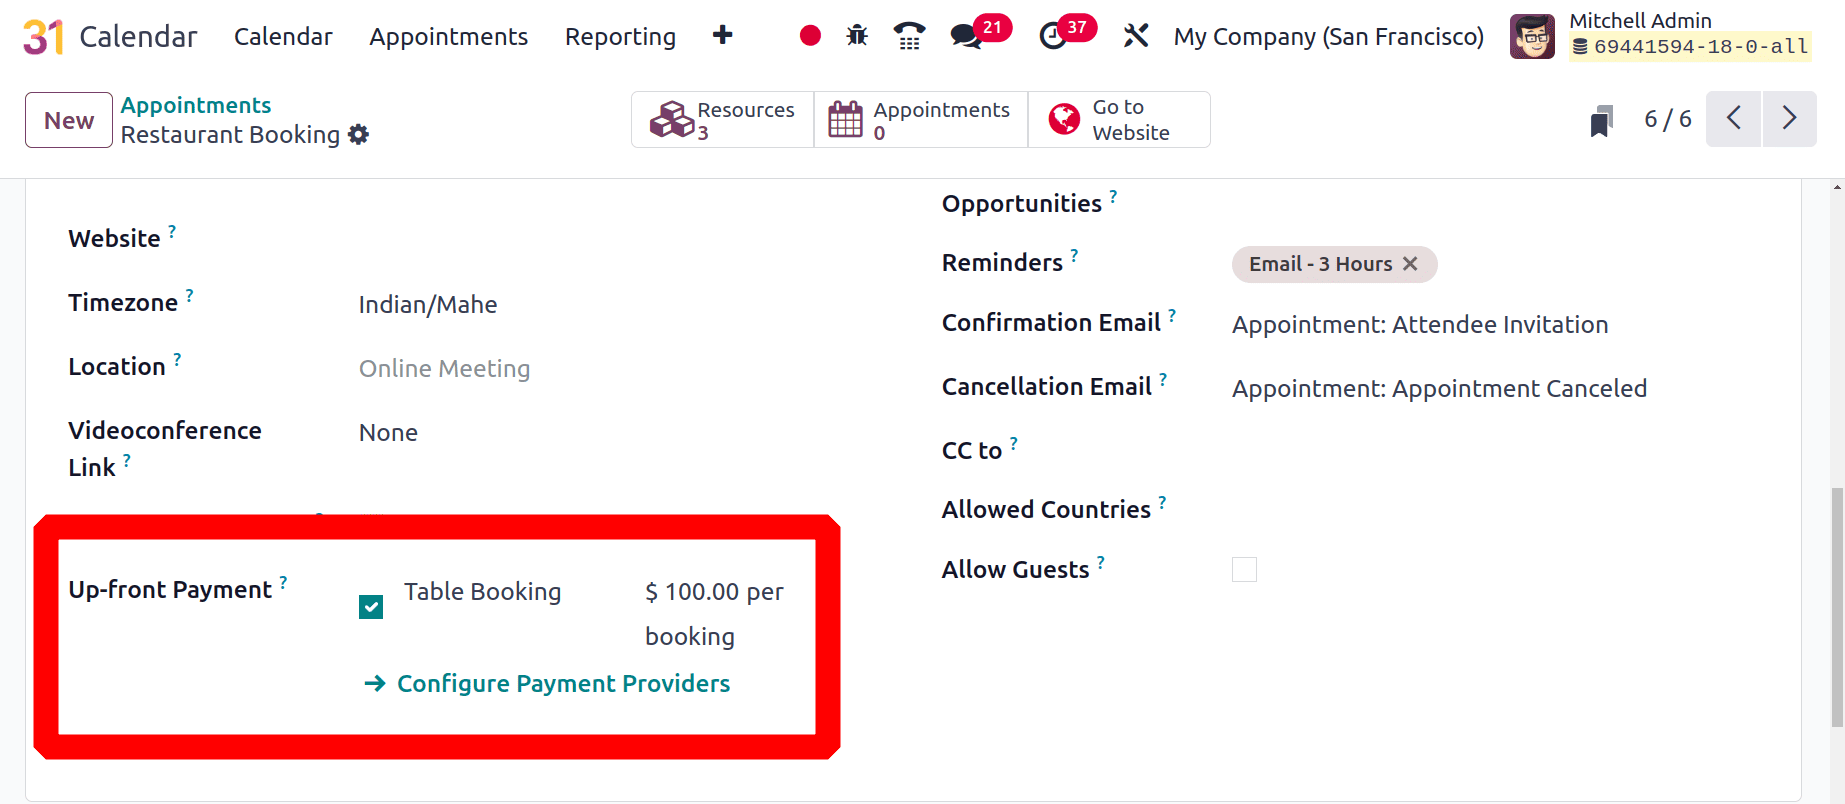
Users need to specify a service product there, then the payment will also be shown there. Payment providers can be configured from there.
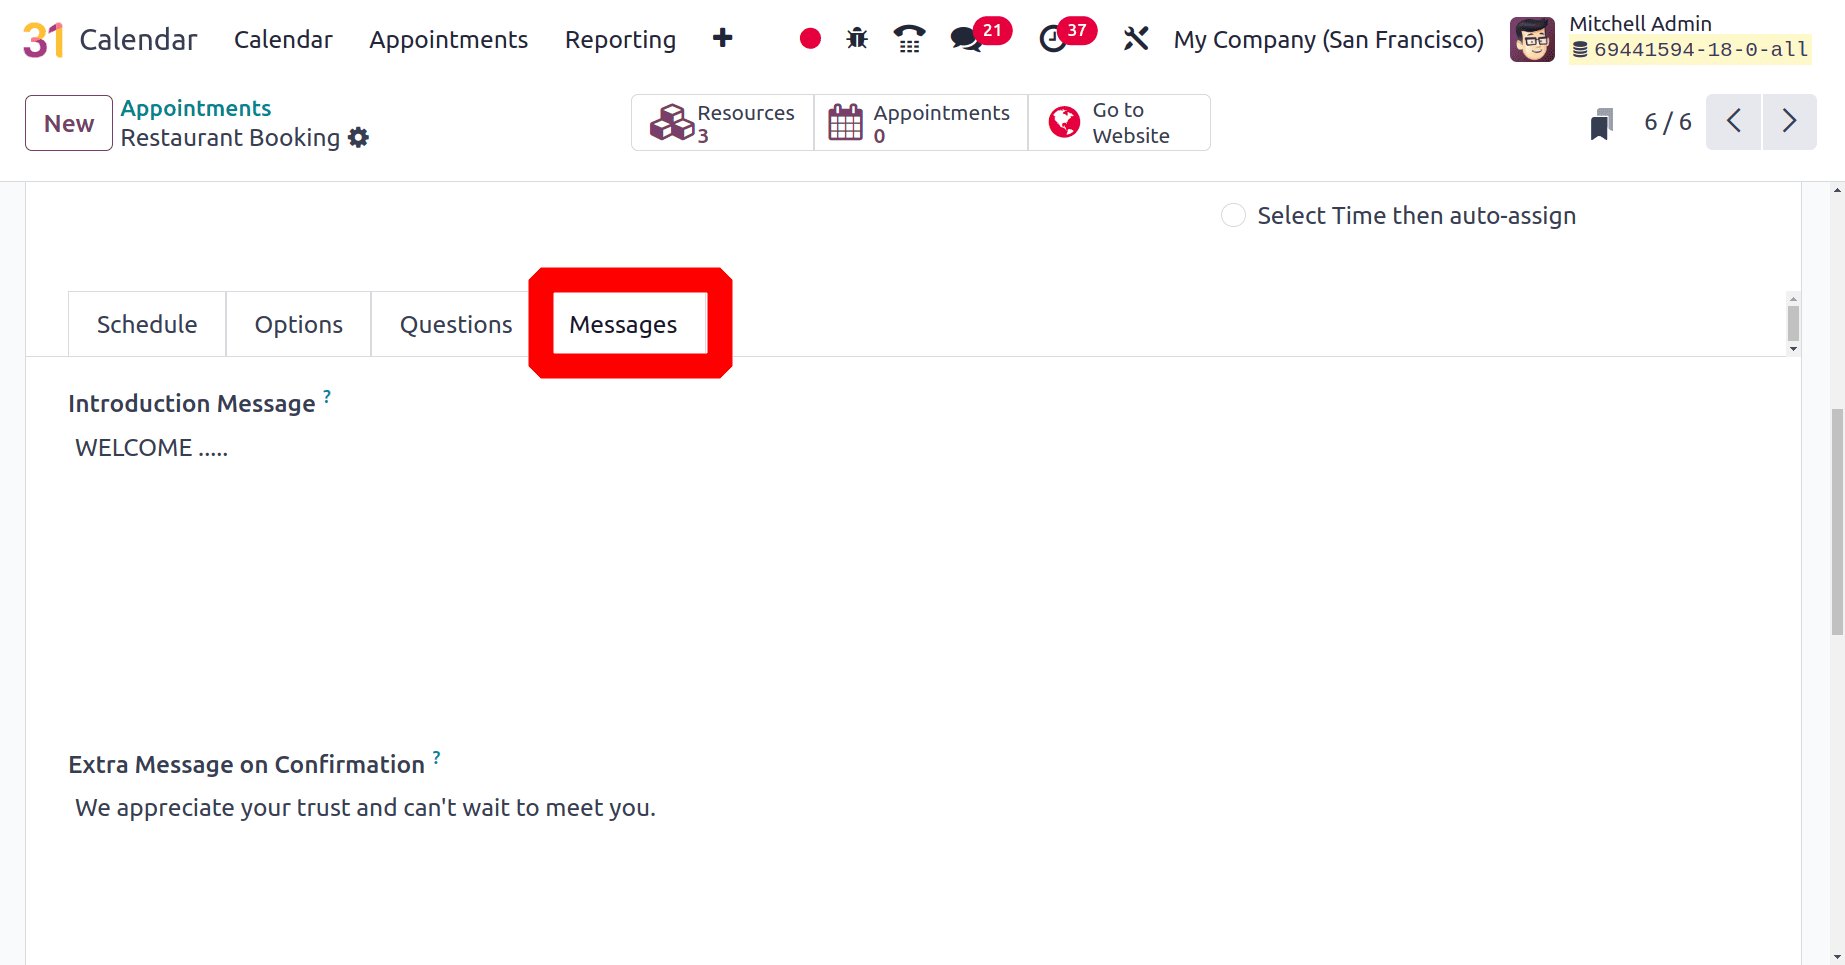
Users can add an introduction message and several more messages on confirmation on the Messages tab. Save the appointment after that.
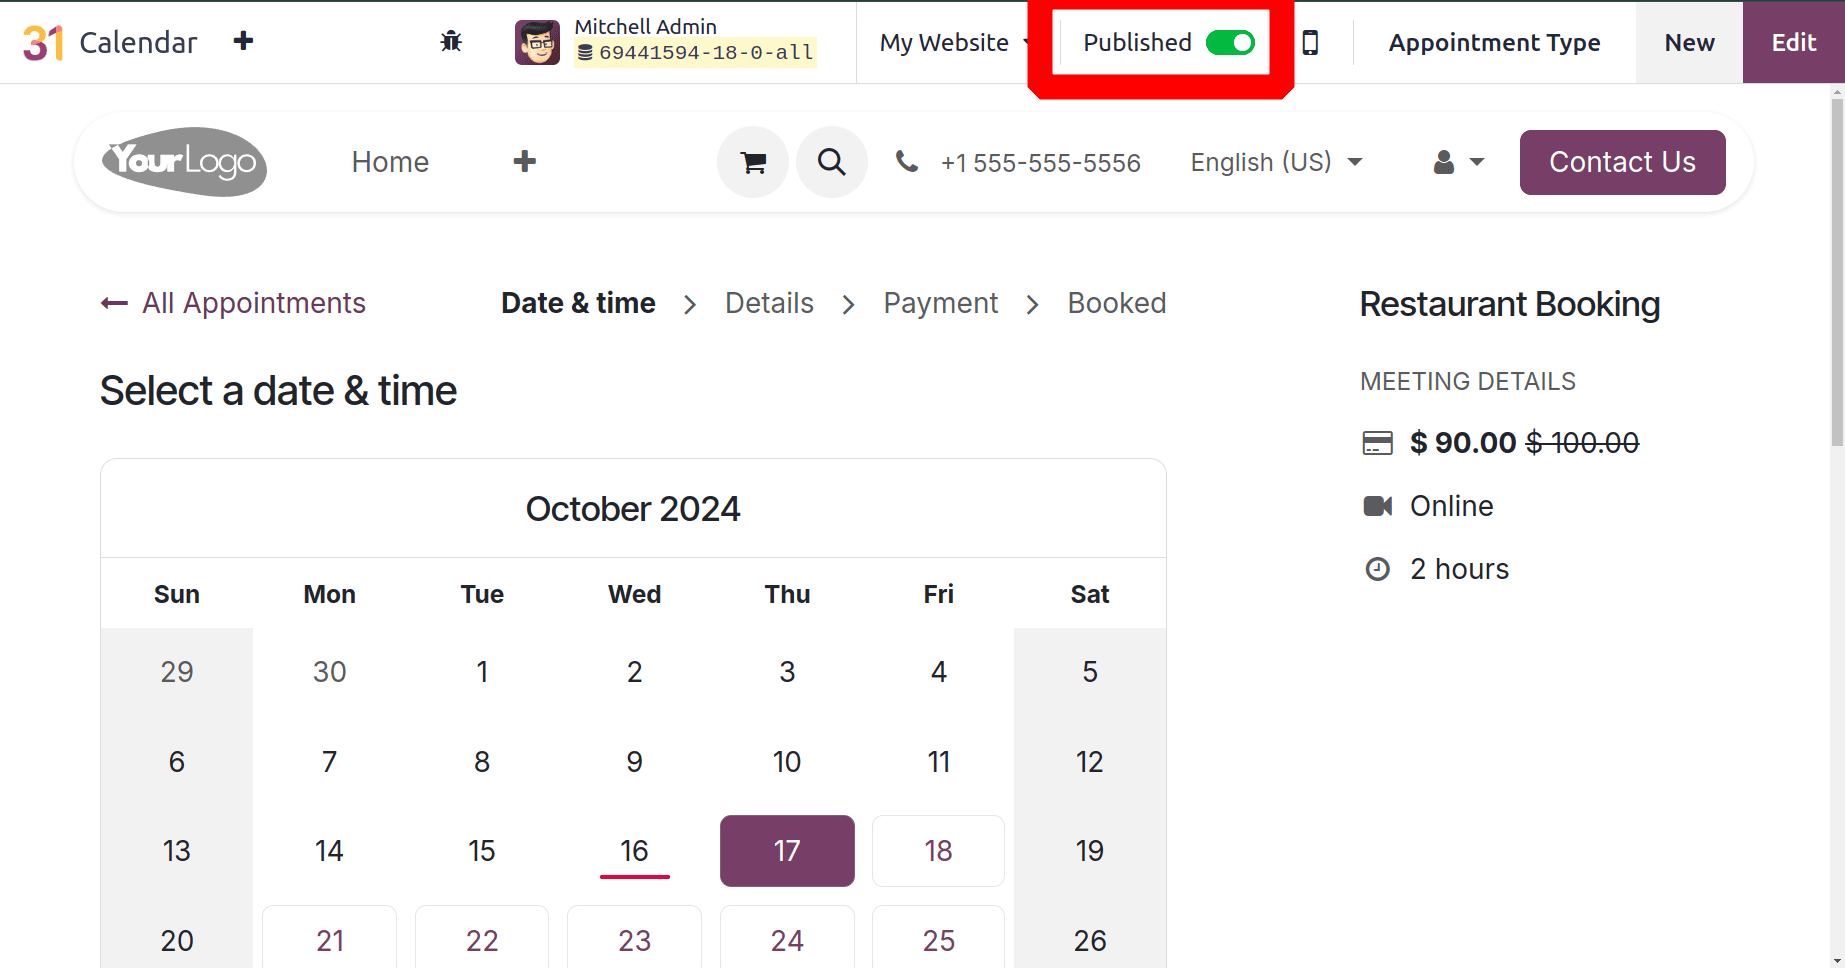
Click on the smart tab named Go to Website, then a website page will open. Then publish the newly created appointment from there as shown in the image below.
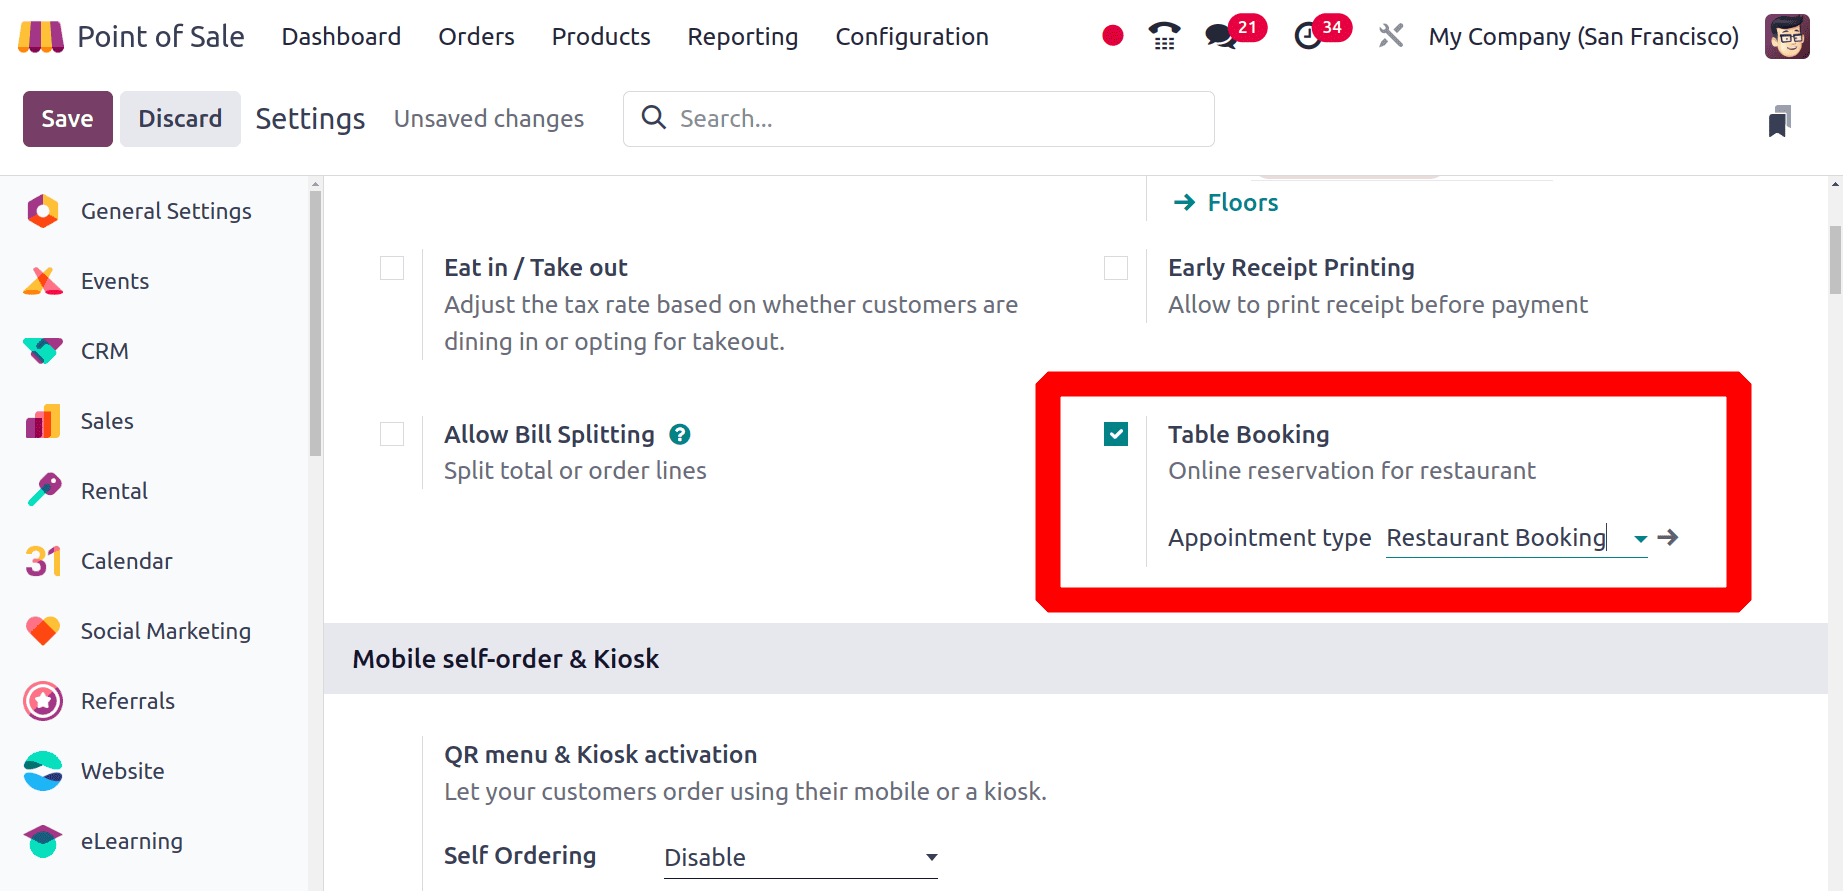
Next, the point-of-sale restaurant configuration needs to include the newly formed appointment type. To do that, enter the point of sale module once more and navigate to the settings. Enable the Table Booking option under Restaurant Mode and choose the created appointment type there. Save the new settings.
* Appointment from Website
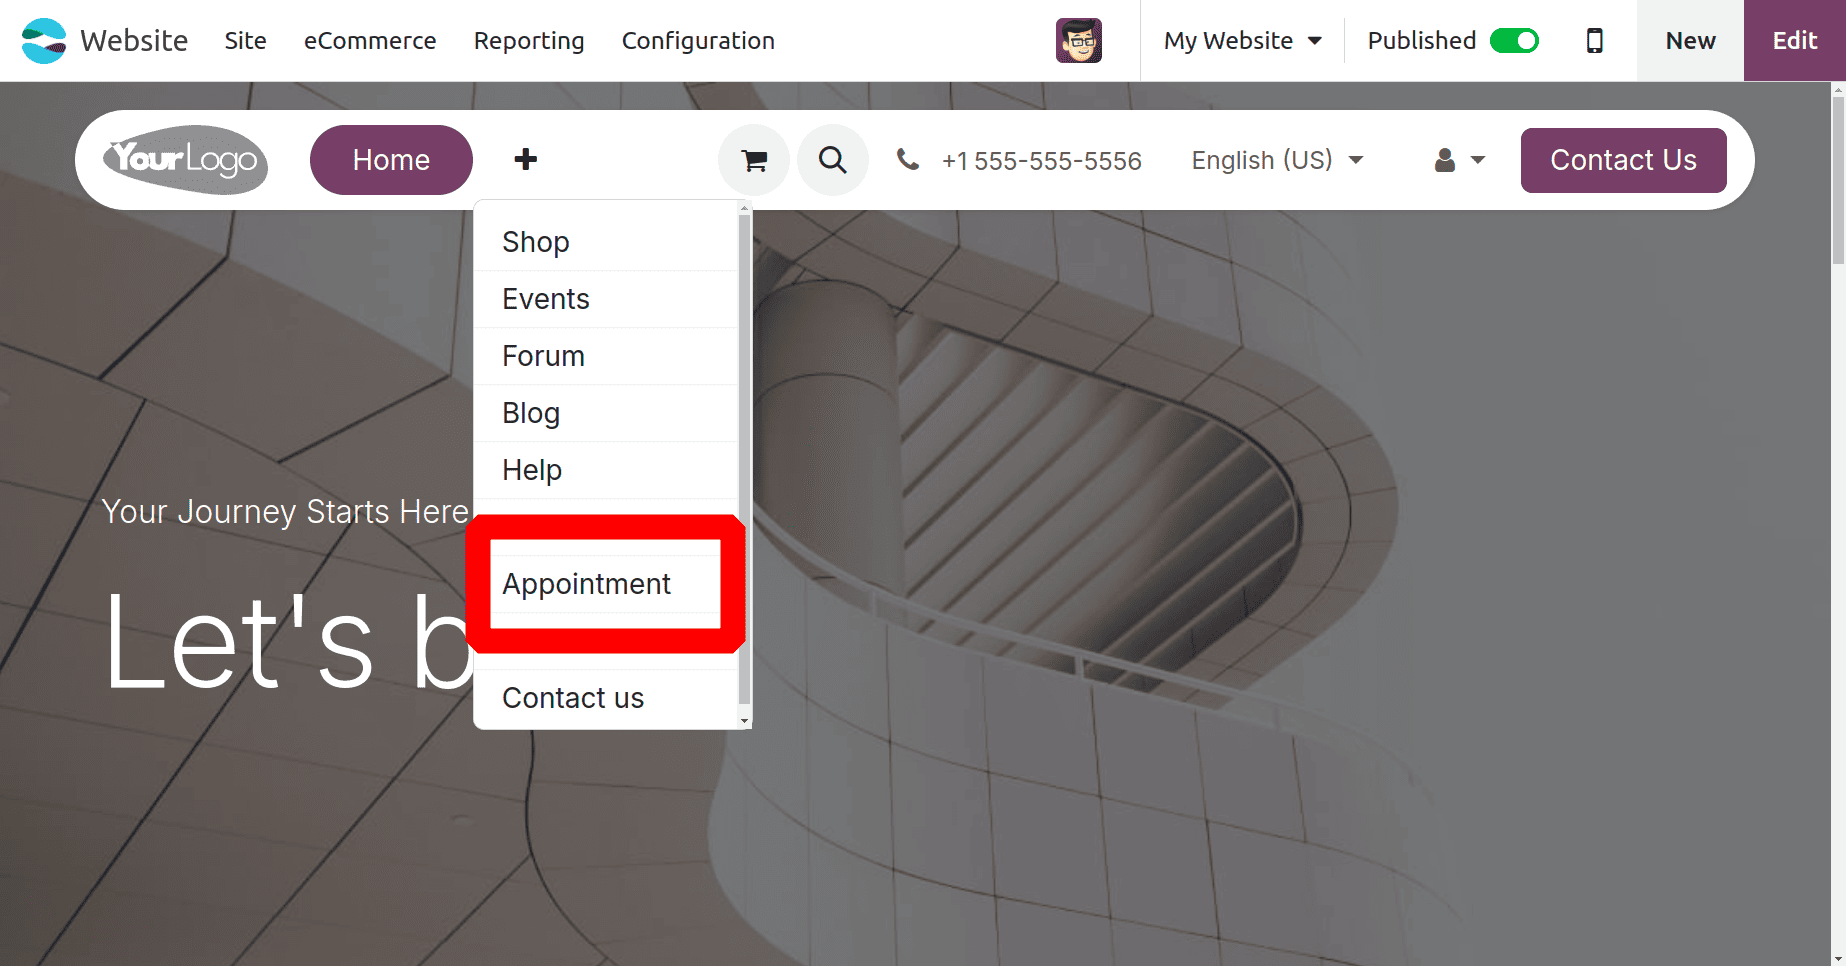
So when somebody needs to book a table in the restaurant, it's possible. For that, go to the website and click on the Appointment button.
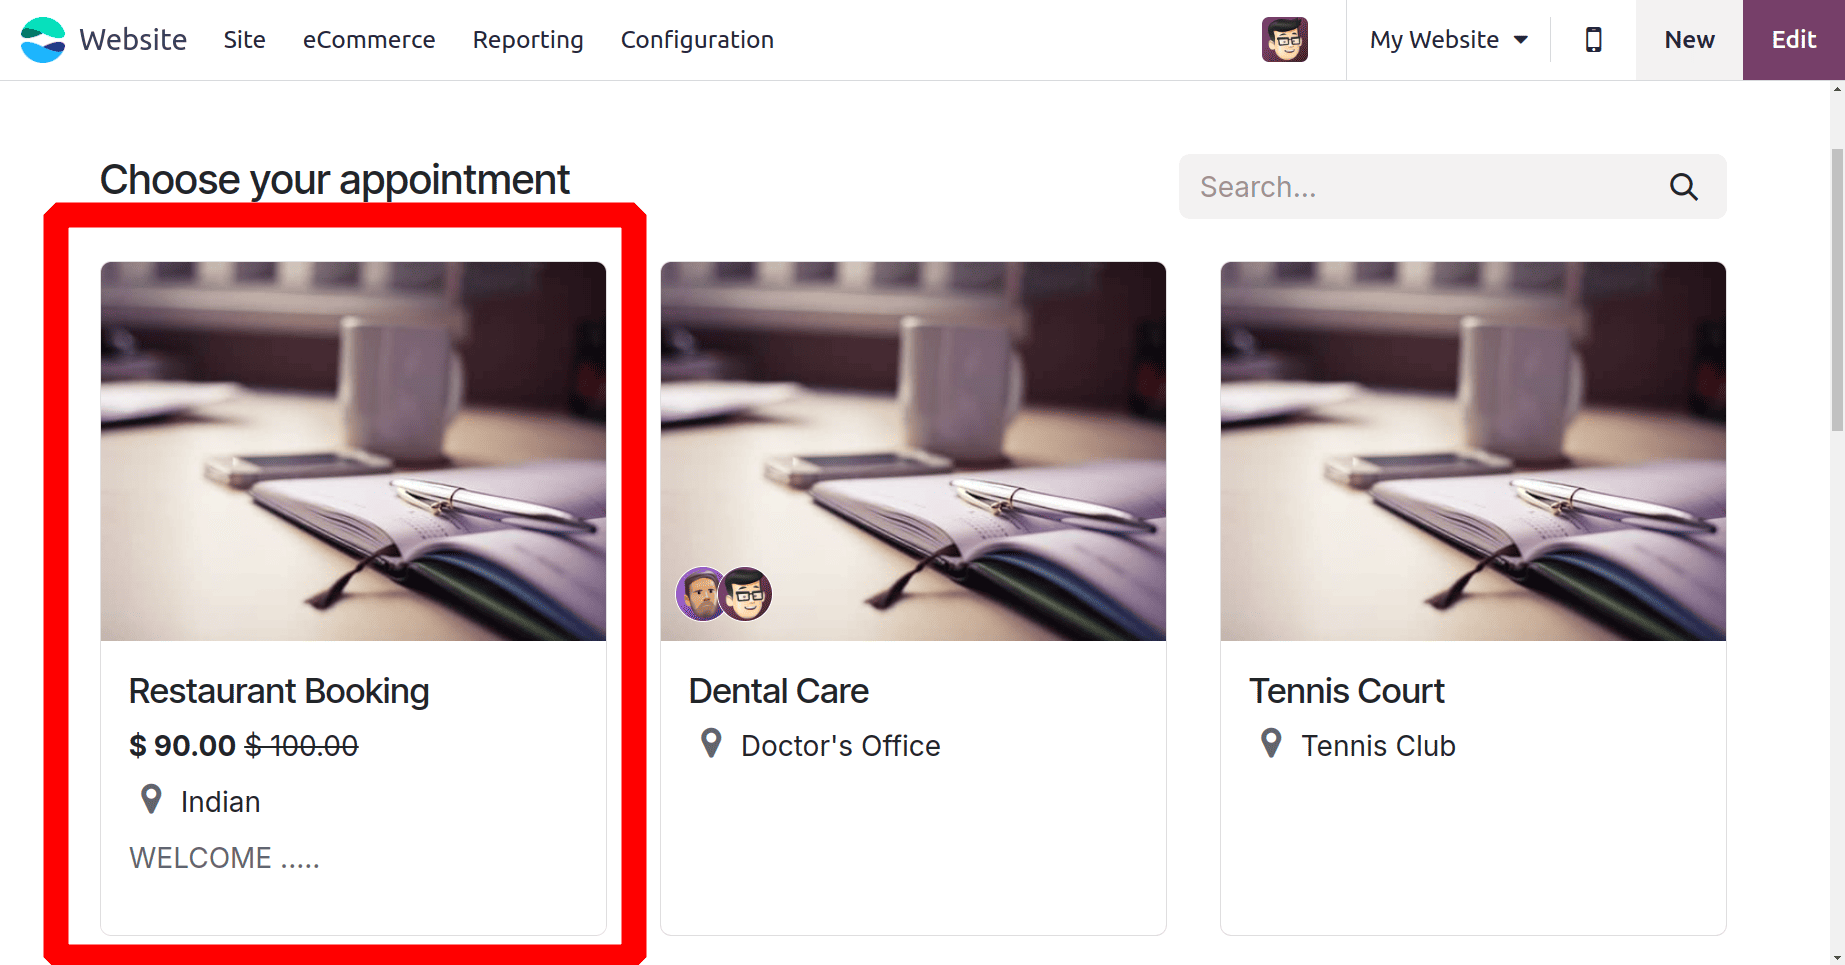
Then a list of appointments is shown there. And the previously created appointment Table Booking can be visible there. Click on it.
The right side of the screen contains the details of the meeting like payment amount, location, time, etc. then select the date and time for the appointment from there.
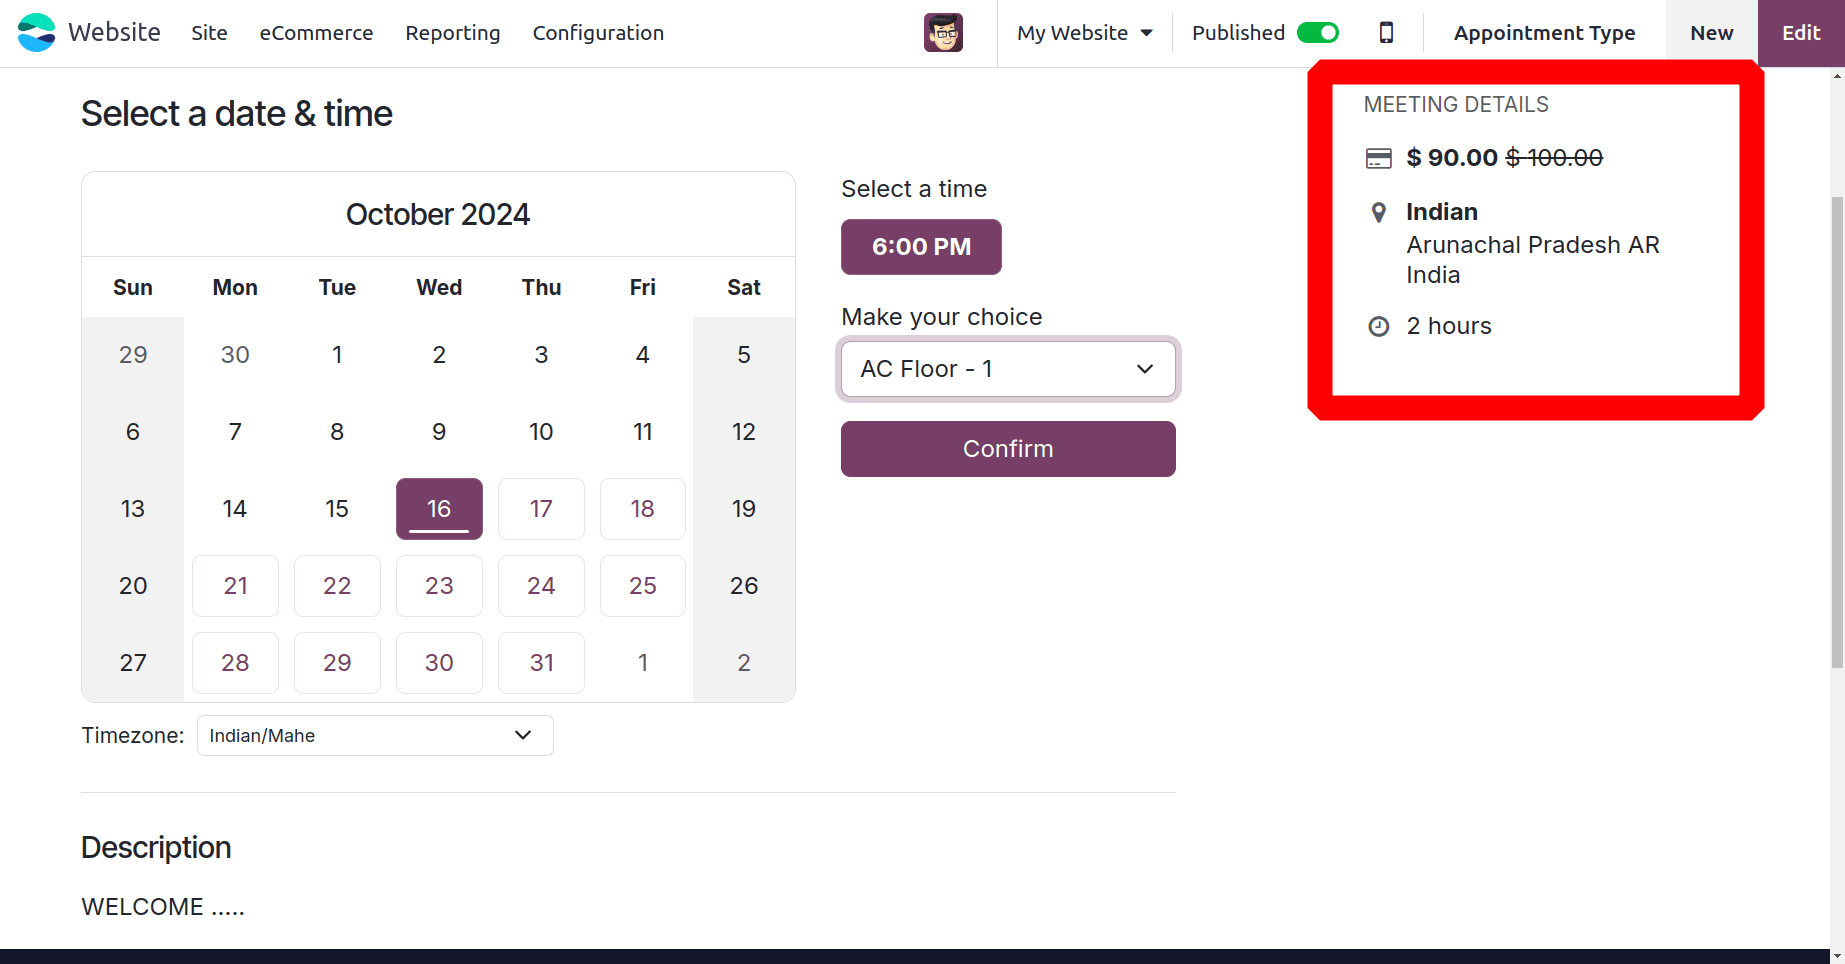
After selecting a time and date, the consumer must select a choice, whereby they can select a table from the restaurant's AC floor. Then click on the confirmation button.
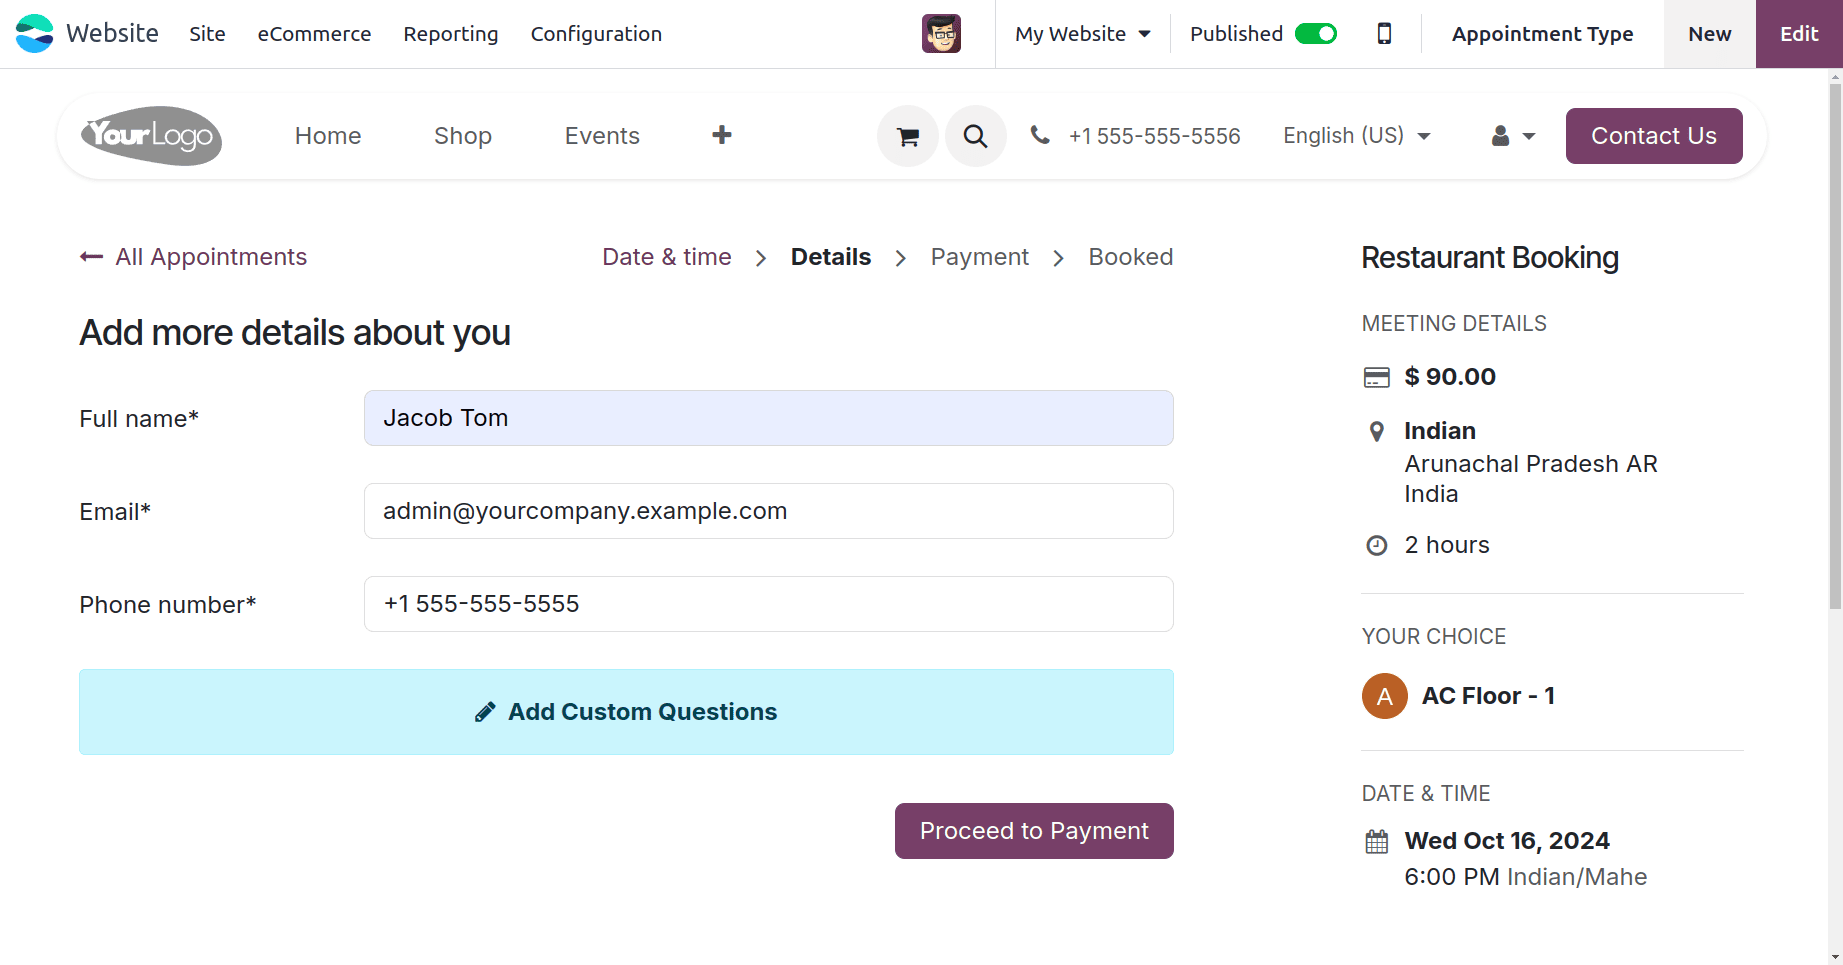
Then add the details like name, email id, and phone number. The right side of the screen shows the booking details with resources, time, etc. then click on the Proceed to Payment button, just because the customer needs to pay some pre-booking fee.
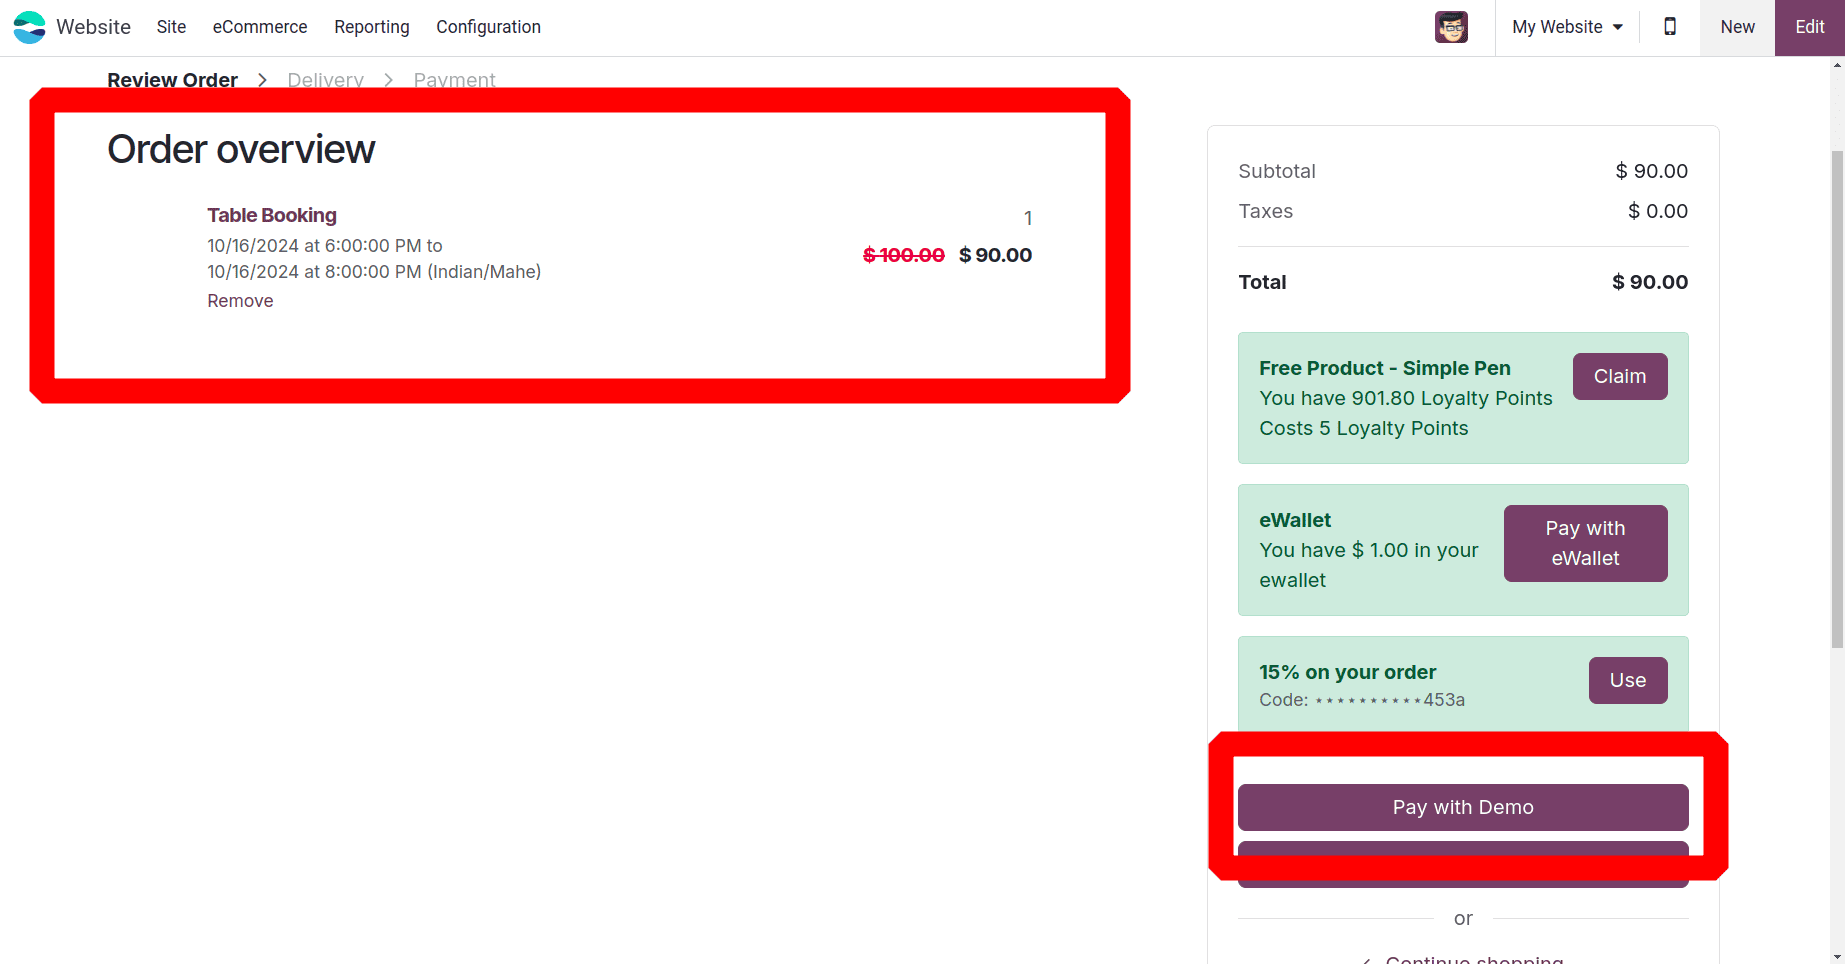
From the very next age, the order overview is visible, then click on the Pay with Demo button.
Then the appointment is placed after the payment. Let's check the Restaurant to view the appointment. Go back to the point of sale. Then from the dashboard, click on the ‘Open Register’ button to check the table is booked.

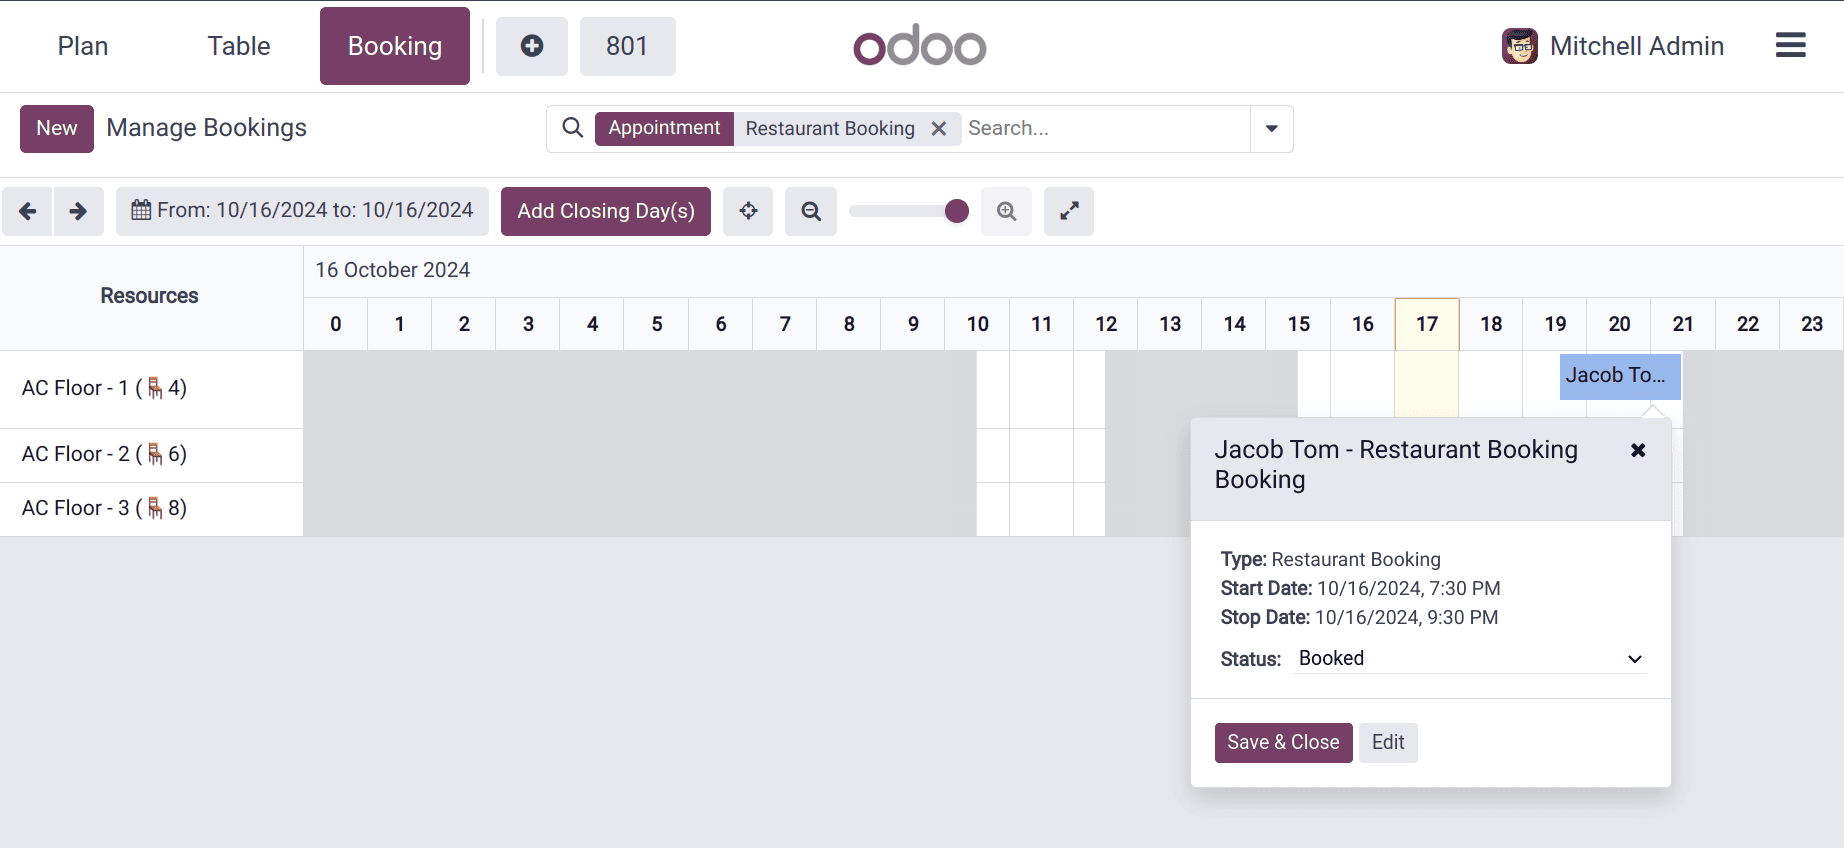
After adding the Opening balance, the floor view will be visible there. So inside the AC Floor, one table is shown as booked. Click on the Booking option to view the booking details.

Here the booking is placed. The start and end date, time, etc., and the status is shown as Booked.
In summary, the direct integration of reservations with the POS system through online table booking in Odoo 18 Point of Sale improves restaurant operations by guaranteeing more efficient table management and superior customer service. Customers will have a better overall eating experience, which also boosts efficiency and decreases errors.
To read more about How to Configure Restaurants in Odoo 17 Point of Sale, refer to our blog How to Configure Restaurants in Odoo 17 Point of Sale.