A fiscal period is a 12-month accounting period for a company, covering all transactions and dealings within a year. It simplifies tax and financial calculations and is often used for financial statement processing and accounting requirements. Companies often close ledgers and accounts at year-end, making fiscal period management a crucial aspect of business operations. ERP software, such as the Odoo 17 Accounting module, can help manage fiscal periods and set company budgets quickly.
The fiscal year, typically starting on January 1 and ending on December 31, is crucial for a company to verify invoices, balance sheets, revenues, and other financial data before generating statements or ending the year.
This blog will help you understand the concept and functionality of setting fiscal years and fiscal periods inside the Odoo 17 Accounting Module.
Configure Fiscal Year in Odoo Accounting
By employing fiscal year language to streamline corporate administration, Odoo 17 makes it simple to specify the end of the fiscal year based on the month or year. Within the Accounting module, users may change these dates. Accessing the Settings menu in Configuration will allow users to enable the Fiscal Years field in the Fiscal Periods section.
The Fiscal Years feature allows users to define fiscal years as more or less than a year, and the Last Day option allows users to add a fiscal year-end date, defaulting to December 31 and customizable based on workflow. This will enable the Fiscal Year functionality, as shown below.
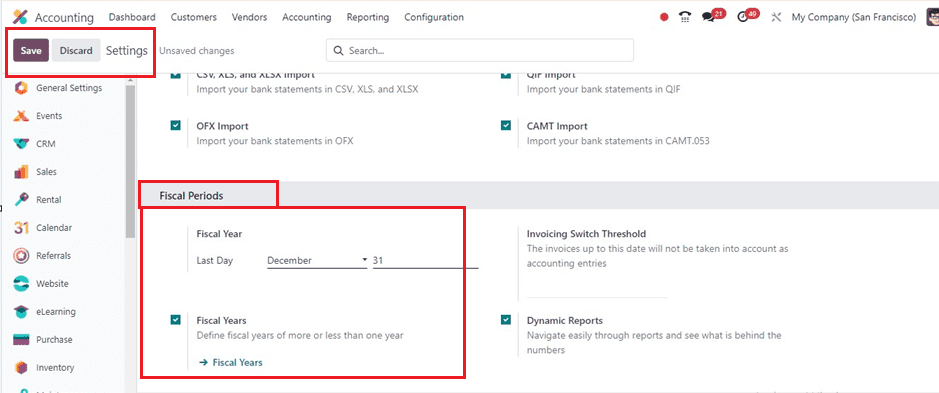
After saving the changes, you can use the ‘Fiscal Years’ link to create or generate new fiscal years or navigate to the Fiscal Year menu in the Configuration tab and click the ‘New’ button in the Fiscal Year window.
Inside the fiscal year configuration from view, fill in the Name of the fiscal year, Start Date, End Date, and Company details as depicted below.

Here, I have created a new fiscal year date setting for the year 2023 and provided the start and end dates of the particular year. Then, save the details using the save button, and you can use the action menu to delete or duplicate the specific record. Finally, your new fiscal year data will be saved in your Odoo Accounting database and can be accessed for future operations from the ‘Fiscal Years’ dashboard.
Closing Fiscal Years
Users need to authenticate revenues, verify vendor bills, and verify customer invoices in order to finish a fiscal year. To perform this activity, navigate to Odoo 17 Settings Application, choose ‘General Settings,’ and click on ‘Manage Users’ to configure permissions. This guarantees appropriate user administration and adherence.

You will get the users dashboard from the ‘Manage Users’ dashboard, as depicted below.

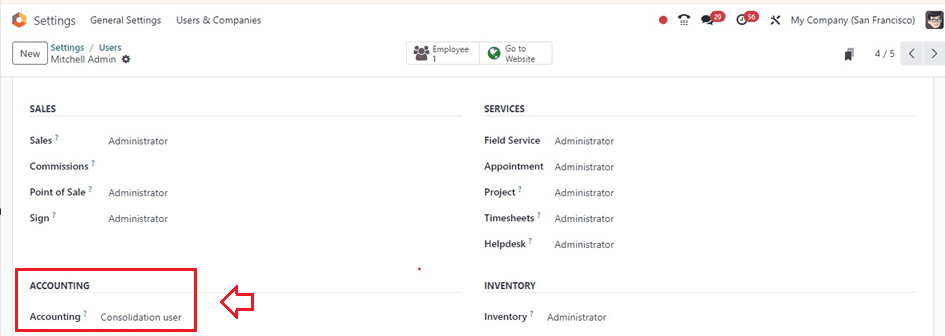
Get the user configuration form open. In the Users window, the 'Access Rights' tab has the 'ACCOUNTING' column. Select the ‘Consolidation user’ from the Users window's ‘Accounting’ field, as shown in the illustration below.
Setting Fiscal Year Lock Dates
After configuring the user settings, choose the ‘Lock Dates’ option located in the ‘Actions’ section of the ‘Accounting’ menu in order to end the fiscal year. This displays the MANAGEMENT CLOSING section in a window. The journal entry lock date should then be applied in the "Journal Entries Lock Date" column, as seen in the screenshot.
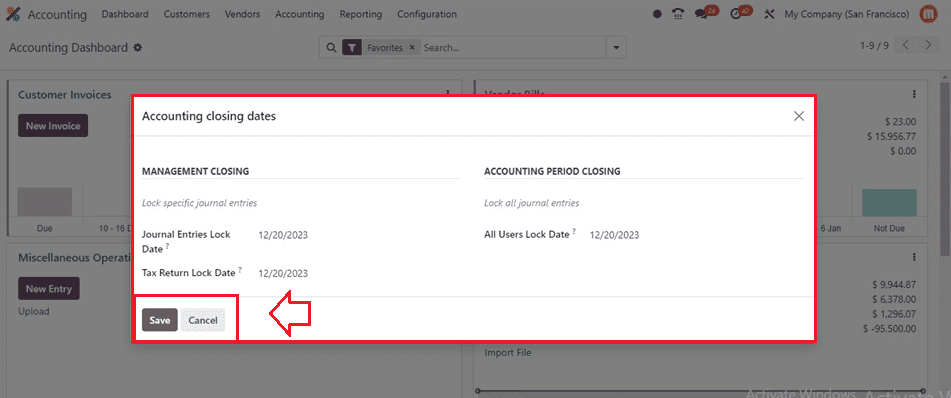
You can also provide a ‘Tax Return Lock Date’ and ‘All Users Lock Date’ inside this Accounting closing dates configuration form. Then, save the dates using the ‘Save’ button.
Balance Sheet Reports
Users can utilize the ‘Balance Sheet’ option in the ‘Reports’ tab and filter by the anticipated fiscal year date, as shown in the picture, to look for unallocated earnings prior to the fiscal year closing.
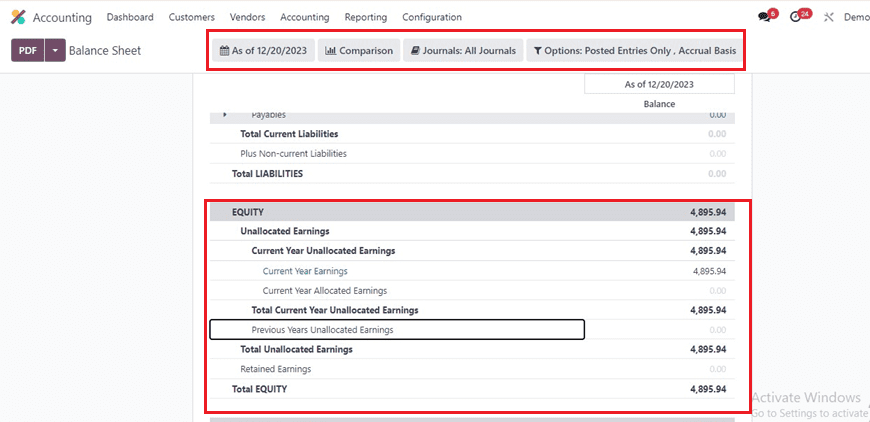
Data on unallocated earnings can be found in the balance sheet's EQUITY section. Before the fiscal year concludes, these earnings must be subtracted or distributed.
Journal Entries
Use the ‘Journal Entries’ option in the ‘Accounting’ tab to start a new journal and distribute profits. As seen in the picture below, you can look through an index of all journal entries along with their Date, Number, Partner, Reference, Journal, Company, Total, and Status.
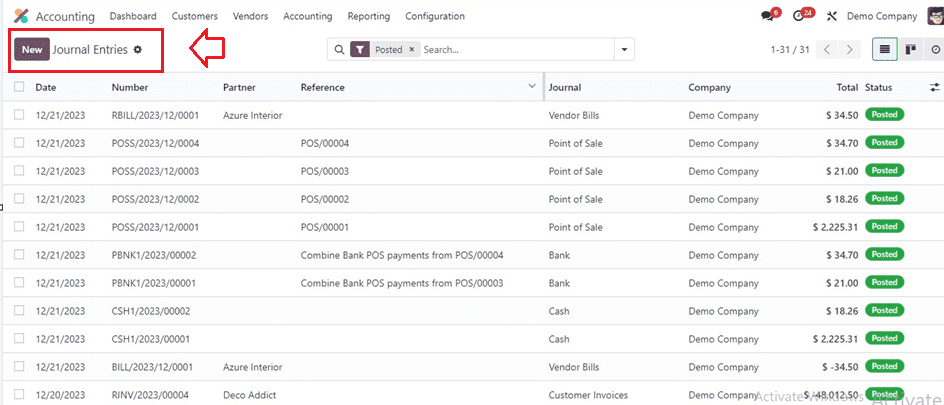
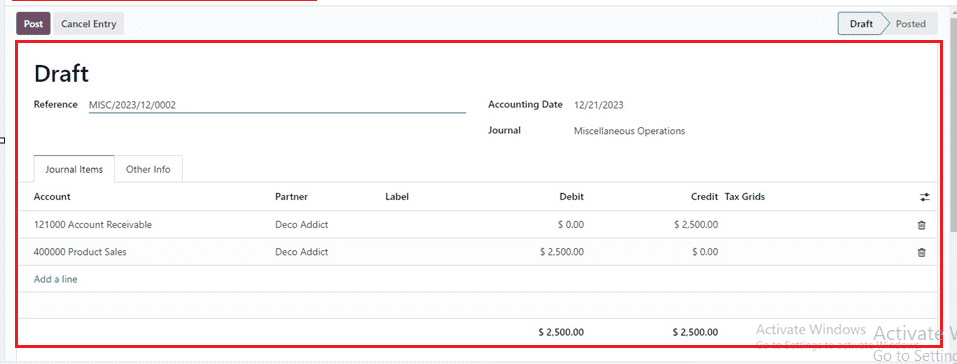
Adding a new one is as simple as clicking the ‘New’ button. Add the journal entry as a reference name in the ‘Reference’ field. Set Miscellaneous Operations in the ‘Journal’ field, and finally, set the accounting date to the end of the fiscal year in the ‘Accounting Date’ field.
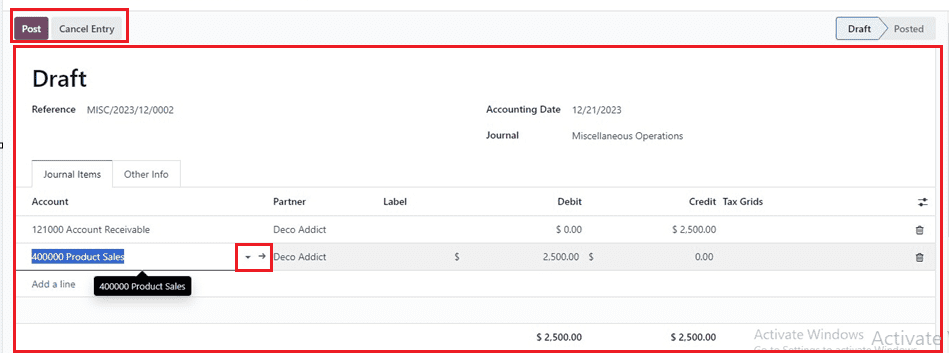
To add Account, Partner, Label, Debit, Credit, and Tax Grid data to the Journal Items tab, use the "Add a Line" option. As seen in the picture, Credit $2500 from the Account Receivable Account in order to offset unallocated earnings and Debit Product Sales Account.
Clicking on the interlink provided in the "Add a line" field.
Inside the new form window, input the report ‘Code’ in the Create Account window, and enter the ‘Account Name’ as per your preference to offset an account into retained earnings.
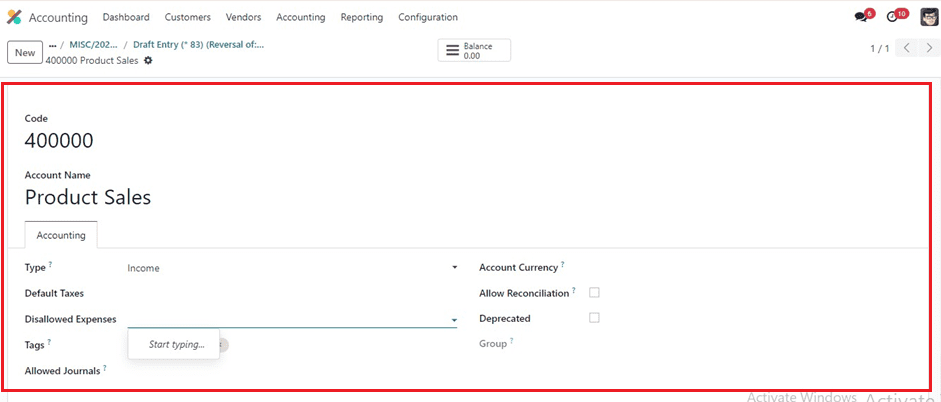
Setting fiscal year guidelines and generating legal reports with a national focus are two uses for this account type. Then, choose an accounting type in the ‘Type’ field. By choosing "Equity," the users can establish an equity account. You can also set the Default Taxes, Disallowed Expenses, Tags, Allowed Journals, Account Currency, Allow Reconciliation, and Deprecated options.
A credit line with the same amount shows in the new account details after storing important account information. When you click the ‘Post’ button, the journal entry is published, and all the details are immediately preserved.
Balance Sheet Reporting
Navigate to the ‘Reports’ tab and choose your balance statement. Your company's balance sheet displays its assets, liabilities, and equity as of a specific date.
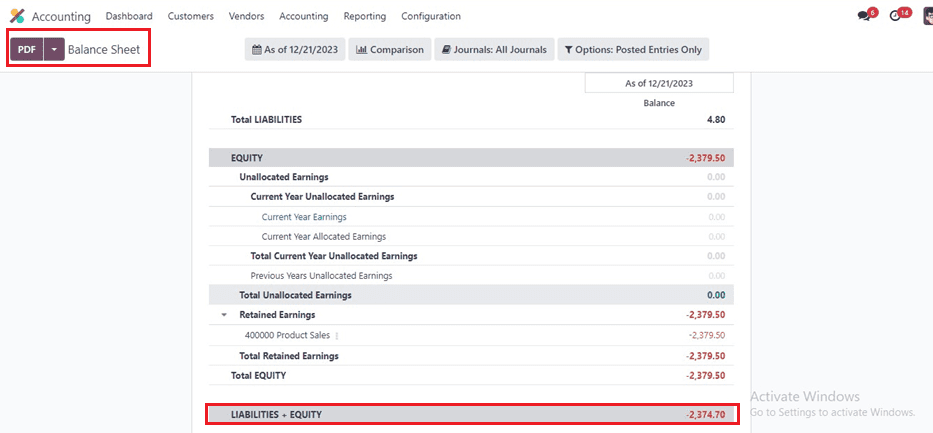
To ensure that the starting date of the profit and loss statement matches the start of the fiscal year, it is prepared in real-time. While all account balances should be zero at the time of production, a particular year-end closure entry is not required.
These are the features of the Odoo 17 Accounting Module's Fiscal Year and Fiscal Periods, as well as how to lock dates.