Completely functional accounting software, Odoo Accounting emphasizes the efficiency of accountants with features like intelligent matching suggestions, bank synchronization, and AI-powered invoice identification. It covers basic accounting concepts, including taxes, customer invoices, vendor bills, payments, bank synchronization, reconciliation, and cash registers. Additionally, it offers reporting, declarations, and analytic accounting. Creating invoices, sending them to clients, and tracking payments are all possible using the stand-alone invoicing software Odoo Invoicing.
Odoo offers various ways to automate the production of client invoices, depending on the action taken and the module used. A draft client invoice is sent upon sales order confirmation, and all you need to do is approve and forward it to the appropriate clients. The Accounting module's Customer menu leads to the Invoices platform, where automated invoices are stored and maintained, or you can manually produce invoices. By designating the proper address for every case, Odoo's client Addresses feature streamlines the process of delivering client bills and deliveries to several addresses in businesses with many addresses. This ensures that every case is handled efficiently.
This blog will provide an overview of specifying the invoice and delivery addresses inside the customer invoices using the Odoo 17 Accounting Module.
Configuring Customer Invoices
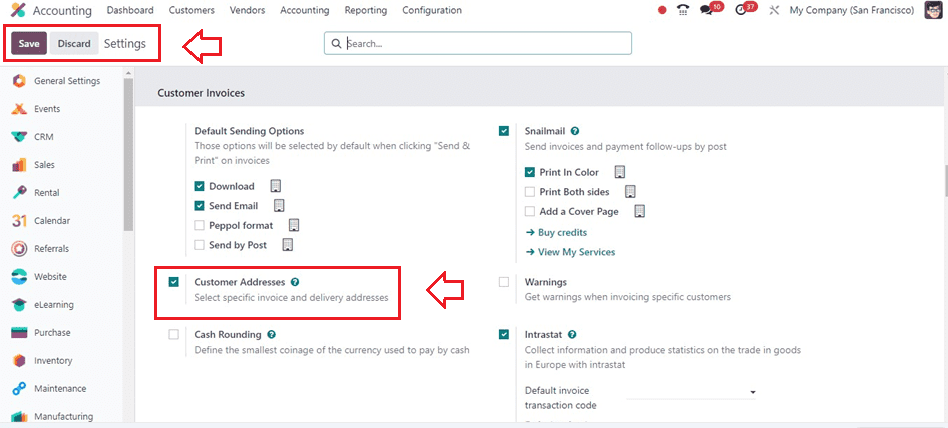
To configure your accounting settings effectively, begin by navigating to the designated path: Accounting >Configuration >Settings. Once you reach there, locate the ‘Customer Invoices’ section and proceed to enable the option for ‘Customer Addresses’ as shown below. This pivotal step ensures that the system incorporates customer addresses seamlessly into the sales order process.
After activating and saving this feature, the delivery and invoicing addresses are now available on sales orders and quotations. If a contact record has the customer's address as their invoice or delivery address, that address is utilized by default; if not, any contact's address is used.
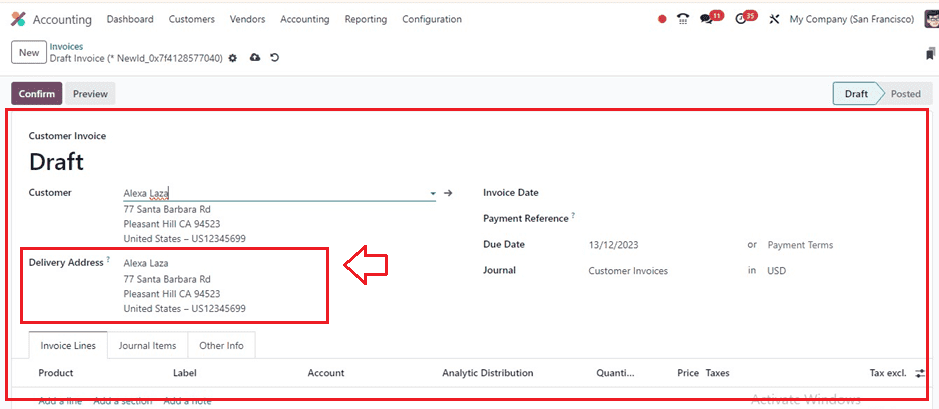
Keeping Track of Multiple Client Addresses
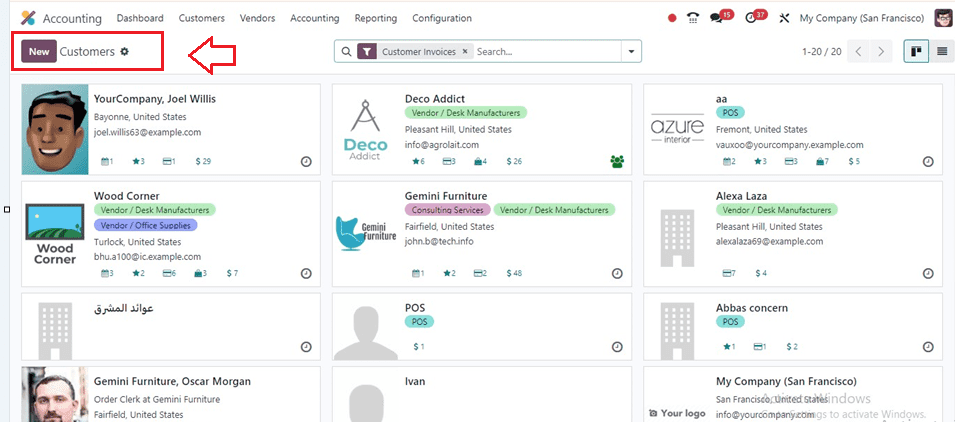
We can create and manage customer data inside the Odoo 17 Accounting Module from the ‘Customers’ dashboard of its ‘Customers’ menu. We can see the existing customer dashboard from this window.
While creating new customer data, you can provide multiple addresses inside the ‘Contacts & Addresses’ tab section of the form.
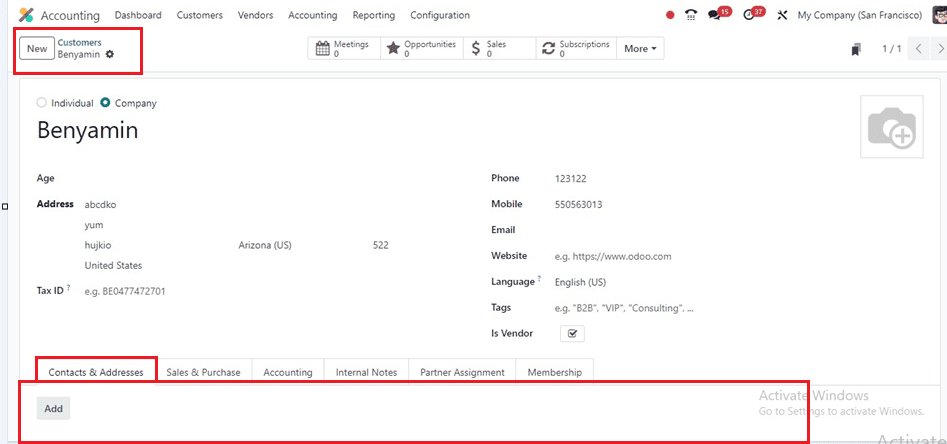
The ‘Add’ button will help you to set different addresses for the customer. The ‘Add’ button will display another pop-up window, where you can set several addresses such as Contact, Invoice Address, Delivery Address, Follow-up Address, and Other Address, as shown below.
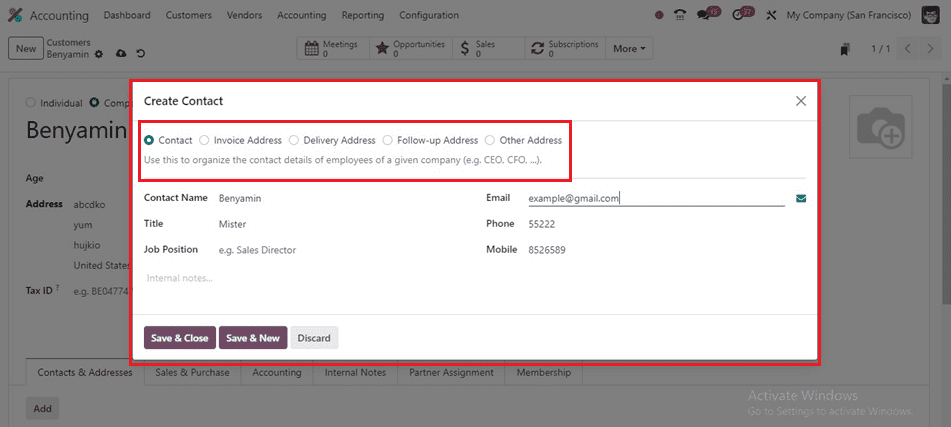
Here, We can edit some basic contact addresses by choosing the ‘Contact’ option and saving the address using the ‘Save & New’ button. Then, immediately choose the Invoice Address option and provide the next address. You can see the two different addresses from the ‘Contact & Address’ tab, as shown below.
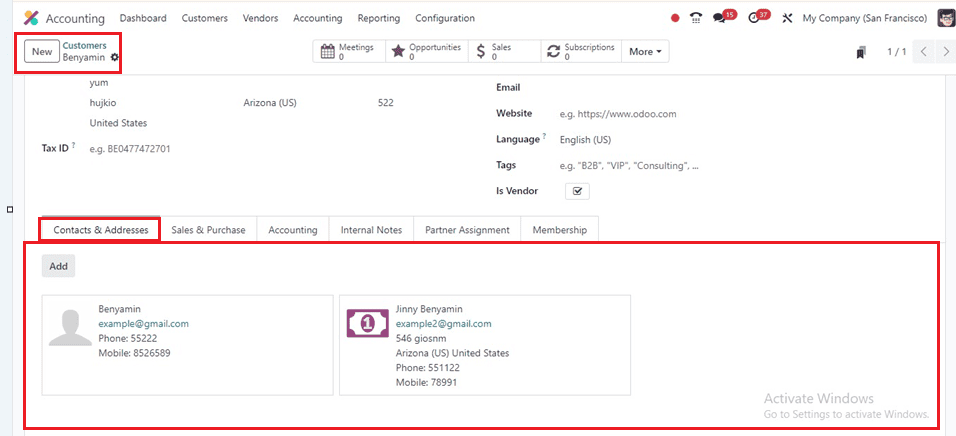
Invoice and deliver to multiple addresses
For delivery orders and accompanying delivery slip reports, the address listed as the Delivery Address on the sales order is utilized. In order to reassure customers that their orders are being delivered to the right place, invoice reports, by default, display both the invoice address and the shipping address. Moreover, emails are sent to several addresses. The invoice is sent to the email address designated as the Invoice Address on the sales order, while the quotation and sales order are sent to the primary contact's email as normal
To check the functionality, we can choose or create a customer with multiple addresses. Then, create a sales order or quotation from the ‘Orders’ menu of the Odoo 17 Sales Module.
Inside the form view, edit the required fields such as Customer Name, Pricelist, Referrer, Payment Terms, Customer PO, etc. You can also edit the Invoice Address and Delivery Address in the designated fields. As you can see in the picture below, I have entered separate addresses for the delivery and invoice locations.
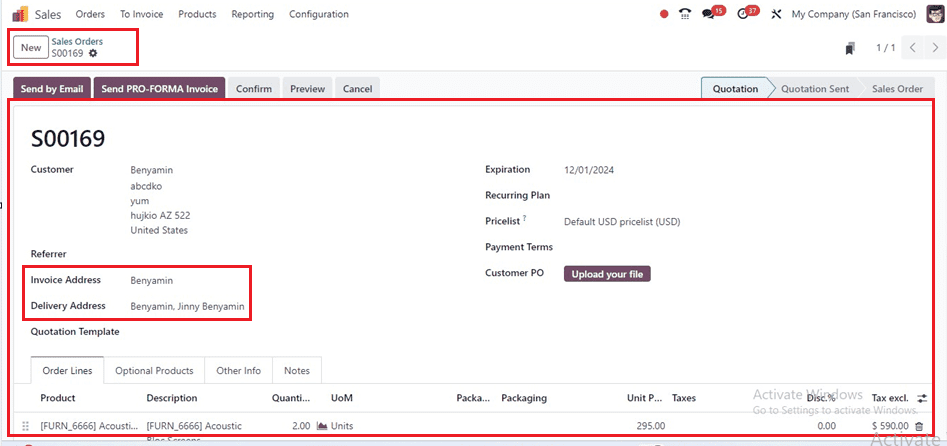
Then, add your sales order products in the ‘Order Lines’ tab. The ‘Optional Products’ tab can be used to add optional products, and other details and notes regarding the sales order can be edited inside the ‘Other Info’ and ‘Notes’ sections. Lastly, use the "Confirm" button to validate the order and save the data from your form.
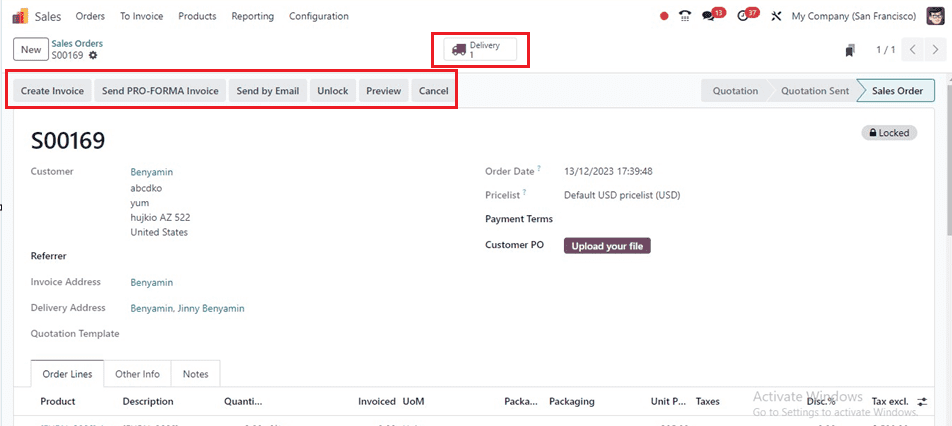
By selecting the "Create Invoice" option, you may produce the sales order invoice. Also, the ‘Delivery’ smartbutton will show the delivery details, and you can validate the delivery from there. Upon validation of the sales order, an invoice may be automatically created, taking into account the designated billing addresses. Choose Regular Invoice, Down Payment (Percentage), or Down Payment (Fixed Amount) as the invoice type from the pop-up window that displays after clicking the "Create Invoice" button, as indicated below.
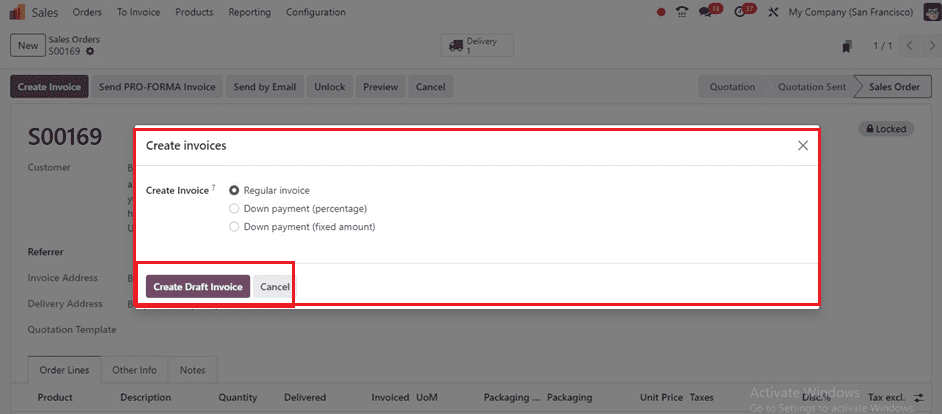
We can choose a Regular Invoice and confirm it by clicking on the ‘Create Draft Invoice’ button. The draft invoice is shown, and by selecting the "Confirm" option, you can confirm the invoice.
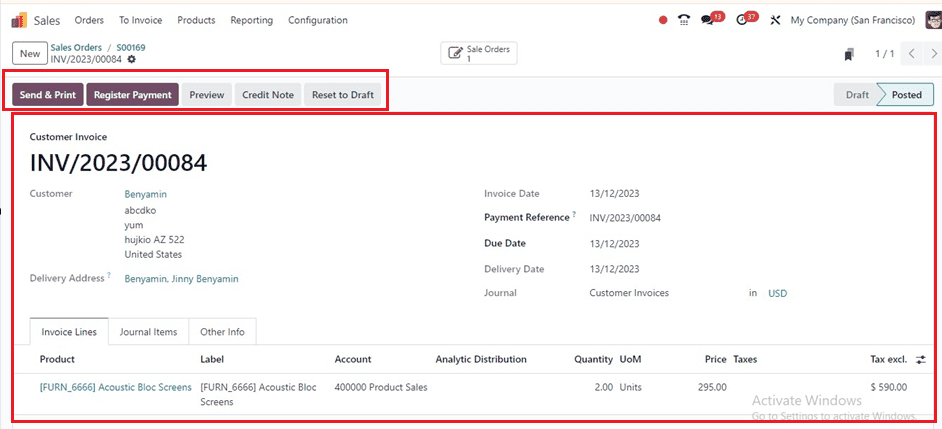
Then, use the ‘Send & Print’ button to send the invoice or print. You can send the invoice to the recipients by editing the mail body, attachments, and multiple recipients inside the send wizard page, as depicted below.

You can go on to the next phases of the sales order after sending the emails. In organizations with different addresses, Odoo's client Addresses feature streamlines the process of storing and sending invoices to various locations, guaranteeing effective case processing and enabling effective client bill delivery.