The Point of Sale (POS) module in Odoo 18 is a robust and intuitive tool for companies trying to optimize their sales procedures. Regardless of whether you run a restaurant, retail establishment, or other service-oriented business. There, customers can choose what they want and submit orders. The things will be delivered to the customer, and they will be able to pay for them there. Extra features like gift card options and discounts, promotions, and coupon programs are included in a Point of Sale session. It is, therefore, the salesperson's obligation to interact with a store. A store may employ personnel like the manager, cashier, and other staff members. A Point of Session also handles the financial matters of an organization. Salespeople retrieve payments from clients and give them their remaining amounts back. When the business closes, a responsible individual—a manager or cashier, for example—calculates all of the revenue and outlays for that specific day. Overnight cash should be carried over and added to the store's opening balance.
Odoo made some changes to the way it manages Point of Sale sessions in version 18. Now, let's examine how Opening Cash Control is managed by Odoo18. Here, the dashboard of Point of Sale contains a kanban view of all the sessions available in the system.

So, a few adjustments must be made to the back end before starting a session. To modify the settings, navigate to the Configuration tab and click on the Settings option. Then, to create a new sessio,n click on the +New Shop.
: Configuration > Settings > +New Shop
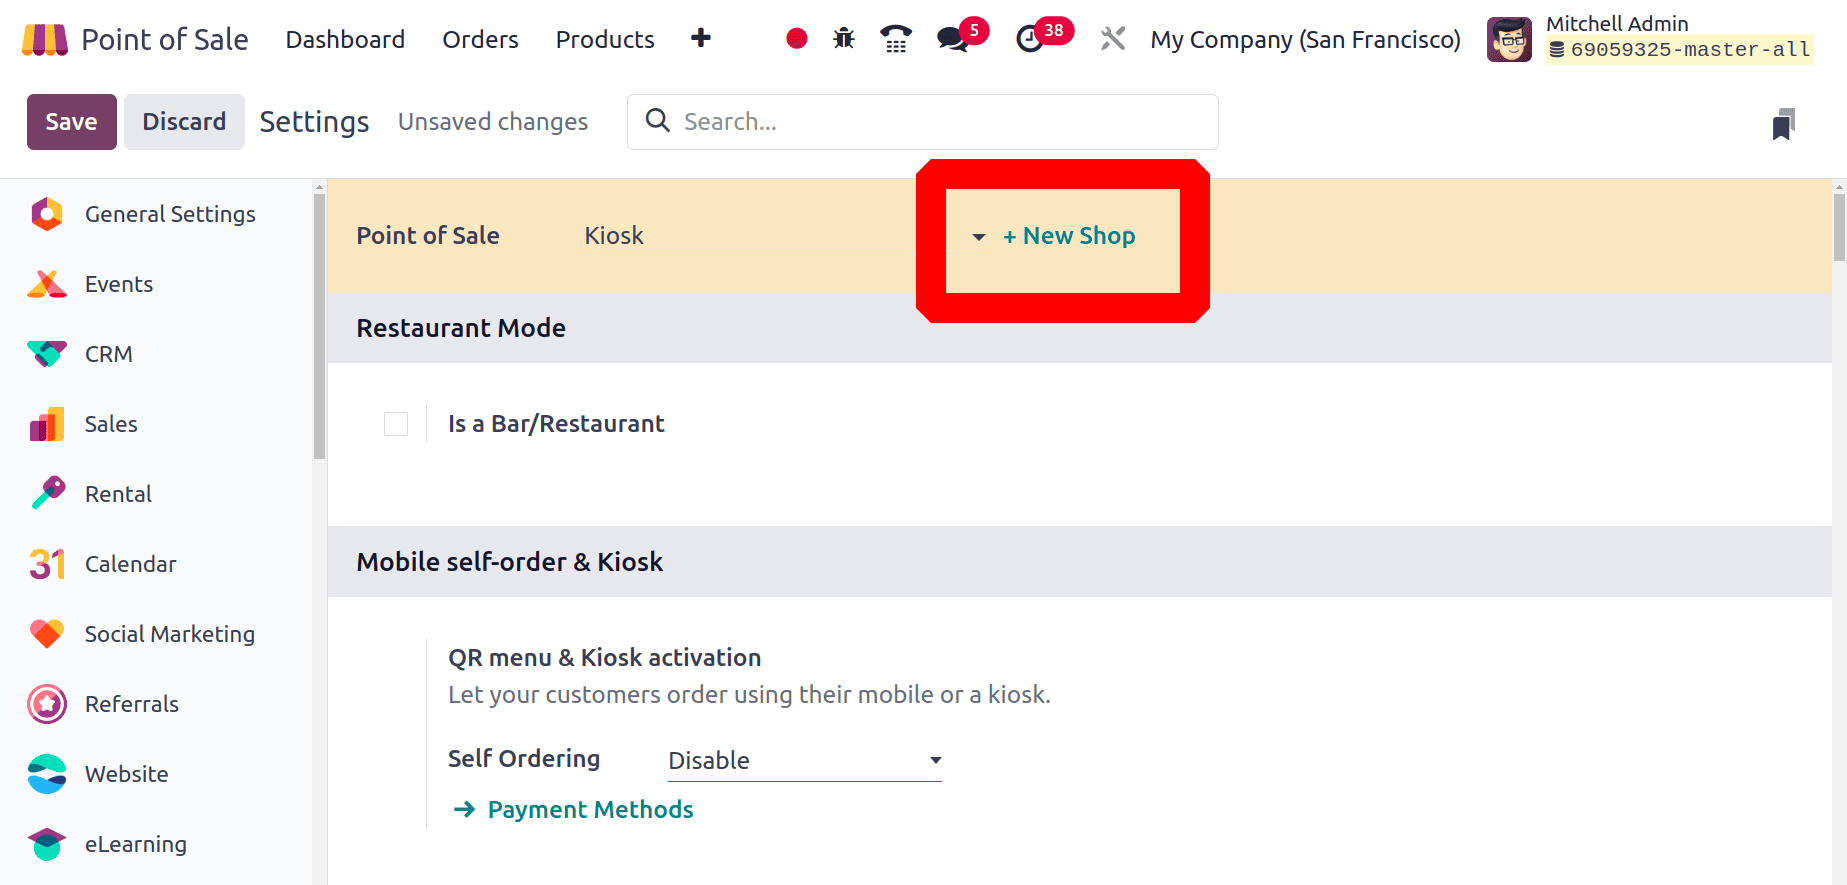
Here, creating a new shop named Cafeteria, which is a Restaurant, enables the Is a Bar/Restaurant option, then save.

* Configuring Coins/Bills
The Coins/Bills settings in Odoo 18 Point of Sale let you specify different denominations of money for cash transactions. The values of the coins and bills that will be accepted can be specified in the "Coins/Bills" section of the POS settings, where you can define these. This configuration ensures that the cash register administration during sales is accurate, which also helps to simplify cash processing.
: Configuration > Coins/Bills
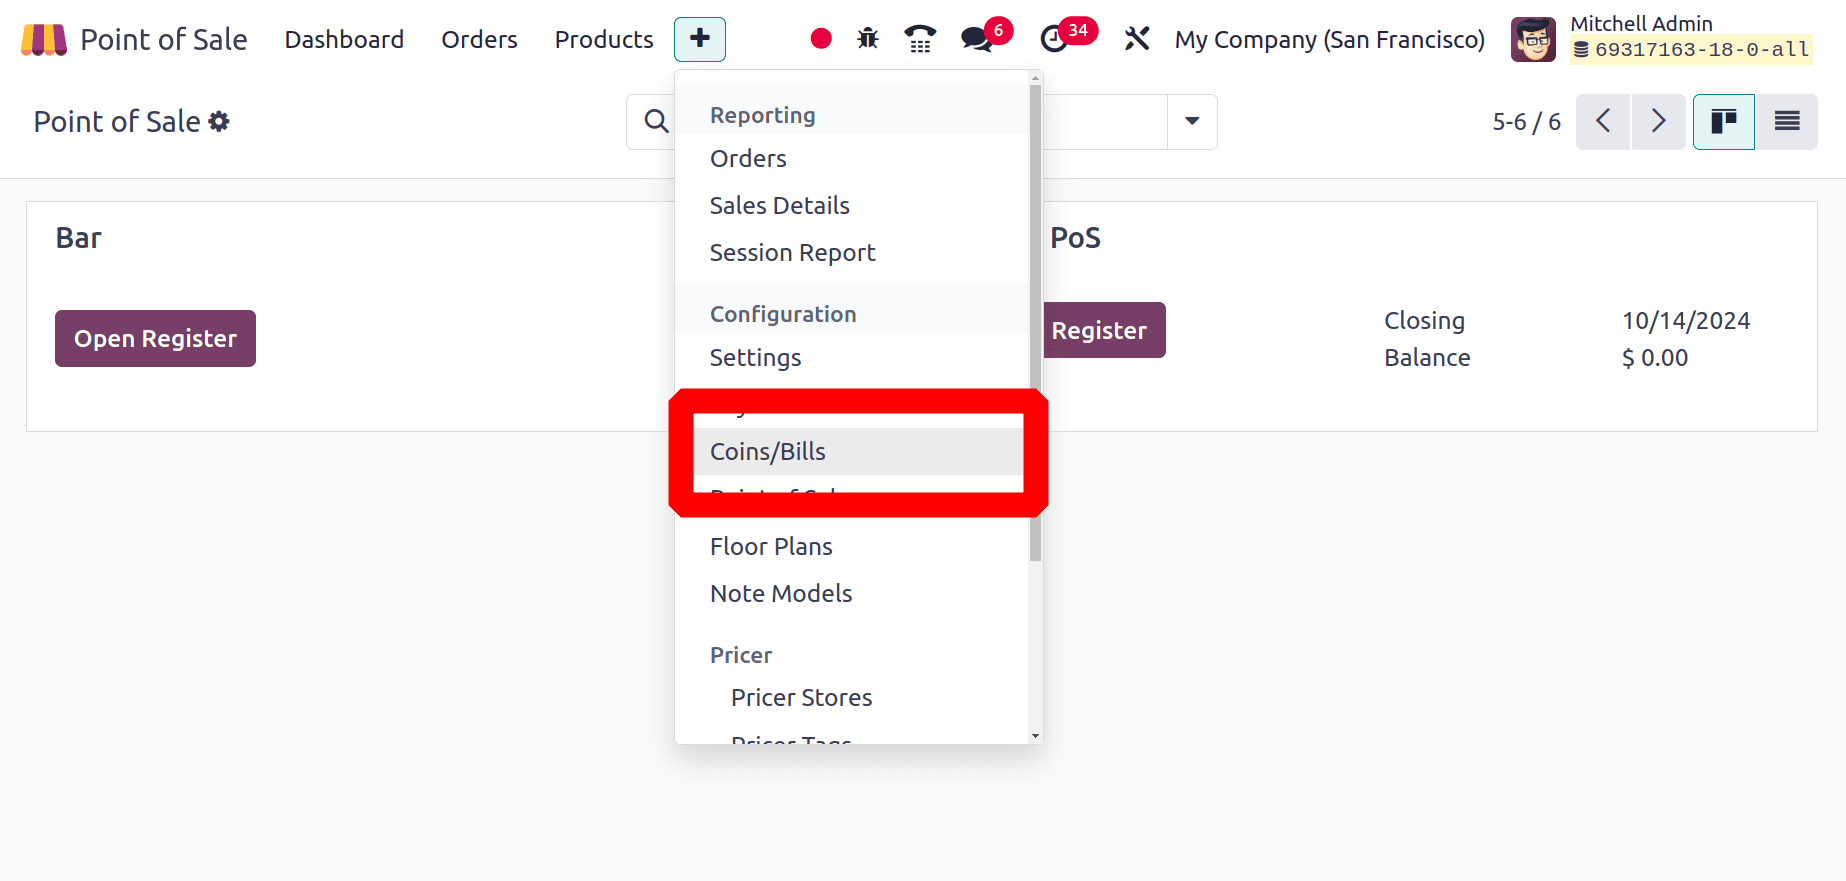
Additionally, there is the Coins/Bills option under the Configuration menu. A list of Values for bills and coins can be viewed as a list. Name, Coin/Bills value, and Point of sale names are shown on the list.
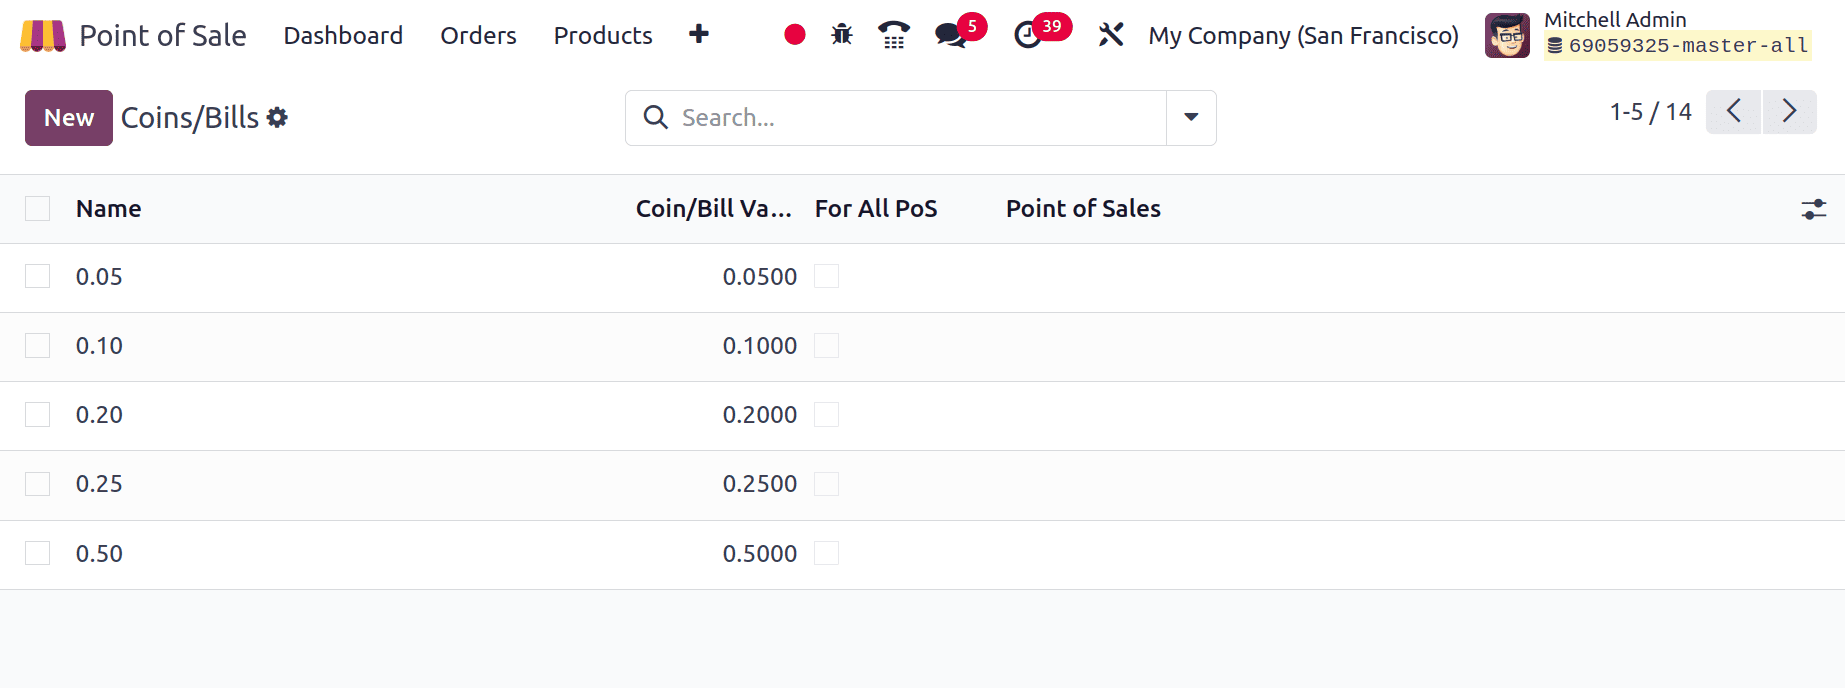
To create a new one, click on the New button. Then, a new line will appear under the list; add the name and the value. If the coin wants to be available in all PoS sessions, enable the boolean For all PoS. Then save it.
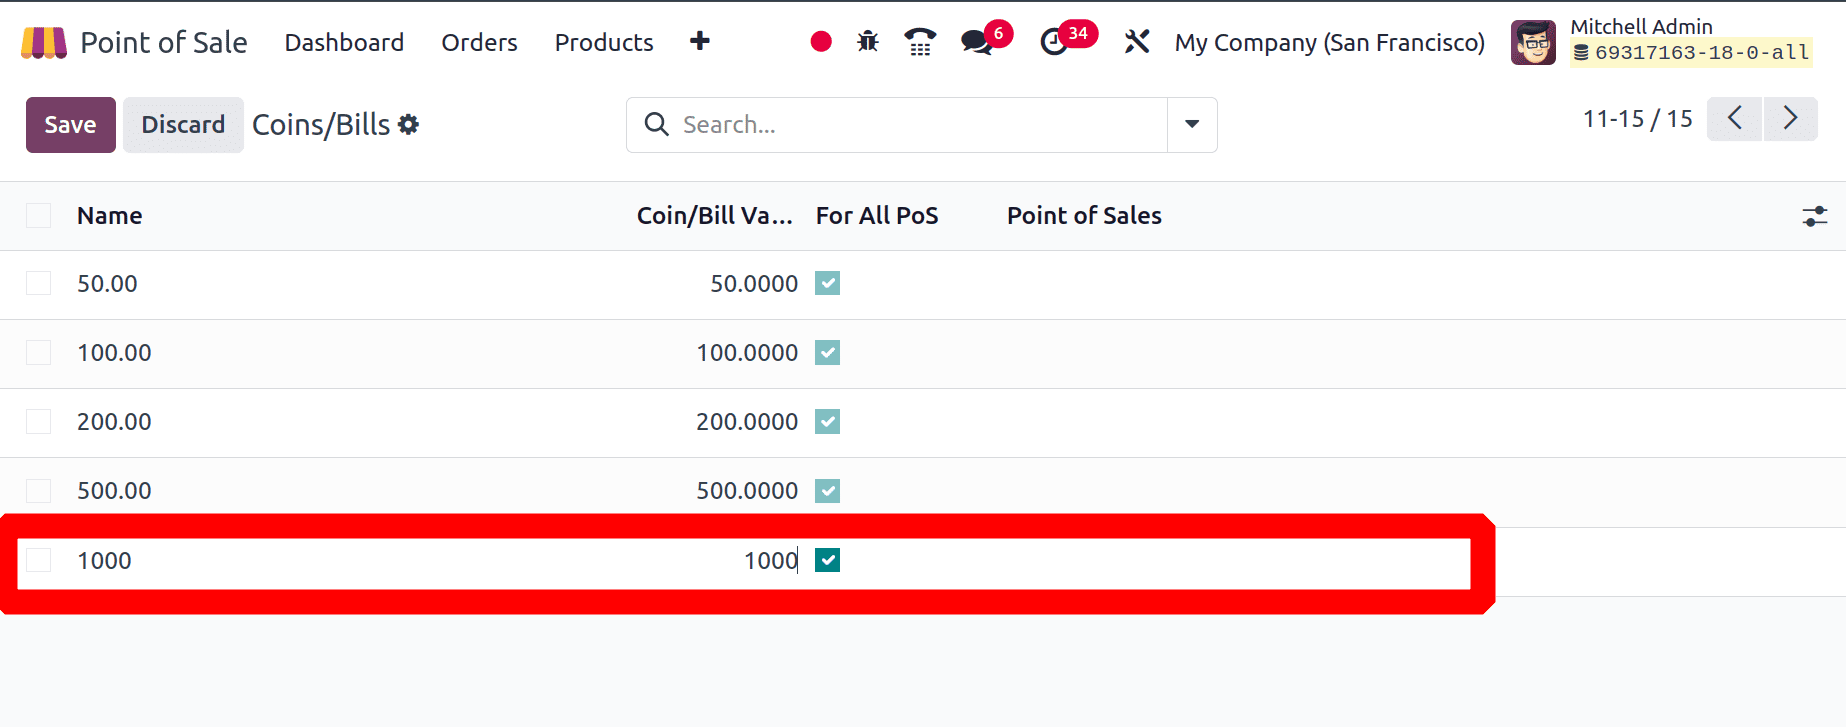
Then, when a session is being opened or stopped, the aforementioned values can be utilized. The number of coins used can be indicated, and the associated values can be updated during the session.
After that, begin a new session. Go to the dashboard and view the Pos sessions to accomplish this. One can begin a new session by selecting Open Register.

The title Opening Control now opens in a new window. The opening balance can then be added to the session.
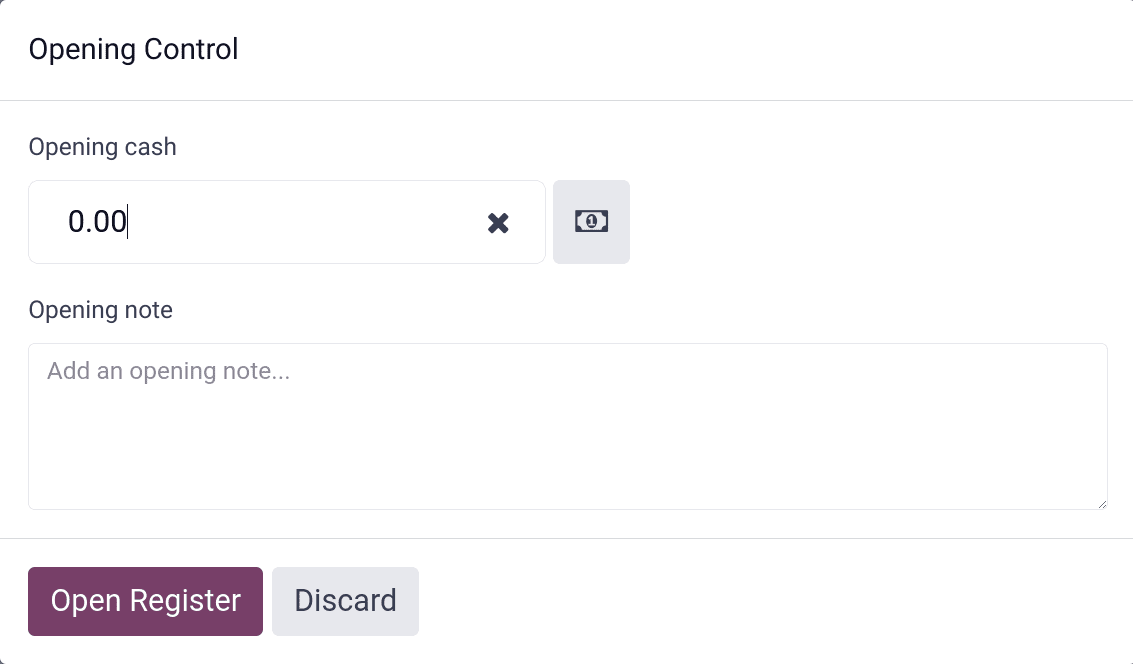
Placing some cash on the counter prior to the start of the day's sales constitutes an opening balance, which can be the money from yesterday’s sale.
Users can either click the icon next to the box or type the amount directly into it to add an opening balance. Clicking the symbol opens the Coins/Bills window in a new window. The coin and bill values that have been shown to the backend are all visible.
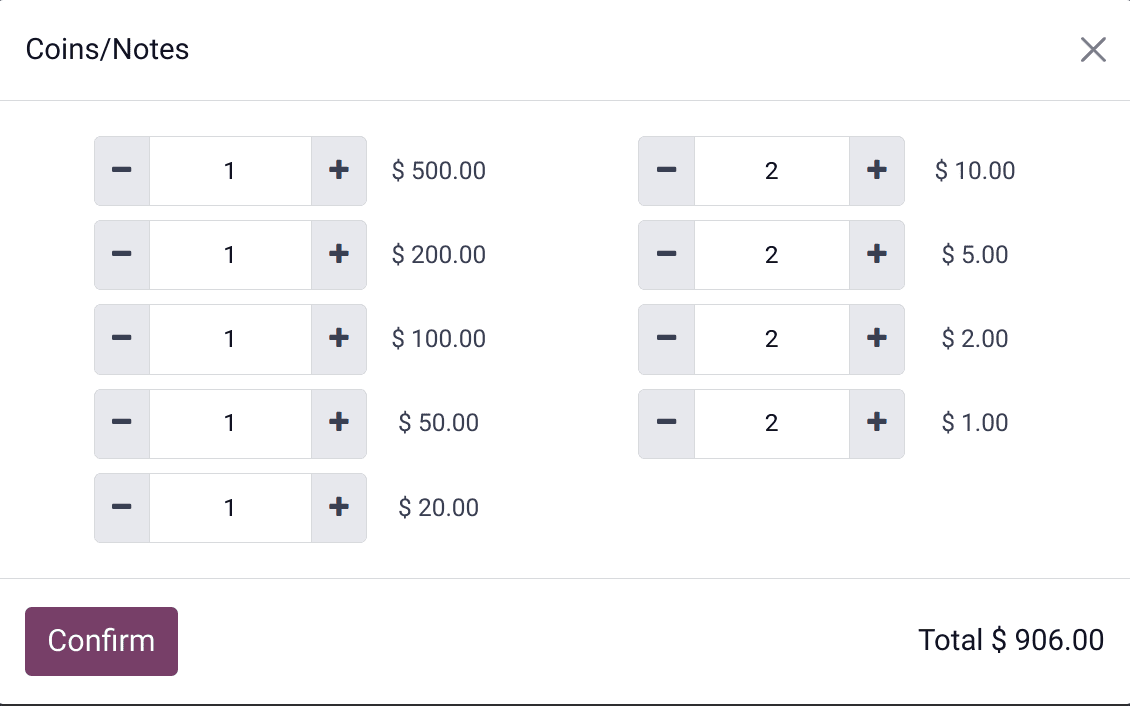
Choose the number of Coins/Notes you want from here, and the matching values will be added to the Total field. Next, make sure of it. The sum is entered into the Opening Control window following the Coin/Bills confirmation.
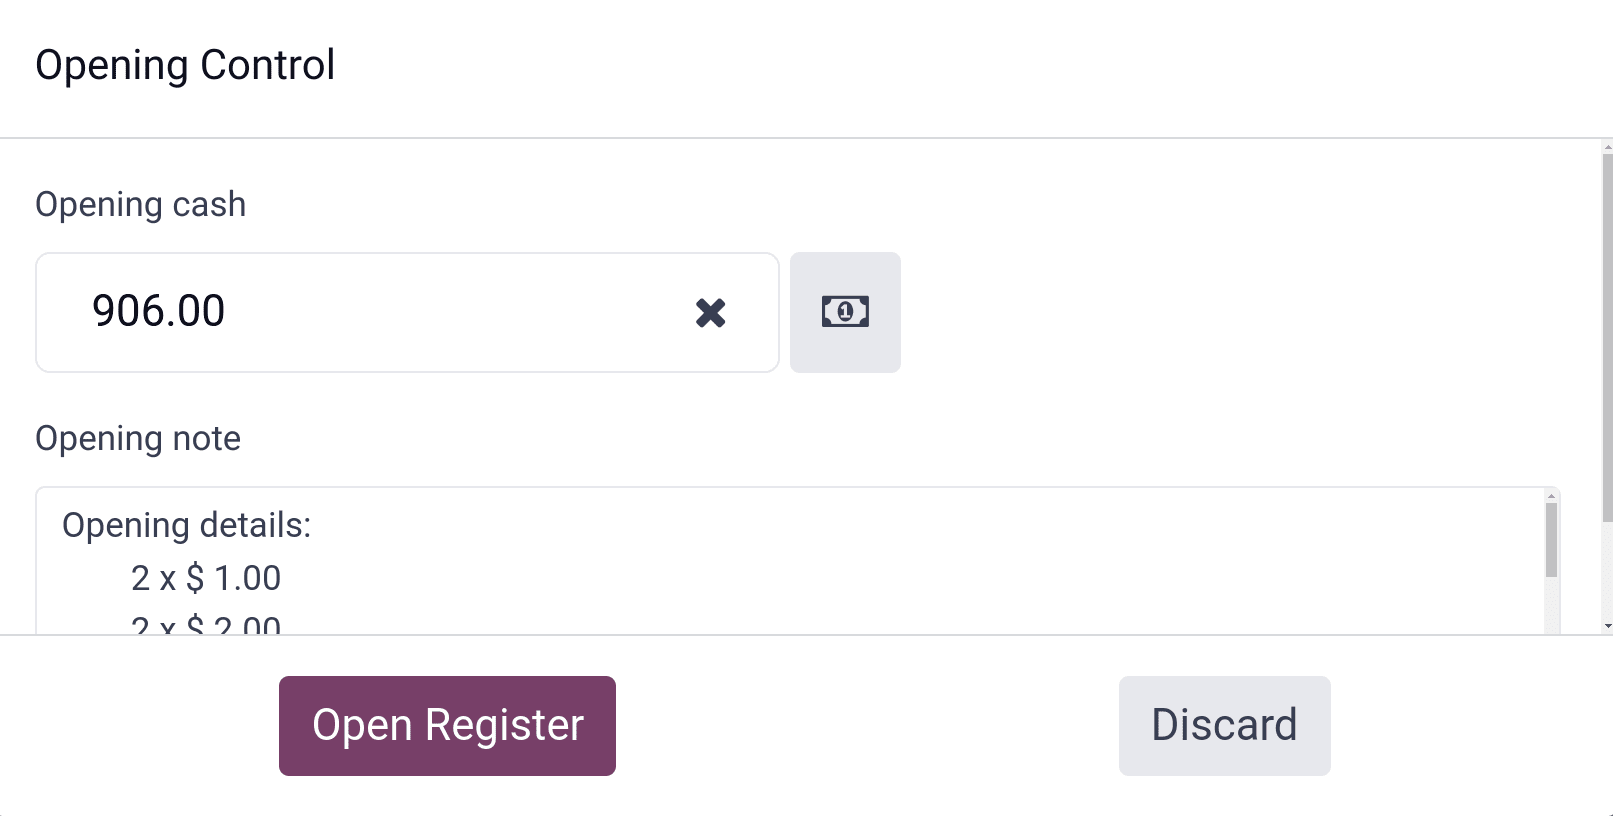
Details are also accessible there. To add an opening balance, hold an open session. The session started off balanced as a result. The beginning balance is 906.00 in total. Now that the session is ready for product sales. It is necessary to add the customer, product, and quantity information.
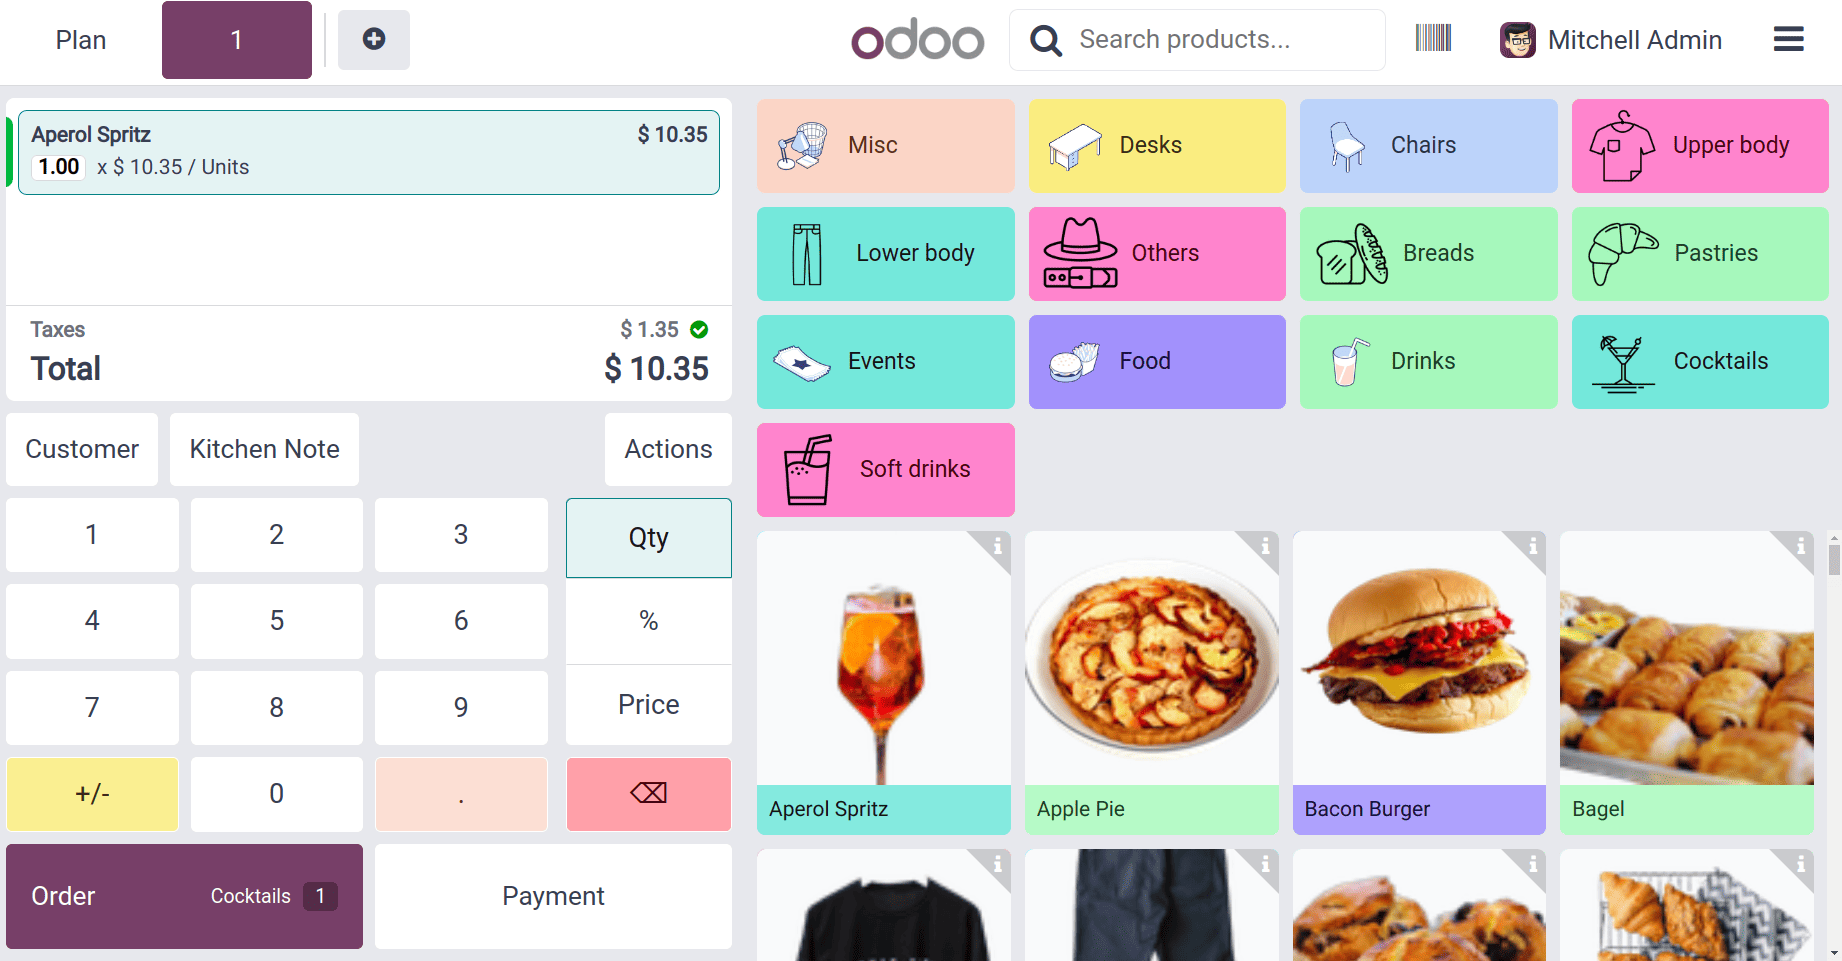
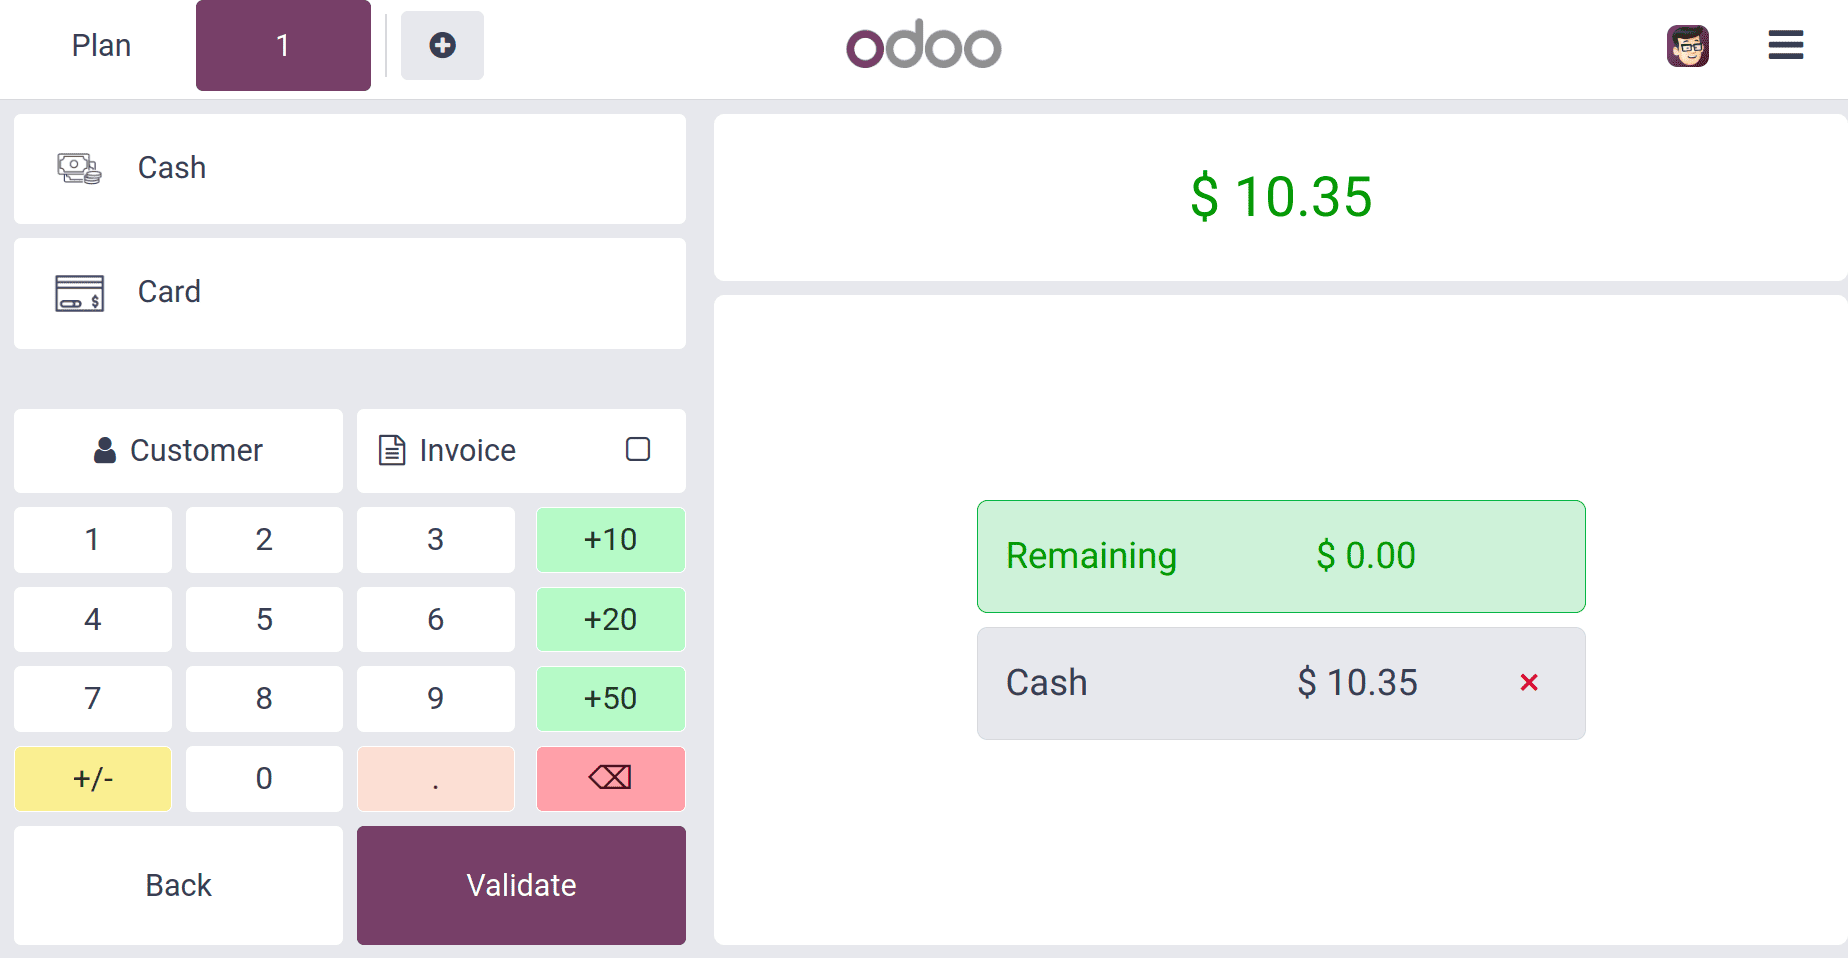
Proceed to make a payment after selecting a payment option. Choose the payment method and click on the Validate button to complete the payment.
Cash In/Out
A Cash In/Out option appears on the session's right side, as shown in the below screenshot. Workers are free to choose to do this. In a session, many employees are involved. Staff members could need money from the counter to pay for personal expenses like food or transportation. A few moments later, or maybe at the end of the day, they put the money back on the counter. Thus, a similar modification was also noted. To utilize such a facility, customers can select the Cash In/Out option.
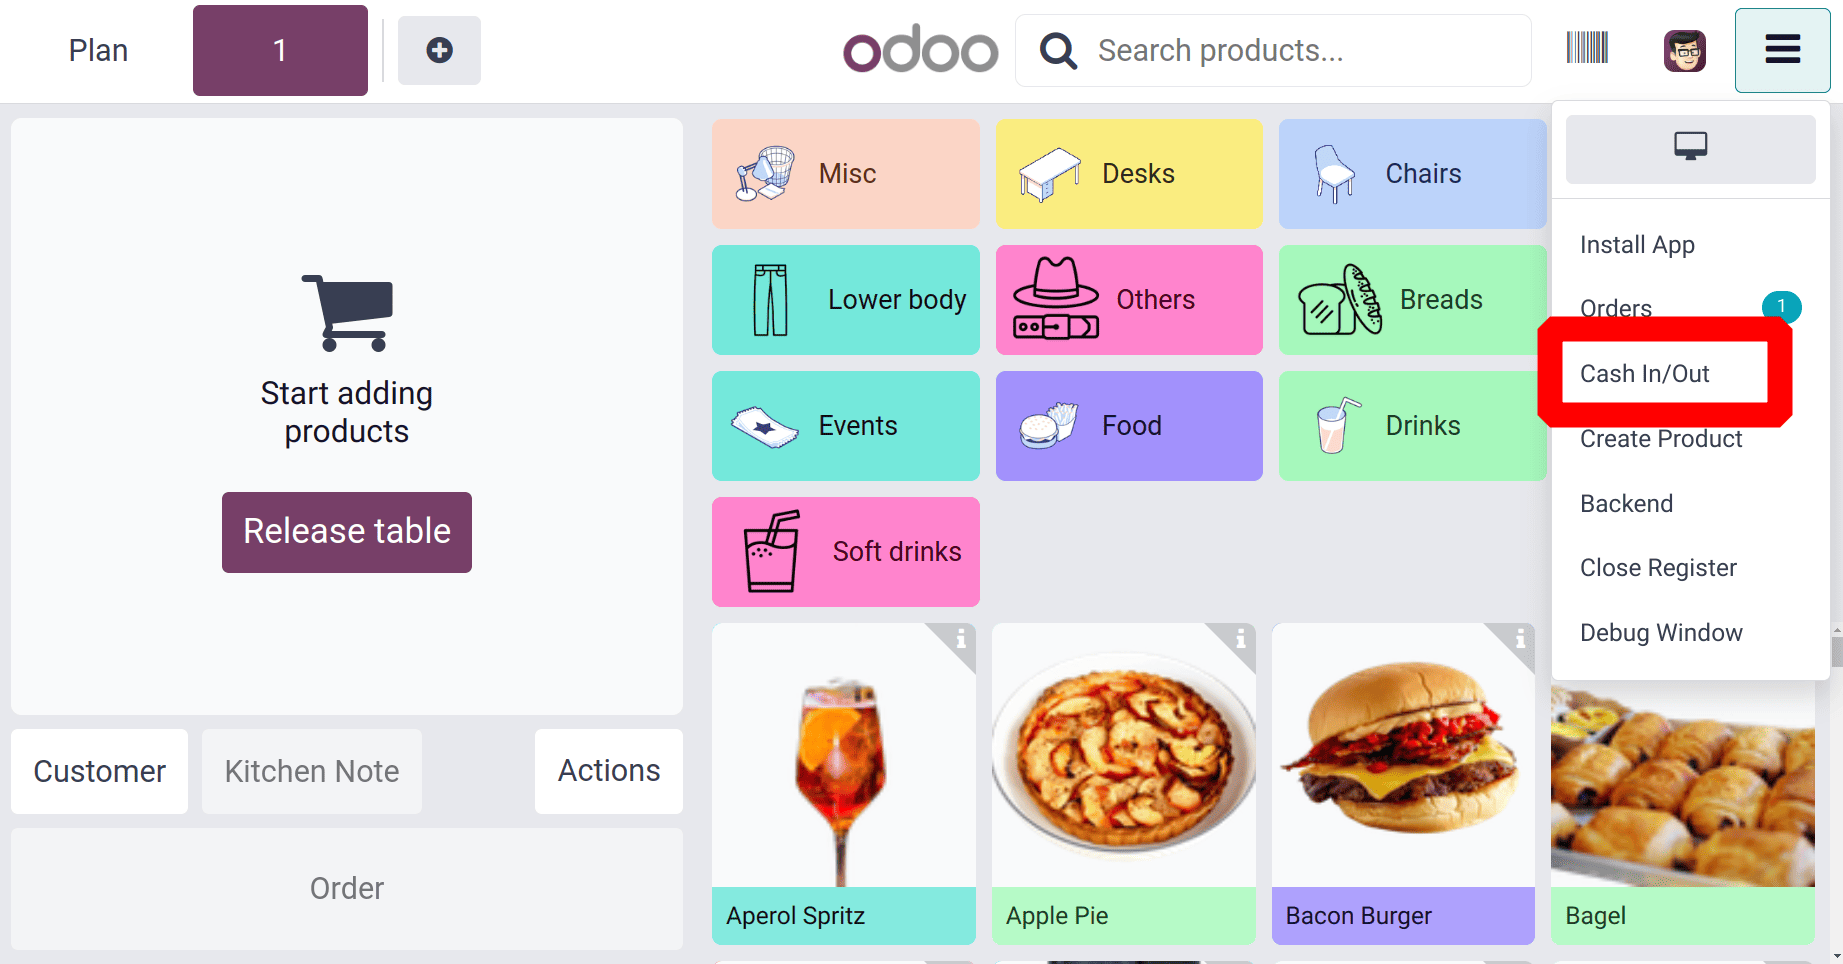
Select the Cash In or Cash Out option. Customers can choose Cash Out if they require money, which can be obtained from the counter. Enter the amount on the right side. There, mention the specifics of the reason. Next, make sure of it. The employee, in this case, took $29 for Travel expenses. Let us verify it.

You can now put the money back on the counter. This is an option called ‘Cash In’ that comes in handy. As said before, select ‘Cash In’, enter the amount, and then give a reason after clicking the Cash In/Out option once more. The $30 is now put back on the counter. Next, make sure of it.

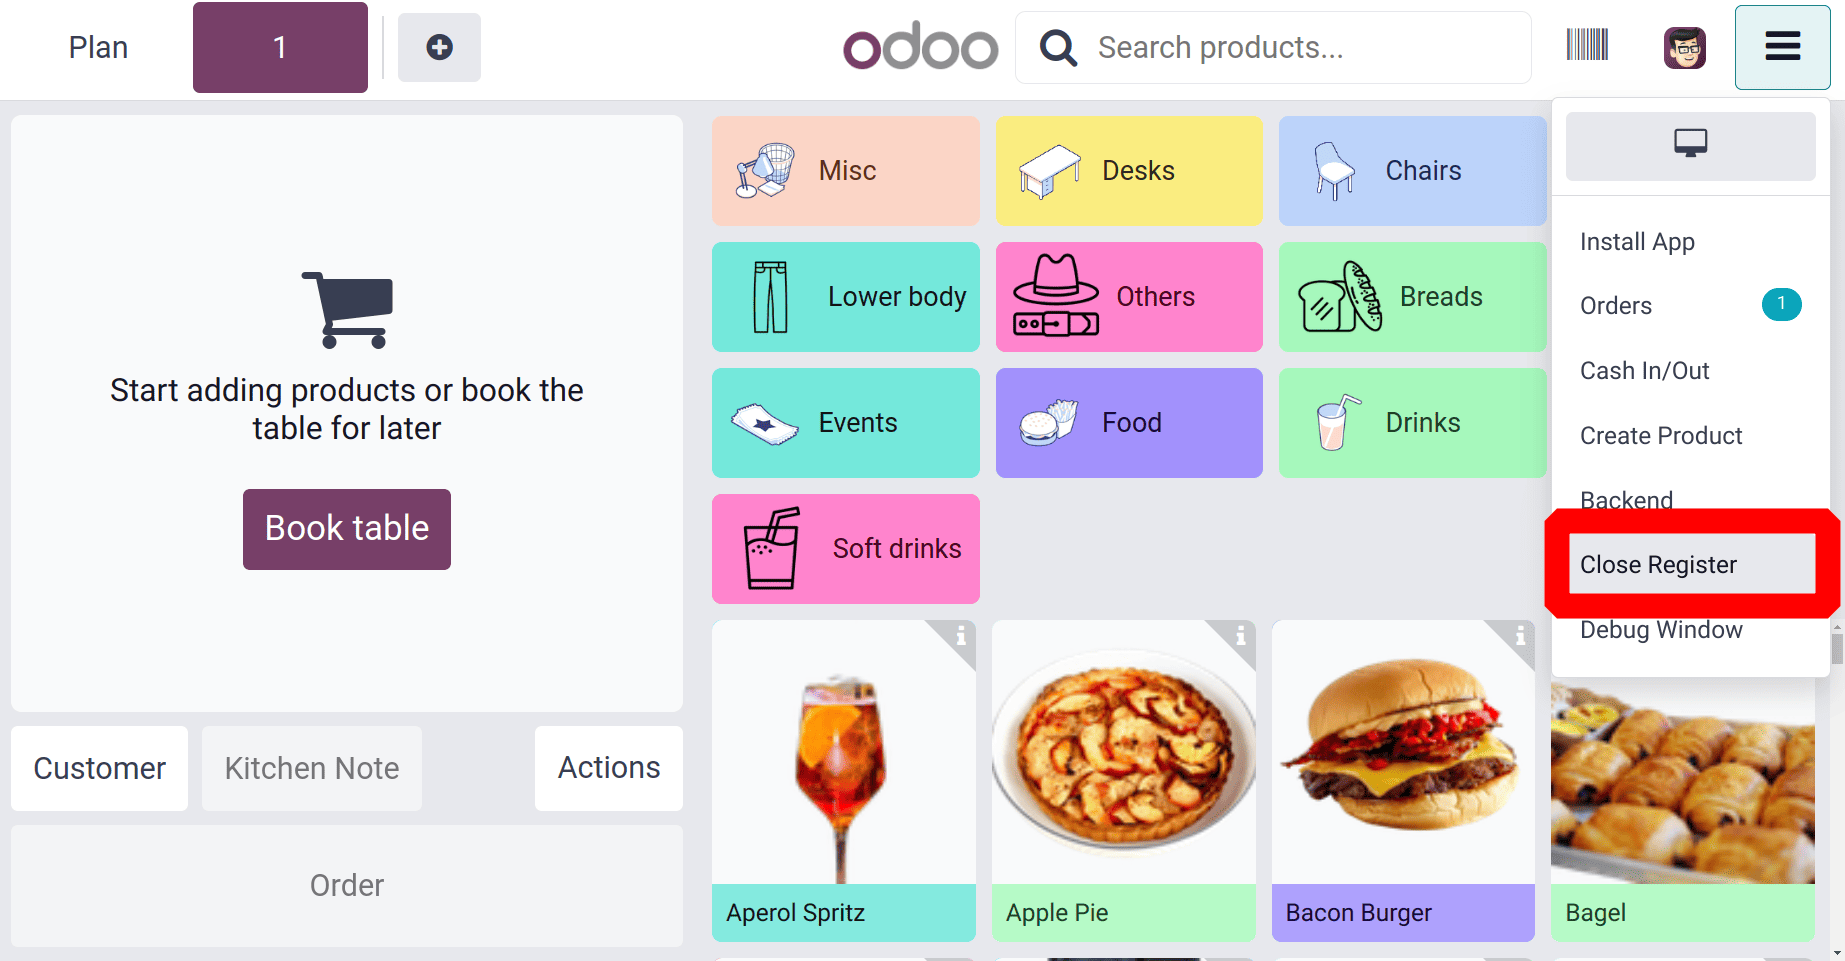
The salesperson can end the session when they have finished processing all of the orders. To end a session, select the Close option, as shown in the below screenshot.
Then, the Closing Register window appeared as a new window. The salesperson can add the session's closing balance once all of the day's sales have been made.
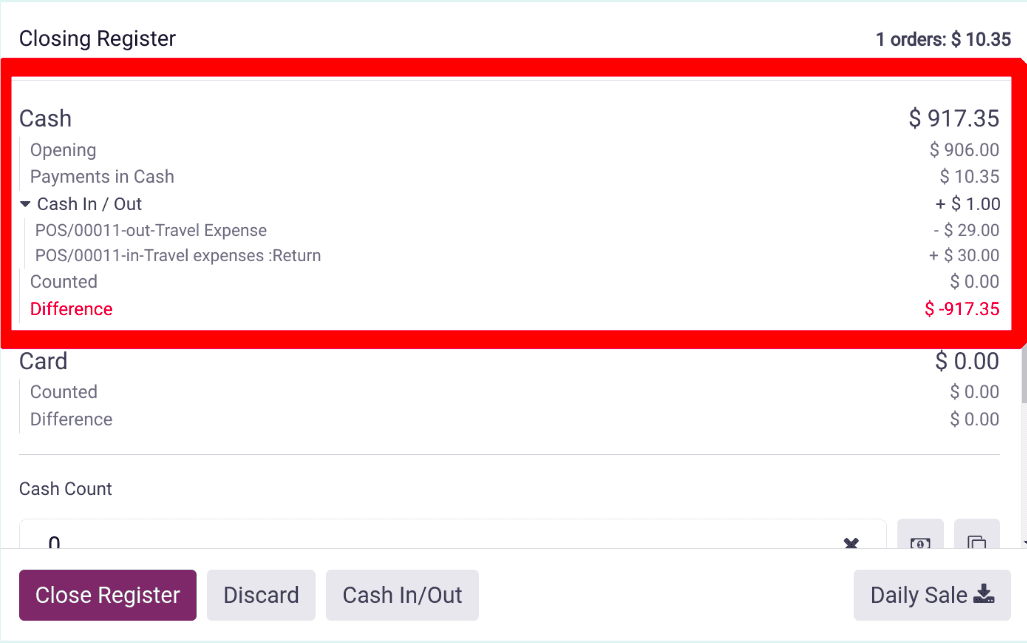
Consequently, this blog post clarified the opening cash controls in a Point of Sale session. This section covers a number of topics, including coins in proof of stake, opening balance, adding denominations, and cash in/out.
To read more about How to Manage Opening & Closing Controls in Odoo 17 POS, refer to our blog How to Manage Opening & Closing Controls in Odoo 17 POS.