The accounting module's employee expenditure management features have been significantly improved in Odoo 16, the most recent version of the well-liked open-source business management program. This update aims to boost efficiency and accuracy for companies of all sizes by streamlining and automating the recording and management of employee costs.
The enhanced connection between the accounting and employee spending processes is one of Odoo 16's notable features. The seamless synchronization of expense data made possible by this interface ensures that expenses are precisely and automatically reflected in the accounting books. This lessens the possibility of errors and guarantees accurate and current financial records.
Improved expense classification and reporting options are included in Odoo 16. Now that expense categories and subcategories may be customized, it is simpler to classify and analyze various charges.
Additionally, the reporting options have been improved, giving firms access to analytical expense reports and visualizations that clearly show spending trends. This enables organizations to choose wisely how to control costs and allocate resources.
The accounting module's improvements in employee expenditure management in Odoo 16 include better integration, simpler procedures, and improved reporting tools. These upgrades help firms effectively monitor and track staff spending, which results in accurate financial records and better resource allocation and decision-making.
There may be instances where an employee must use money from their own resources to carry out a project or activity or make purchases on the company's behalf. In these situations, the business pays the appropriate employee back. The Odoo Accounting module can be used to aid an employee in recording these costs. Under the Vendors menu, you can select Employee Expenses. You can keep track of your expenditures here and send them to the manager for approval. The expense amount will be reimbursed to your account once the manager has given his or her permission.

In the list view of the employee expenses, you can see the employee, expense report, company, activities, total amount, status, and payment status. You can post expense reports after scanning them using the Scan option. By clicking the Create button, a new report can be created.

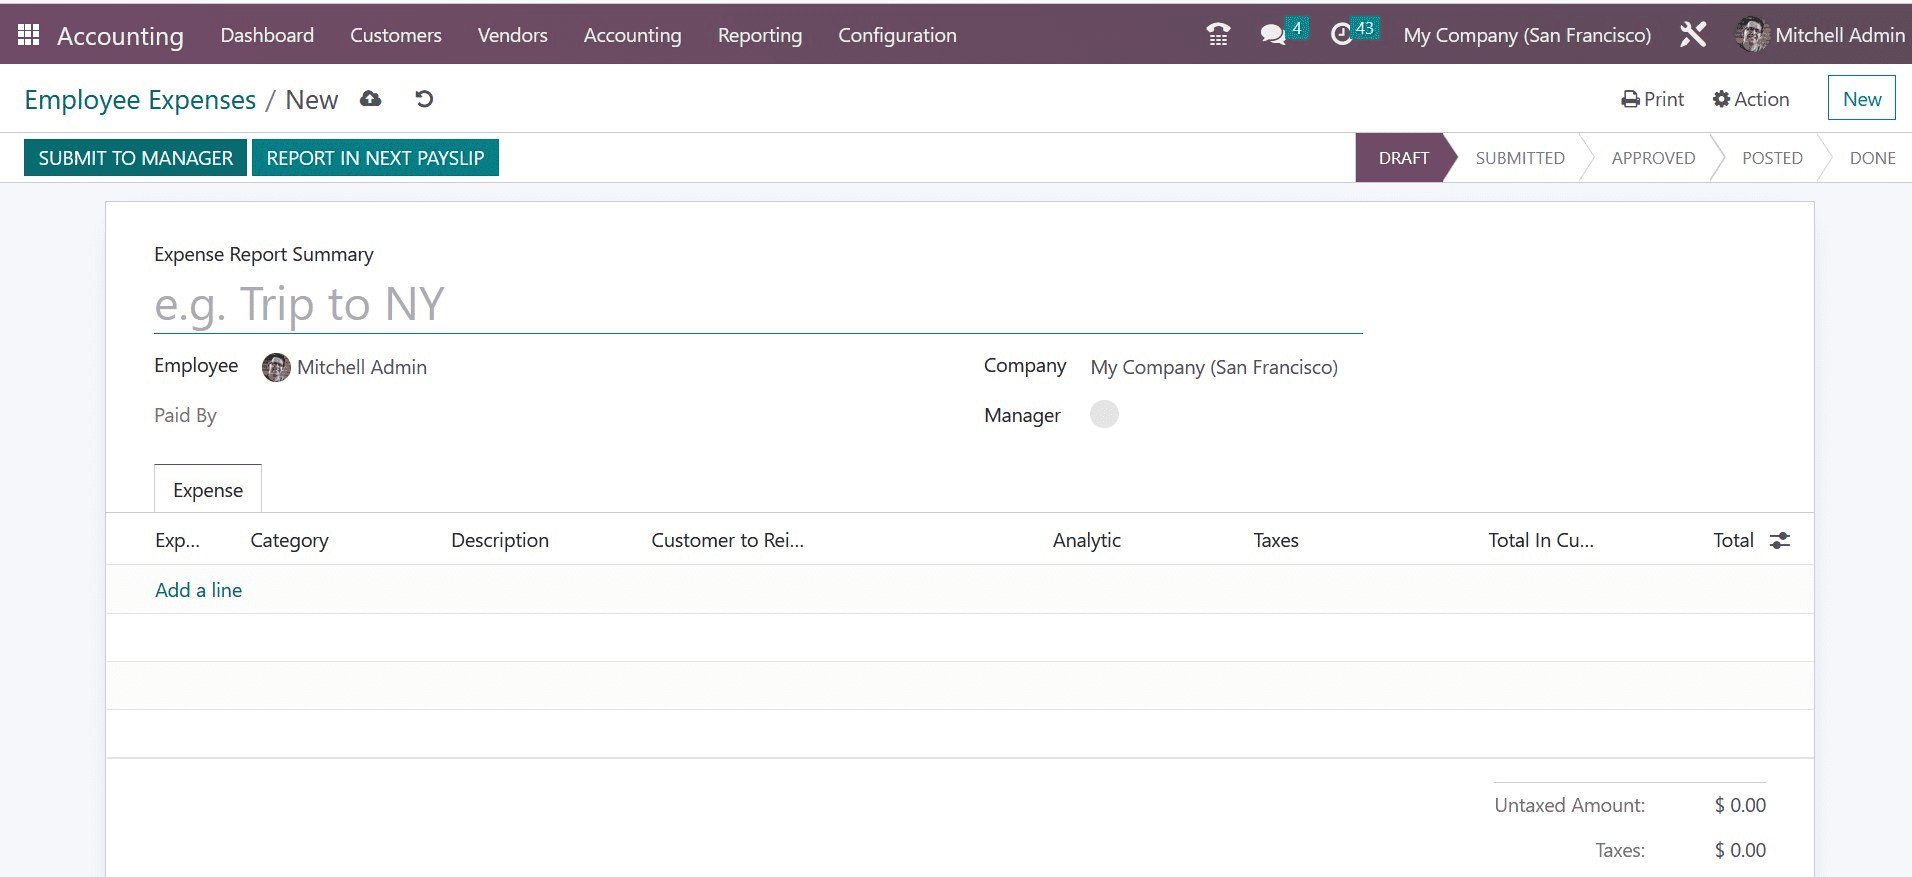
The title of the report can be added as Expense Report Summary in the provided box. Your employee id will automatically populate the Employee column. You can indicate whether you used your personal or business accounts in the Paid By area. You can mention the Manager whose consent is required in order to receive your money back, and the name of the Company can be seen in the relevant field. You can add the expenses one at a time using the Add a Line button under the Expense tab.
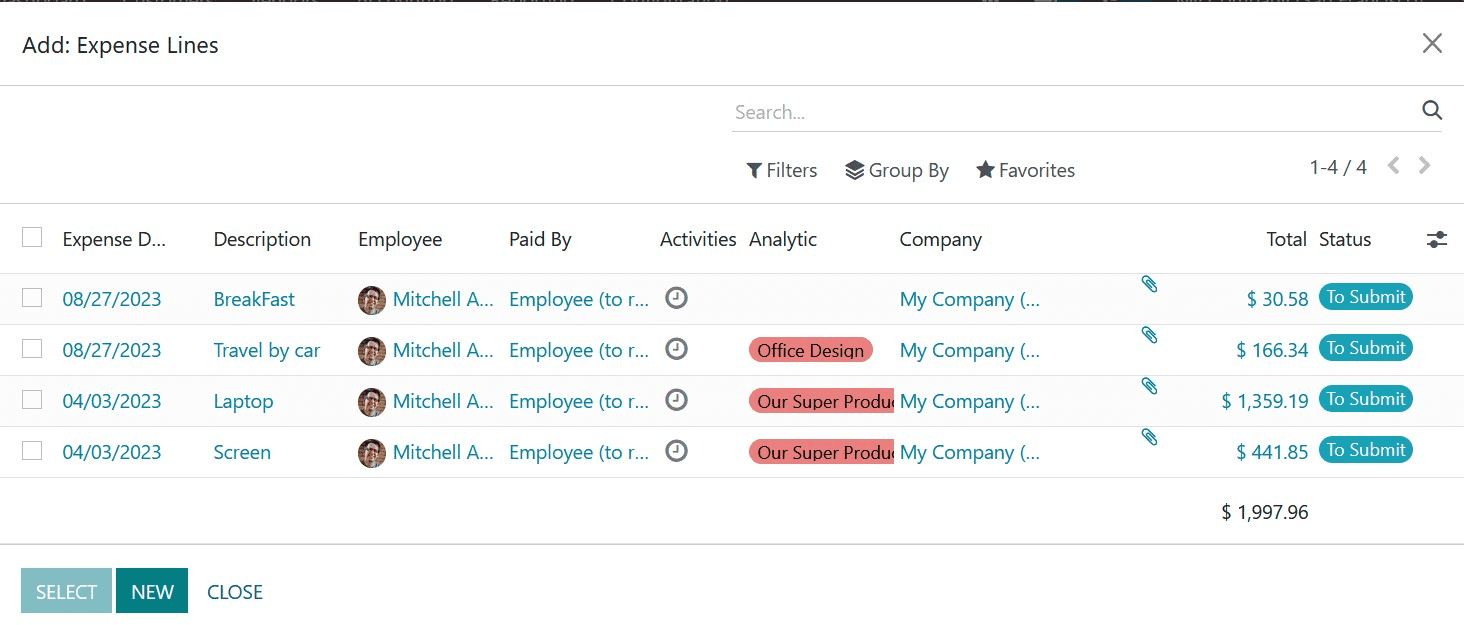
To choose the expenses, a pop-up will display, as shown in the screenshot below.

If you haven't yet entered your spending, click the New button to add a new line of expenses.

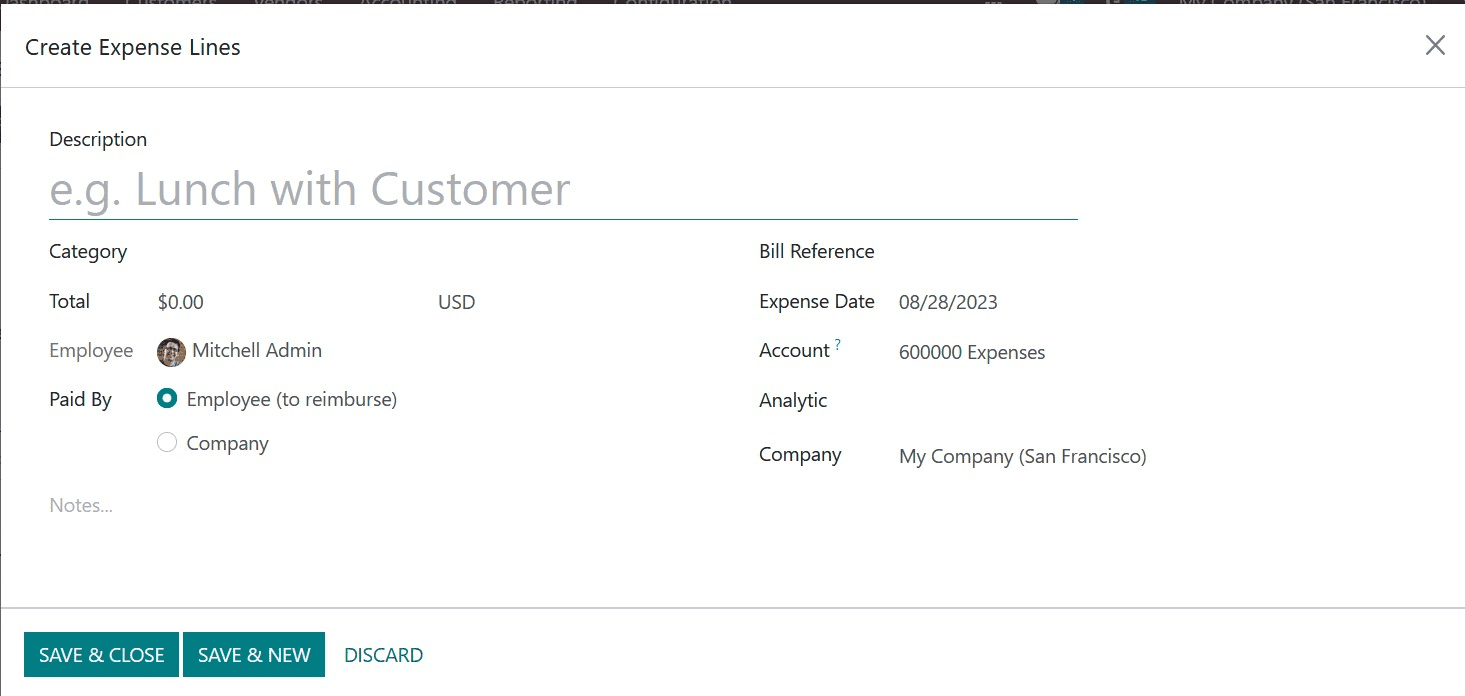
Include a Description for the expense line and indicate the item's Category. You can enter the total cost in the chosen currency in the Total area. In the corresponding fields, you can specify information about Employee, Paid By, Bill Reference, Expense Date, Account, Analytic, and Company.
Clicking the Submit To Manager button will let you submit the expense lines. The expense report will be sent to the specified management for approval by pressing this button.

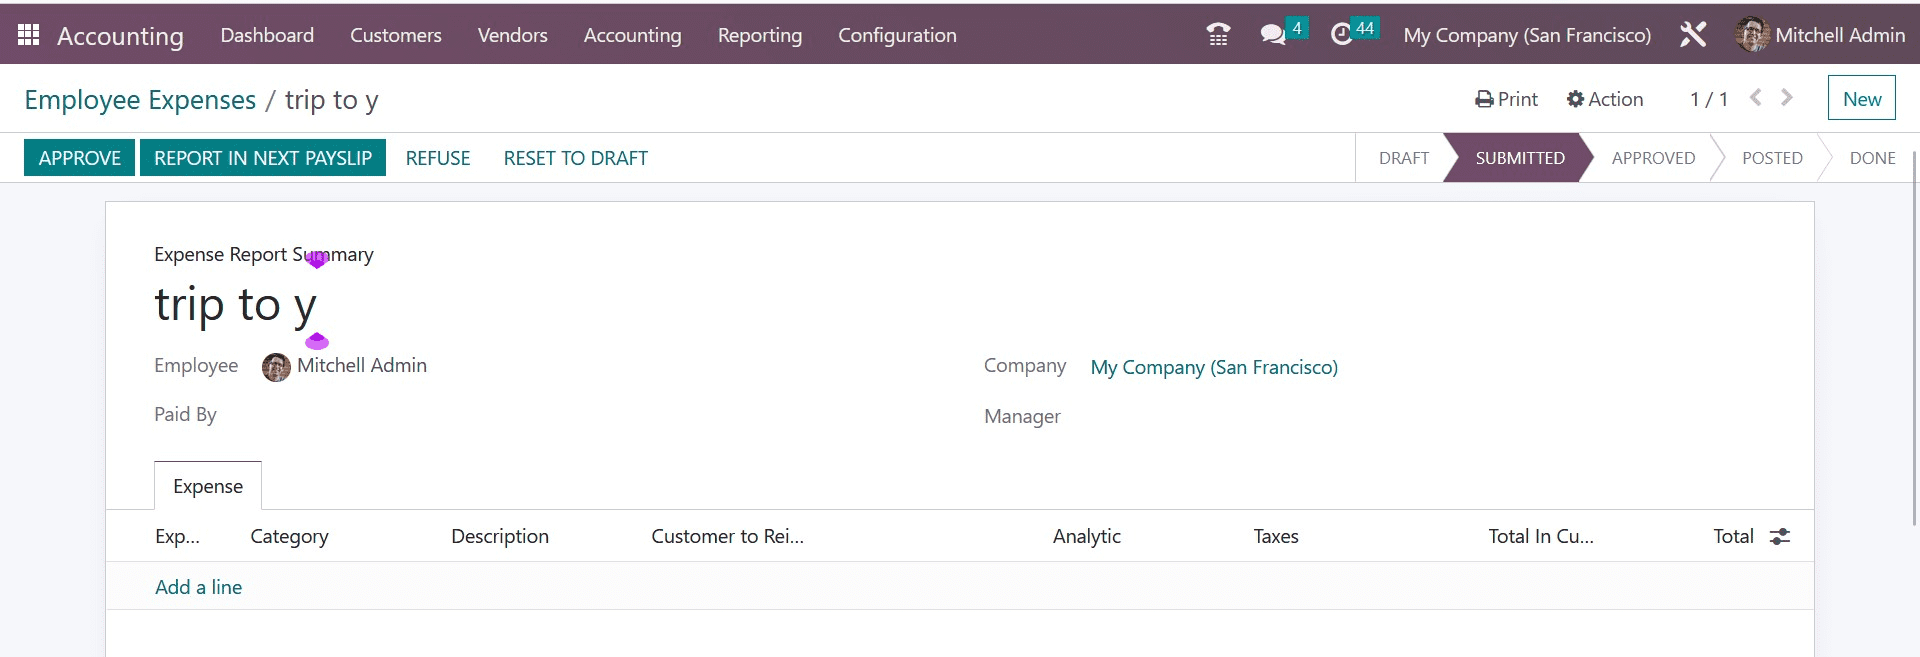
Selecting the "Report in Next Payslip" button allows you to add the payment to the following payslip. The manager will verify the completed submission before deciding whether to accept or reject the report.

If more information is needed, the manager can return the expense report to Draught. The manager can refuse an expense by clicking the Refuse button if any obligations are discovered in the report. The authorized expense will be included in your subsequent payslip. This is how we will manage Employee expenses in the employee module of Odoo ERP Software.