The Down Payment feature available on the Odoo platform is an exclusive feature that will be very useful for a firm to allow their customers to pay a percentage of the amount during the ordering process and pay the balance at the time of delivery or pay the remaining amount at a later date. The down payment feature appears as an additional feature in every organization. This functionality will be very advantageous to attract customers and businesses for every organization and business entity. The down payment system is commonly used in every advanced application of business, from digital business platforms to physical shops.
The down payments can be applied for a fixed amount or a fixed percentage of the total amount based on the organization's preferences. The Odoo 16 Sales module offers excellent support for establishing a down payment in these two ways: a fixed amount and a fixed percentage, as it fluctuates across business organizations.
In this blog, let us look at how Odoo treats the down payment functionality and how to set up down payments in the Odoo 16 Sales module.
As we mentioned above, a down payment is a partial payment made by a customer to secure goods or services before the complete delivery or fulfillment of an order. Down payments are used for various reasons, such as confirming an order, reserving resources, or covering initial production costs. Businesses often request down payments to mitigate the risk of non-payment and ensure customer commitment. The Odoo Platform manages the down payment concept in a highly concentrated way. The platform allows to manage of down payments as a separate product and can be activated upon the user's request. The down payment feature for sales can be activated while summoning the checkout process of an order. The option will be available from the invoicing menu of the Sales module.
To easily understand the down payments in Odoo 16, let us explain them based on an example.
How to manage down payments in the Odoo 16 Sales module
To manage Down Payments in the Odoo 16 Sales module, you should initially be required to set up a Sale Order. So let us go to the Sales module. To create a Sale Order, you can open the Sale Orders window using the Orders menu available under the Orders tab.
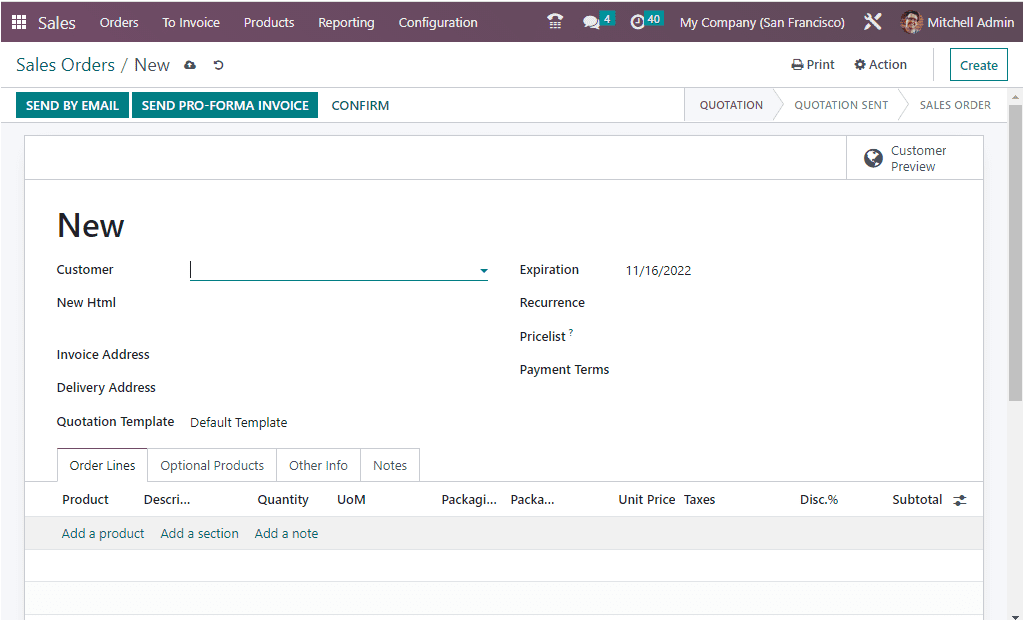
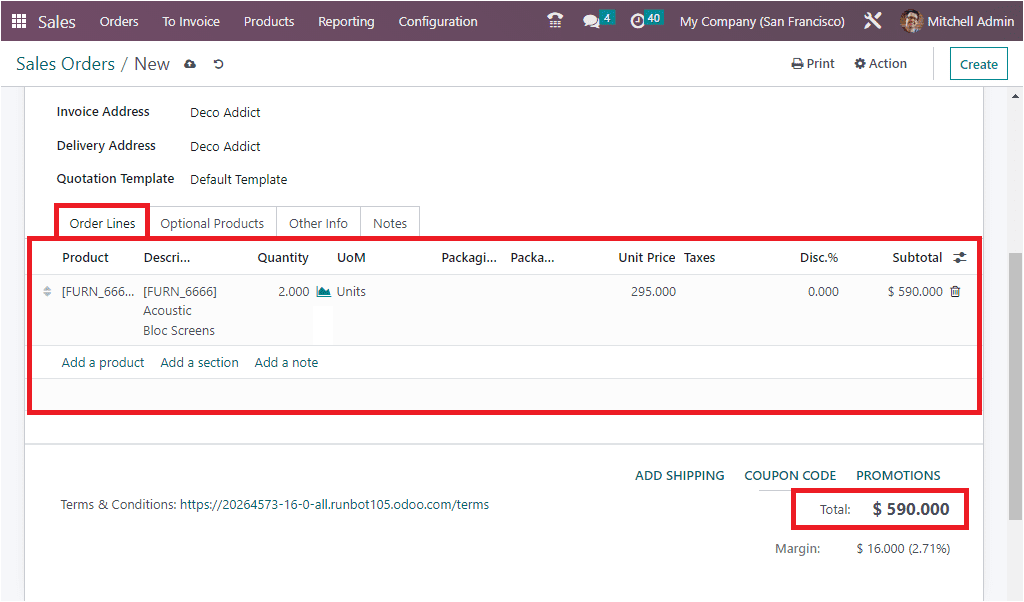
You can fill in all the details required for creating a sale order. In the form view of the Sales Orders window, choose the customer from the dropdown menu (all the customer details saved in the system will be displayed in the dropdown menu. If it is a new customer, you can create a new customer by giving all the details). Provide the name of the Referrer, Invoice Address, Delivery Address, Quotation Template, and other details. The Expiration date will be automatically allocated based on the default validity we defined earlier. You are also able to change the Expiration date if required. Then you can allocate the Pricelist details and the Payment Terms. Under the Order Lines tab, you can provide the product details. Also, you can provide the number of units required. Here, we can choose the Acoustic Bloc Screens as the product, and the quantity can be set to two. The total amount of the product will be displayed below the product details.
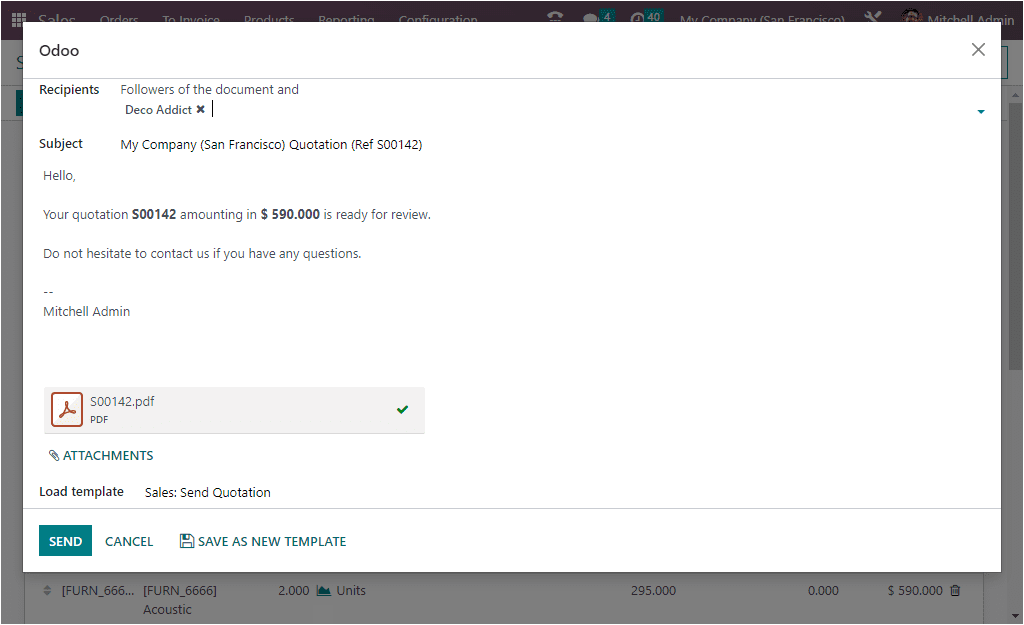
Once you fill in all the required information, save the sale order. Then, you can send the quotation by clicking on the SEND BY EMAIL button. Now, the system will depict a default window where you can check the details and send them to the customer by clicking on the SEND button.
Now, the quotation status will be changed from QUOTATION to QUOTATION SEND. Once the customer agrees to the quotation and confirms the order, the status will be automatically changed to SALE ORDER.
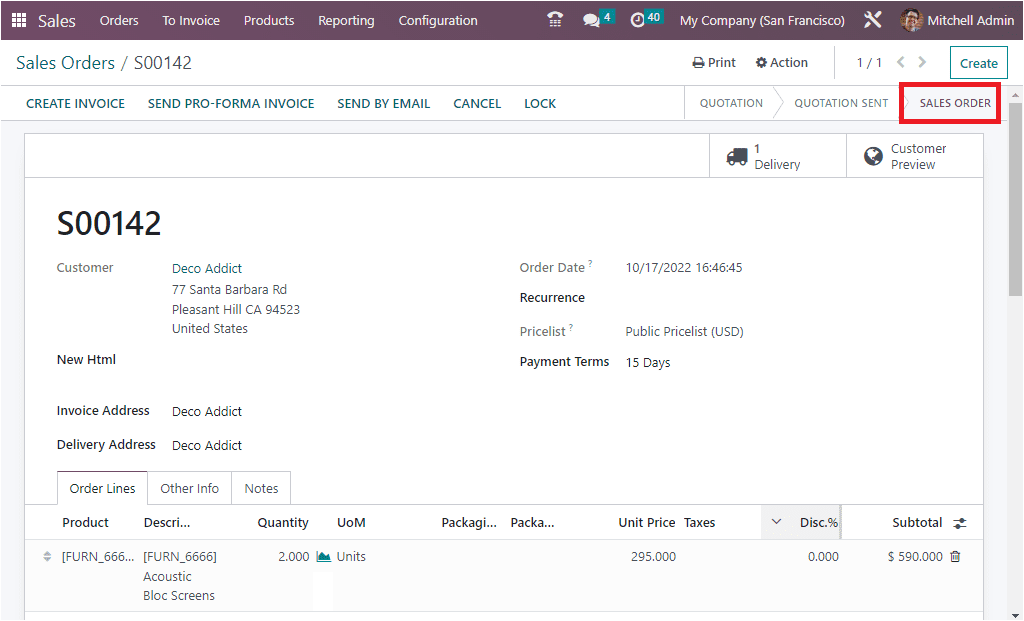
Then, you can create an invoice. For that, you can choose the CREATE INVOICE button. The Create invoices pop-up window will appear when you click on the CREATE INVOICE button, as shown in the image below.
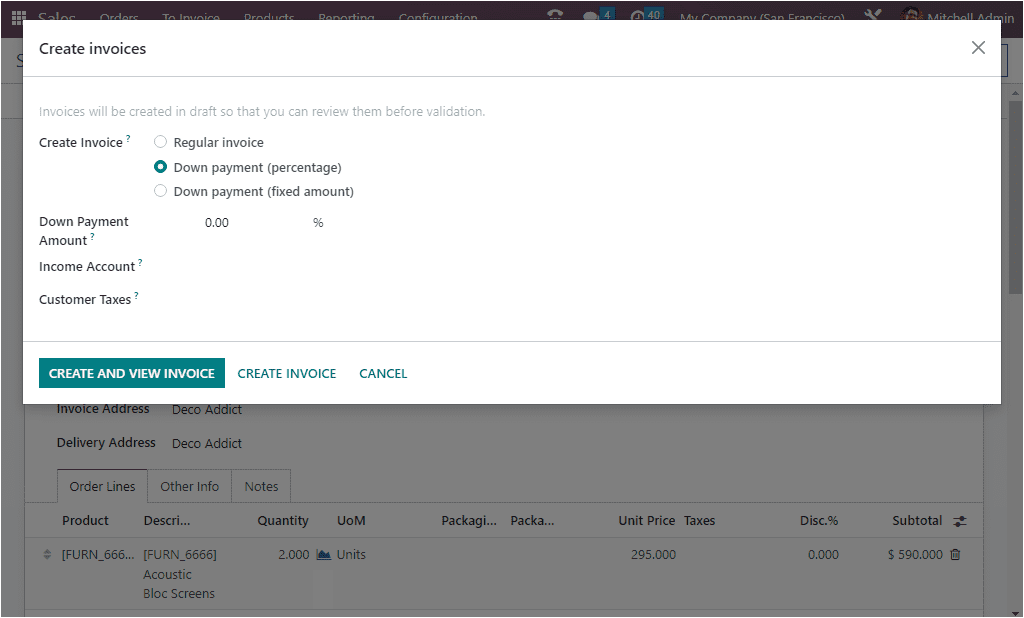
The pop-up window asks you to determine the invoice type. Here the window shows three options, such as Regular Invoice, Down Payment (percentage), and Down Payment (fixed amount). From these options, the user can pick the option for invoicing based on their requirements. If the user opts for a Regular Invoice, it will generate a normal invoice. When we come to the case of Down payments, they have two options. One with a fixed amount, and the other one is a fixed percentage. Both of these options are very convenient for organizations, and they can apply them based on their terms of service.
If the user selects the Down Payment (Percentage) option, the down payment percentage can be allocated in the Down Payment Amount field. This is the percentage of the amount to be invoiced in advance, taxes excluded. In addition, the Income Account and the Customer Taxes fields can be filled with the required information. If you are selecting the Down Payment in terms of a Fixed amount, the fixed down payment amount can be given in the Down Payment Amount field.
Here, we can make a down payment in percentage terms, and the amount can be given as 50 %. That means we are creating an invoice that involves a 50% amount down payment on this particular product. After confirming all these details, you can click on the CREATE AND VIEW INVOICE button. Now you will be directed to the Draft Invoice page, where you can view all the details as shown in the image below.
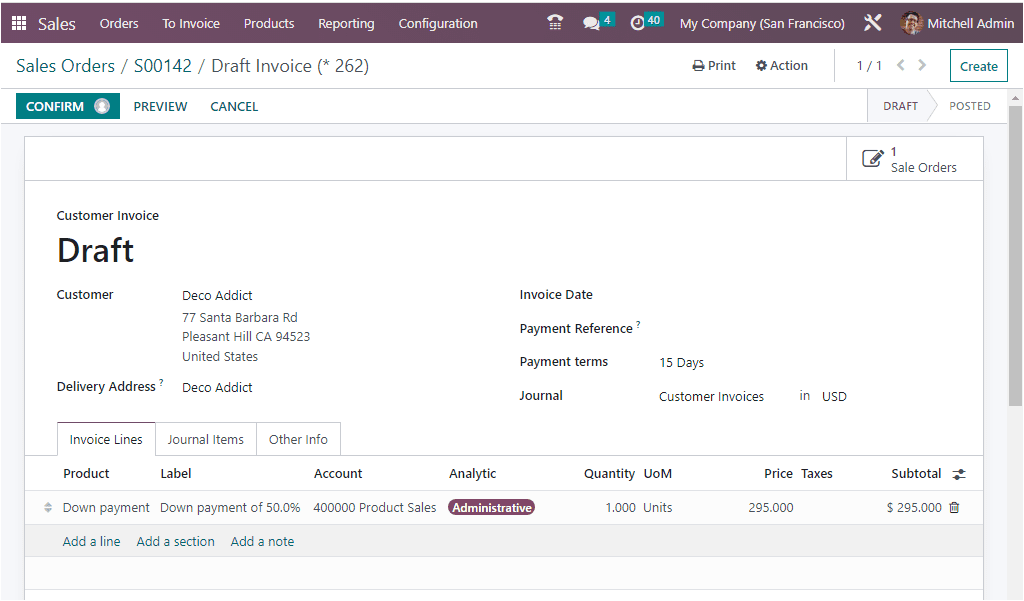
In the Draft Invoice, you can view a detailed view of the down payment. The amount the customer wants to pay in the initial stage of ordering will be clearly defined.
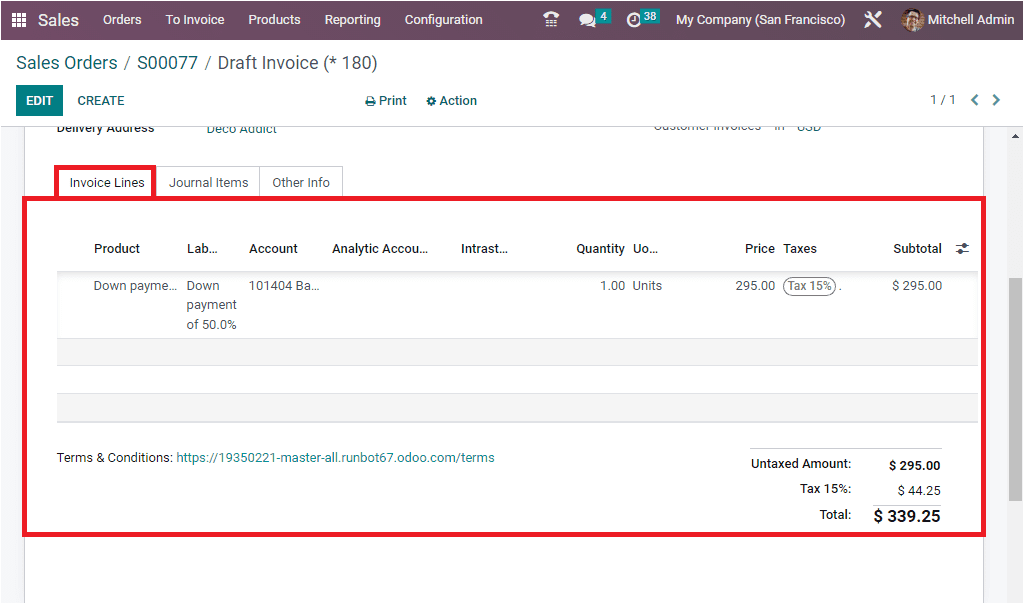
When you look into the Invoicing Lines tab, you will be able to see that the down payment is considered as a separate product, and the down payment percentage, account details, price, taxes, sub-total, and every detail are displayed. The total amount will also be displayed by adding the Untaxed Amount and the Tax amount.
Some companies follow the way to set up the initial down payment before delivery. This can be established by clicking on the REGISTER PAYMENT button.
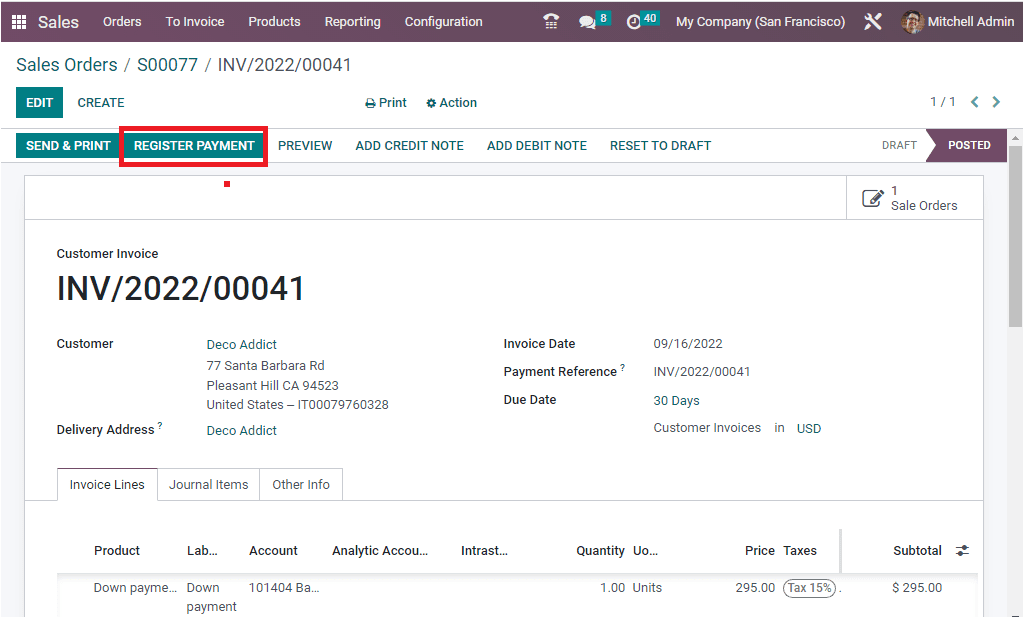
When you click on the REGISTER PAYMENT button, the system will display a pop-up window, as shown in the image below.
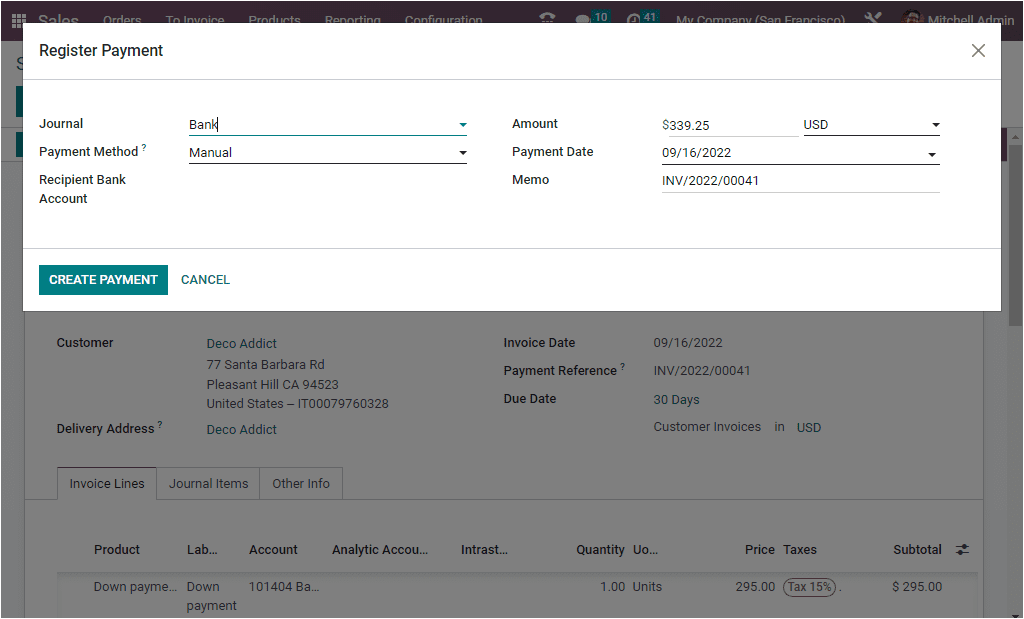
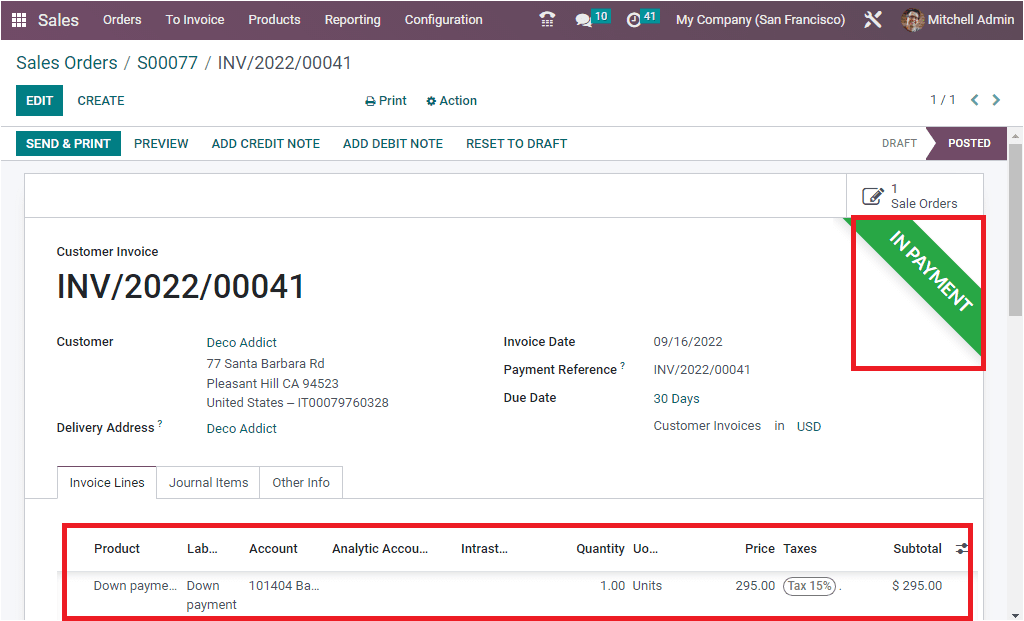
After checking the details, click on the CREATE PAYMENT button. The moment you click on the CREATE PAYMENT button, the user can view the customer invoice, where the user can view the successful payment in the invoice with an IN PAYMENT ribbon, as depicted in the image below.
Now, suppose the company’s policy is to deduct the remaining payment only once the delivery happens. In that case, the user has to wait for the confirmation of the delivery and the number of initial units delivered based on the number of units.
Once the customer validates the delivery, the user will be able to create the invoice for the remaining down payment. To do this, the user can select the sales order and create an invoice, as we did earlier. As we already made a down payment, a new option will be displayed in the system while creating an invoice.
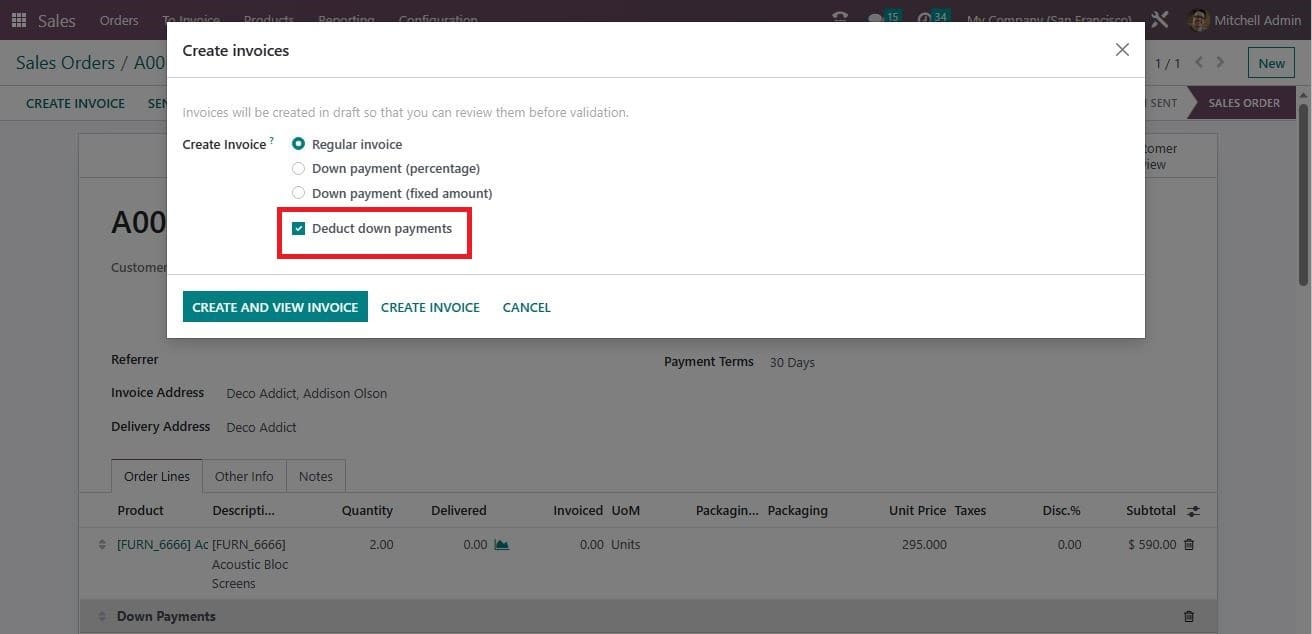
As highlighted in the screenshot above, a new option ‘ Deduct down payments’ will be visible and which is activated by default. If the remaining balance is ready to be paid, the Regular Invoice option should be chosen, and the Deduct down payments option should remain chosen. Following that, click Create and View Invoice.
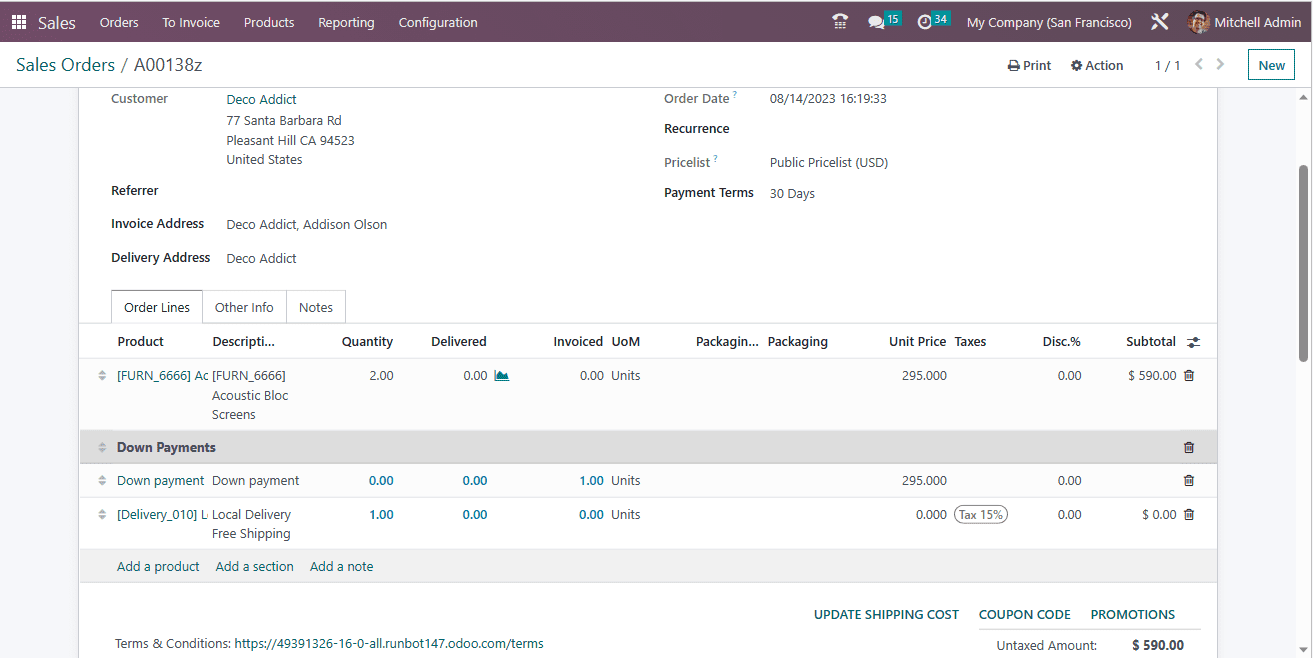
Down payment in terms of a fixed amount
When it is required to create another down payment in terms of fixed amount, just use the CREATE INVOICE button, and you can select the Down Payment for fixed amount. Then you should need to provide the Down Payment Amount. Here we can provide the amount as 200.
Now, another down payment is created for the amount 200, as shown in the screenshot below.
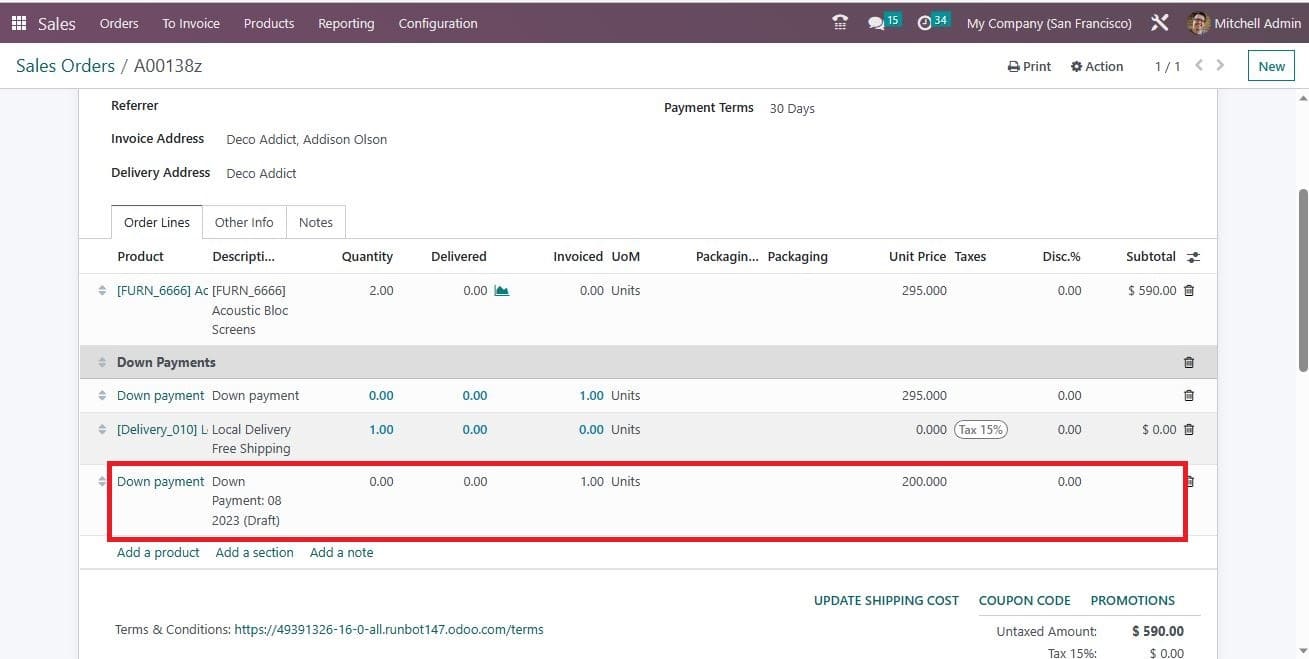
To make a payment, you can choose the CREATE INVOICE button.
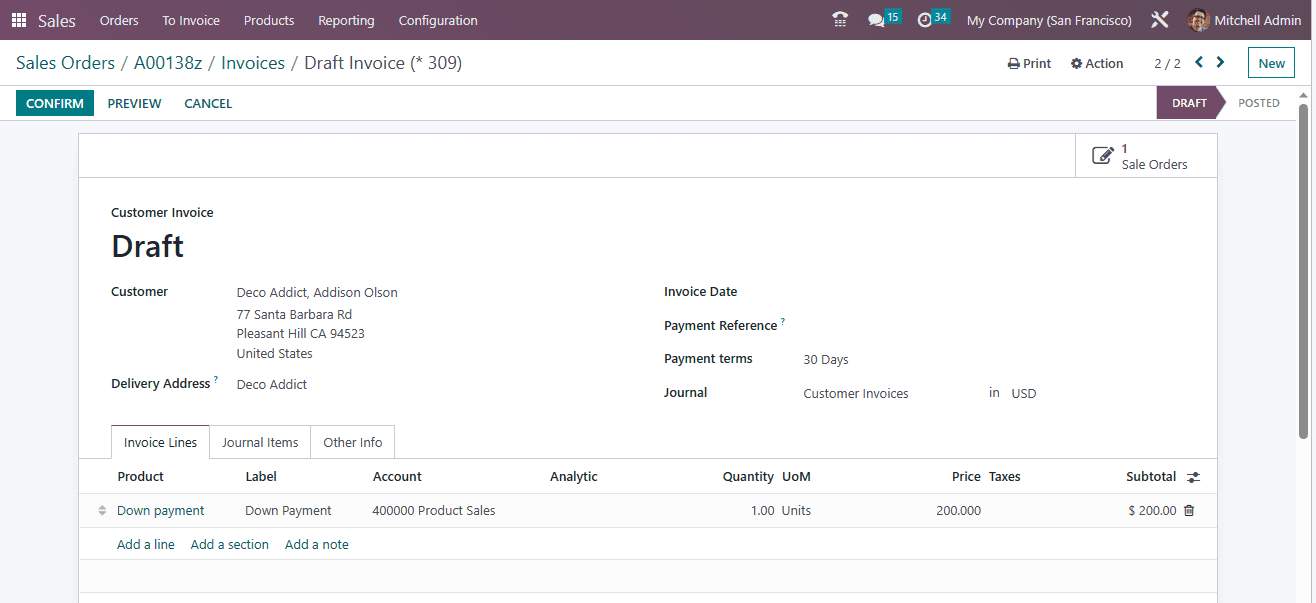
Now, you can confirm it by clicking on the CONFIRM button. Then you can choose the REGISTER PAYMENT option.
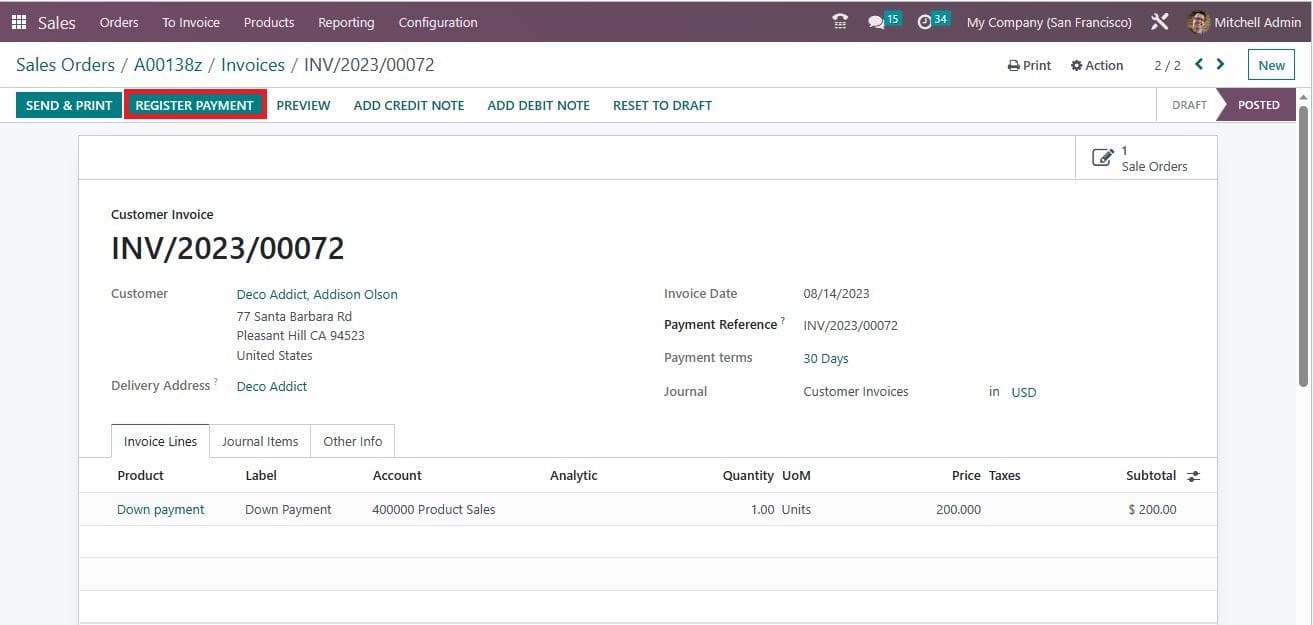
After checking the details in the Register Payment button, you can create a payment using the CREATE PAYMENT button.
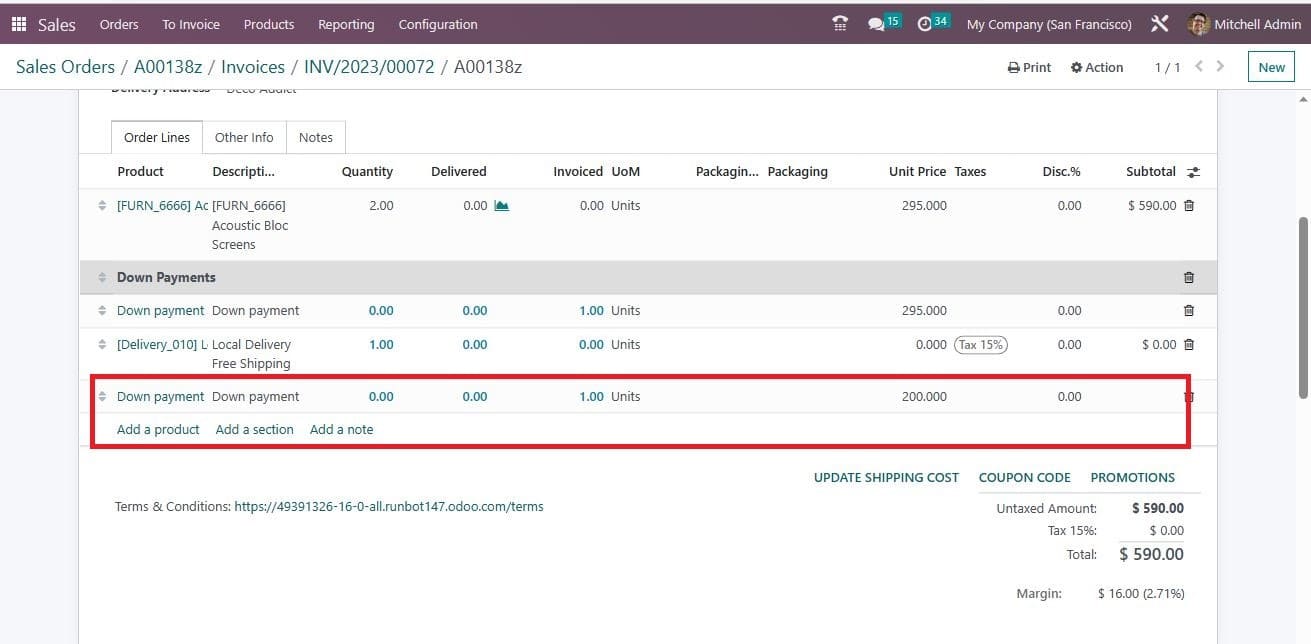
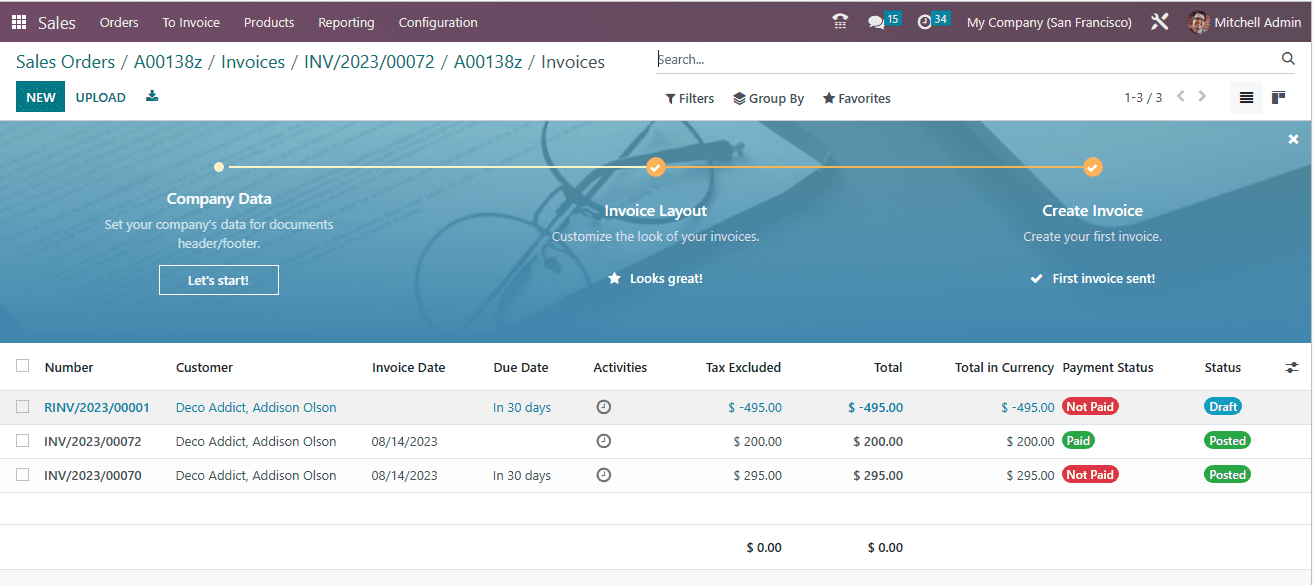
This downpayment flow creates a separate invoices page with a list of all the invoices associated with that specific sales order. Each line item displays all pertinent information for each invoice along with the current payment status.
This way, Odoo allows you to manage Down Payments in the Odoo 16 Sales module.