A key component of Odoo 18, reception reports are intended to improve inventory management and expedite the goods receipt process. These reports offer thorough documentation of the items received, guaranteeing precision in both quantity and quality checks while minimizing mistakes. Businesses can better manage their supply chain by integrating reception reports with Odoo's more comprehensive inventory and procurement modules. The advantages, configuration, and applications of reception reports in Odoo 18 will all be covered in this article. This article will assist you in making the most of this potent tool, regardless of your level of experience with Odoo.
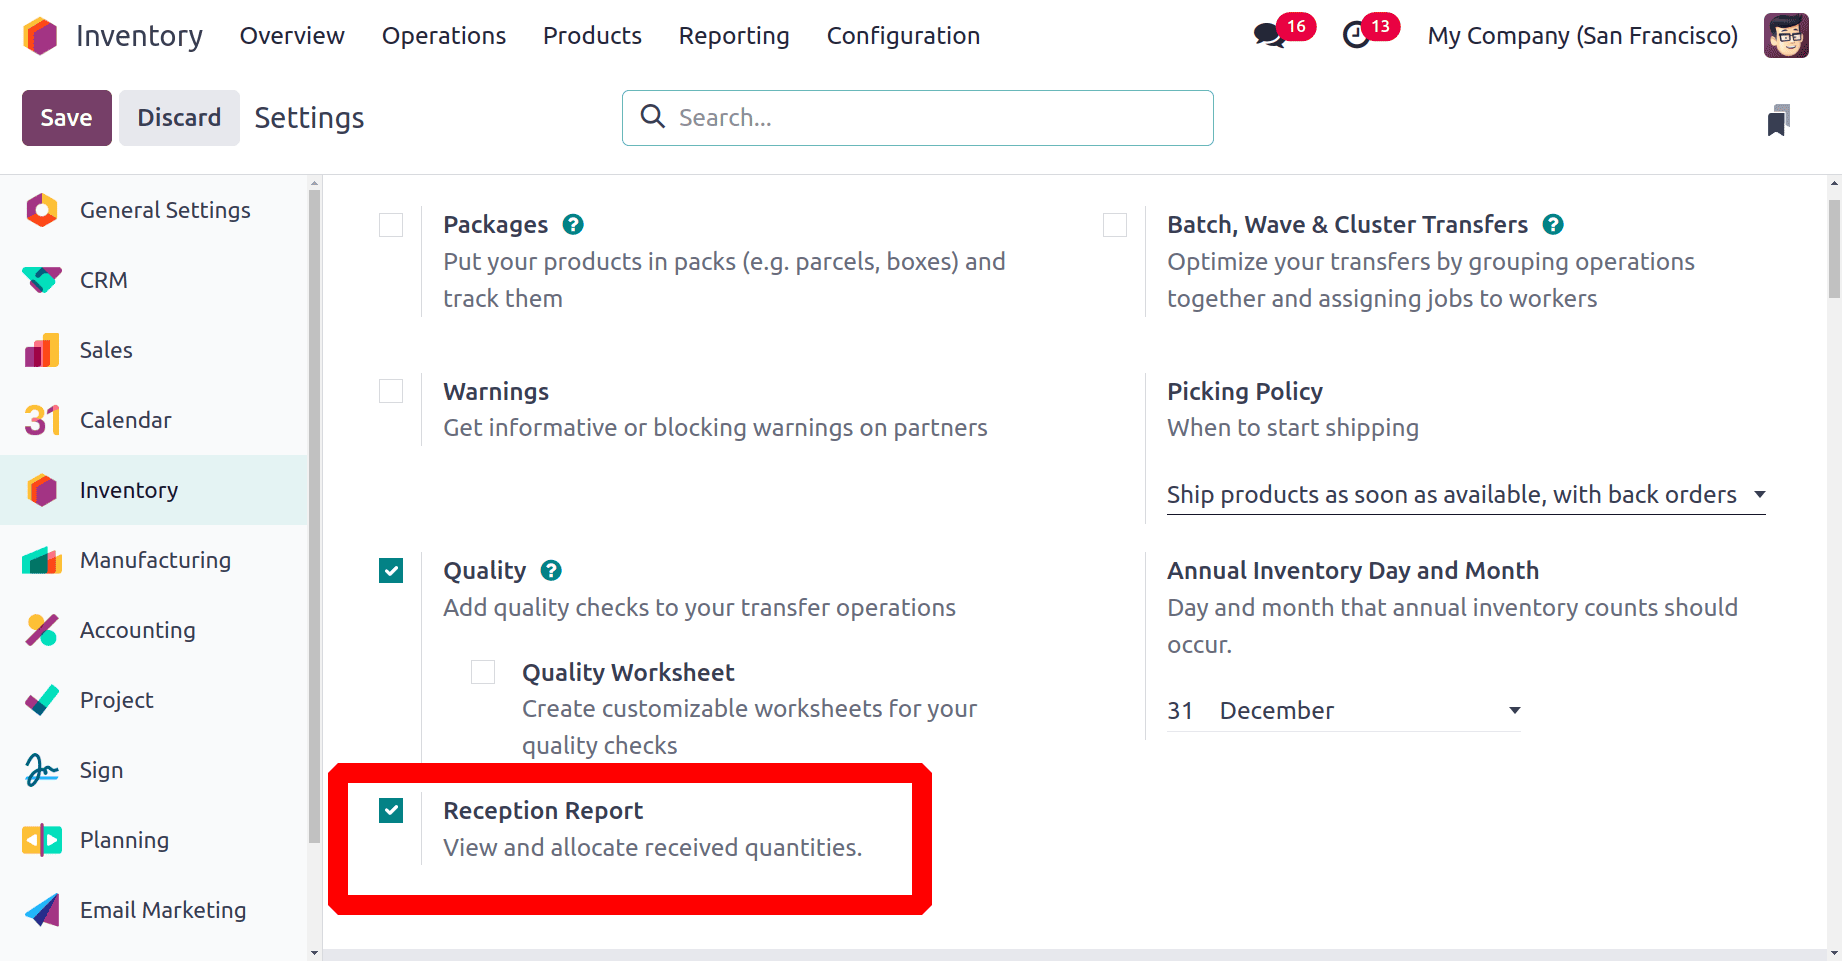
Enable the "Reception report" option initially in order to obtain the report. To accomplish this, navigate to the configuration tab of the Inventory module. From the configuration menu, select Settings. A Reception Report option will be available. Turn it on. Save the page after making the necessary changes.
: Settings > Configuration > Reception Report > Save
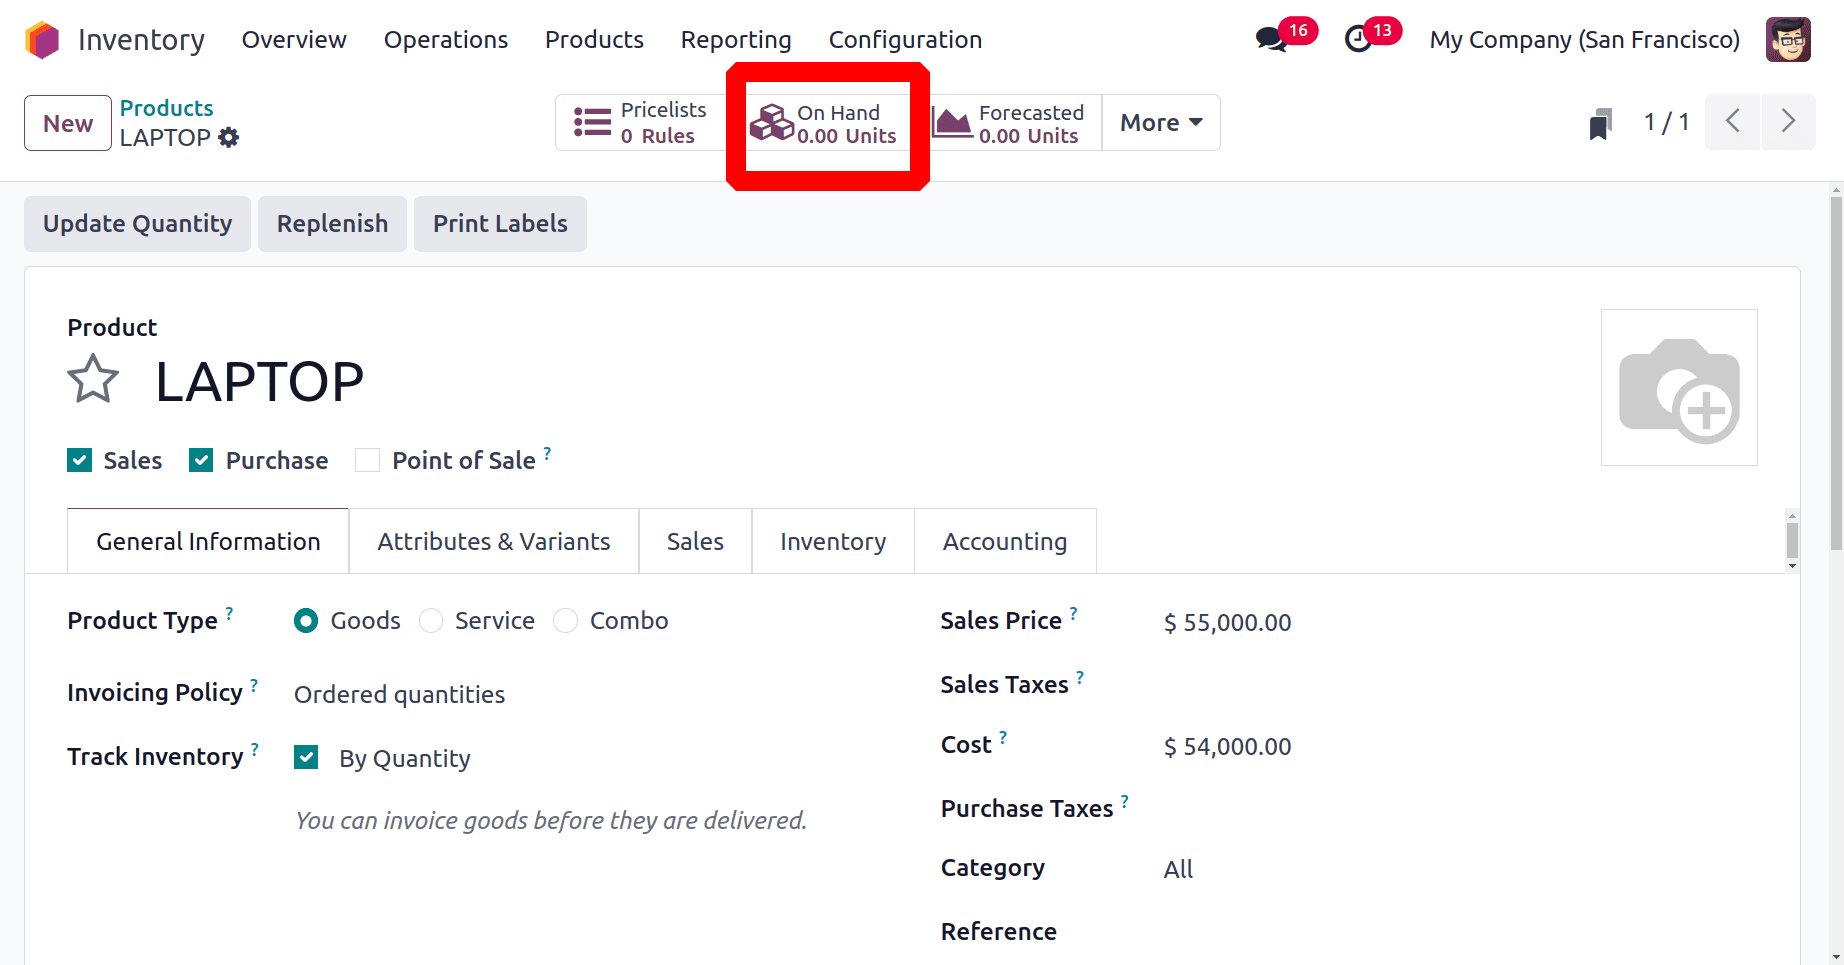
Now let's examine how the Reception Report works. To create a new product, let's go to the products section and click the New button. The product name is LAPTOP, a storable product. Currently the Onhand quantity is zero, which means the product is outstock.
There is currently no stock since the product is not yet available. Take into consideration that there have been some enquiries about this product. Placing orders for this item's sale. To do this, navigate to the Inventory module again and generate a new Delivery transfer. Just click on the Transfers menu, and choose Delivery. Click on the New button to add a new one.
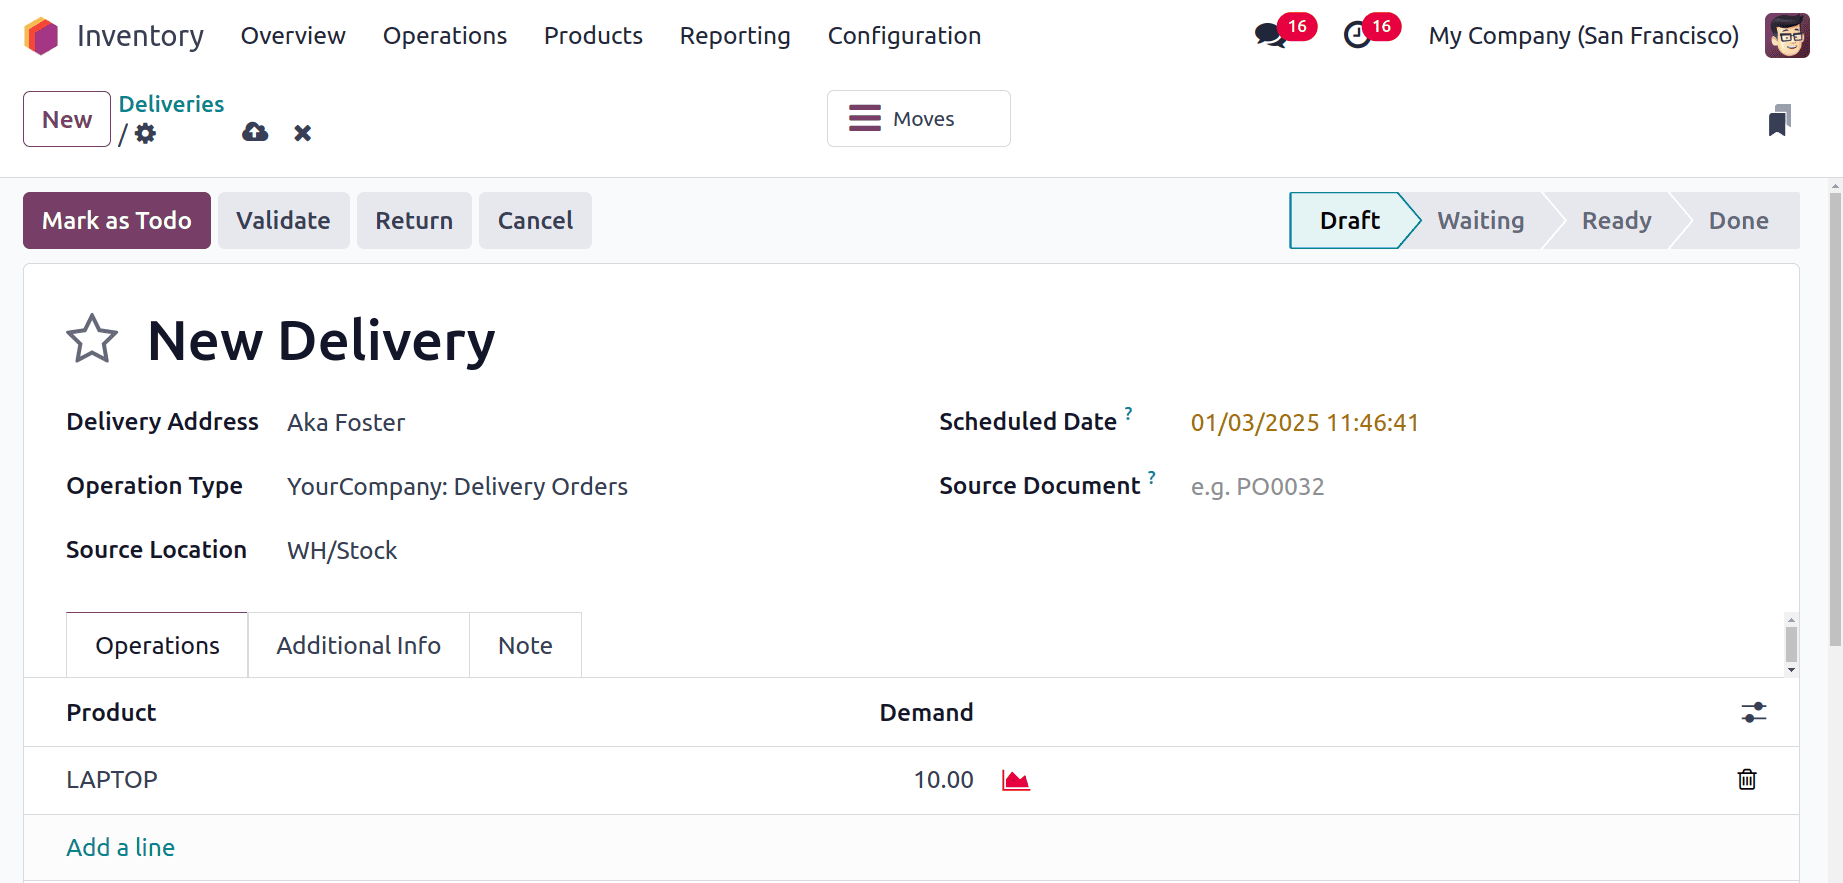
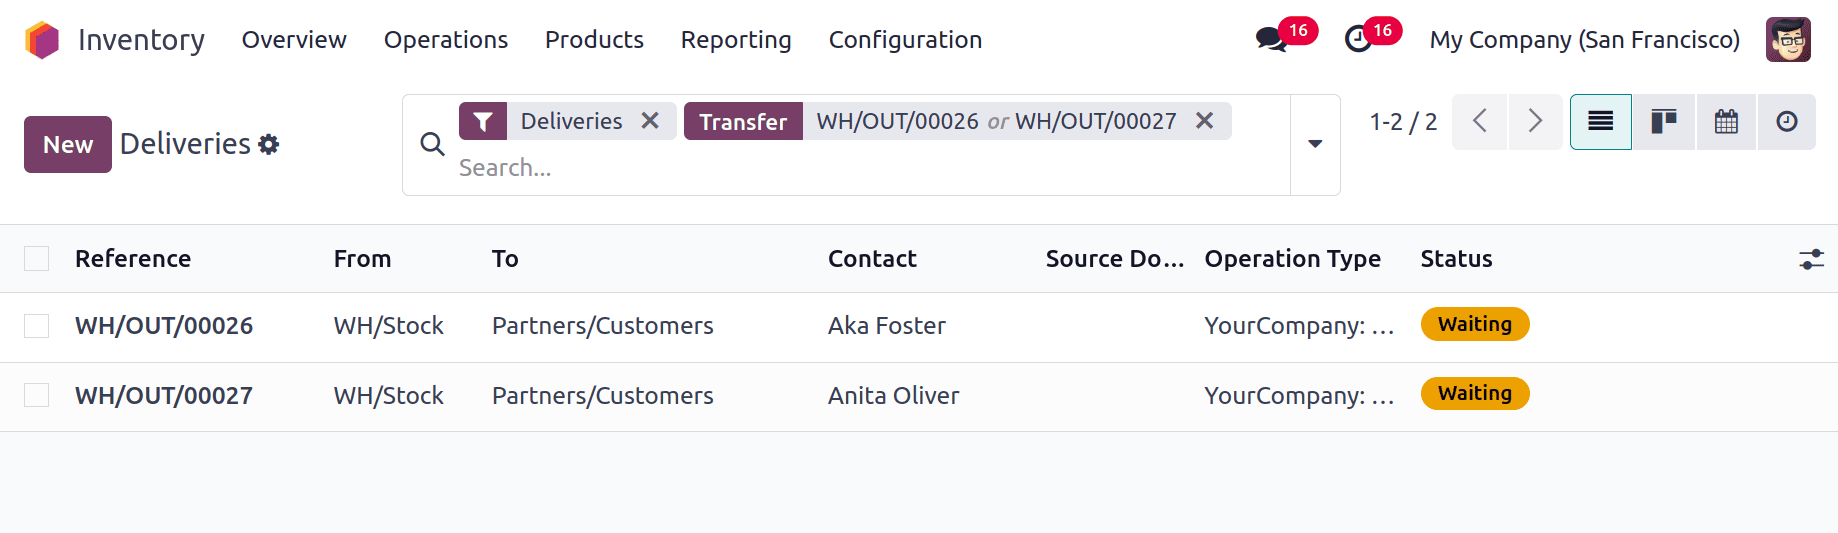
The first delivery transfer was created for a customer named Aka Foster. The customer required 10 quantities of LAPTOP. Click on the Mark as Todo button.
Another customer named Anita Oliver requested 15 quantities of the same product. Click on the Mark as Todo button. Then from the delivery users can view that the product is not available inside the stock.
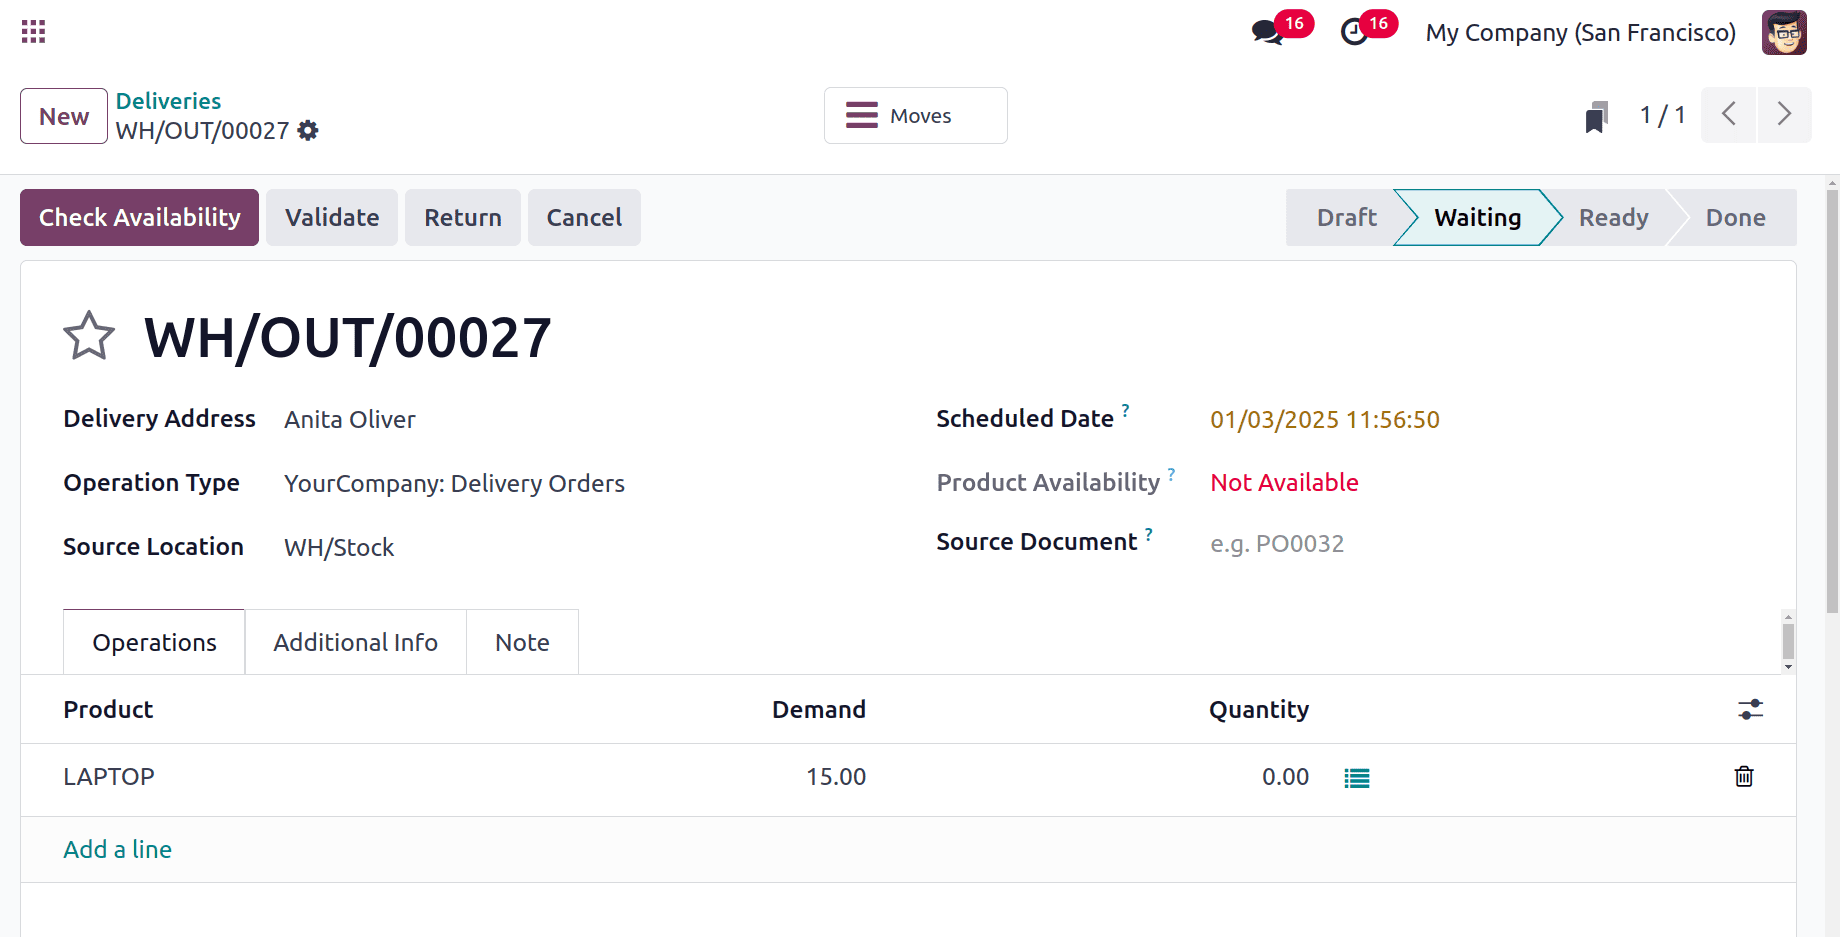
Two delivery orders are created for different customers. Both of them are requested for the same product. But the product is not available in the company stock. So the delivery transfers are in the Waiting stage.
Lets create a new receipt for the product. from the transfers itself the users can create new receipts. Click on the New button to add a new receipt. Here the product is received from the vendor Azure Interior. Inside the Operations line user can add the product with quantity.
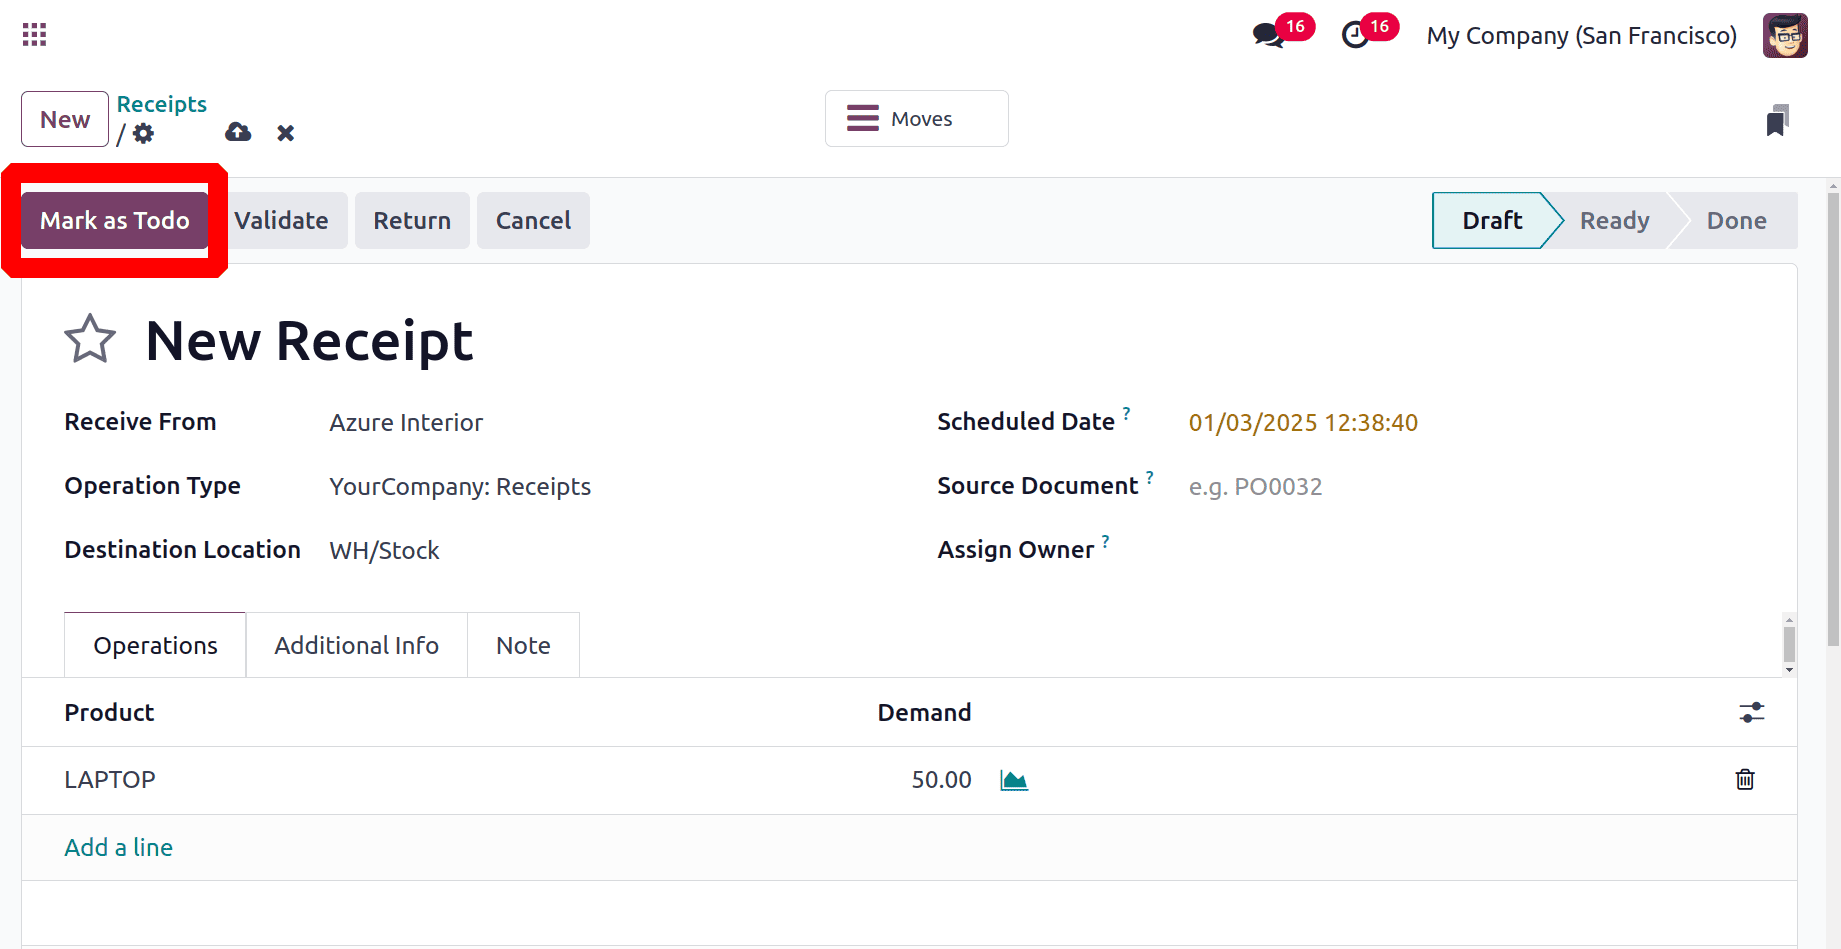
The user added the product LAPTOP and demanded 50 quantities. The receipt shows the destination location as WH/Stock, which is company stock. Click on the Mark as Todo button. Then the receipt changed to Ready stage, click on the Validate button to complete the transfer.
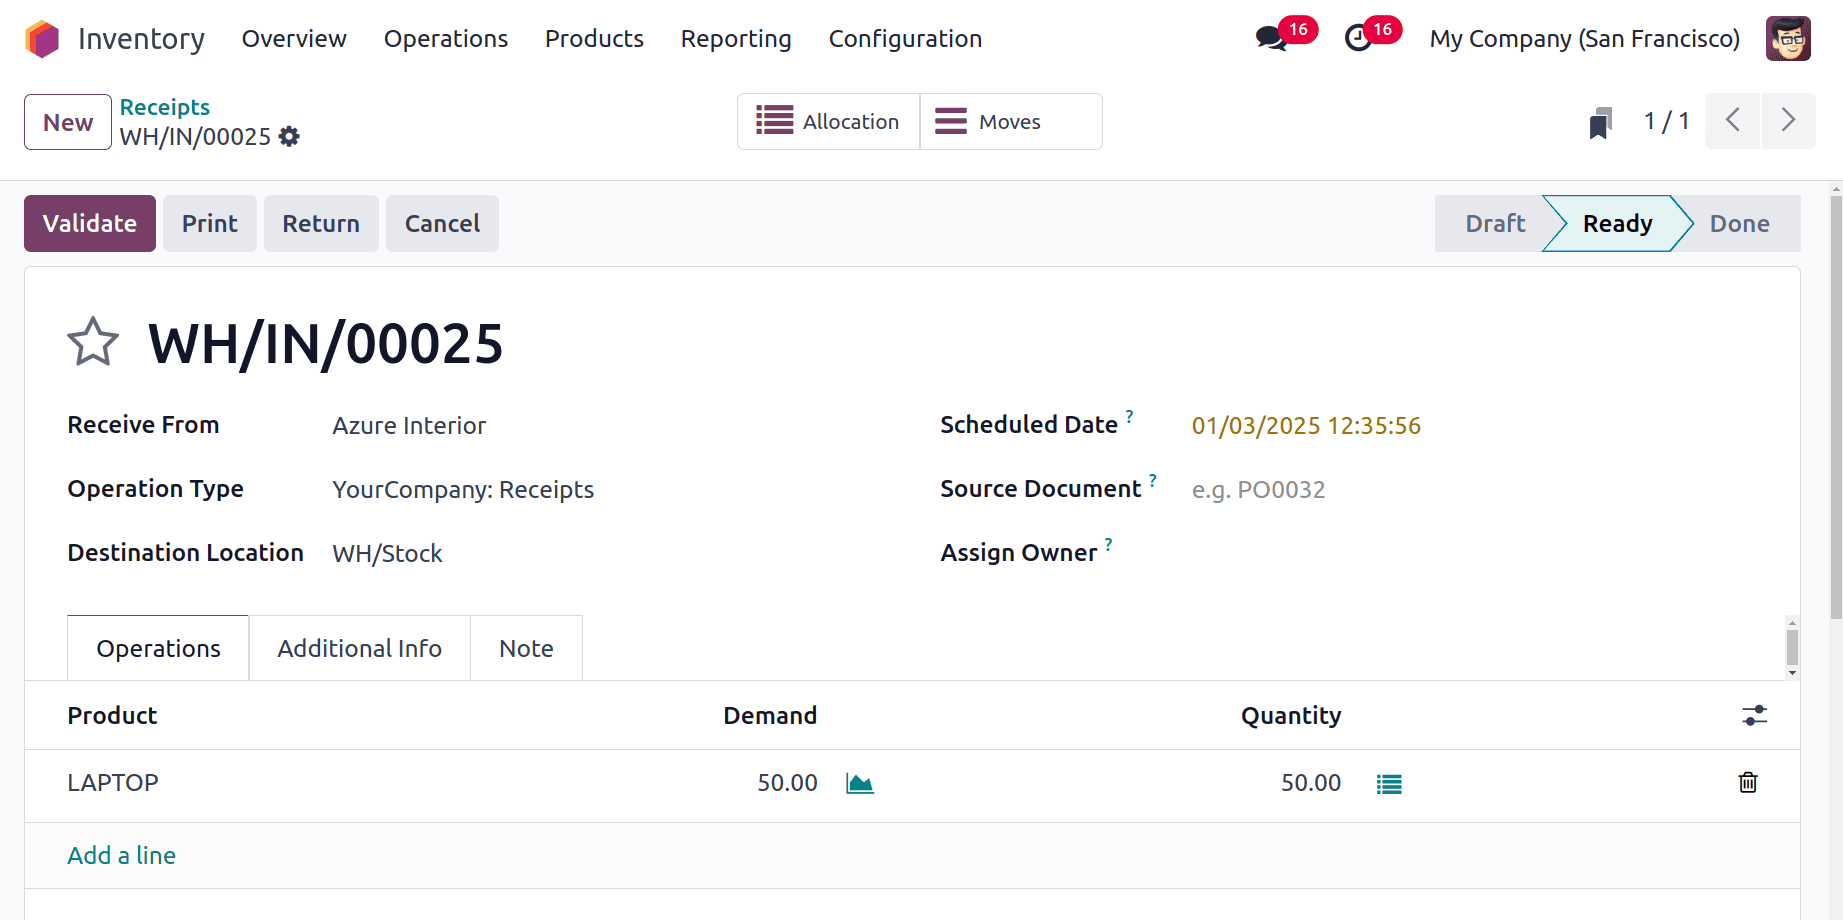
The receipt stage will change to Done. Then the transfer is completed and the product reaches the stock location. As shown in the below screenshot, a smart tab named Allocation will appear there.
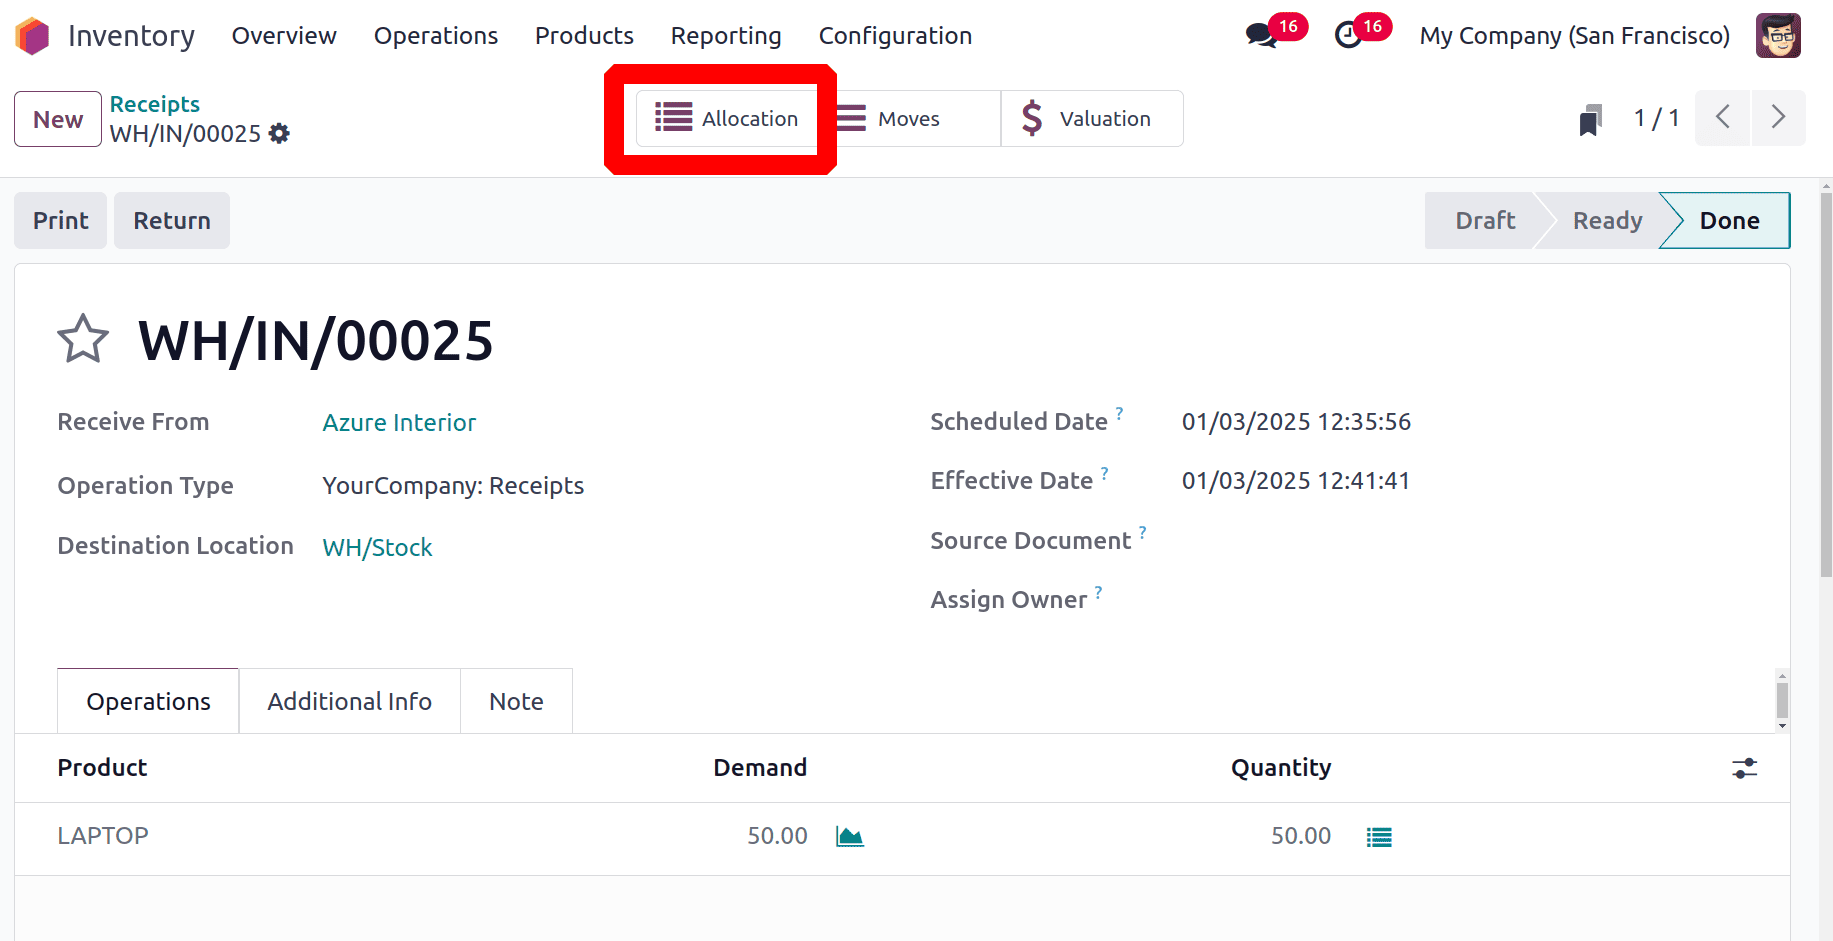
While opening the smart tab Allocation the users can view the reception report. This Reception Report shows a list of deliveries created for the received products. The reception report shows the details like customer name, sequence number of the delivery, Expected delivery date, number of quantities needed.
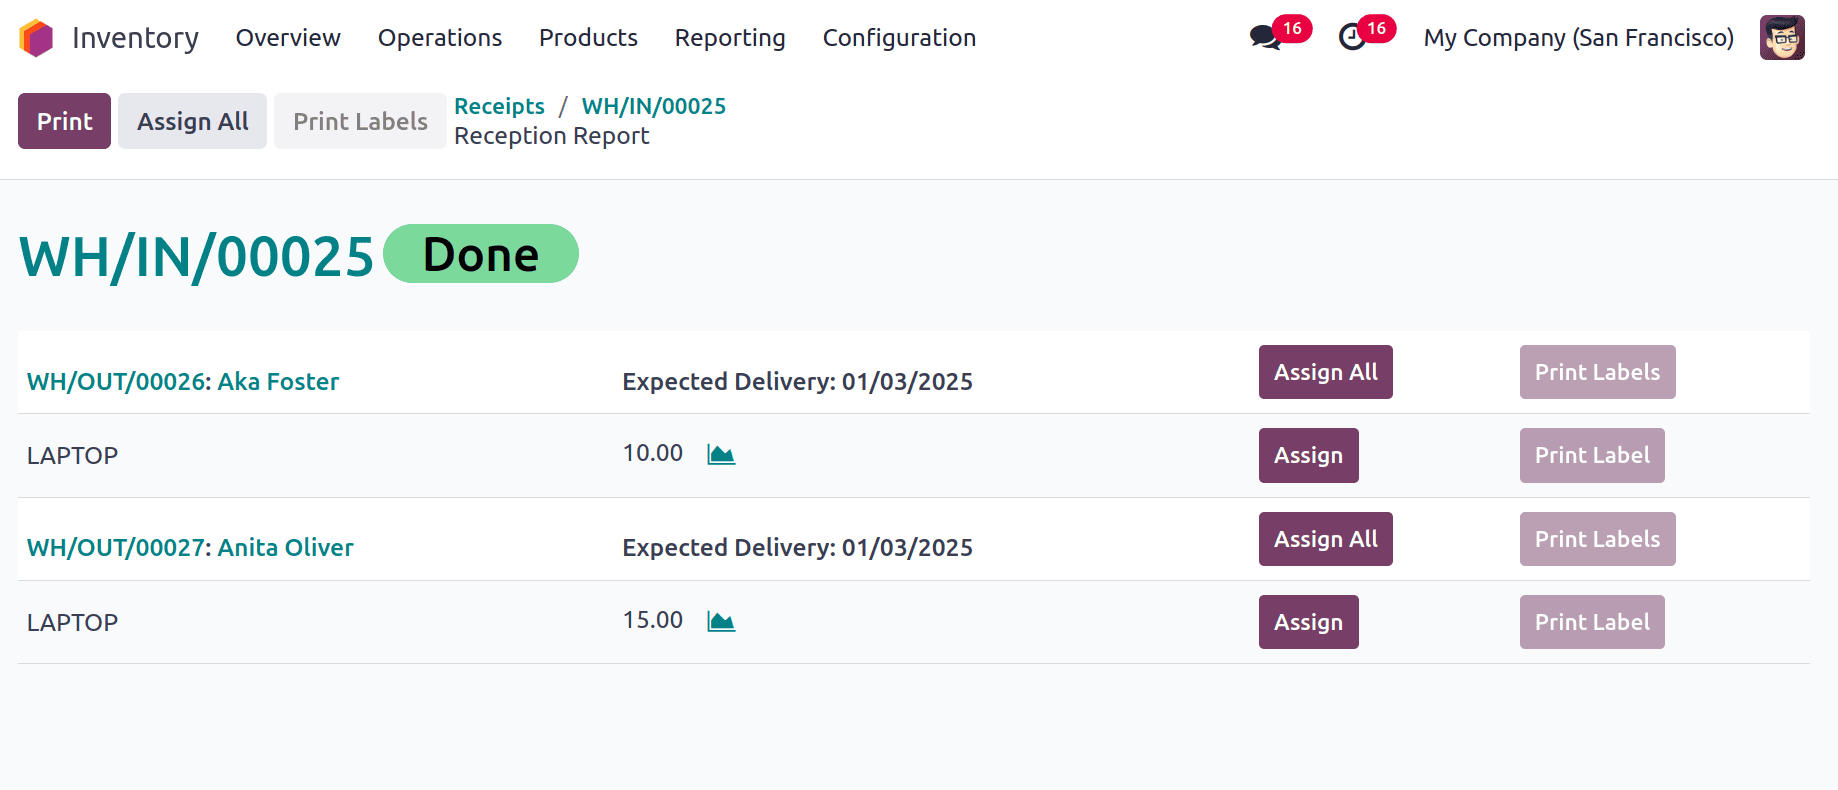
So the above screenshot shows the two delivery orders, one is for the customer Aka Foster and the other one is for Anita Oliver. The right side shows a button named Assign and Assign All. using those buttons users can easily assign the received products to the delivery orders.
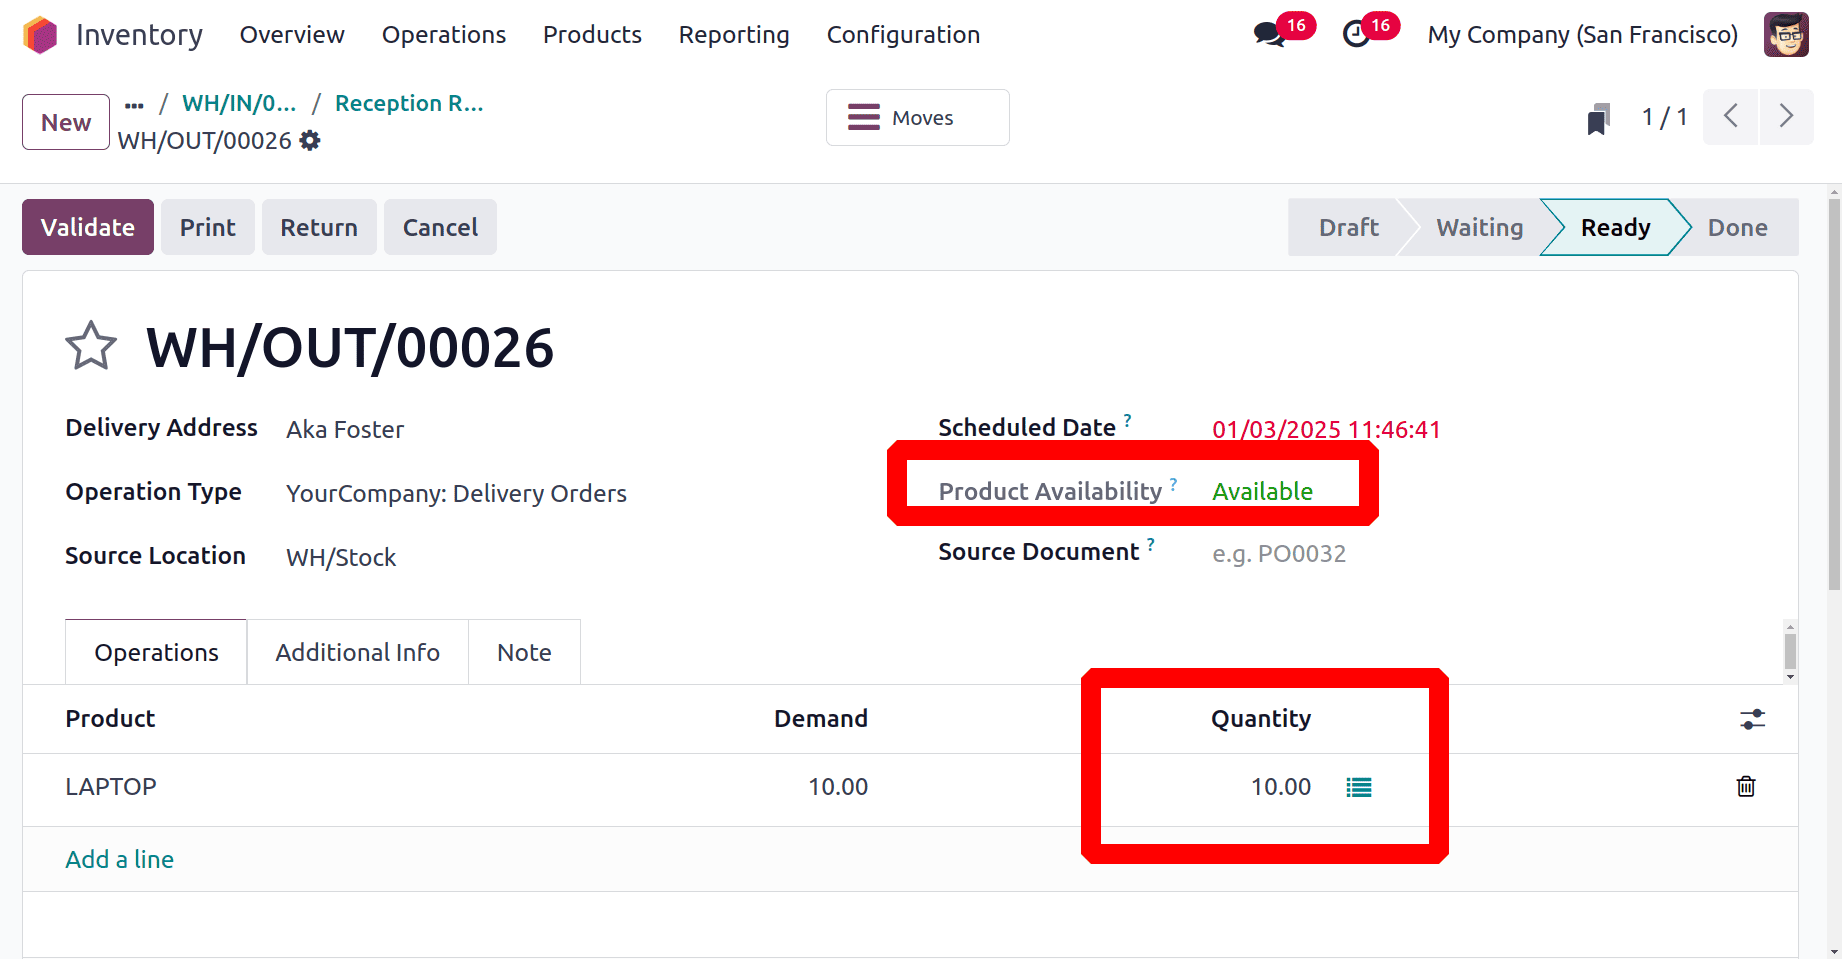
After assigning the product, check the delivery. Then the Product Availability shows as Available. Users can Validate the order.
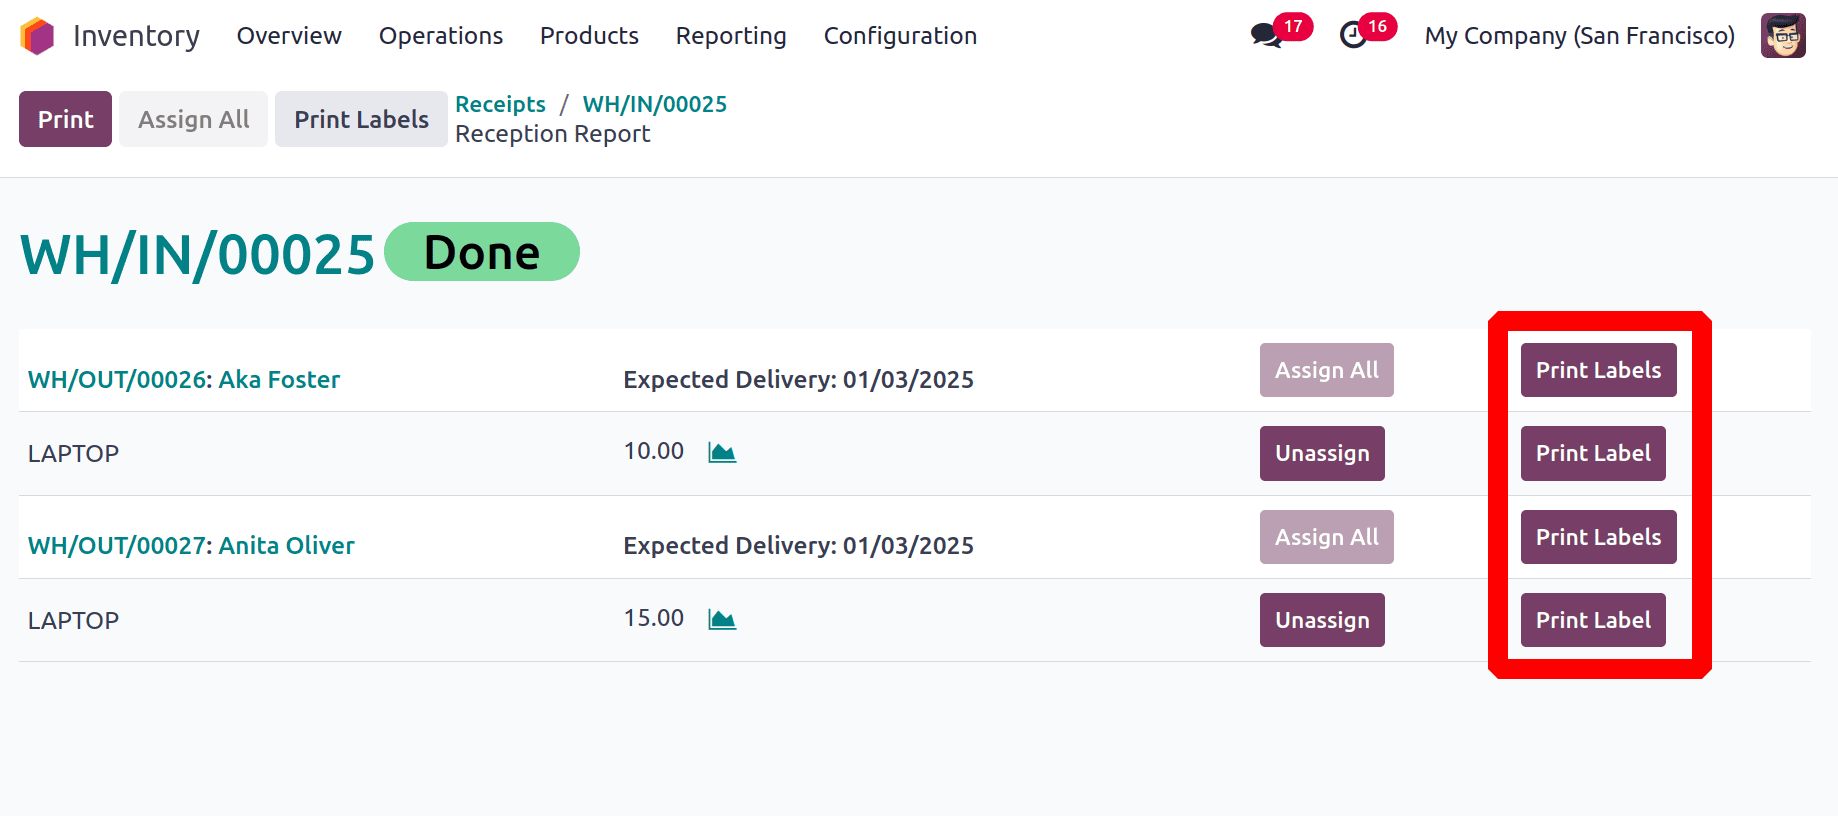
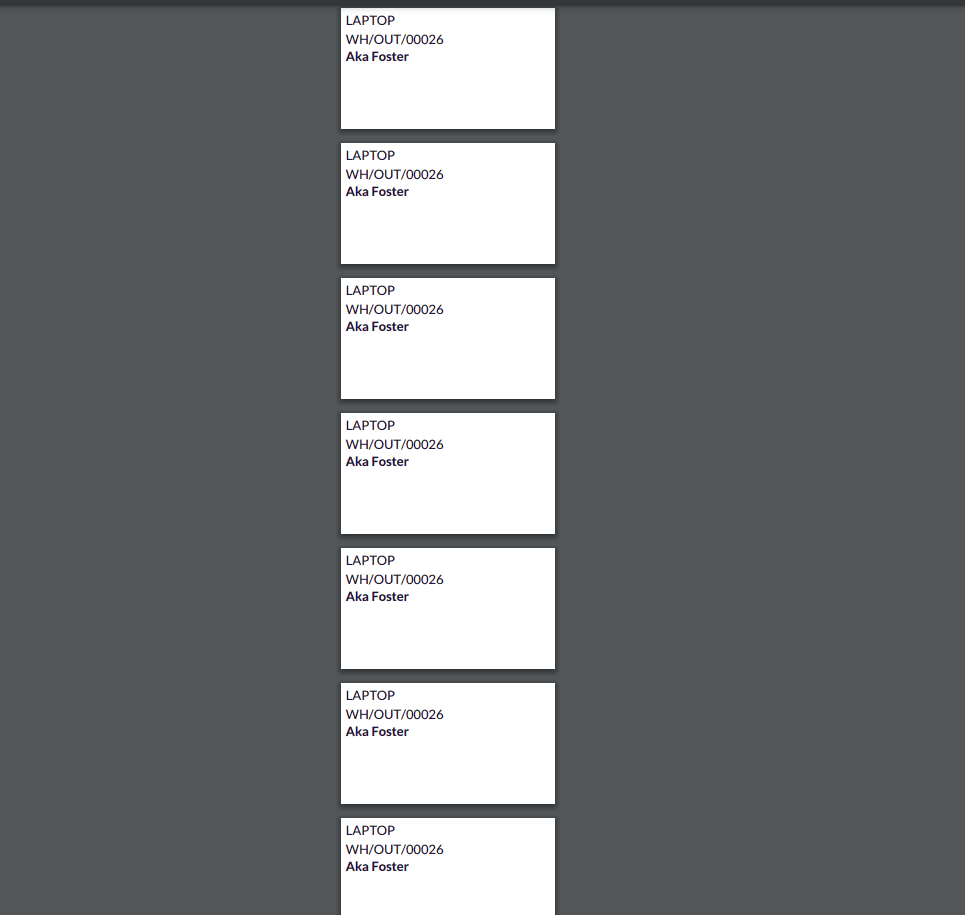
Then another button named Print Label will appear on the reception report. The labels of for the order can easel print from there, and the labels are same as shown below.
Using MTO
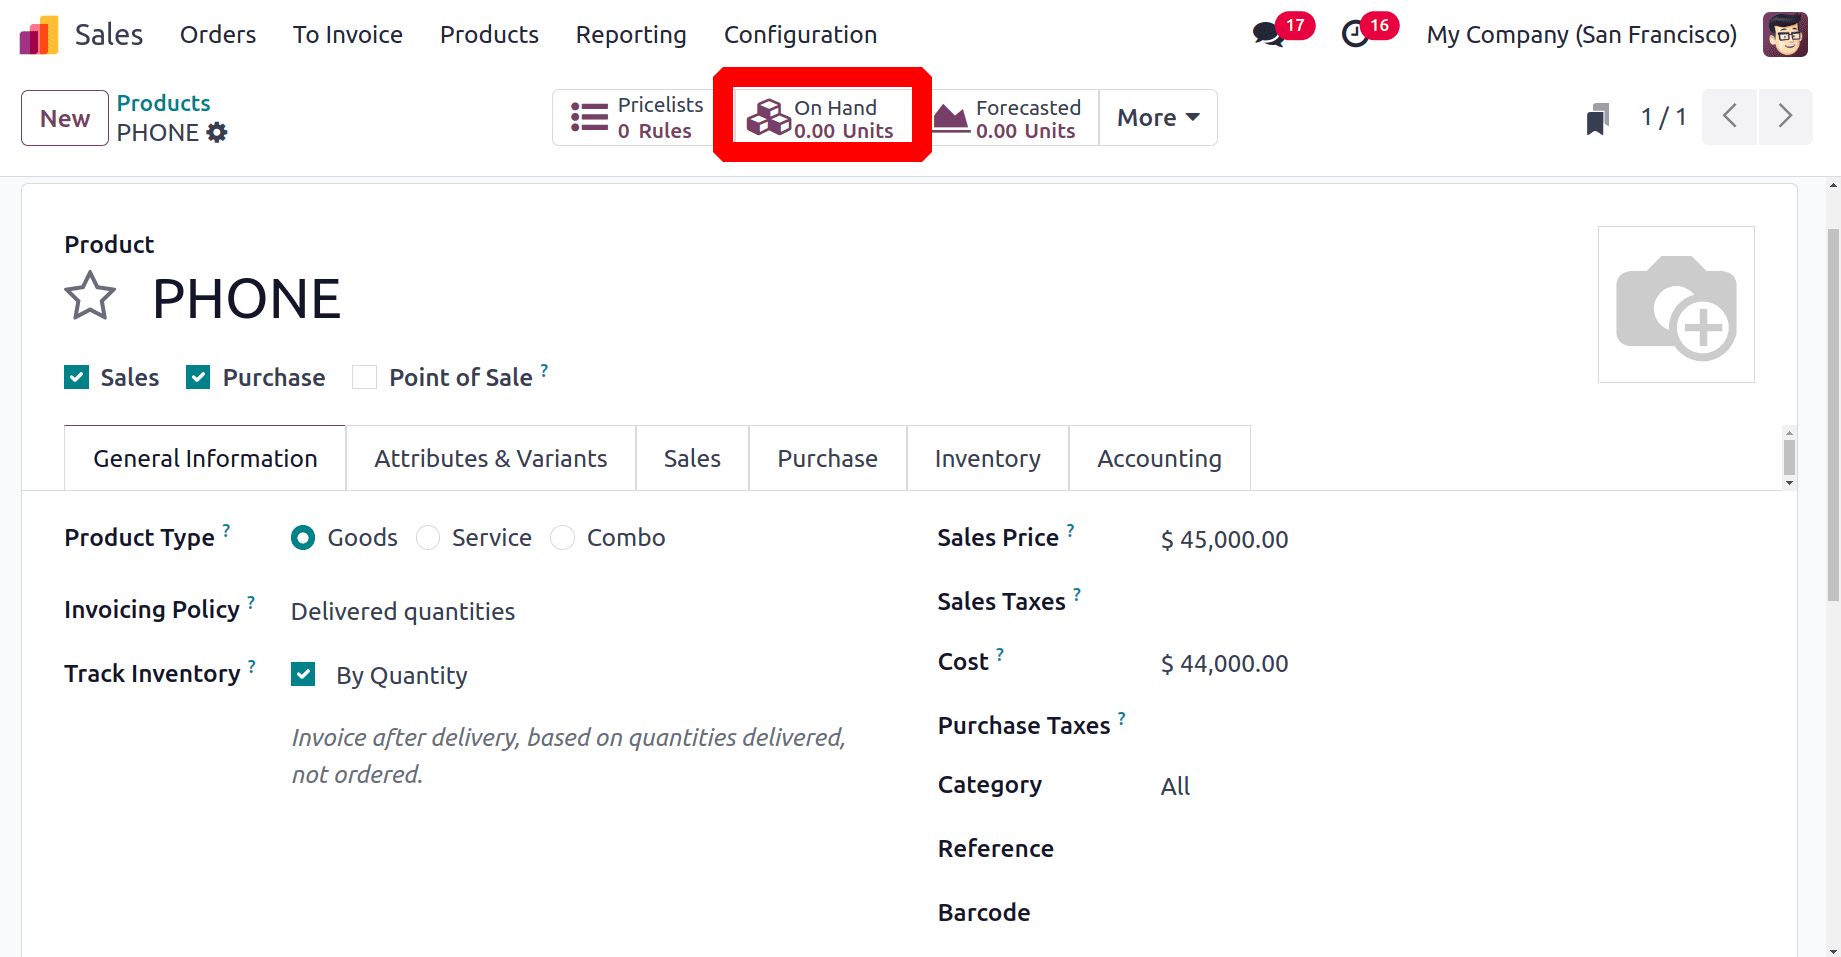
So lets configure a new product, here the product named as PHONE. All the details like cost, sales price, taxes are added. Then while checking the Onhand quantity of product, it's zero. Which means the product is not available in the stock.
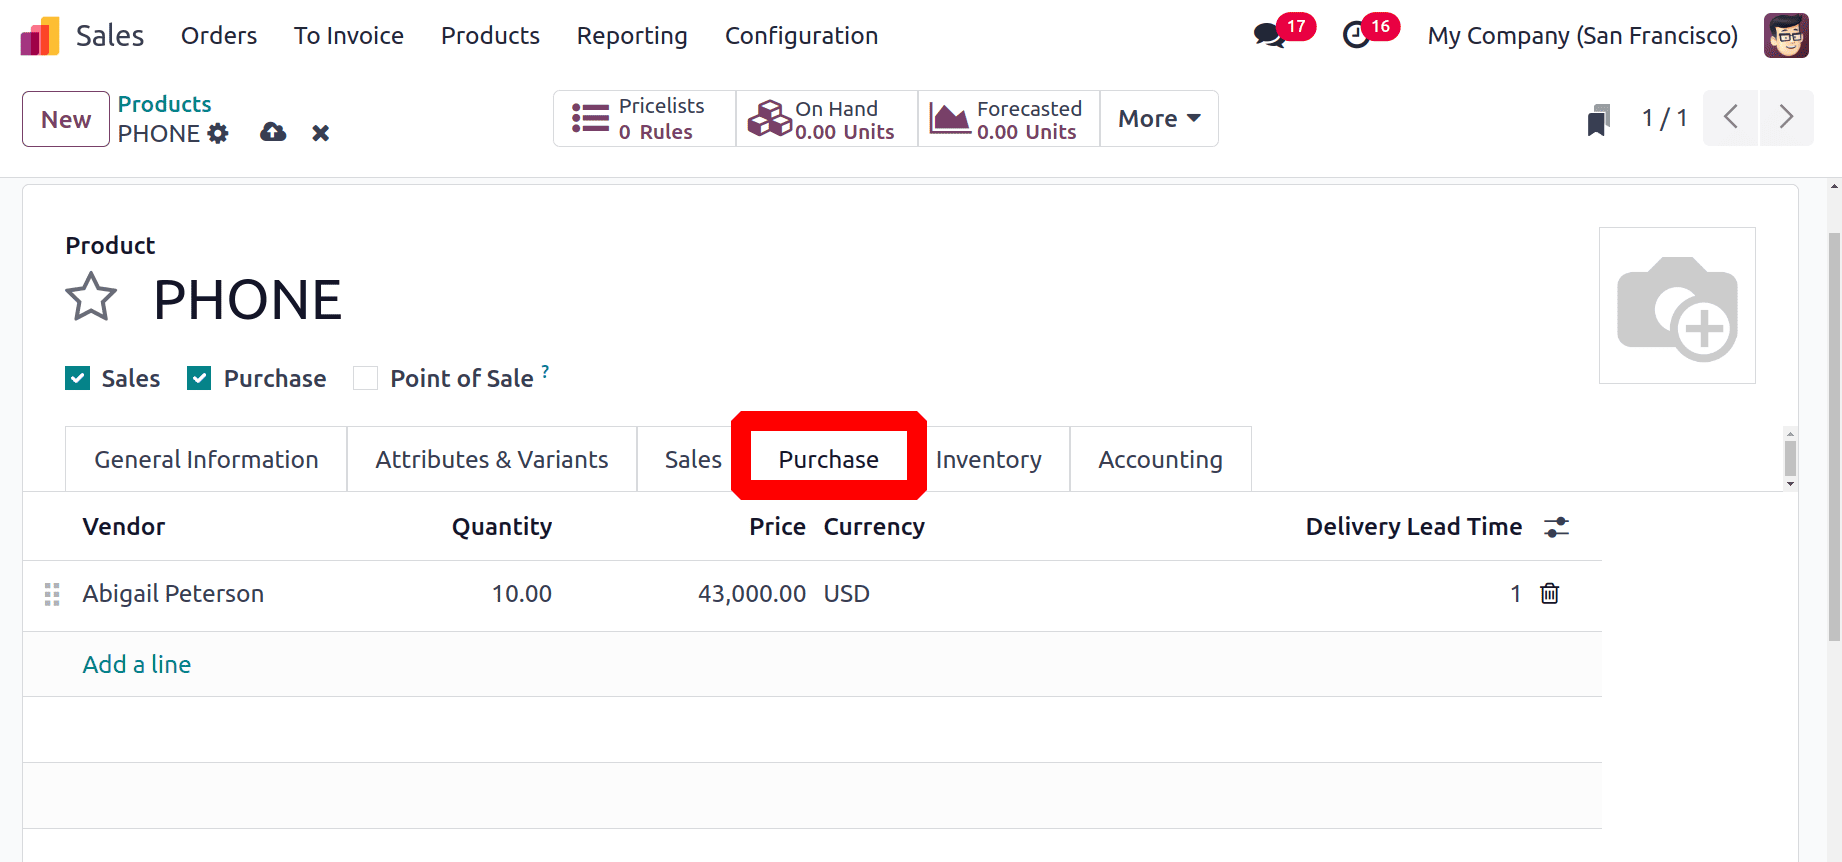
Under the purchase tab user can specify the vendor name, from whom the product is going to purchase. Here the mentioned vendor is Abhigail Peterson. Vendor price, and Delivery lead time are also visible there.
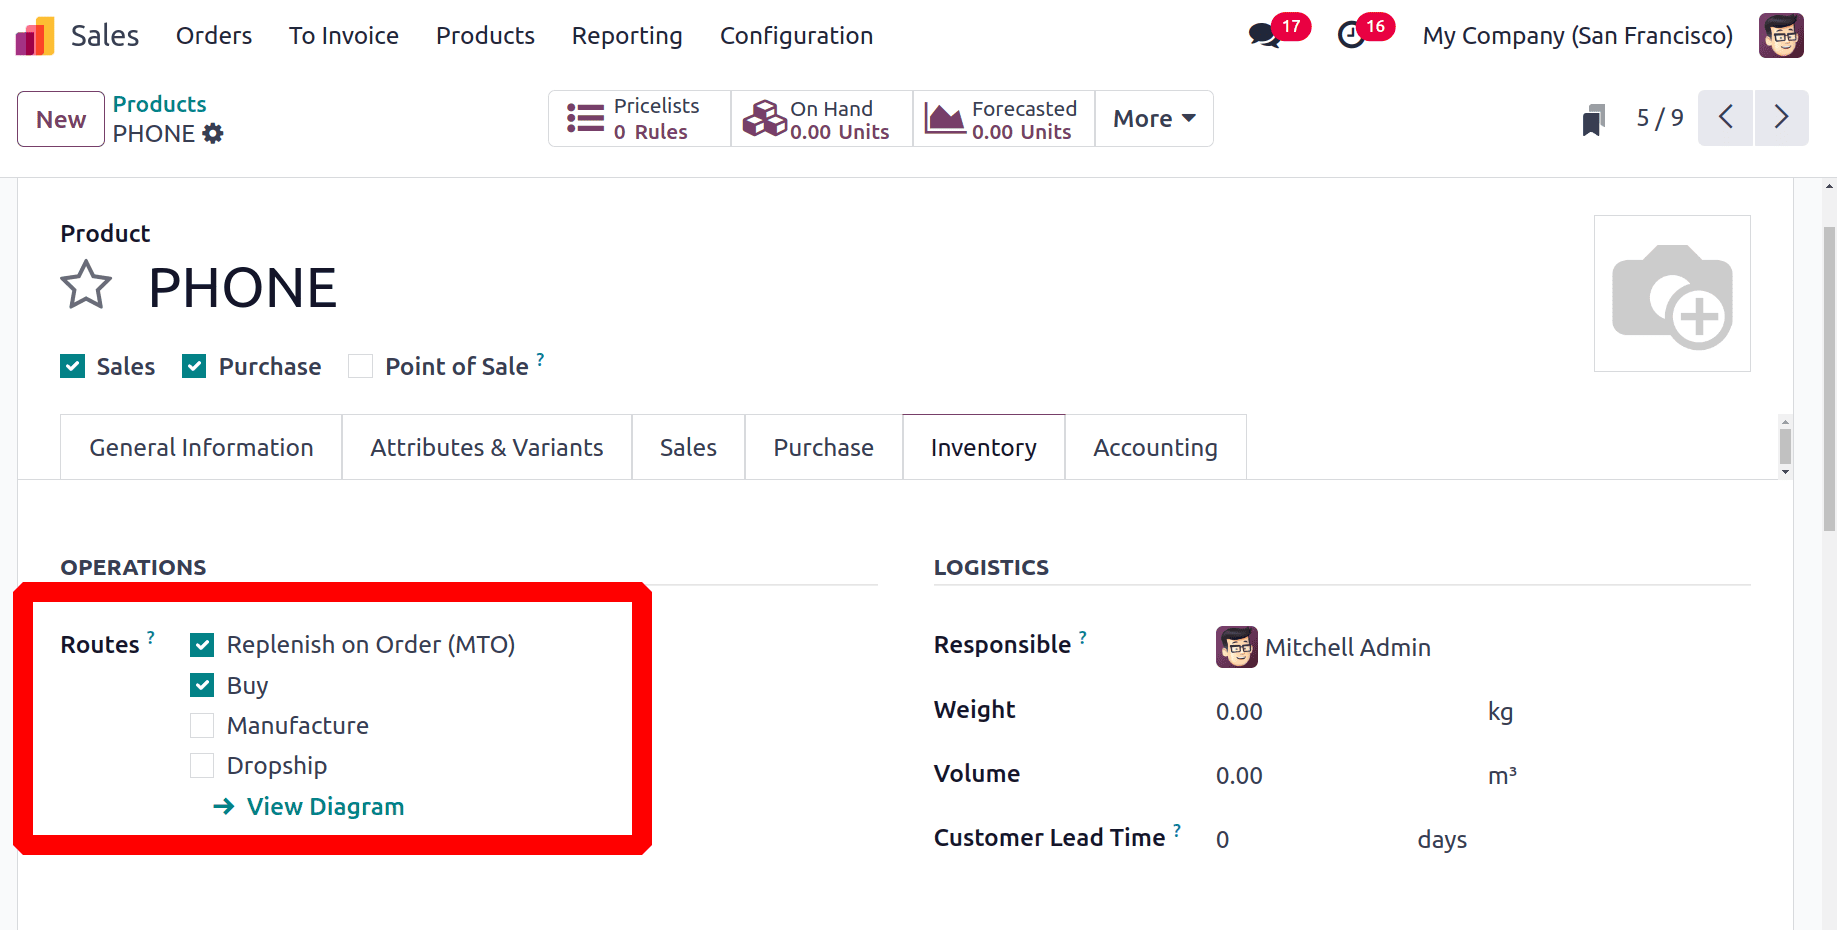
From the Inventory tab users can add the routes for the product . Here the preferred routes are Replenish on Order (MTO) and Buy.
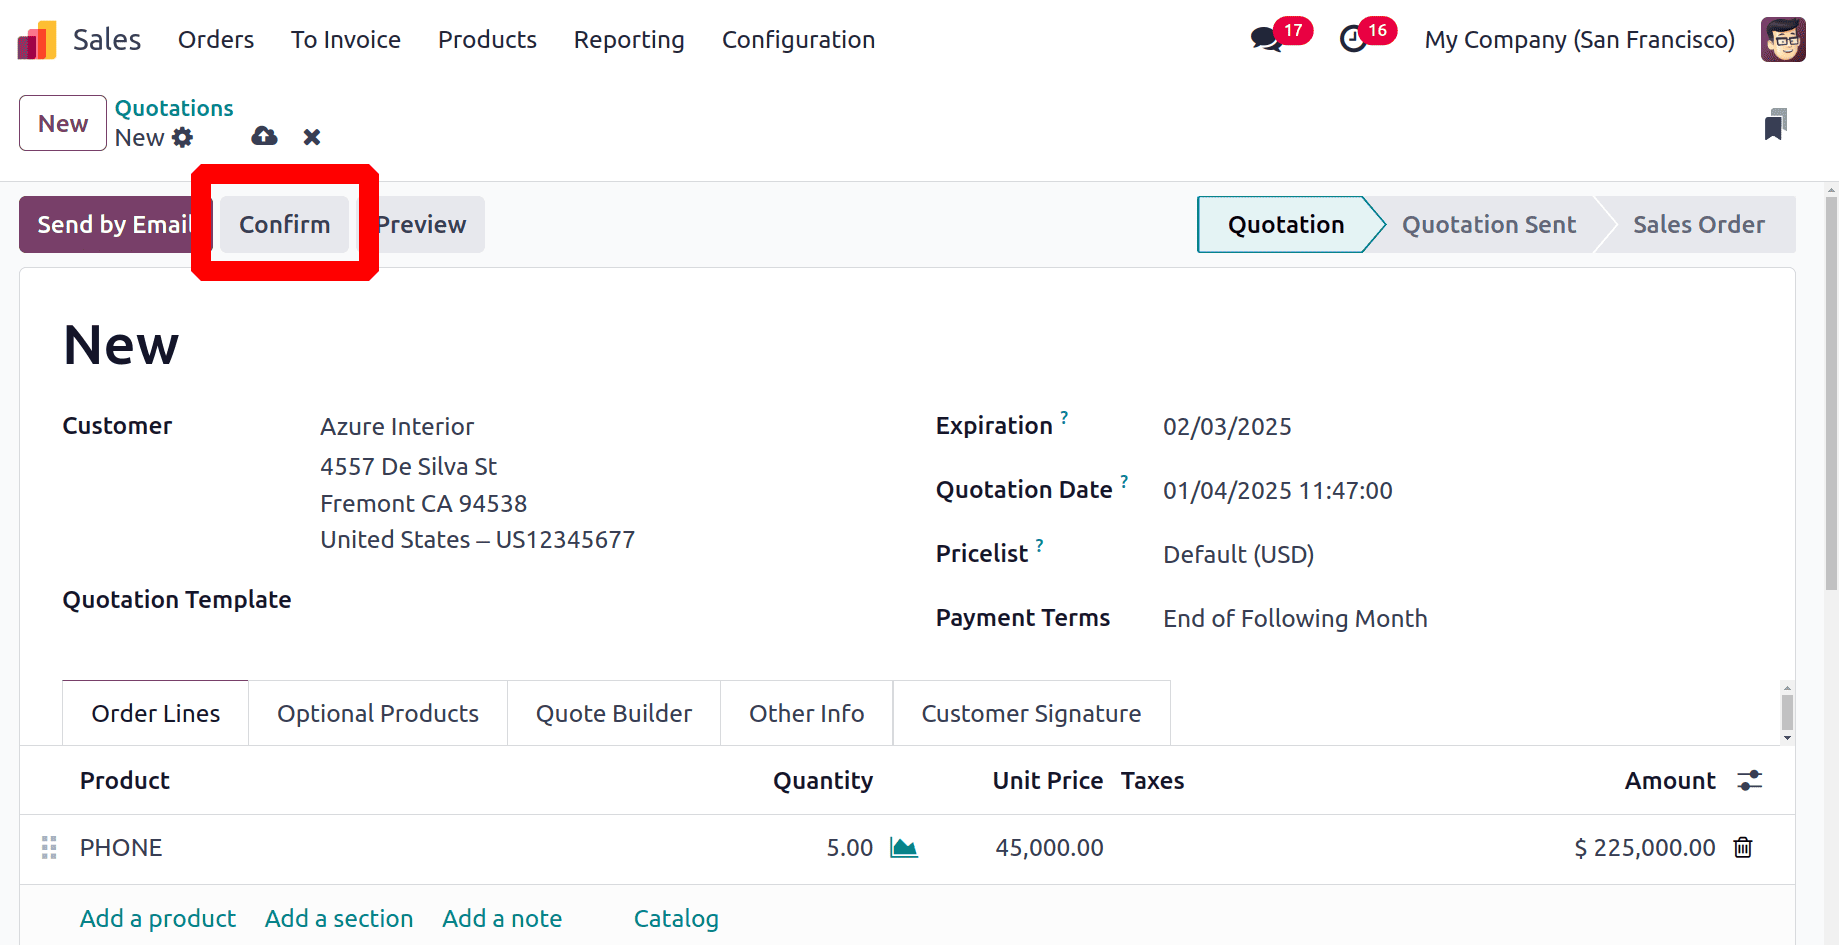
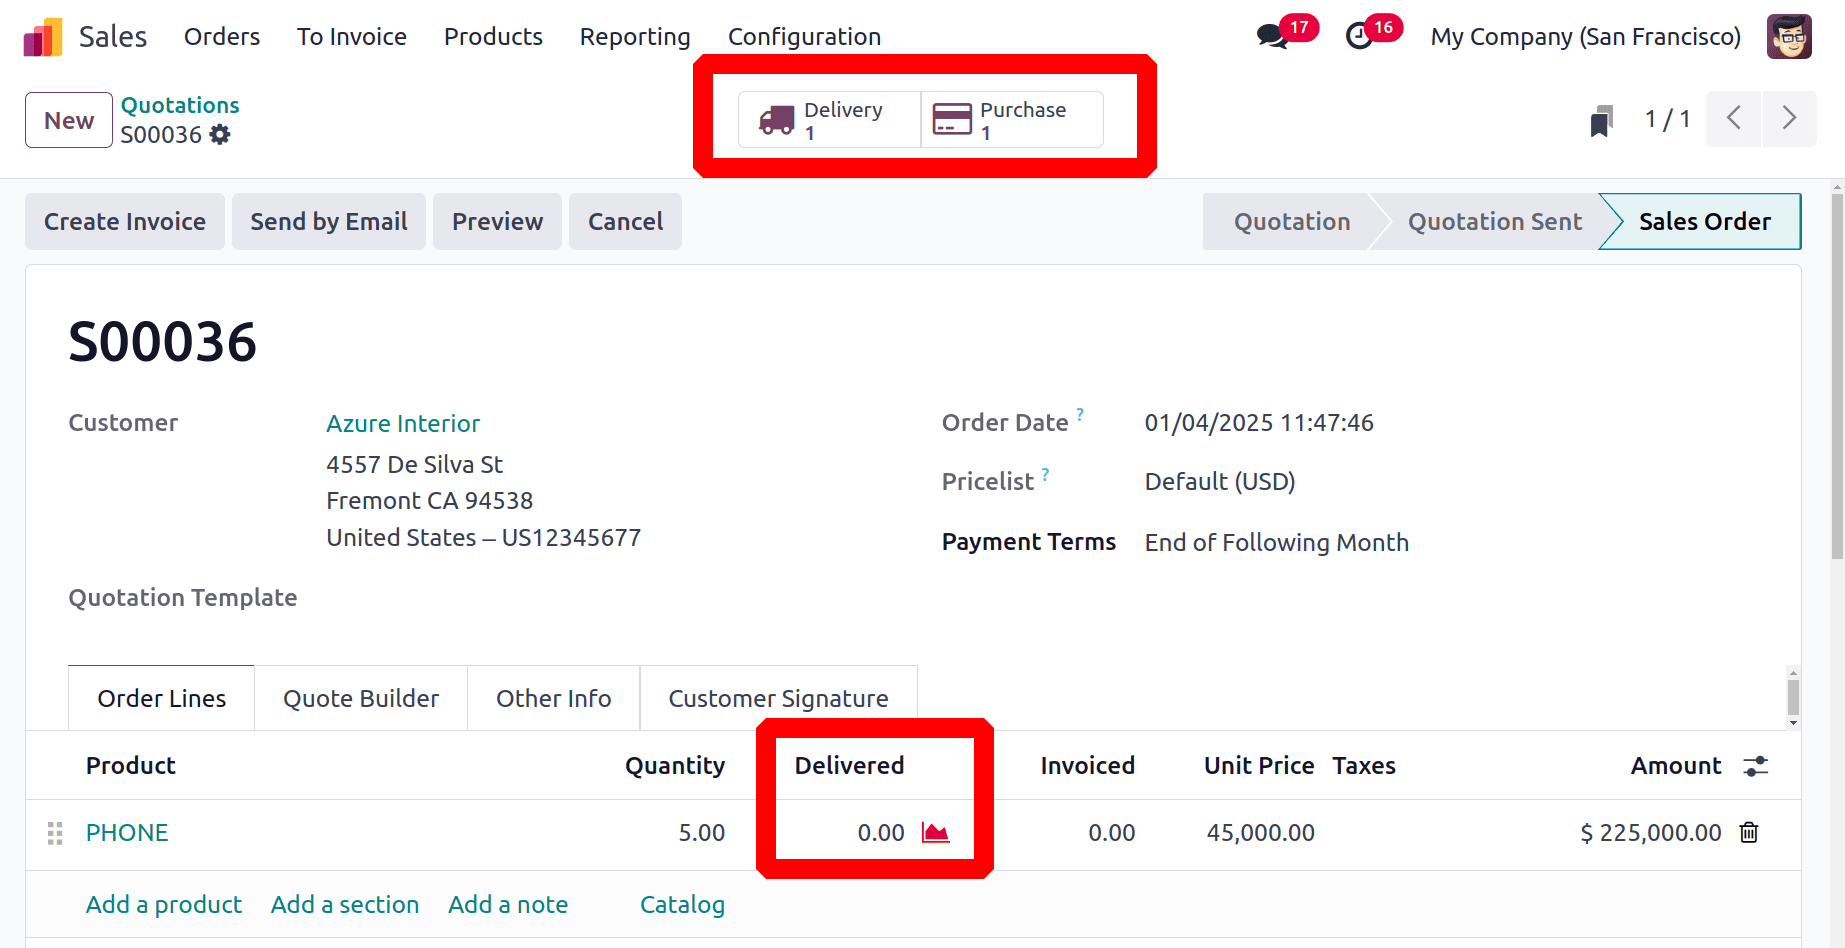
So the product configuration is completed. So let's move to add a new sale order. Here the chosen customer is Azure Interior, and the customer placed an order for 5 quantities. Confirm the quotation.
After confirming the quotation one Delivery and one Purchase order are triggered there. While checking the delivery, it's clear that the product is not available in the stock.
Open the Purchase order to check. The vendor is Abigail Peterson, the same one which mentioned inside the product.

Before confirming the purchase, create another sale order for one another customer. This time the customer is Deco Addicts. Customers required the same product PHONE, and the requested quantities are 10. Confirm the order.
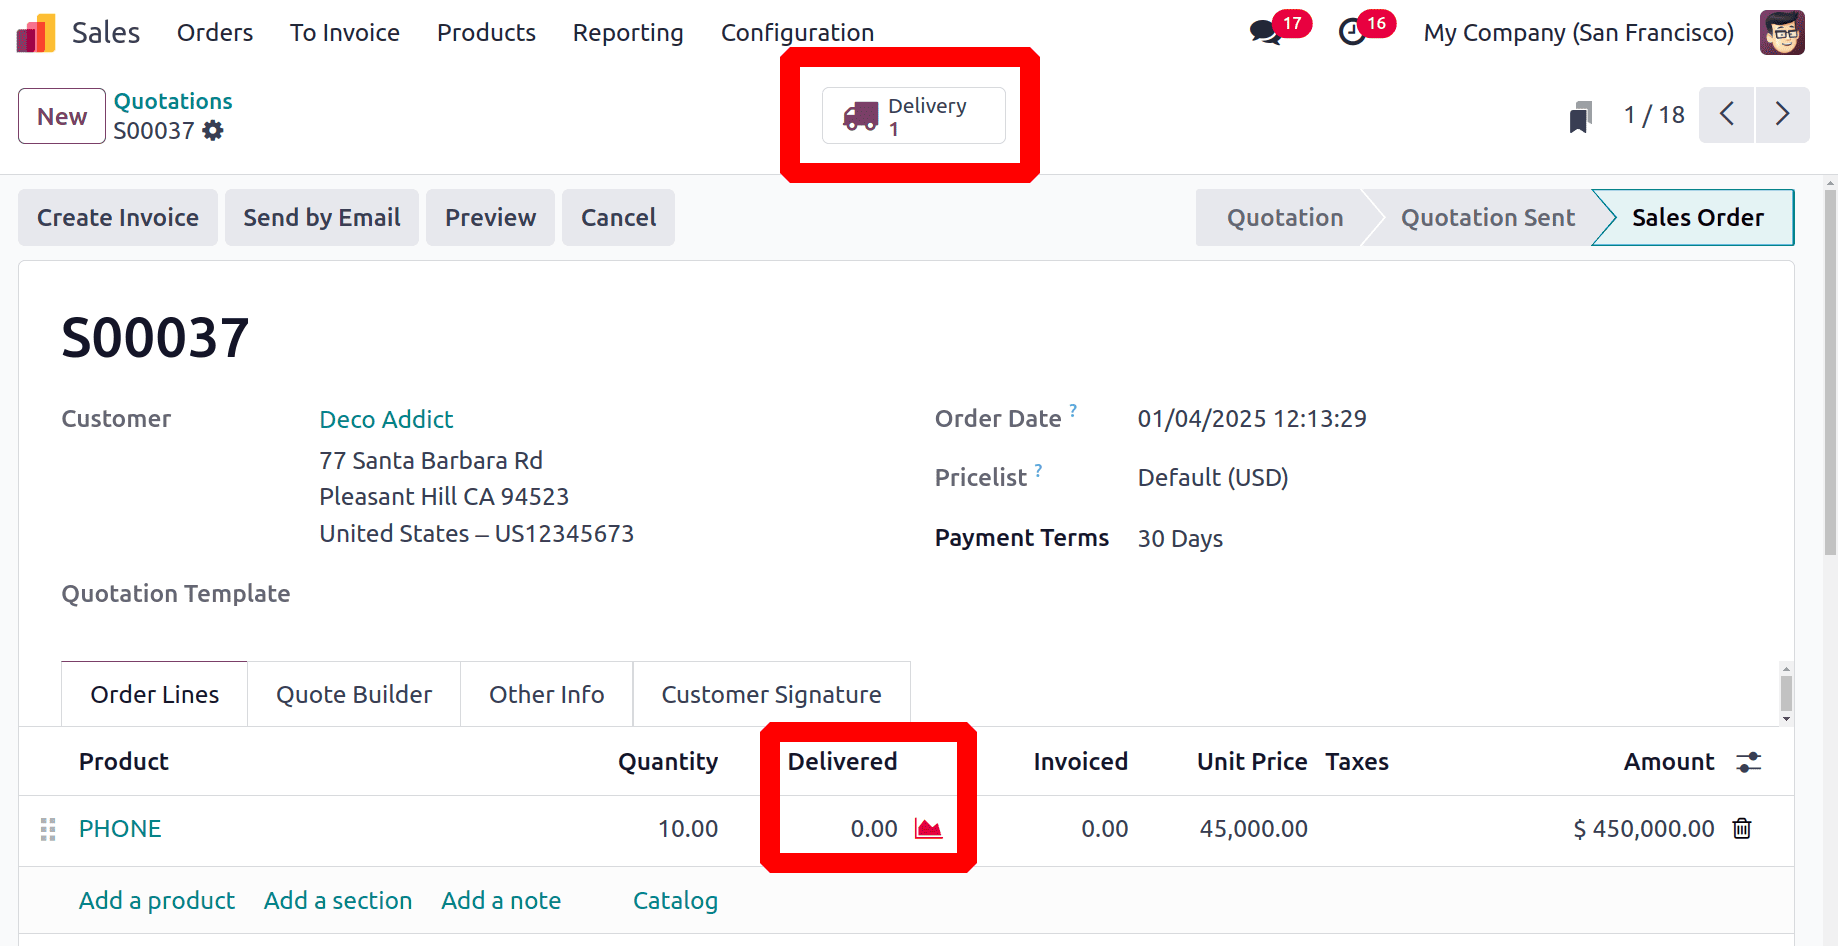
Instead of the previous case, this time only delivery is created. So let's check the previous Purchase order. Which can be either open from the previous sale order, or from the Odoo 18 Purchase module.
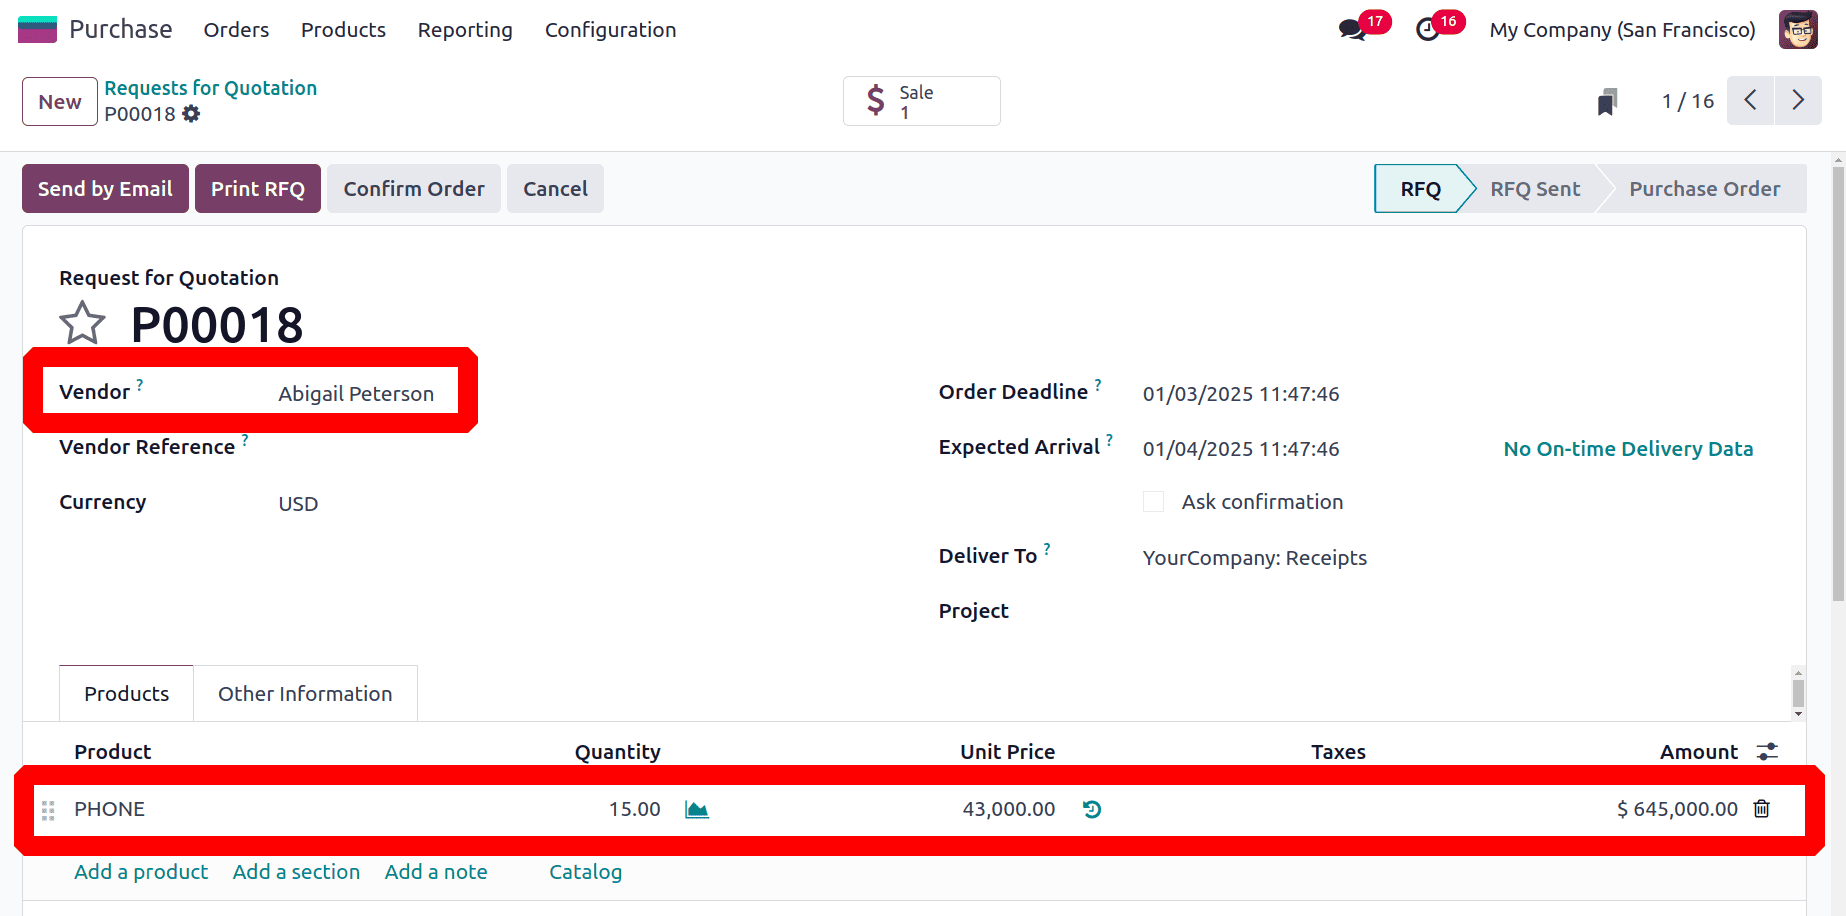
Here the ordering quantity inside the purchase order is 15. This means the first customer Azure Interior ordered 5 quantities and the second customer Deco Addicts ordered 10 quantities. In this case the second demand append to the first RFQ. This means if any open RFQ is there and if any RFQ is generated automatically for the same product and from the same vendor, it will append to the open RFQ. Confirm the purchase order. Then Receive the products. Click on the Validate button in the Receipt.
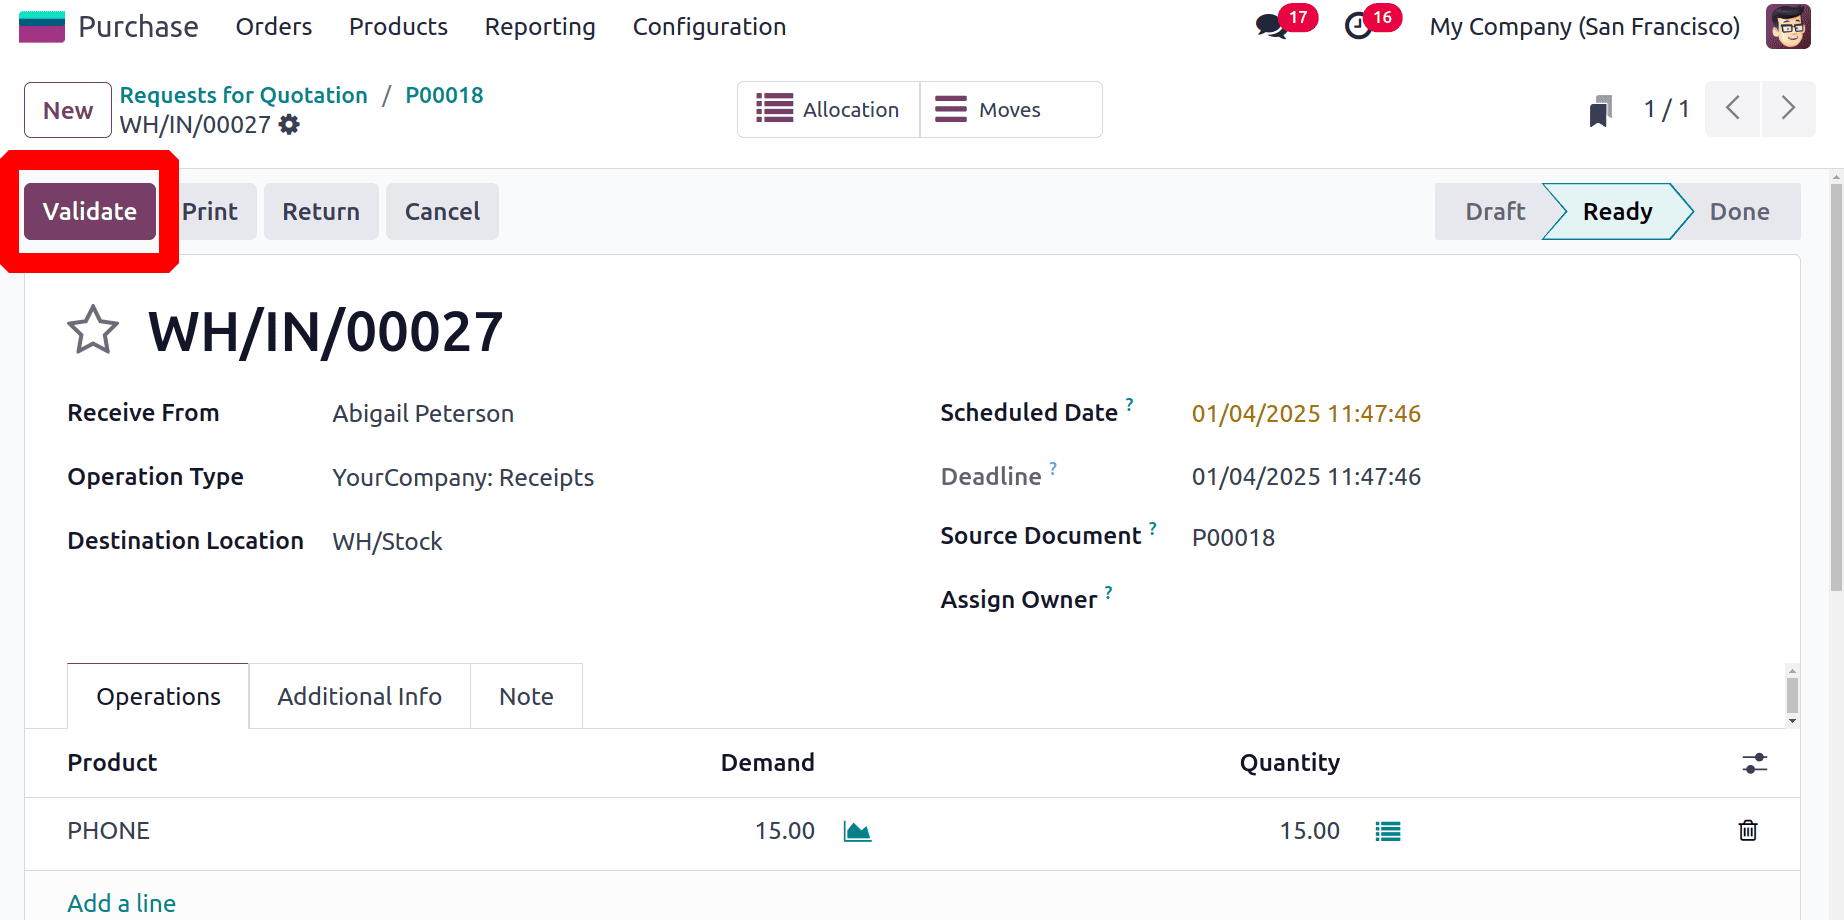
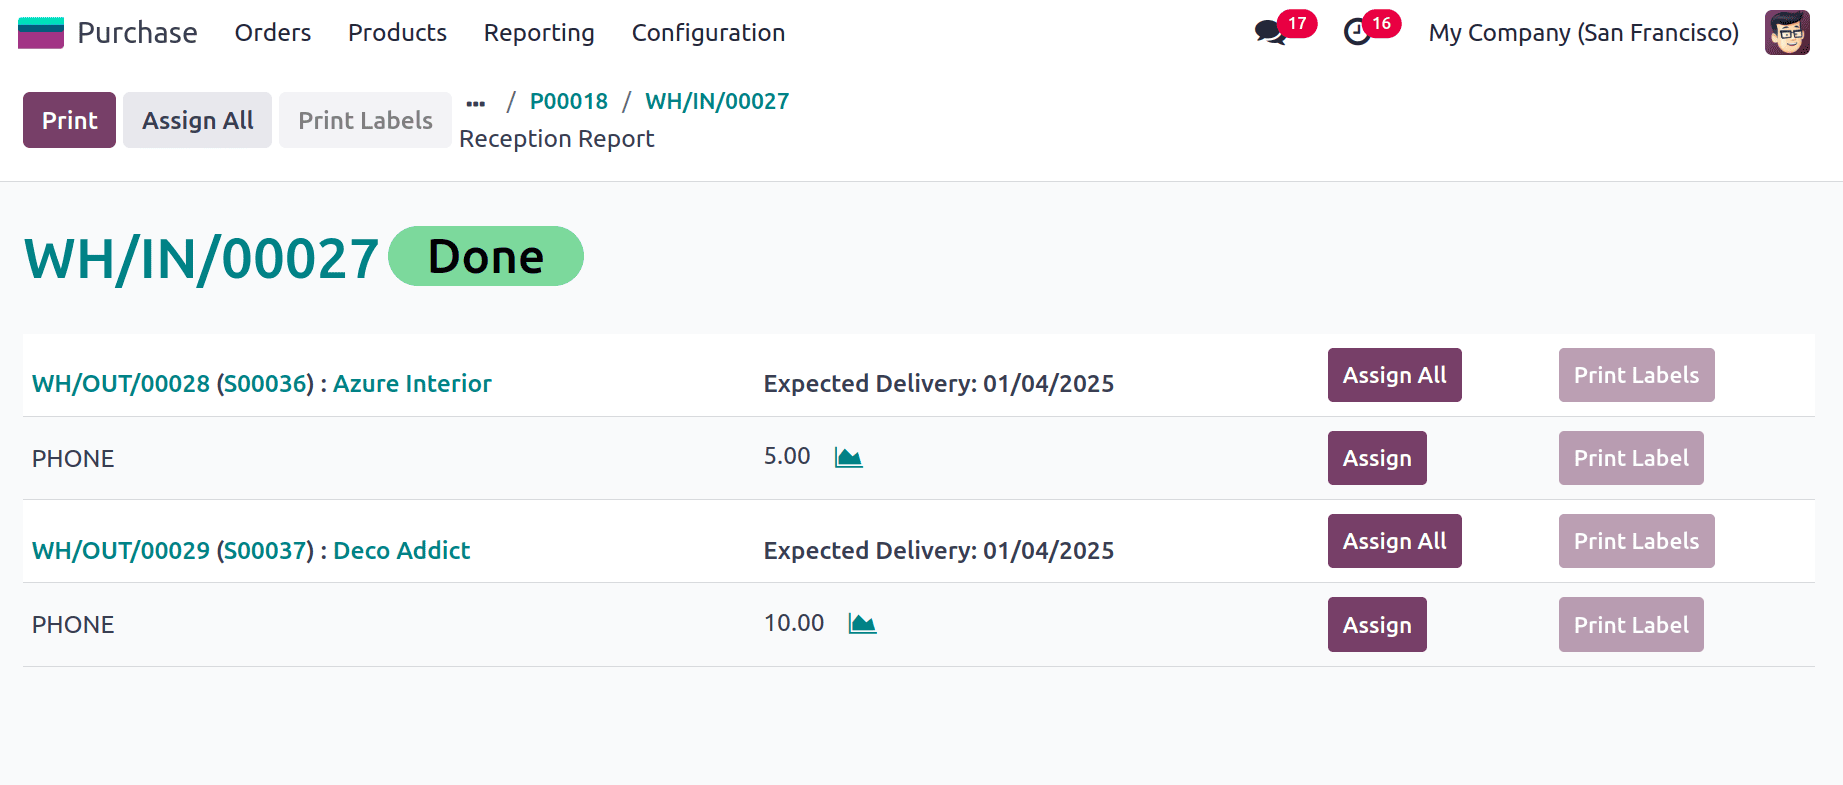
After validation as mentioned before, the Allocation is shown. Click on it to view the Reception Report. Users can simply allocate the received product to each delivery orders from the Allocation report itself.
To sum up, managing Reception Reports in Odoo 18 simplifies the purchasing process by offering a simple and effective means of comparing received items to purchase orders. This functionality reduces inconsistencies, improves supplier communication, and guarantees correct inventory updates. Businesses may increase operational efficiency, streamline their procurement process, and keep accurate records by utilizing Odoo 18's features.
To read more about How the Reception Report Works in Odoo 17 Inventory App, refer to our blog How the Reception Report Works in Odoo 17 Inventory App.