The Odoo platform helps to restrict the creation of sales documents for customers, and the system is also efficient in prompting a warning message when invoicing to a specific customer. This warning feature in the Odoo platform is also available in the 16 version. In the Odoo platform, one of the most highlighted features, ‘Warning,’ is available in different modules. We will get the product and customer warning features while setting sale or purchase orders. The Warning and the Alert are very useful for configuring alerts and warning messages on customers, sellers, or products.
In this blog, let us discuss how to get warnings when invoicing specific customers in Odoo 16.
Configuration Steps
The Odoo 16 Accounting module allows you to set warnings and block messages to specific customers while invoicing. So to initiate this feature on your database, you should activate the Warnings option in the Settings window of the Odoo 16 Accounting module. You will be met with the Warnings option when you scroll down the Settings window to the Customer Invoices section. To access this feature, you can take the route Accounting module -> Configuration -> Settings -> Customer Invoices -.> Warnings
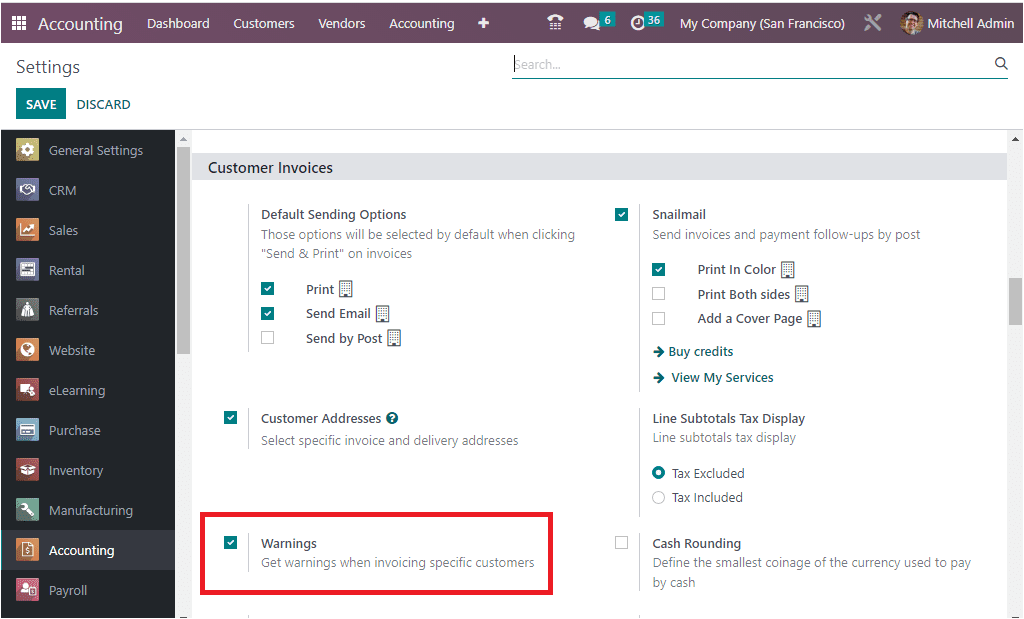
In Settings, you should confirm whether the Warning option is activated. If the option is not activated, you should activate it by checking the box near the Warnings option and then clicking on the SAVE button to save the changes.
Now you can open the Customers tab available in the module.
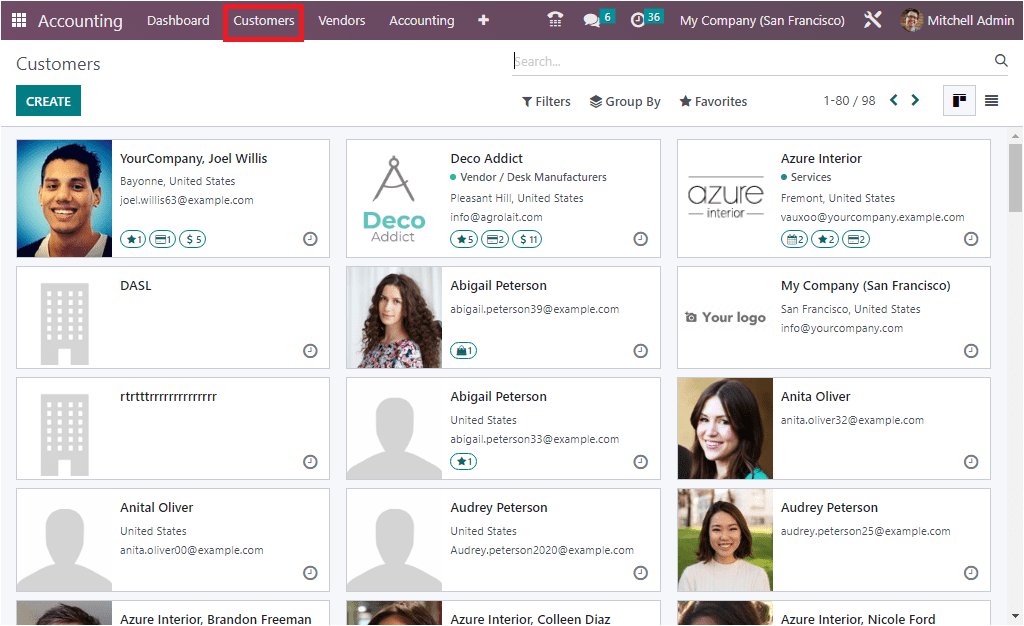
You can view all the customer's records which we have already configured in the platform. You can create more customer records using the CREATE button. While creating a new customer, you will be able to raise warnings. We can click on the CREATE button. Next moment, you will depict the Customer creation form as seen in the screenshot below.
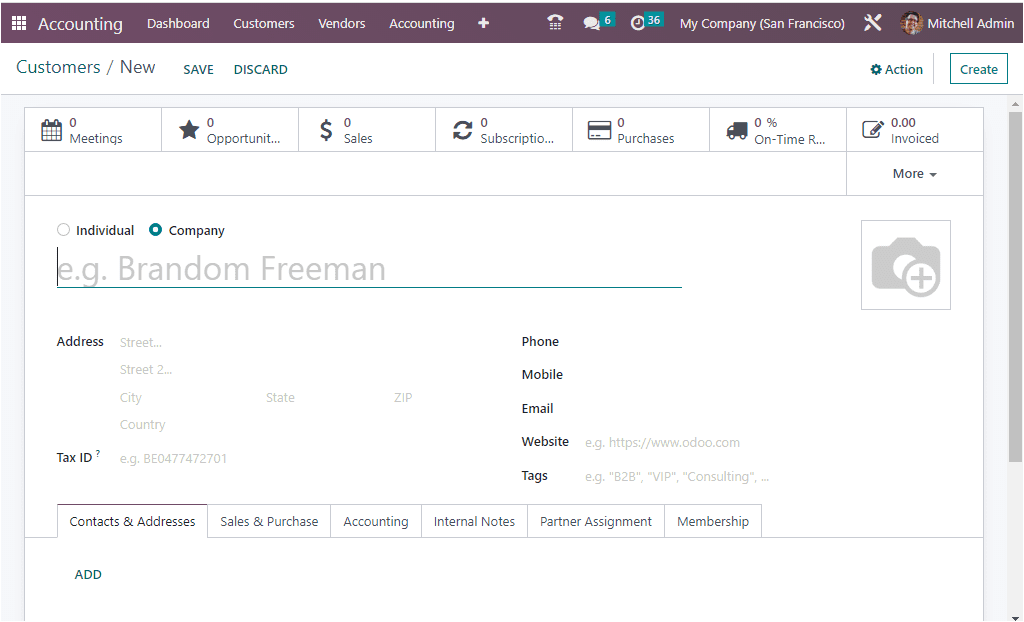
In the creation form, you can view various fields where you can provide all the details of customers in the corresponding fields. Apart from the form view, you can also see various tabs such as Contact & Addresses, Sales & Purchase, Accounting, Internal Notes, Partner Assignment, and Membership.
When you click on the Internal Notes tab, you will be able to see the warnings options as shown in the image below.
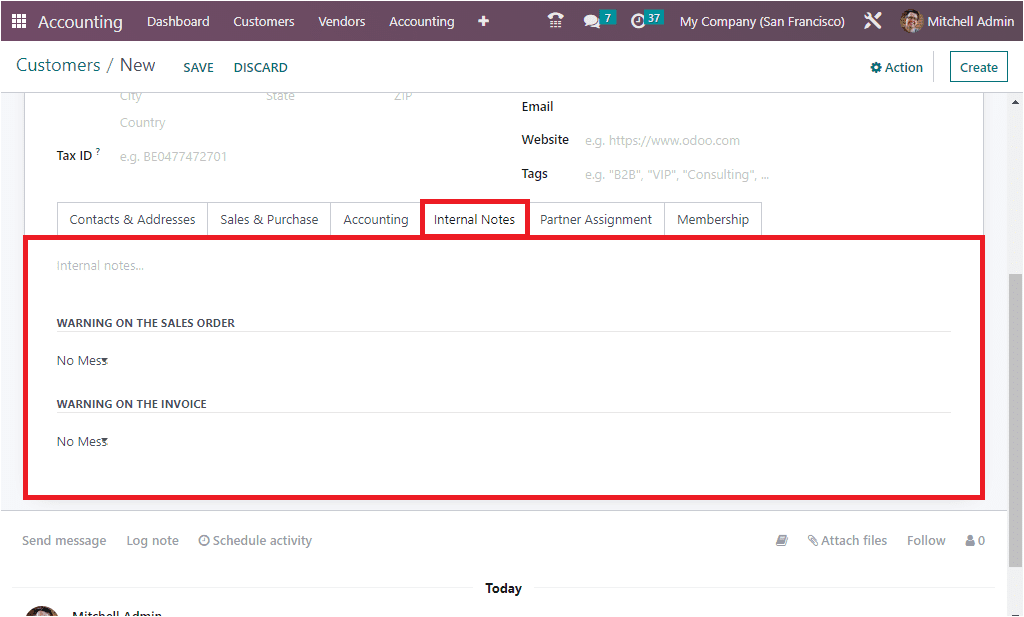
In the Internal Notes tab, you can deliver the Internal notes in the internal notes area. Below, you can see the WARNING ON THE SALES ORDER and the WARNING ON THE INVOICE. The WARNING ON THE SALE ORDER is very useful for setting warnings on sale orders. Likewise, the WARNING ON THE INVOICE option allows you to set warnings or block messages for that particular customer. Here, you have three options which are: ‘No Message, Warning, and Blocking Message’ as shown in the image below.
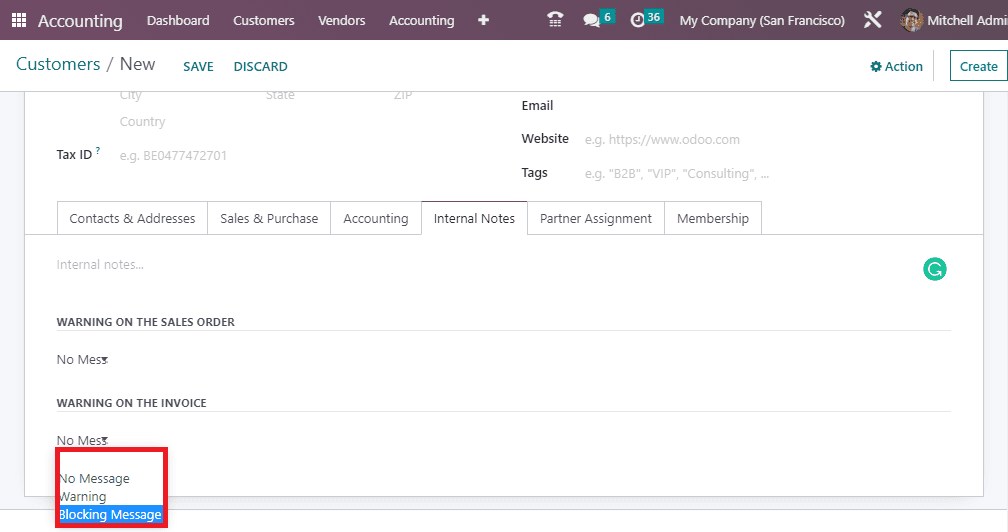
You can select the Warning Messages option if you want to set Warning Messages. In case you are required to block the customer, you can choose the Blocking Message option.
Now let us create an invoice for the customer with warning messages. For that, let us select Azure Interior as the customer. Now let us make a warning message under the Internal Notes tab. So in the WARNING ON THE INVOICE section, we can create the warning message.
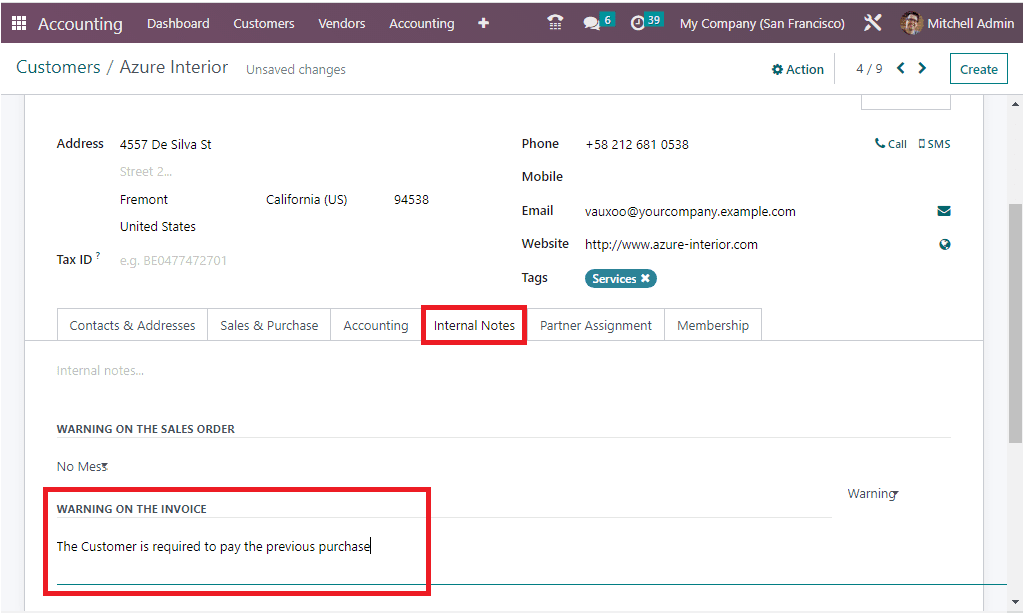
After providing the details, you can save it by clicking on the SAVE button on the top left. Now, we can create an invoice. For that, let us select the Invoices menu under the Customers tab. The Invoices menu will direct you to the Invoices window, as shown in the image below.
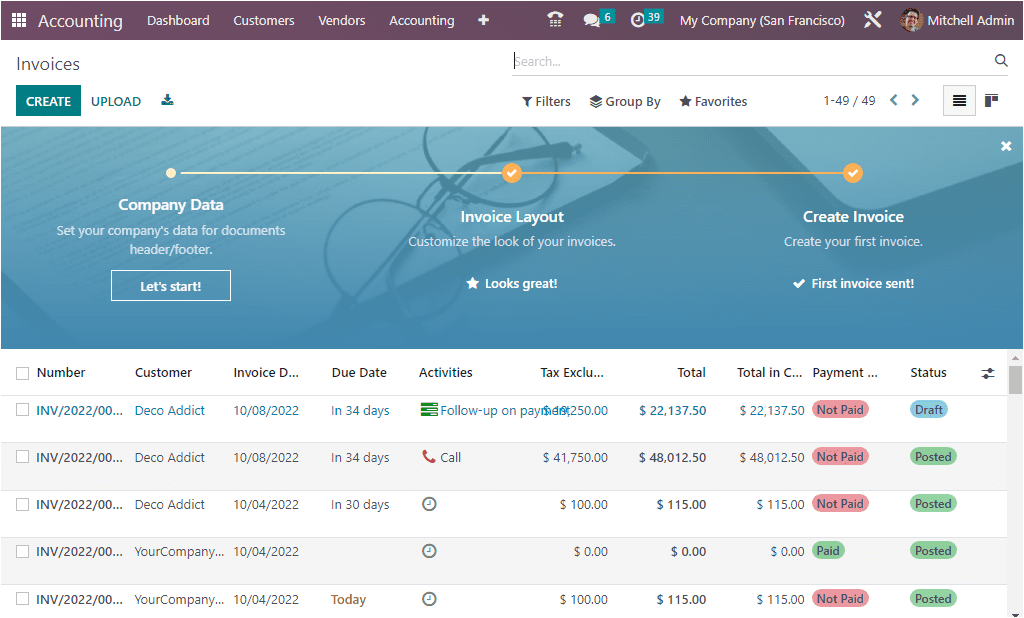
Let us create a new invoice by clicking on the CREATE button. Here we can select the Customer as Azure Interior. The moment you select the Azure Interior, the system will automatically raise a warning message, as shown in the image below.
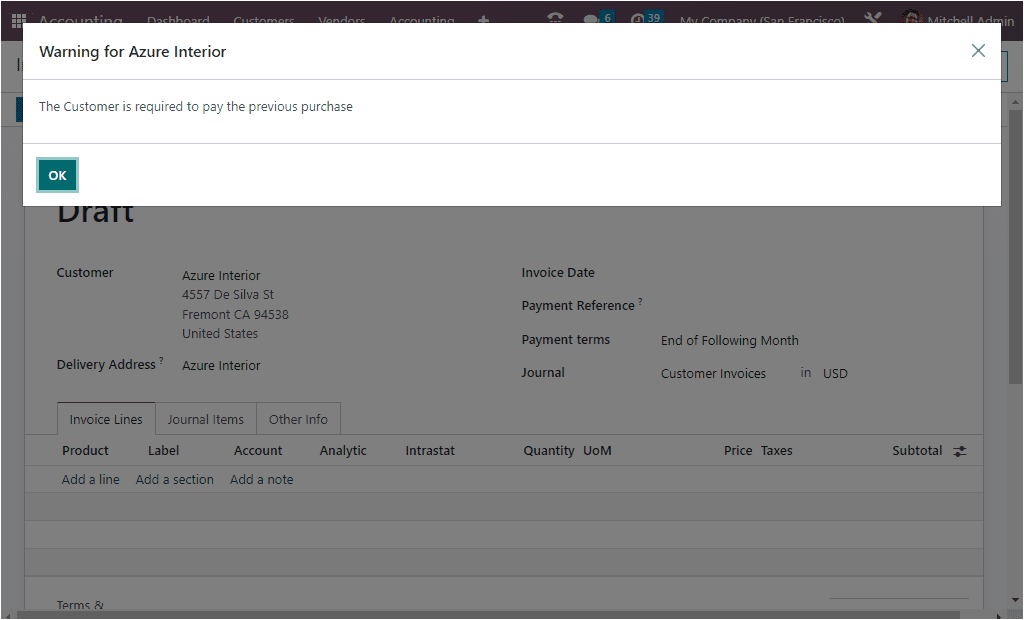
The warning that we mentioned in the Customer will be auto-depicted here as a Warning for Azure Interior. In this manner, we can set warning messages for customers.