In this blog post, we’ll explore how to create JavaScript (JS) dialogs or popups in Odoo 18. Dialogs are an effective way to display important messages, confirm user actions, and alert users to warnings or errors. A dialog box is a small window that appears over the current page when triggered by specific actions, such as clicking a button or interacting with fields like Many2many. These dialogs enhance both frontend and backend user experiences and can be shown as modals or popups for confirmations, alerts, and more.
We’ll walk through some key types of dialogs in Odoo 18, including WarningDialog, ConfirmationDialog, AlertDialog, FormViewDialog, and MessageConfirmDialog.
ConfirmationDialog
The ConfirmationDialog is useful for displaying a brief message with two options, typically "Ok" and "Cancel." Users can dismiss the dialog by clicking the Cancel button or the close (X) icon.
To implement this dialog, start by importing the required components:
import { ConfirmationDialog } from "@web/core/confirmation_dialog/confirmation_dialog";
import { useService } from "@web/core/utils/hooks";
Then, set up the dialog in your component's setup method:
setup() {
   super.setup();
   this.notification = useService("notification");
   this.dialogService = useService("dialog");
},
Add the dialog service with a confirmation message as follows:
this.dialogService.add(ConfirmationDialog, {
    body: _t("Sample text to confirm here"),
    confirmClass: "btn-primary",
    confirmLabel: _t("Confirm"),
    confirm: () => {
        this.notification.add(_t("Confirmed"), {
            type: "success",
        });
    },
    cancelLabel: _t("Cancel"),
    cancel: () => { },
});
Example: Adding a Confirmation Dialog to Open a Form View from a Many2many Field Tag
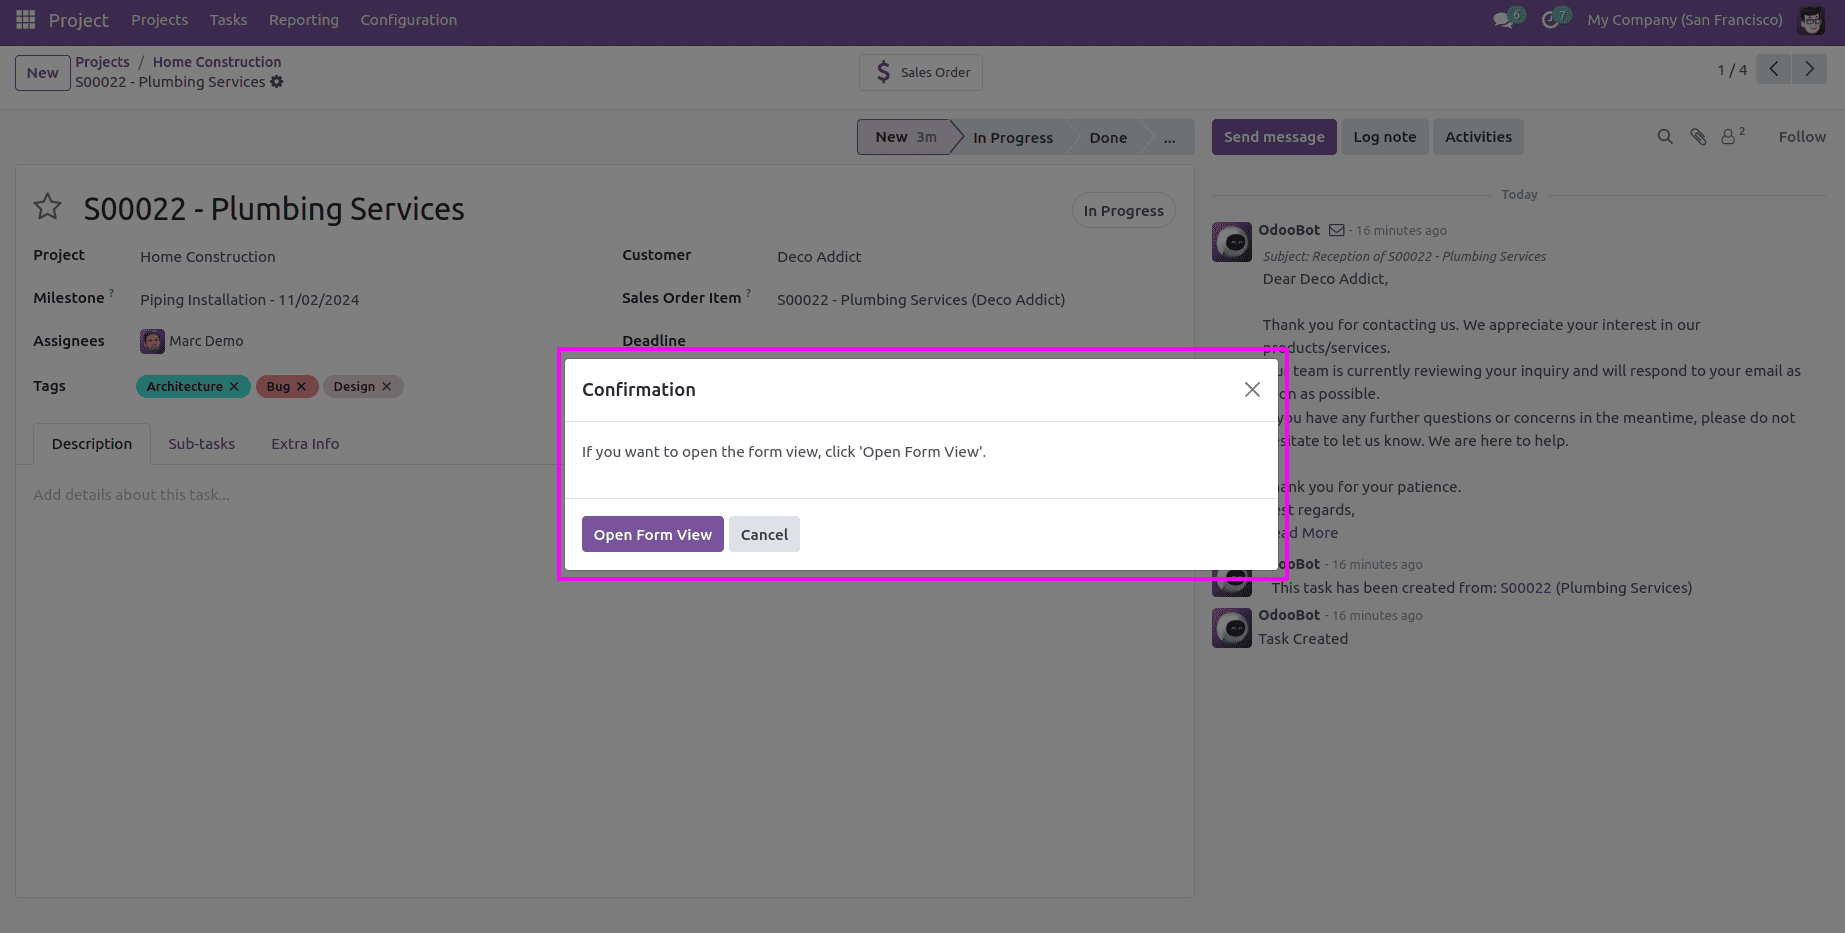
In this example, we’ll implement a confirmation dialog that opens a form view when a user clicks on a Many2many field tag.
/** @odoo-module **/
import { _t } from "@web/core/l10n/translation";
import { useService } from "@web/core/utils/hooks";
import { Many2ManyTagsFieldColorEditable } from "@web/views/fields/many2many_tags/many2many_tags_field";
import { ConfirmationDialog } from "@web/core/confirmation_dialog/confirmation_dialog";
import { patch } from "@web/core/utils/patch";
patch(Many2ManyTagsFieldColorEditable.prototype, {
   setup() {
       super.setup();
       this.action = useService("action");
       this.dialogService = useService("dialog");
   },
   onTagClick(ev, record) {
       this.dialogService.add(ConfirmationDialog, {
           body: _t("If you want to open the form view, click 'Open Form View'."),
           confirmClass: "btn-primary",
           confirmLabel: _t("Open Form View"),
           confirm: () => {
               this.action.doAction({
                   type: 'ir.actions.act_window',
                   res_model: this.relation,
                   res_id: record.resId,
                   views: [[false, 'form']],
                   target: 'current',
               });
           },
           cancelLabel: _t("Cancel"),
           cancel: () => { },
       });
   }
});
Here’s a output showing the confirmation dialog:
WarningDialog
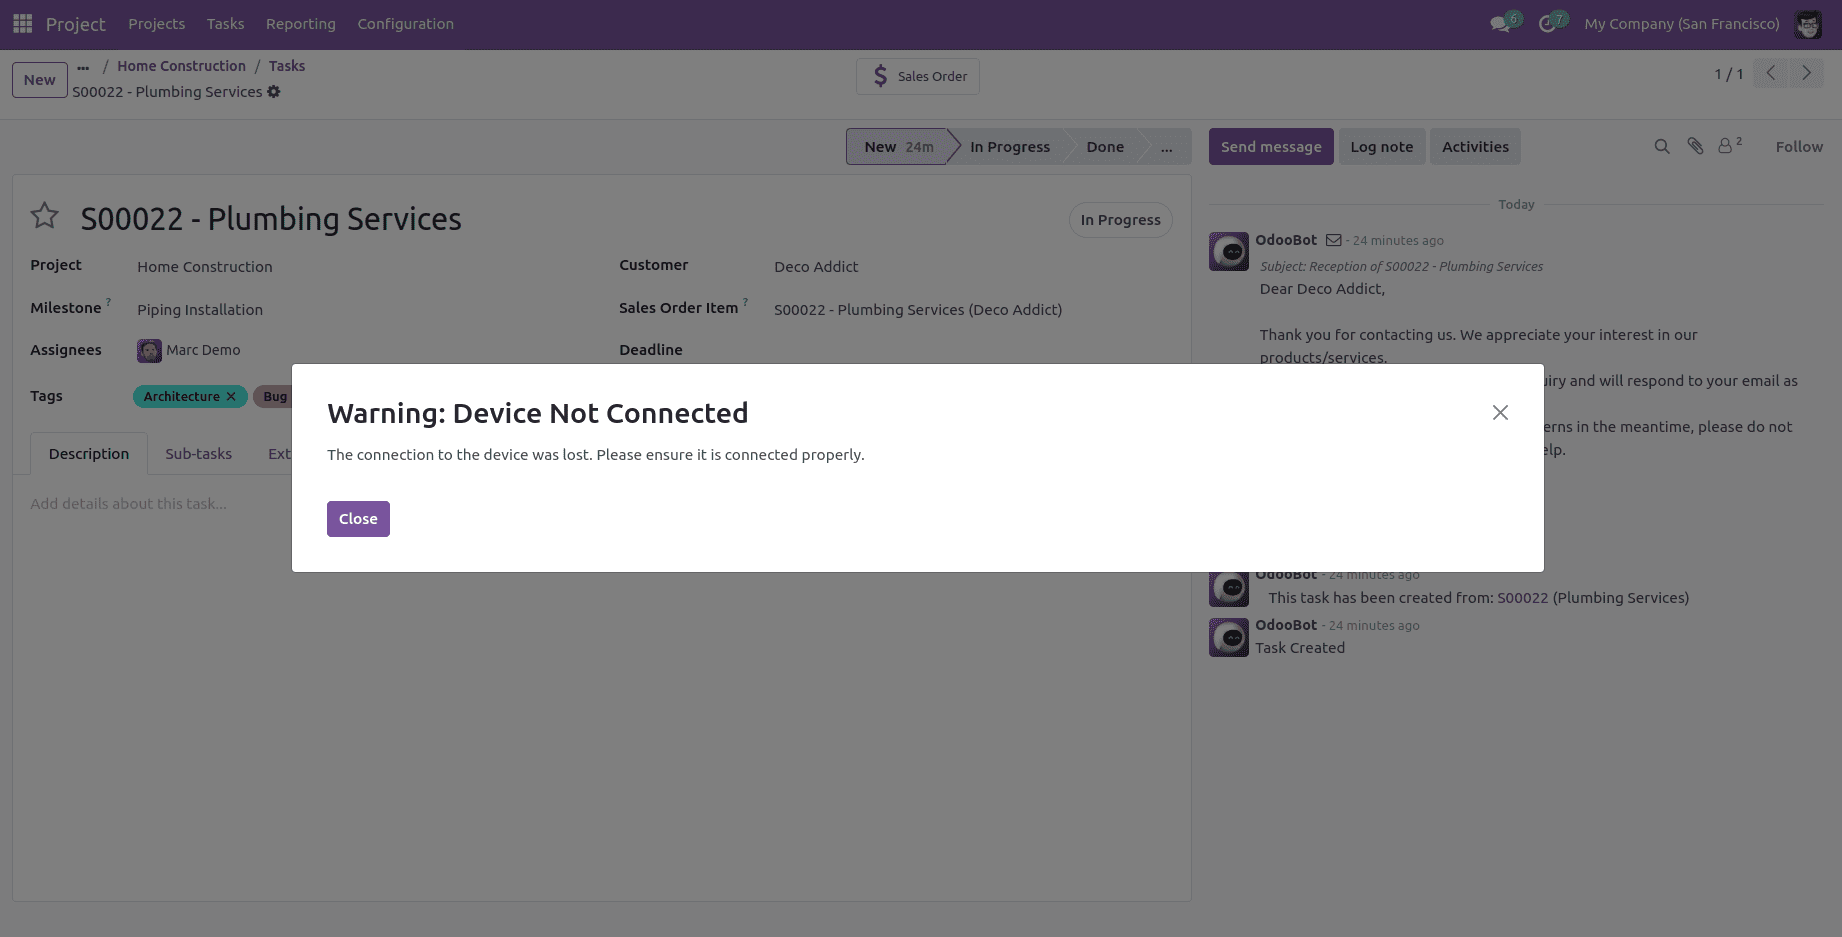
The WarningDialog is primarily used to display important warnings or errors to the user. It typically includes a title, a message, and user interaction buttons.
To use this dialog, start by importing the required components:
import { WarningDialog } from "@web/core/errors/error_dialogs";
import { useService } from "@web/core/utils/hooks";
In the setup method, specify the dialog service:
setup() {
   super.setup();
   this.dialogService = useService("dialog");
}
Add the dialog with a warning message as follows:
this.dialogService.add(WarningDialog, {
    title: _t("Warning: Title goes here"),
    message: _t("Warning message goes here."),
});
The output will appear as follows:
AlertDialog
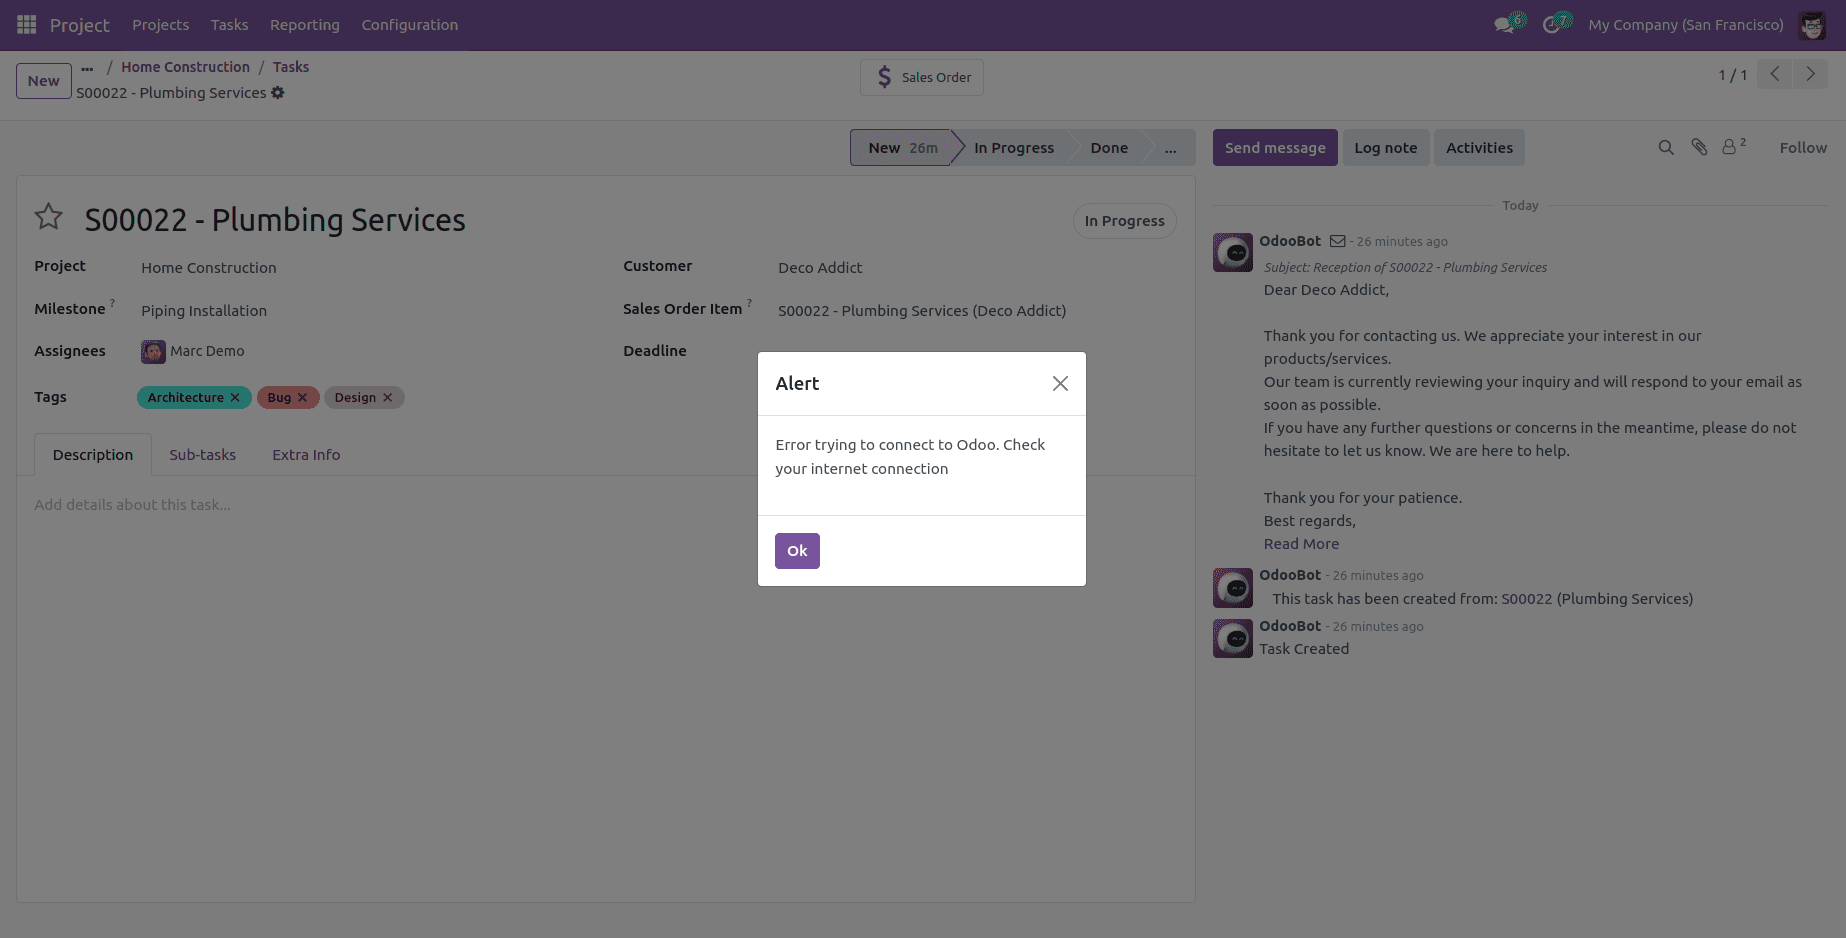
The AlertDialog can be used to display simple error or alert messages. It is available in the same module as the ConfirmationDialog.
To implement it, start by importing the required components:
import { AlertDialog } from "@web/core/confirmation_dialog/confirmation_dialog";
import { useService } from "@web/core/utils/hooks";
In the setup method, include the dialog service:
setup() {
   super.setup();
   this.dialog = useService("dialog");
},
Add the dialog for an alert message as follows:
this.dialog.add(AlertDialog, {
    body: _t("Error trying to connect to Odoo. Check your internet connection"),
});
The output will appear as follows:
FormViewDialog
The dialog types like FormViewDialog and MessageConfirmDialog. are tailored to different use cases, providing flexibility when confirming user actions, displaying forms, or showing messages.
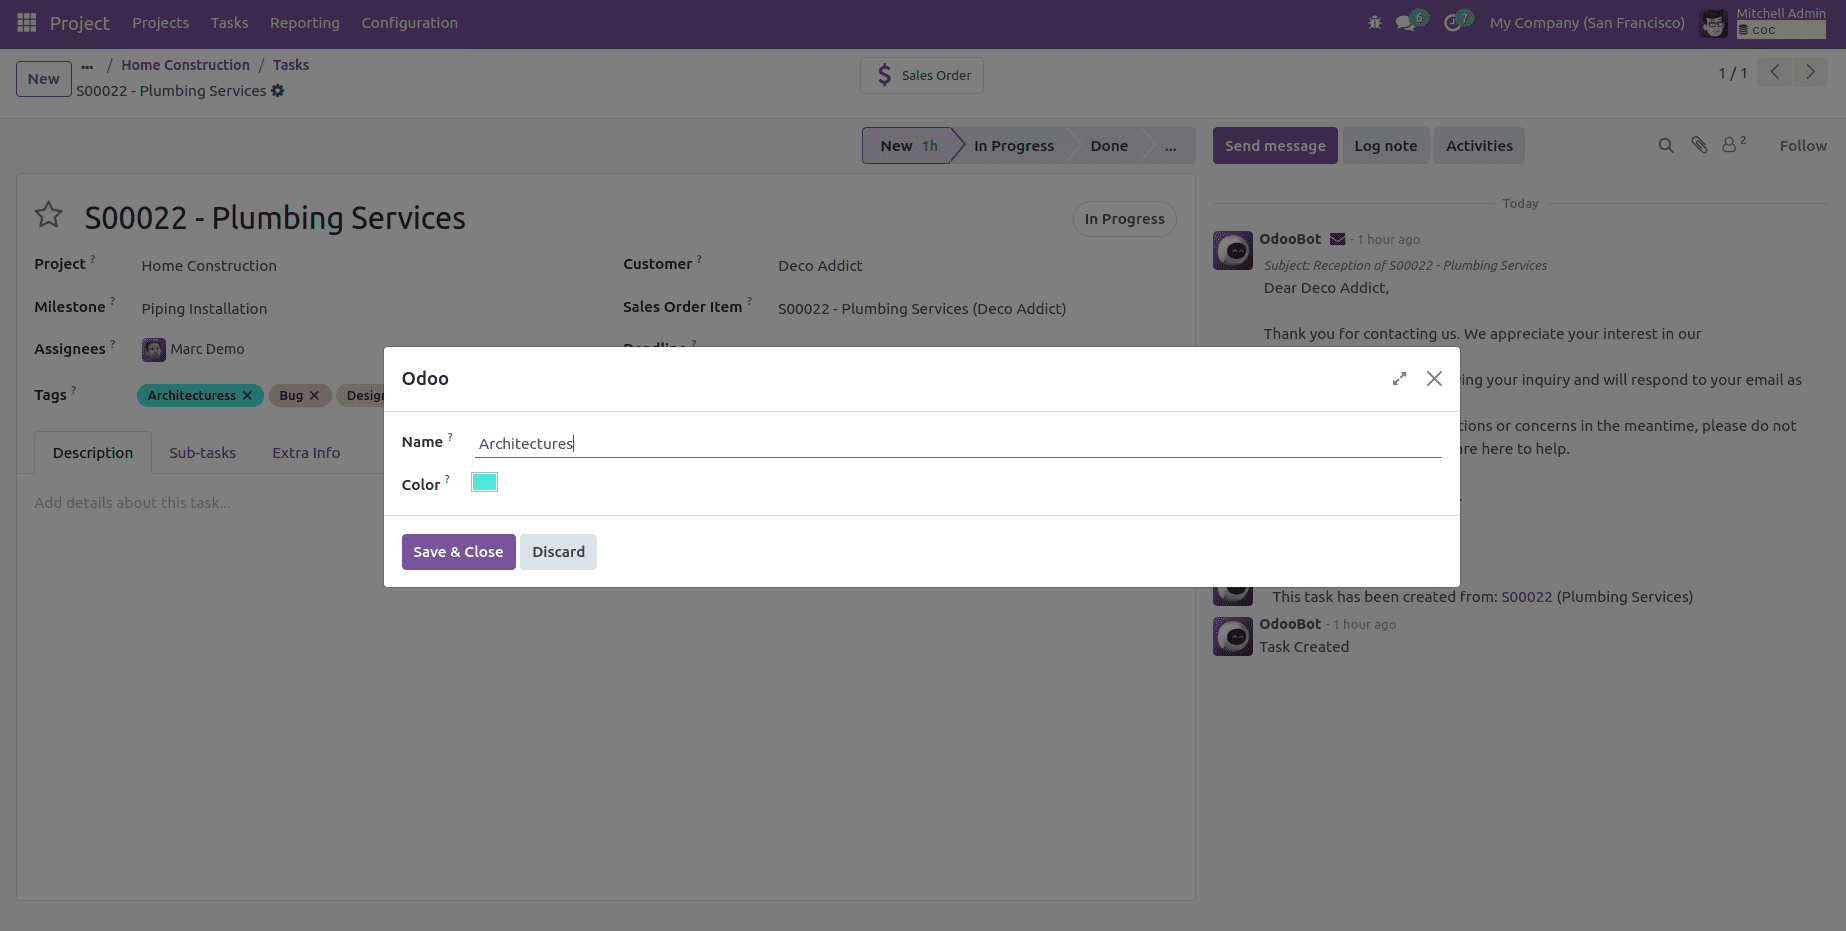
If we are using the FormViewDialog to open the form view of the tags inside the project task Here’s how to implement it:
Import the required components:
import { FormViewDialog } from "@web/views/view_dialogs/form_view_dialog";
import { useService } from "@web/core/utils/hooks";
In your setup method, set up the dialog service:
setup() {
   super.setup();
   this.dialog = useService("dialog");
},
In the tag click function, add the following:
onTagClick(ev, record) {
        this.dialog.add(FormViewDialog, {
            resModel: "project.tags",
            resId: record.resId,
            onRecordSaved: async (record) => {
                //add the action here
                this.action.doAction({
                    type: "ir.actions.act_window_close",
                });
            },
        });
   }
The output will appear as follows:
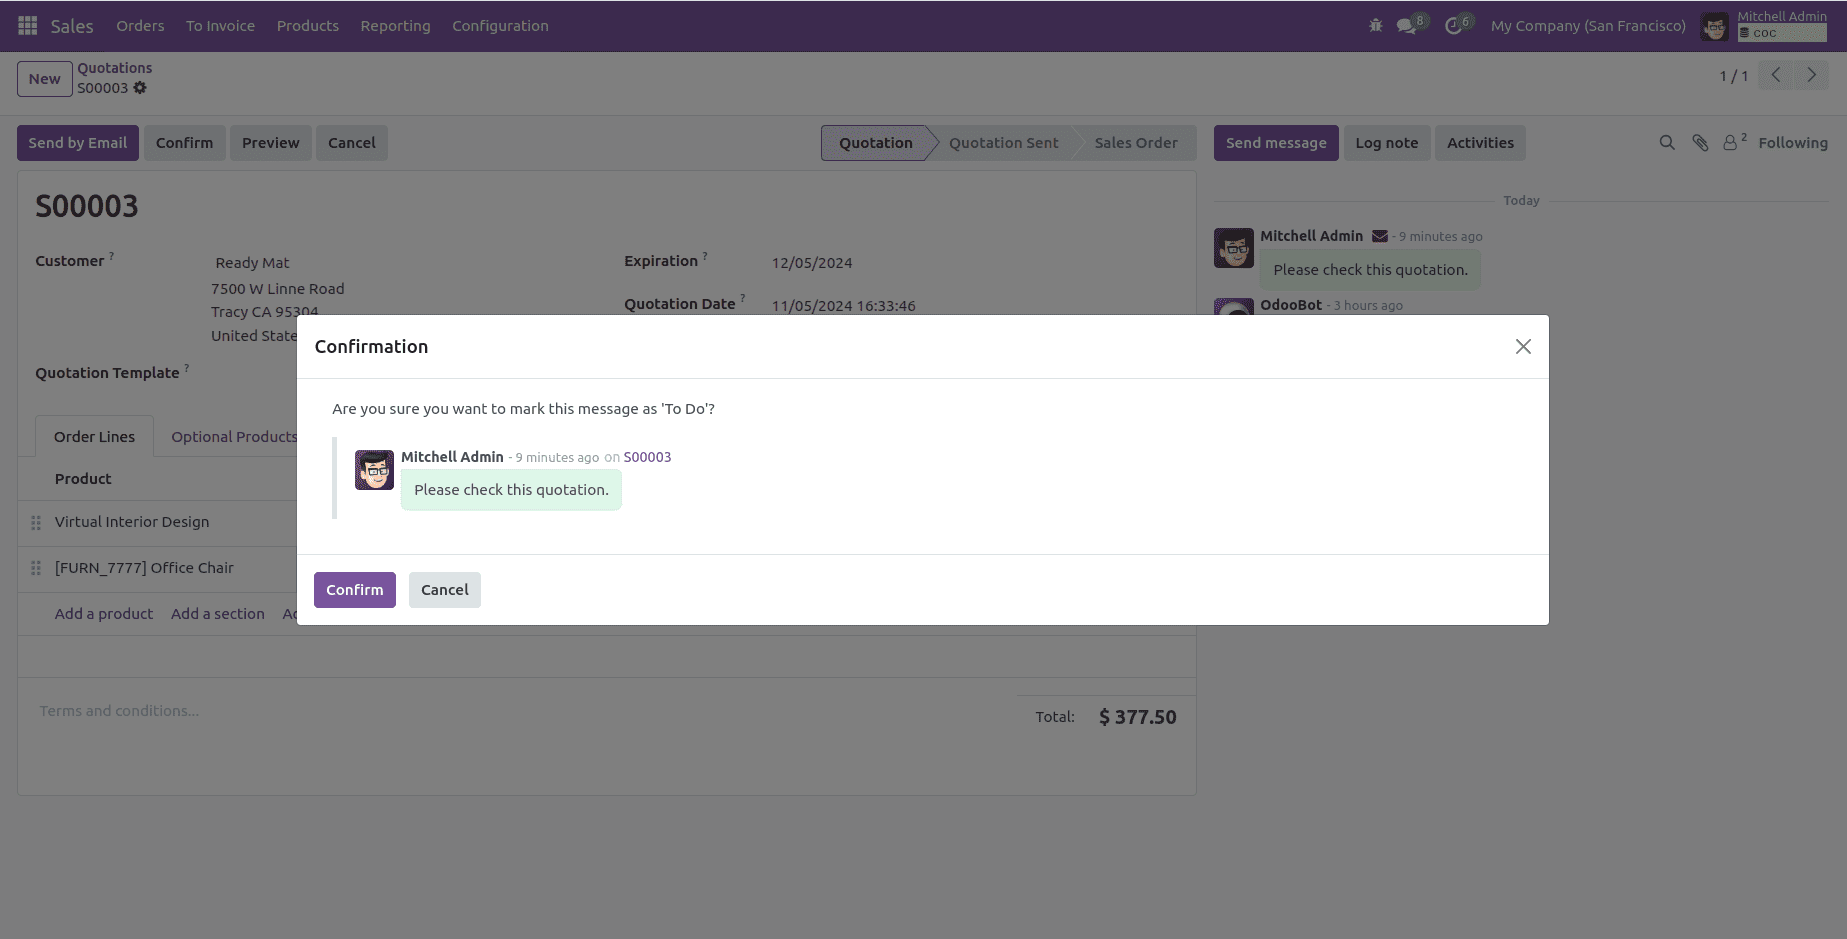
The MessageConfirmDialog is specifically designed for handling messages. Let's look at an example of integrating this dialog when marking a chatter message as "To Do." To accomplish this, we will patch the message model and update the toggleStar function to incorporate the MessageConfirmDialog as follows:
import { patch } from "@web/core/utils/patch";
import { Message } from "@mail/core/common/message_model";
import { _t } from "@web/core/l10n/translation";
import { MessageConfirmDialog } from "@mail/core/common/message_confirm_dialog";
patch(Message.prototype, {
    async toggleStar() {
        this.store.env.services.dialog.add(MessageConfirmDialog, {
            message: this,
            onConfirm: async () => {
            await super.toggleStar();
        },
            prompt: _t("Are you sure you want to mark this message as todo?"),
        });
    },
});
When you click the “Star” icon on the message, a popup will appear. The result will be as follows:
Integrating these JavaScript dialogs enables a more interactive and responsive user experience in Odoo 18. Whether used for displaying warnings, confirming actions, or alerting users, these pop-ups ensure that essential messages are communicated clearly and effectively, enhancing overall usability and engagement.
To read more about How to Create Odoo JS Dialog/Popup in Odoo 17, refer to our blog How to Create Odoo JS Dialog/Popup in Odoo 17.