Odoo 18 offers a robust email management system that allows businesses to streamline communication directly within the platform. By configuring Outgoing Mail Servers, users can send emails seamlessly. With Incoming Mail Servers, Odoo can process received emails and create records, such as leads or helpdesk tickets. This guide explains how to configure both types of mail servers in Odoo 18, ensuring smooth and secure email integration.
Step 1: Enable Developer Mode
The ability to configure mail servers is a technical feature and requires access to the Technical menu, which becomes visible only in Developer Mode.
How to Enable Developer Mode
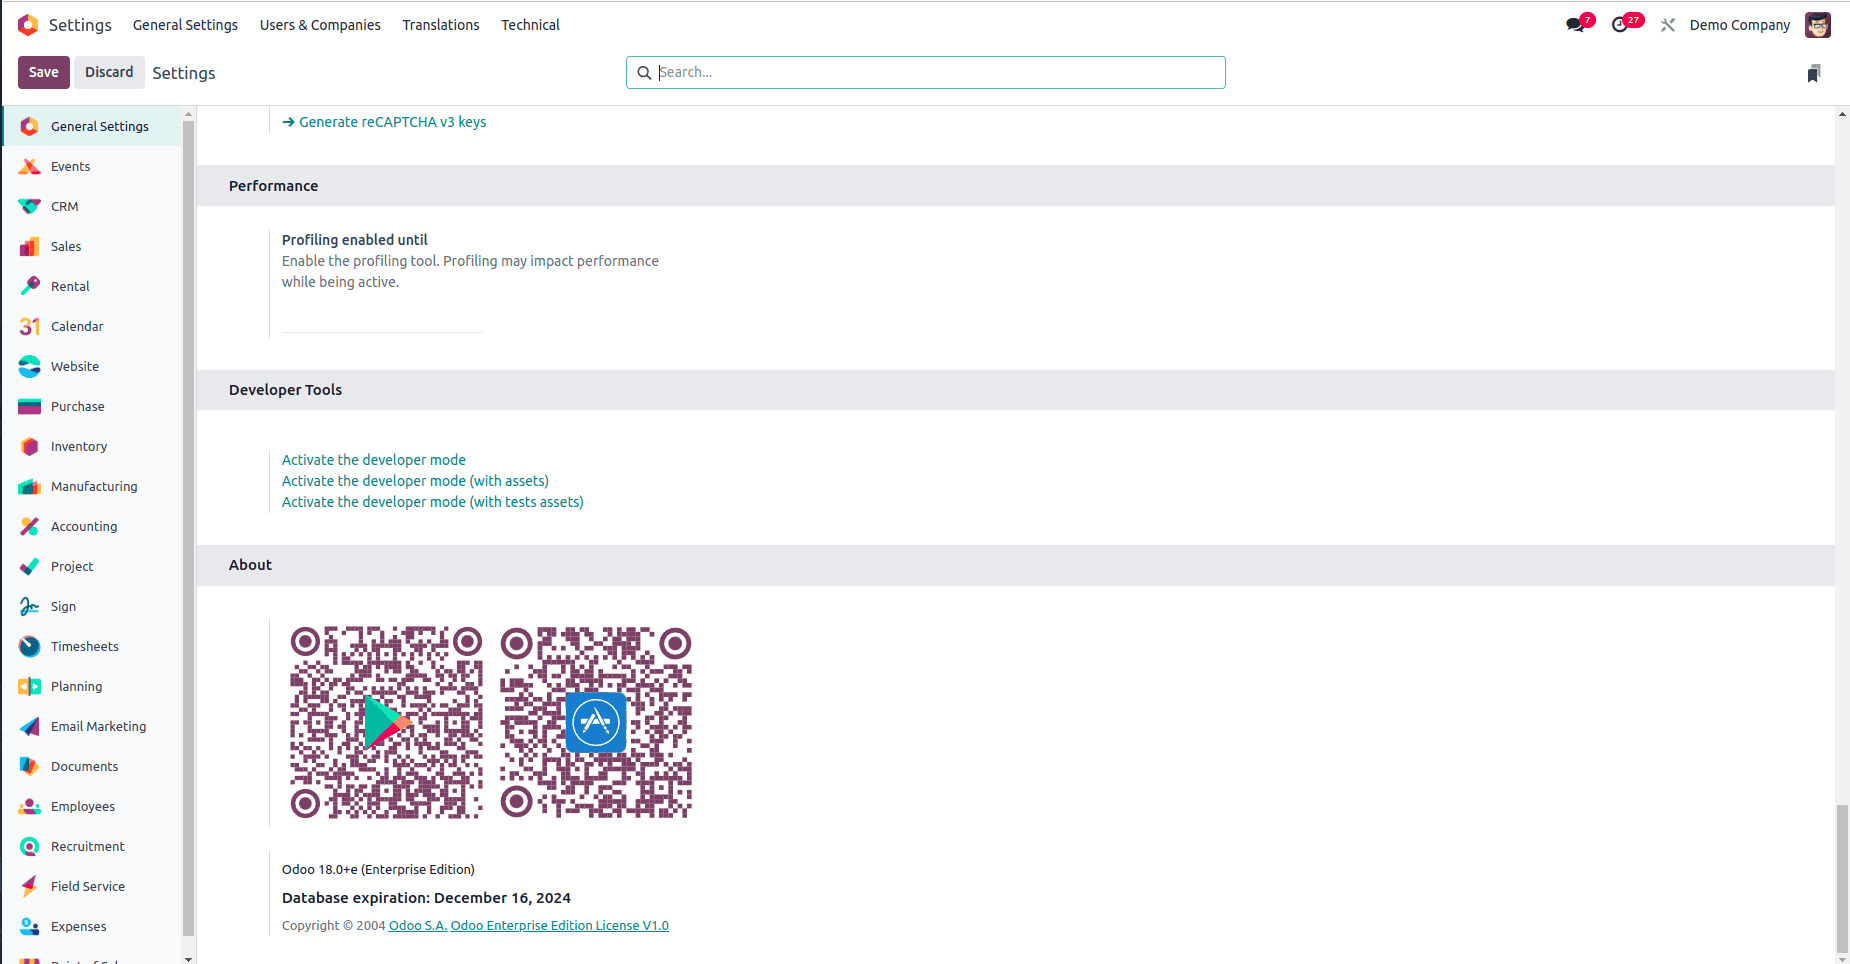
1. Navigate to General Settings: From the Odoo main dashboard, select Settings.
2. Activate Developer Mode:
* Scroll to the bottom of the page, and click Activate the Developer Mode.
* Alternatively, search for "debug" directly from the Odoo homepage.
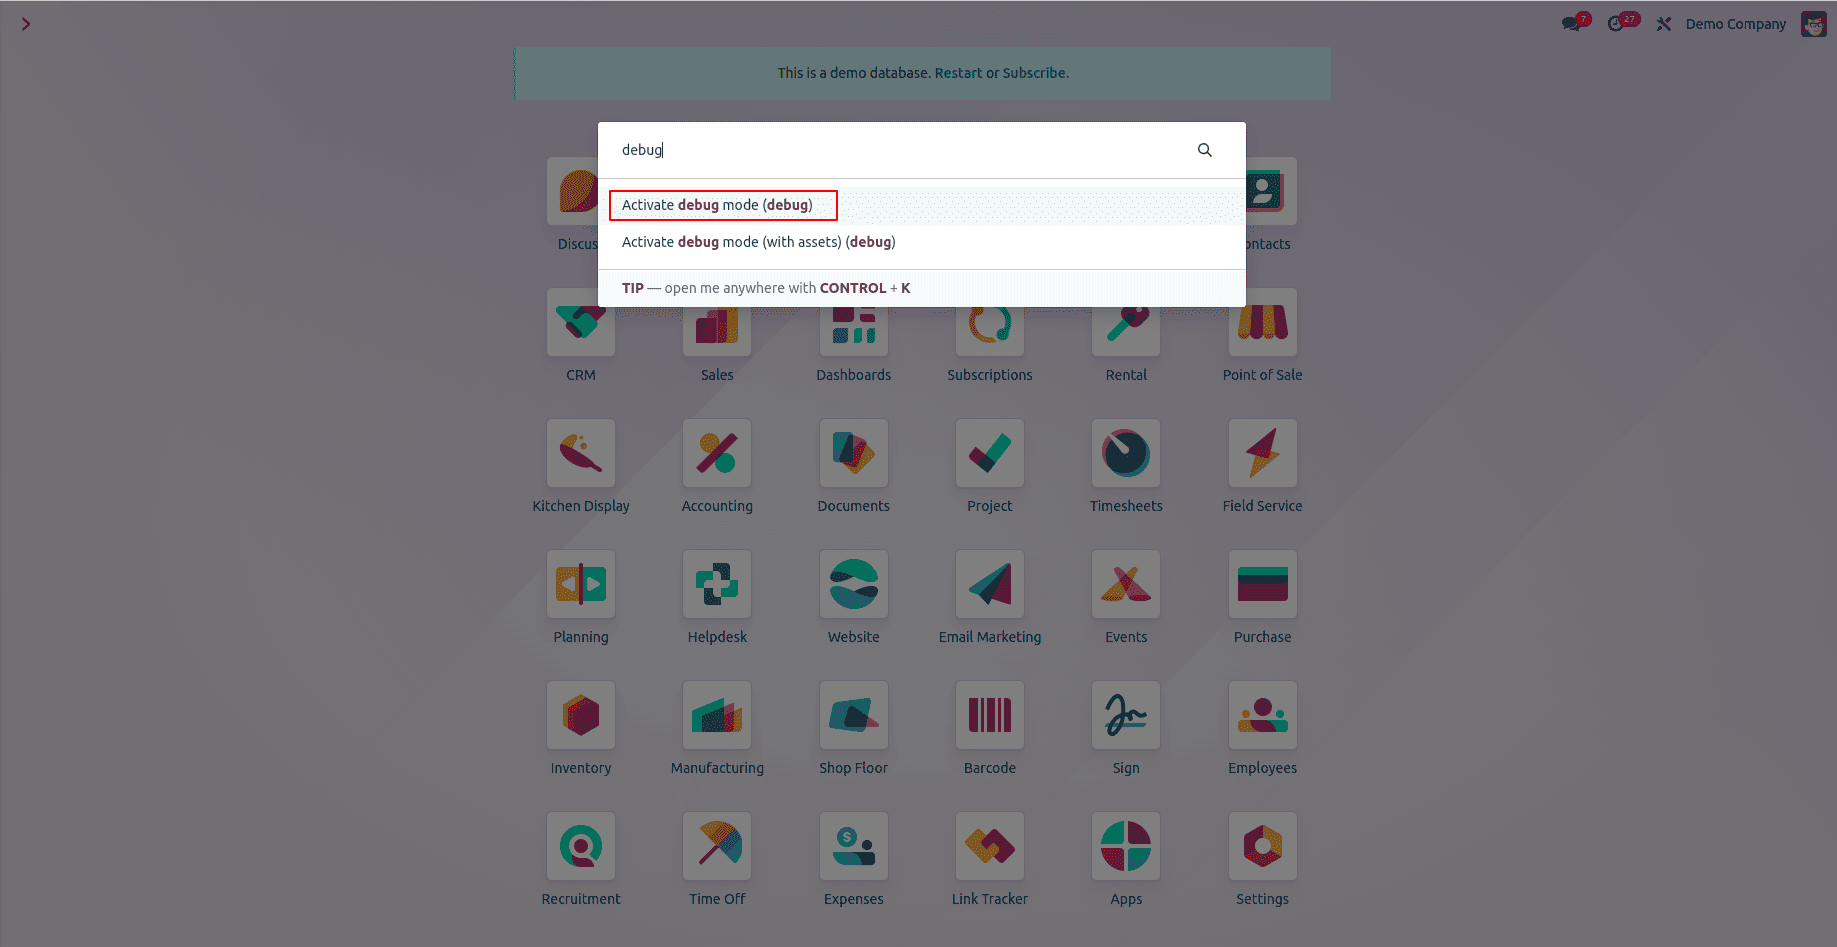
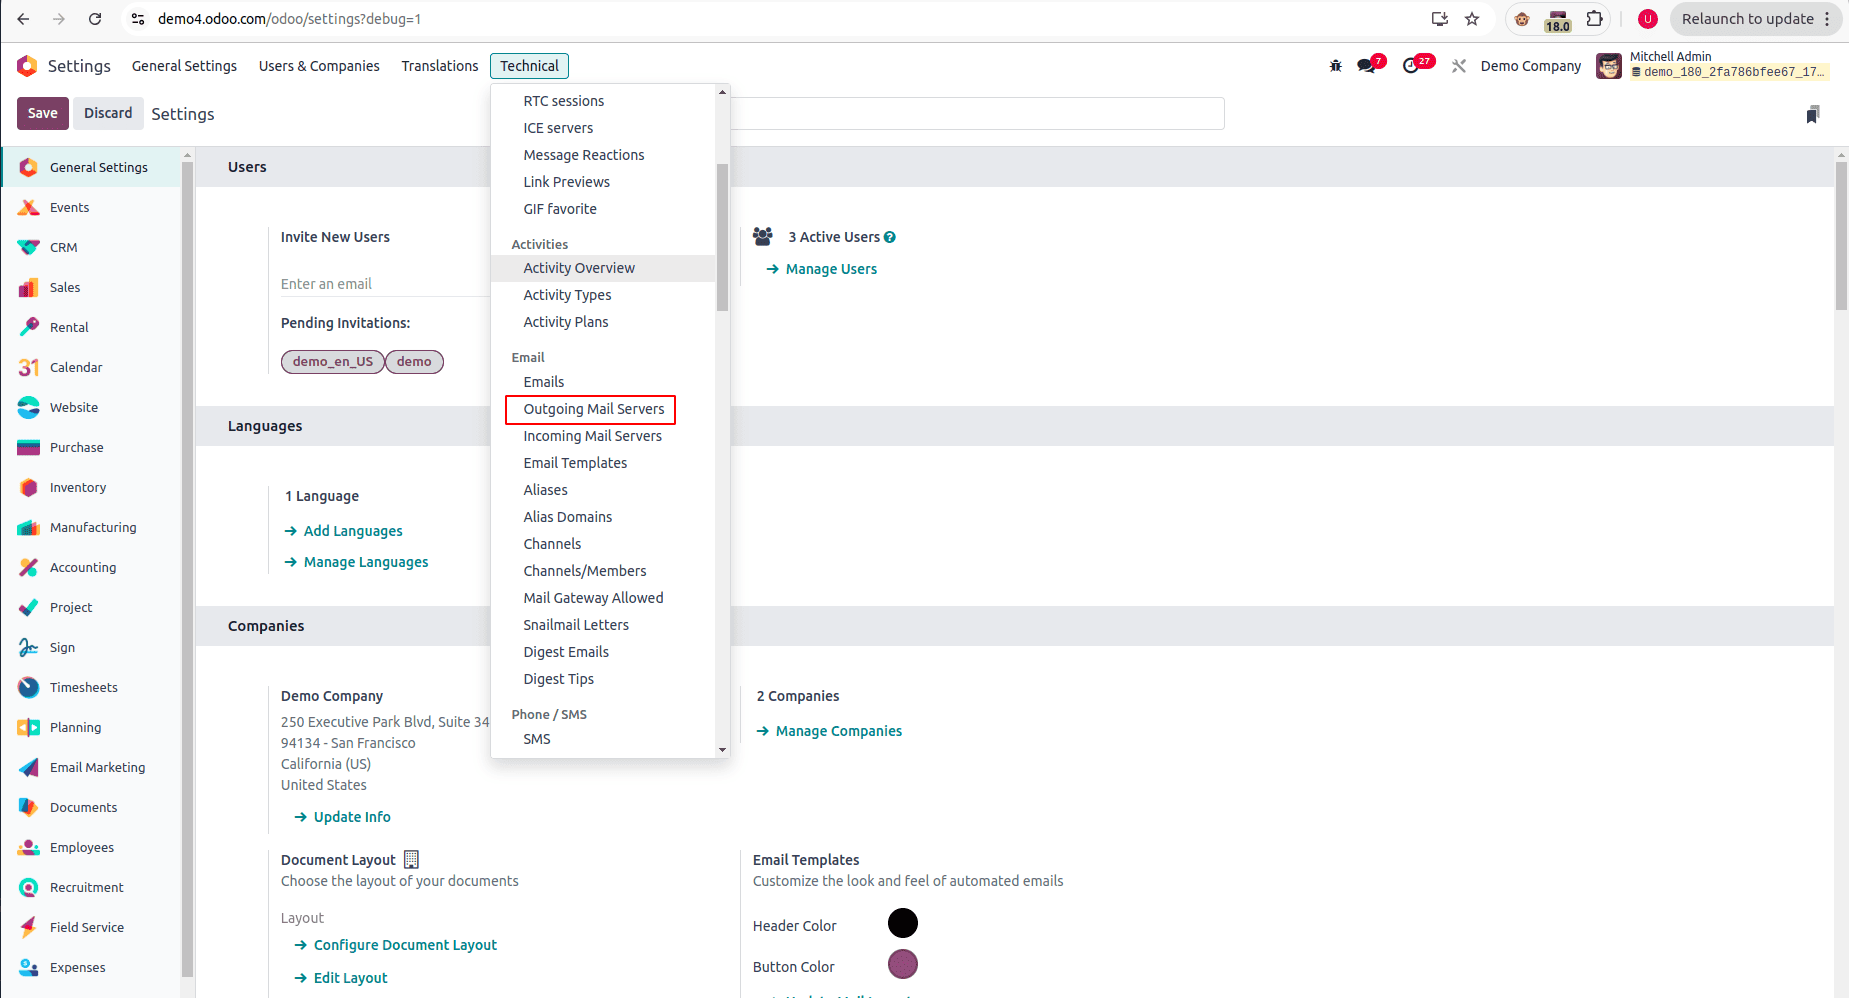
After enabling Developer Mode, a new Technical menu will appear as a menu, providing access to advanced configuration options.
Step 2: Configuring Outgoing Mail Servers
Outgoing mail servers allow Odoo to send emails, such as notifications, invoices, or promotional campaigns, directly from the platform.
Access Outgoing Mail Server Settings
1. Navigate to Settings > Technical > Email > Outgoing Mail Servers.
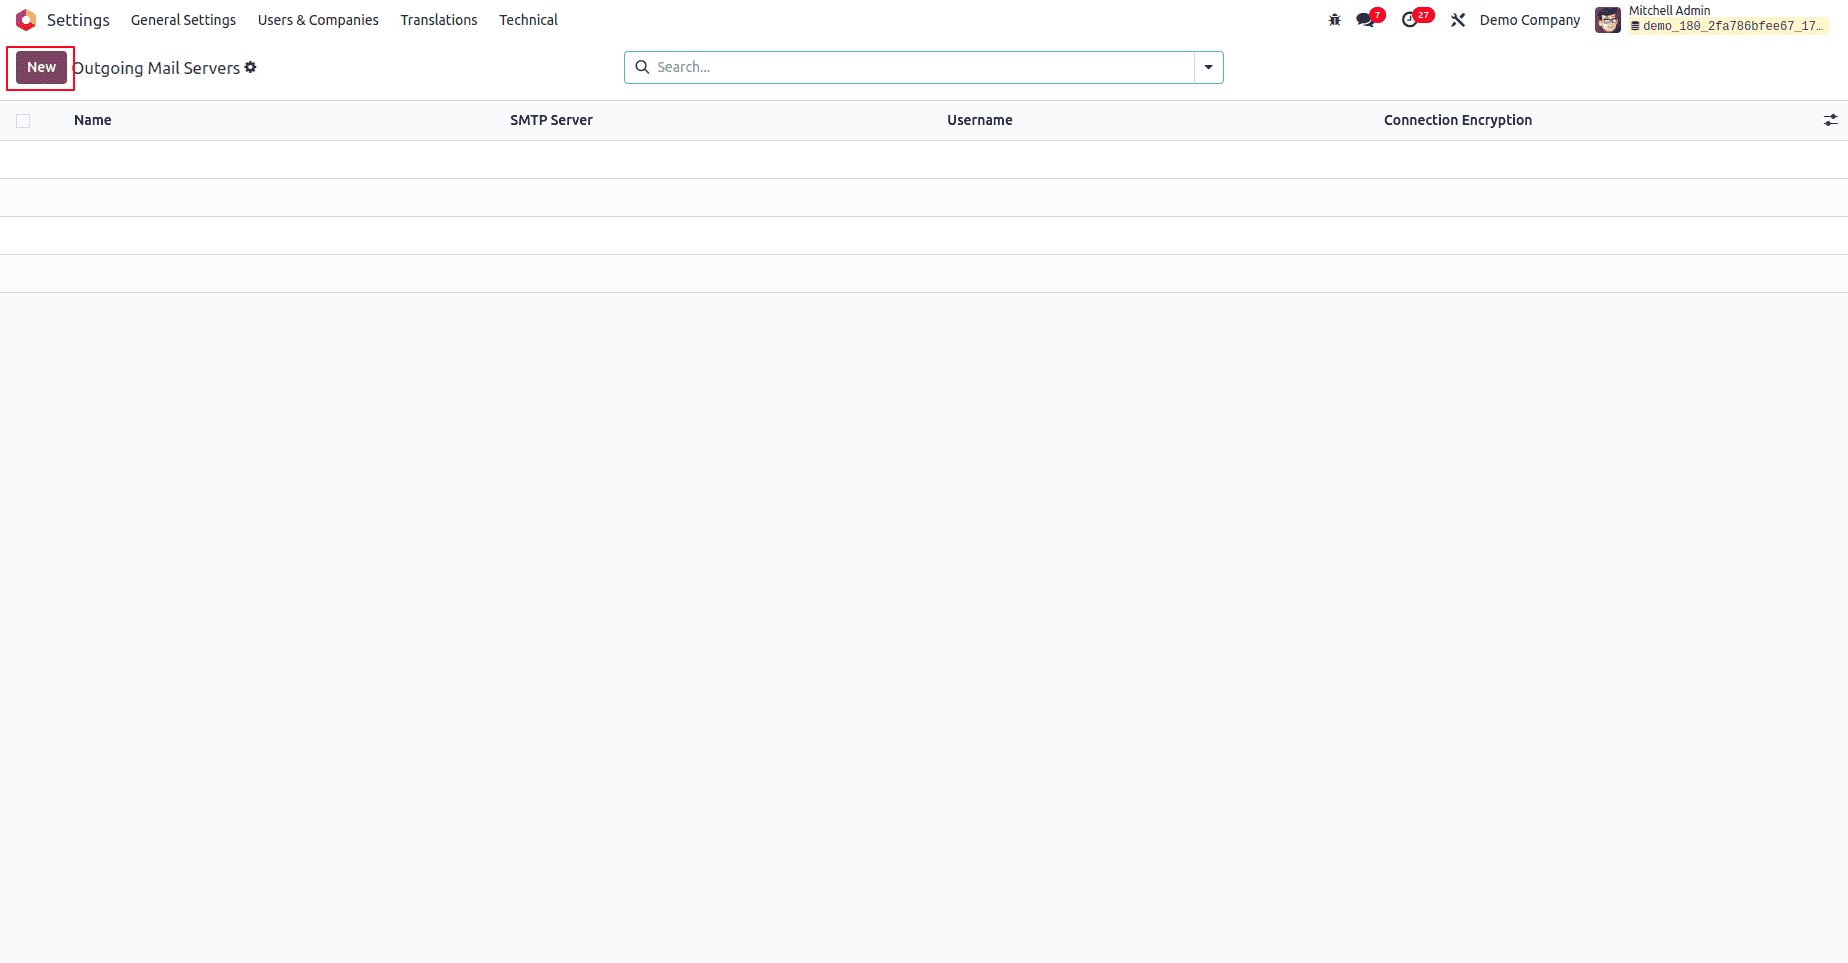
2. Click the New button to add a new outgoing mail server configuration.
3. Fill in Outgoing Mail Server Details
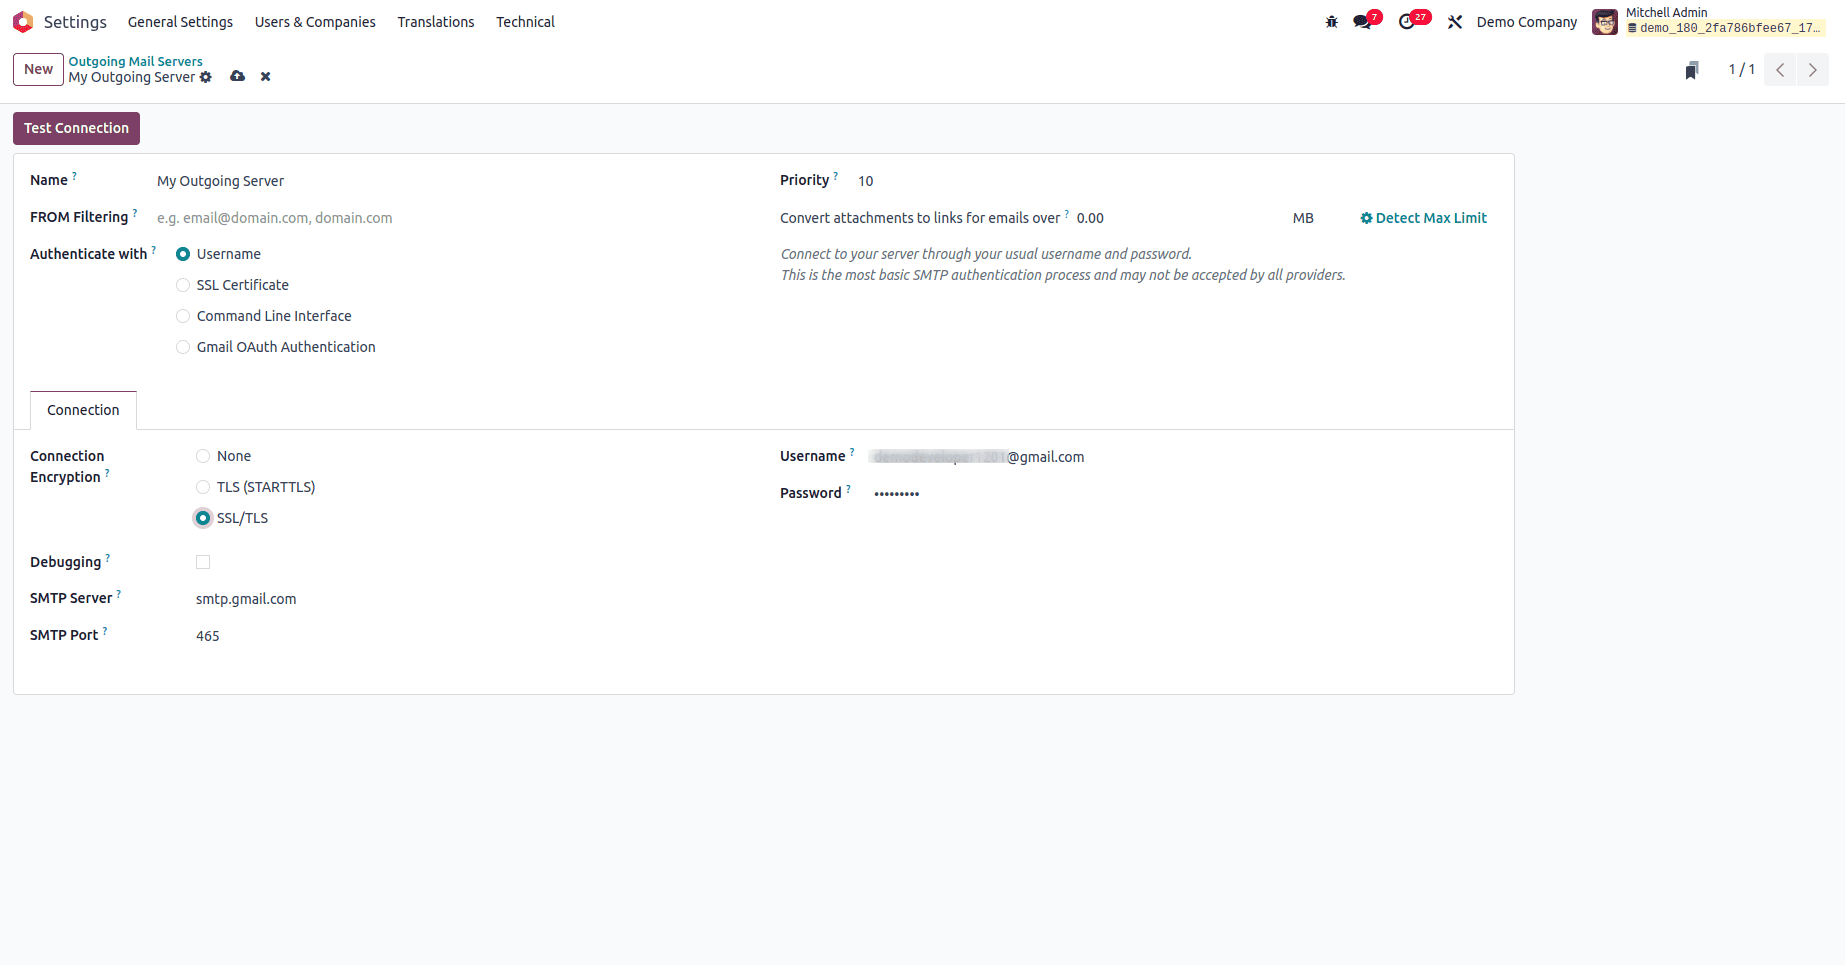
In the form view, provide the following information:
1. Name: Assign a descriptive name for the mail server configuration (e.g., "Gmail SMTP Server").
2. SMTP Server: Enter the SMTP server address provided by your email service:
* For Gmail: smtp.gmail.com.
* For Outlook: smtp.office365.com.
* For Yahoo: smtp.mail.yahoo.com.
3. SMTP Port: Specify the port number based on your encryption settings:
* 465 for SSL/TLS.
* 587 for STARTTLS.
4. Connection Encryption: Choose the appropriate encryption type to secure email communication:
* SSL/TLS is commonly recommended for modern email configurations.
5. Authenticate With: Select User Name as the authentication method.
6. Username: Enter the full email address used for authentication (e.g., user@example.com).
7. Password: Provide the password for the email account app-specific password if your email provider requires it.
8. Priority: Assign a priority level. Lower numerical values are processed first in cases of multiple mail server configurations.
Test the Connection
1. After completing the form, click Test Connection at the top of the page. If the configuration is correct, Odoo will display a success message confirming the connection.
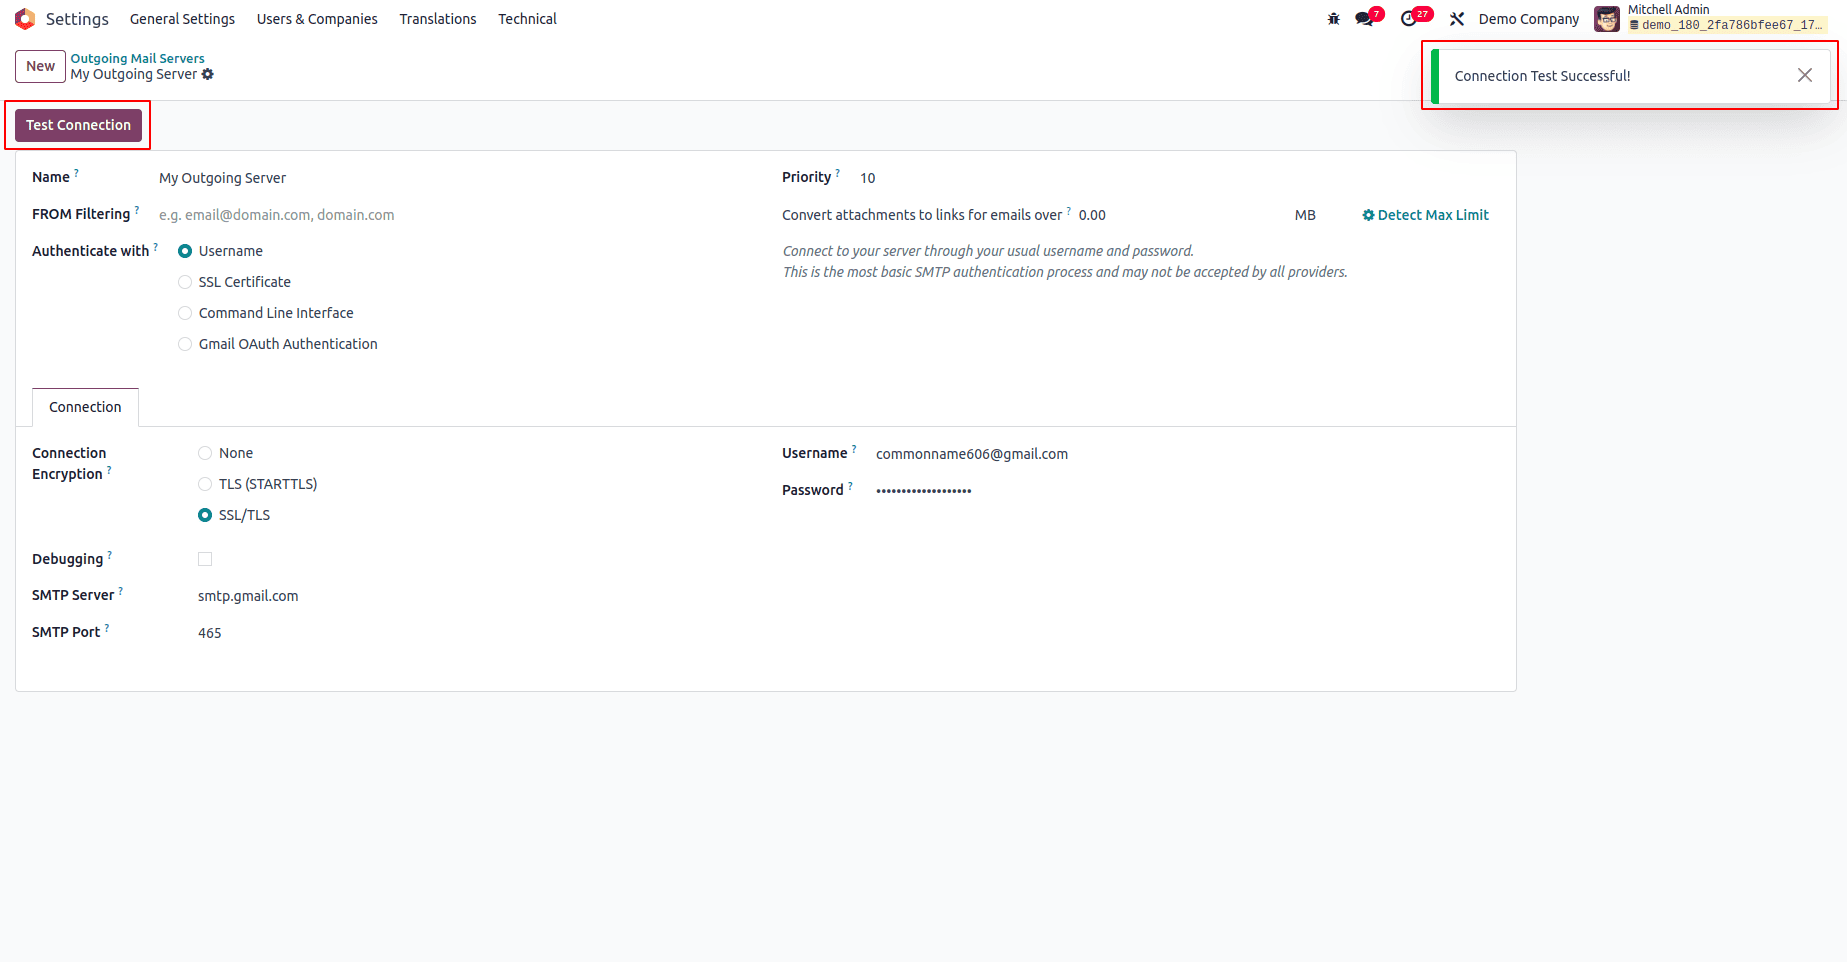
If the test fails, double-check the server address, port, username, and password. Ensure that email settings like "Allow less secure apps" or "App passwords" are correctly configured in your email provider's account.
Step 3: Configuring Incoming Mail Servers
Incoming mail servers enable Odoo to receive emails, automatically process them, and create records in specified models like leads or helpdesk tickets.
Access Incoming Mail Server Settings
1. Navigate to Settings > Technical > Email > Incoming Mail Servers.
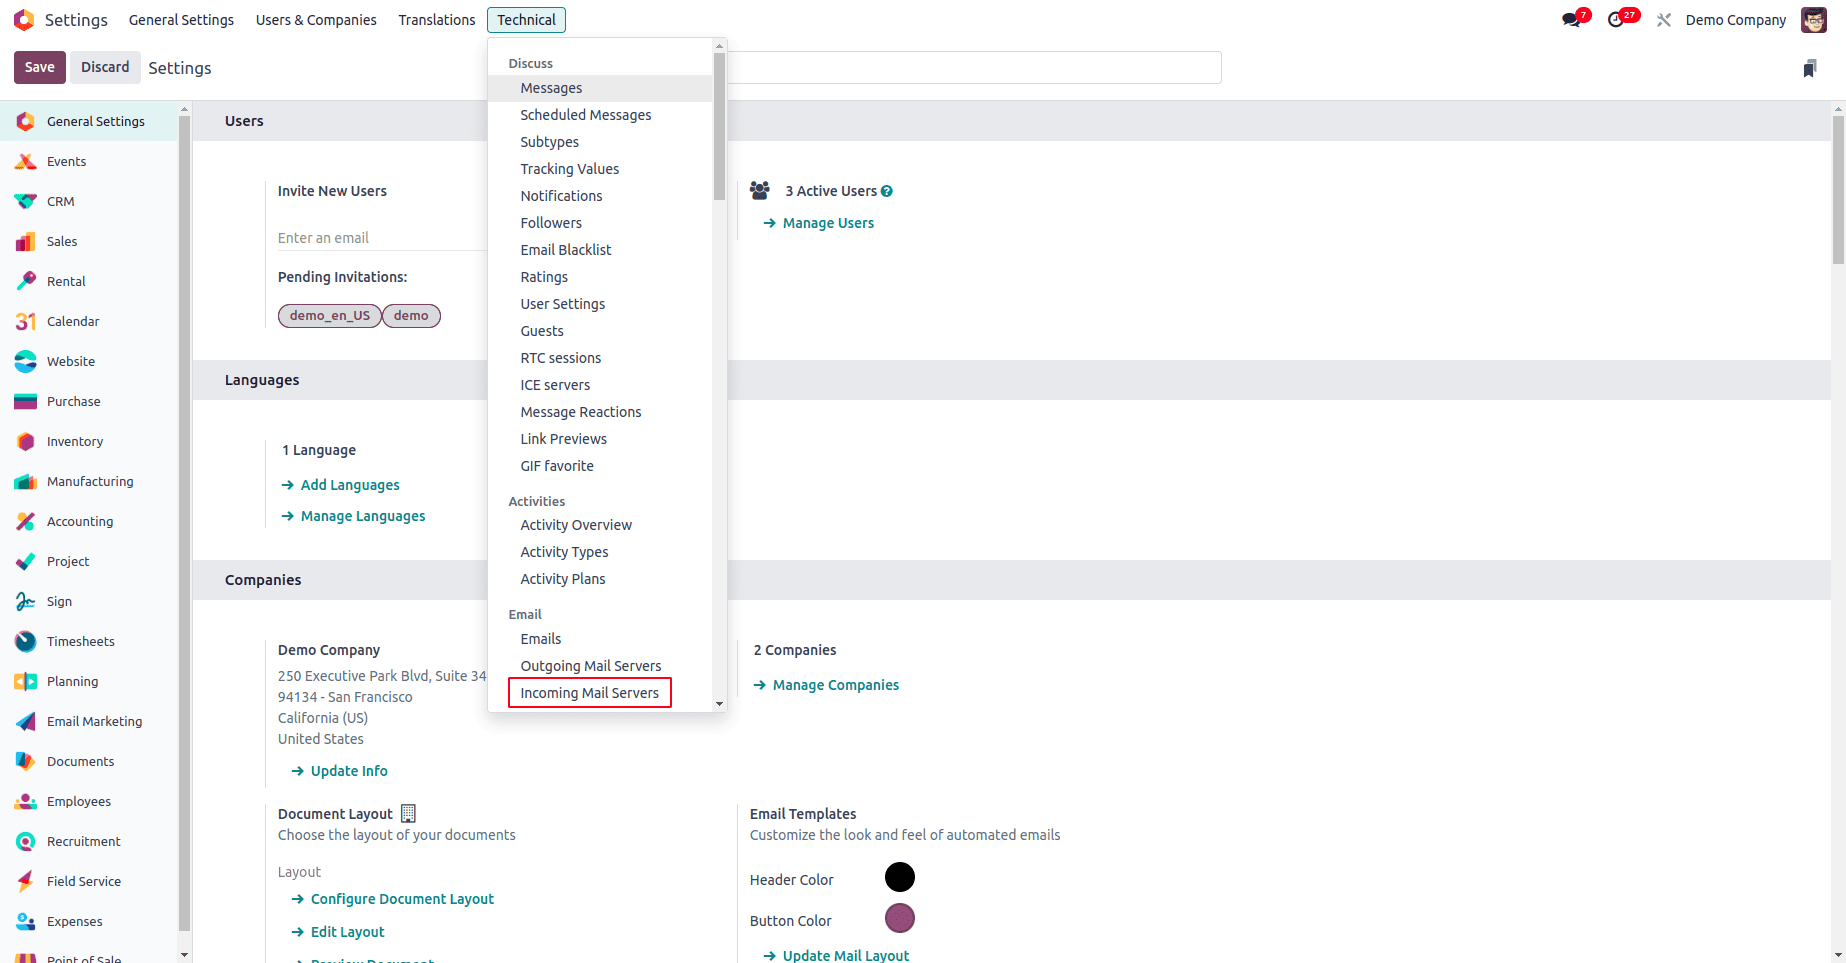
2. Click New to add a new incoming mail server.
Fill in Incoming Mail Server Details
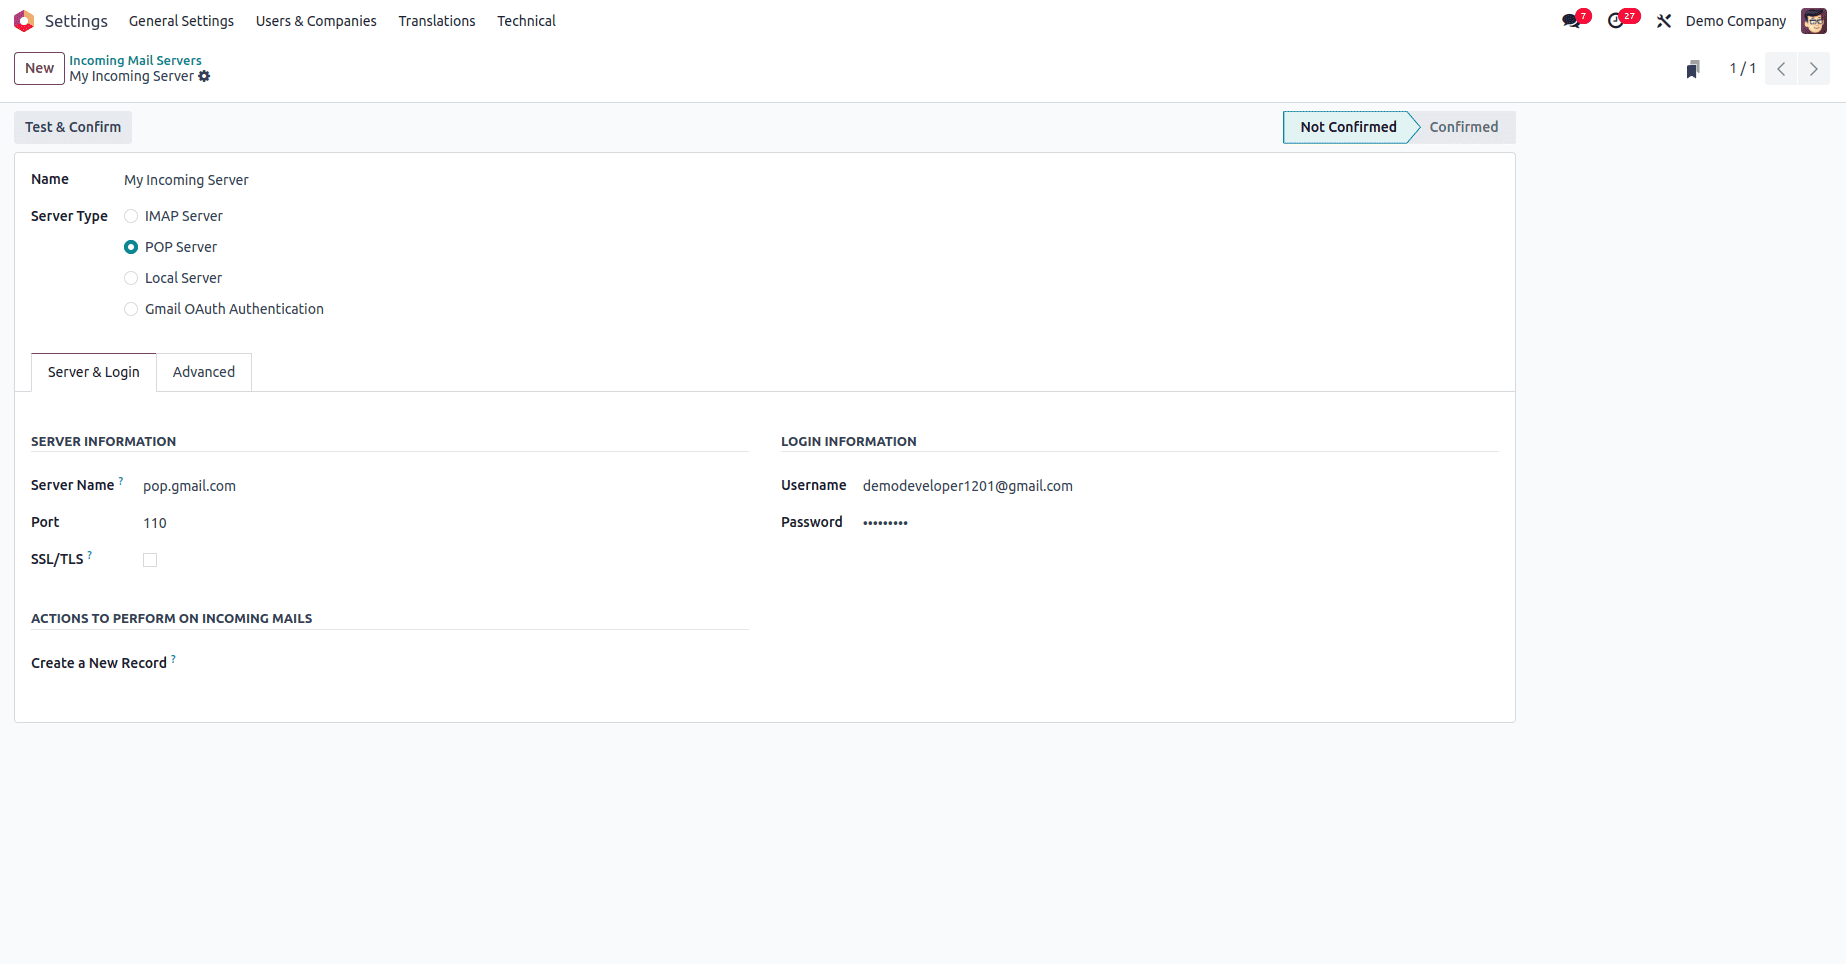
In the form view, complete the following fields:
1. Server Name: Enter the email server address:
* For Gmail POP3: pop.gmail.com.
* For Gmail IMAP: imap.gmail.com.
* For Outlook: outlook.office365.com.
2. Port: Specify the appropriate port for the email protocol
3. SSL/TLS: Enable this option to ensure secure email communication.
4. Username: Enter your full email address (e.g., `user@example.com`).
5. Password: Provide the corresponding email account app-specific password.
Actions to Perform on Incoming Mails
Odoo can automatically create records based on incoming emails. In the Actions to Perform on Incoming Mails section:
1. Create a Record in a Model: Select the model where emails should be processed. For example:
* Leads: Create CRM leads from incoming emails.
* Helpdesk Tickets: Generate support tickets for your helpdesk.
Test & Confirm the Configuration
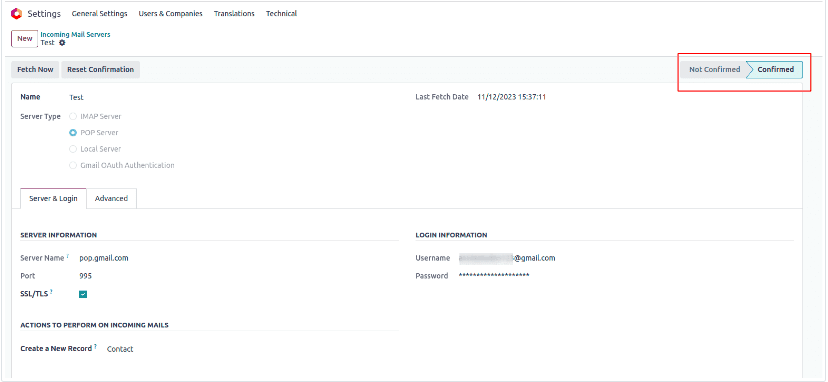
1. Click Test & Confirm in the top-right corner of the form view.

2. If the connection is successful, Odoo will update the status from NOT CONFIRMED to CONFIRMED.
Step 4: Monitoring and Troubleshooting Email Communication
Following this detailed guide, you can configure both outgoing and incoming mail servers in Odoo 18, unlocking powerful email integration features that boost communication, enhance productivity, and support secure business operations.
To read more about How to Configure Outgoing & Incoming Mail Servers in Odoo 17, refer to our blog How to Configure Outgoing & Incoming Mail Servers in Odoo 17.