Odoo is an ERP software that includes various business management tools like CRM, website and e-commerce, invoicing, accounting, manufacturing, warehouse management, project management, sales management, purchase management, HR management, and inventory management.
In this blog, we can see how to create a custom calendar on the Odoo 16 Website. For the illustration, I have created a sample model for defining the fields for which the calendar view is created on the website.
Below, I have created a test.model and defined its fields in a python file,
# -*- coding: utf-8 -*-
from odoo import fields, models
class TestModel(models.Model):
	"""Test model for defining fields required for calendar view"""
	_name = 'test.model'
	name = fields.Char(string='Event Name', required=True,
                   	help="Your test model record name")
	start_date = fields.Datetime(string='Start Date', required=True,
                             	help="Start date of the test model record")
	end_date = fields.Datetime(string='End Date', required=True,
                           	help="End date of the test model record")
	description = fields.Text(string='Description',
                          	help="Description of the test model record")
The security for test model is defined in the ir.model.access.csv as below,
id,name,model_id/id,group_id/id,perm_read,perm_write,perm_create,perm_unlink
access_test_model,test.model,model_test_model,,1,1,1,1
Now I have defined the form view for the test model, the window action, and the menu item for the test model as given below,
<?xml version="1.0" encoding="utf-8"?>
<odoo>
	<!-- Test Model Form View   -->
	<record id="view_test_model_form" model="ir.ui.view">
    	<field name="name">test.model.view.form</field>
    	<field name="model">test.model</field>
    	<field name="arch" type="xml">
        	<form string="Test">
            	<sheet>
                	<group>
                    	<group>
                        	<field name="name"/>
                        	<field name="start_date"/>
                        	<field name="end_date"/>
                        	<field name="description"/>
                    	</group>
                	</group>
            	</sheet>
        	</form>
    	</field>
	</record>
     <!-- Test Model Tree View   -->
     <record id="view_test_model_tree" model="ir.ui.view">
    	<field name="name">test.model.view.tree</field>
    	<field name="model">test.model</field>
    	<field name="arch" type="xml">
        	<tree>
            	<field name="name"/>
            	<field name="start_date"/>
            	<field name="end_date"/>
        	</tree>
    	</field>
	</record>
      <record id="test_model_calendar_action"
        	model="ir.actions.act_window">
    	<field name="name">Test Model Action</field>
    	<field name="res_model">test.model</field>
    	<field name="view_mode">tree,form</field>
	</record>
	<menuitem id="test_model_calendar_menu_action" name="Test model"
          	parent="website.menu_website_global_configuration" sequence="12"
          	action="test_model_calendar_action"/>
</odoo>
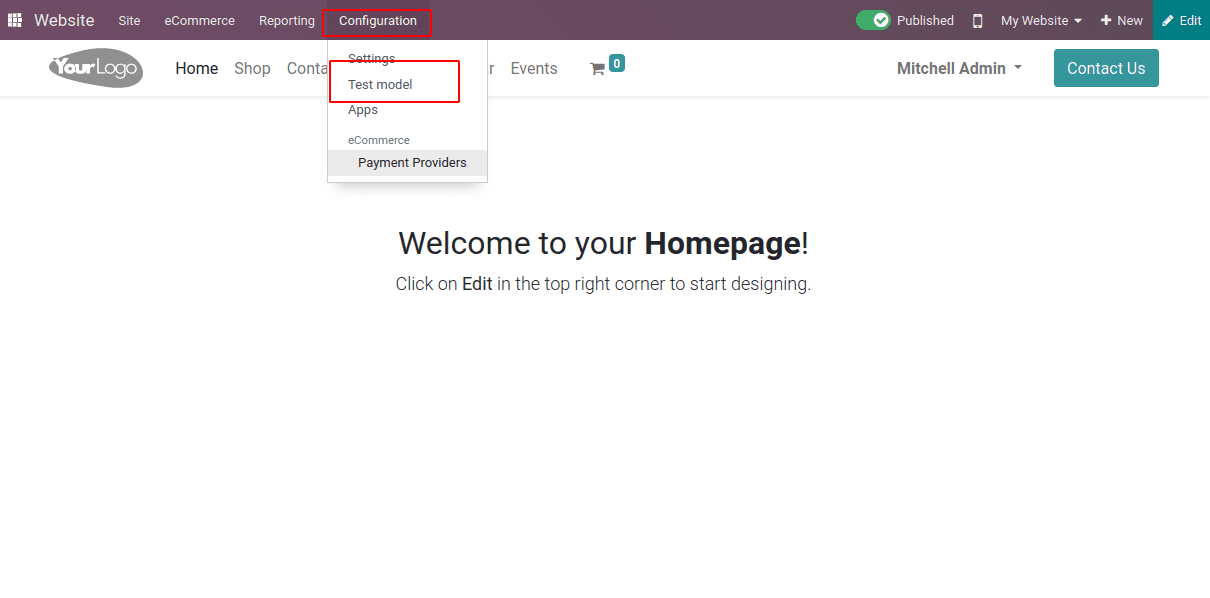
The Test model menu item comes under the website global configuration menu since we have set the "website.menu_website_global_configuration" as parent menu, as shown below.

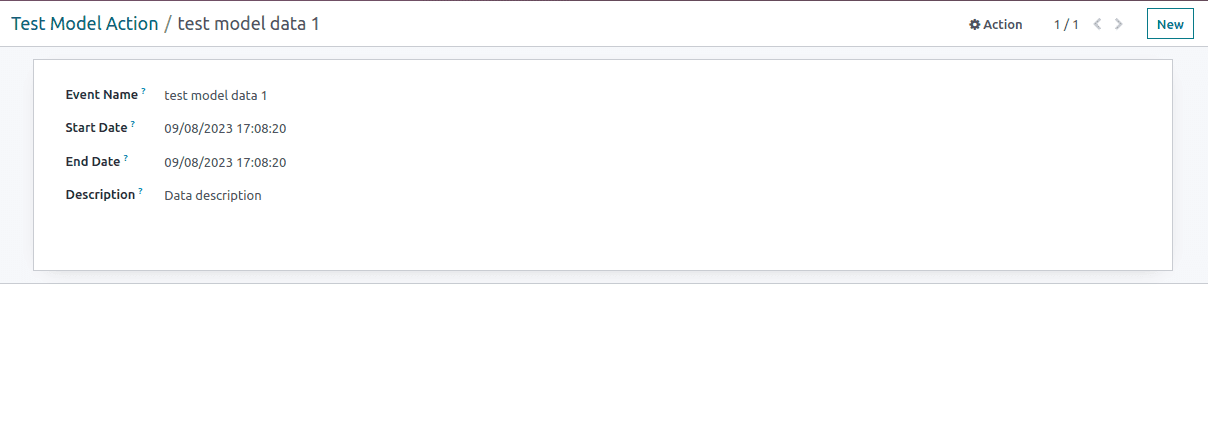
Next is creating the test record as given below. Fill in the start and end date and add other required fields for your model.

Now, define the template for your calendar. For that, I have created the calendar template and called that template into another template using t-call, and that template is rendered using a controller route, which I have currently added as a menu URL.
<?xml version="1.0" encoding="utf-8"?>
<odoo>
	<template id="website_test_model_calendar_template">
    	<section class="test_model_calendar_main_class">
        	<div class="container">
            	<div class="row">
                	<div class="col-lg-5">
                    	<h4>Test Model Calendar</h4>
                    	<div class="test_model_calendar"/>
                	</div>
            	</div>
        	</div>
    	</section>
	</template>
	<template id="global_events_calendar" name="Global Calendar Events">
    	<t t-call="website.layout">
        	<div class="oe_structure oe_empty">
            	<t t-call="test_model_calendar.website_test_model_calendar_template"/>
        	</div>
    	</t>
	</template>
</odoo>
The http controllers, which is accessed from the website menu and from the rpc call, is defined in the Python file as below,
from datetime import timedelta
from odoo import http
from odoo.fields import Date
from odoo.http import request
class WebsiteCalendar(http.Controller):
	@http.route('/test-model/calendar', type='json', website=True, auth='public')
	def test_model_website_calendar(self,  start, end):
    	"""Day with events"""
    	events = request.env["test.model"].search([
        	"|",
        	("start_date", "<=", end),
        	("end_date", ">=", start),
    	])
    	days = set()
    	one_day = timedelta(days=1)
    	start = Date.from_string(start)
    	end = Date.from_string(end)
    	for event in events:
        	now = max(Date.from_string(event.start_date), start)
        	event_end = min(Date.from_string(event.end_date), end)
        	while now <= event_end:
            	days.add(now)
            	now += one_day
    	return [Date.to_string(day) for day in days]
	@http.route(['/test_model_calendar_menu'], type='http', auth="user",
            	website=True)
	def global_calendar_events(self):
    	"""Url for Test model calendar menu"""
    	return request.render(
        	"test_model_calendar.global_events_calendar")
In the static folder, the JS file for extending the website animation class is created.
odoo.define('test_model_calendar.calendar', function (require) {
	"use strict";
	var animation = require('website.content.snippets.animation');
	var core = require("web.core");
	var time = require("web.time");
	var ajax = require("web.ajax");
	var DATE_FORMAT = time.strftime_to_moment_format("%Y-%m-%d");
	var DATETIME_FORMAT = time.strftime_to_moment_format(
    	"%Y-%m-%d %H:%M:%S");
	var INVERSE_FORMAT = "L";
	var CalendarList = animation.Class.extend({
    	selector: ".test_model_calendar_main_class",
    	init: function () {
        	this.datepicker_options = {
            	inline: true,
            	minDate: moment().subtract(100, "years"),
            	maxDate: moment().add(100, "years"),
            	icons: {
                	previous: "fa fa-chevron-left",
                	next: "fa fa-chevron-right",
            	},
            	format: DATE_FORMAT,
            	useCurrent: false,
            	locale: moment.locale(),
        	};
        	return this._super.apply(this, arguments);
    	},
    	start: function (editable_mode) {
        	this._super.apply(this, arguments);
        	if (editable_mode) {
            	return;
        	}
        	this._dates = {
            	min: null,
            	max: null,
            	matches: [],
        	};
        	this.$calendar = this.$target.find('.test_model_calendar')
            	.on("change.datetimepicker", $.proxy(this, "day_selected"))
            	.on("update.datetimepicker", $.proxy(this, "calendar_moved"));
        	this.preload_dates(moment())
            	.then($.proxy(this, "render_calendar"));
    	},
    	calendar_moved: function (event) {
        	if (event.change !== "M") {
            	return;
        	}
        	this.preload_dates(event.viewDate);
    	},
    	preload_dates: function (when) {
        	var margin = moment.duration(4, "months");
        	if (
            	this._dates.min && this._dates.max &&
            	this._dates.min <= when - margin &&
            	this._dates.max >= when + margin
        	) {
            	return $.Deferred().resolve();
        	}
        	margin.add(2, "months");
        	var start = moment(when - margin),
            	end = moment(when + margin);
        	if (this._dates.min) {
            	start.subtract(6, "months");
        	}
        	if (this._dates.max) {
            	end.add(6, "months");
        	}
        	return this.load_dates(start, end);
    	},
    	load_dates: function (start, end) {
        	return ajax.rpc(
            	"/test-model/calendar",
            	{
                	start: start.format(DATE_FORMAT),
                	end: end.format(DATE_FORMAT),
            	}
        	).then($.proxy(this, "_update_dates_cache", start, end));
    	},
    	_update_dates_cache: function (start, end, dates) {
        	if (!this._dates.min || this._dates.min > start) {
            	this._dates.min = start;
        	}
        	if (!this._dates.max || this._dates.max < end) {
            	this._dates.max = end;
        	}
        	this._dates.matches = _.union(this._dates.matches, dates);
    	},
    	render_calendar: function () {
        	var enabledDates = _.map(this._dates.matches, function (ndate) {
            	return moment(ndate, DATE_FORMAT);
        	});
        	this.$calendar.empty().datetimepicker(_.extend({},
            	this.datepicker_options, {'enabledDates': enabledDates}));
    	},
	});
	animation.registry.test_model_calendar = CalendarList;
	return {
    	DATE_FORMAT: DATE_FORMAT,
    	DATETIME_FORMAT: DATETIME_FORMAT,
    	INVERSE_FORMAT: INVERSE_FORMAT,
	};
});
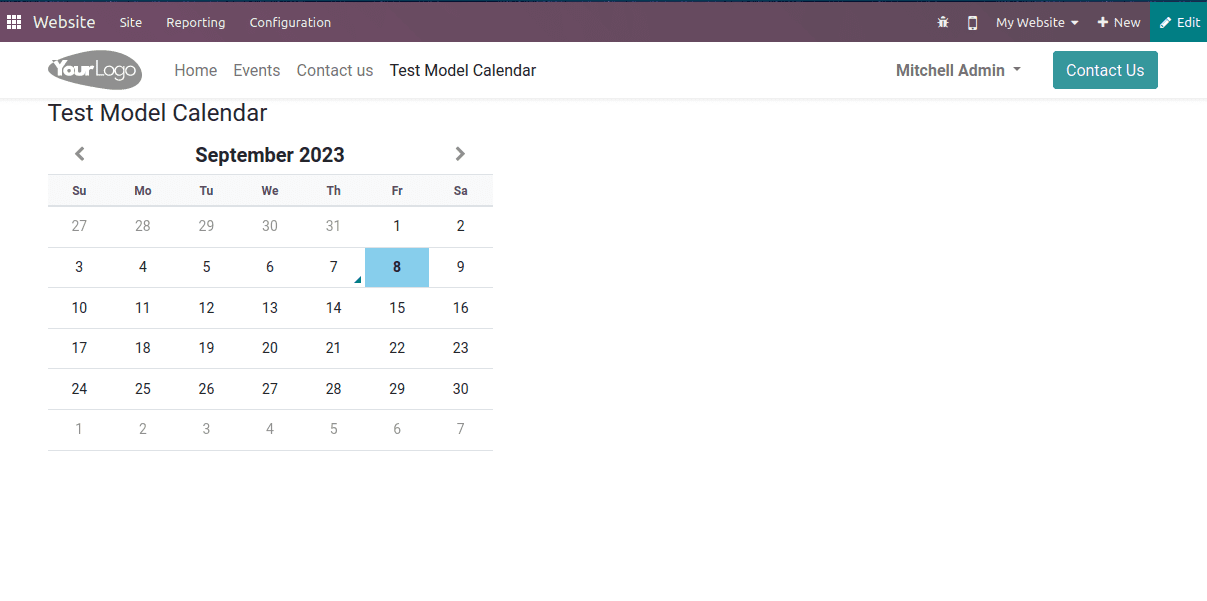
The end result after linking ‘/test_model_calendar_menu’ link to a website menu,

Above, we have discussed a sample method for explaining the creation of a custom calendar for any model on the Odoo 16 Website.
To read more about scheduling online appointments with the Odoo 16 calendar app, refer to our blog How to Schedule Online Appointments With Odoo 16 Calendar App