Odoo offers a common approach for creating new user menus and their accompanying actions. Odoo is now more practical and simple to use as a result.
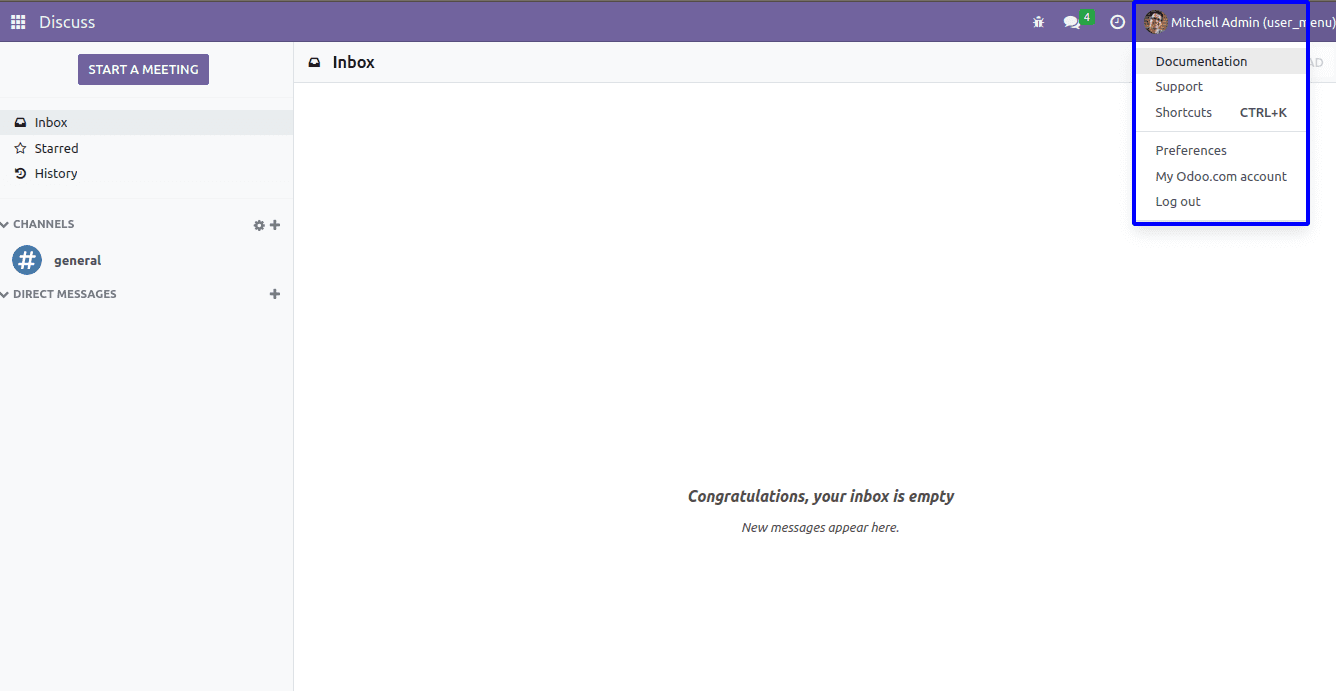
You can observe your profile photo on the top right corner of the page when you enter into Odoo. The user menu, which appears when you click on the image, offers drop-down options like documentation, settings, shortcuts, support, etc.

We can now begin to examine how to build and administer a new user menu in Odoo16.
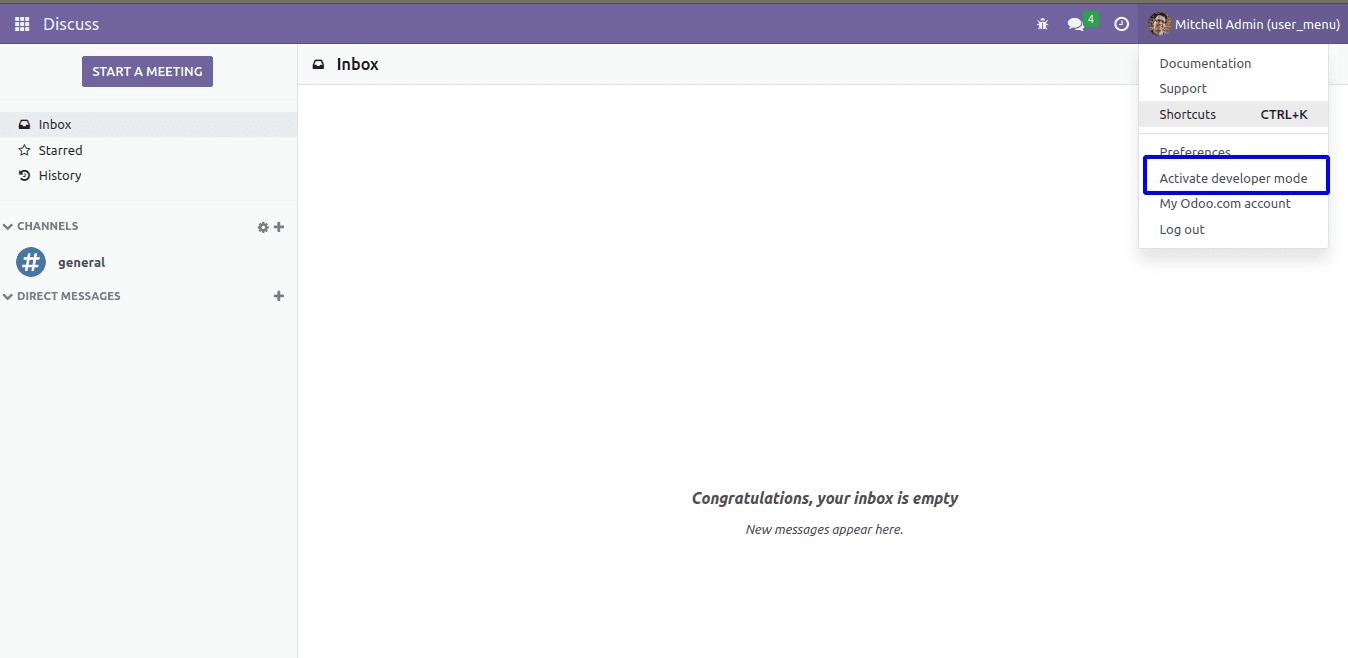
I've included a menu to enable developer mode in this place.
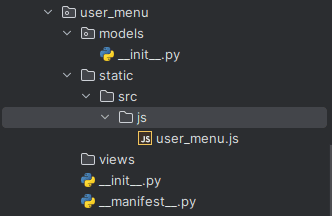
We must first construct a new module for it. Moreover, the supplied value needs to be added to the appropriate Registries. They are crucial to the extensibility of the user interface. After being registered, the object can be used by the rest of the web client. Registries are a key/value map that is ordered. While defining an object, a number of Odoo JavaScript framework features query the registry (field, view, client action, service, etc.).
Categories of Registries:
- Effect Registry: A database of all effects that are accessible.
- Formatter Register: Functions for value formatting.
- Parser Registry: Functions for parsing values
- Main Components Registry: Top-level components for your web client
- Service Registry: The services that need to be activated are all listed in the service registry.
- Systray Registry: Information shown on the navbar's right side.
- User menu Registry: The User menu Registry houses all of the menu items.
We must expand the User menu registry to add a new user menu in order to do so. All of the menu items shown when the user menu is opened are stored in the User Menu Registry (category: user menu items).
Moreover, user menu items are defined by the use of functions that take the environment as an argument and output an object containing the data listed below:
Description: Callback for menu item
Text: To dial when a choice is made
Href: Use the href property to place the item's value in the a> element.
Hide: To bury the object
Order: Establishes where the item stands in relation to other dropdown items.
Create a js file in the static / src / js directory.

And add the below code to that js file.
/** @odoo-module **/
import { registry } from "@web/core/registry";
import { preferencesItem } from "@web/webclient/user_menu/user_menu_items";
import { routeToUrl } from "@web/core/browser/router_service";
import { browser } from "@web/core/browser/browser";
const usersMenuRegistry = registry.category("user_menuitems");
function debugItems(env) {
  const URL = $.param.querystring(window.location.href, 'debug=1');
  return {
      type: "item",
      id: "debug",
      description: env._t("Activate developer mode"),
      href: URL,
      callback: () => {
          browser.open(URL, "_self");
      },
      sequence: 50,
  };
}
registry.category("user_menuitems").add("debug", debugItems)
Automatic conversion to an Odoo module: /** @odoo-module **/. Import the class or method. We must add a function to the Site after importing. After opening a template, UserMenu adds a new element with a particular value to the object.
window.location.href: returns the current page's href (URL).
'assets':{
   'web.assets_backend':  [
       '/user_menu/static/src/js/user_menu.js',
   ],
},
After creating the javascript, we need to add this in the __manifest__.py file in the assets.
Activate the developer mode is a menu item that appears on the user menu when the module has been installed (top right of navigation bar).

Now when you click on the "Activate Developer Mode" menu, you can see that developer mode is activated. The user menu registry contains all menu items that are shown when opening the user menu (the navbar element with the user name on the top right).