The Sales module in Odoo ERP streamlines and enhances businesses' sales processes. It features a customer portal, order management system, quotation builder, payment gateway integration, invoice generator, and sales dashboard. This module automates the creation, sending, and approval of sales orders for payments. Additionally, it includes tools for Sales Forecasting, integration with CRM, and detailed sales activity reporting. Odoo Mobile allows users to access sales data from anywhere, providing flexibility. The system also supports instant invoice sending, simplifying customer tracking and follow-ups. Overall, Odoo is one of the most comprehensive sales management solutions available, suitable for businesses of any size. This module plays a vital role in boosting profitability, enhancing customer engagement, and providing a clear overview of product-related metrics.
Product Documents in Odoo Sales
Product documentation plays a crucial role in marketing, SEO, and customer retention by providing detailed information that validates a product’s features and fosters customer trust. Satisfied customers positively impact a brand's reputation. Product documentation can take various forms, such as user manuals, technical specifications, knowledge bases, guides, software development kits, feature documentation, and marketing materials. It typically includes clear instructions, troubleshooting tips, product features, and practical examples of usage.
With Odoo 18, users can now create and attach product documentation directly within the Sales Module. As a result, customers who place sales orders will automatically receive these documents, which can be downloaded, printed, or shared. To take advantage of this feature, simply navigate to the Odoo 18 Sales Module and configure the product data through the "Products" window in the "Products" menu.
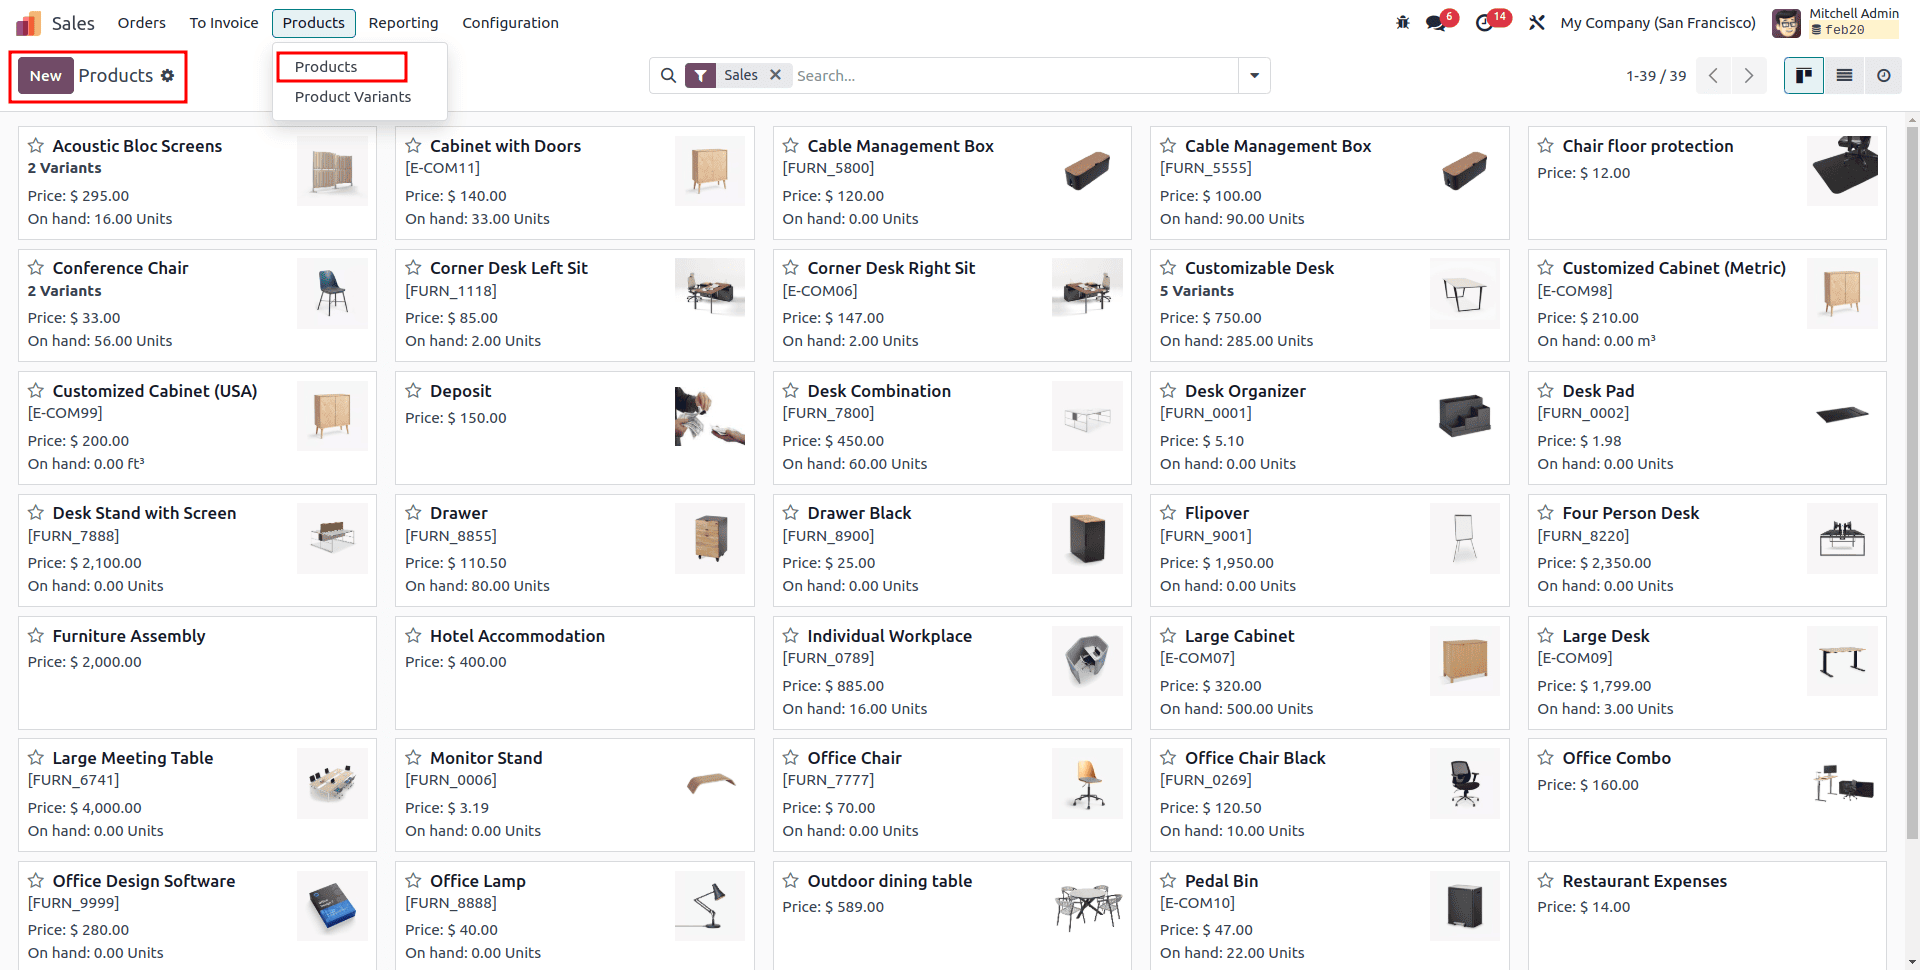
To begin creating a new product in the Sales Module, navigate to the "Products" menu and select "Product." Then, click the "New" button to start adding a new product.
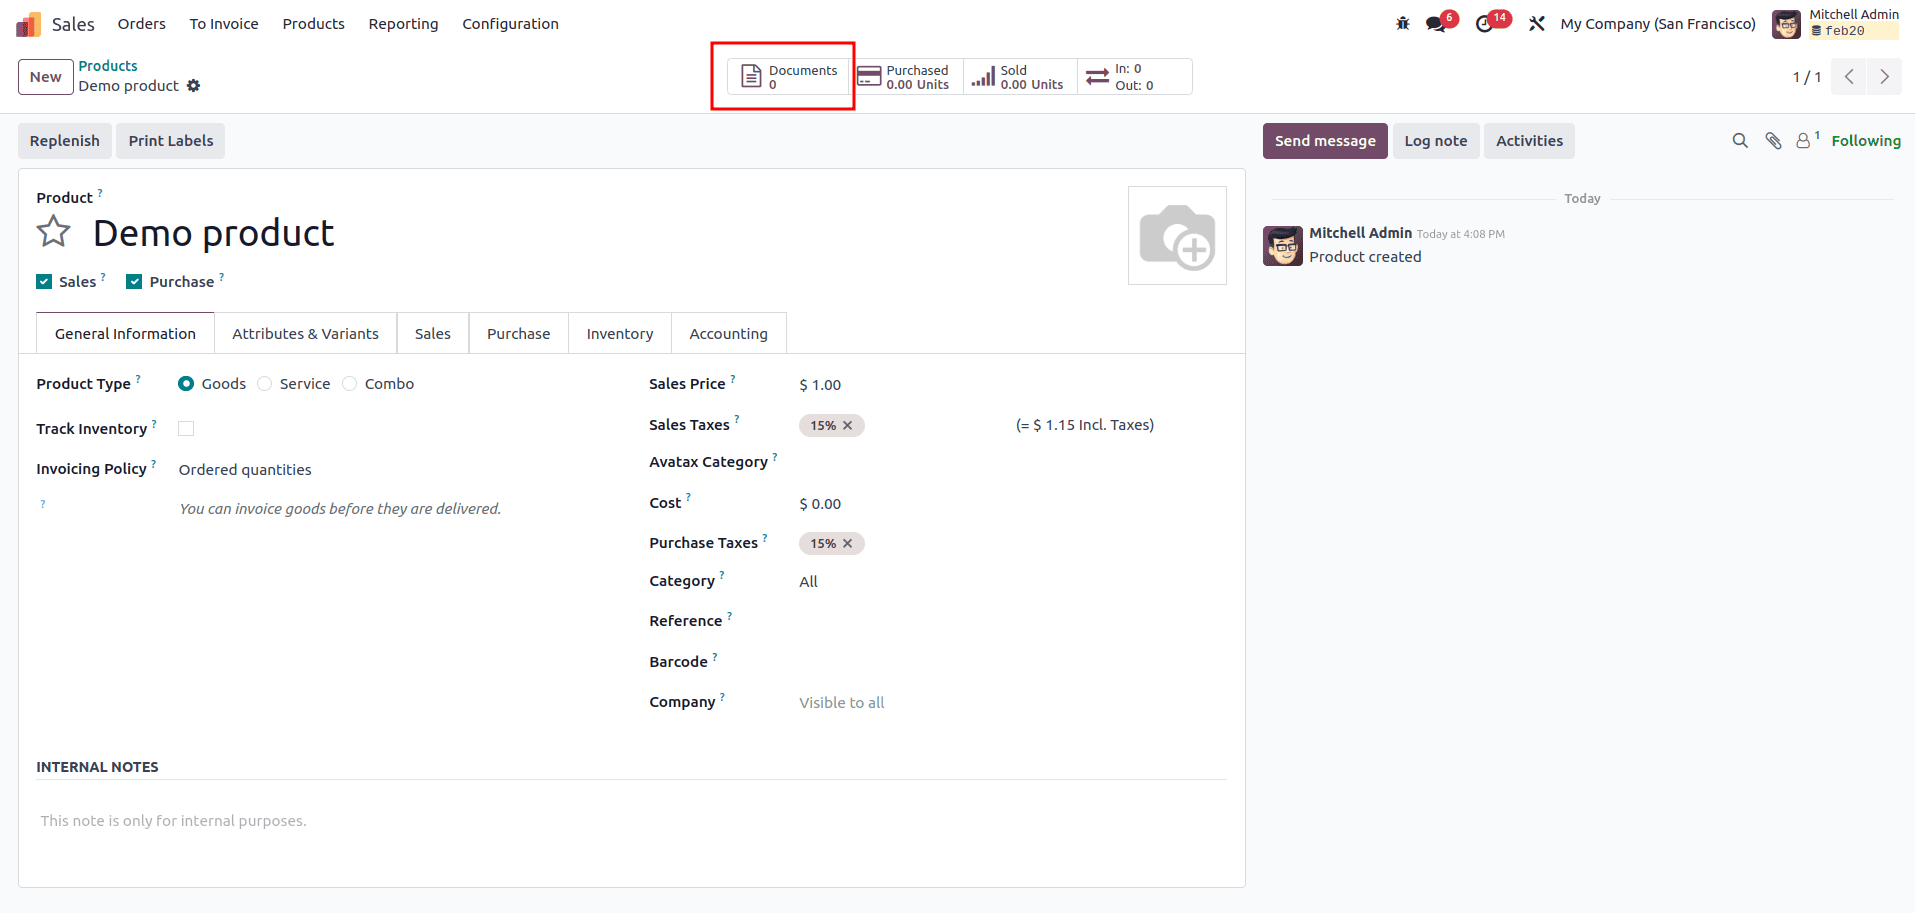
After creating the product and updating the necessary product details, click on the "Documents" smart button in the top-left corner of the form. This section allows you to attach product-related documents, such as warranties, descriptions, user manuals, and more. Since it's currently empty, you can add new product documents by clicking the "Documents" smart button. The Document Dashboard window will then appear as shown below.
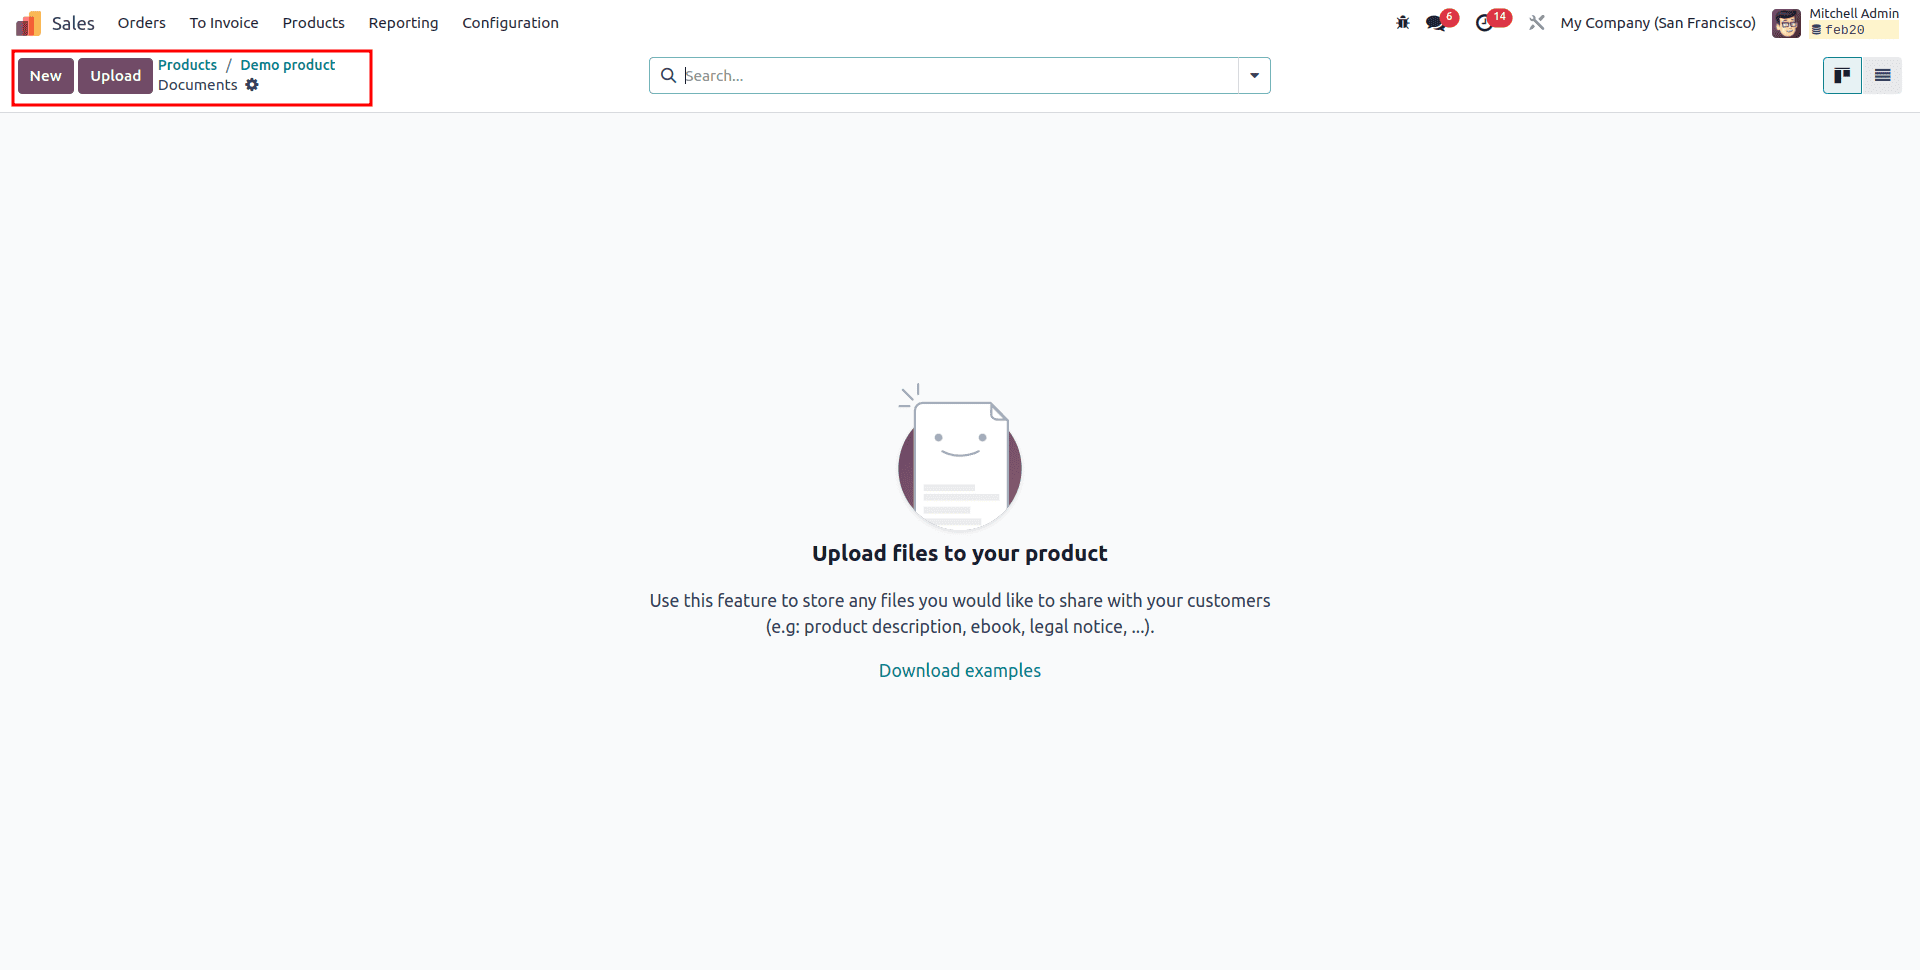
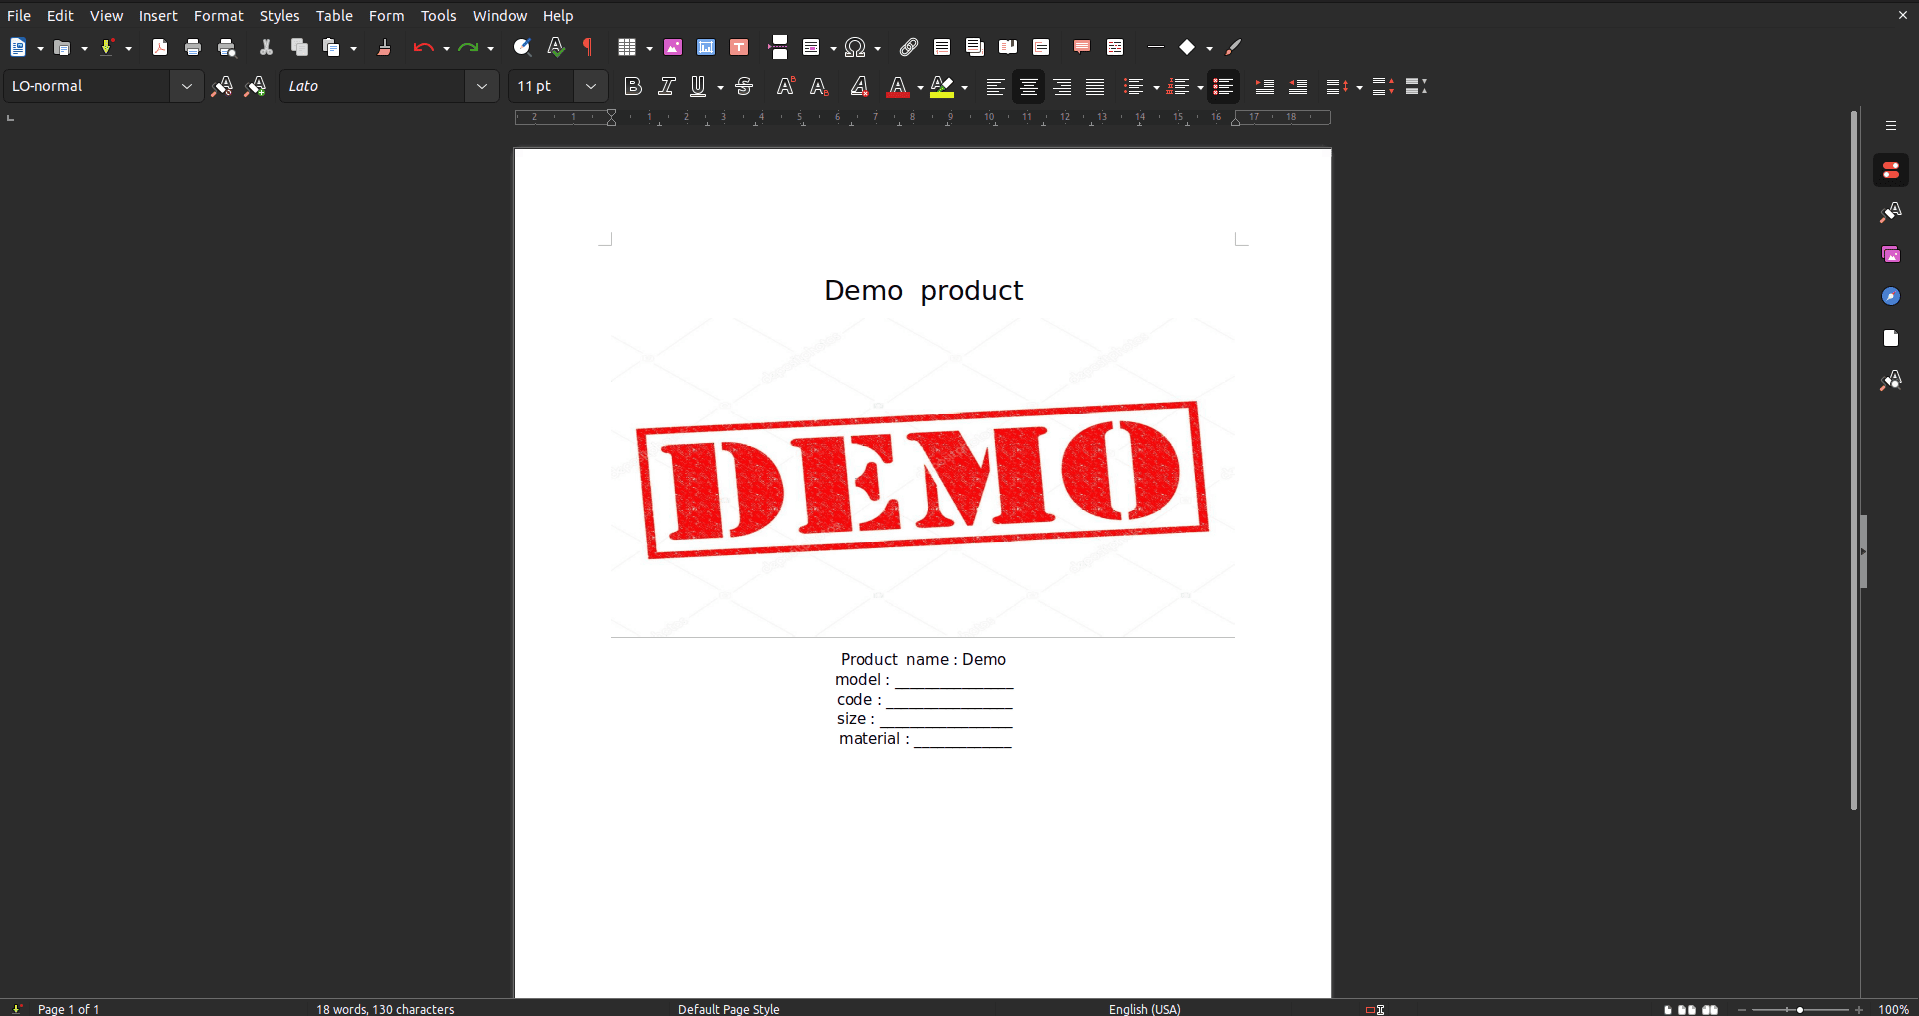
You can create or add a new document by clicking the "New" button. For this demonstration, I have created a sample product document and saved it as a PDF file on my device, as shown below.
Return to the Document Configuration form and select a document type from the "Type" field. The "Upload your file" button allows you to choose and upload a PDF file from your device's storage.
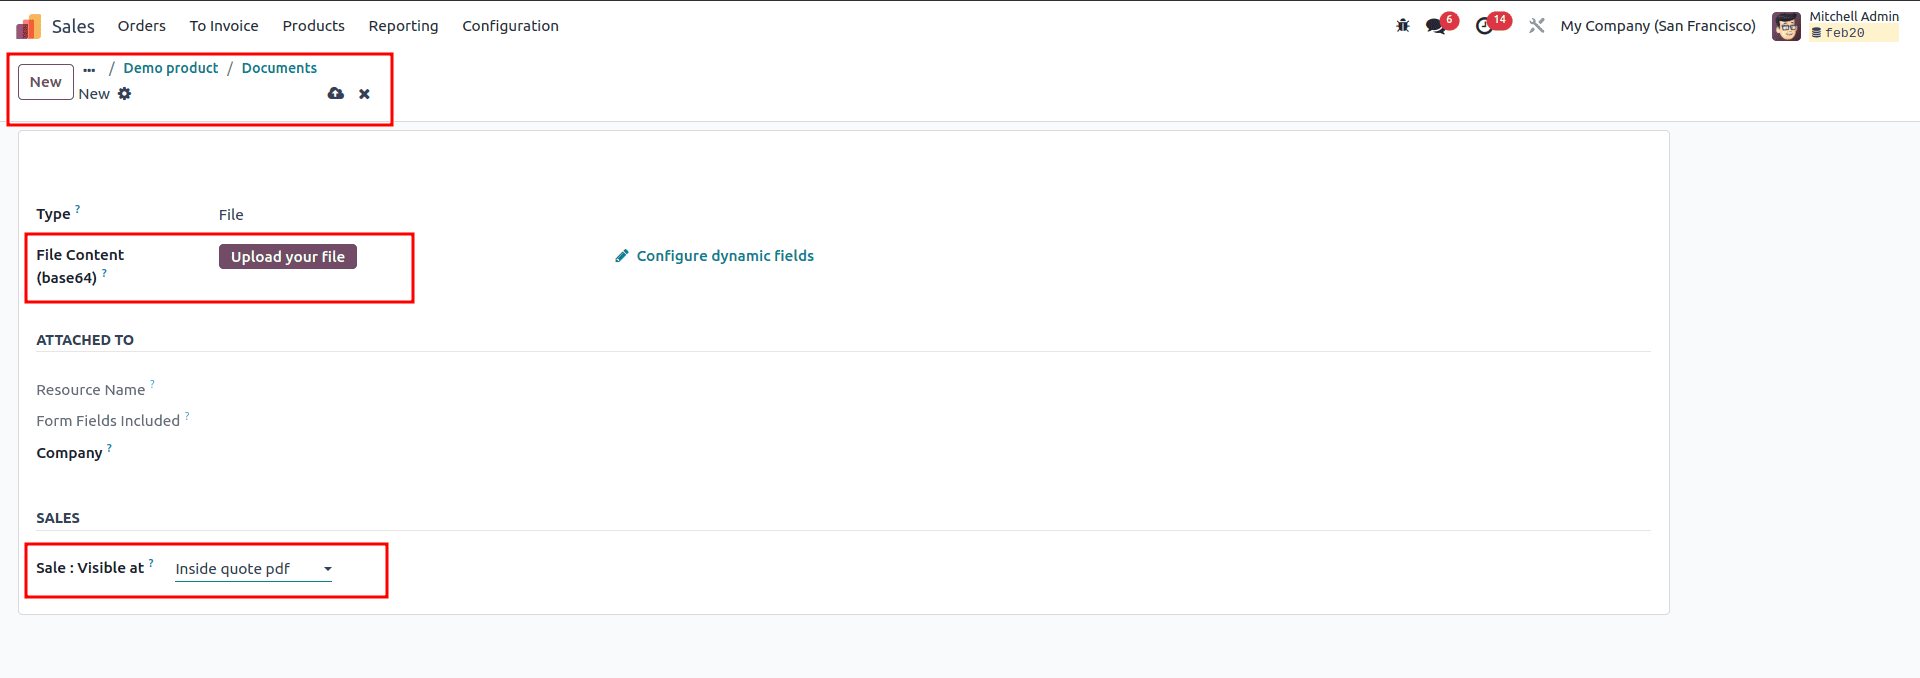
The "Sale: Visible at" field lets you control when product details are shared with customers on the eCommerce page. You can choose from "On quote", "On confirm order" or "Inside quote pdf". If you select "On quote" the document will be visible within the quotation. Choosing "On confirm order" makes the document available only after the order is confirmed. If you select "Inside quote pdf" the product description will appear between the header and footer of the quote template.

This example uses a sample product document. Once the document is added, you can proceed to create a Sales Order with the product. To do so, navigate to the 'Sales Order' window under the 'Orders' menu. Click the 'New' button to start a new sales order and begin entering the necessary details as shown below.

Fill in the required fields on the form, such as 'Customer', 'Referrer', 'Invoice Address', 'Expiration', 'Recurring Plan' and 'Pricelist’.
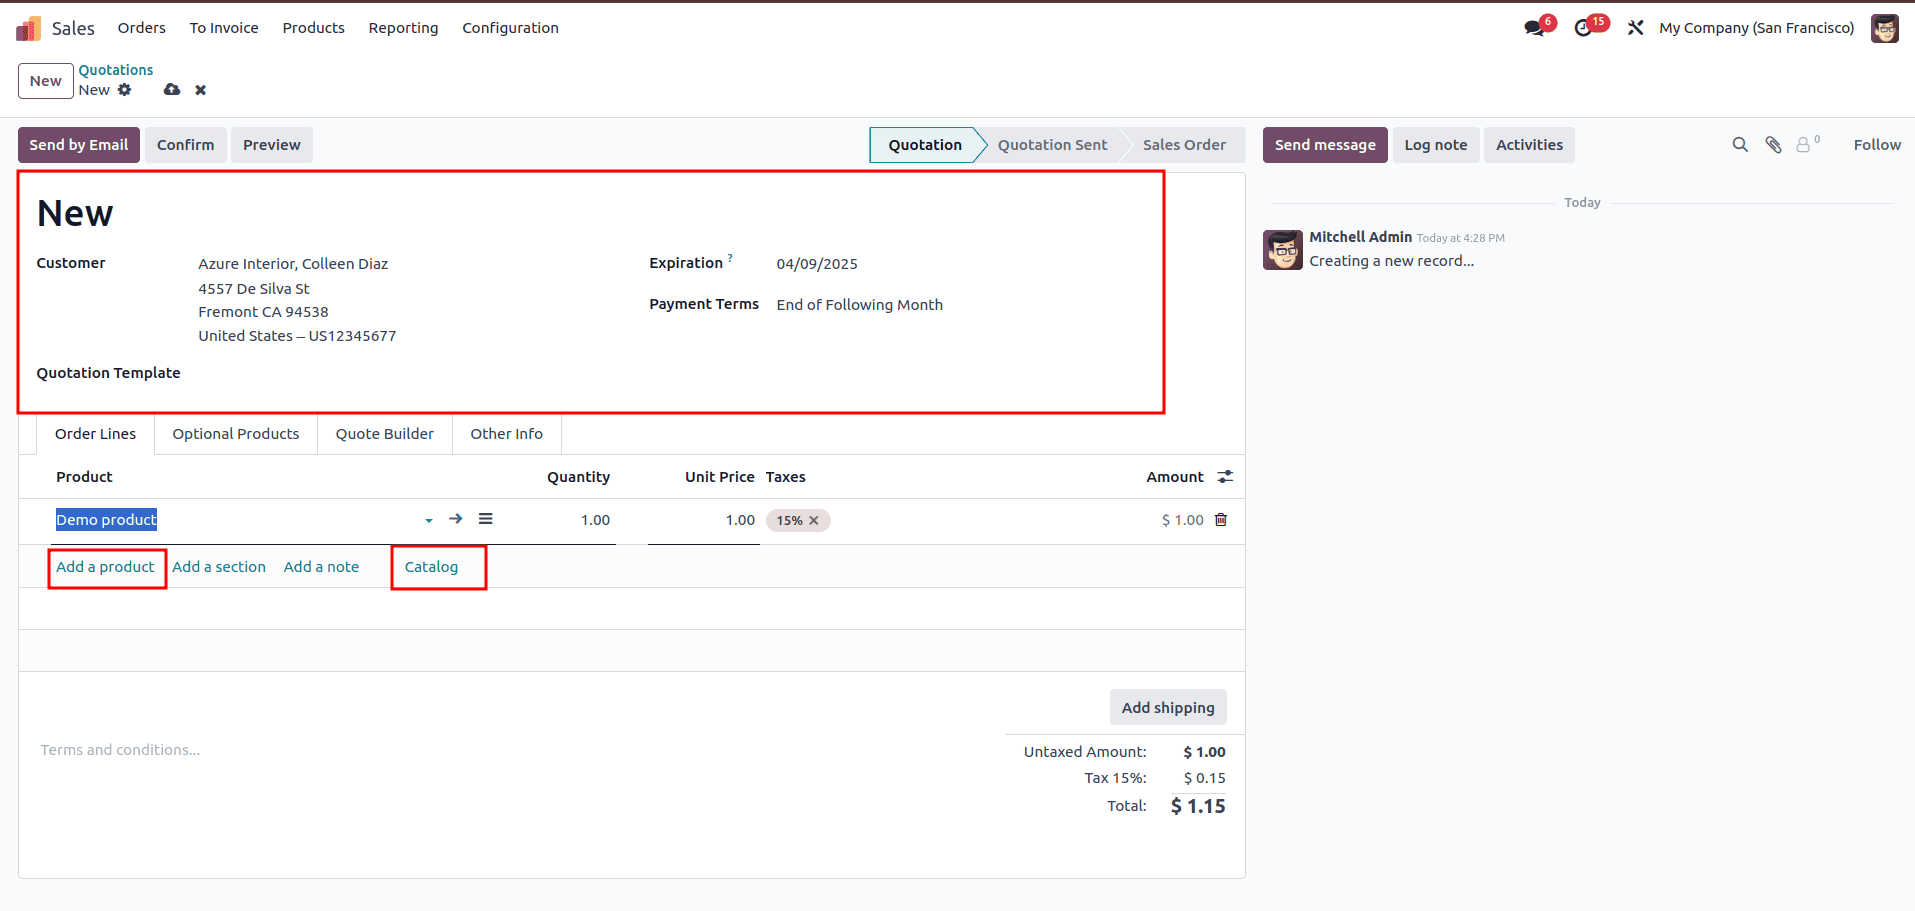
To add a product, click on 'Add a product' in the 'Order Lines' section. Alternatively, you can use the 'Catalog' button to select products directly from the product catalog. In this case, we can choose the previously configured product, 'Demo Product' as shown below.
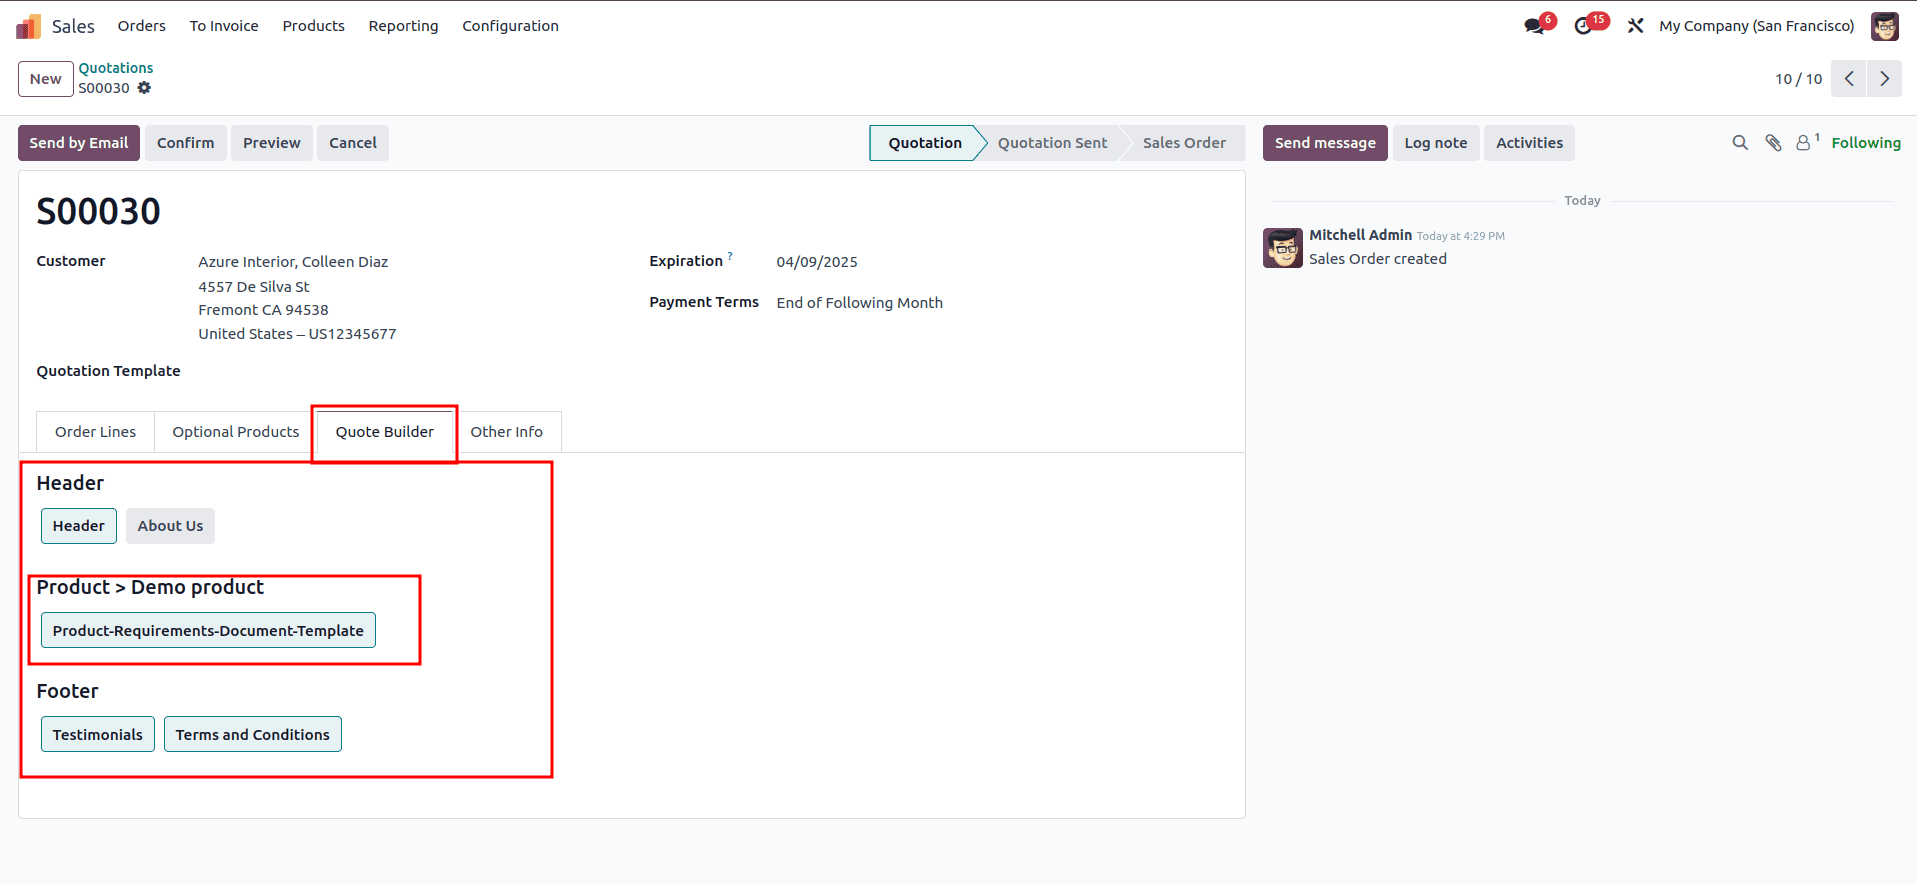
After selecting the product, navigate to the "Quote Builder" tab. Here, choose the product document name that you want to appear in the "PDF Quote" report. Additionally, you can customize the header and footer for the "PDF Quote" within this tab.
Once the Sales Order is saved, you can click on the “Action” menu located next to the “New” button and choose the “Print” option.
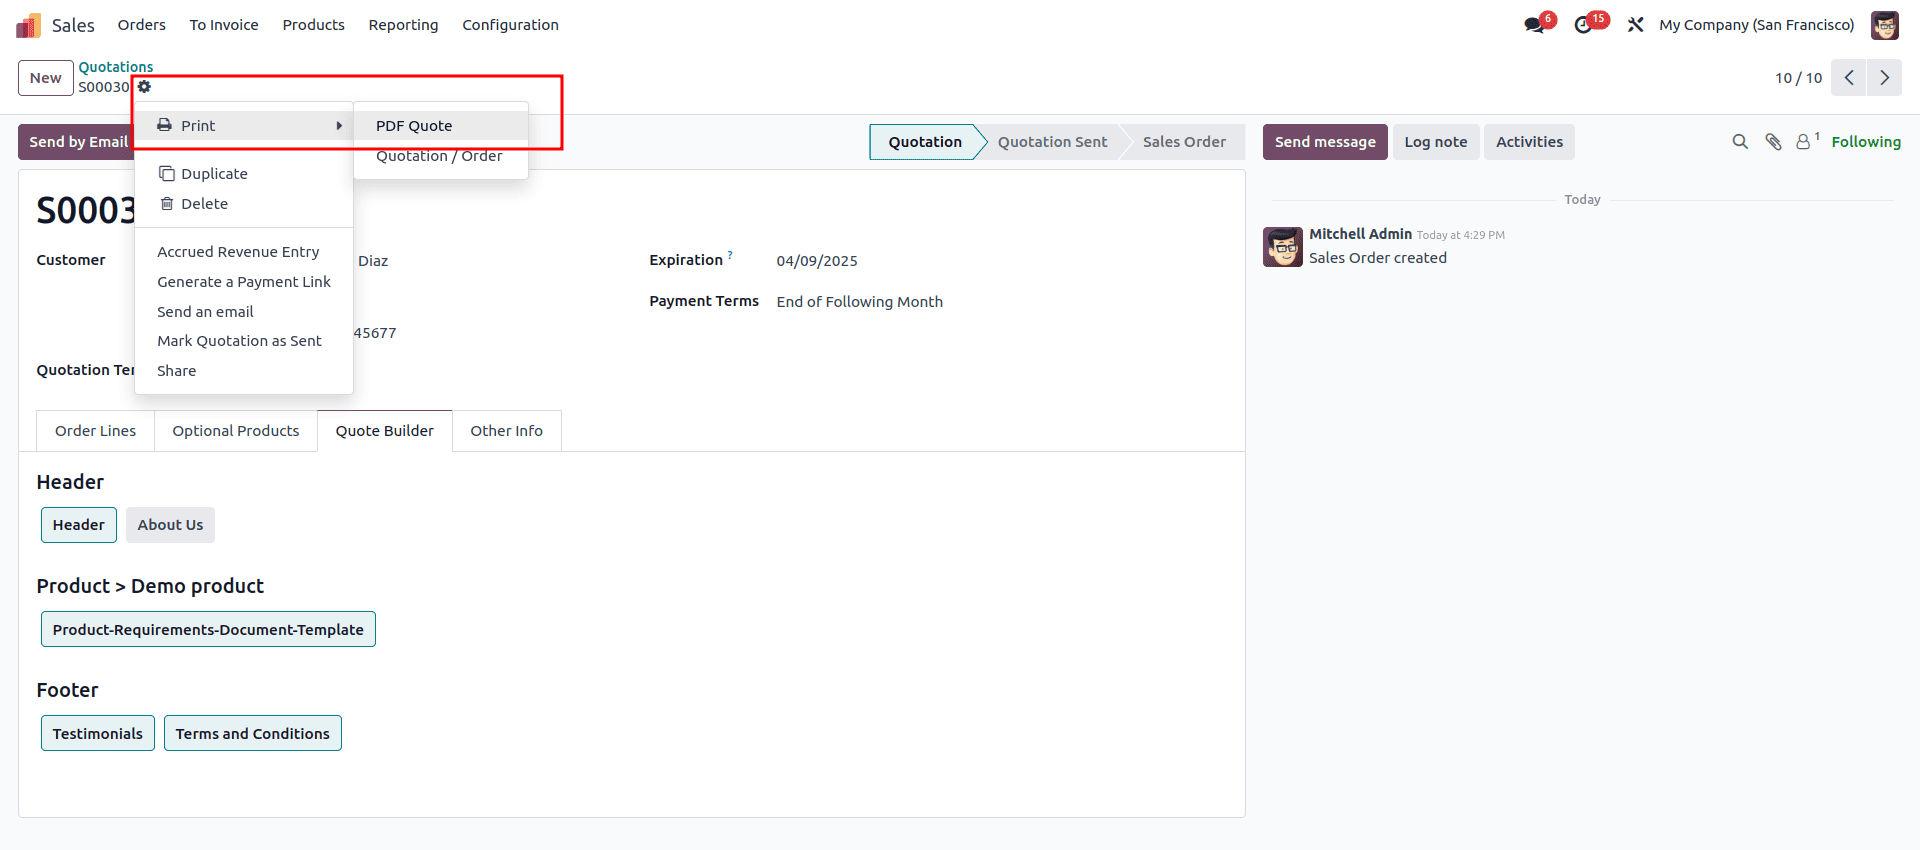
The "Print" section offers several options, including the ability to print the "PDF Quote," "Quotation/Order," "Pickup and Return Receipt," and "Timesheets." For this explanation, we will focus on downloading the PDF quotation, which contains product information. By selecting the "PDF Quote" option, the document file will be downloaded to your device. You can then open the file to either print or save it for future reference. The product details will appear between the Header and Footer pages of the Quotation Template, as shown in the screenshot below.
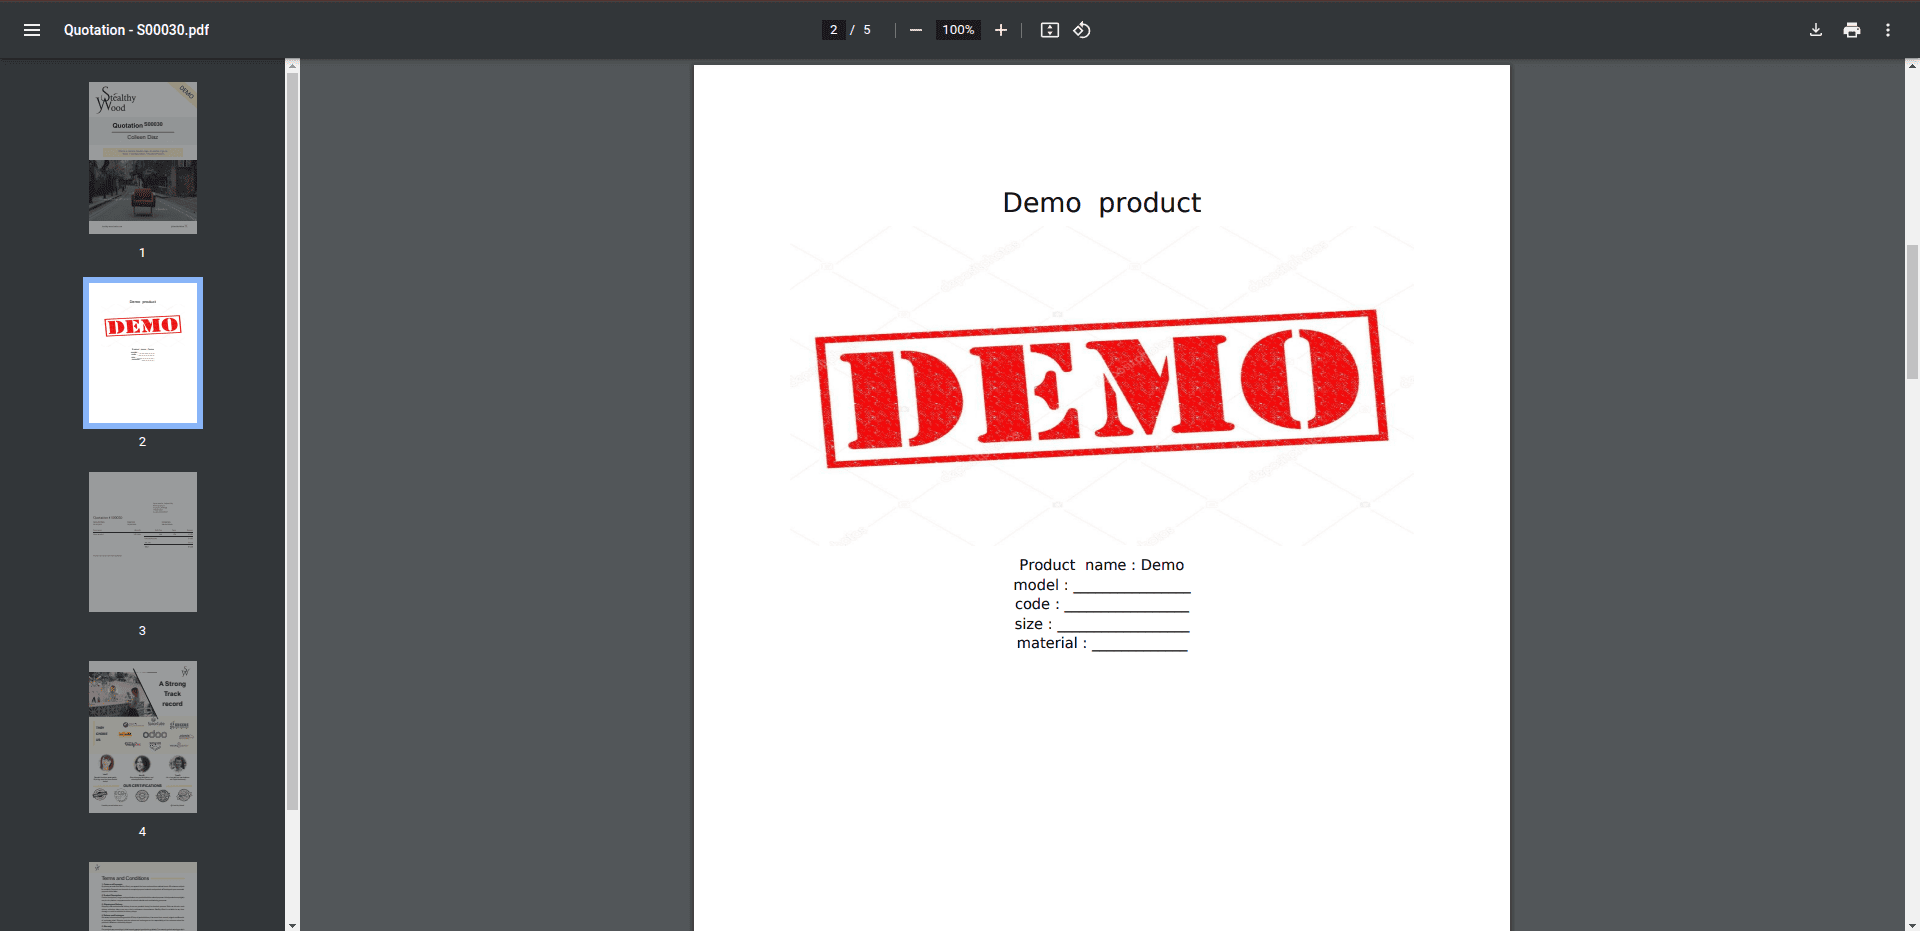
This is the process for attaching a product document within the Odoo product configuration forms, incorporating them into quotes and sales orders, and downloading them through the Odoo 18 Sales Module.
To read more about How to Attach Product Documents Using Odoo 17 Sales App, refer to our blog How to Attach Product Documents Using Odoo 17 Sales App.