For any business, customer service is the key to a good customer-company relationship. Planning and managing product maintenance, installation, etc. can be time-consuming. To help you with this Odoo 13 provides you with the Field Service module. With the help of the Field Service module one can plan, assign, perform and asses the Customer Field Service tasks effectively and efficiently. Not only that, one can evaluate the work reports and know the progress in your business.
General Configuration
In order to avail of this service install the Odoo v13 Field Service module and click open it.
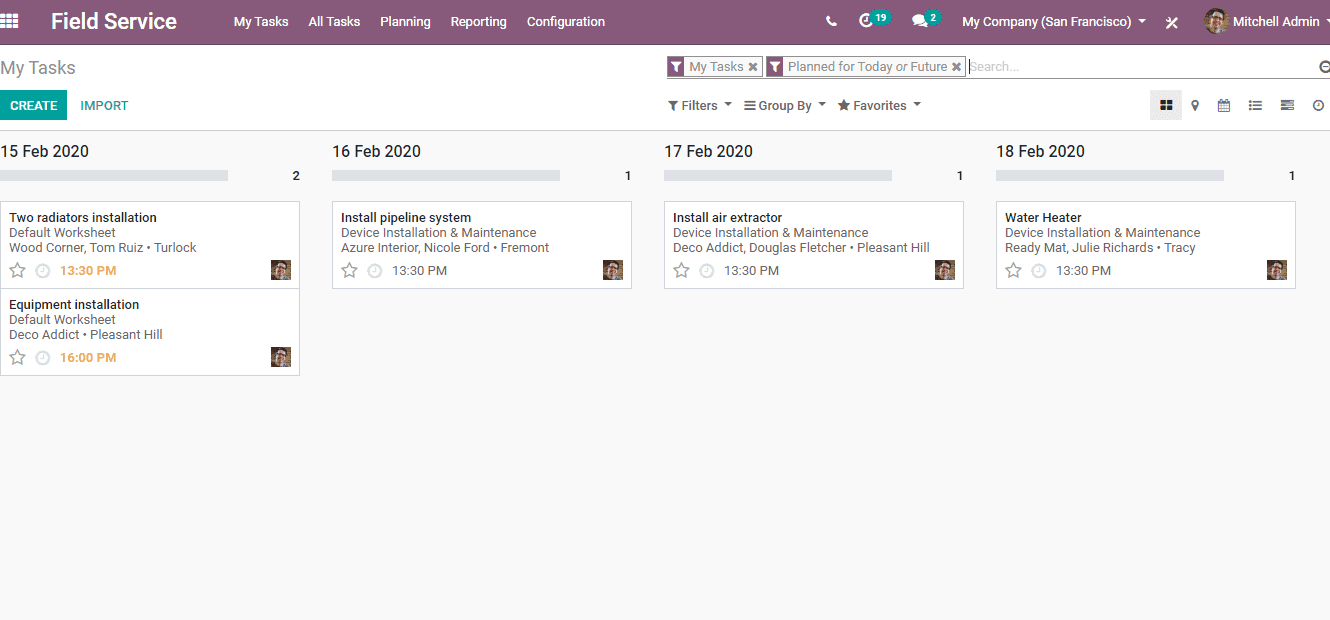
In this window, you can see the chronologically arranged tasks in Kanban's view. You can also make use of different ‘Views’ provided on the top right corner by clicking on them. In addition to that, multiple ‘Filter’ and ‘Group by’ options are also available. By clicking on each task, you can view the task details and if you want to make changes you can always click ‘Edit’ and change it as you wish.
The administrator can view ‘All Tasks’ irrespective of the employee assigned to it by going to;
Field Service -> All tasks -> All tasks
You can edit the task as you wish, by following the same manner with ‘My Tasks’.
In order to create a new task, click the ‘Create’ button on the top left corner. Now a window like the one given below will appear.
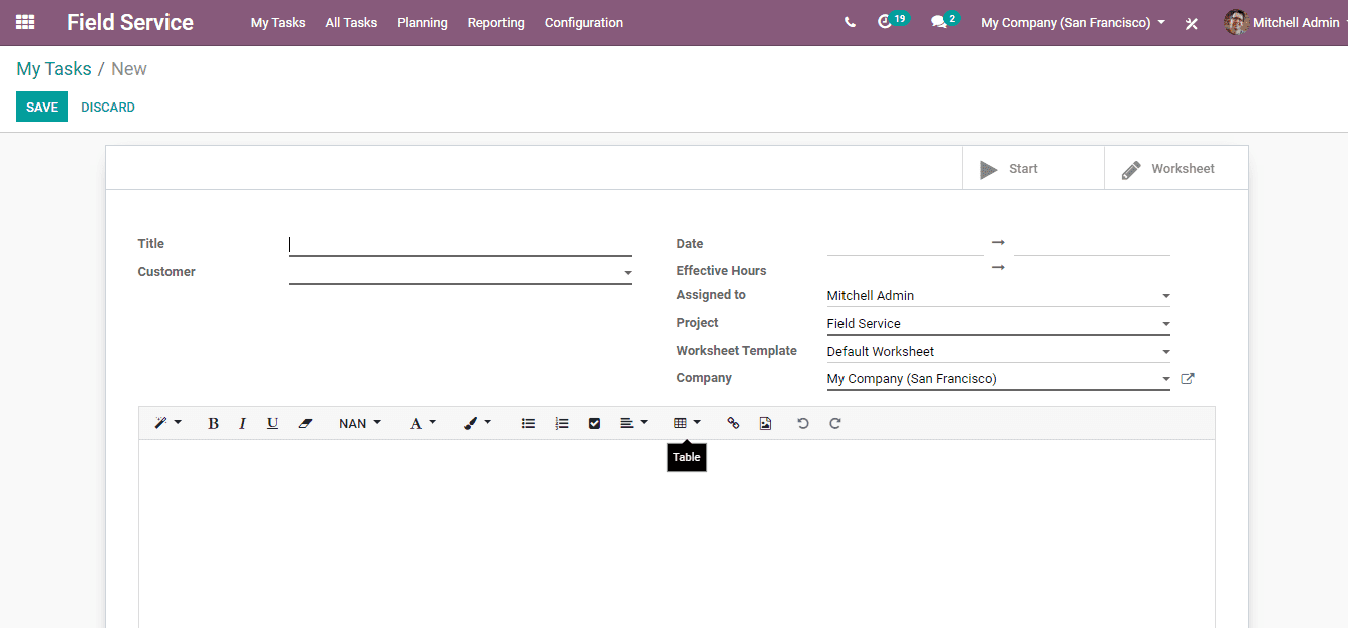
Fill up the name of the task you want in ‘Title’. While selecting the customer, you can provide only the address of the service point to the employee if the customer wishes to remain anonymous. To do this, just select the customer and erase the name of the ‘Customer’ field to do this and click ‘Save’ after entering details on all the required fields.
After selecting the customer, select the time of service, assign an employee, specify the service project type, etc. You can add a foot description also to inform about any particularities about the task. Complete the form and click ‘Save’ to save the document.
Now think of a scenario where the customer asks for another fixing or service to the serviceman at the time of service. In such cases, the “Extra Quotation” feature comes in handy. By activating this feature, all the paperwork that has to be done after servicing can be avoided as the serviceman himself can update the quotation right at the service point itself.
To activate this feature; Go to, Field Service -> Configuration -> Settings
Now a window like the one given below will appear.
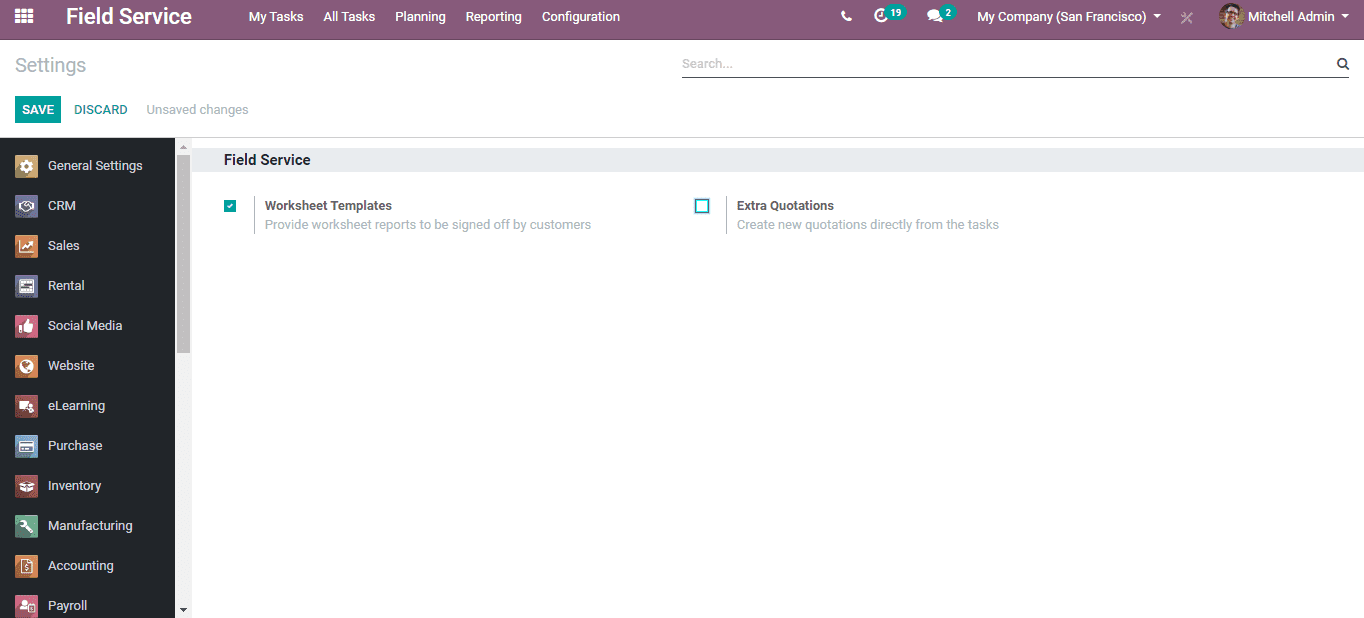
Here, tick mark the ‘Extra Quotation’ option and after that;
Go to Field Service -> Configuration -> Projects
In this new window, you can see all the different projects in Field Service. Select the one to which you want to enable this feature. Now a new window will appear showing the detailed form of the project. Click the ‘Edit’ button and scroll down to the bottom.
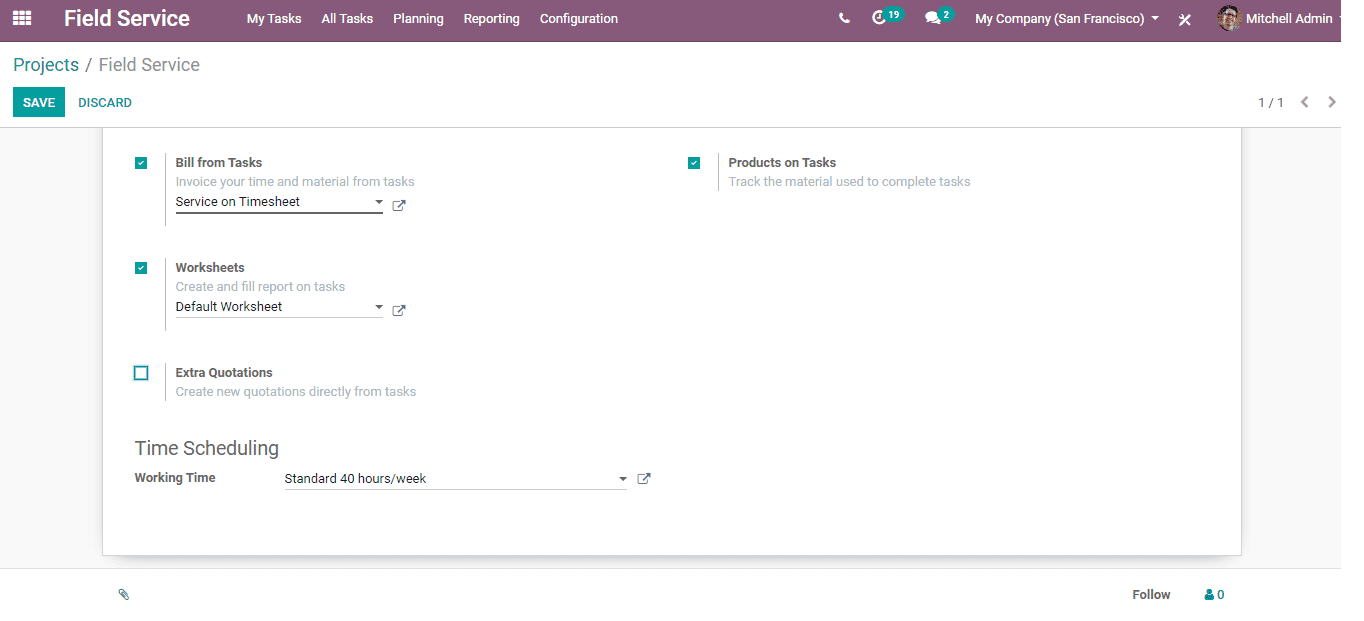
Tickmark the ‘Extra Quotation’ option and now this feature is enabled for this project.
Once the serviceman starts to do his job, there is provision for recording the time taken for the service. Once done, you can click ‘Mark as Done’ and after that invoice and report can be created and send.
You can plan your activities without any confusion and self-contradiction in the Field Service module by looking at the schedule. For that;
Go to Field Service -> Planning -> By user/ BY project/ By worksheet
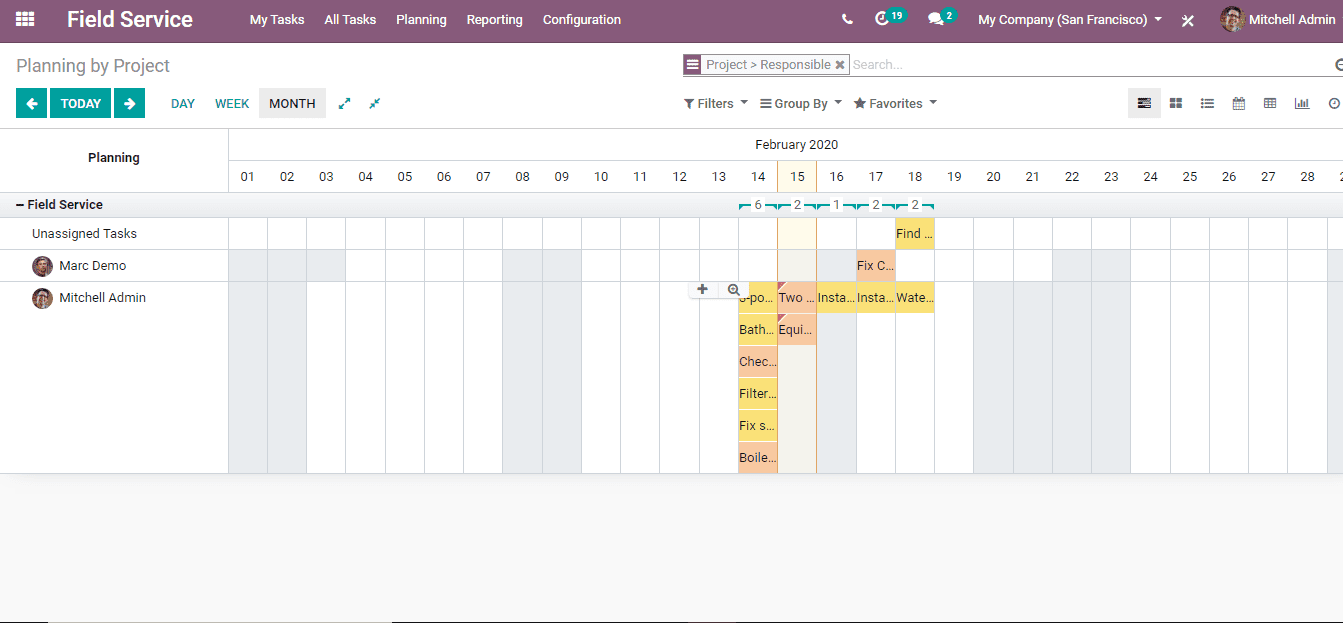
Here you can analyze the planned activities. Changes can be done to these tasks by simply clicking on them. Multiple filter and grouping options are available here also.
You can analyze your work reports by going to; Field Service -> Reporting
That is everything basic about Field Service Module in Odoo 13.