The cash spent by an employee for company purposes is an employee expense. In some situations, employees must spend money on various projects and purchase commodities from vendors for company purposes. In these cases, a firm is responsible for giving back the money to employees. We need support to manage employee expense management, and Odoo ERP is the best solution for it. Several types of employee expenses include medical, travel, and vendor-related expenses. We can quickly manage all these expenses using Odoo 15 Accounting module.
This blog explains employee expense management in Odoo 15 Accounting module.
Users can easily register various expenses of employees of your Company in journals and manage them using an Odoo ERP. Quick management of employee expenses becomes easy within Odoo 15 Accounting module. Let’s see how to handle employee expenses in Odoo 15.
To Use Employee Expense in Odoo 15 Accounting
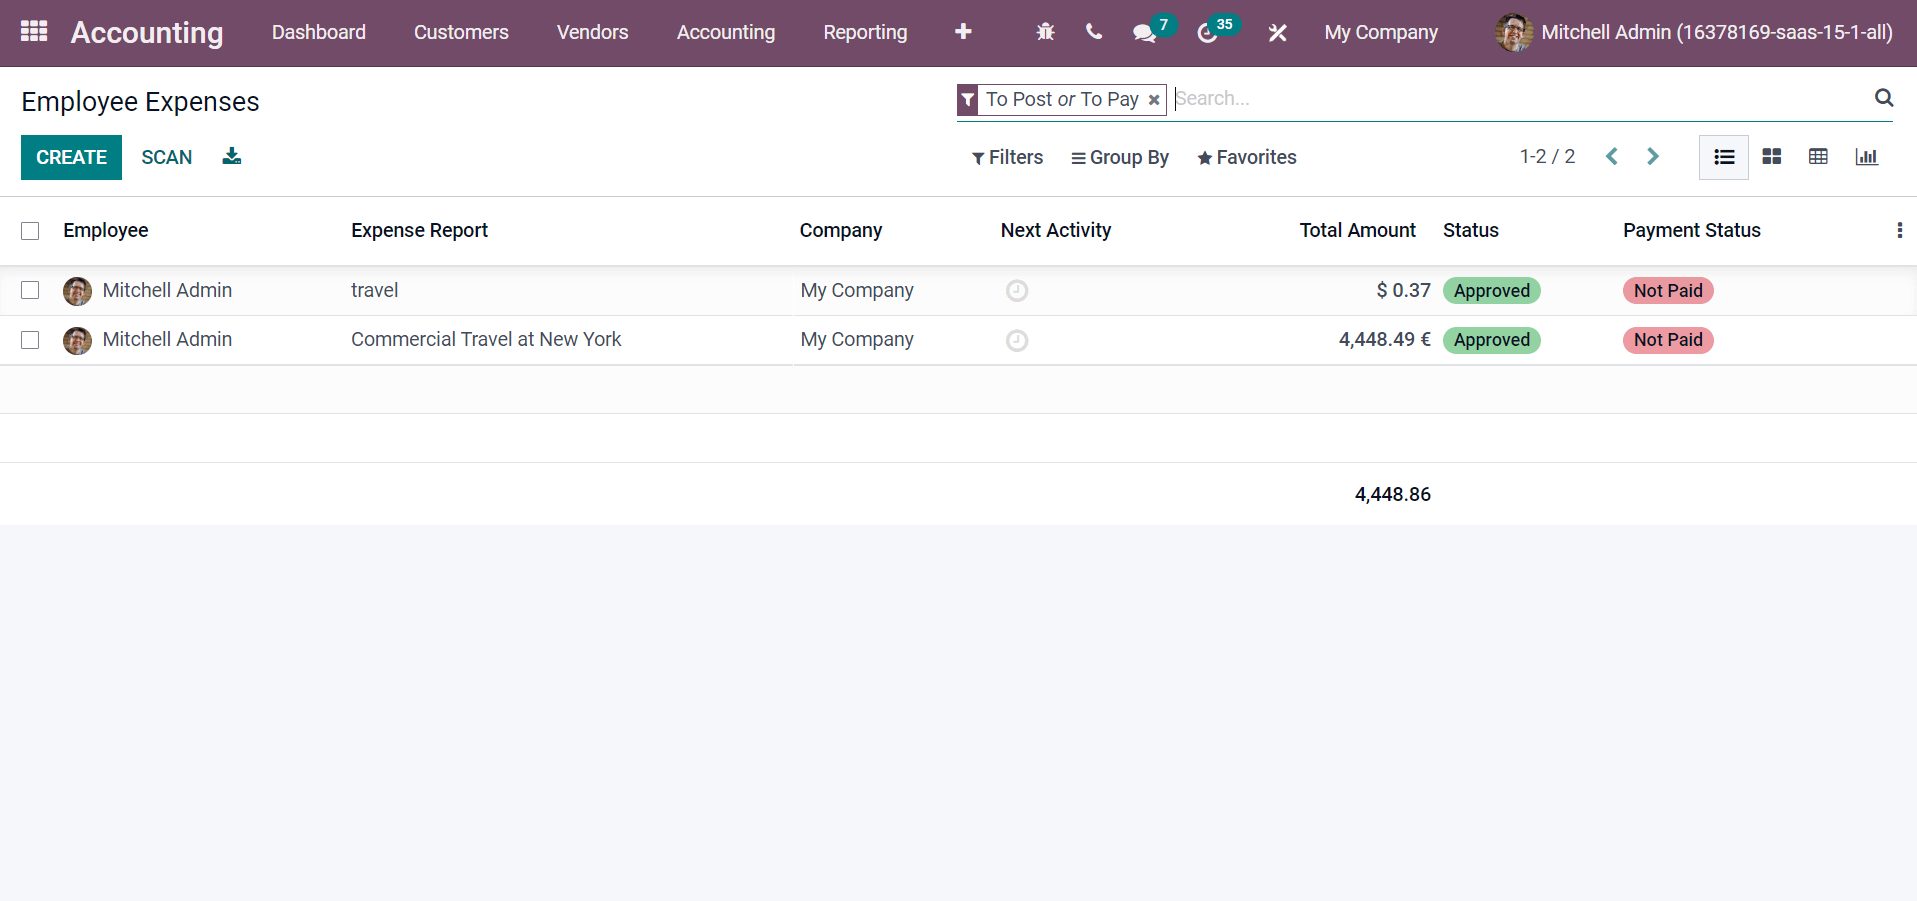
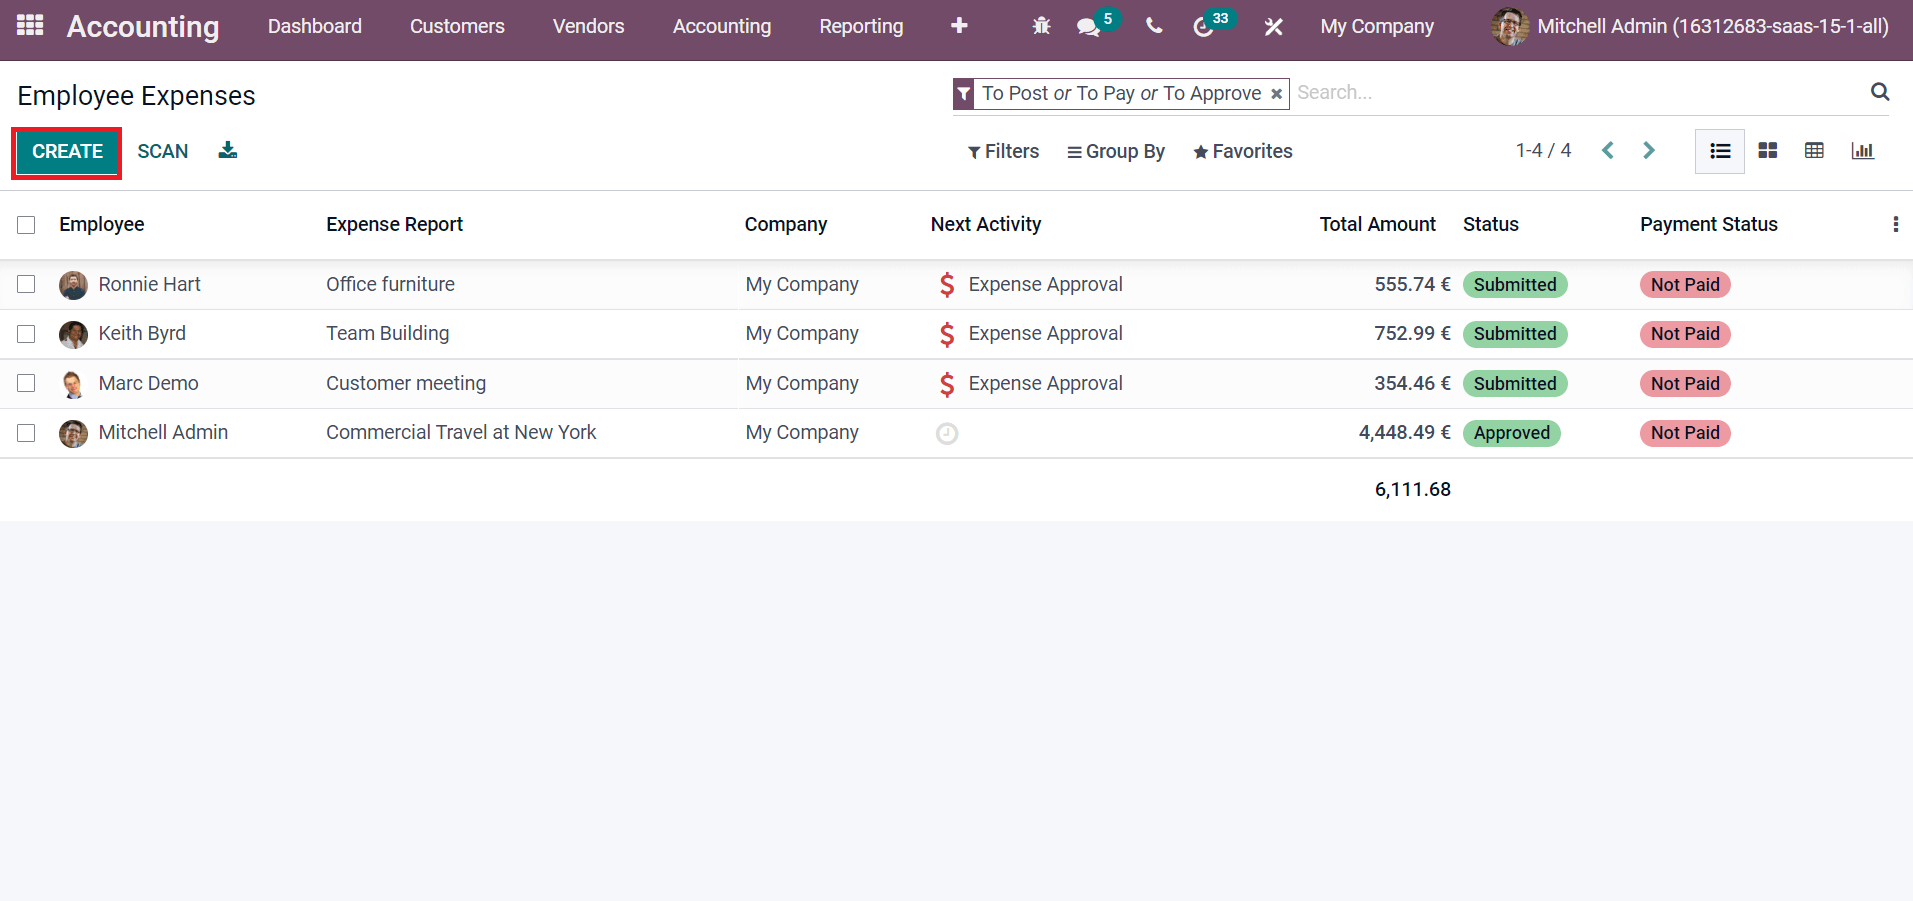
All expense-related tasks complete efficiently by the employee expense feature in Odoo 15 Accounting. It allows you to maintain vendor-related payments accurately by utilizing an Odoo ERP. To process employee expense data, go to the Employee Expenses menu in the Vendors tab. Users can see the submitted or approved employee expenses in the new window, as denoted in the screenshot below.
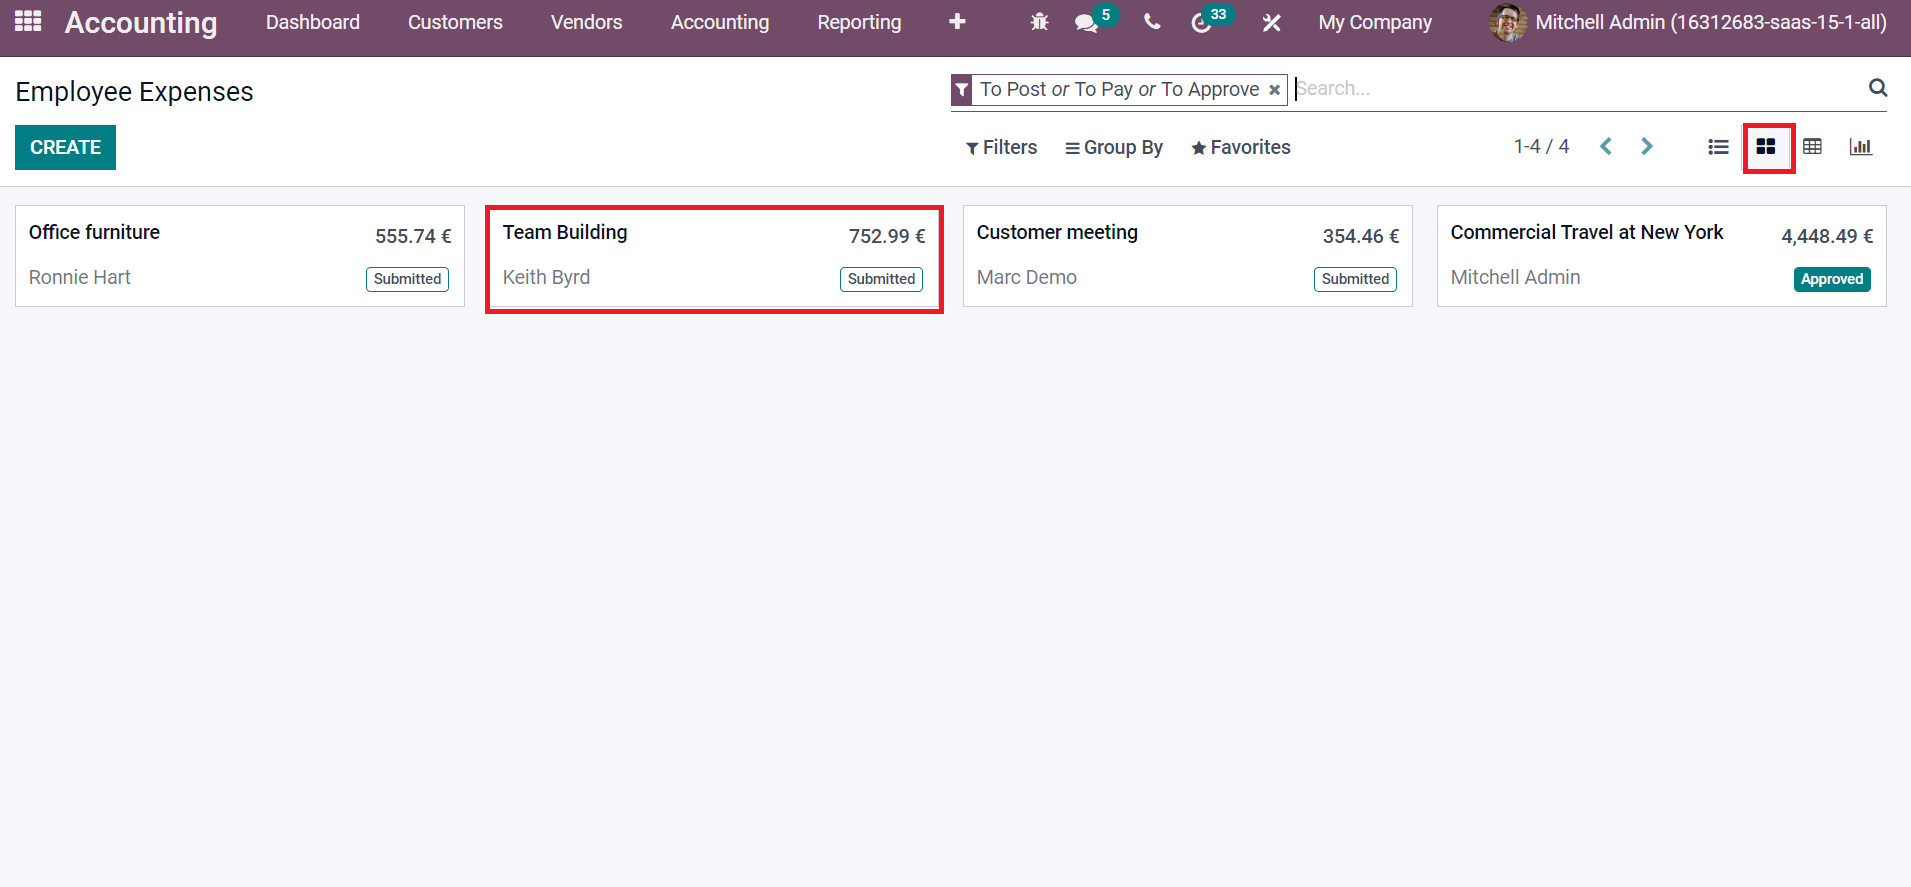
The Kanban view of the Employee Expenses window denotes the expense report title, employee name, total amount, and status of each employee separately.
In the Graph view, you can analyze employee expenses in a graphical representation. The X-axis shows Employee data, and Y-axis consists of the Total Amount, as denoted in the screenshot below.
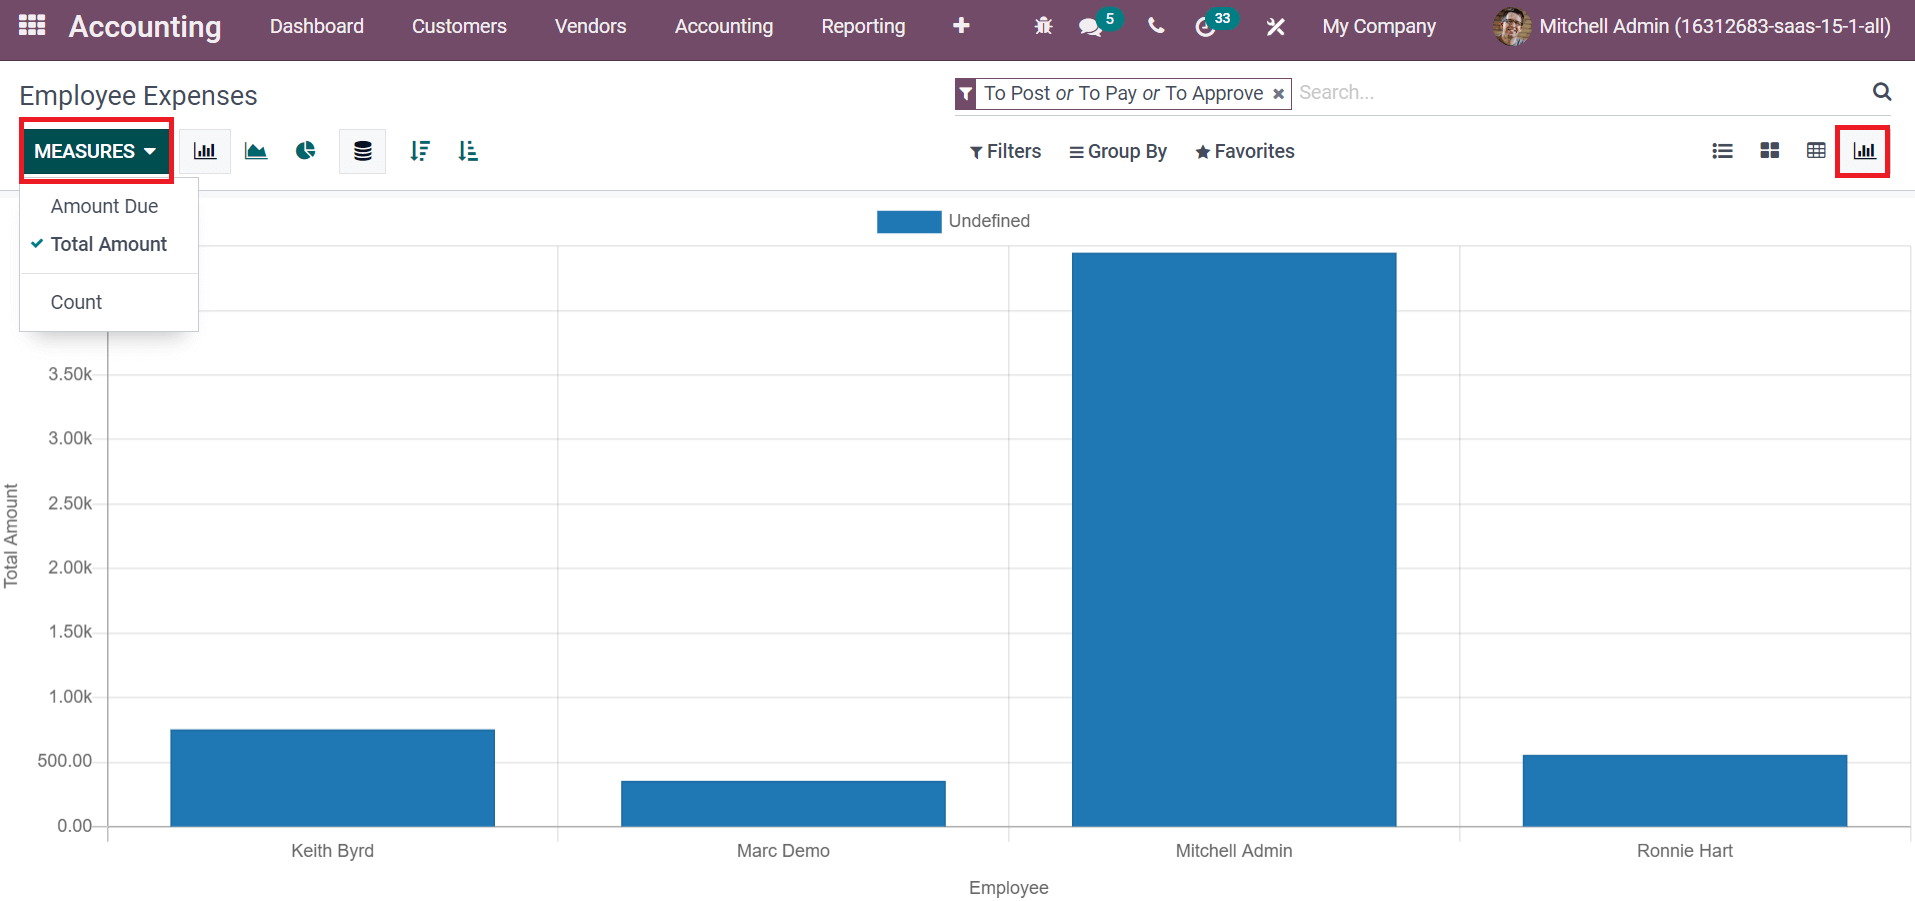
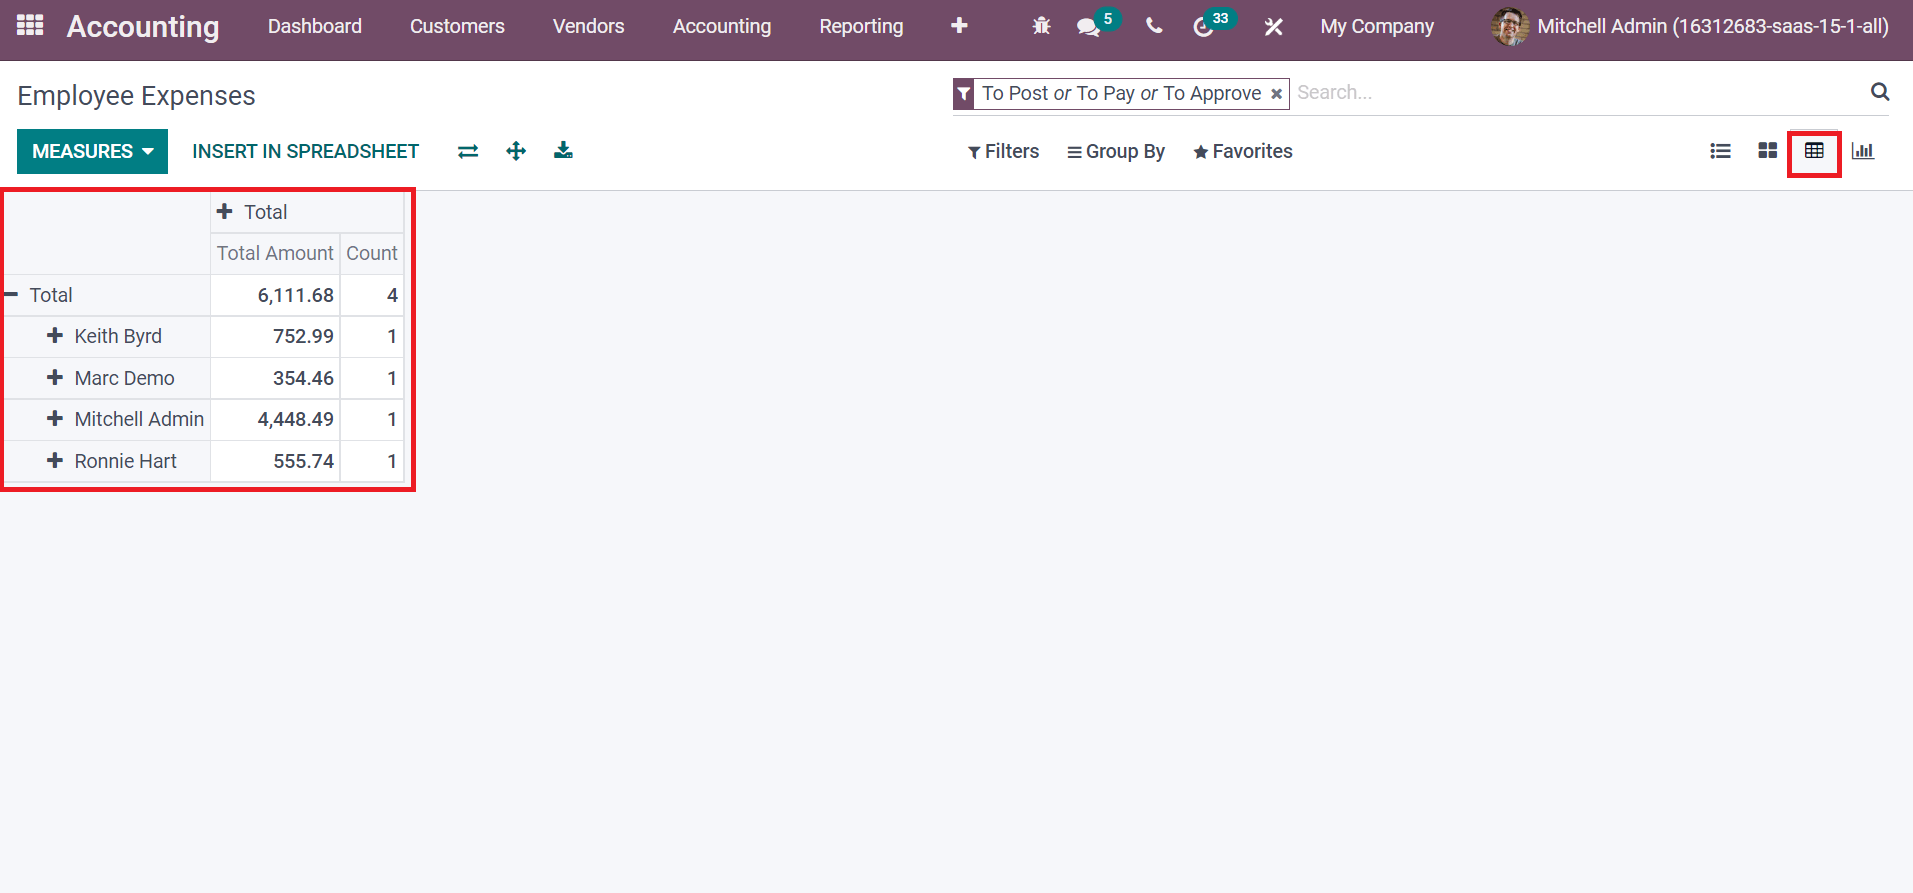
We can apply various measures such as Amount Due and Count to the graph by clicking on the MEASURES icon, as shown in the screenshot above. Users can evaluate the pivot table of employee expenses by selecting the Pivot view. The table shows the total expenses each employee spends in your organization, as portrayed in the screenshot below.
Now, let’s generate an employee expense for an employee by choosing the CREATE icon in the Employee Expenses window.
We can create an expense report for an employee ‘Anita
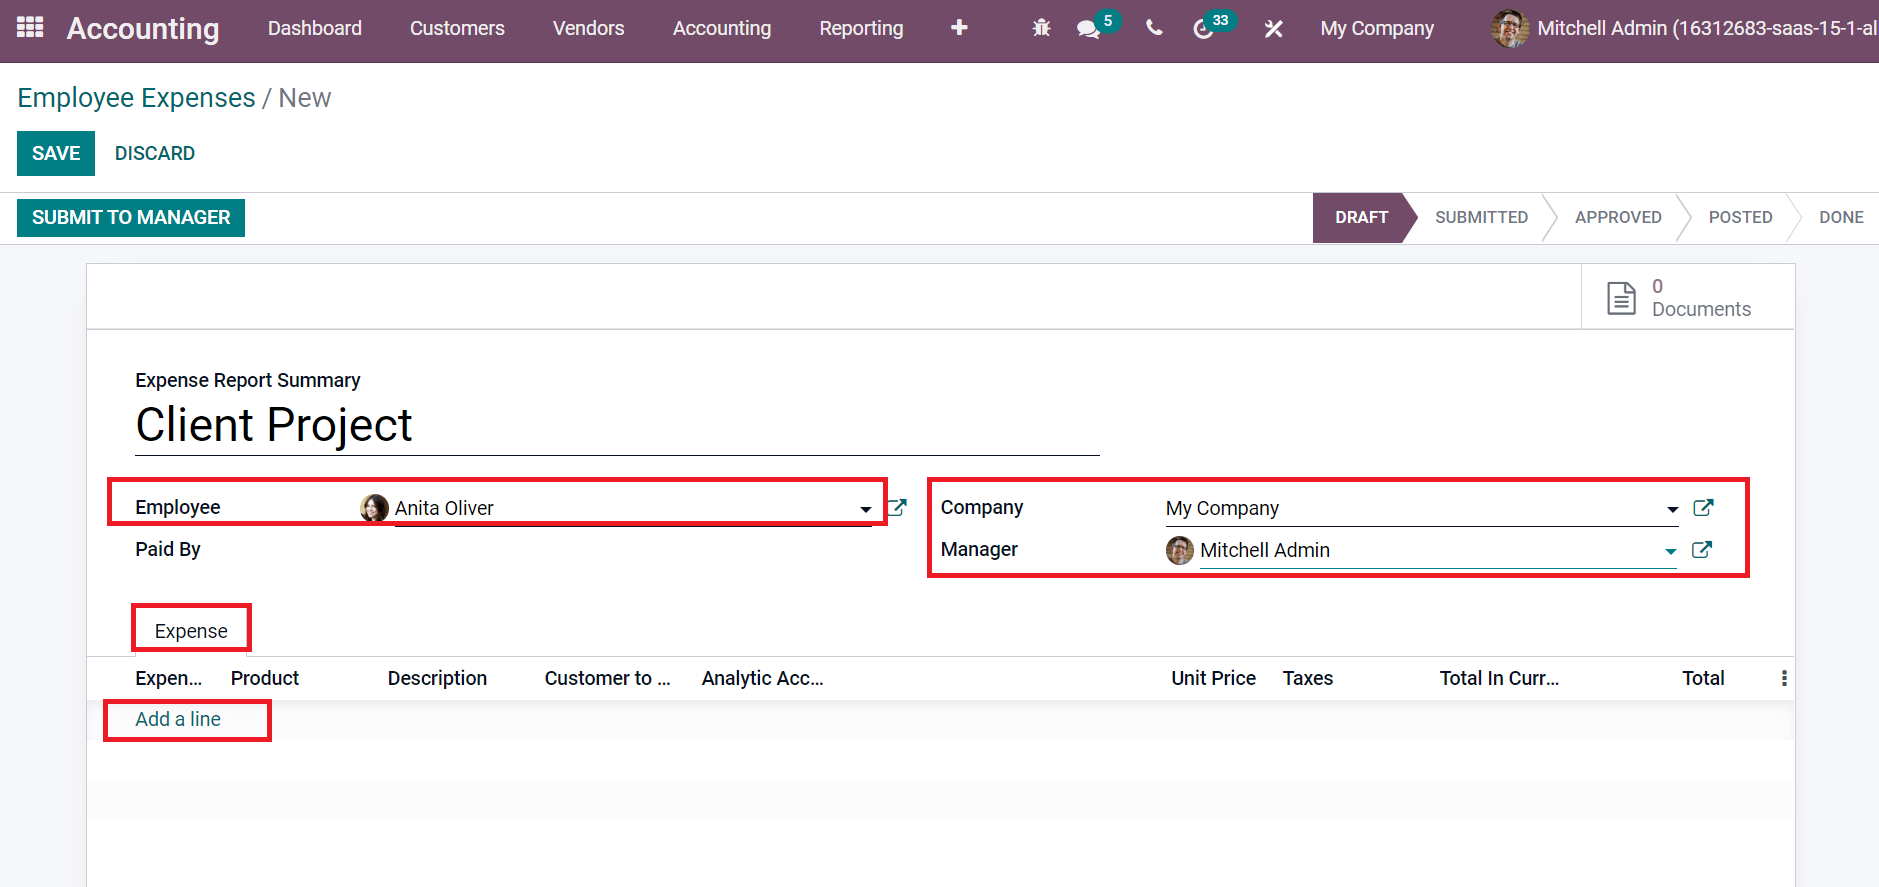
Oliver’ in the new window. Add Client Project in the Expense Report Summary field and choose your Employee Anita Oliver. Users can also select a Manager for the
employee and pick up the Company, as displayed in the screenshot below.
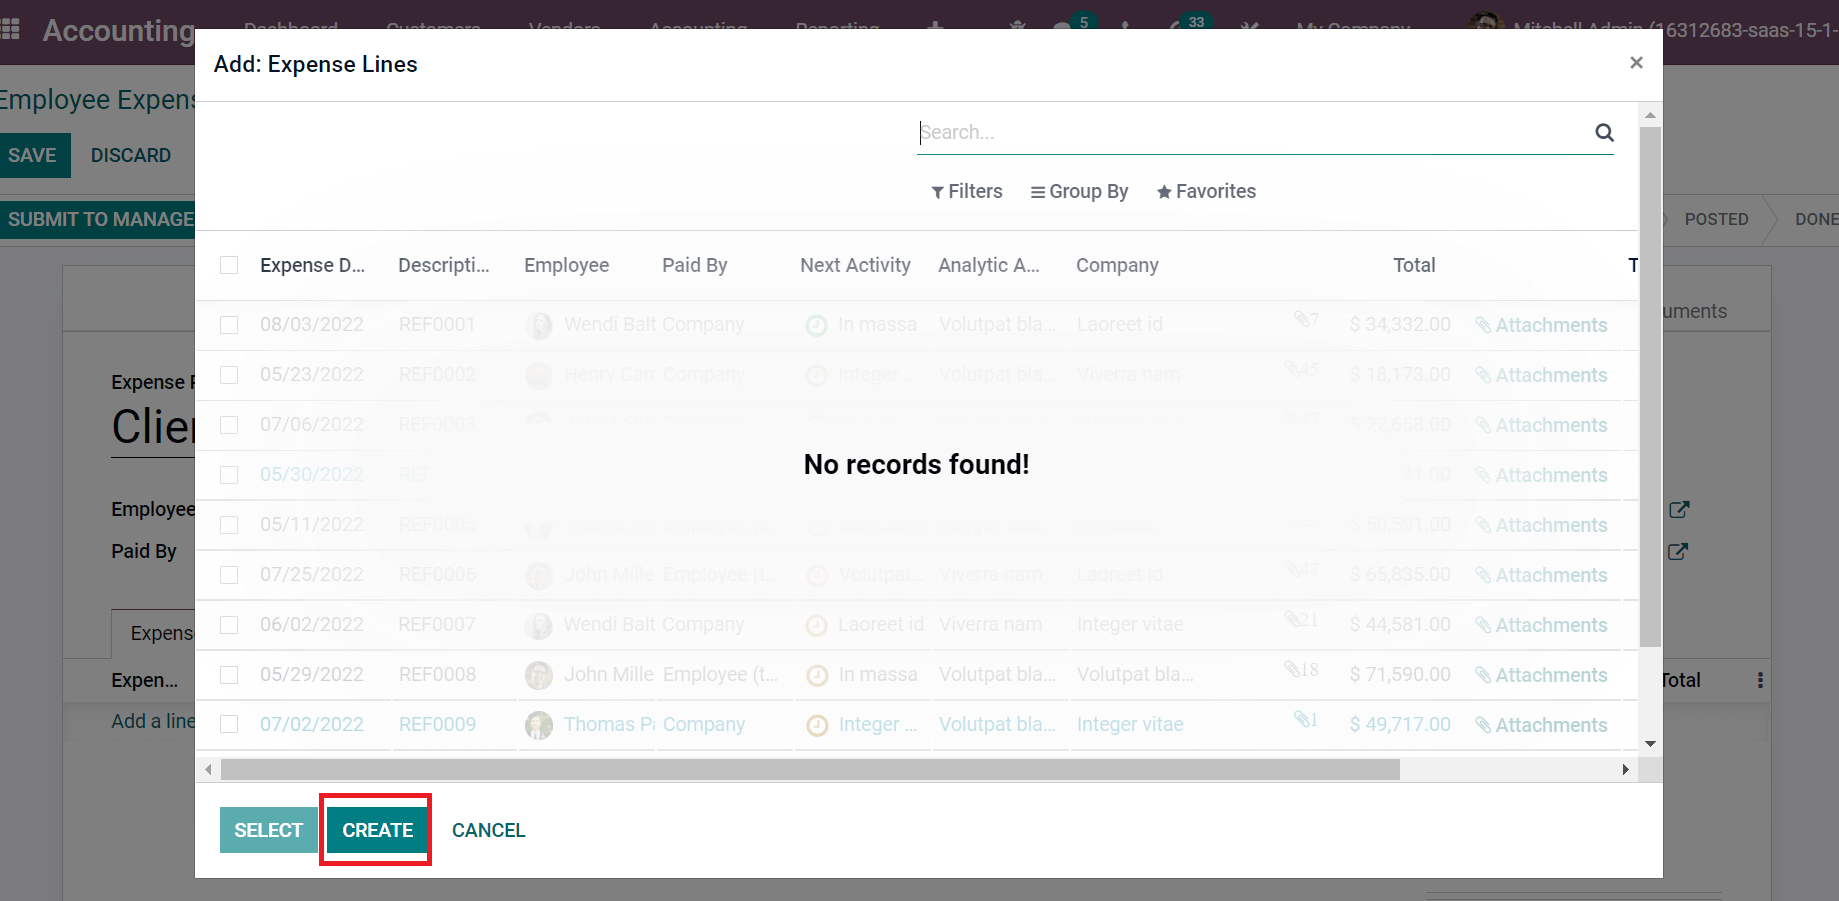
Next, you can enter all expenses spent by Anita Oliver for the client project by clicking on Add a line option inside the Expense tab, as in the screenshot above. By selecting Add a line option, a new Expense Lines window appears before you, and click on CREATE icon as specified in the screenshot below.
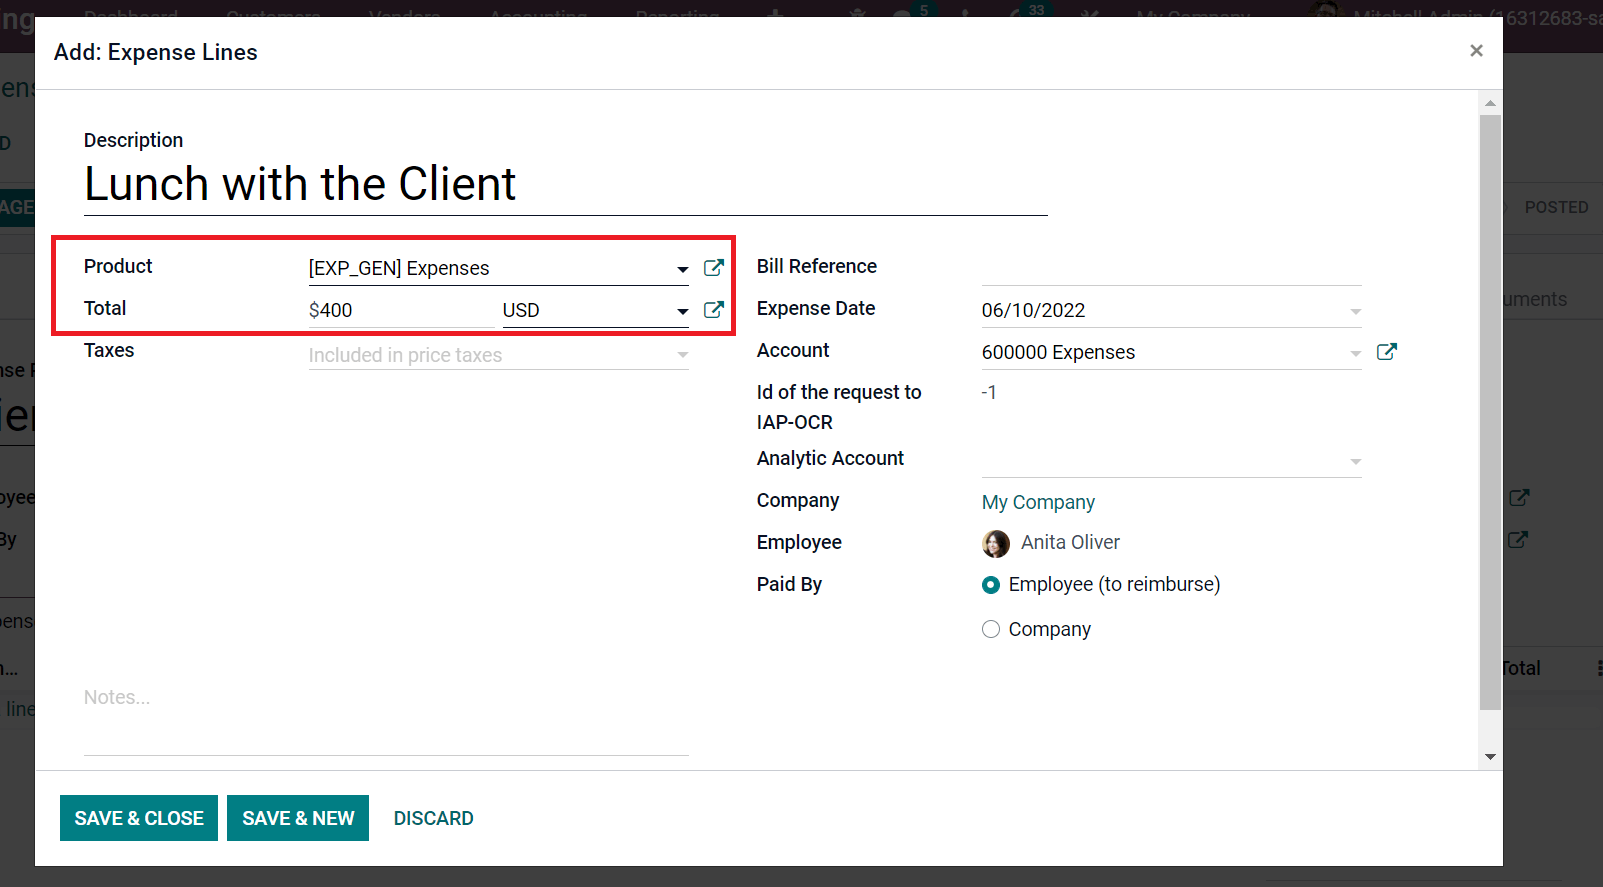
You can enter a description of the expenses inside the Expense Lines window. Firstly, we generate an expense for Lunch with the Client to the employee Anita Oliver. For that, enter Lunch with the Client in the Description option, select the Product and add cost for expense in the Total field, as illustrated in the screenshot below.
After that, choose the expense account in the Account field, Expense Date, and Analytic Account. We can also select the person who paid the expense in Paid By field. It contains two options, Company and Employee, as shown in the screenshot below.
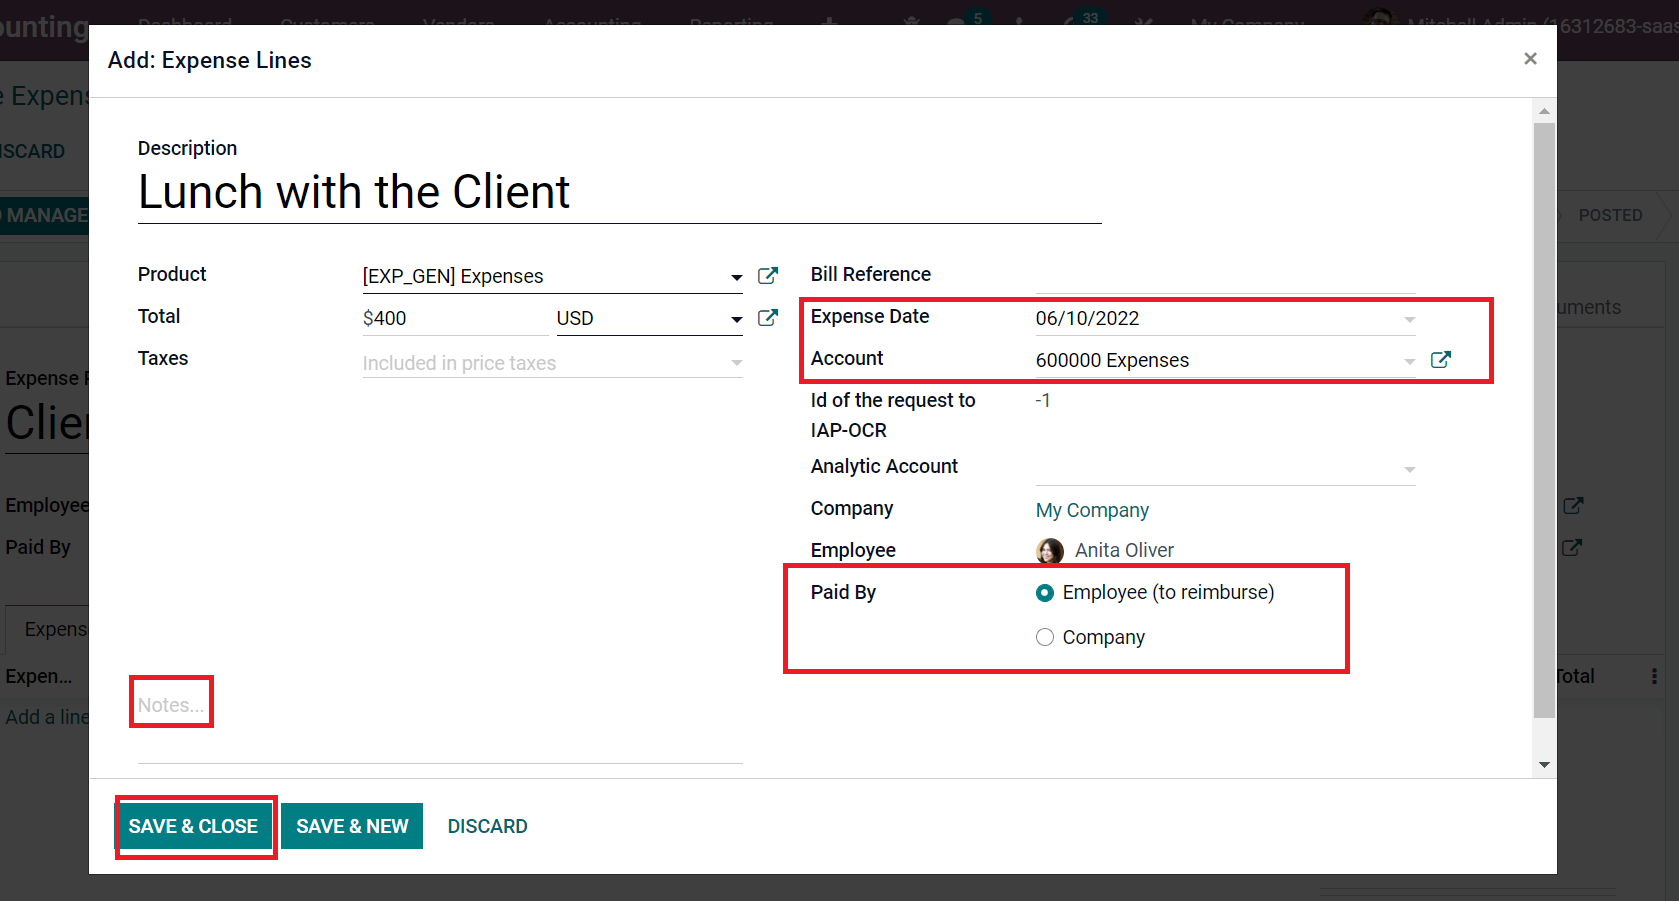
You can add details about the expense in the Notes section and click on SAVE & CLOSE icon. In the same way, we can develop expenses occur for Anita Oliver for a Client Project. All created expenses are visible below the Expense tab, as portrayed in the screenshot below.
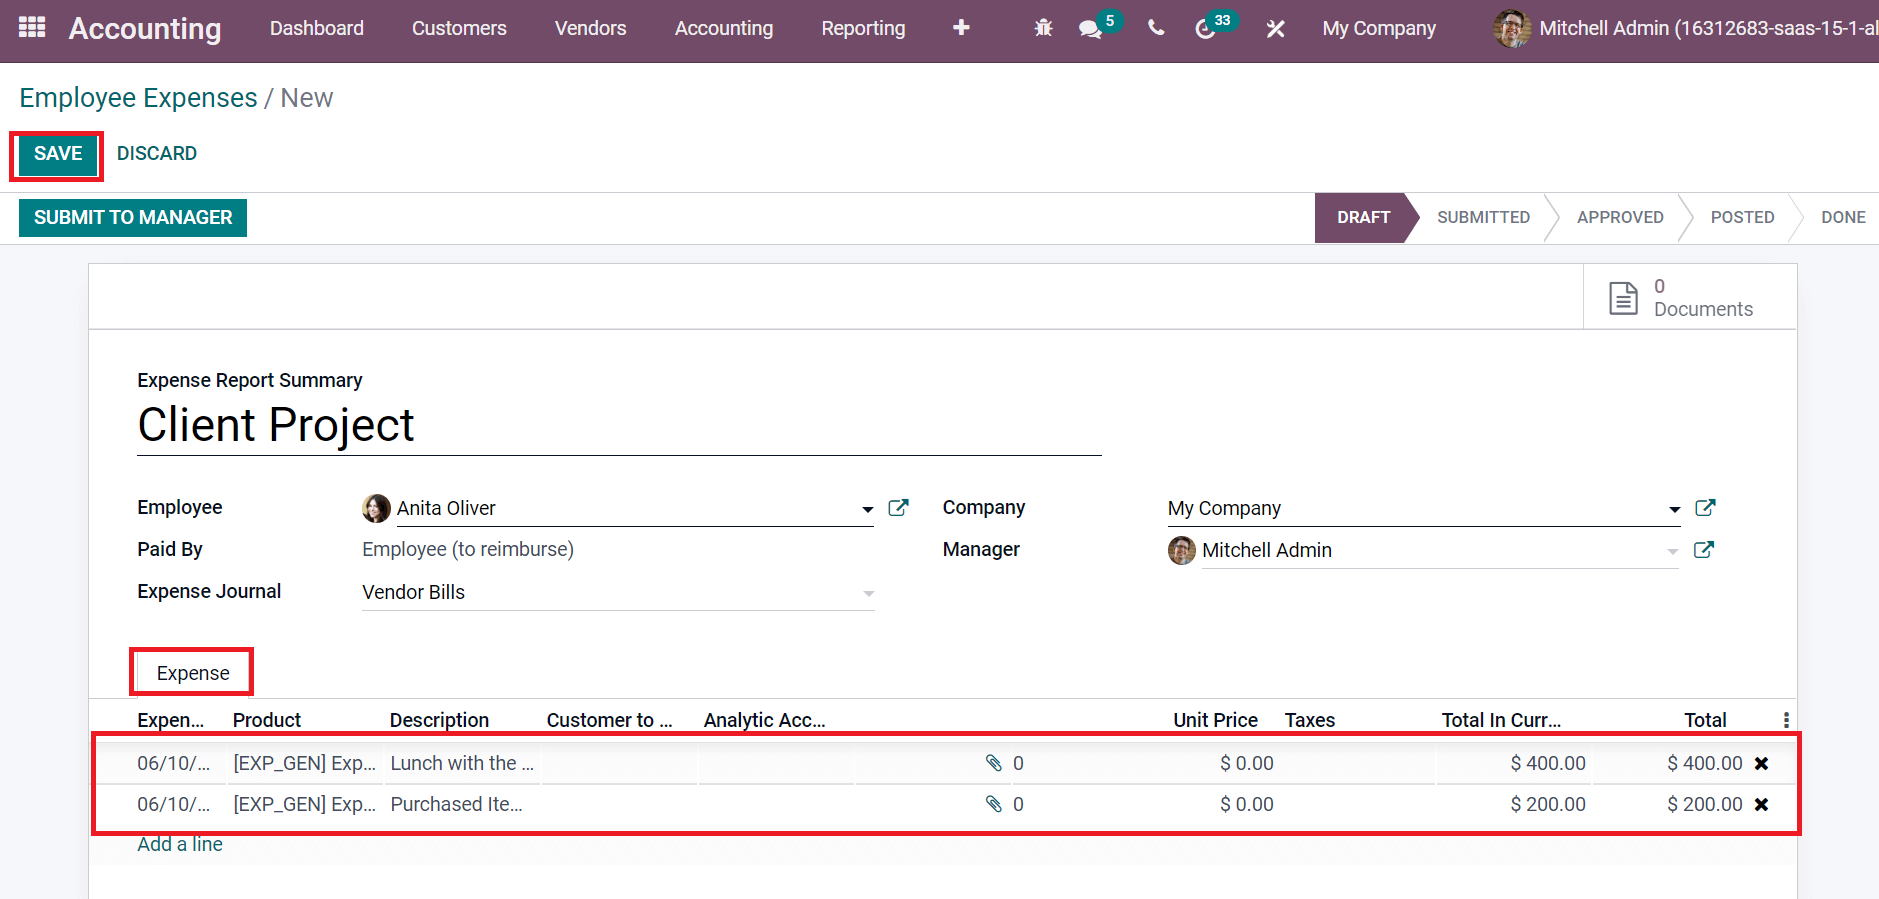
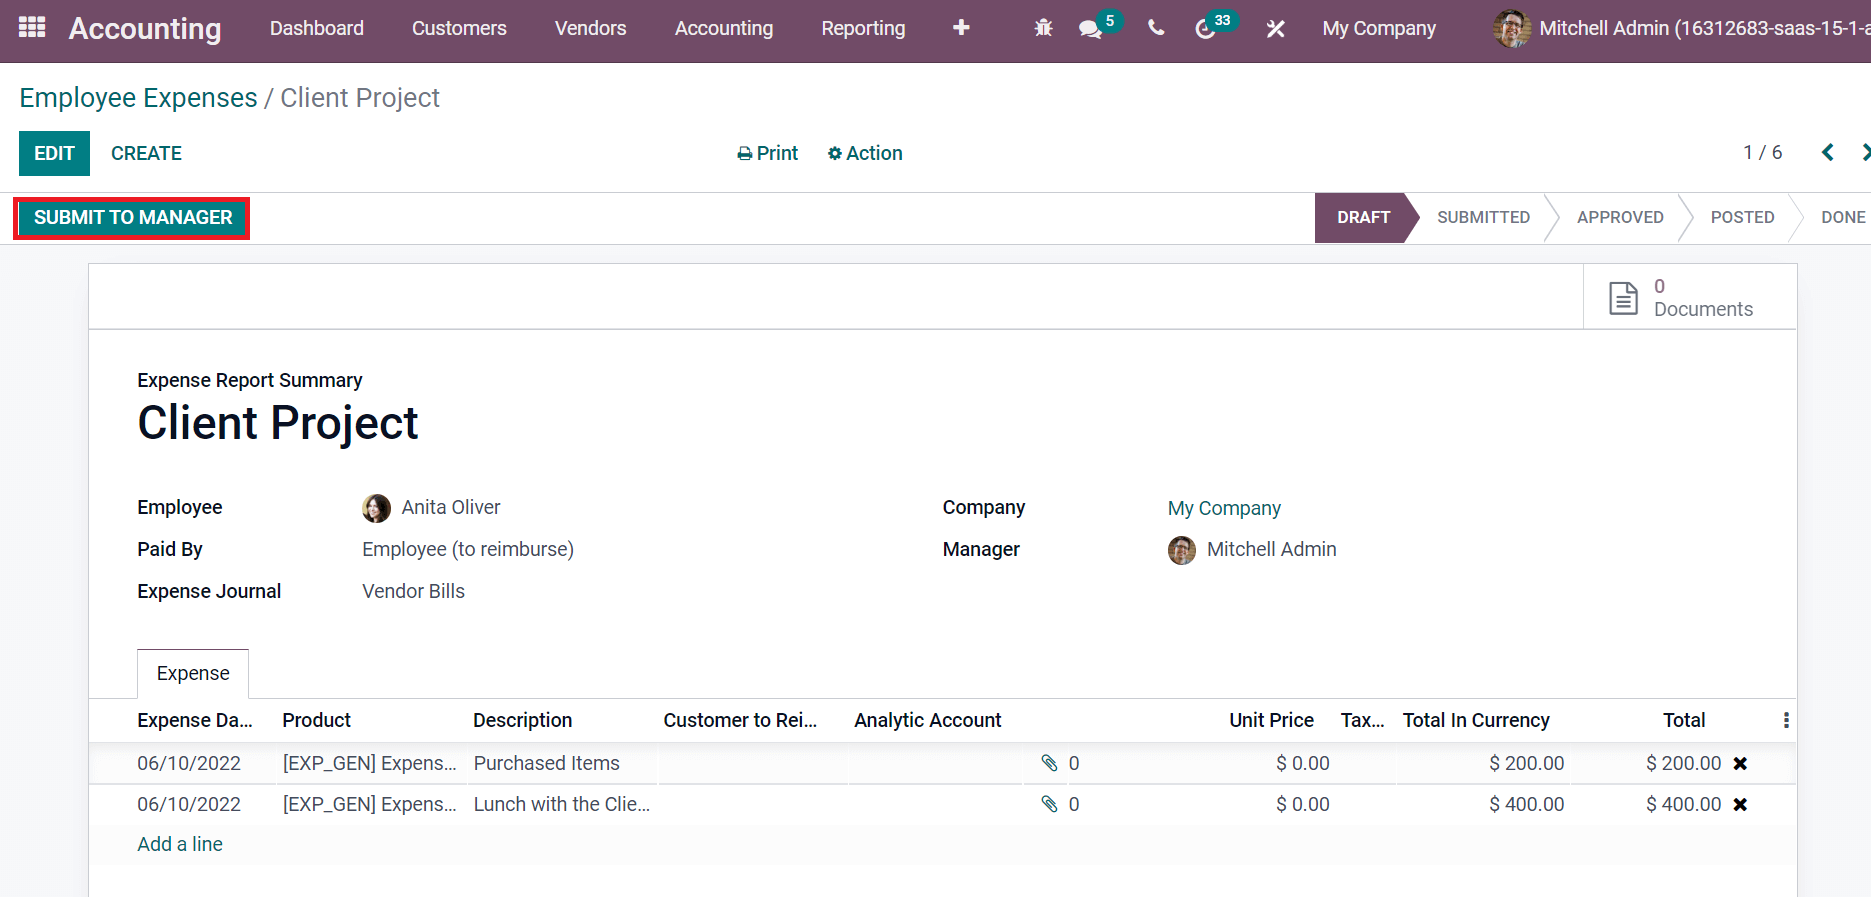
After mentioning these details, select the SAVE button to process an Employee expense for a client project. Now, we can submit the expense report to the manager by selecting the SUBMIT TO MANAGER icon, as denoted in the screenshot below.
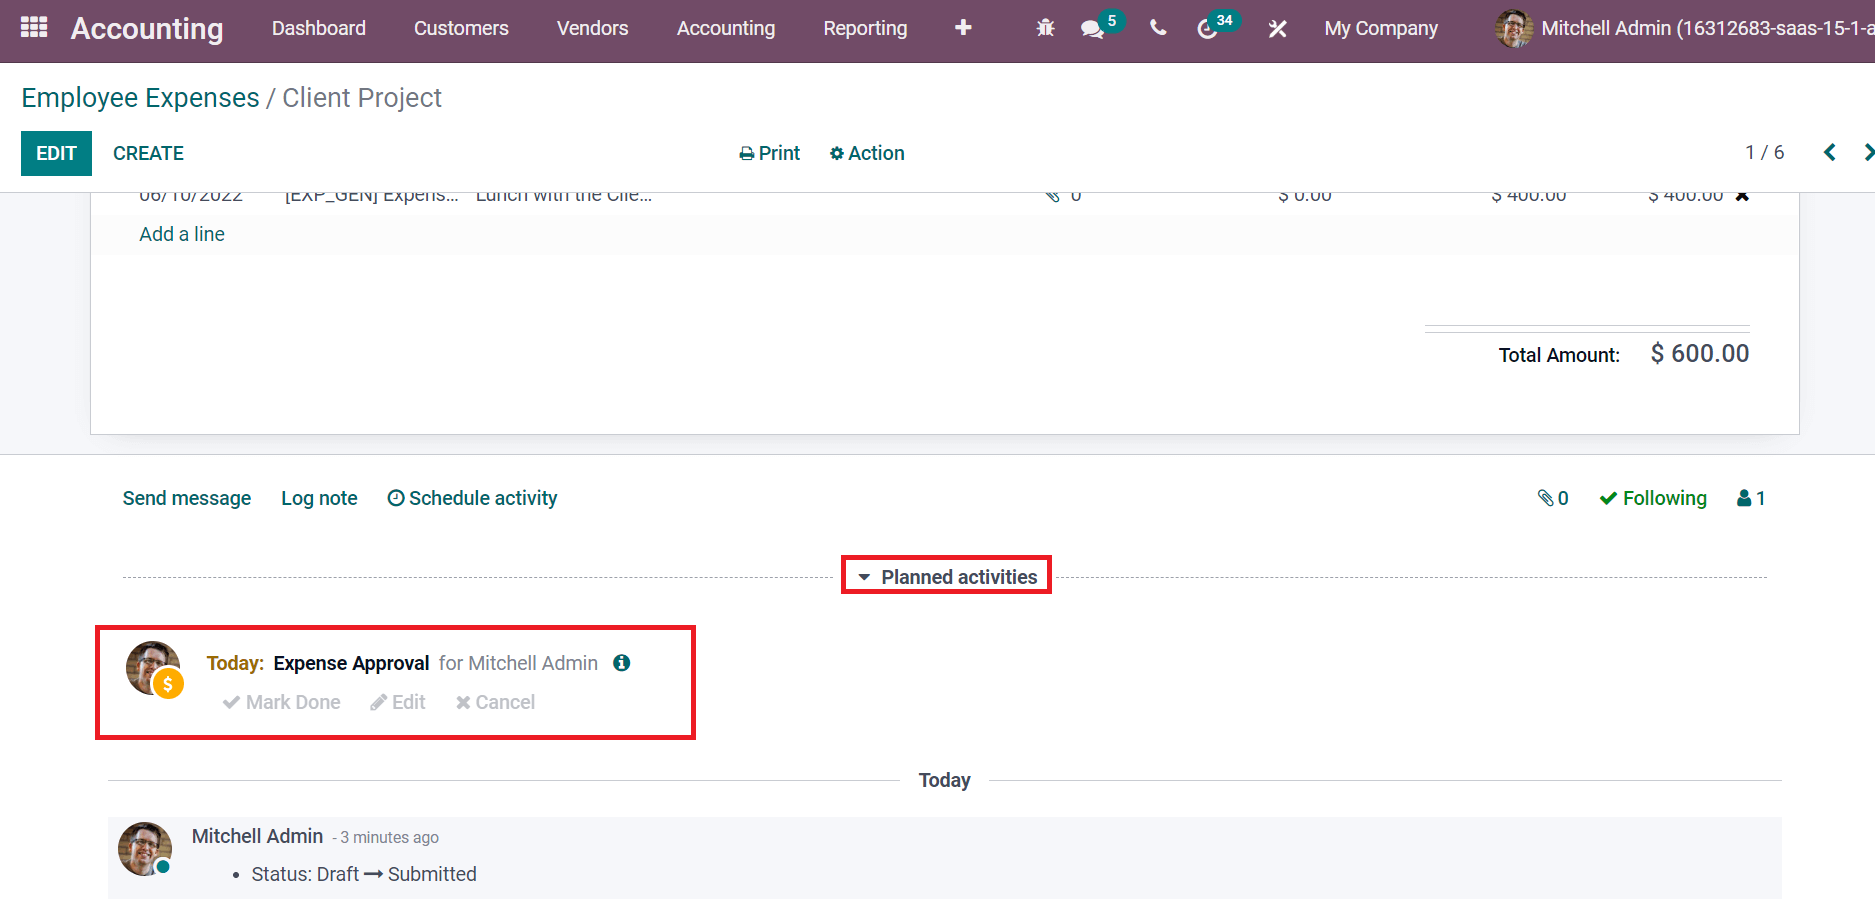
The manager will get the notification to approve your expense report. At the end of the Employee Expenses window, you can view the Expense Approval option inside the Planned Activities section, as demonstrated in the screenshot below.
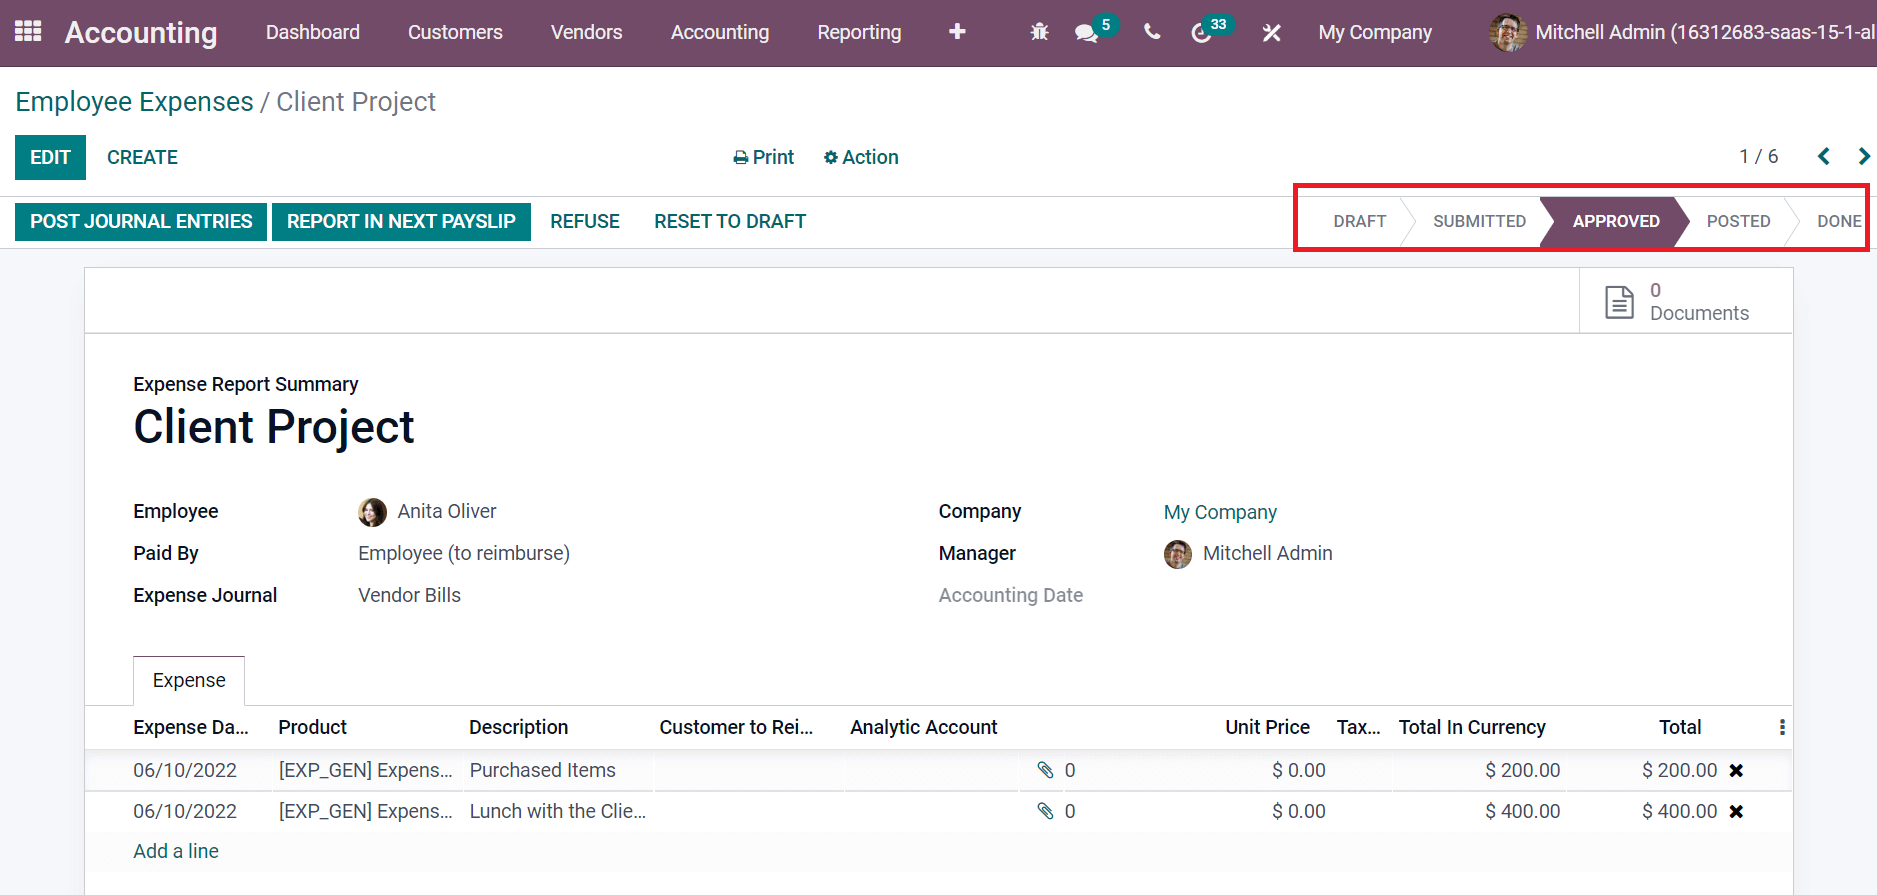
After evaluating the expense report, a manager can approve it by selecting the Mark Done option or APPROVE button in the Employee Expense window, as portrayed in the screenshot below. Once clicking on APPROVE icon by the manager, the stage changes from SUBMITTED to APPROVED, as demonstrated in the screenshot below.
How to Post Journal Entries for Employee Expenses?
Users can easily post journal entries regarding employee expense reports after approval by the manager. Click on POST JOURNAL ENTRIES icon in the Employee Expenses window as specified in the screenshot below.
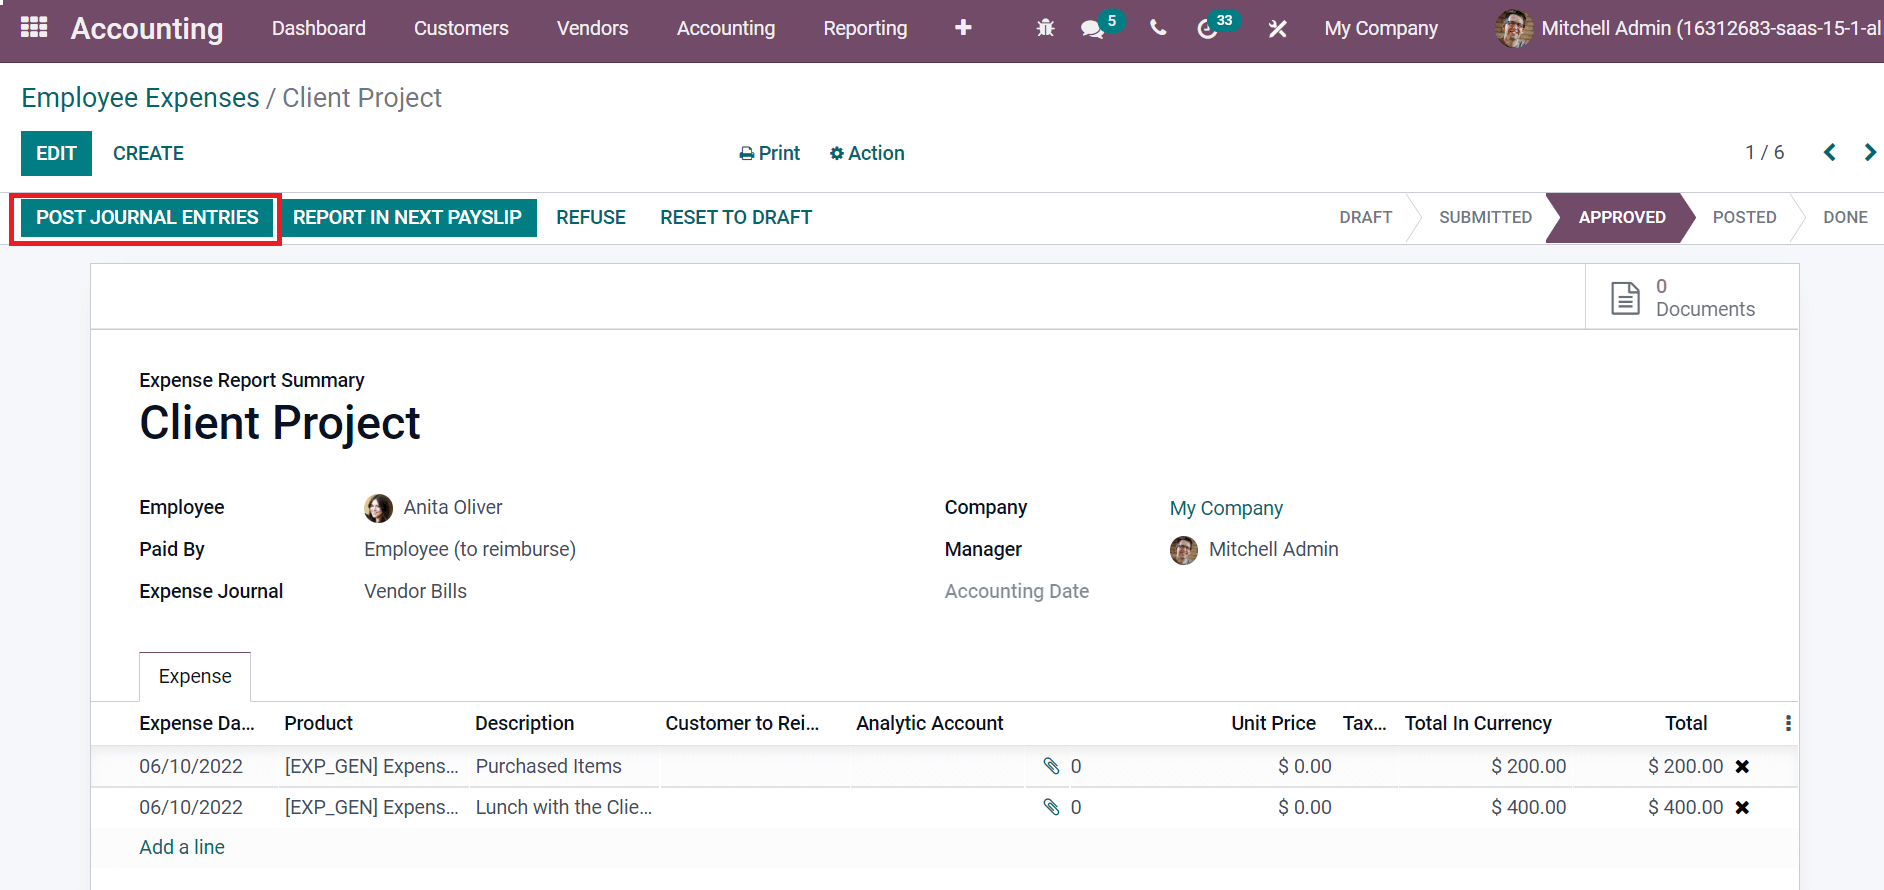
After clicking on the POST JOURNAL ENTRIES icon, the stage changes from APPROVED to POSTED. We can make the payment by selecting REGISTER PAYMENT, as marked in the screenshot below.
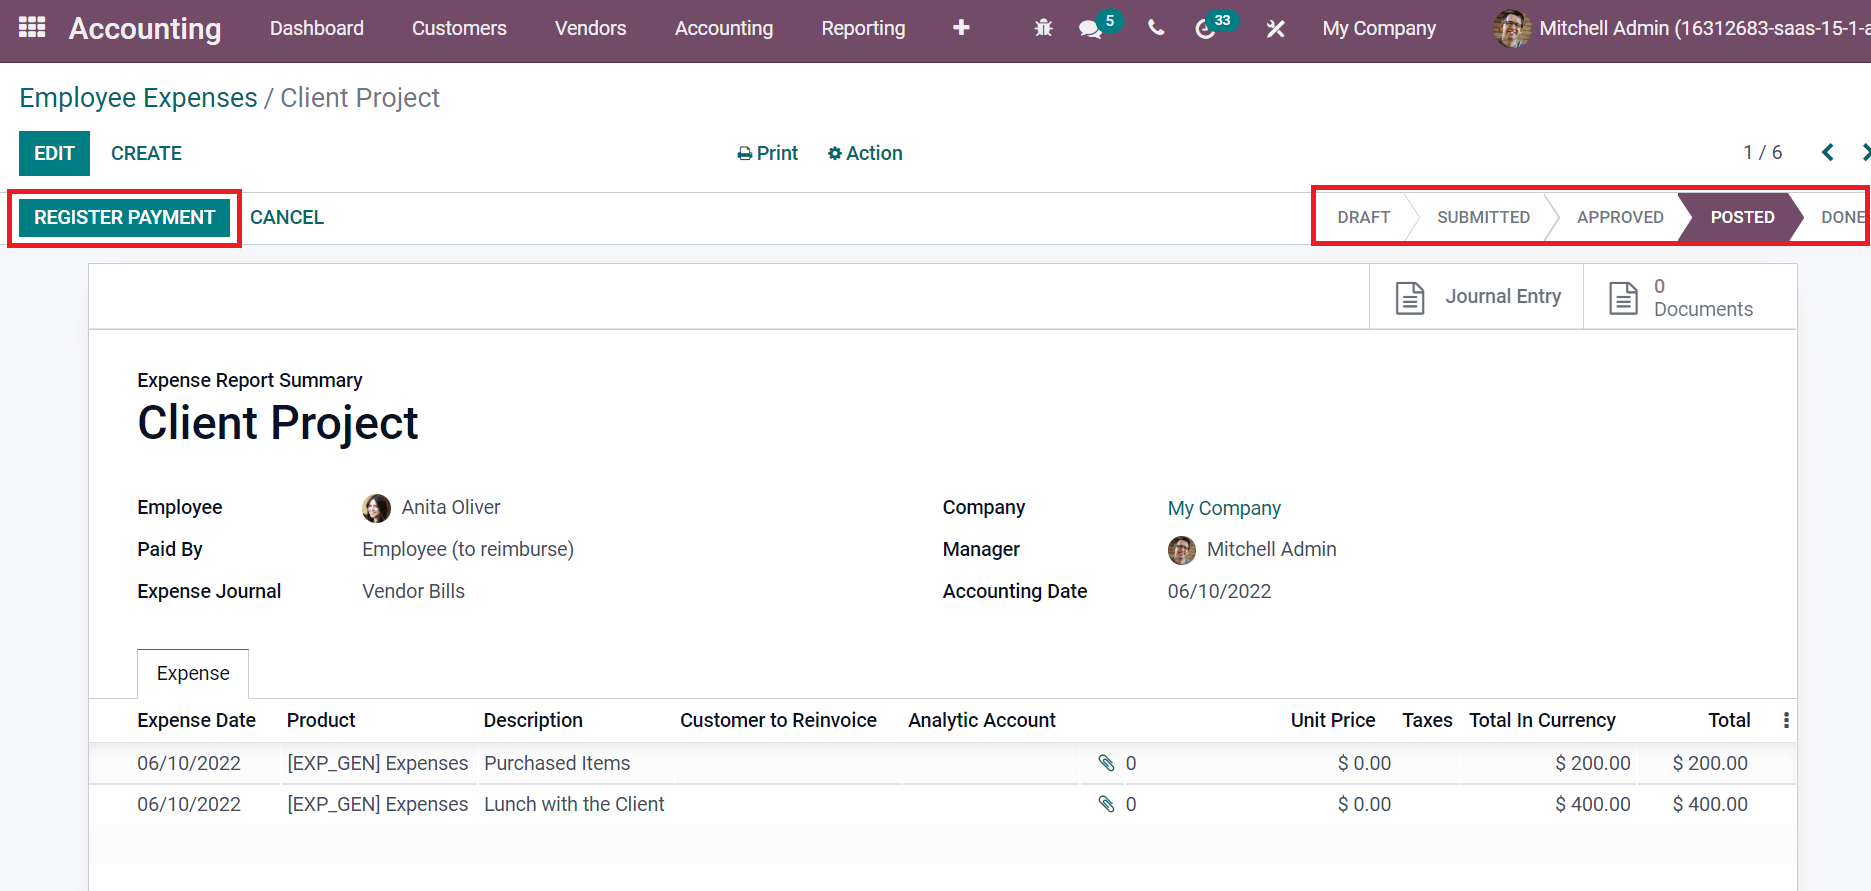
By selecting the REGISTER PAYMENT icon, a Register Payment window opens before you. Choose the Bank as Journal field and pick your Payment method. The payment method is classified into Manual, Checks, and more, as denoted in the screenshot below.
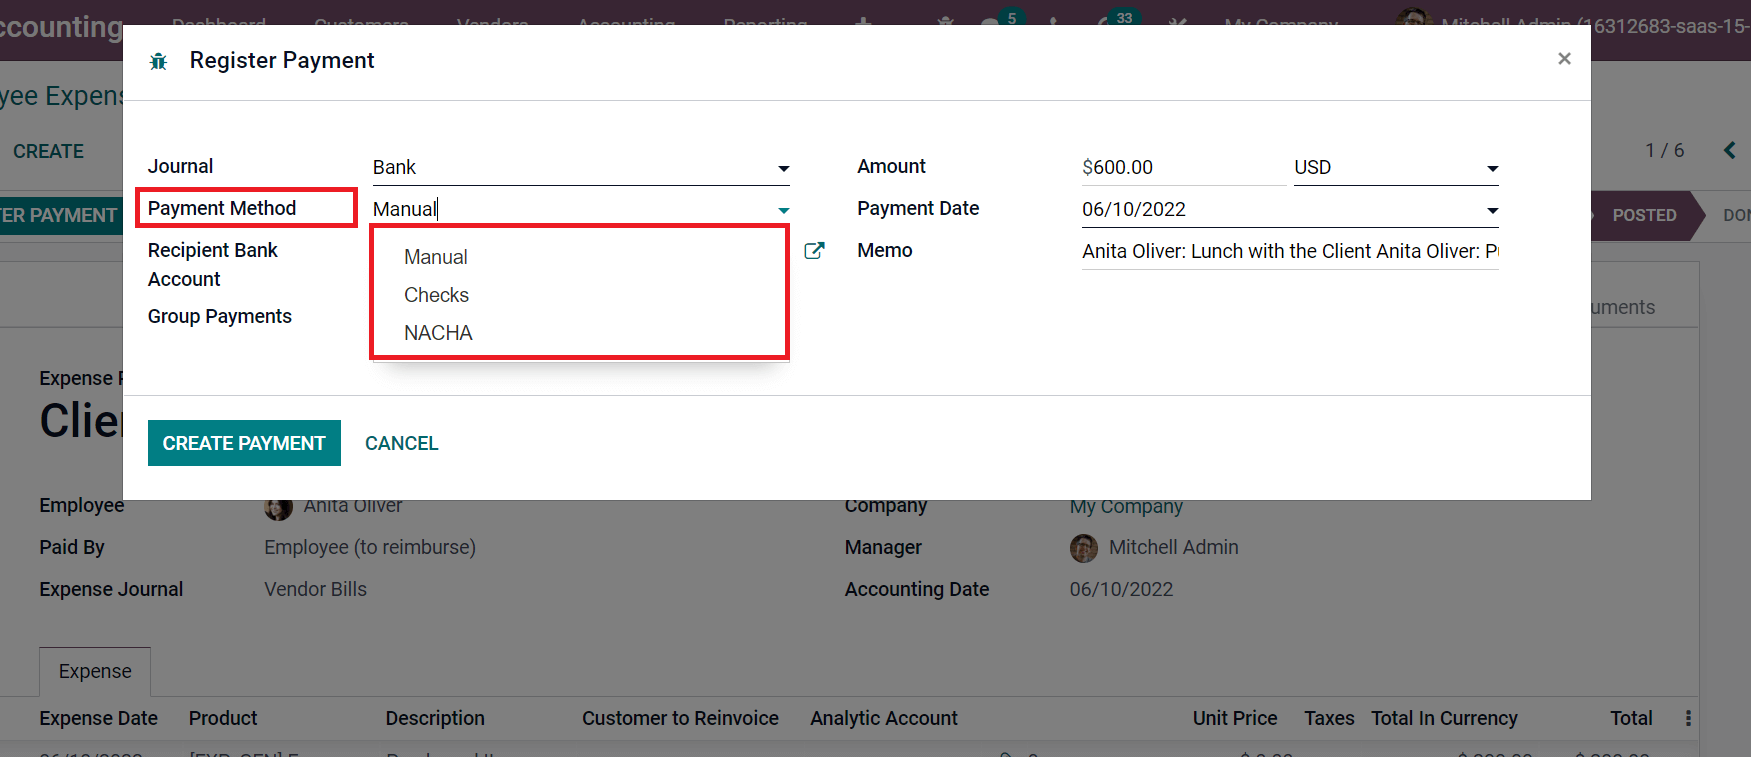
We selected Manual Payment Method and Recipient Bank Account in the Register Payment method. By activating Group Payments, one payment will be formulated by a partner. Other details such as Amount, Payment Date, and Memo are automatically viewable in the Register Payment window as explained in the screenshot below.
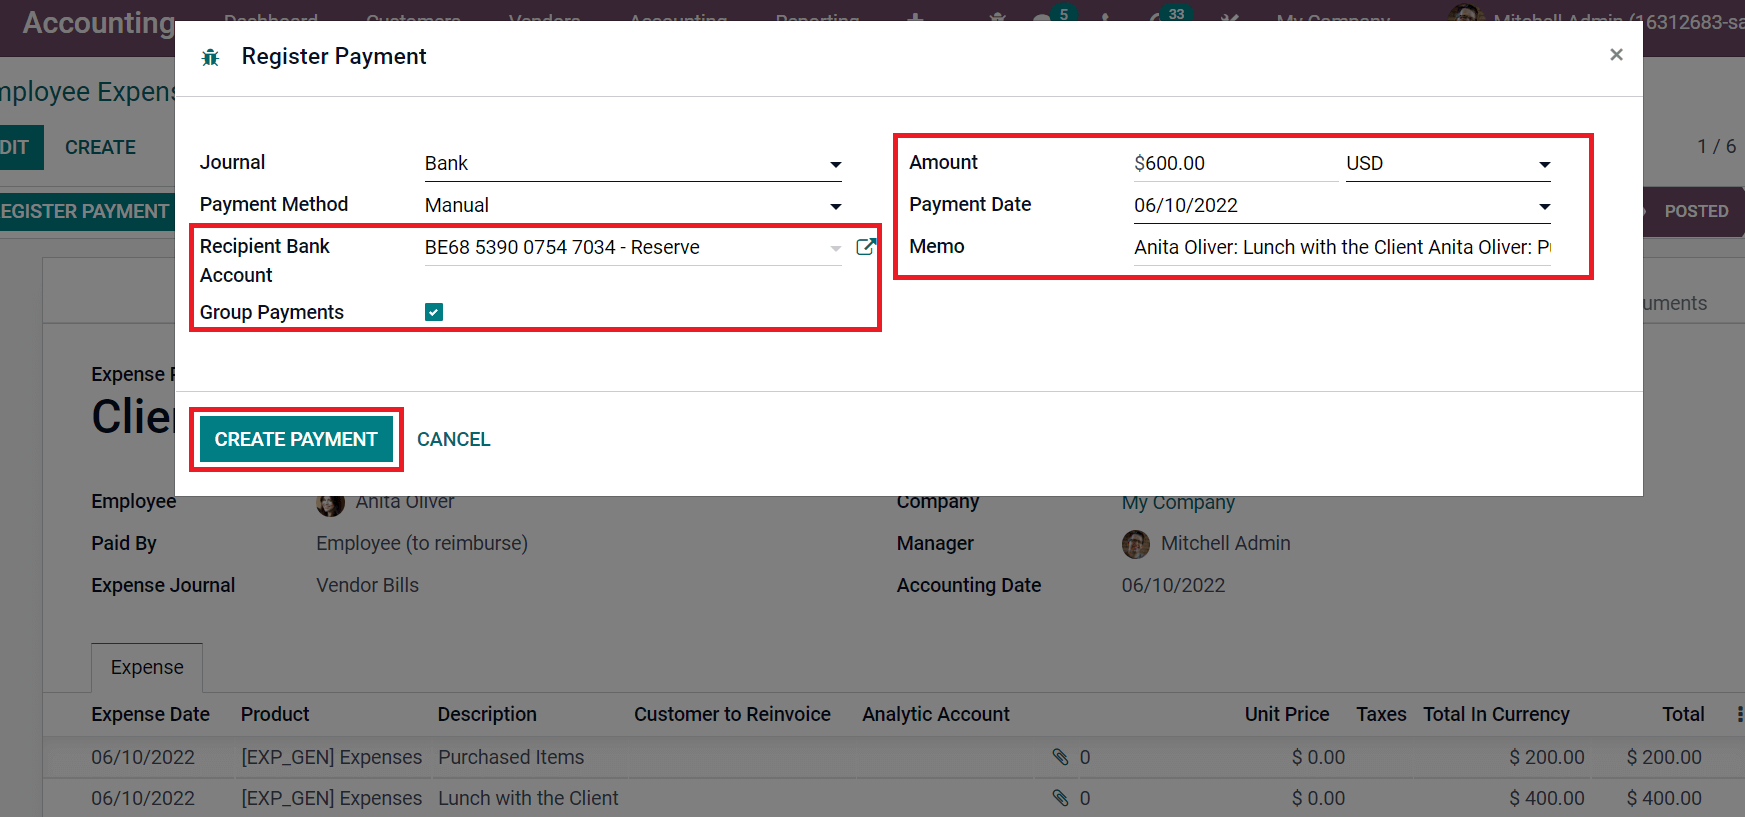
After applying all details, click on CREATE PAYMENT icon as denoted in the screenshot above. Now, we can view that stage is changed from POSTED to DONE, and a green line is marked in the Employee Expenses window as IN PAYMENT.
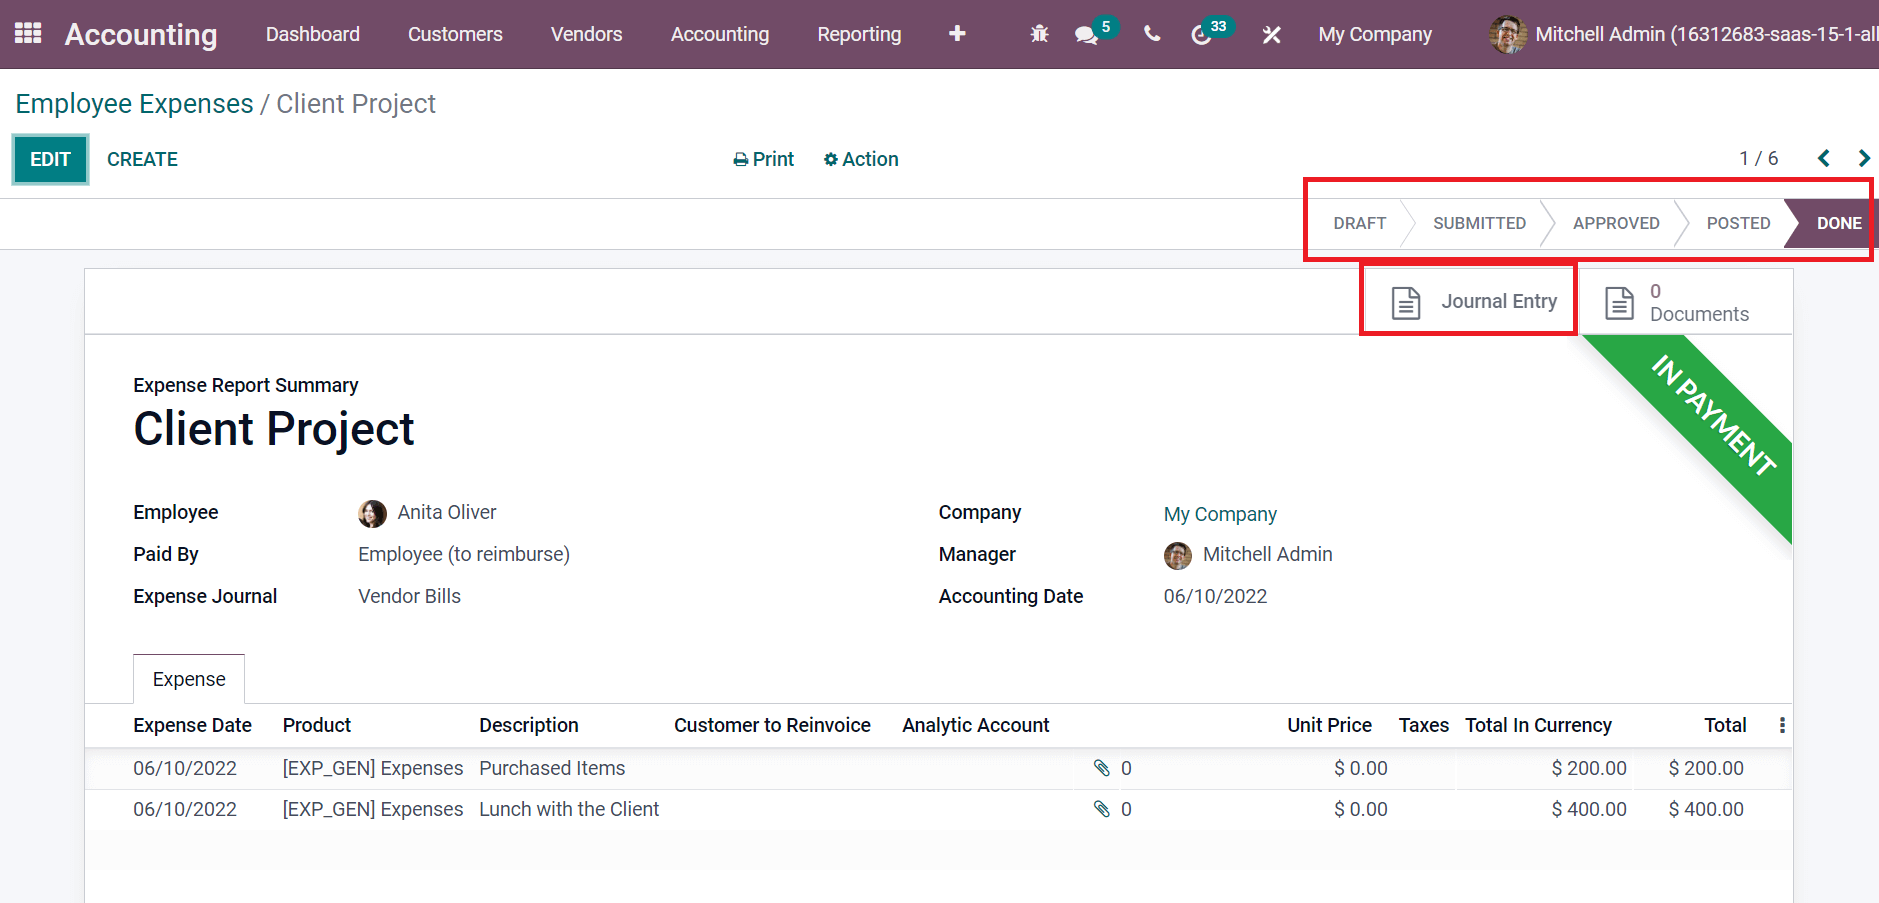
By clicking on Journal Entry smart button, you can analyze the bill of various items in employee expenses. The Bill window denotes the information such as References, Journal, Accounting Date, and other Journal Items, as marked in the screenshot below.
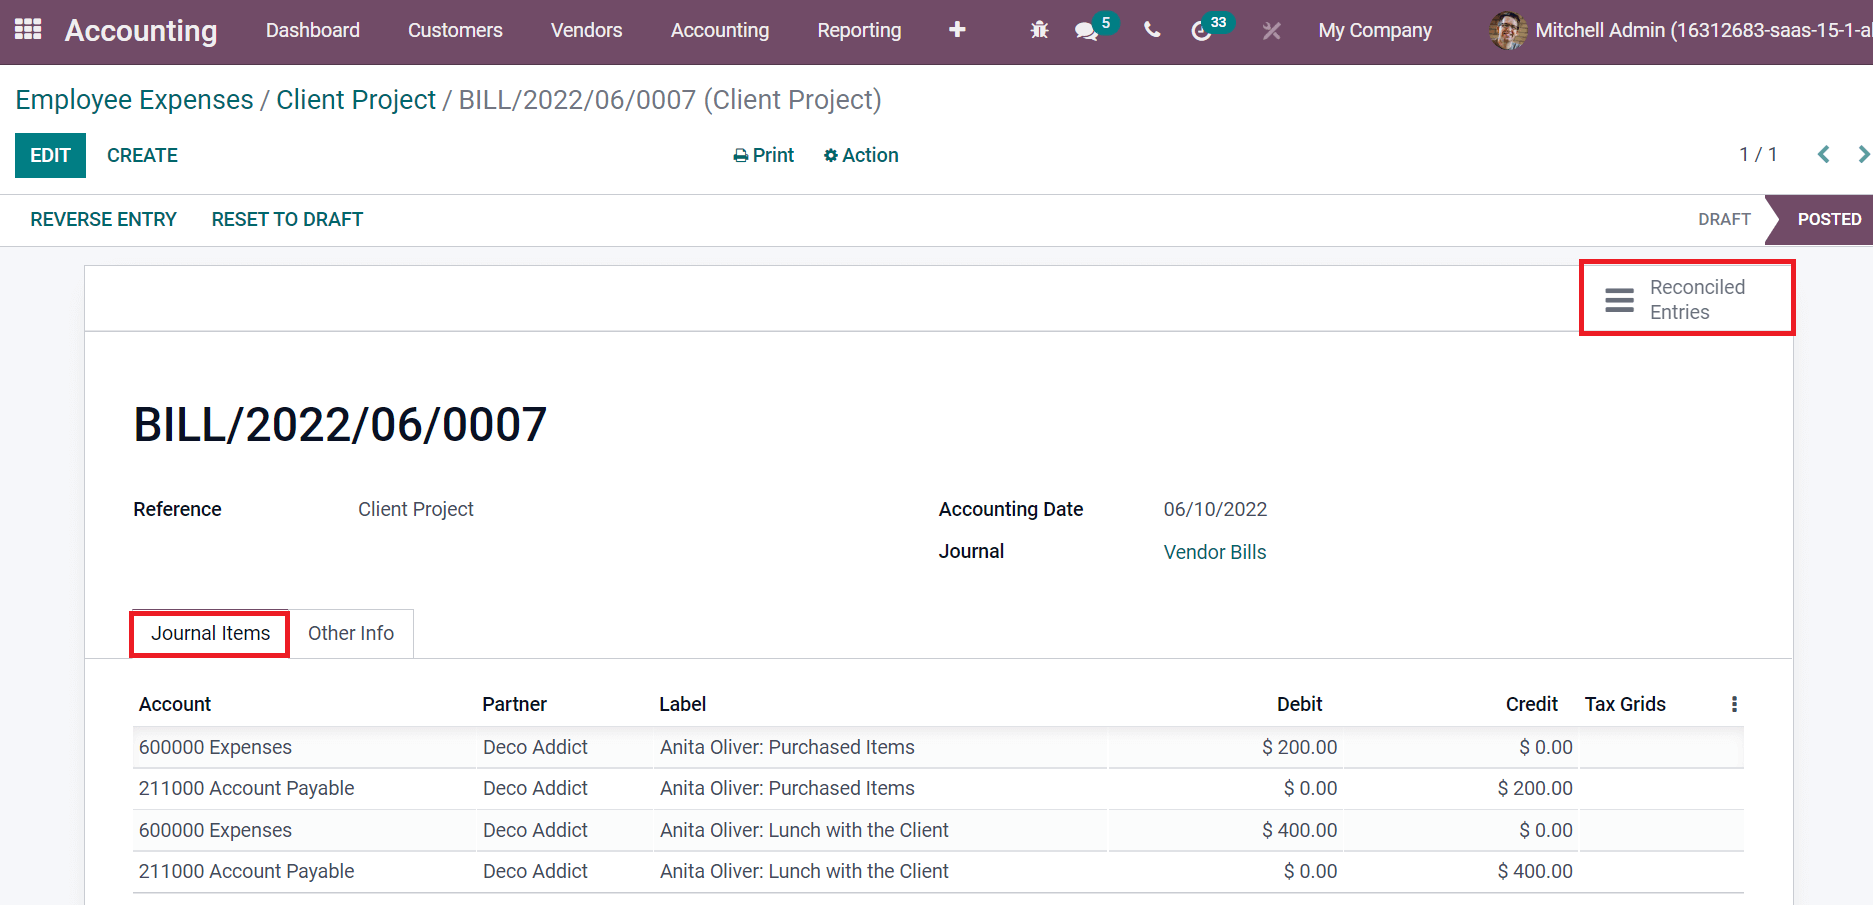
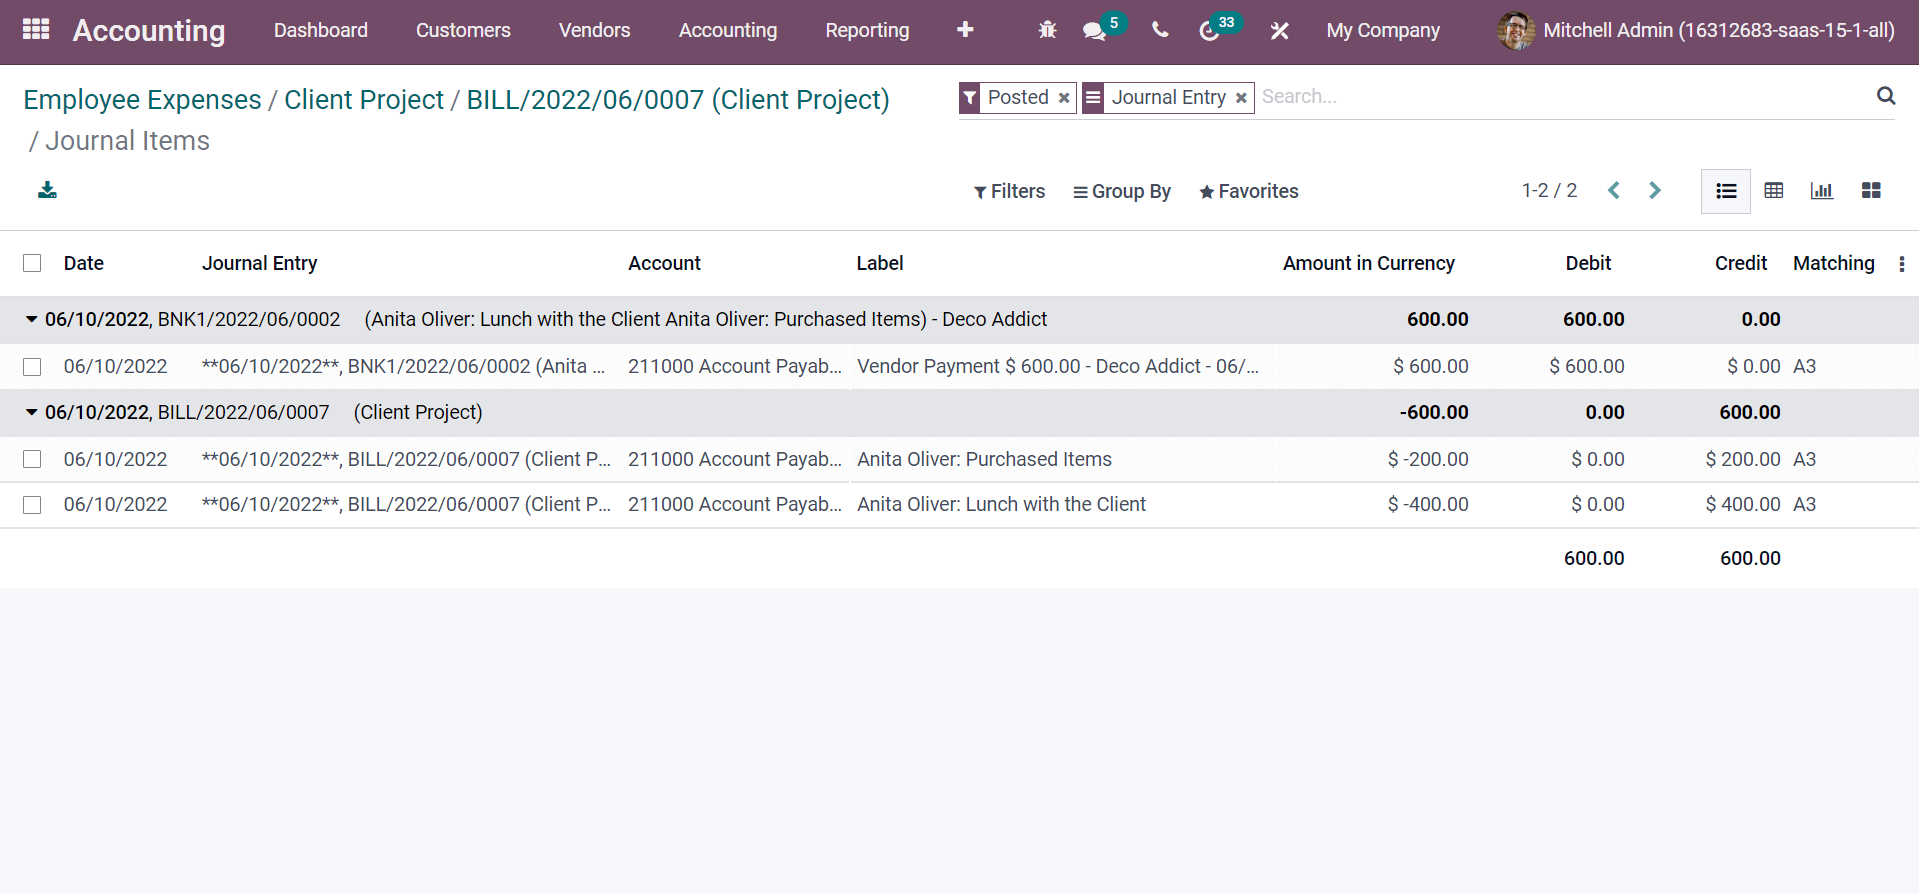
Users can access journal items in a client project by selecting the Reconciled Entries smart button.
Comprehensive support is available to users through the various features of the Odoo 15 Accounting module. Using the Accounting module, we can manage multiple tasks such as creating employee expenses and posting journal entries. Refer to the following link to get an idea about Odoo 15 Accounting Module