Most companies face some difficulties in managing Lunchtime and order for employees. ERP system helps to control the food supply of a firm. Odoo Lunch module assists in categorizing, ordering, accounts, and vendors of food. You can set alerts, create a product list and place an order through the advanced facilities of the Odoo Lunch module. It is helpful for small and large industries to manage the lunch criteria for each individual. This application assists in managing the delivery, orders, and needs of employees in a company. Odoo 15 Lunch module ensures checking prices, advance order booking, and tracking of payments.
This blog helps you control Vendors, Accounts, and Cash in the Odoo 15 Lunch Module.
Odoo 15 Lunch Module
You should install the Odoo Lunch module from Odoo Apps. After installation, you can see the module in the Odoo dashboard.
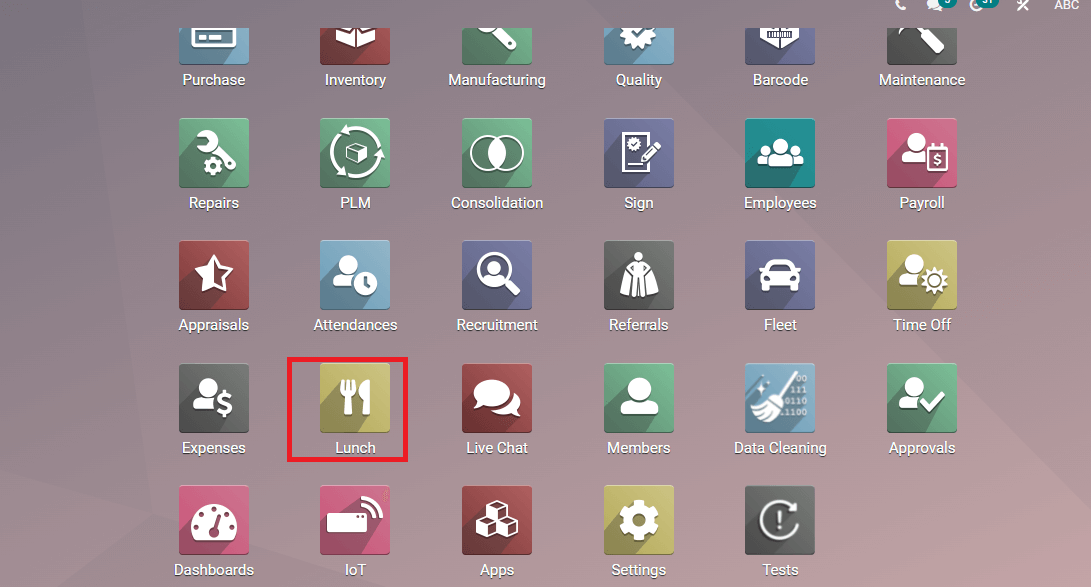
A dashboard is visible to the user after entering the Odoo Lunch Module.
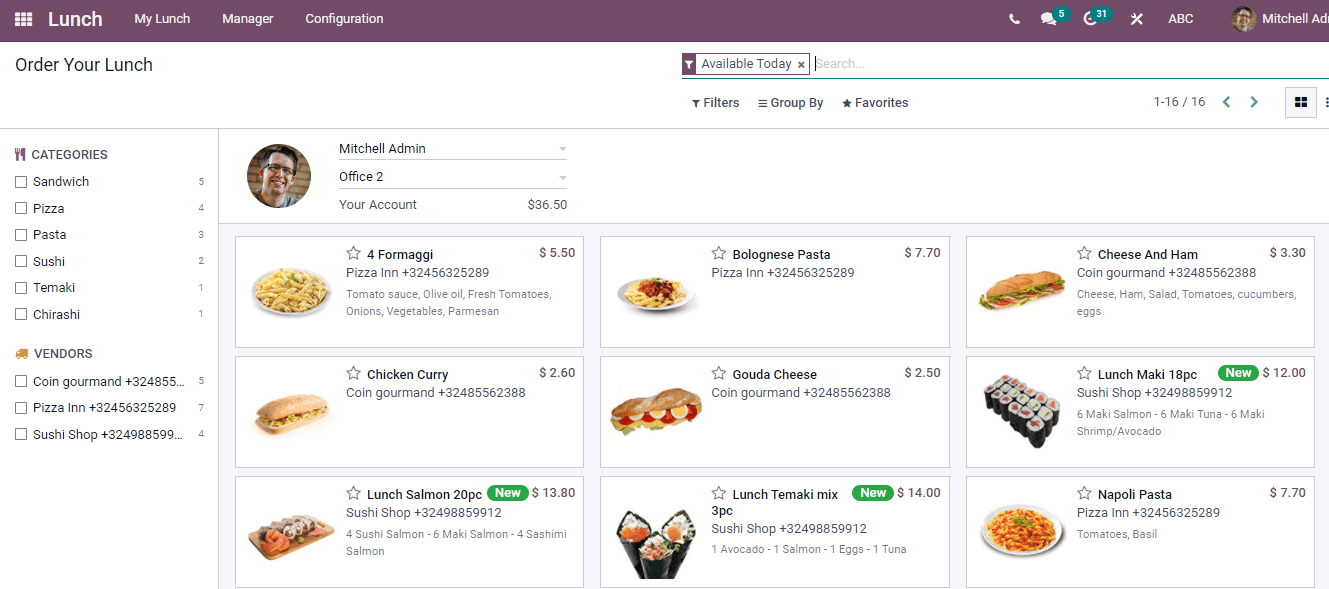
The dashboard page provides details of orders generated by the employee. It is possible to categorize food items and choose the vendors list. All these sorting options give on the left side of the Lunch window.
Control Vendors
Select the Control Vendors menu from the Managers tab in Odoo 15 Lunch module. It helps to see the placed orders from several vendors. By clicking on Order Date, you can see details of each order separately.
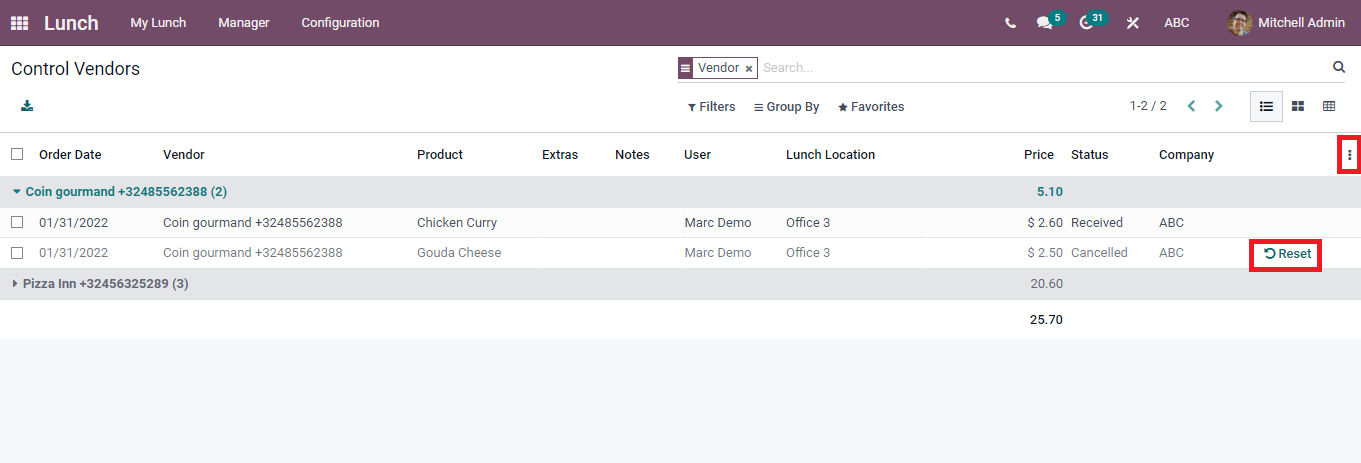
In the Control Vendors window, we can see the name of Vendor, Product, Extras, Notes, User, Lunch Location, Status, Price, and Company. We can add a Custom Field of Vendors and the existing one by clicking on the three-dot button at the right end of the window. The Reset option helps set the order details in the Control Vendors window again.
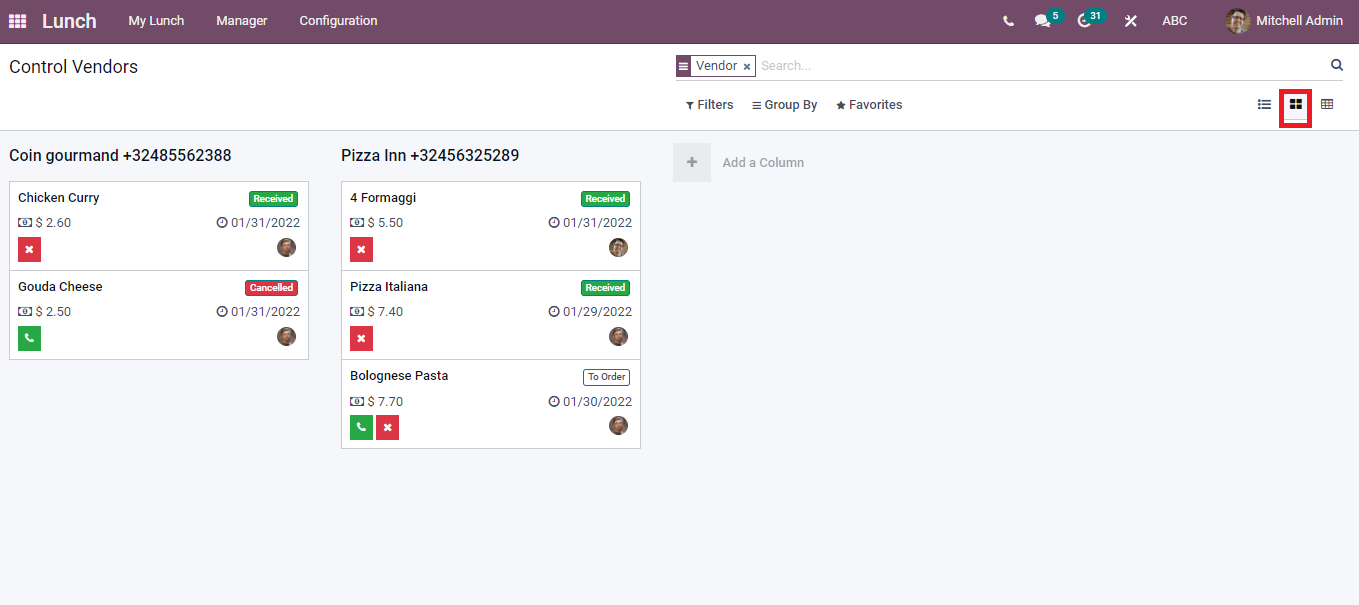
The Kanban view depicts the detailed view of each Vendor. You can see the Price, Date, Product Name, and Order received/canceled/progress in Kanban view of the Control Vendors window. The green icon consists of a call button that helps to book your order, and the red button contains a cross mark assist to Cancel an order. You can attach a new column by pressing on + icon.
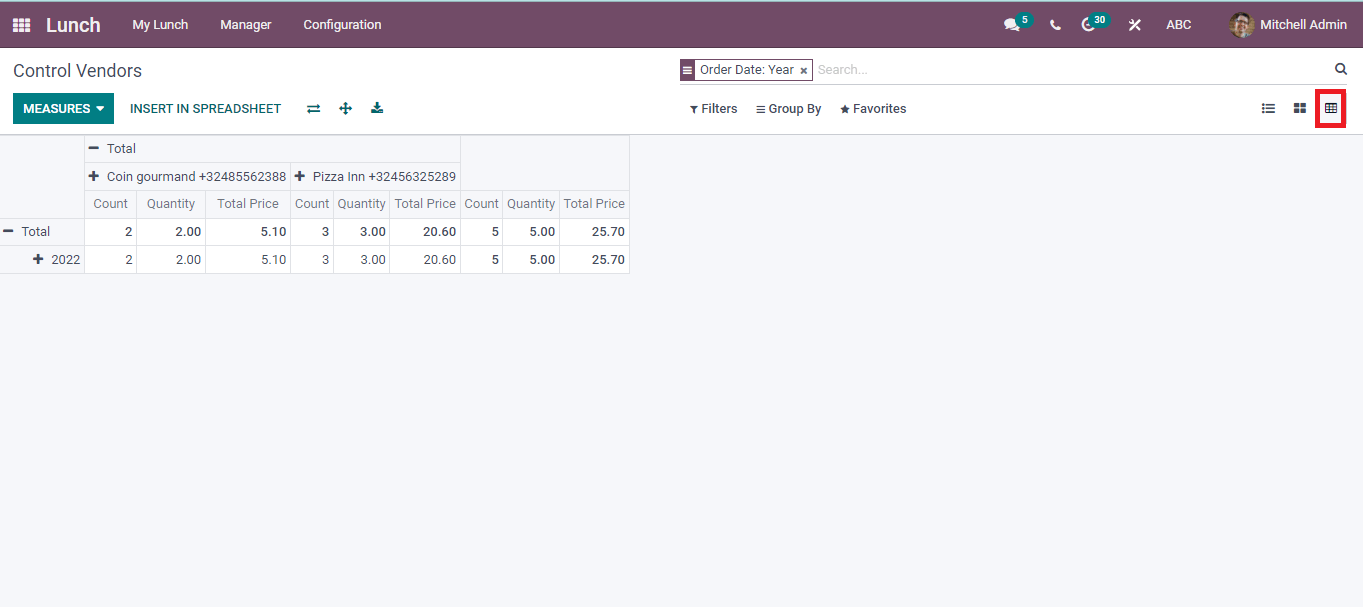
The Pivotal view depicts the total count and name of Vendors. By enabling options on the Measure icon, you can make the Count, Quantity, and Total price in the count table. Insert in Spreadsheet option assist in choosing a spreadsheet on your Pivot. Filters option enables you to see Received, Not Received, Cancelled vendors and possibly add Custom Filters.
Control Accounts
Select the Control Accounts menu from the Managers tab in the Odoo 15 Lunch Module. We can see the Date, Amount, Description of order, and user name in the Control Accounts window. A custom field adds by clicking on the three-dot button at the right page end.

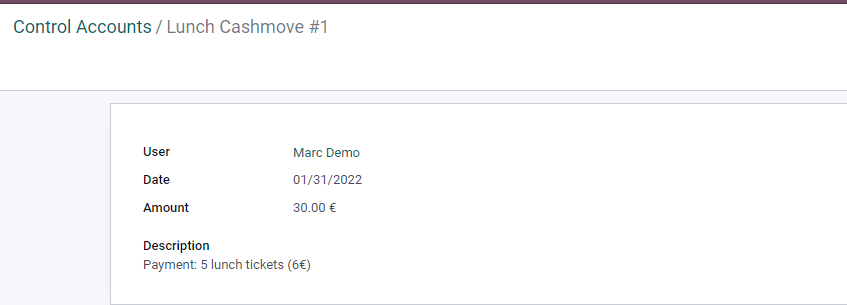
You can view the vast information of orders by pressing on the title of each user. The new window denotes the user's name, Date, Amount, and payment description of total lunch tickets.
The Kanban view shows the orders of each user separately. You can see the Name, Price, and Date of an ordered item under each user.

The +icon enables you to add more columns regarding user or order. After entering the title, click on Add button, and you can create a new user from the Configuration panel. It directs you to the new Users window of Control Accounts and press the Create button.
Create a New User
The Create icon in the Users window of Control Accounts assists in developing a new User.
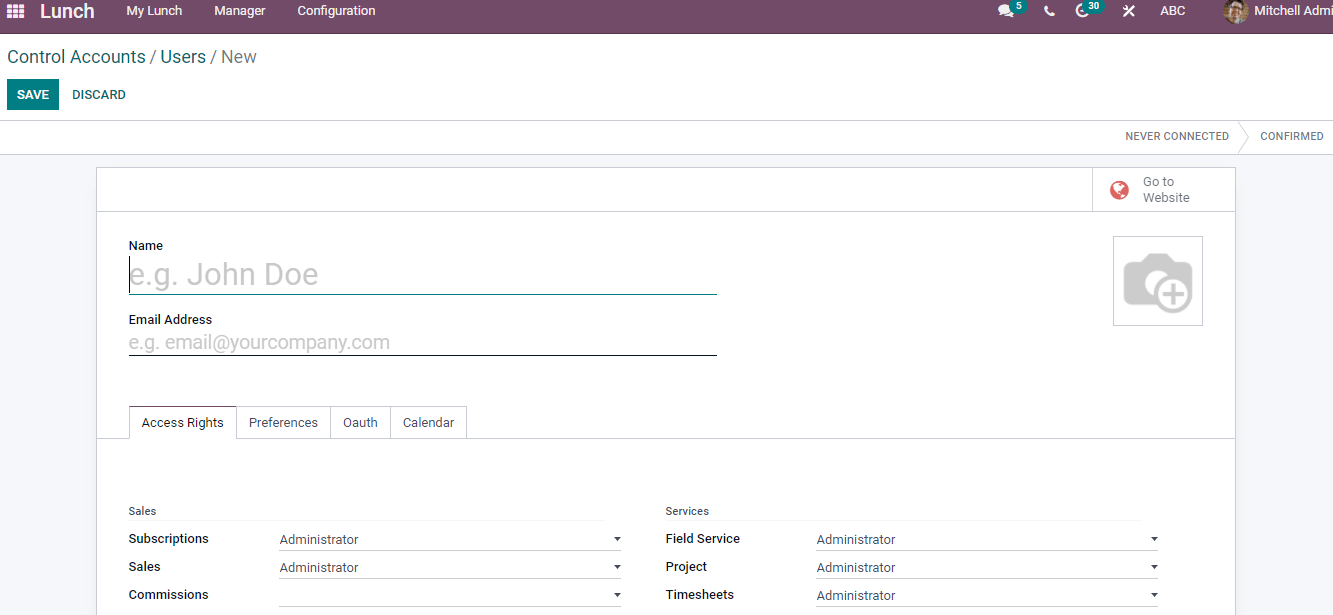
We can enter the Name, image, and Email Address of the latest user. The Access Rights tab contains options like Sales, Services, Inventory, Accounting, Manufacturing, Website, Productivity, Administration, Marketing, Human resources, and you can select Administrator/User inside each option.
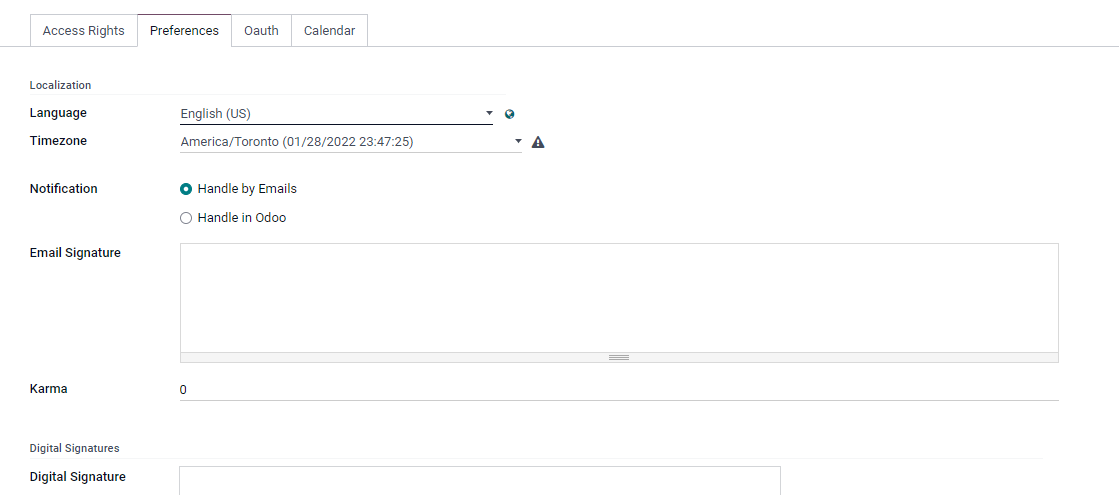
The Preferences tab assists to add Localization details consisting of Language, upload Signature, Timezone, and Notification by email/Odoo. You can add a Livechat username, set the SIP password, Handset, and Browsers extension under the VOIP Configuration.
The Oauth tab assists in adding the name of Provider, User ID, and Calendar tab helps to Reset Account in Outlook/Google Calendar.
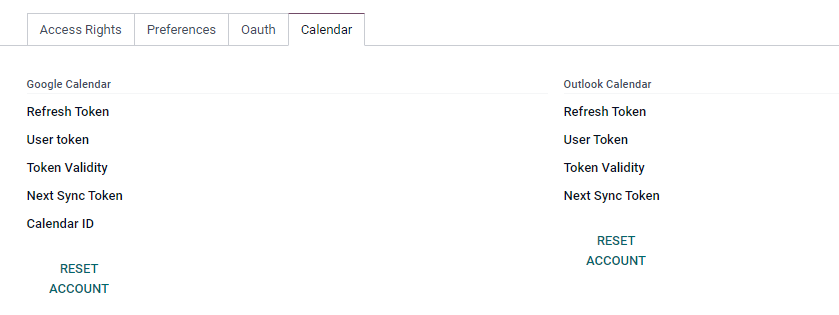
Click on the Save button after adding details regarding the user, and we can see the name of a created user in the Control Account window. You can apply Custom Filters, Groups using the Filters and Group By option in the Kanban view of the Control Accounts window.
Cash Moves
The Cash Moves window provides details of the User name, Date, Amount, and Description of Cash Move. Select the Cash Moves menu from the Manager tab in the Odoo Lunch Module, and you can also record a new Cash move of an order in this window.

The three-dot button at the end enables you to add a Custom Field of order Cash Moves towards the existing one. The export icon helps to download all data of Cash Moves. We can develop a new Cash Move by clicking on the Create icon.

You can add the Date, Amount, and Name of the User in the New Cash Moves window. Additionally, there is a space to enter the order description and Save the data. The created details of Cash Moves are visible in the main window, and you can edit the data at any time.
The kanban view denotes the Description, date, and amount of Cash Moves. You can add Custom Filter, Group, and import records using Filters, Group By, and Favorites options.

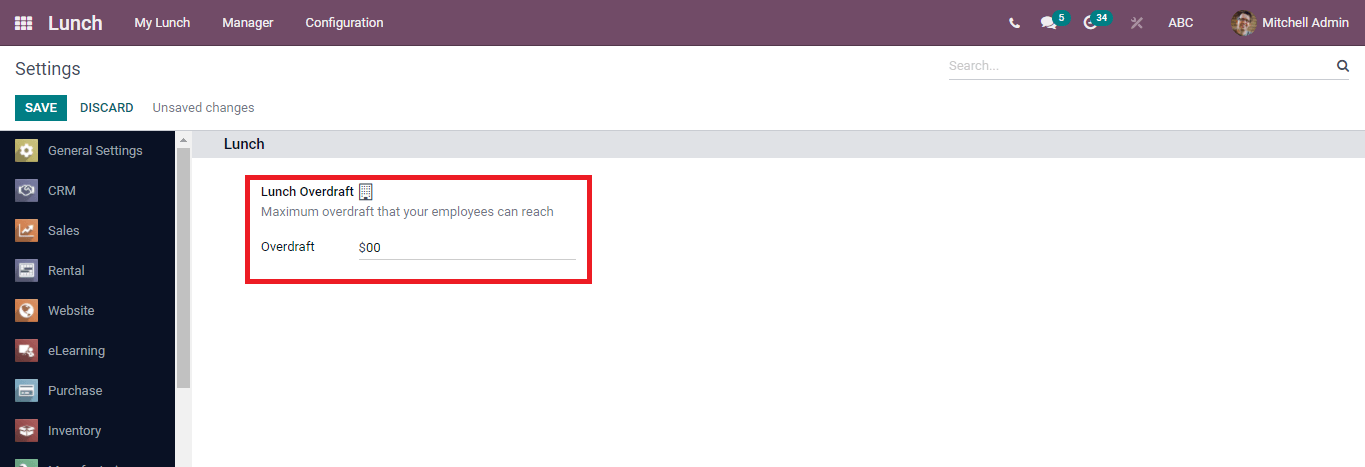
The Settings menu sets an overdraft for employees' lunch in the Configuration tab. You can select a maximum overdraft for an employee using the Lunch Overdraft menu. There is an option to take a loan when the employee's account balance reaches zero.
The food supply system is maintained easily with the help of an ERP system. Odoo 15 Lunch module provides advance order requirements. All worries about food supply avoid installing the Odoo Lunch module, which is helpful for the organization.