Analytical accounts are a standard way to relate to every product or service to accurately track all of your company's processes. In certain software analytical accounts are operated as an enhancement to general accounts. In Odoo OpenERP, analytical accounts are related to general accounts but are handled separately and distinctly. You will then enter separate analytical operations that have no equivalent in the general accounting records.
The term Analytical Account in Odoo is equivalent to the cost center in Tally. If you need to monitor the cost details of a product against the sum of your total products, we should create a different analytical account of that particular product. The analytic account should not make a journal entry when invoicing so that we can see the real transaction amount. That is the main account is not affected by the analytic account of the analytic account.
The analytic account can be used in different scenarios. When it is used at budget management, it can separately record how much we can spend and how much we spent. When it comes to asset management the depreciation is also separately analyzed.
When it comes to analytical tags, the expense or revenue is distributed among the different analytical accounts. For example, if we're to break the amount of a product, we have to divide the sum or payment sum to many departments by the respective value ( by percent), so create the departments as analytical accounts and also create analytical tags. So using that tag the split amount can be defined.
To configure an analytical account Go to Accounting Module > Configuration > Settings > Analytics > Enable Analytical Accounting and Analytical Tags
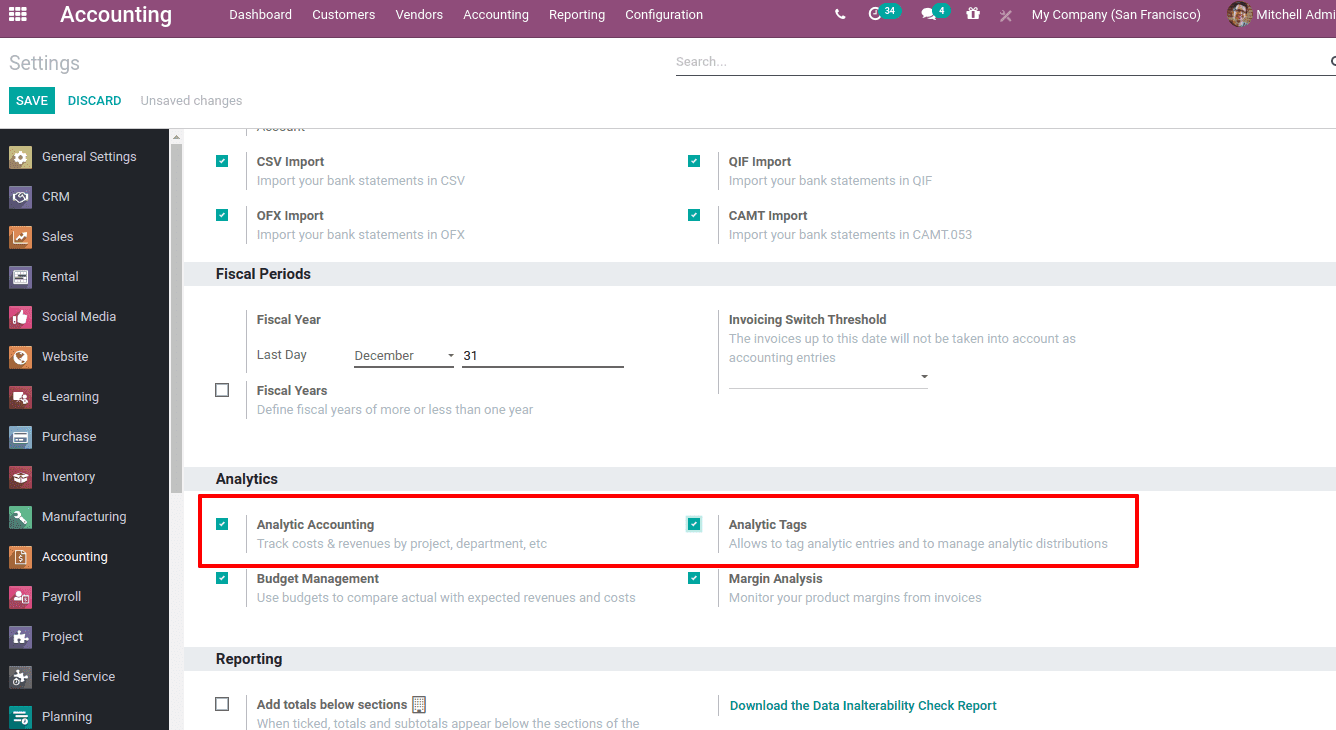
Now save the changes. So you can see options for ‘Analytic Accounting’ and ‘Analytic Tag’ under the configuration menu.
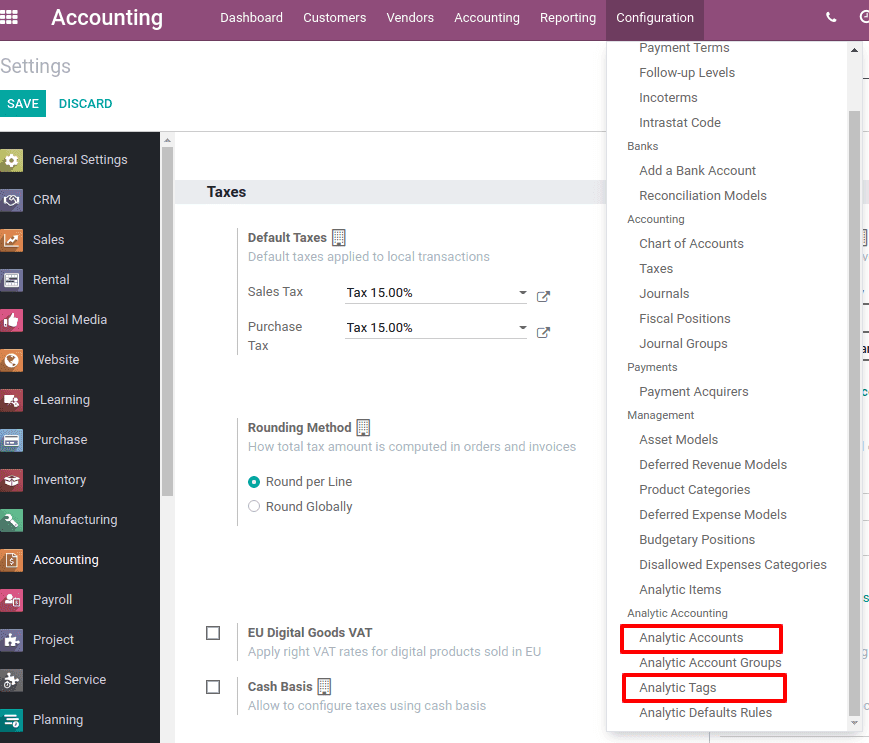
Go to Analytic accounting and create one. The form is shown below.
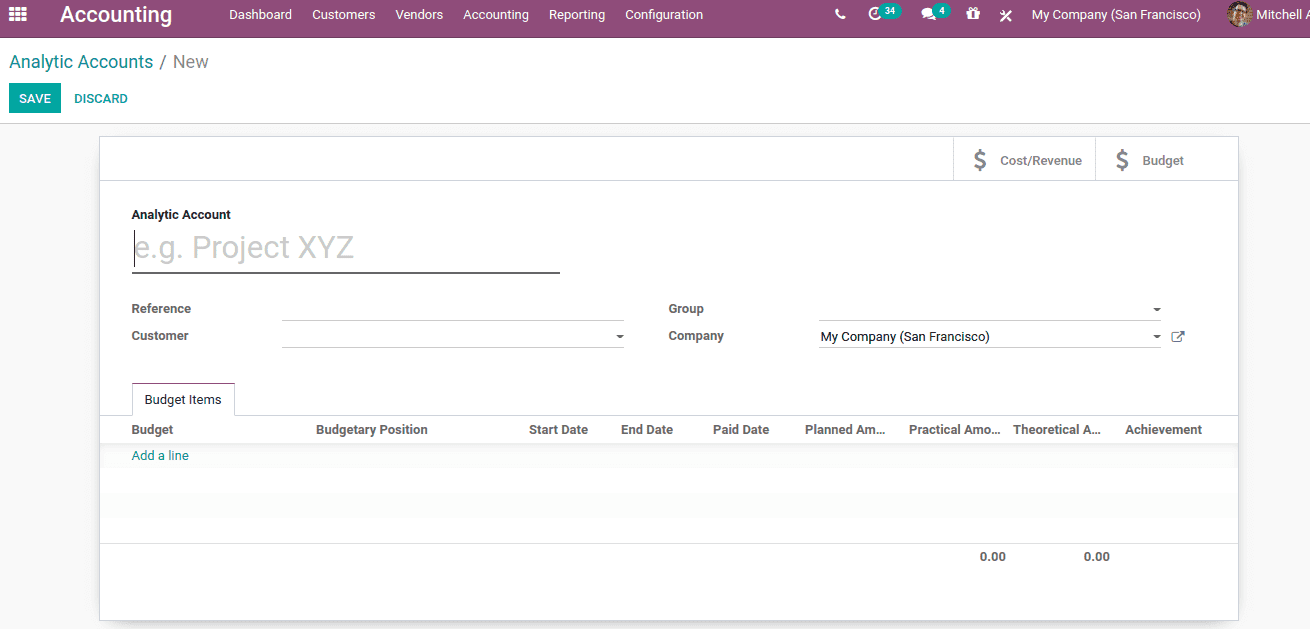
Add an analytic account name and set references. Set the customer which will help to filter and add groups, for which multiple analytical accounts are used. Thus a single can be used to get the results of all included analytical accounts. One can use the existing group from the drop-down or can create a new group.
A new group can be created as Accounting Module > Configuration > Analytical Accounting > Analytic Account Groups
So after creating an analytic account, let us create a vendor bill. Go to Accounting > vendors > Bills > Create
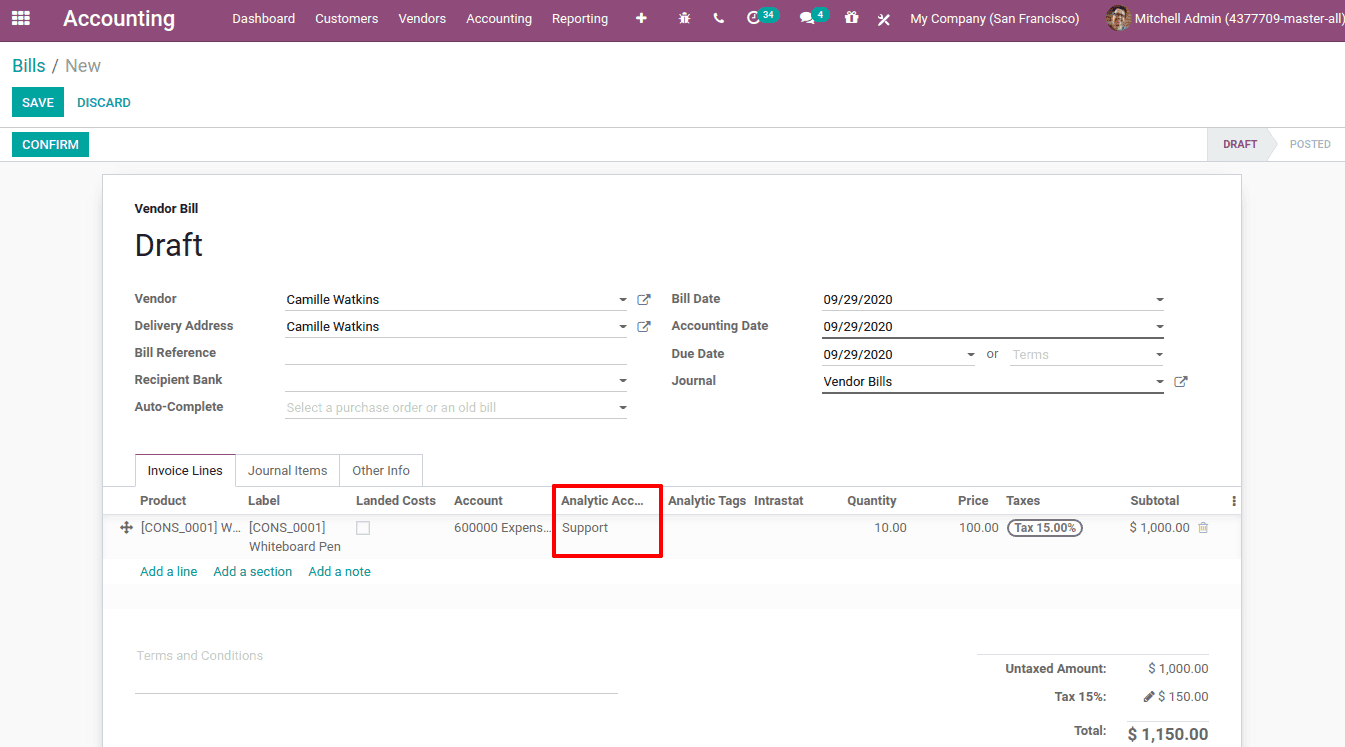
Add vendors and products. In the order line of the vendor bill, there is a field to add the analytical account. One can add the created analytic account in the required field. After that post and validate the bill.
One can check analytic items there and you can find the analytic account entry, Accounting > configuration > Management > Analytic Items.

One can also use the ‘Group By’ option for analytic accounts.

This brings to analyze the report before the journal entries are posted.
Now go to Analytical report, Accounting > Reporting > Analytic Report
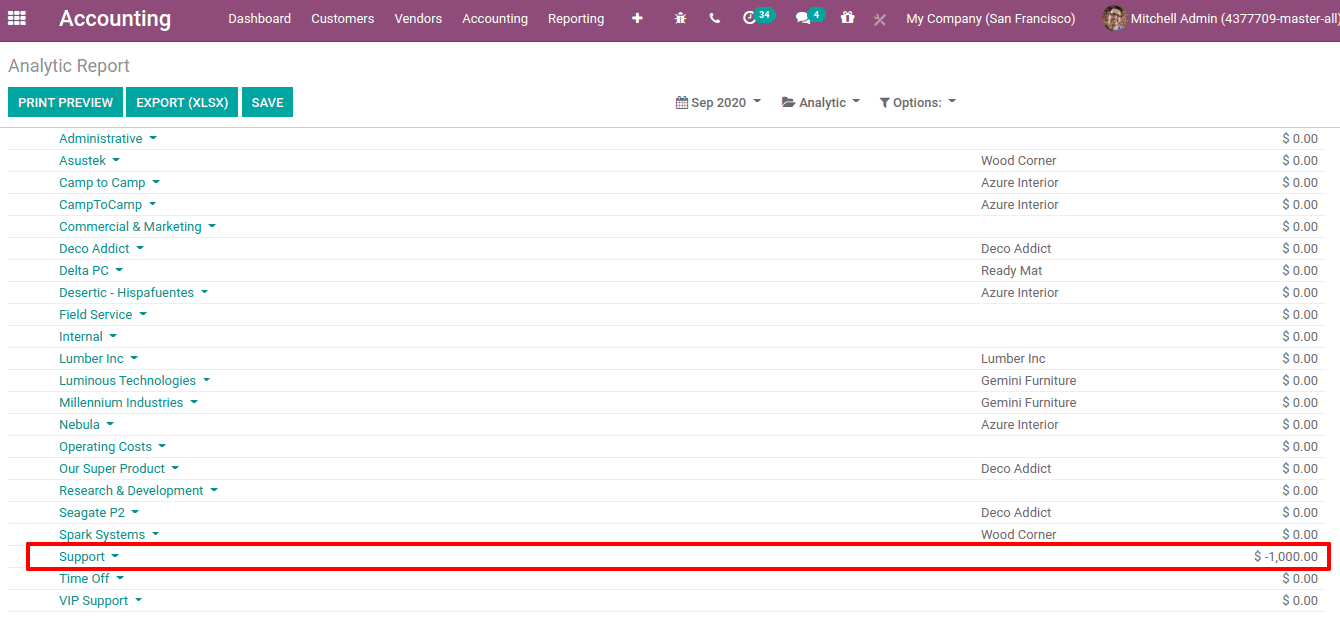
The negative value in the report refers to the expense amount.
Analytic Tags
We know that the expense or revenue can be distributed among the different analytical accounts using analytic tags.
One can create analytic tags from Accounting > Configuration > Analytic Accounting > Analytic Tags > Create.
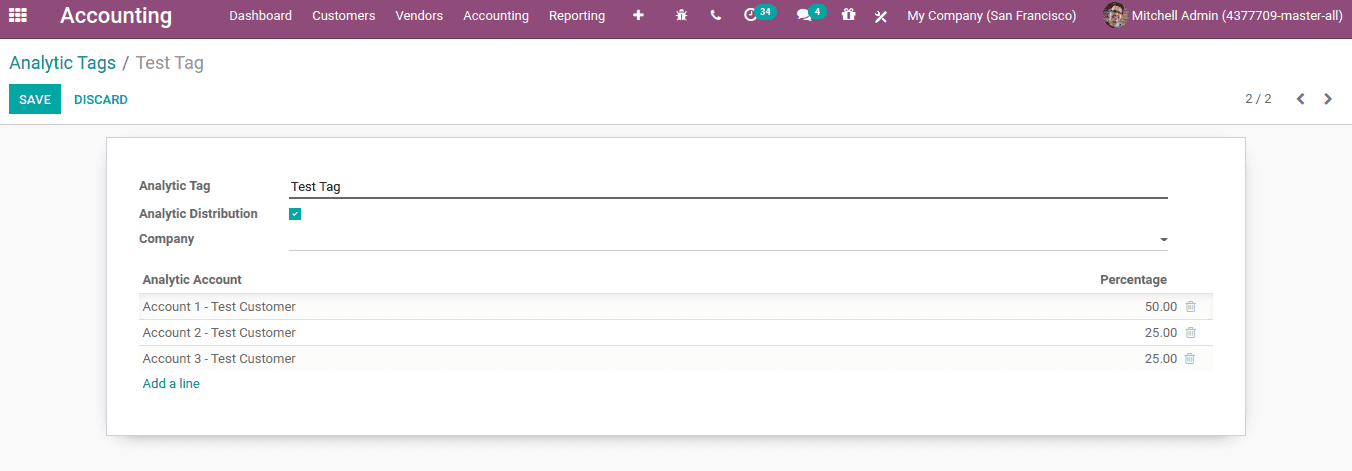
Add the Analytic tag name and enable analytic distribution to distribute the amount based on the percentage given for each Analytic Account. Add analytic accounts and the percentage distribution using the ‘Add a line’ option.
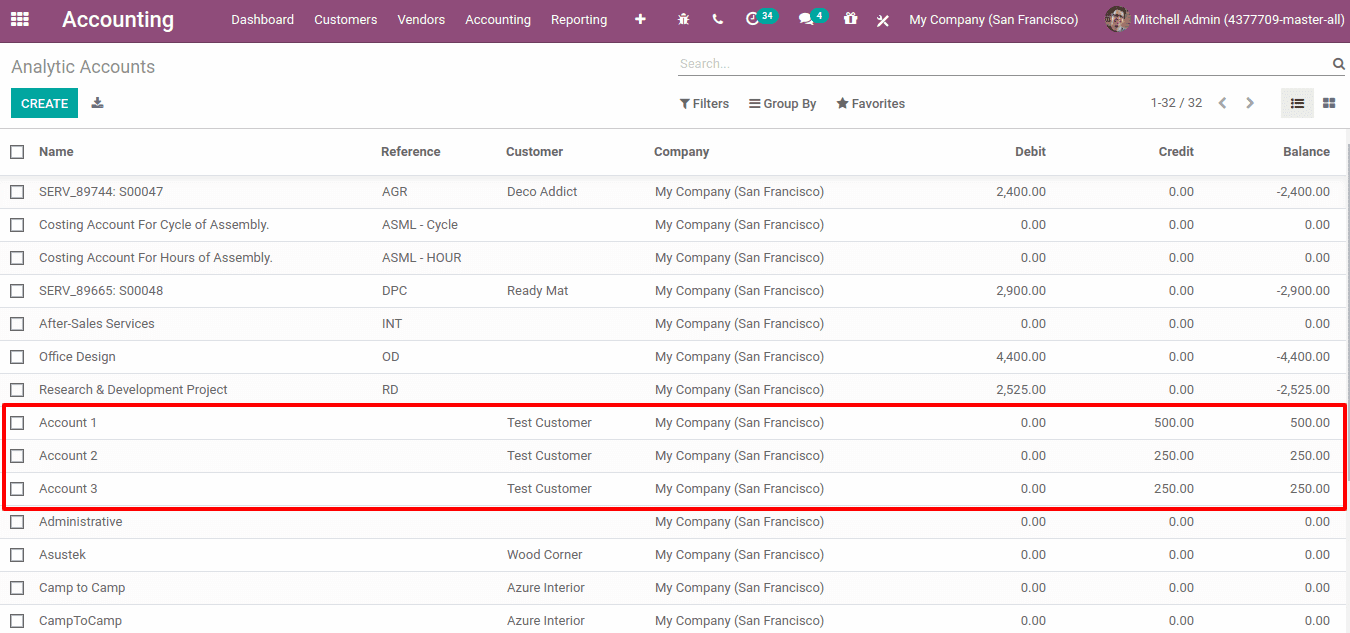
In this case, 50% is distributed to ‘Account 1’ and 25 % to ‘Account 2’ and ‘Account 3’.
Create a customer invoice. Add the customer, product, and add the analytic tag.
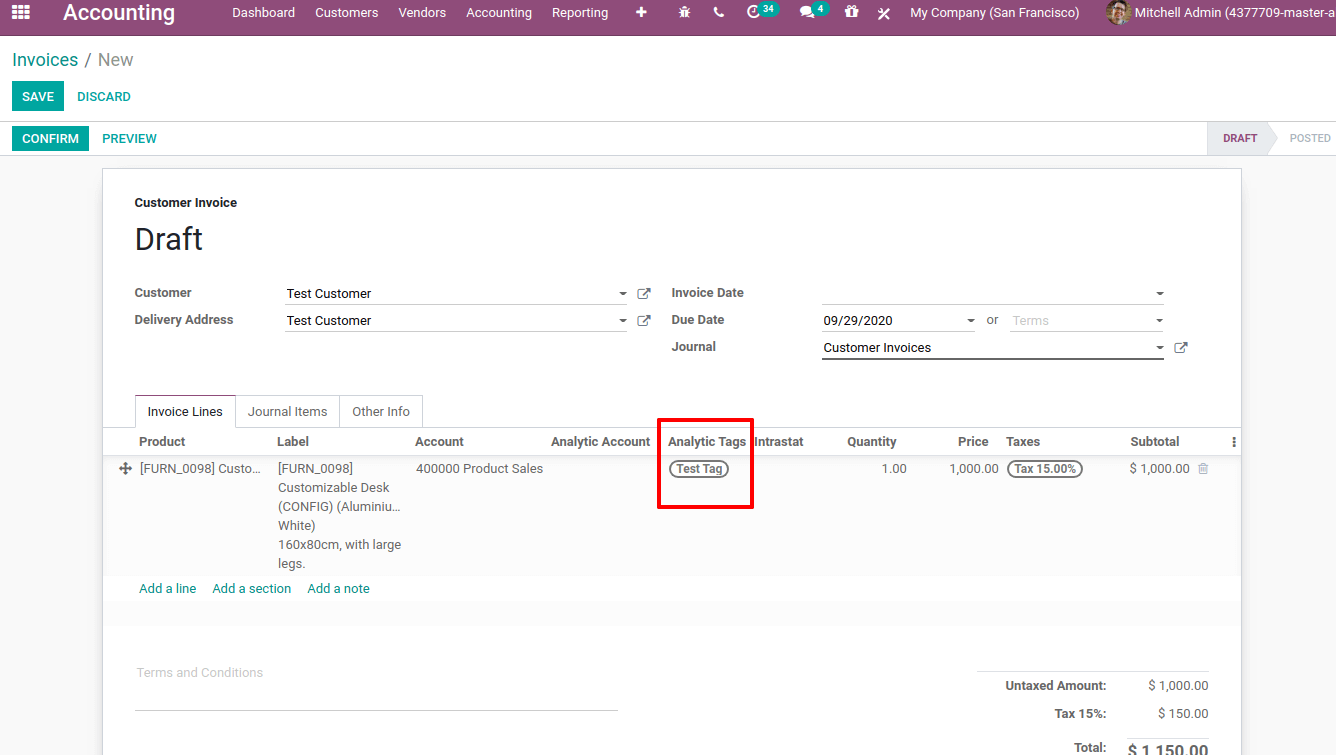
Confirm and post the invoice. Now go to analytical accounts, the distribution of amounts among different analytical accounts can be seen.
Also Read: Analytical Account and Tags in Odoo 13