A solid digital document system is an inevitable business tool to store and keep track of your company’s documents. It can be considered a basic functionality required for any company regardless of its size and type in the digital world.
Document management systems are plenty in the digital and software era. Some of them stand alone with few functionalities. But some are designed for dedicatedly assisting users with so many features and functionalities. The Odoo ERP comes with a more perfect suite that involves a number of other business modules. The Odoo Document module is ideal for all types of businesses looking forward to a single solution for managing documents.
This blog will discuss the different options listed under the Configuration tab of the Odoo 15 Document module.
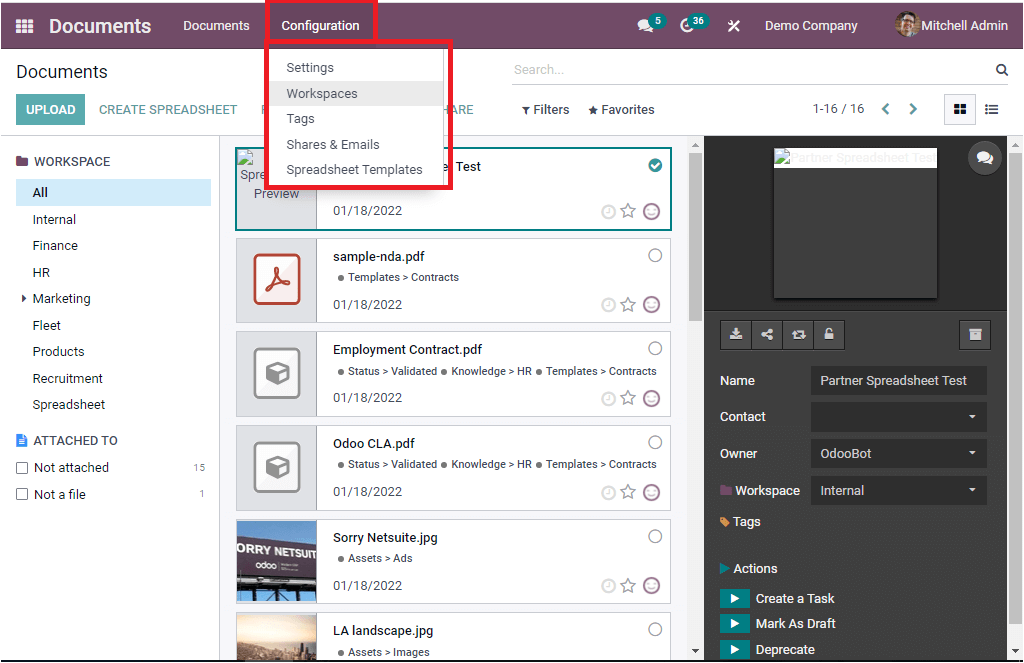
The Configuration tab of the Odoo Document module includes various menus such as Settings, Workspaces, Tags, Shares & Emails, and Spreadsheet Templates. You can open the Odoo Document module and click on the Configuration tab to view the options. The Configuration tab encompasses a dropdown menu to access all these described options. The image of the dropdown menu is depicted below.
Let us discuss each of these options below.
Settings
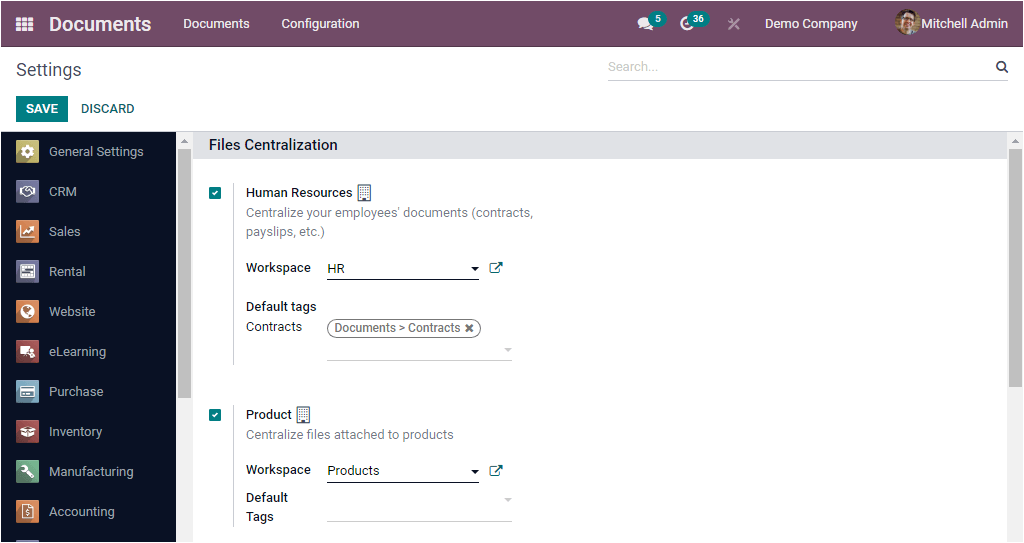
The Settings window of the Odoo Document module includes various options. All these options are listed under the Files Centralization tab. The different options are as follows:
- Human Resources
- Product
- Projects
- Spreadsheets
- Recruitment
- Accounting
All the described options can be activated to get these options' functionalities. These options are specifically designed to centralize the documents associated with different departments of your business. The Human Resources option can be activated for centralizing your employees’ documents like employee contracts, payslips, and many more aspects. Here you have the option for defining workspace and default tags. To activate, you should check the box near the option. And to save the changes, you should click on the SAVE button.
The second option available under the Settings window is Product. You can activate the Product option for centralizing files attached to products. Here also, Odoo includes the options for Workspace and Default Tags.
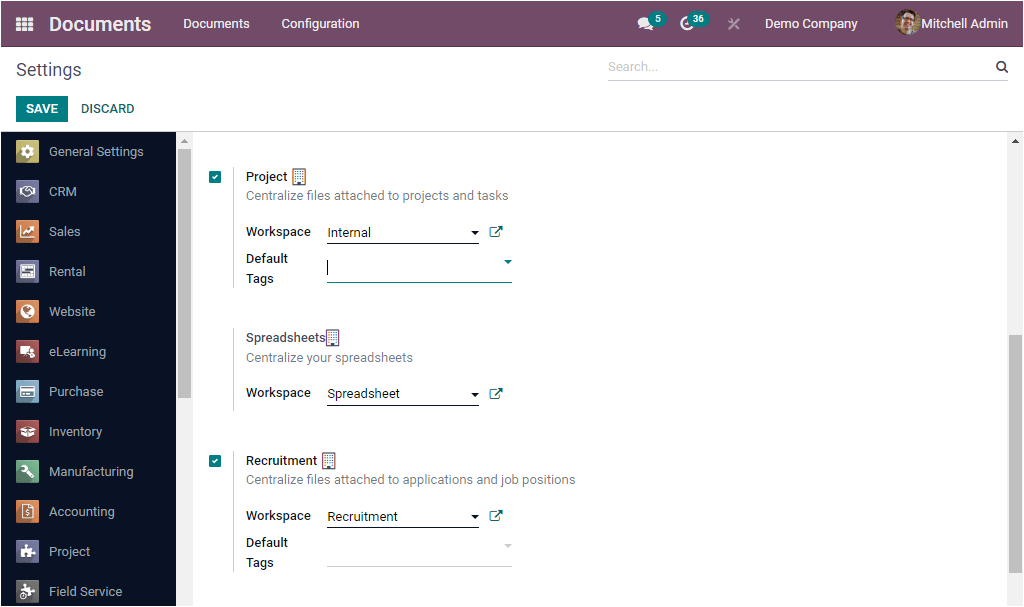
The Project option available on the Settings window can be enabled for centralizing files attached to projects and tasks. The Workspace and Default Tags can be explained using the dropdown menu.
The module also supports you to centralize your spreadsheets. From the settings window itself, you can define the workspace. If the workspace is a preconfigured one, you can select it from the dropdown menu. Otherwise, you can click on the external link menu icon for defining a new workspace. Upon selecting it, you will depict the creation form as shown below.
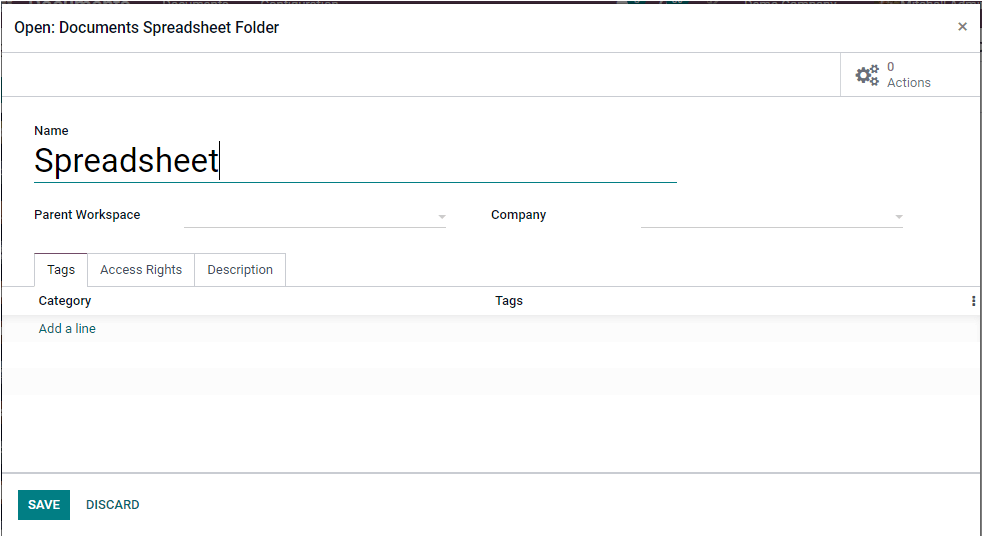
With the help of this create form, you can easily configure a new workspace from here itself.
Moreover, the Recruitment option can be activated to integrate the recruitment files attached to job applications and job positions. Similarly, the Accounting option should be enabled for centralizing accounting filters and documents. You can easily synchronize journals and can create workspaces.
The above-mentioned options are the available options under the Settings window of the Odoo Document module and let us look at the Workspaces menu.
Workspaces
The Workspaces menu available under the Configuration tab of the Odoo Document module allows you to create and configure Workspaces. When you click on the Workspaces menu, you will be directed to the Workspaces window, as portrayed in the image below.
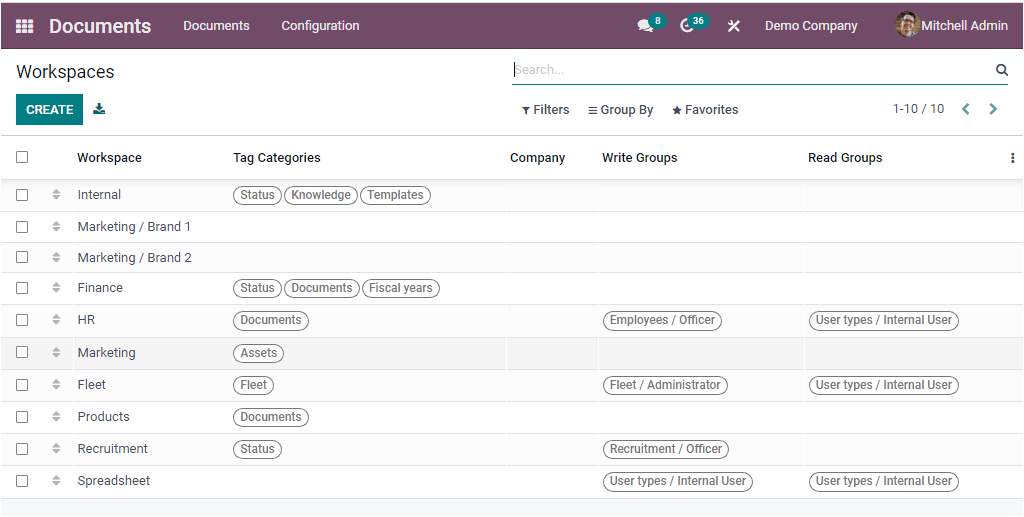
The Workspaces window will give you a preview of the already defined Workspaces. The details listed in the window are the Workspace Name, Tag Categories, Company, Write Groups, and Read Groups. Each of the preconfigured Workspace data can be taken for viewing in detail.
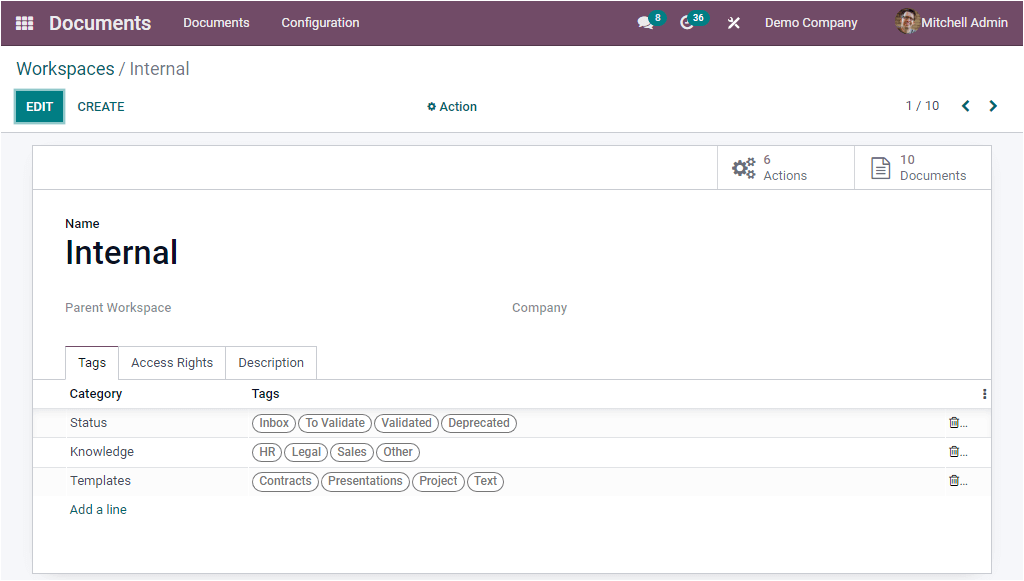
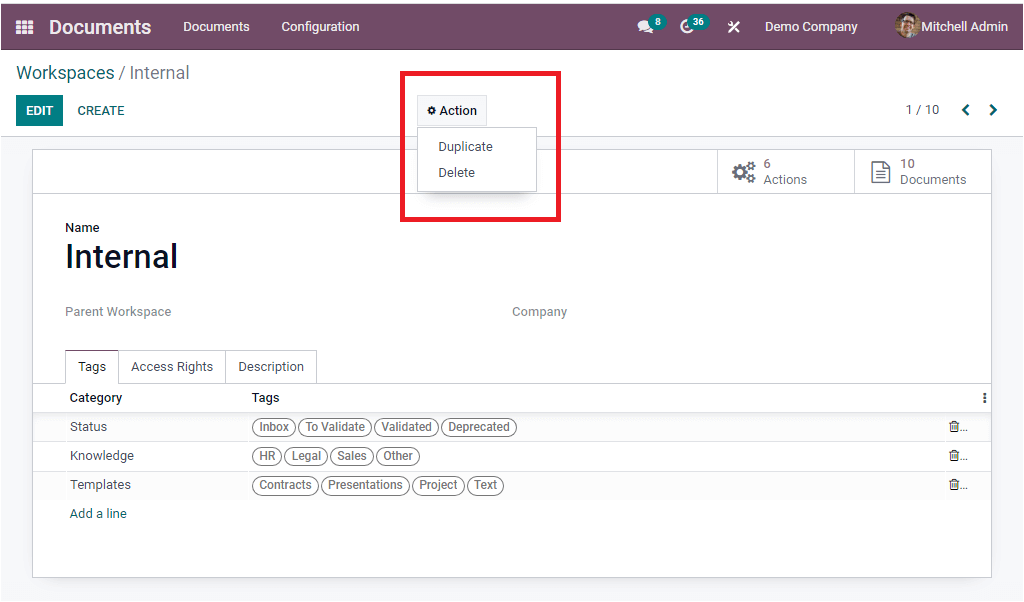
If you want to modify the data, click on the EDIT button. In addition, you can apply additional actions like Duplicate the record or Delete the record. You can access the respective options under the Actions tab that you can view in the top center.
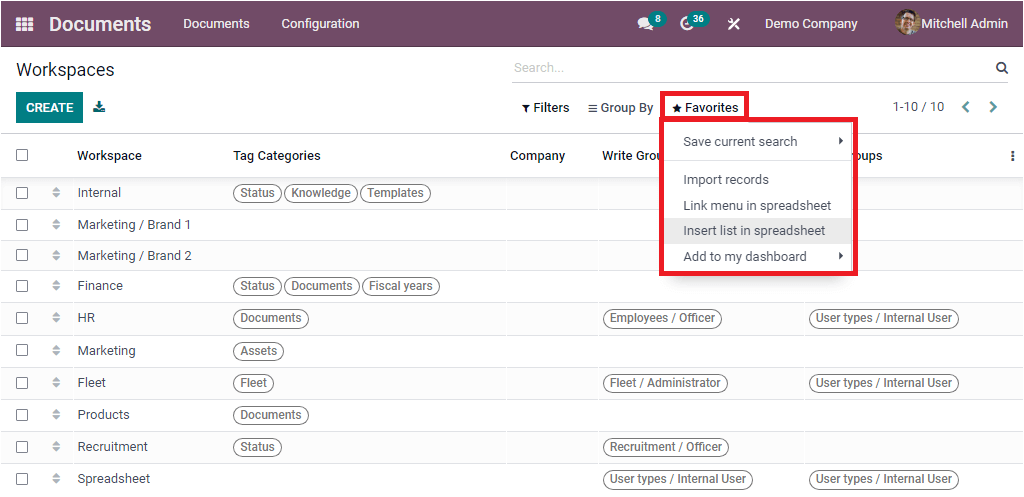
Back to the Workspaces window, Odoo includes multiple functionalities to simplify or help to access required data quickly. You can view the Filters, Group By, Favourite, and Search tabs at the top of the window. With the help of these tabs, you can customize filters based on your company requirements by applying conditions. You can also add custom groups by clicking on the Group By tab. The default Group By option ‘Parent Workspace’ can categorize your workspaces based on their parent workspace. When you take your cursor on the Favourite tab, you will see a list of options such as Save current search, Import records, Link menu in a spreadsheet, Insert list in a spreadsheet, and Add to my dashboard options.
Furthermore, the Export All menu can be viewed right to the CREATE button, allowing you to export all the data in the list into an excel sheet. To create a new Workspace, you can click on the CREATE button.
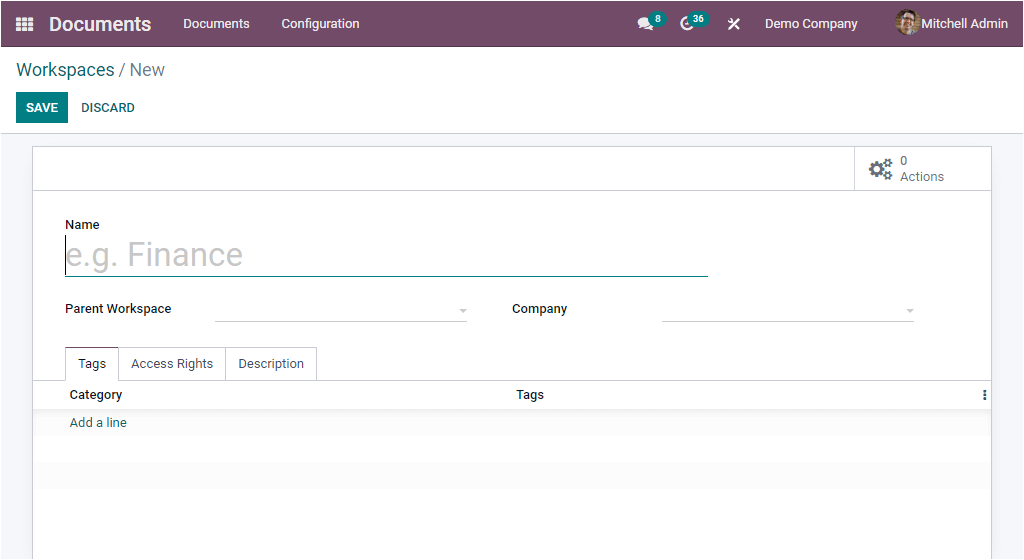
The above image depicts the Workspace creation window, and here you can fill in the required details to configure a new workspace. First of all, you can allocate the Name of the Workspace in the provided space. Then you can define the Parent Workspace with the help of the dropdown menu. Similarly, the company details can be described in the Company field. The tag categories for this workspace can be defined under the Tags tab. For doing so, you can press on the Add a line menu. Now the system will display a pop-up window for creating tag categories.
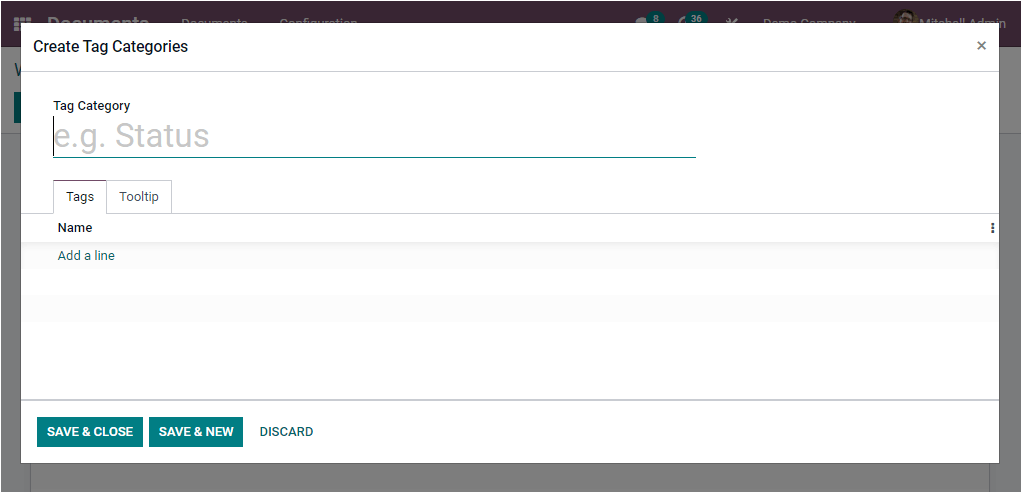
Provide Tag Category, tags, and Tooltip. After that, save and close the created tag category.
Back to the Workspaces creation window, Under the Access Rights tab, you have the Write Groups option in the Write Access and the Read Groups option in the Read Access. You can allocate the Write Groups, and the groups will be able to see the workspace and read, create and edit its documents. Similarly, the read groups can see the workspace and read its documents without creating or editing rights.
Moreover, the Description tab allows you to describe the workspace in the provided box. Once you complete it, you can click on the SAVE button. Now the newly created workspace will be listed along with all other previously configured workspaces.
Apart from the options, you can view smart tabs based on the modules you installed on the system. When you look at the window's top right corner, you can see Actions and Documents buttons, as shown in the image below.
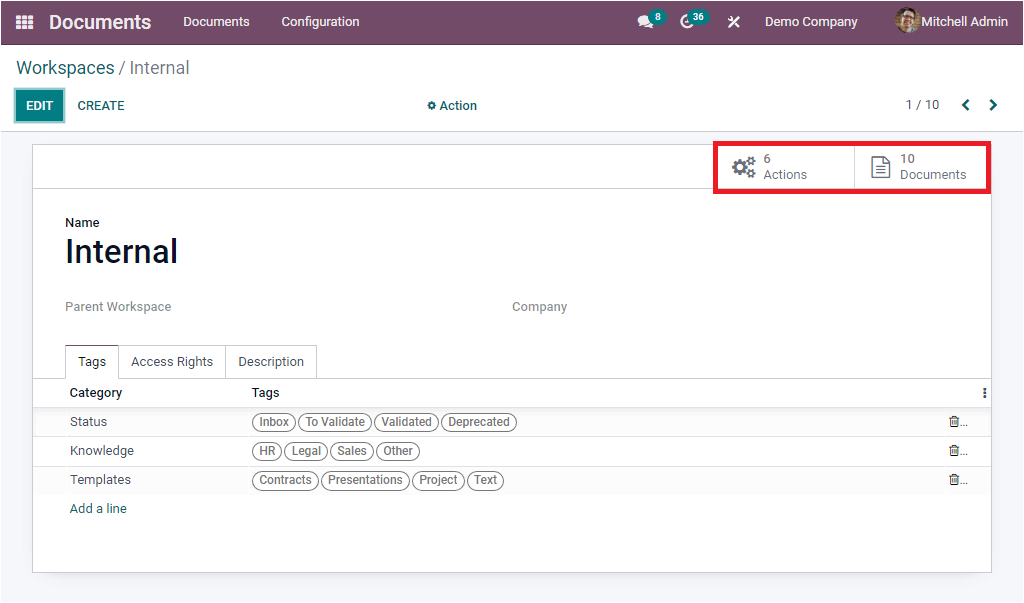
These buttons act as the direct link to the respective windows. When you click on the Actions smart button, you will be navigated to the Actions window where you can view the details of all the created actions under the respective workspace. The image of the window is depicted below.
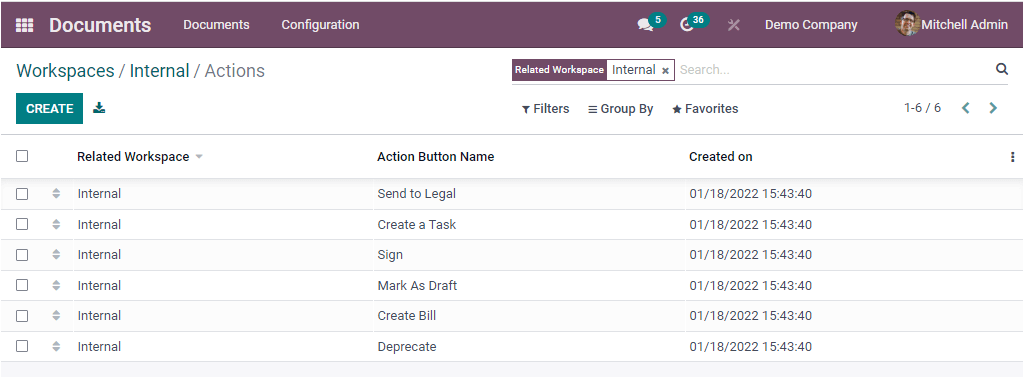
Similarly, the Documents smart button helps you to jump into the Documents window.
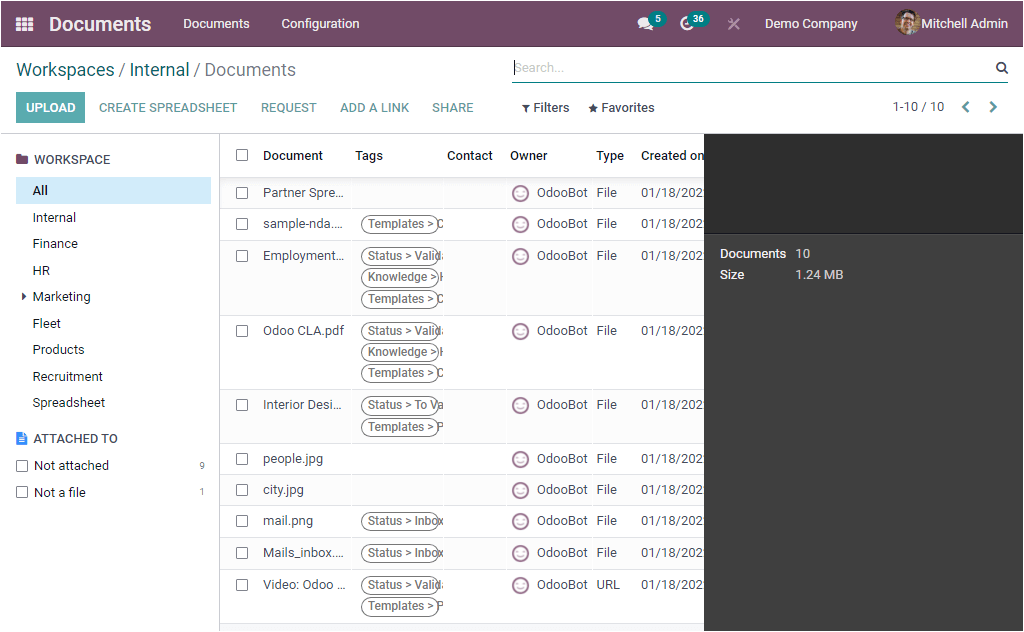
As we clear on the configuration steps of Workspaces and now let us move on to the following menu available under the Odoo Documents module.
Tags
Odoo ERP gives a significant role for the feature 'Tags' in most of its modules. Even if you look at the Document module; you can view the role of tags. Tags play an important role in categorizing and quickly identifying documents and workspaces. The Tags menu available under the Configuration tab of the Odoo Document module helps you to open the Tags window.
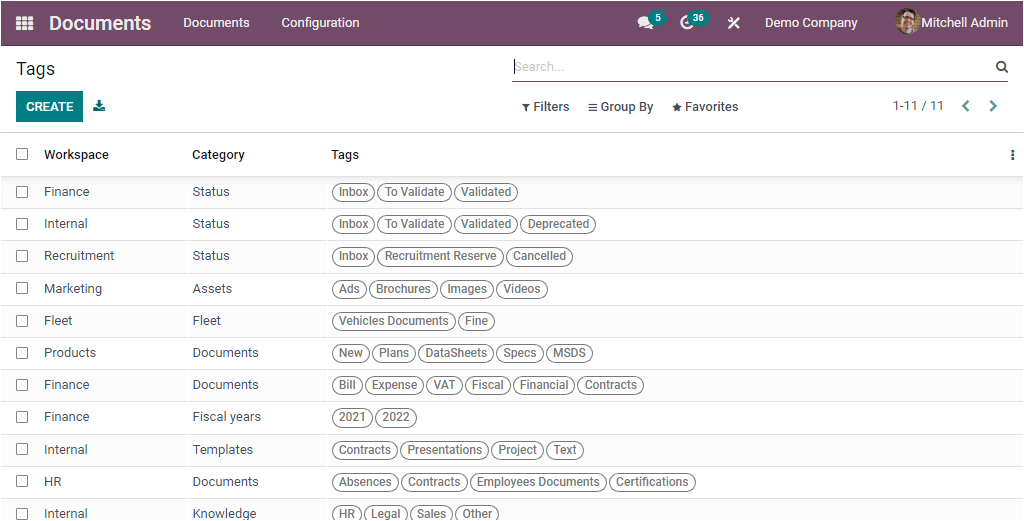
The above image represents the Tags window, and the window will display you a list of Tags that are already configured in the platform. Each tag was listed along with its related Workspace, Category, and Tags. If you want to create a new Tag, you can click on the CREATE button. Now you will be taken into the Tags creation window. The screenshot of the creation window is depicted below.
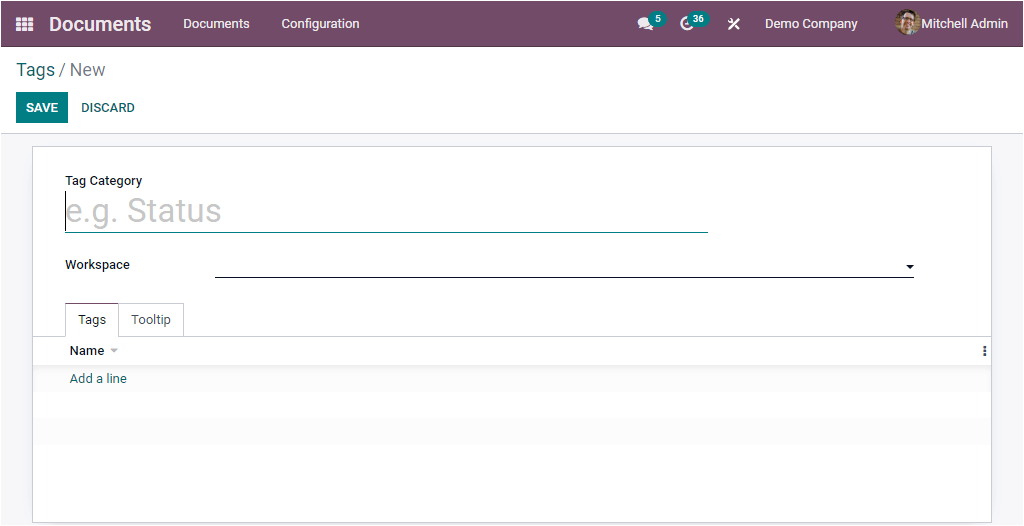
You can provide the Tag Category in the specified space and allocate Workspace with the help of the dropdown menu. The respective tags can be defined under the Tags tab. To add tags, you can click on the Add a line option. Using this method, you can add multiple tags based on your preferences.
Similarly, if you want to add tooltips, you can do it under the Tooltip tab. These tooltips are the info tips or the text which will be displayed when hovering on this tag category or its tags.
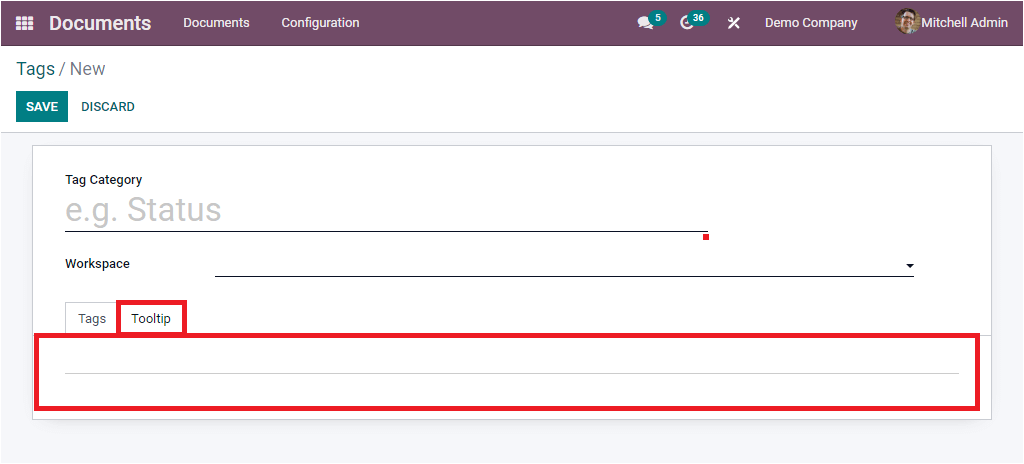
Now let us have a glance at the following menu: Shares & Emails available under the Configuration tab of the Odoo Documents module.
Shares & Emails
The Shares & Emails menu available under the Configuration tab of the Odoo Document module will direct you to the Share Links window, as shown in the image below.
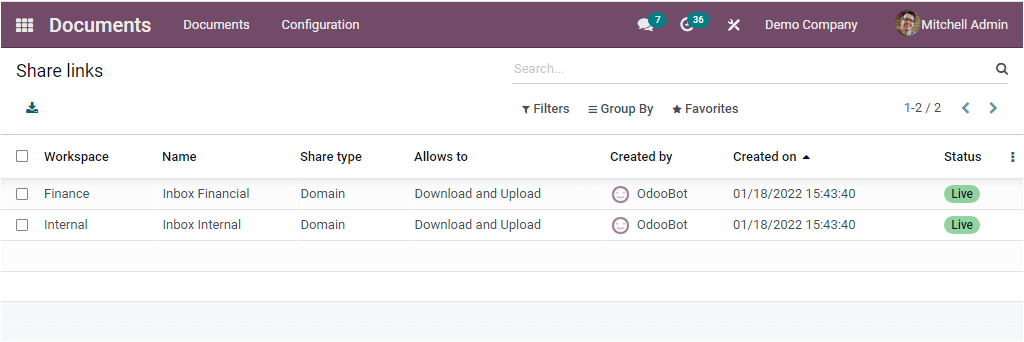
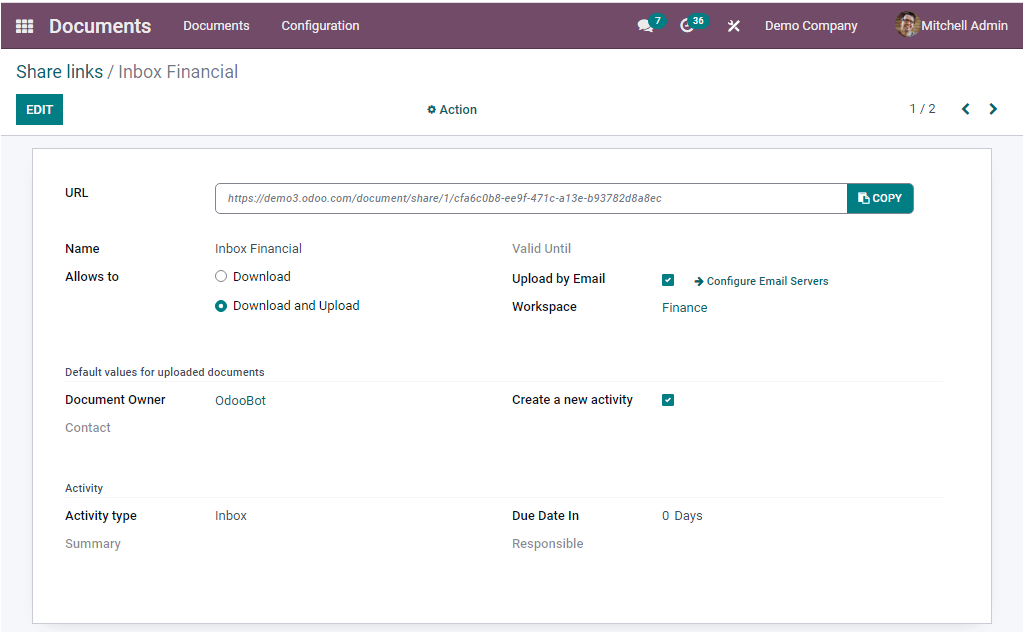
Here you can view all the shared document links and emails. The system will depict the Workspace, Name, Share Type, Allows to, Created by, Created on, and Status in the preview. To view the information in detail, you can click on the respective data.
The Odoo Document module is packed with multiple features and advantages that will be enough to fulfill the requirements and needs of the modern-day business.