Employees can submit their expenses to the manager like travel expenses, food, fuels etc. Odoo makes it in a good flow to submit expenses of employees manually. Now we can do it in two ways. Where employees can log in to their portal and manually create an expense record and submit to managers. Later managers can approve the expenses and account advisor can post and register the payment. Here we are going to discuss the automatic expense submission and management with mail.
First, we need an alias email to receive mail with expenses and an incoming mail server. Odoo crone jobs will fetch the emails in particular intervals according to our configuration. Do the following steps to activate the expense submission through emails.
1. Install Expenses module from Odoo applications.
Apps -> Expense Tracker
2. Set up Expense mail alias.
Go to Expenses -> Configuration -> Settings

Setup a mail alias and apply. So from now when any mail to expenses@cybrosys.in will create an expense regarding the mail. To avoid security problems the emails from the authenticated employees are accepted. The employees with the proper info’s and a working email will be accepted and the email should have a written format in case need to select the product and prices from the mail.
3. Set up the incoming mail server
Activate developer mode, Settings -> Email -> Incoming Mail Server
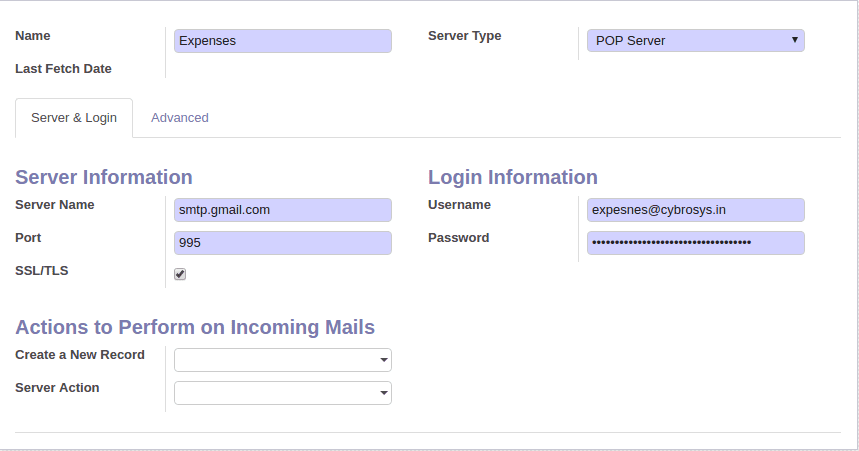
Create a mail incoming server to fetch the emails for expenses.

Here on incoming mail server form filled with expense email as username and its password and also properly set the server name.
Expense email Subject Format.
While creating expenses from incoming mail the subject format is important and we should keep that with the subject contents with an internal reference code for the product to predict which product and the integer values to take its amount.
Mail with the proper subject will create an expense record in the state to submit.
Here AT is the code for expense air travel.
Created Expense Record