Invoicing is extremely easy with Odoo. The invoicing feature is deeply integrated with Odoo 15 for maximum accessibility for the users. Understanding and learning about the Invoicing procedures using Odoo are crucial for preserving efficiency in business management.
This blog will help you understand how invoicing works with Odoo 15 Sales module.
To explain more on the invoicing procedures, we have to through an example.
Mitchell is the Salesperson and the Administrator of a company. Mitchell had a deal with one of its customers on a quotation, which was successful. Mitchell received confirmation on Quation from the customer, and now he must prepare the invoice for the customer to make the payment. But before getting into the invoicing procedures, Mitchell has to set up the invoice based on his company's business policies. Mithcell has to go to the Configurations Settings, and under the Invoicing policy section, he can choose the policy that suits his business the most, as shown below.
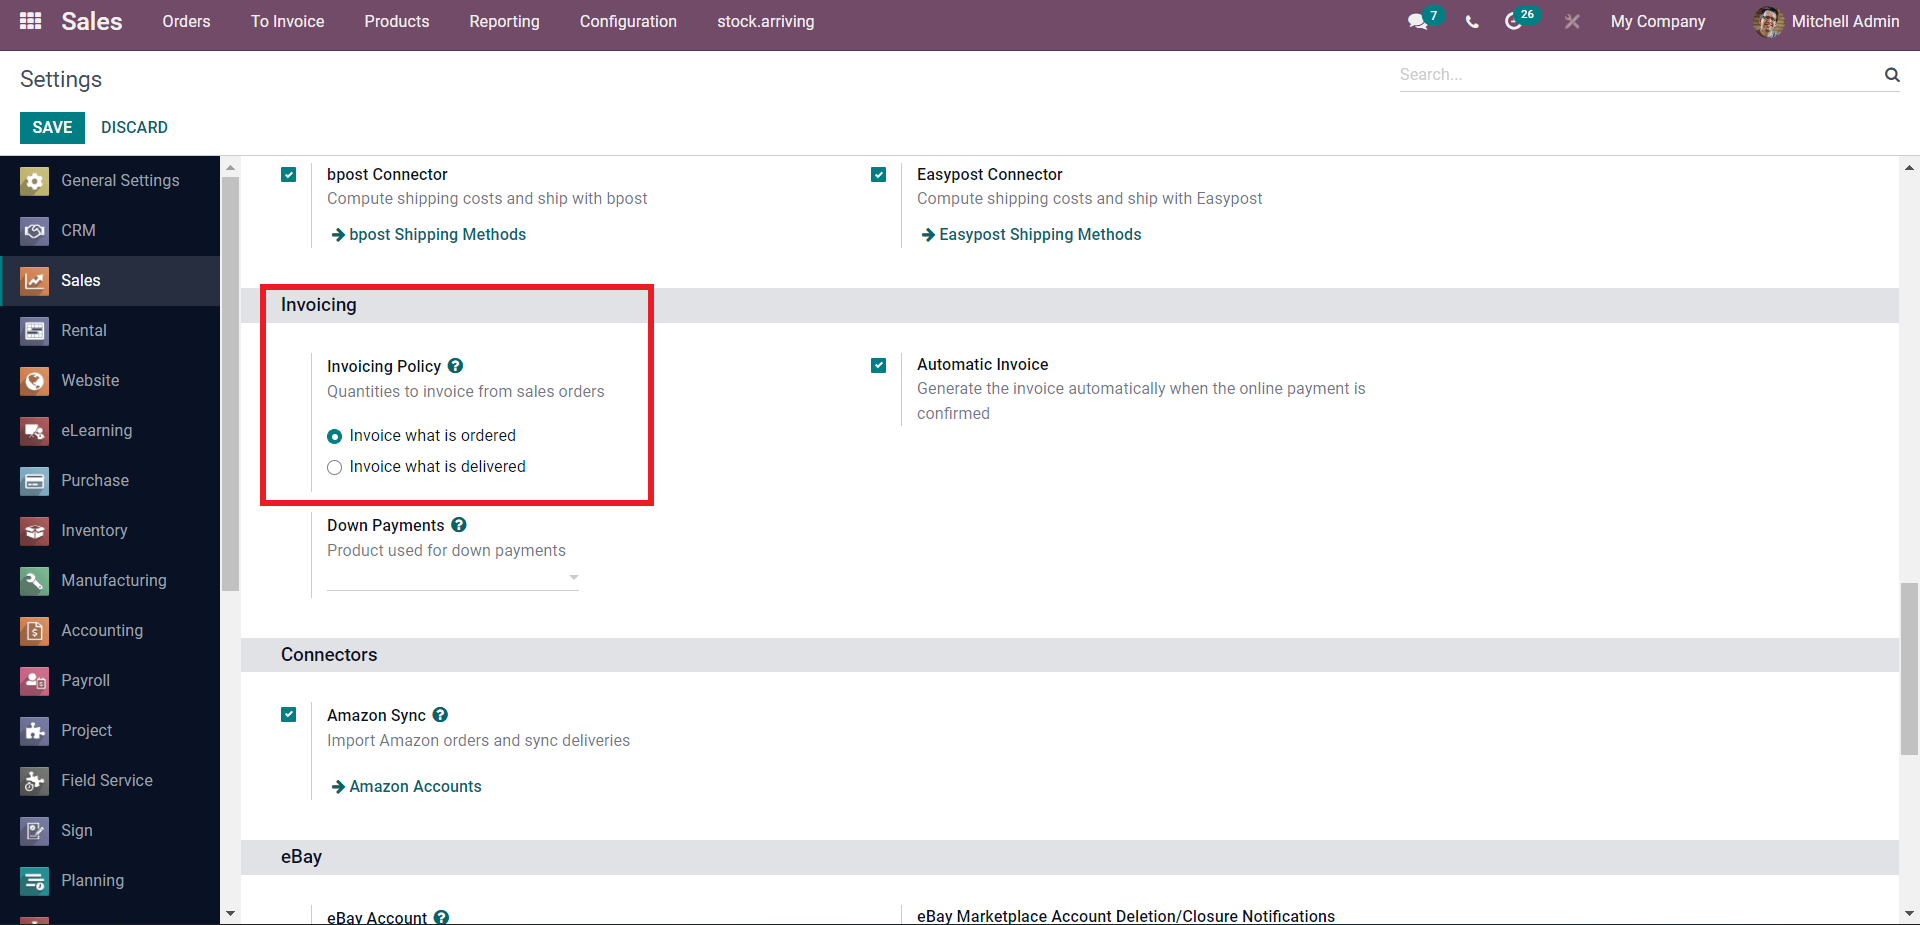
There are two invoicing policies that Mitchell can choose from, Invoice what is ordered Or Invoice what is delivered. The Invoice that is delivered is a default option that will invoice the customers once the sales order is confirmed, or Mitchel can click on the Invoice What is delivered option to invoice the customer once the delivery is complete. Having invoicing options will allow Mitchell to have more flexibility in invoice management. In this, Mitchell has chosen to go with the Invoice what is Delivered.
Generating invoices from the Quotations
From the Sales module, Mitchell can generate Invoices directly from the approved or customer confirmed sales quotations. Sales quotations can be managed and overviewed from the module's dashboard, as shown below.
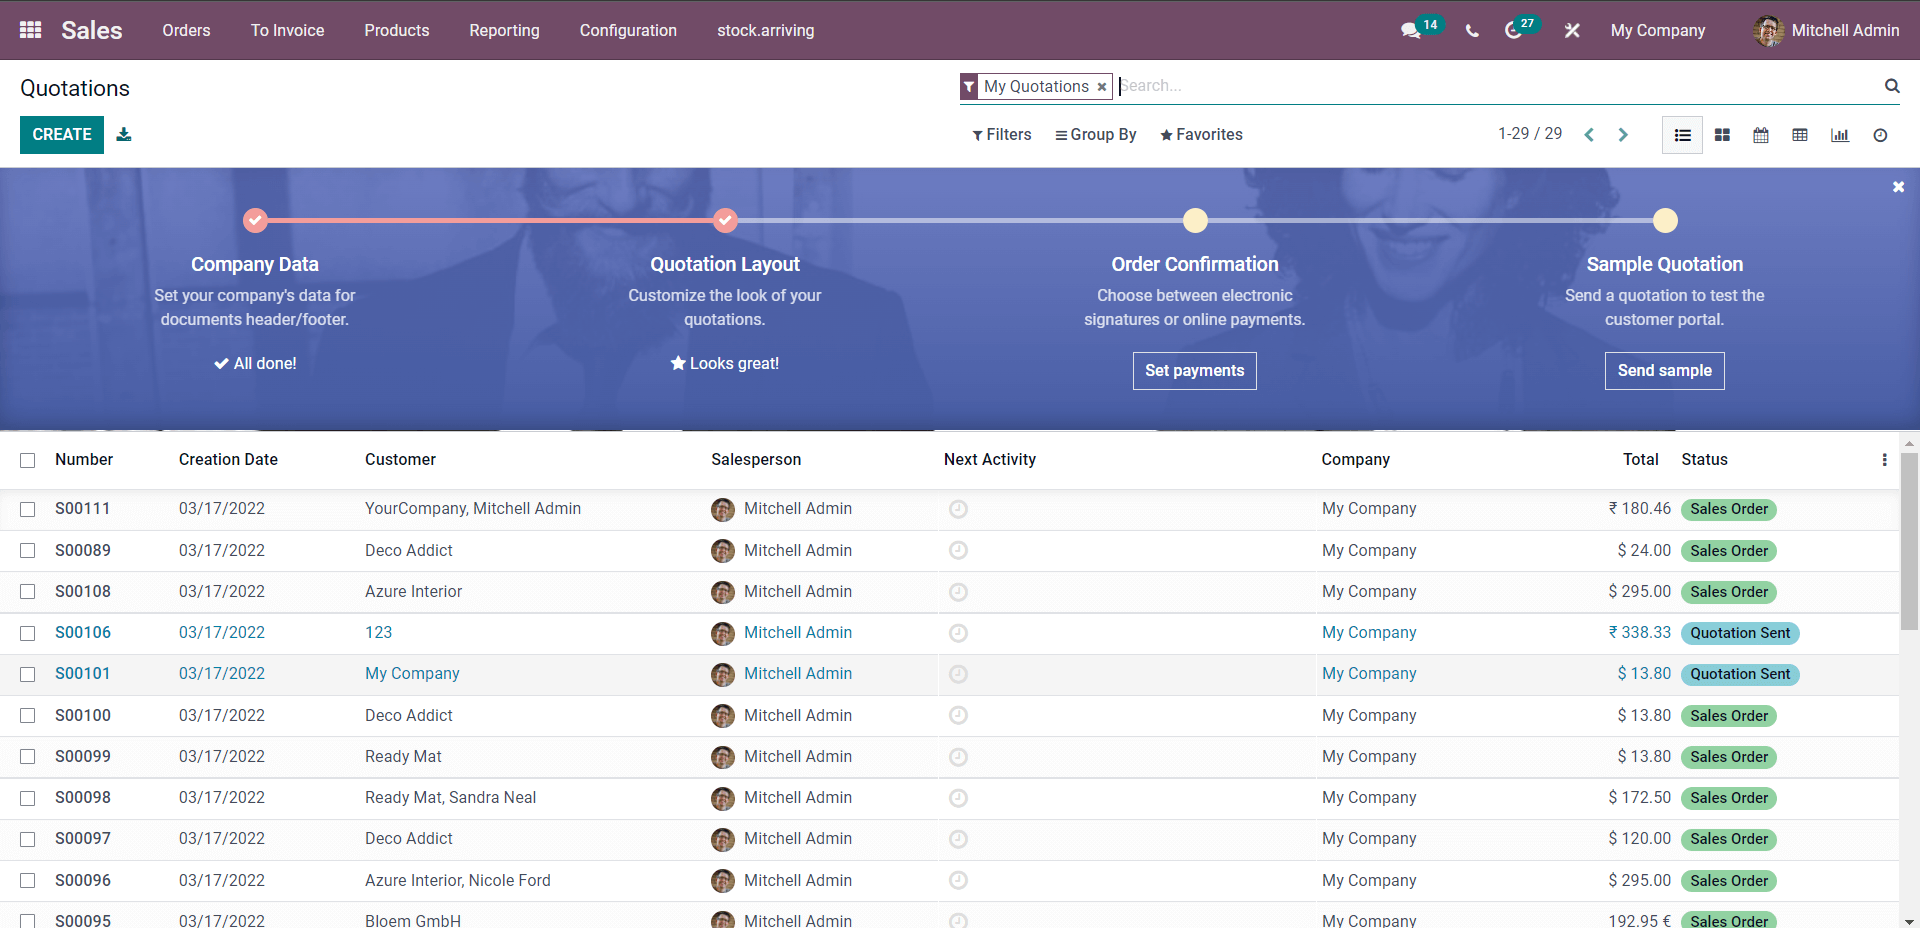
Mitchell can manage and overview the real-time data of all of his quotations. All quotations with their live status will be shown on this page. Mitchell can choose from the list of quotations converted to sales orders to create the invoice, as shown in the image below.
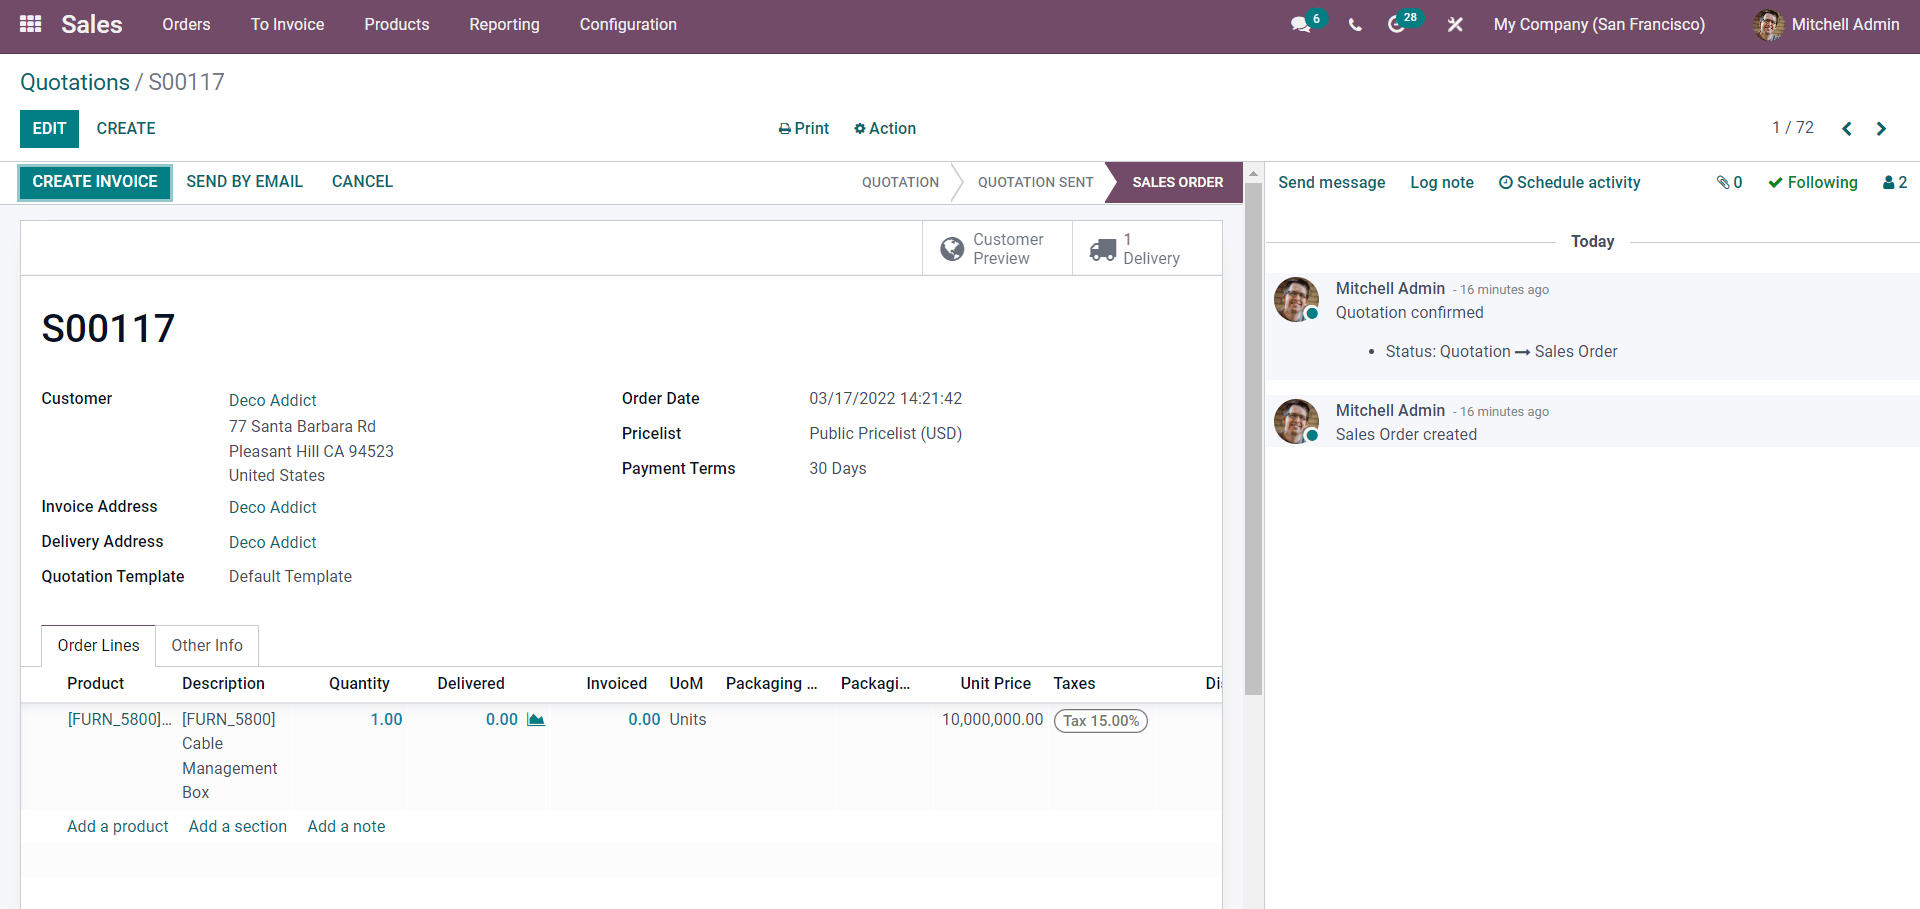
From this page, Mitchell can use the CREATE INVOICE BUTTON for creating the invoice. A tab to choose the invoice type will popup.
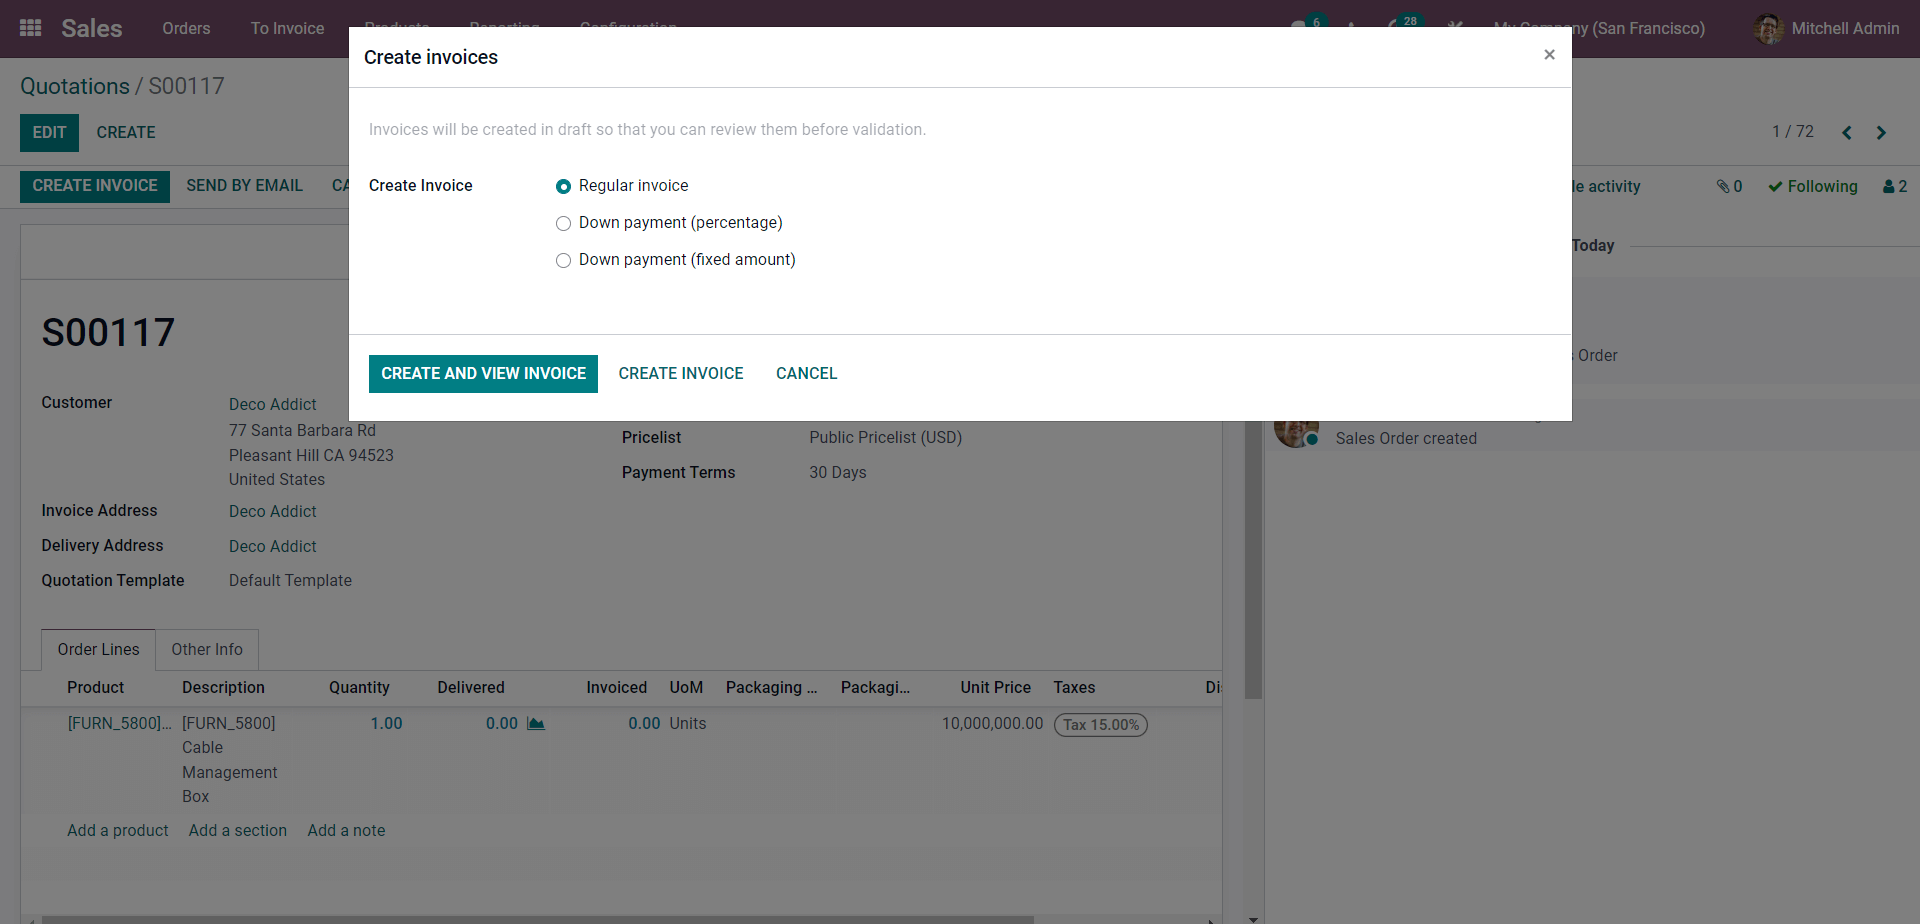
Michell has opted to go with a Regular invoice as the product does require any down payments, and click on the CREATE AND VIEW INVOICE button to generate the invoice. A draft invoice page will open up for Mitchell to edit and overview, as shown below.
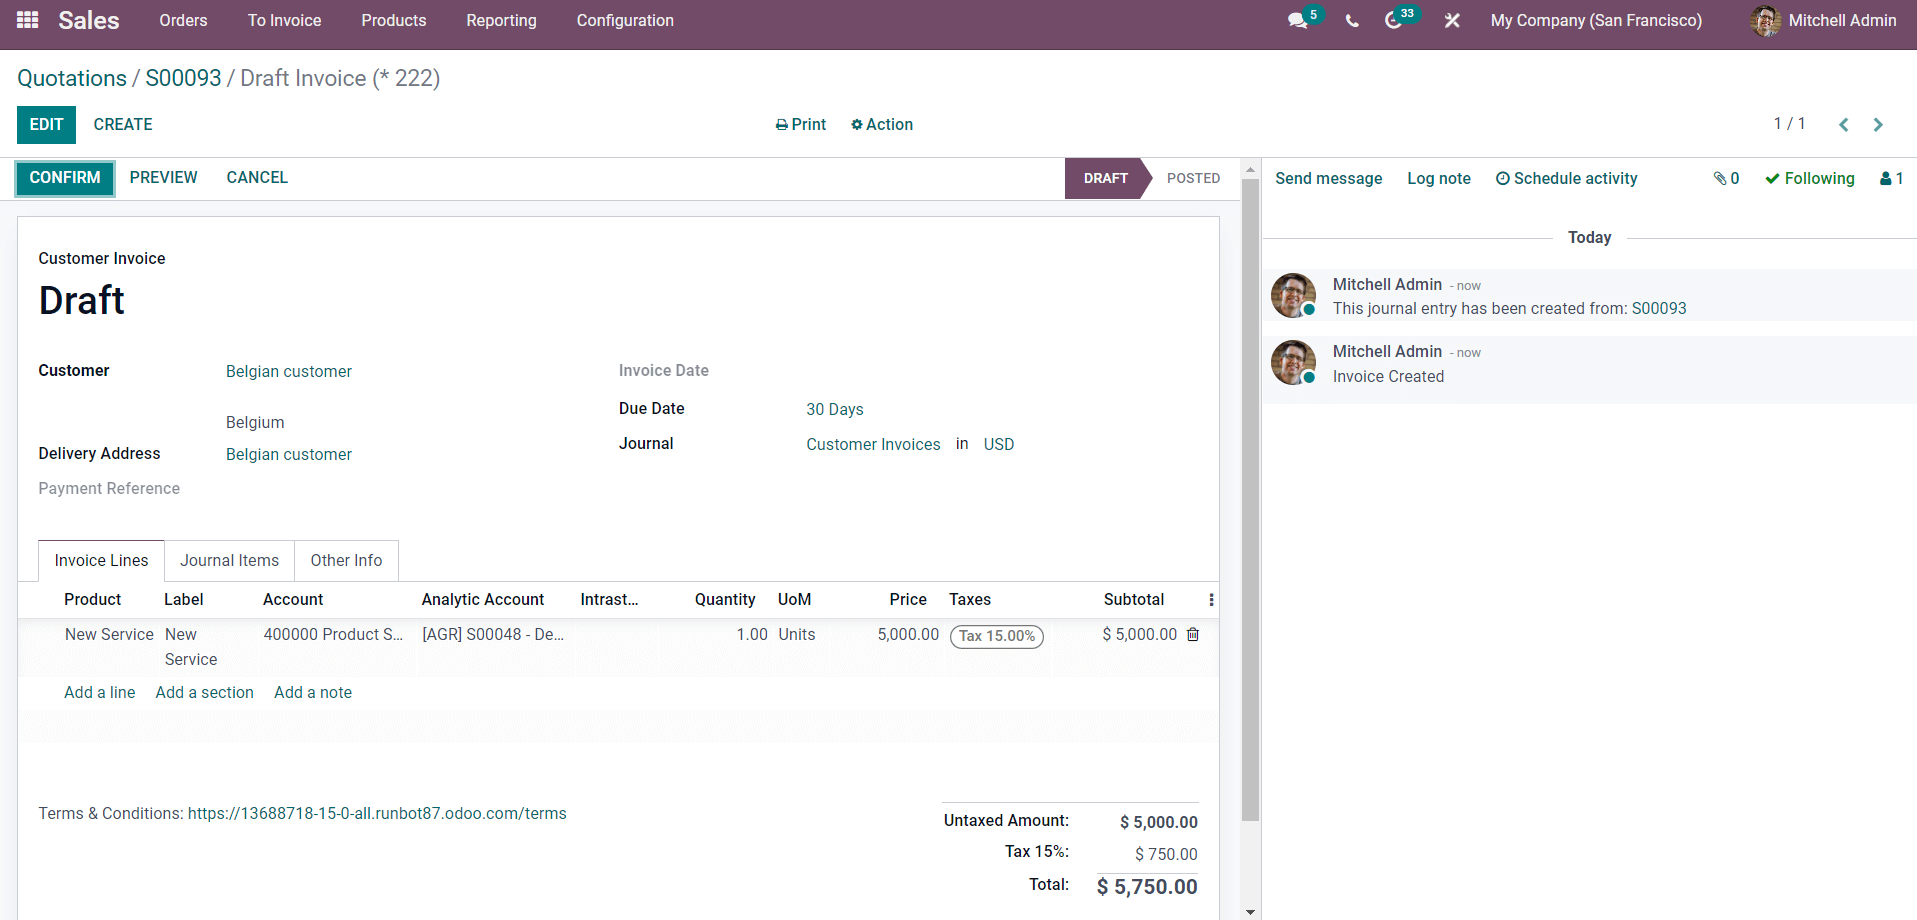
Mitchell can edit the errors in the details of the invoice before sending it to the customer. Here Mitchel is sending the invoice to the customer named Belgian Customer. The delivery details and the other details of the invoice will be auto-filled with respect to the information in the sales quotation, so Mitchell doesn't have to go through the process again to fill in all of the data.
Under the Invoice lines tab of the configuration page, Mitchell can view the details on the Product tor the service that he is selling to the customer. Reconfiguring or editing the invoices in this draft stage before sending them to the customers will allow Mitchell to keep the data as accurately as possible and preserve the integrity of his business. Post configurations, Mitchell can click on the CONFIRM button to confirm the draft invoice and move to the next step, as shown in the image below.
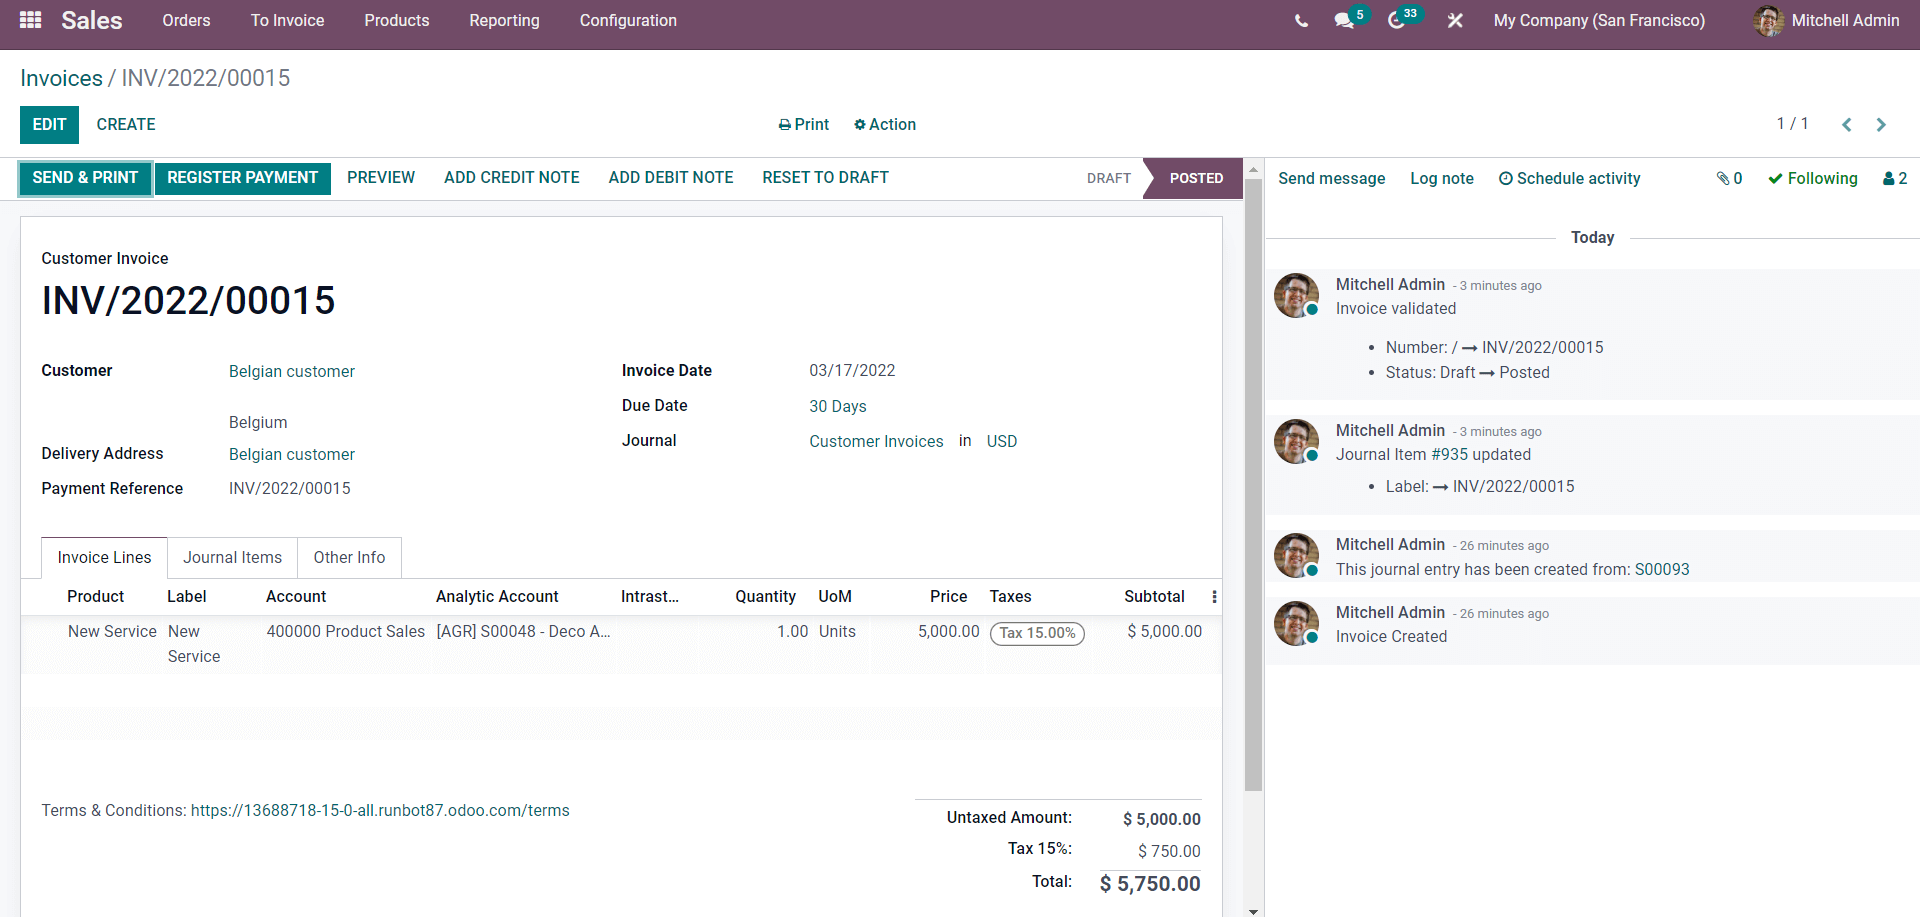
The next step in the process is to send the invoice or register the payment for the invoice. In this case, Mitchell has to send the invoice to the customer, so he has to click on the SEND&PRINT, or he can click on the PREVIEW button to have a preview of the invoice. The SEND &PRINT button will instantly send the invoice to the customer.
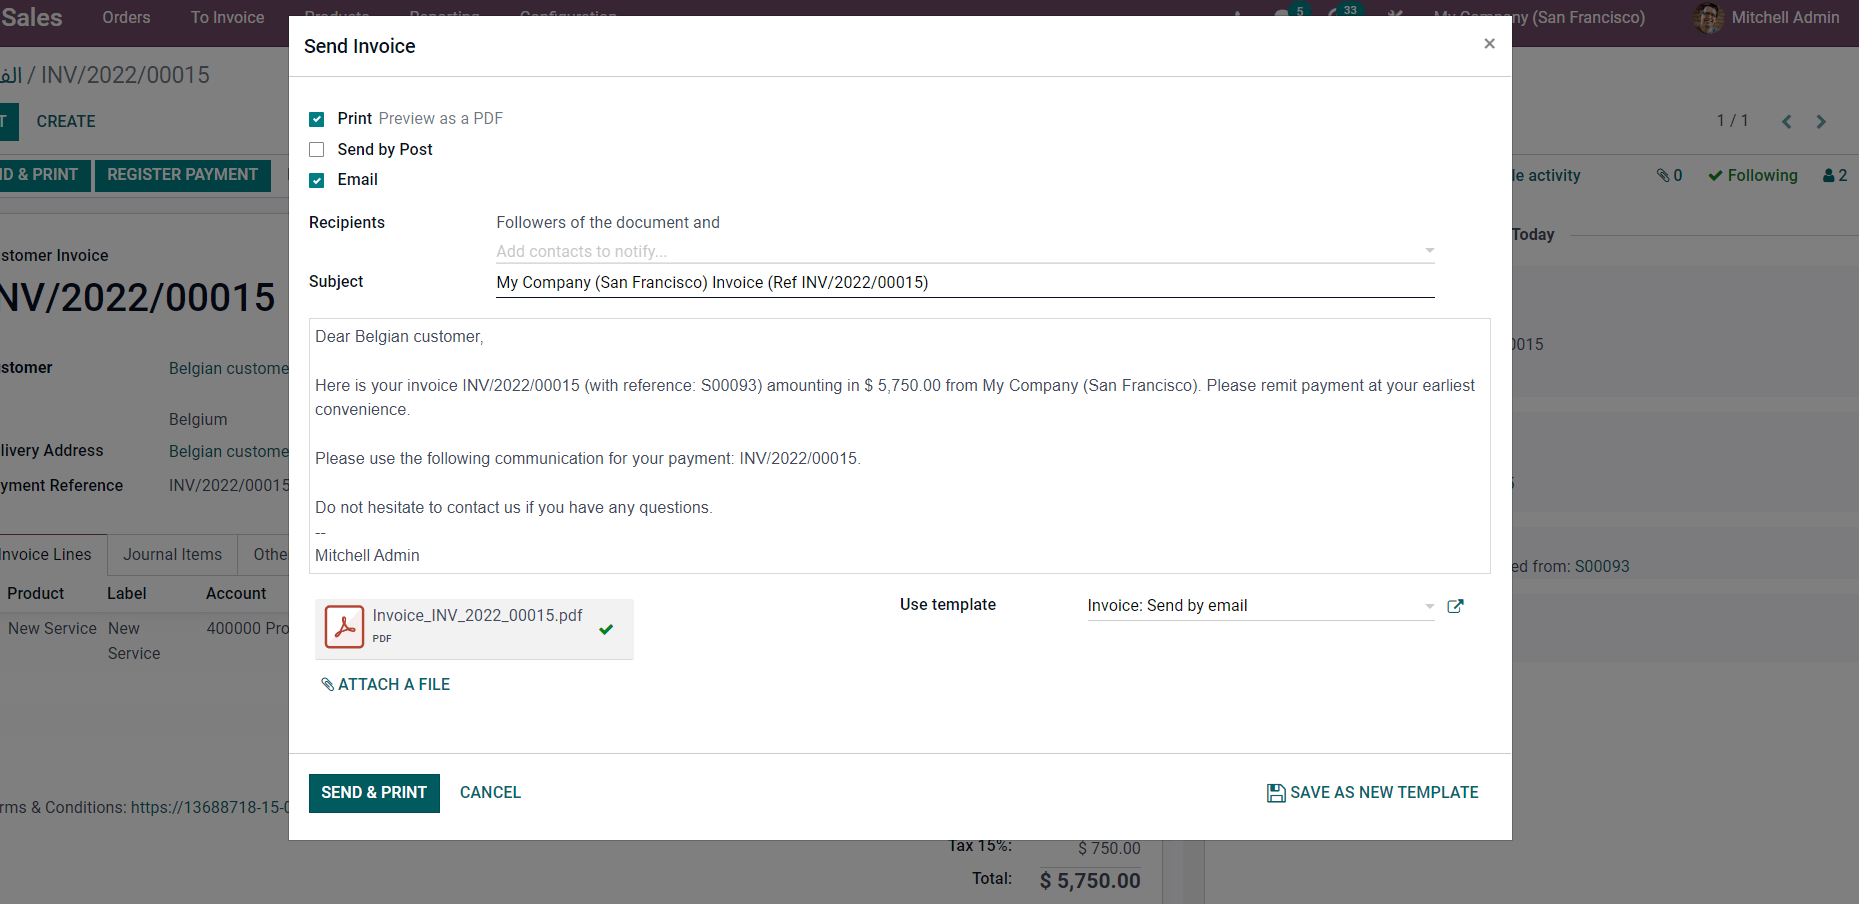
Mitchell can choose how to send the invoice to the customer, Print, Send by Post and Email. Mitchell can configure the Subject and the body of the mail to accompany the invoice. Mitchell can add additional documents by clicking on the ATTACH A FILE button. After attaching the files, Mitchell can send and print the invoice by clicking on the SEND & PRINT button for finalising the entire process.
Mitchel can click on the REGISTER PAYMENT after confirming the customer payment. A register payment tab will open up
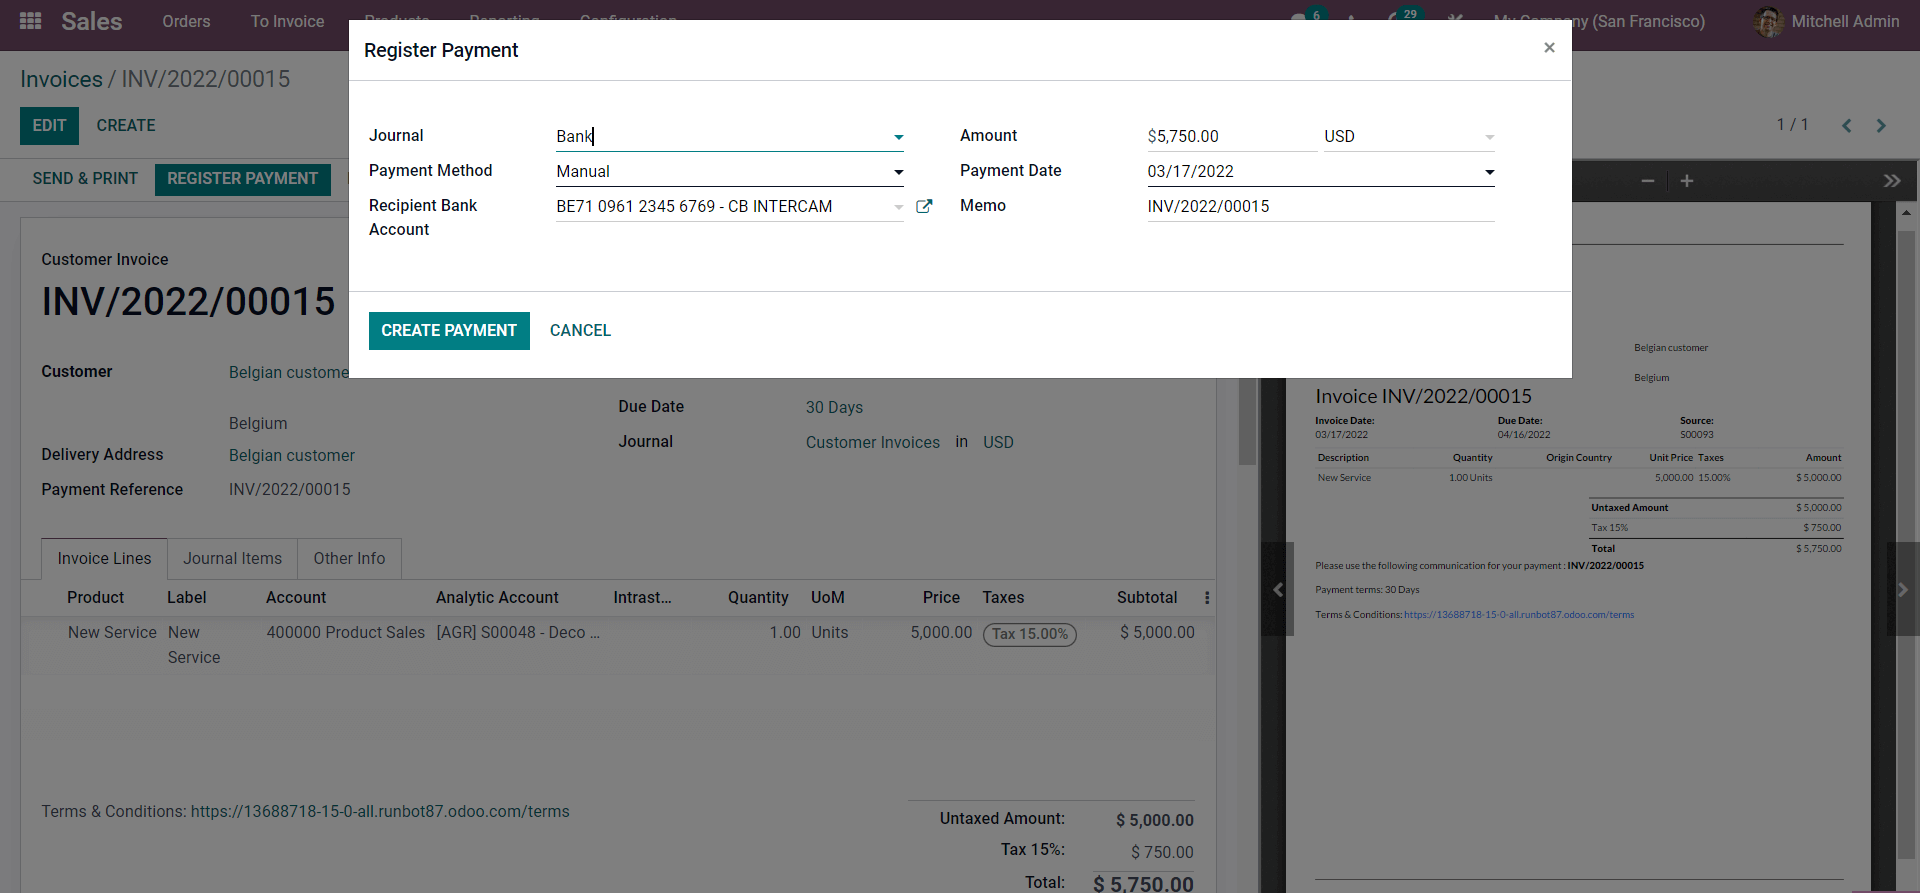
Mitchell can choose the Journal to include the payment information, and he can also select the payment method and enter the amount. The receptions bank account can be set from the respective field. After the configurations, Mitchell can click on the CREATE PAYMENT button to create the payment, which will put the payment with an IN PAYMENT tag, as shown in the image below.
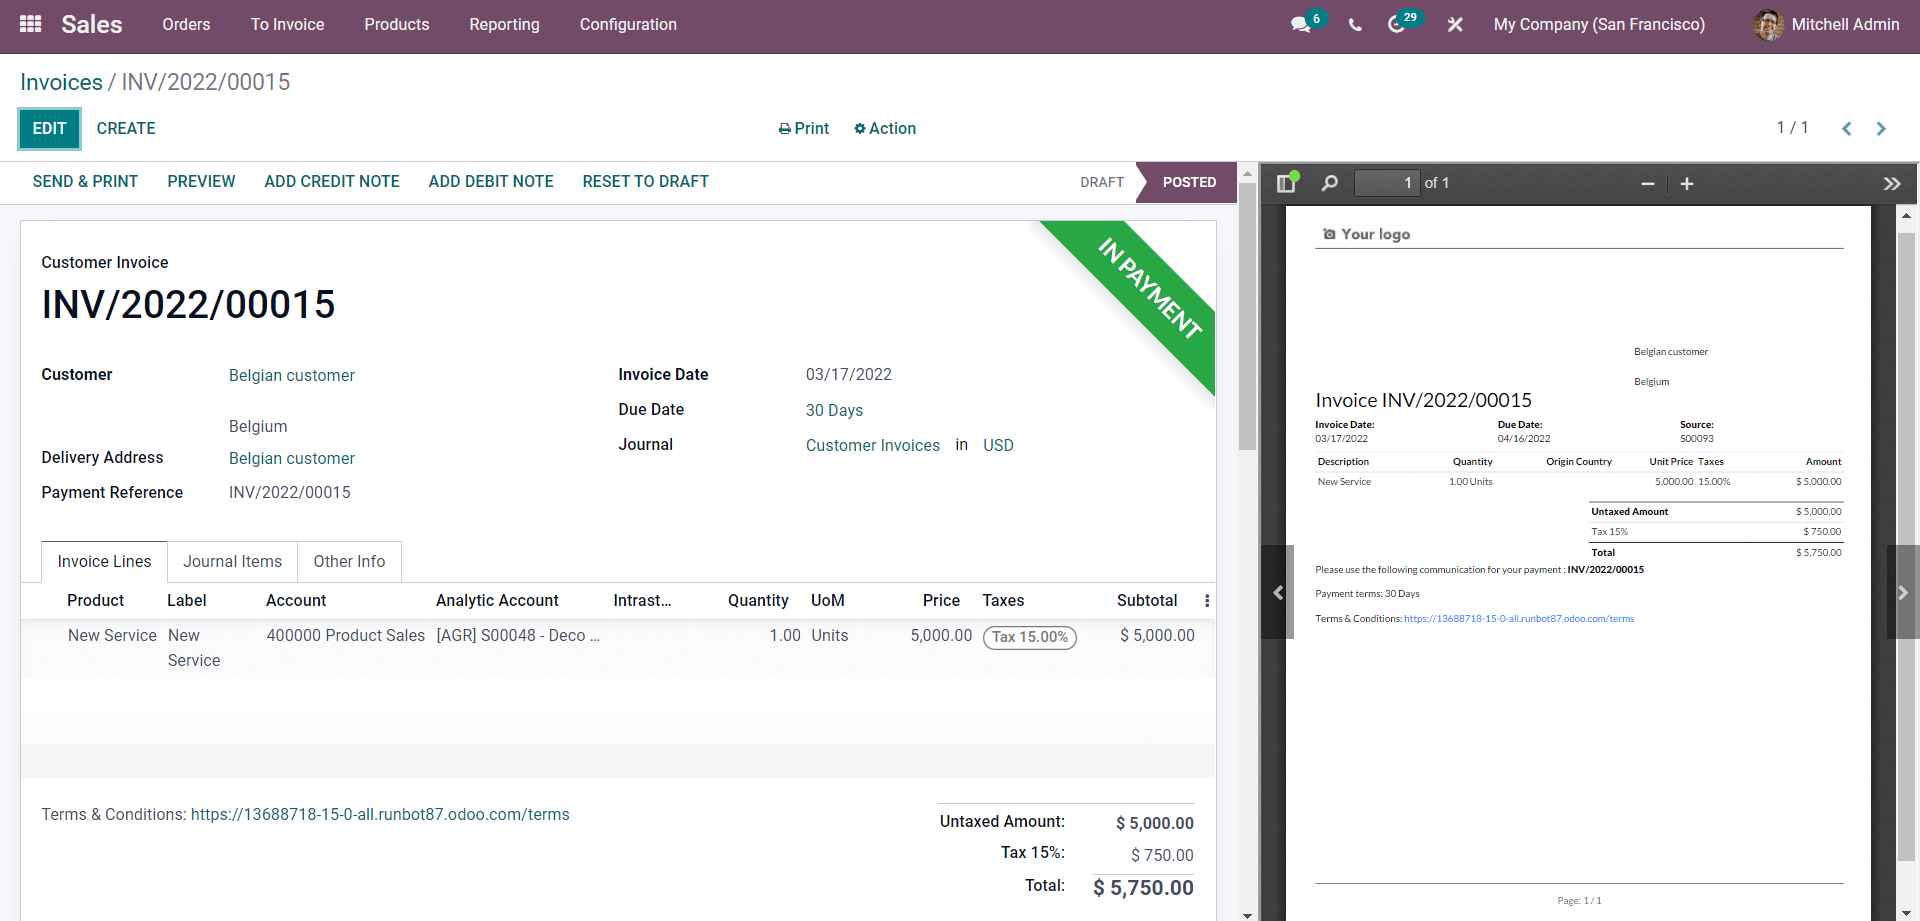
Going back to the dashboard of the Module Mitchel can see that the Invoice is marked as in payment as shown in the image given below.
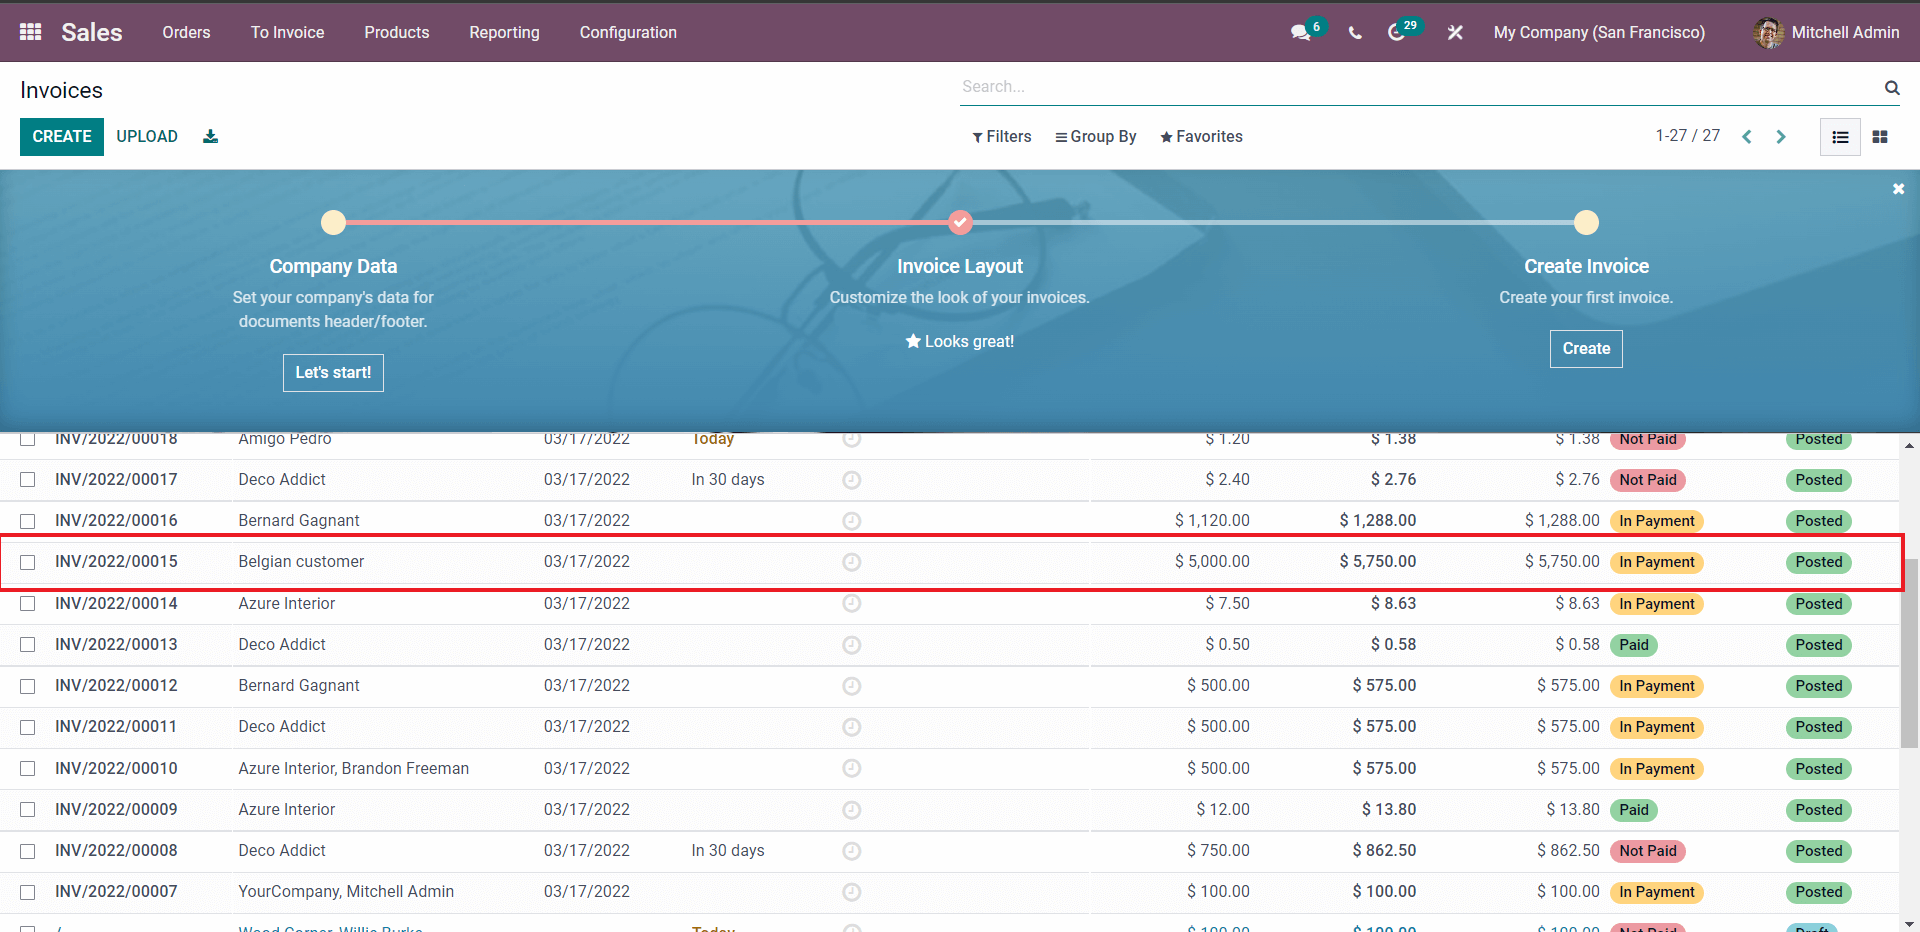
Mitchell can click on the Invoices from the list to view them at any time. This is how you generate and manage the invoices from quotations in the Sales module.
Requesting for a downpayment
Mitchell can ask for a downpayment if necessary from the buyer at the end of the sales contract.
So for this Mitchell has to choose or opt from the invoicing options in the Create invoices tab as shown in the image given below
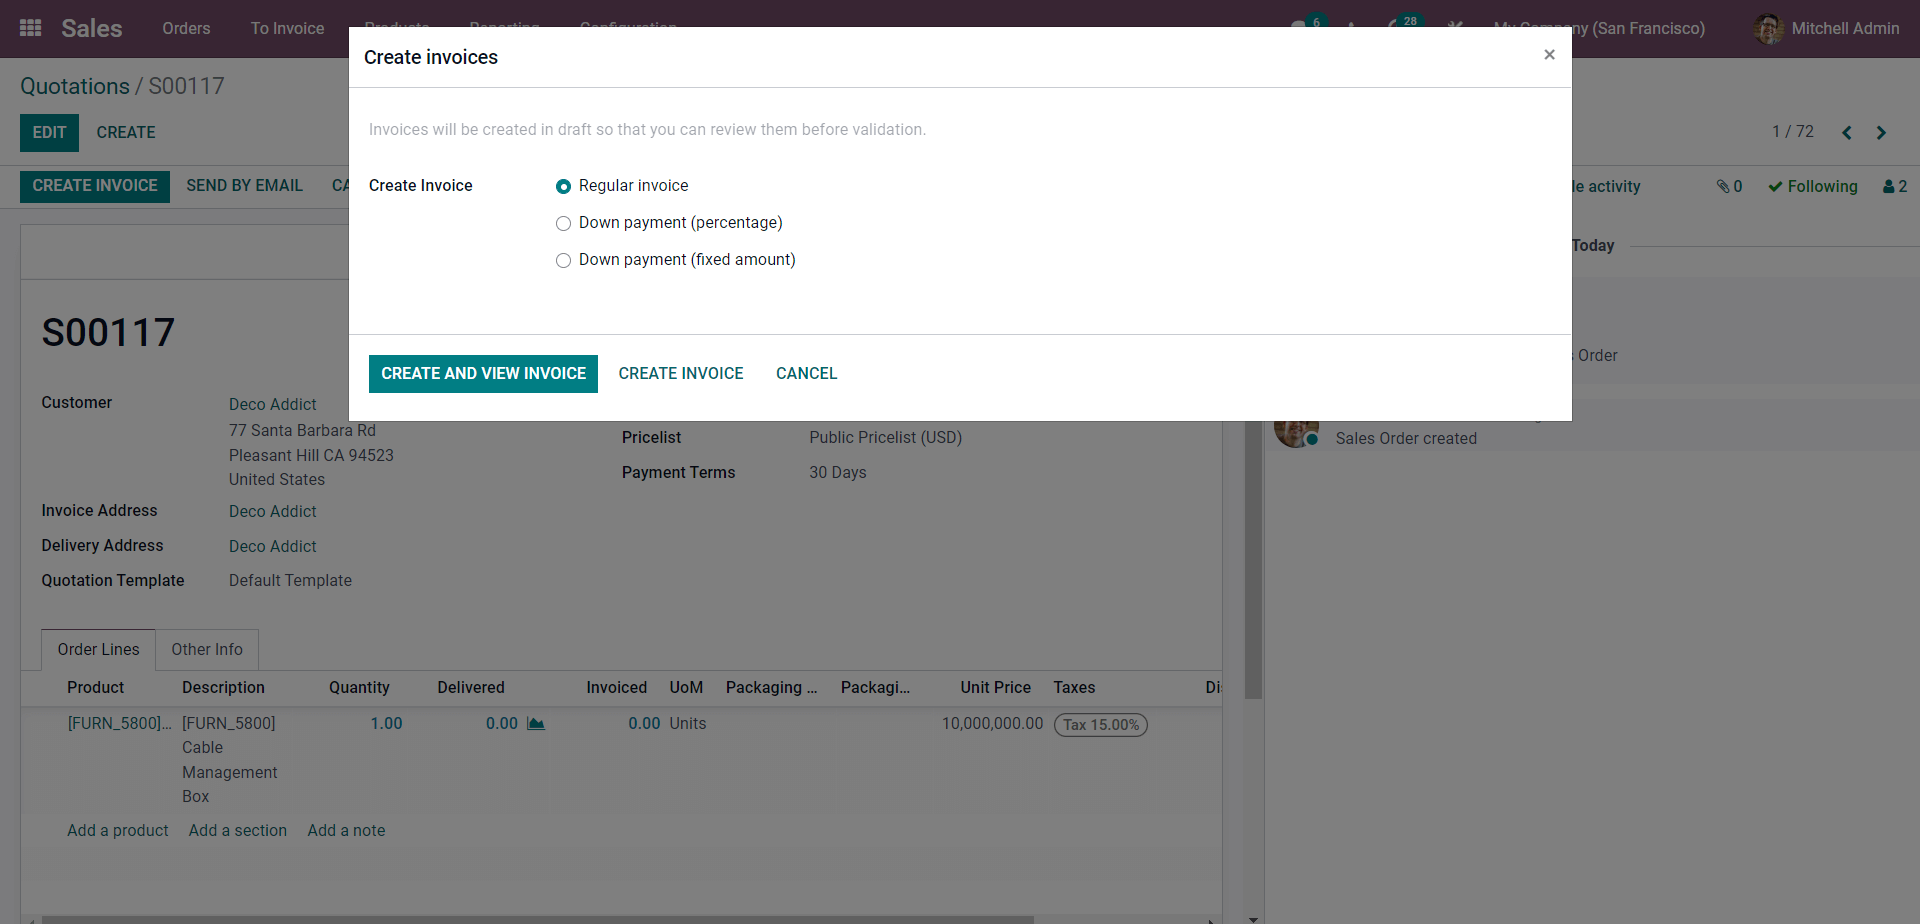
Mitchell can select from the Downpayment options, Percentage or Fixed amount. For the options, other than Regular invoice, Mitchell will be given an additional set of configurations to configure the downpayment, as shown in the image below.
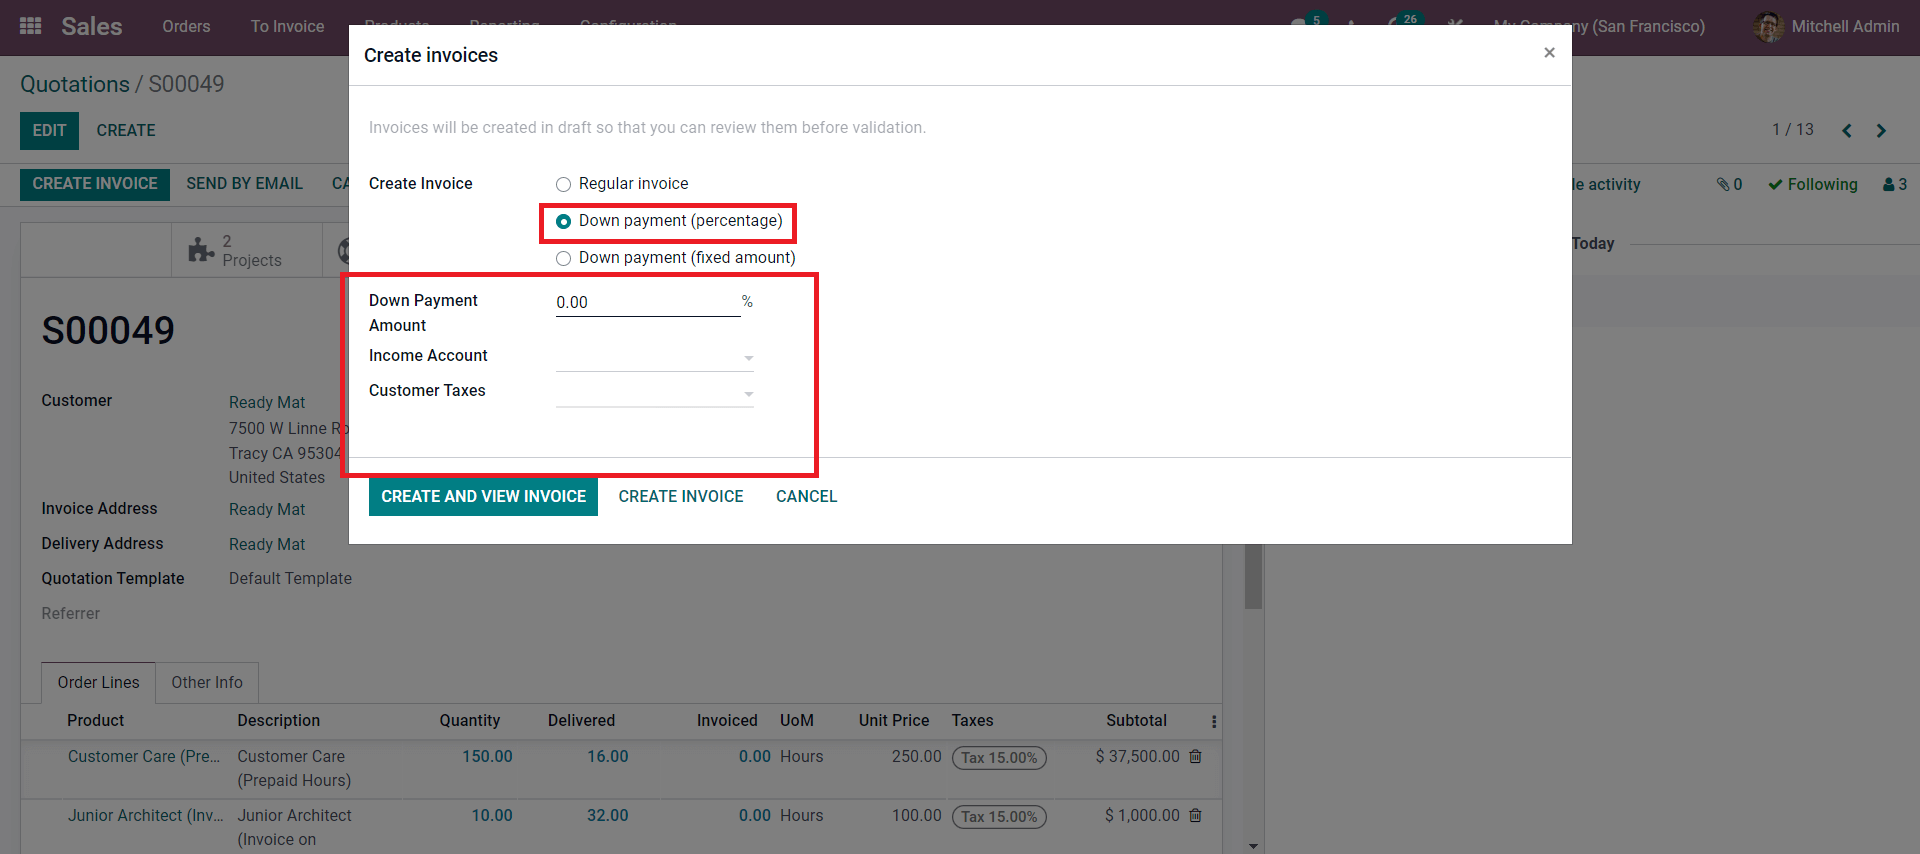
Mitchell has to type in the down payment amount in percentage along with the income and customer taxes. All entered amounts will be listed down on the invoice for the customer to view for making the payment. Mitchell can choose between the options and press the CREATE AND VIEW INVOICE button to create the invoice.
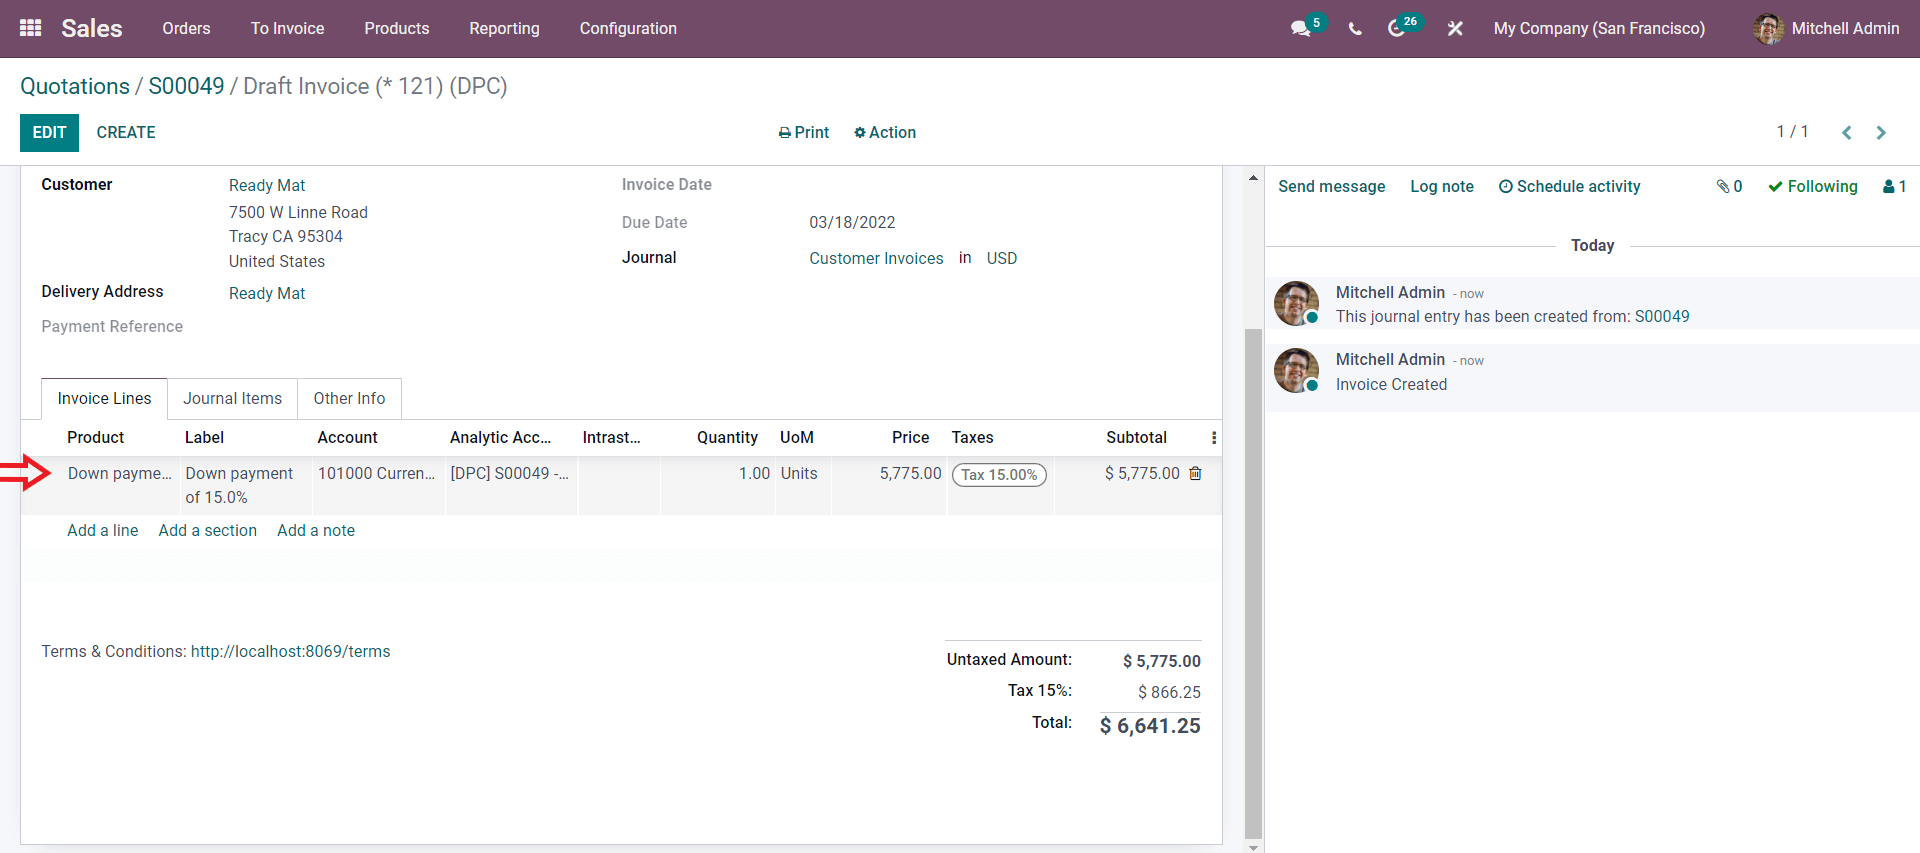
You can note that in the invoice line, the Downpayment details are filled with respect to the configurations done by Mitchell. He can click on the REGISTER PAYMENT button to continue the invoicing process.
The Invoicing features of Odoo are highly advanced and are deeply integrated with all of the modules in Odoo. With the Odoo 15 Sales module, you can easily use Odoo invoicing. The features' highly advanced and user-friendly nature will make it easy for you to manage even the most complicated invoicing procedures effortlessly without any data corruption.