Invoice management is always considered a hectic task. Respecting the importance of Invoice management, business organizations around the world kept on updating and improving the formats of invoice management to improve their efficiency. The introduction of ERP systems reduced the demanding nature of business invoice management to a level where it is easy to manage and analyze.
This blog will give you a detailed note on the integration of Invoicing with the Sales and Accounting modules of Odoo
Invoicing and Accounting module
The accounting module can be considered the control center for Invoices in Odoo. The module has a dedicated Invoice option under the Customer tab. The image given below image represents the Invoice page of the Accounting module.
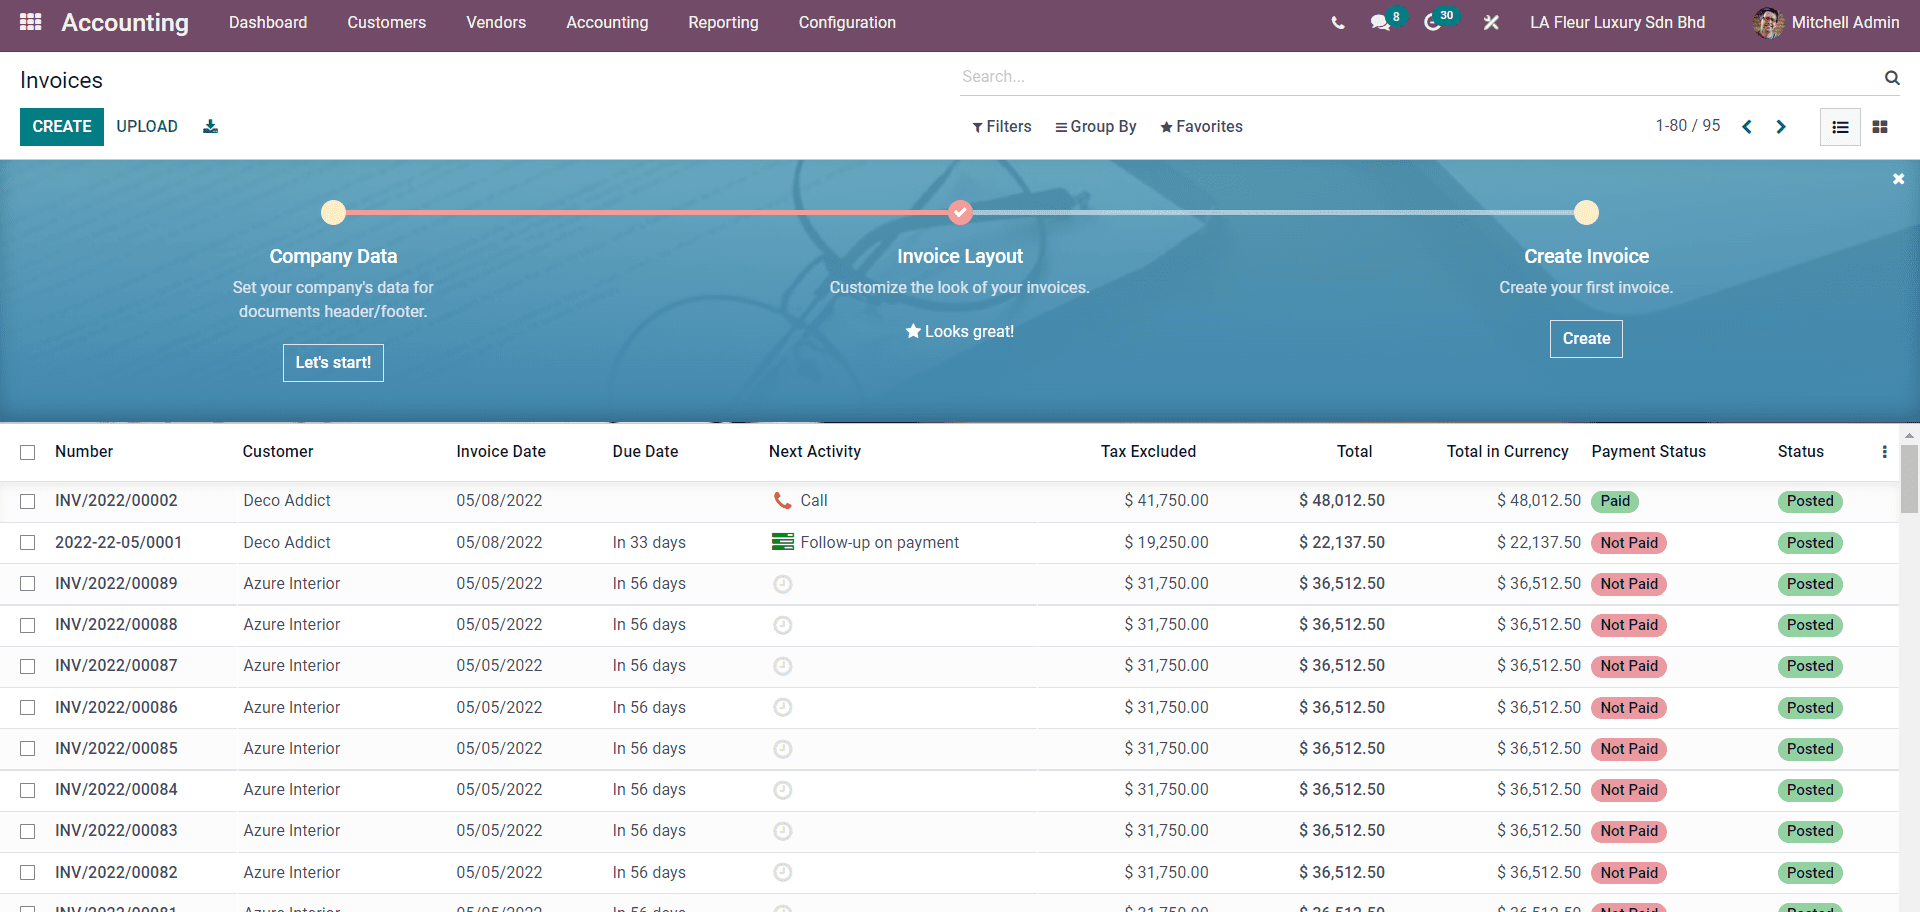
The page will display all of the created invoices with their live status. You can filter and group the invoices for easy access. You can click on any invoices from the list to view and manage them.
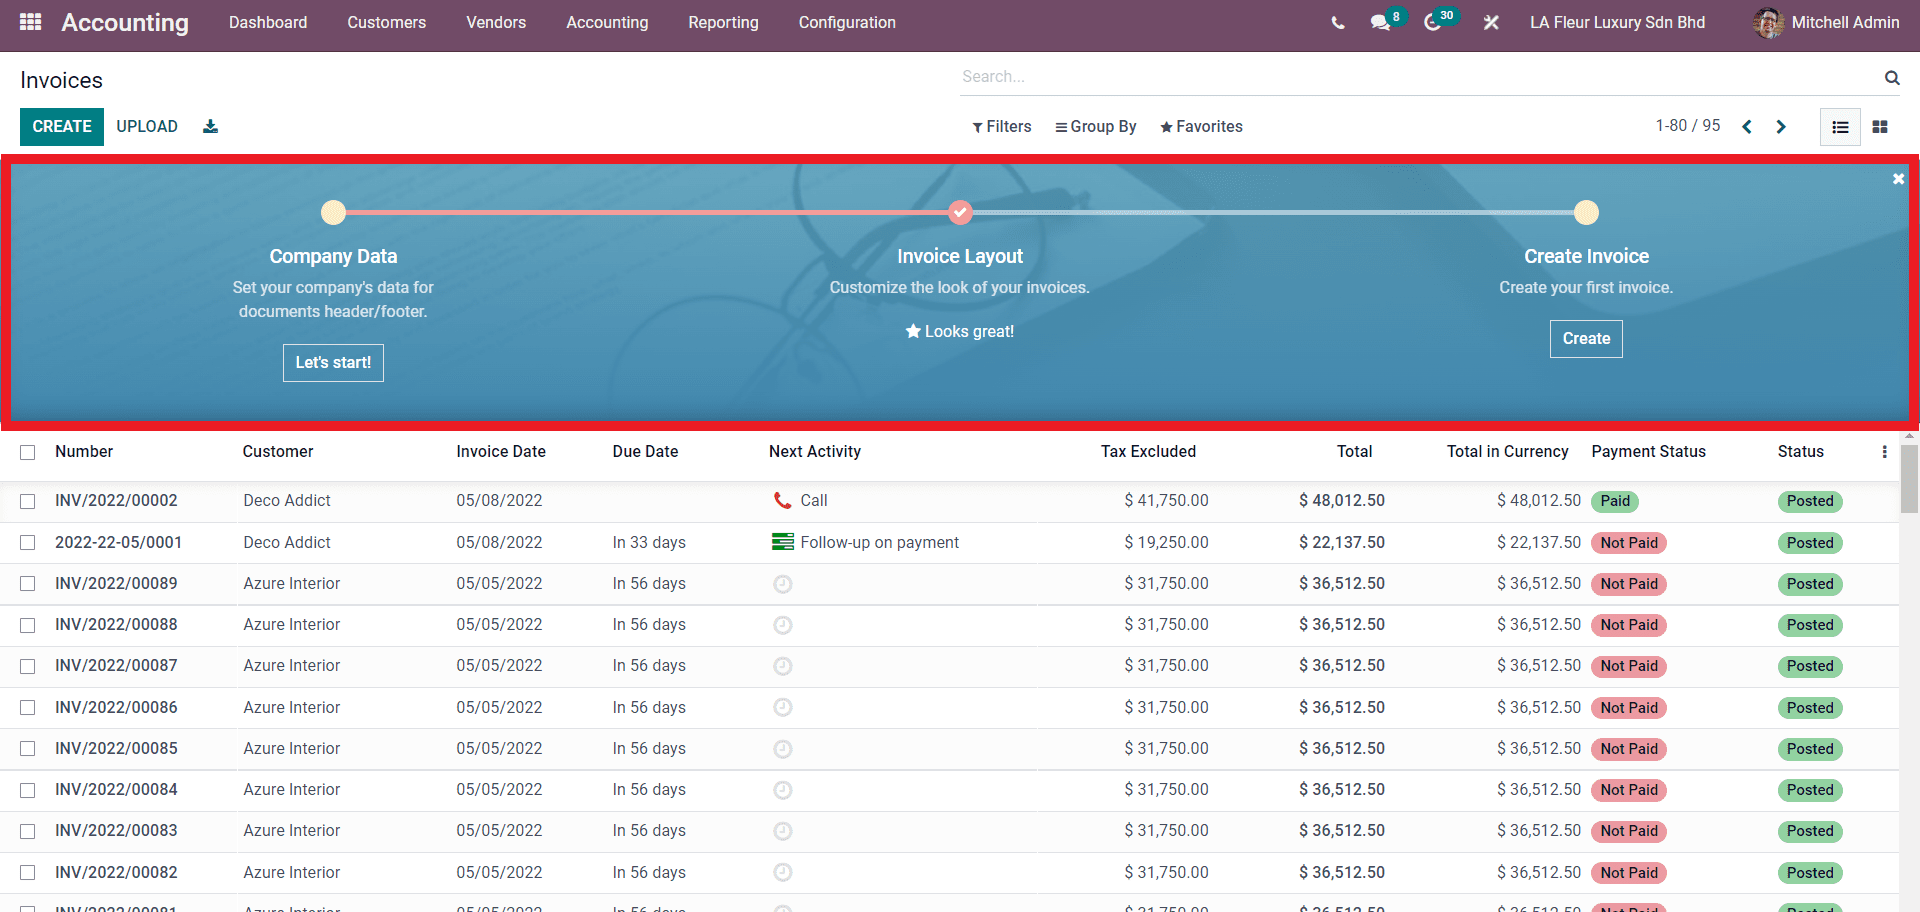
As an initial setup, the Accounting module will let you enter the company details and design the invoice layout from the banner head of the module, as shown below.
Check out this blog How to Manage Invoices Efficiently with Odoo 15
Creating Invoices
Creating invoices is extremely easy with Odoo. As Invocieing is highly automated in nature, Invoices can be triggered based on the actions happening on the modules. You can create invoices manually from the accounting module of Odoo by clicking on the CREATE button on the Invoice page of the module.
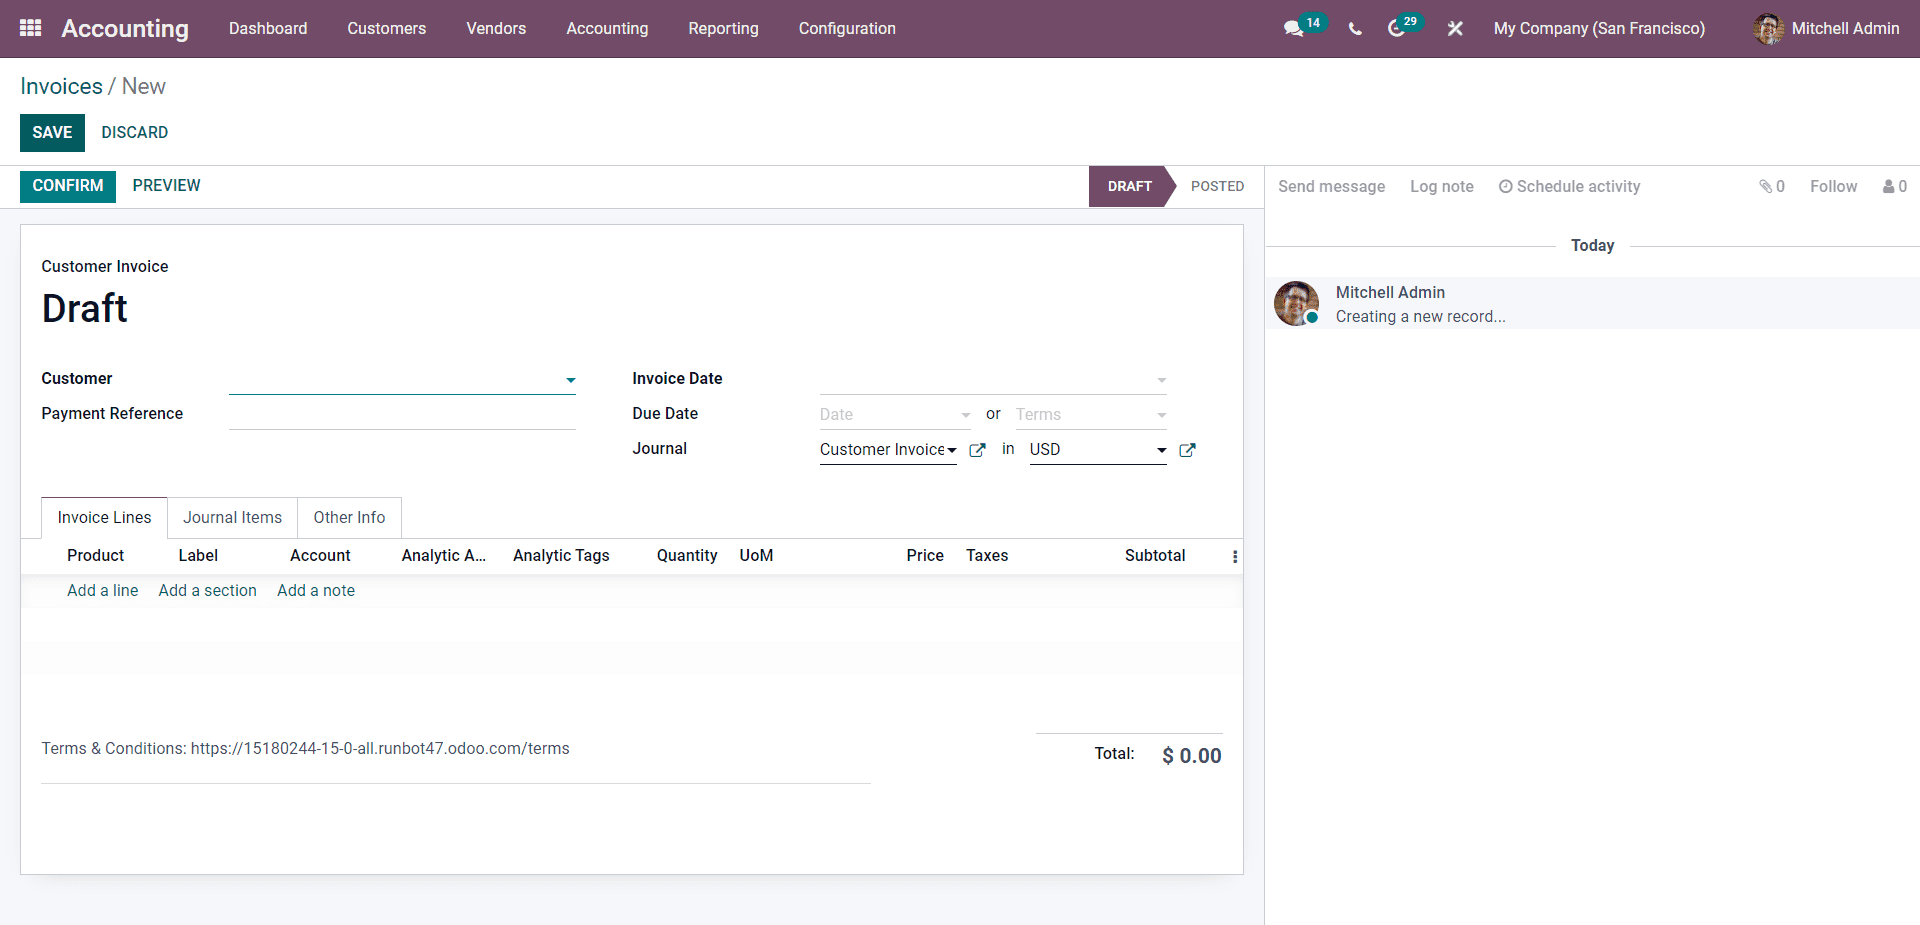
You can type in the details and configure the Invoice from this page. Note that the invoice configurations are unified or the same across all of the modules in Odoo for easy configuration and management. The integration of the Accounting module with the invoices will allow it to access all of your customers from the Customer filed of the invoices configuration page as shown below.
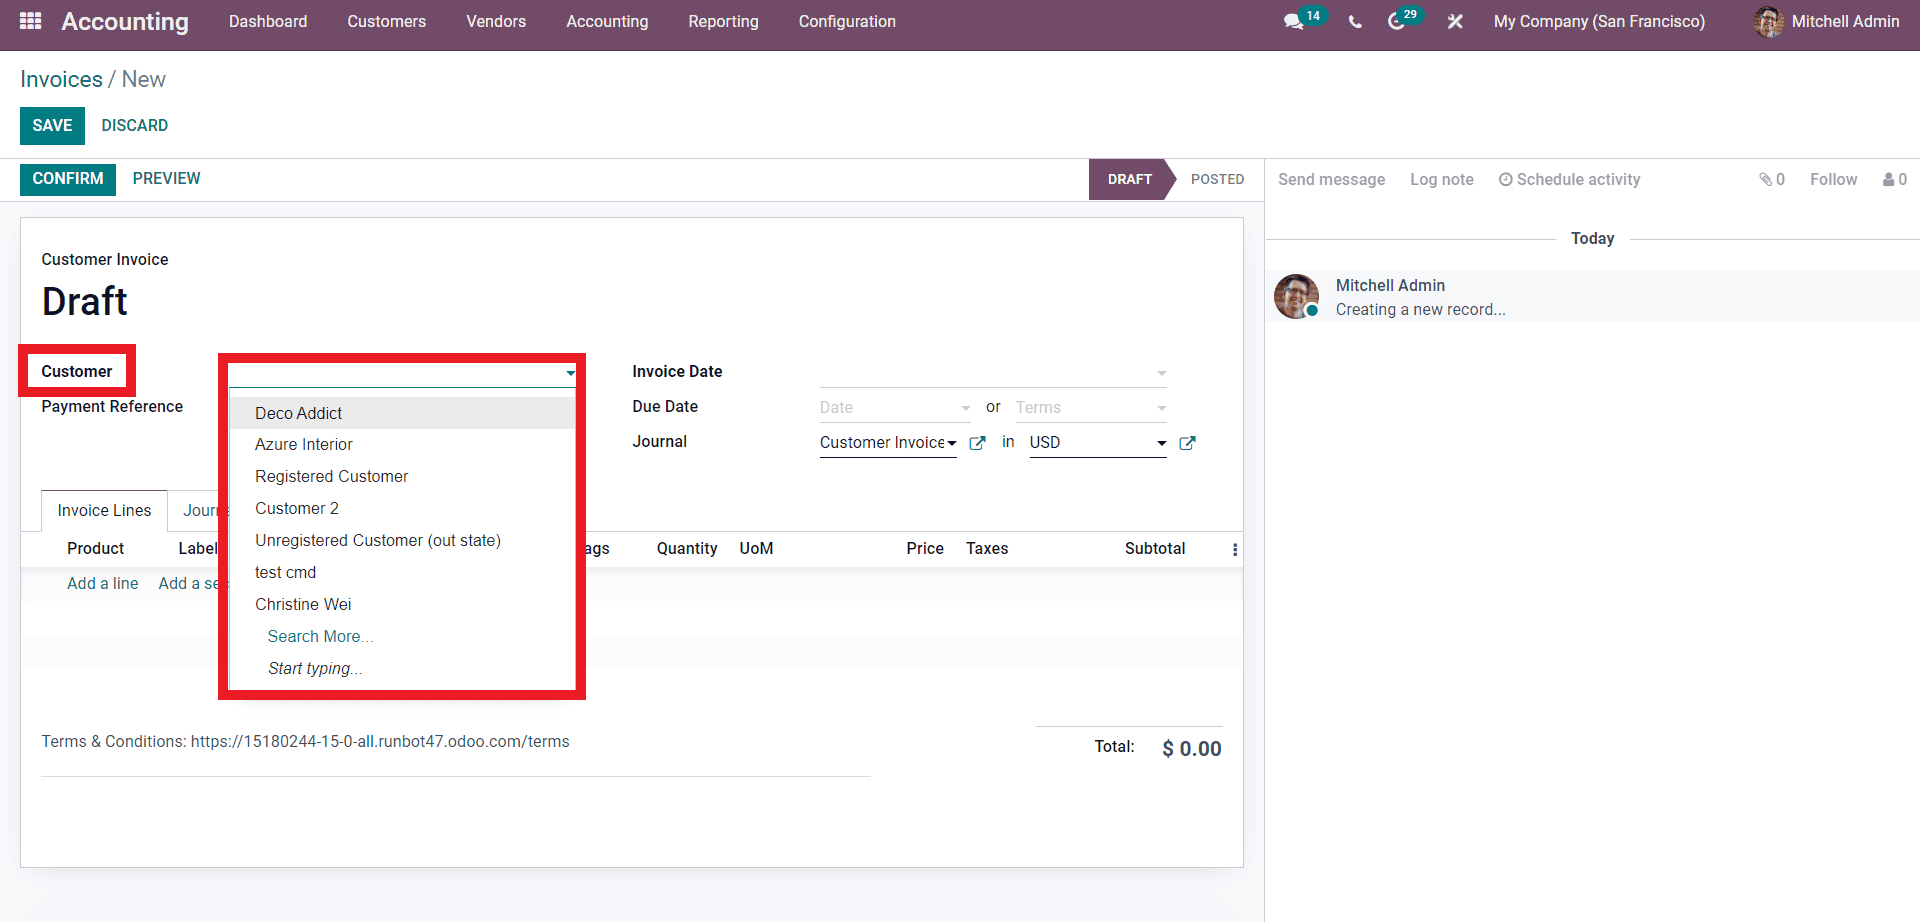
The accounting module must have direct access to the customer profiles and details for efficient accounting management, which constitutes invoice management.
The integration will also allow you to select the Journal to enter the Invoice from the Journal field, as highlighted in the image below.
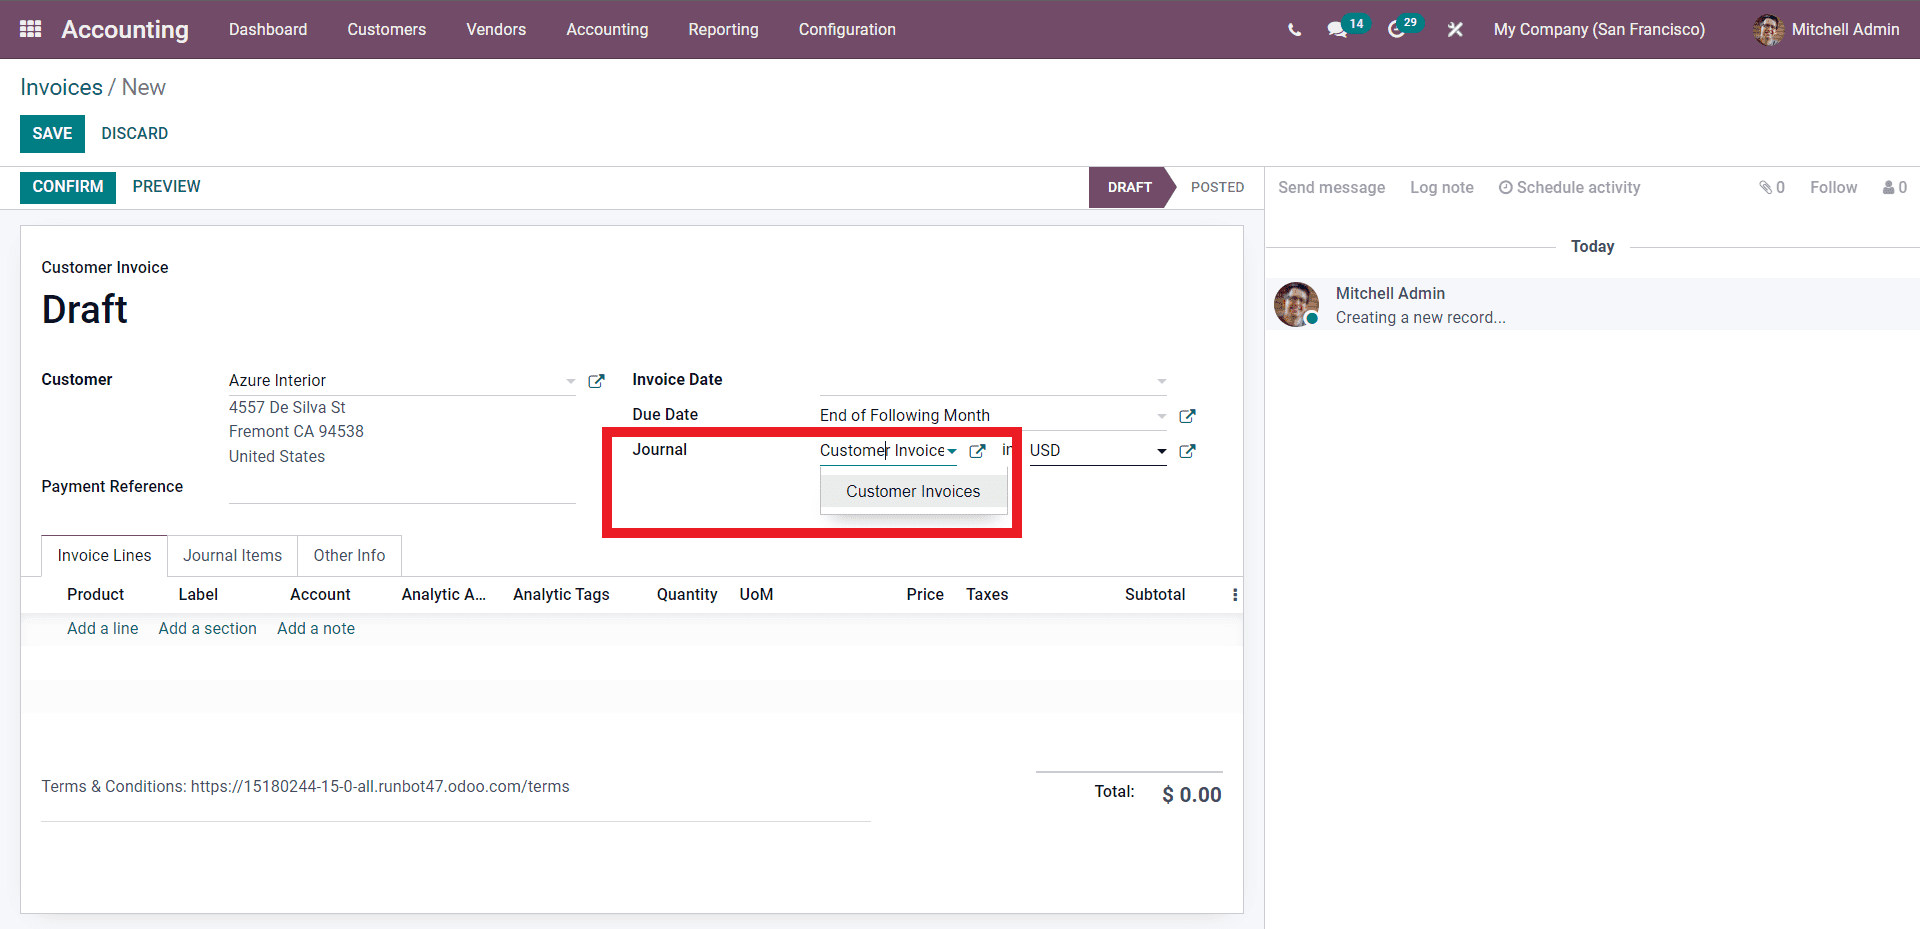
You can edit the chosen journal by clicking on the external link button. The window on the selected journal will open up as shown below.
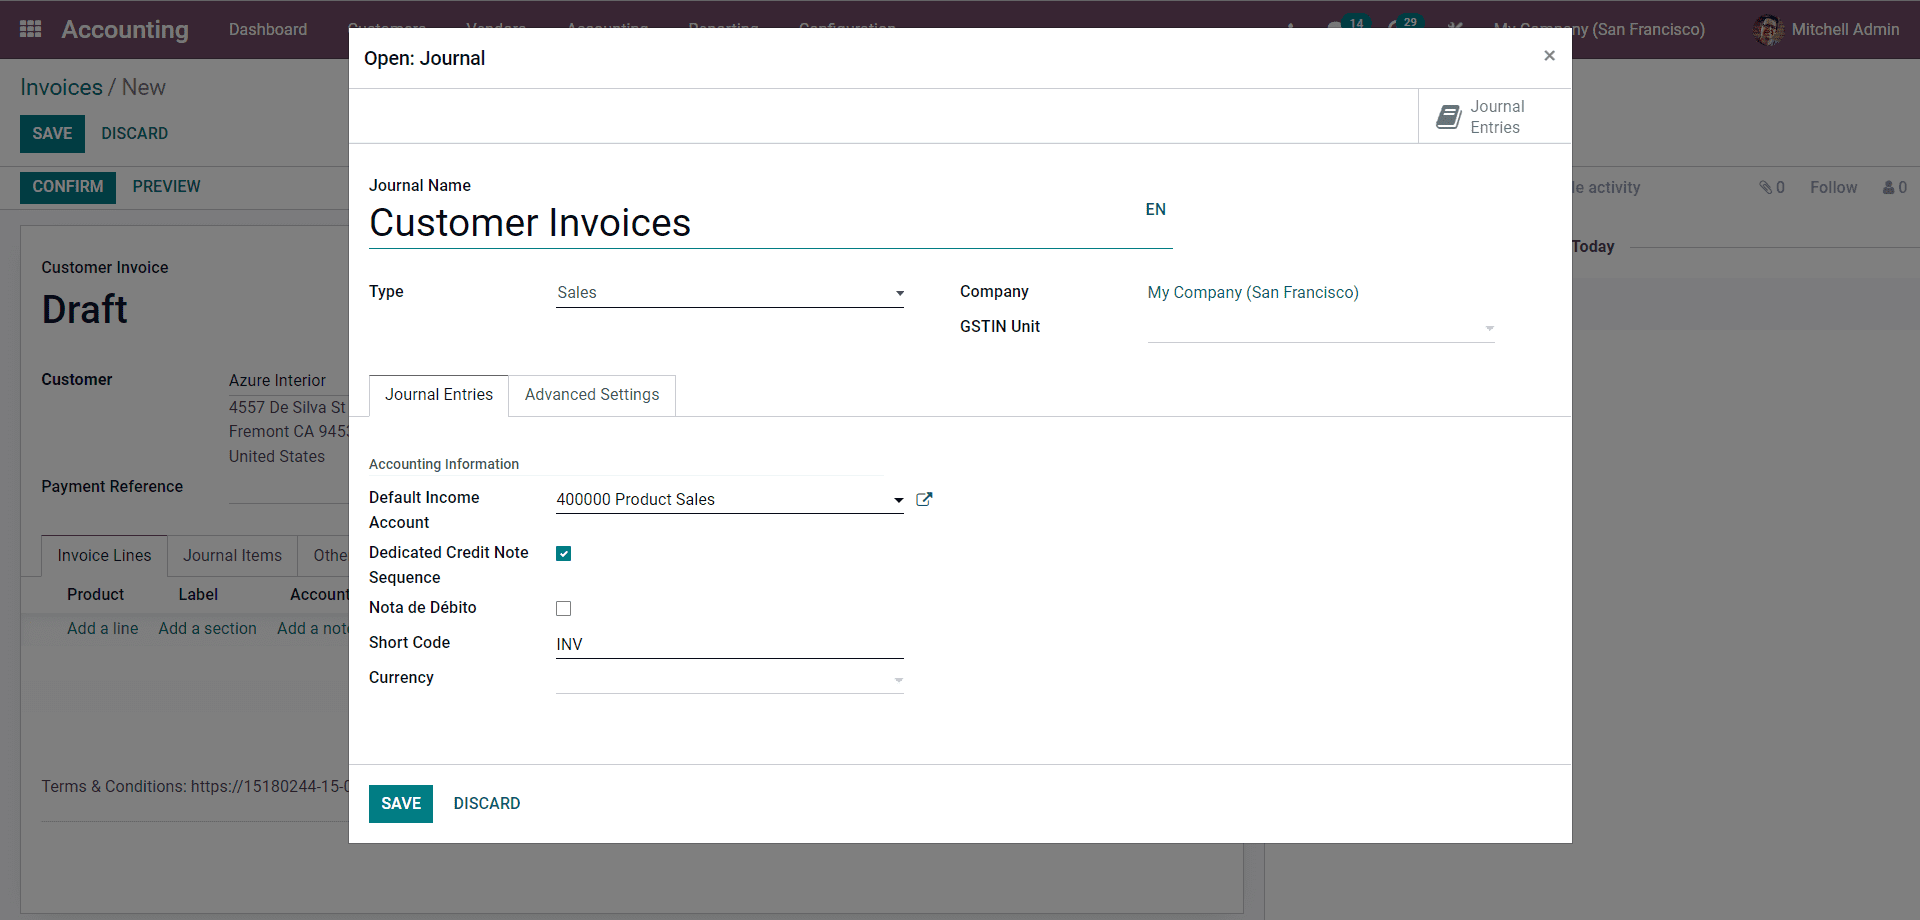
You can configure the chosen journal from this page. Note that selecting the journal for storing or entering your invoicing details is essential for easy analysis of customer invoices and will let Odoo manage them efficiently.
Invoice Journal Management
With the Accounting module of Odoo, you can create new journals for Invoices according to the nature of your business or invoices management strategy. Journals can be made from the Journals option under the Accounting section on the Configuration tab of the accounting module.
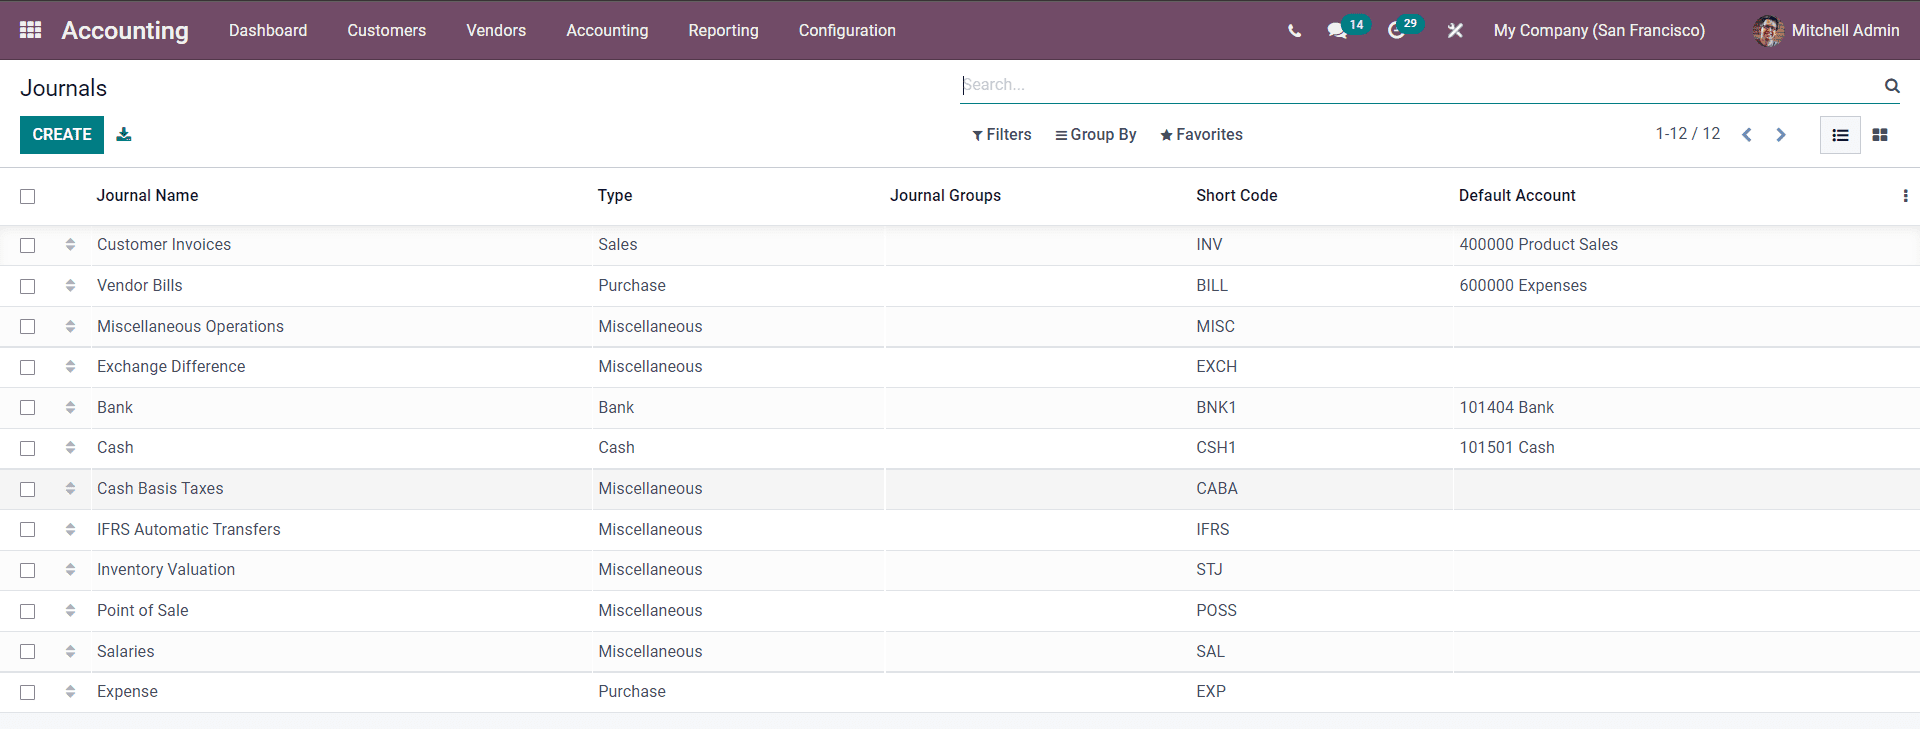
Click on the CREATE button to create the new Journal. Note that the created journals will be available to access from all of the modules in Odoo.
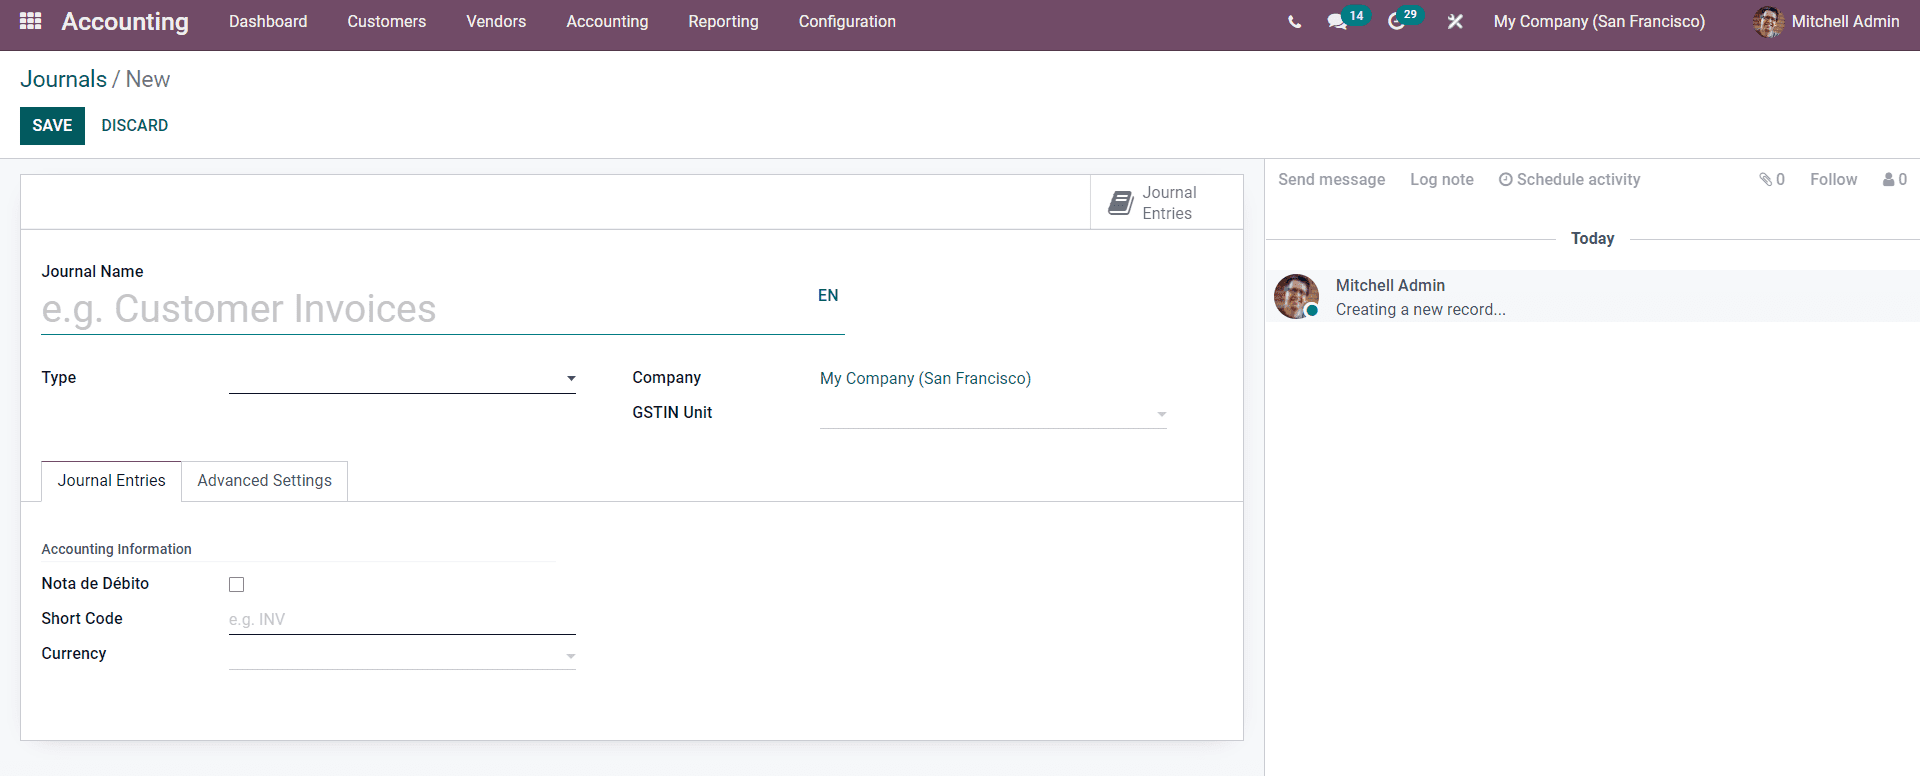
You can create the new Journal from this configuration page. Let us create a Journal for entering Customer invoices.
As an initial step, you have to start by naming the Journal and choosing the Journal type from the Type section of the configuration page.
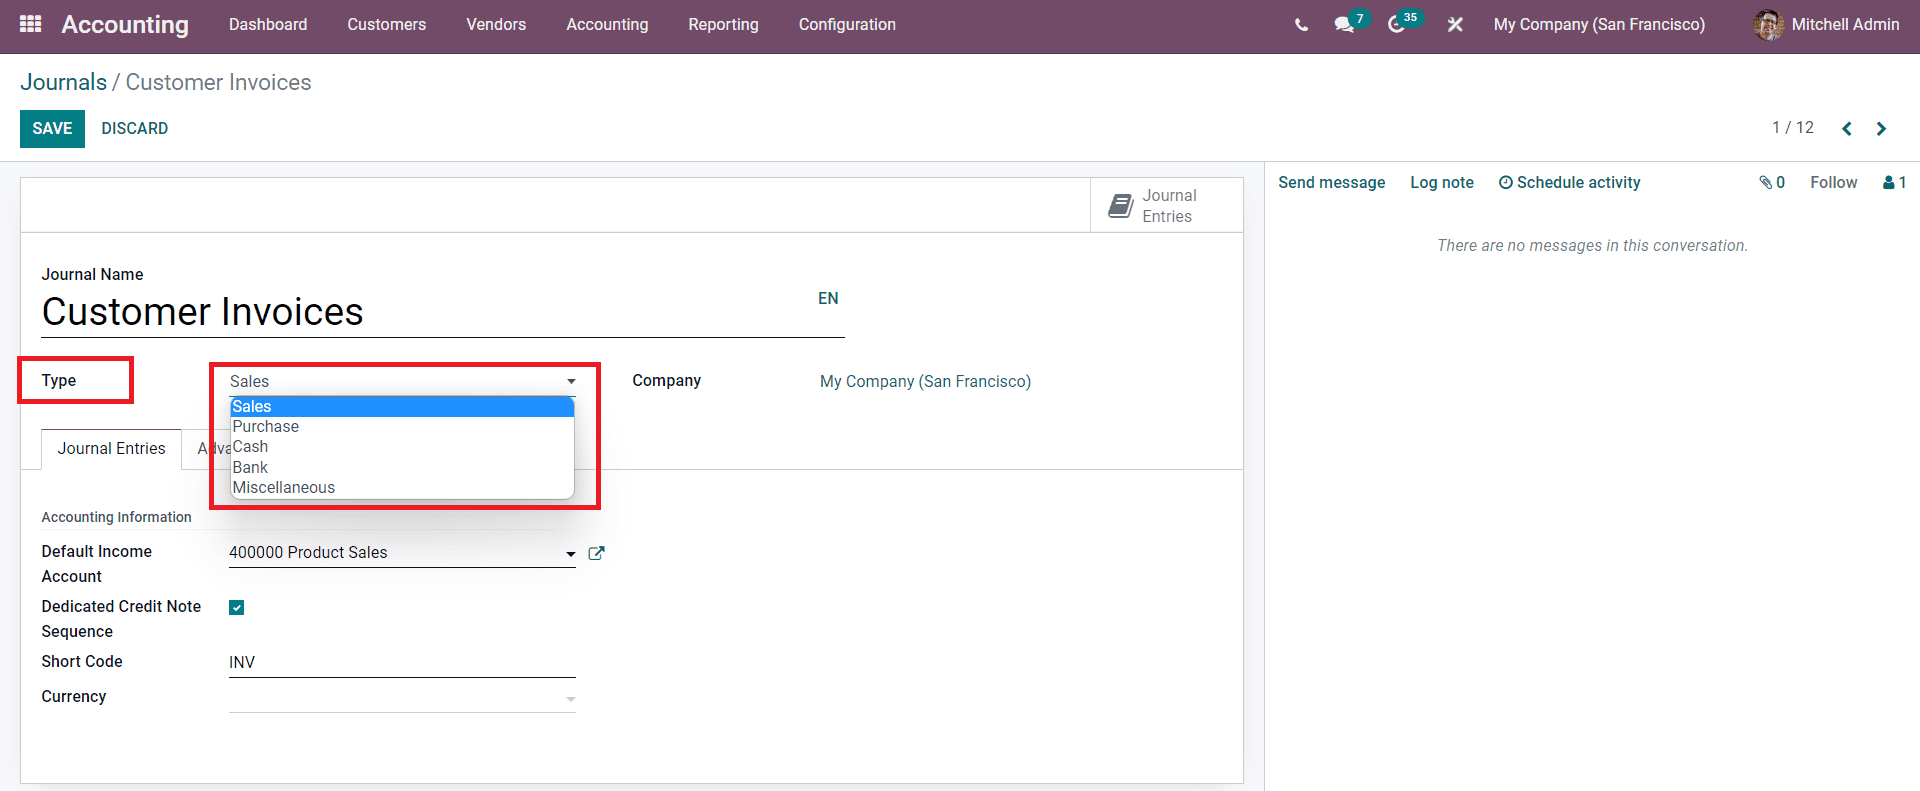
Here we have to choose Sales as the Journal type to satisfy the Invoicing operations. Note that for each Journal type you choose, the configuration settings will also change accordingly. To know more about Journal types and how to manage
After choosing the Journal type, you can select the Income account from the Default Income Account field to enter the invoice's income. Visit the link to learn more about the configurations on the Journal in Odoo 15.
The newly created invoice Journal will be listed on the Journals page of the Accounting module.
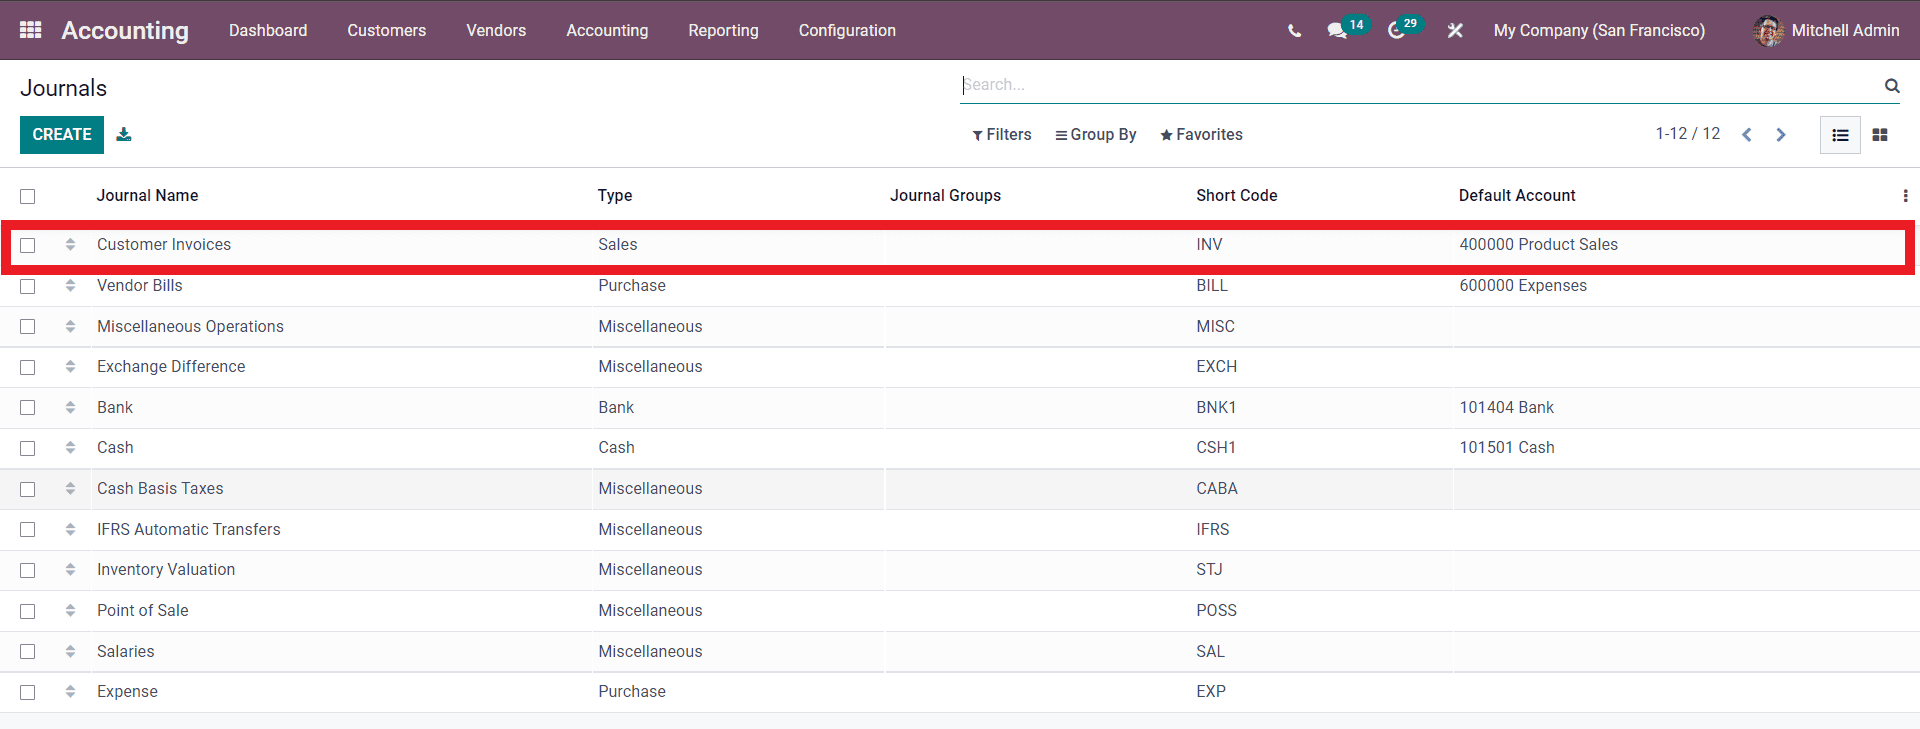
You can click on any created invoice journals from the list to configure and manage them.
A Journal can be edited and reconfigured at any point in time to suit the business requirements. You can create and manage multiple Journals for more accessibility to the entries or the invoice records.
Journals are also integrated into the other modules of Odoo to provide full user access. For easy accounting management, you can add the invoices to the journals from the Invoices configuration page. The integration lets you have complete control over your whole customer invoices and billing procedures and document the documents attached to them. To know more about the advanced features of invoicing with the Odoo 15 Accounting module.
You can effectively use invoicing with the Odoo 15 Expenses module. Invoicing is deeply integrated into the expense module for generating maximum user accessibility in expense report management. Follow the link below to learn more about Invoicing with the Expenses in Odoo.
Invoicing with Sales Module
As mentioned earlier, Odoo 15 Sales module is one of the modules into which the Invoicing feature of Odoo is deeply integrated. The Sales module of Odoo and the Accounting module work hand in hand to generate maximum efficiency in sales data management and accessibility.
The sales module will let you generate invoices directly from the sales quotations and orders.
Compared to the Accounting module, Invoicing with the Sales module is different to satisfy the sales needs of the business. You can instantly create and manage the Invoices directly from the sales quotations. But before anything, you have the option to configure the invoicing policy. Invoicing policy can be configured from Settings under the Configuration tab of the Sales module. Scroll down, and you will be able to find the Invoicing section of the configuration page, as highlighted in the image given below.
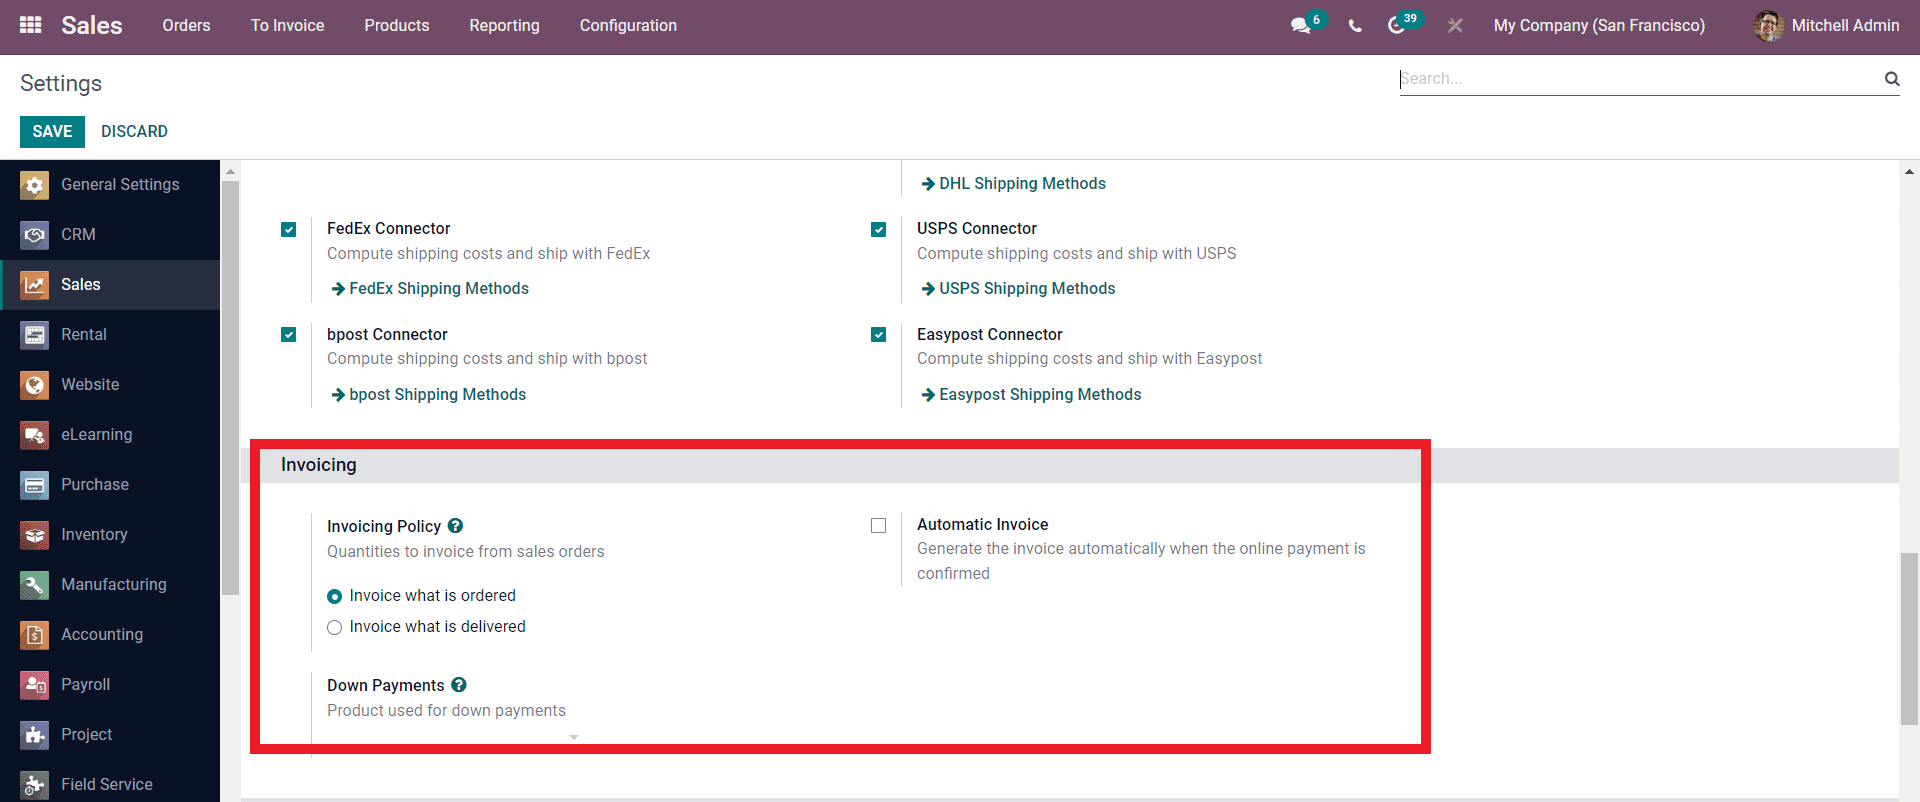
You can choose the Invoicing policy for your Sales Invoices from here. Note that you can select the invoicing policy directly from the invoice when creating one from the sales quotation. There are two invoicing policies for you to choose from; Invoice what is ordered and invoice what is delivered. You can choose between the options to suit your business requirements. The module's configuration page will also let you have the option to activate the Automatic invoice option.
The Automatic invoicing feature of the sales module allows Odoo to send Invoices directly to the customer after the online payment confirmation from the Payment acquirer. You can choose the downpayment option, where you can set the default product used for payment advances, as shown below.
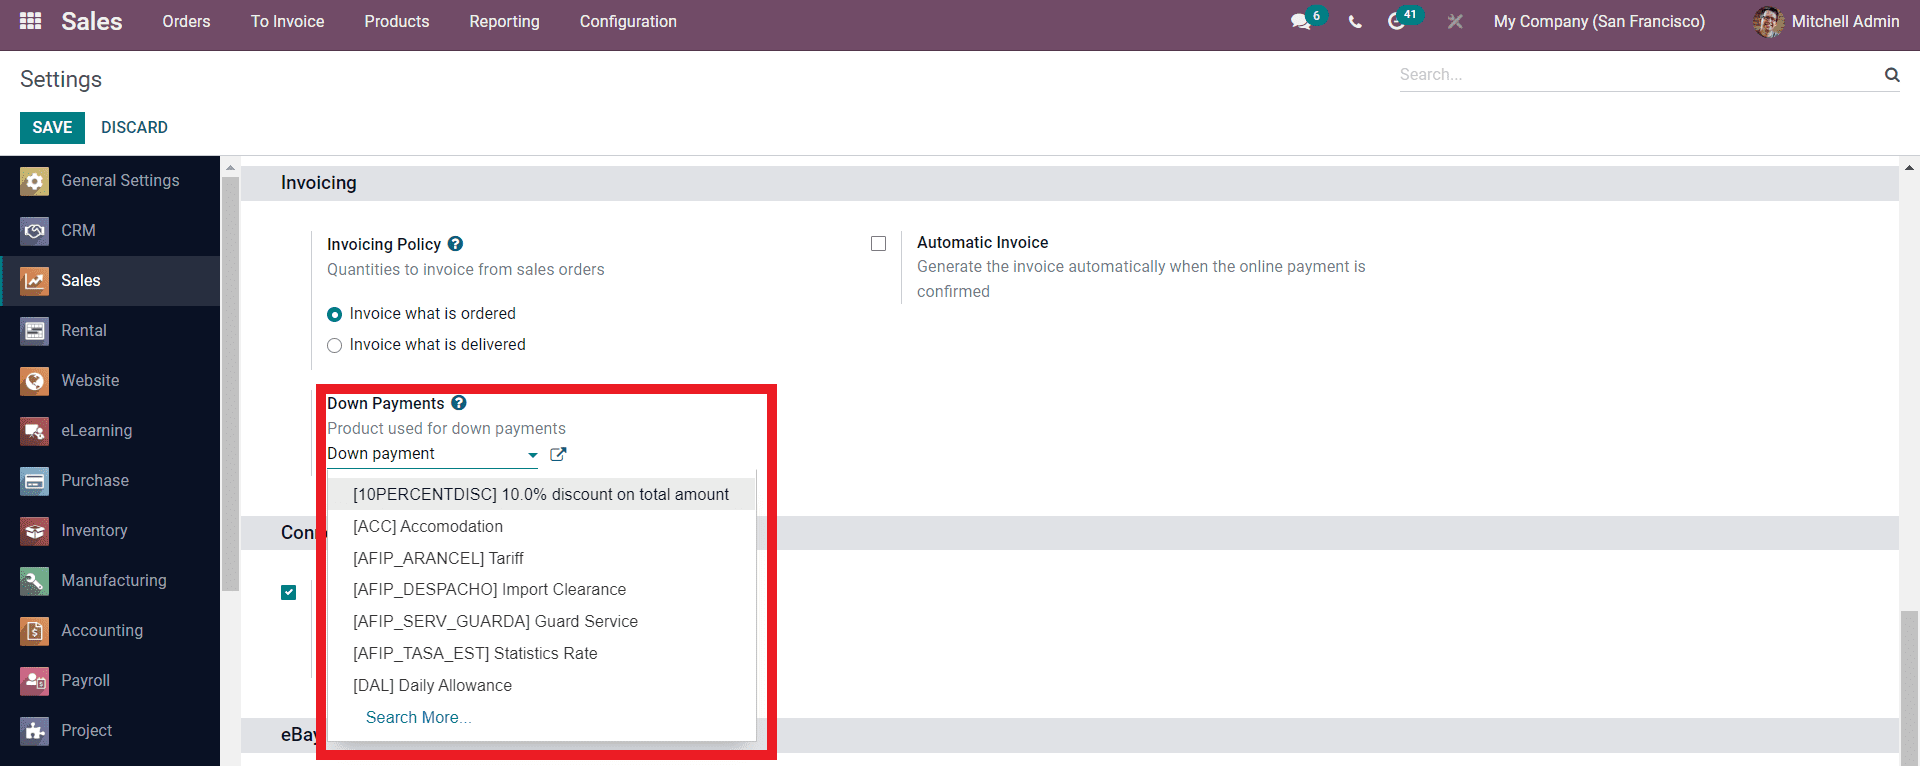
After the configurations on the Invoices, you can go ahead to create or generate an invoice from the Sales quotations.
Generating invoices from the Quotations
From the dashboard of the Sales module, you can have a complete overview of all of the sales quotations from the Status section of the page. You can generate an invoice post-payment confirmation from the customer.
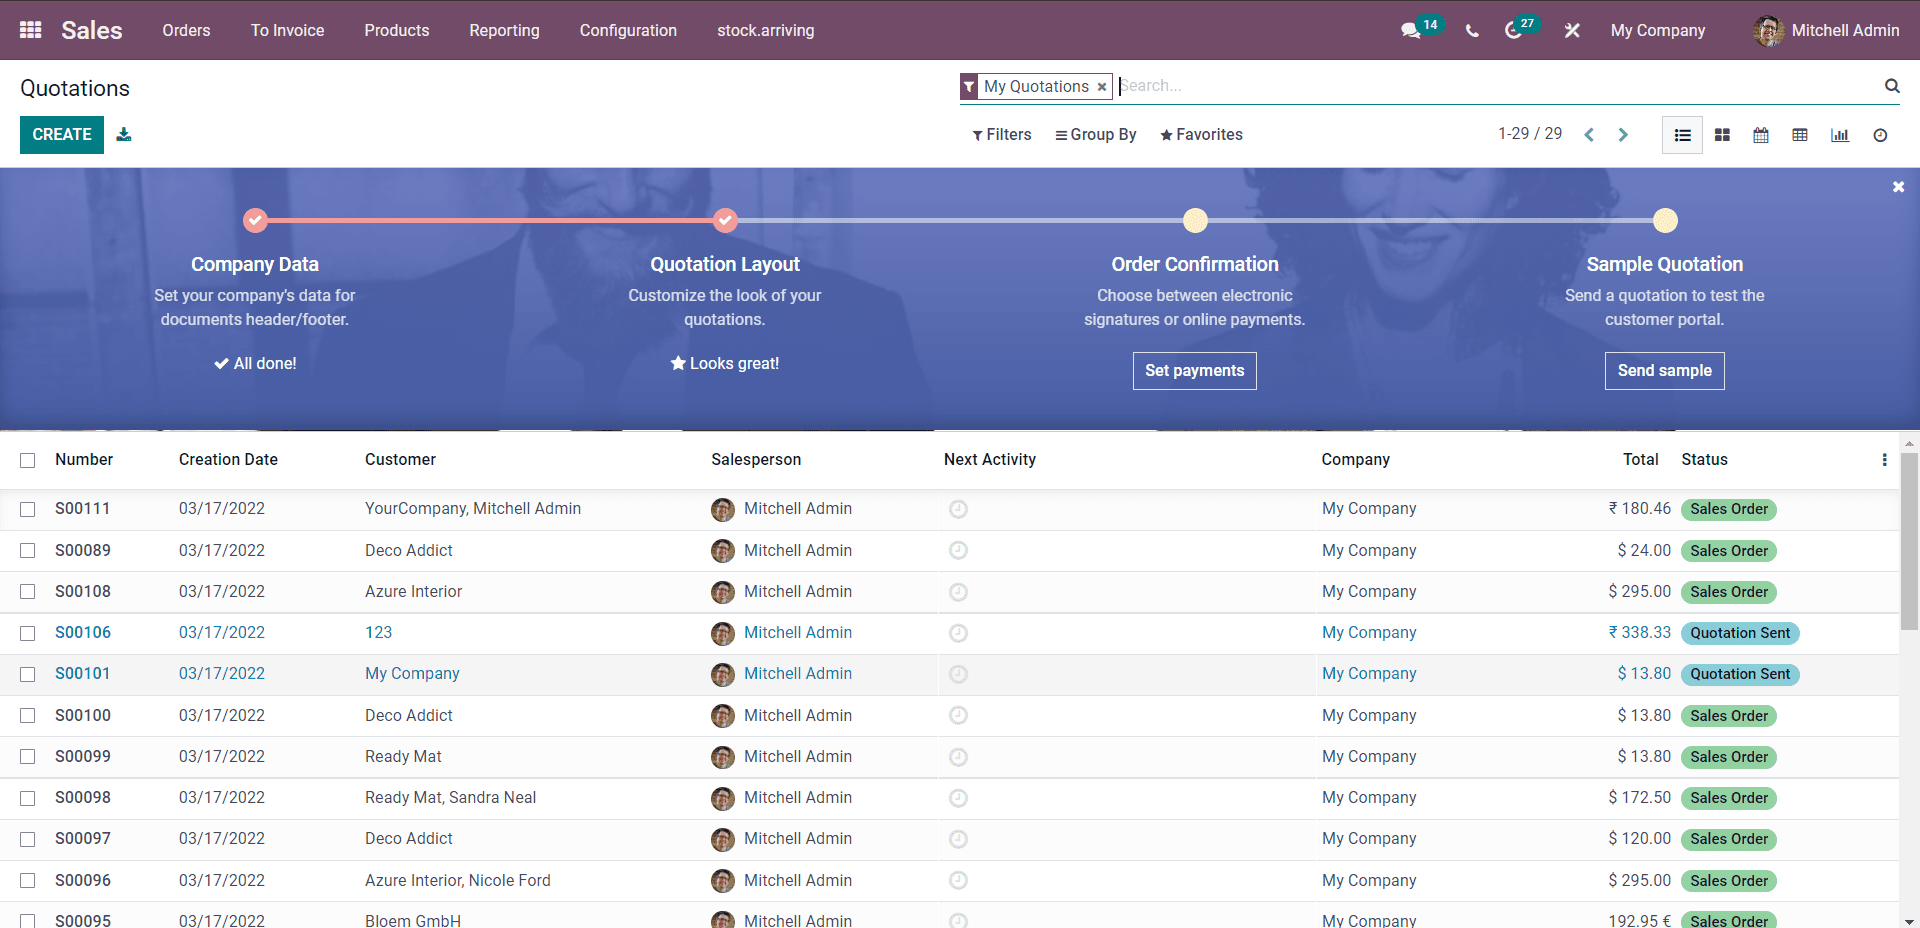
You can choose from the quotations categorised as Sales orders under the Status section of the quotations page to generate a new invoice.
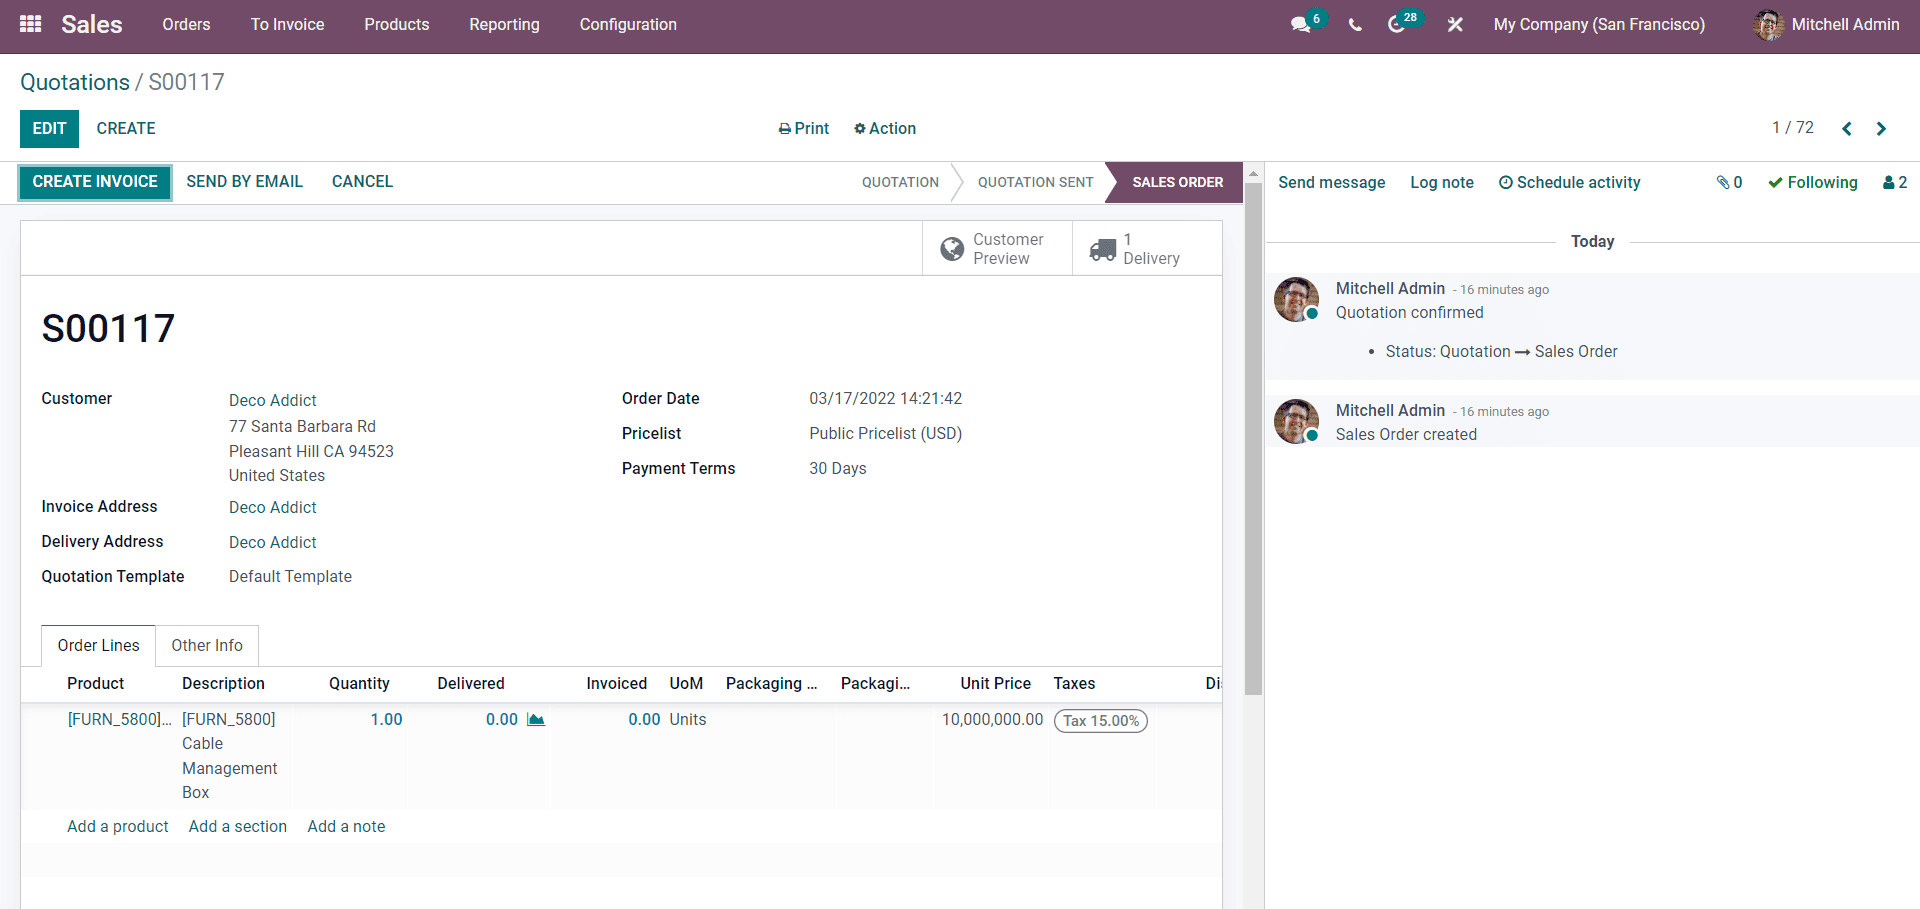
A CREATE INVOICE button will be available on the selected quotation page, as shown in the image given above. Click on it, and a quick tab will open up.
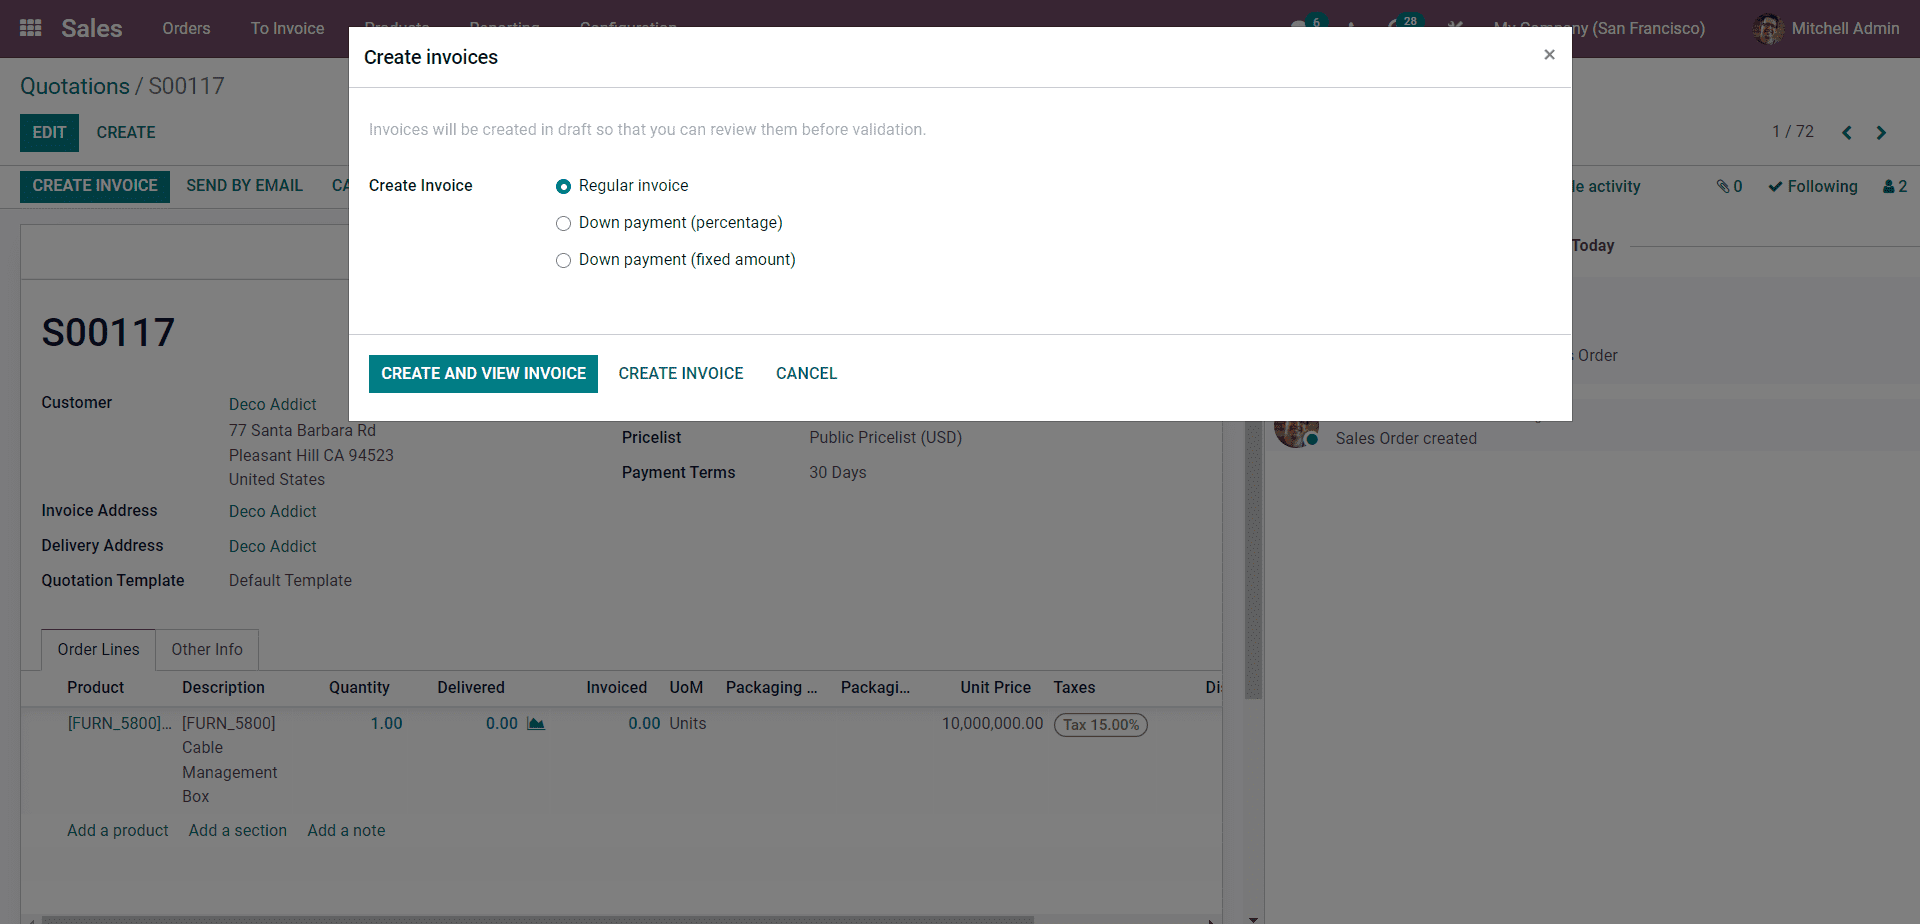
There are multiple Invoicing options in the tab to choose from for finalizing the nature of the invoice. The invoicing options include Regular Invoices, Down payment (Percentage), and Down payment (Fixed amount).
Let's create or generate regular invoices by selecting Regular Invoice from the options.
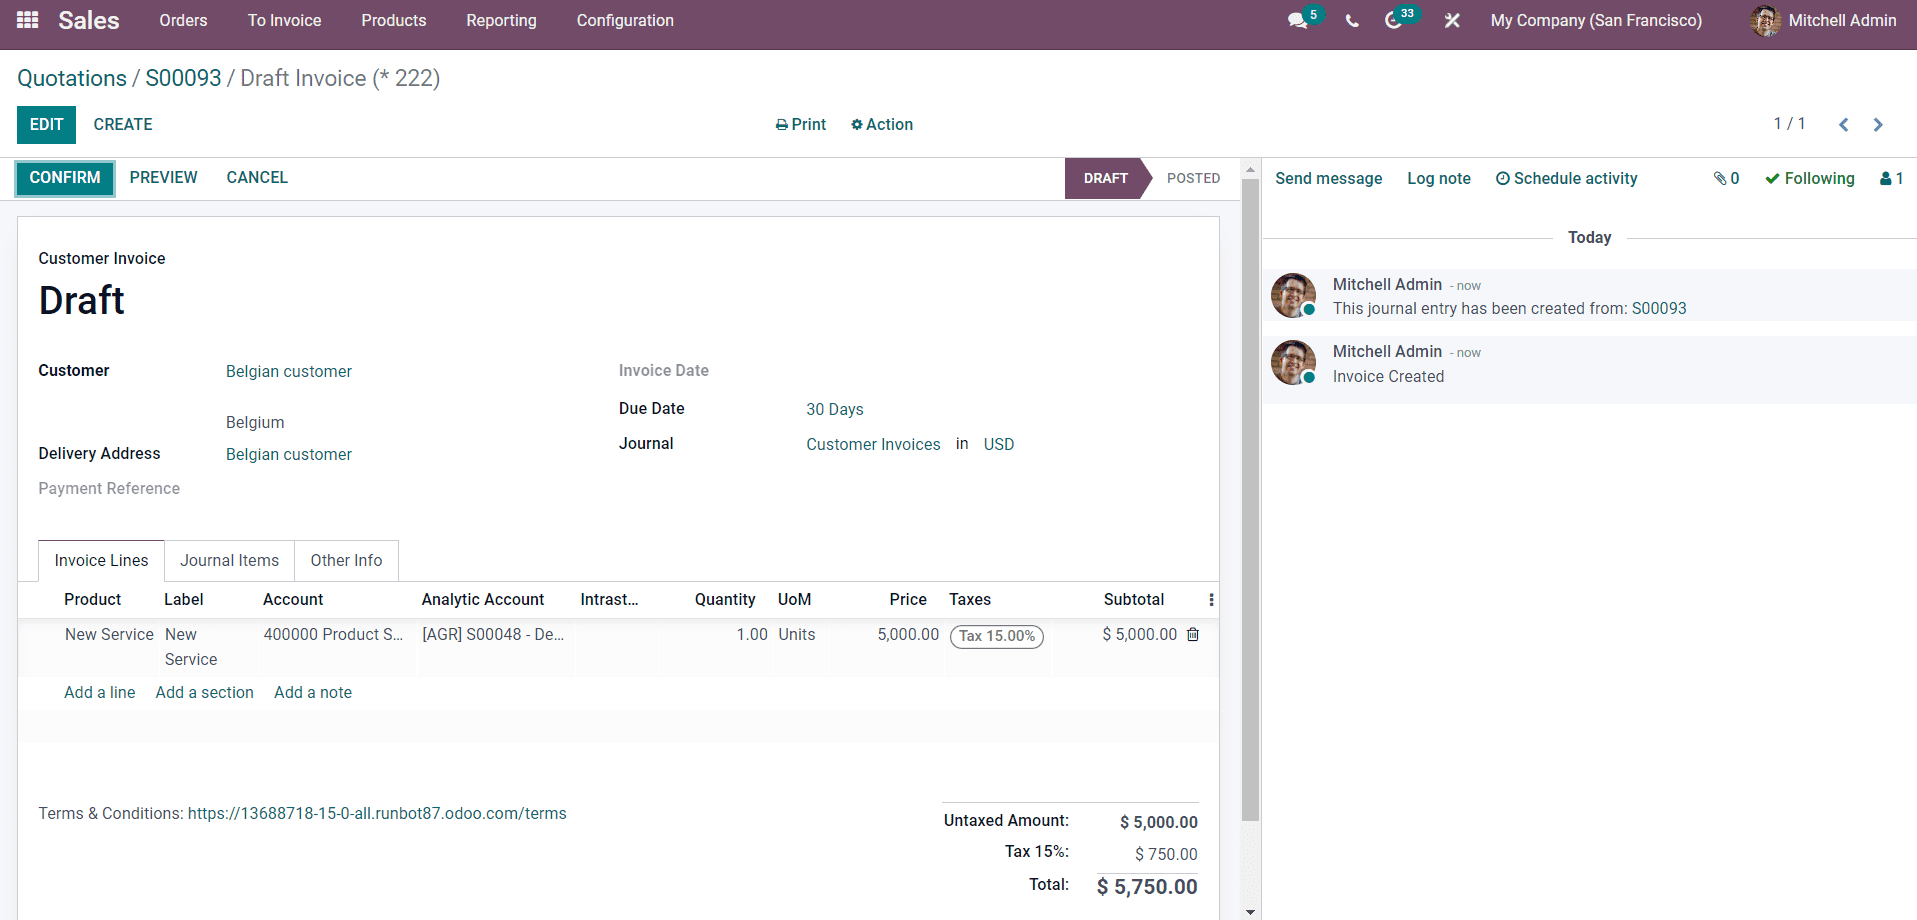
The Invoice will be automatically filled in with details or the data collected from the quotations. The EDIT button will let you edit all of the information on the draft invoice before sending it to the customer. You can change the customer and the Journal to enter the Invoice and the Due date.
Under the Invoice lines tab of the draft invoices page, you will be able to find the Product and the related info to be included in the Invoice. You can configure the information on the Product, including the tax details, and the invoice amount will automatically change concerning tour configurations. The Add a line button in the Product section will let you add more products to the invoice. Invoices will let you have complete access to all of your products and customers due to their highly integrated nature.
After the configurations, you can either click on the CONFIRM button to confirm the invoice or the PREVIEW button to get a preview of the invoice before sharing it with the customer. For explanation, we can click on the CONFIRM button to move to the next section, as shown below.
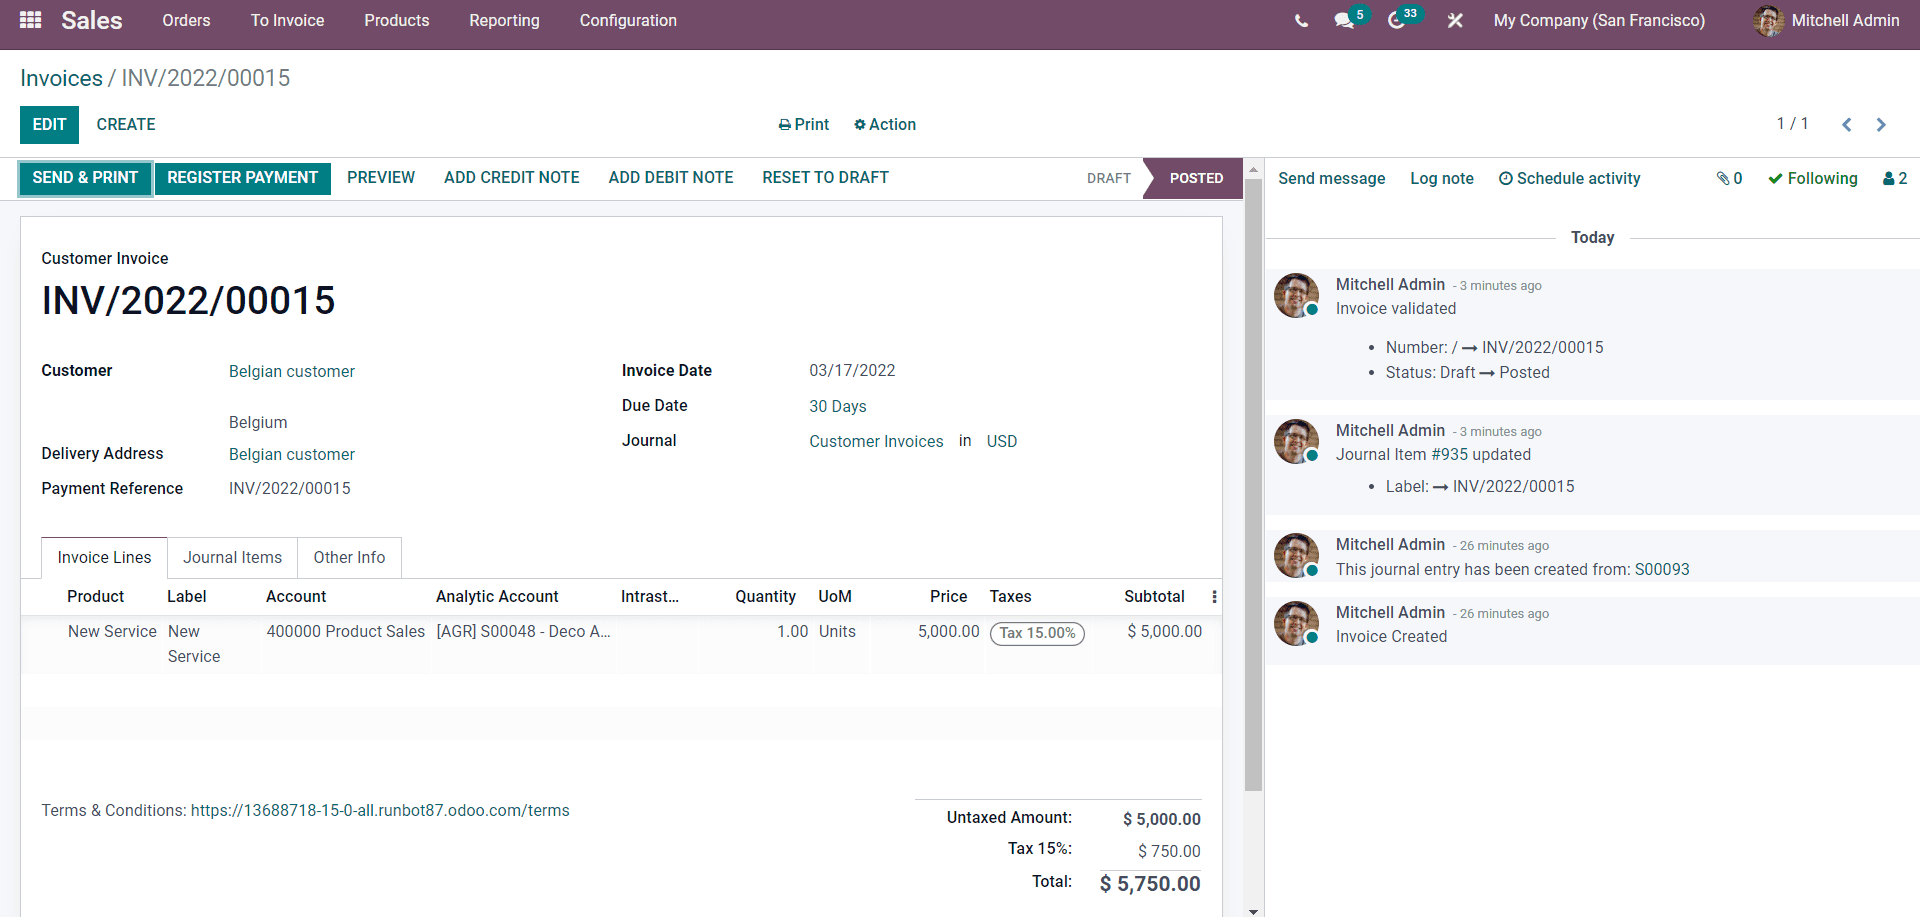
The Payment registration page will let you record the payment from the customer. Clicking on the SEND&PRINT button will let you send the Invoices directly to the customer, assuming the payment registration. As shown below, a window with the info on printing and sending the invoice will open up.
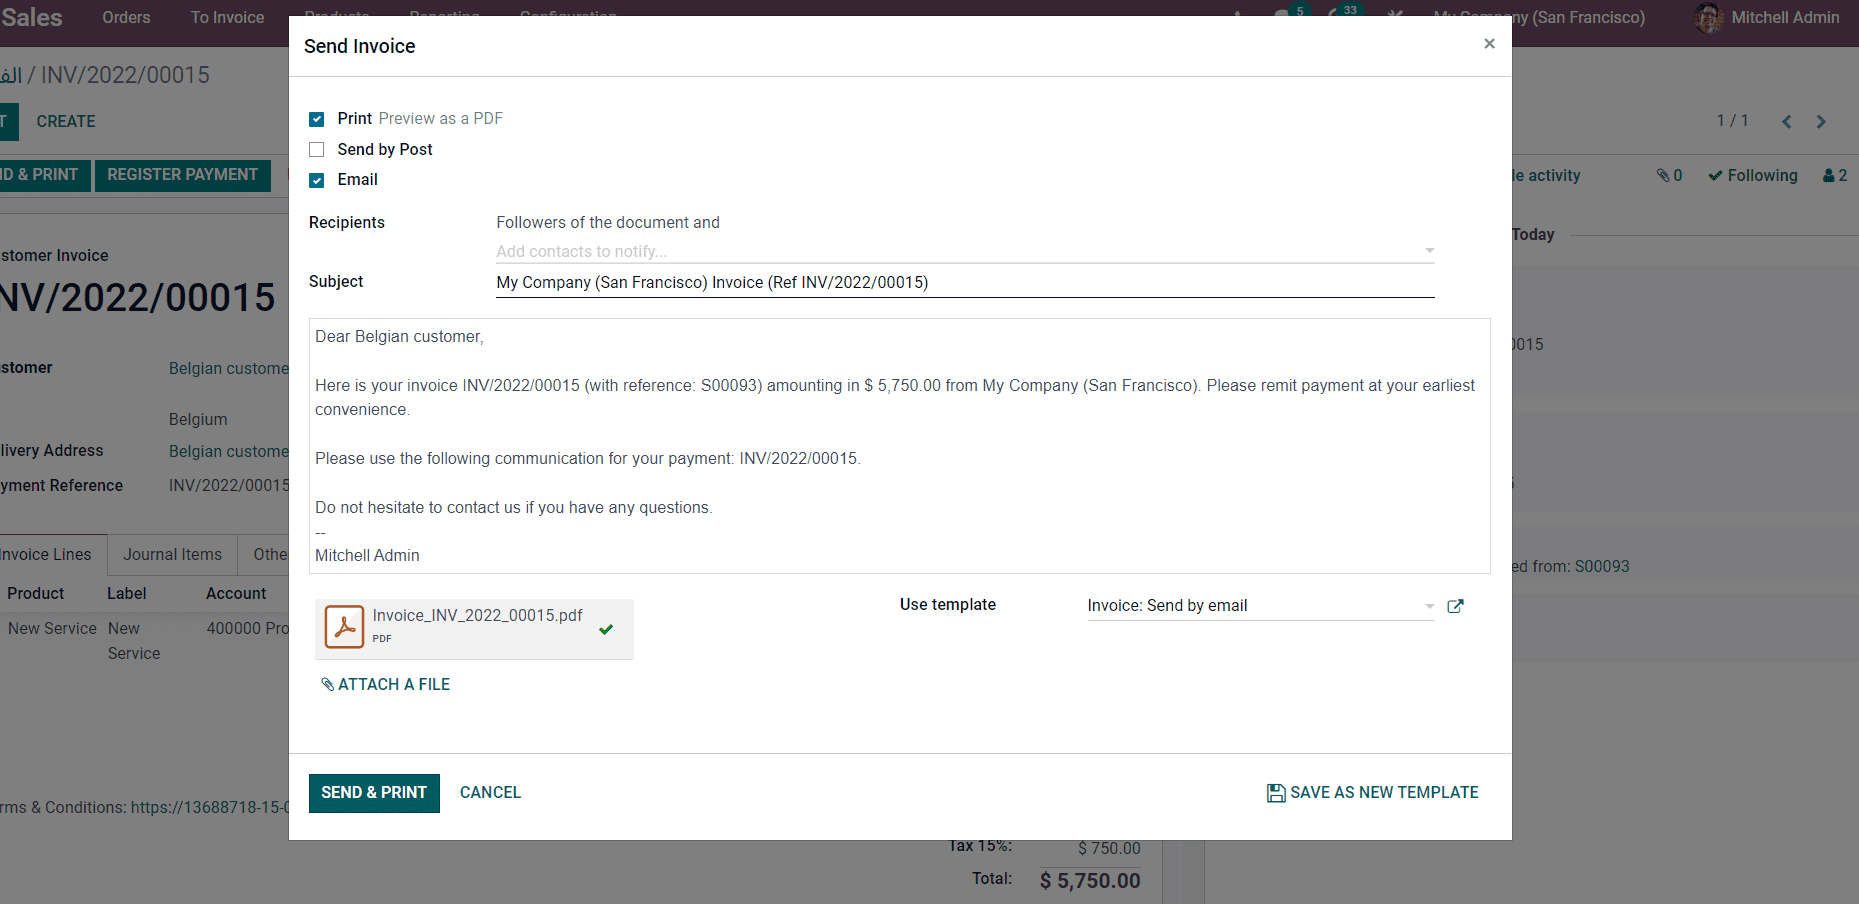
Invoices can be sent through the Post or Email. Suppose you have Opted for sending the invoice via Email. In that case, you can write a mail letter with the invoice to include any relevant information regarding the invoice or a summary of the invoice. Invoices will be attached to the mail. You can add additional documents to the mail by clicking on the ATTACH FILE button. You can instantly send the mail by clicking on the SEND & PRINT button.
The REGISTER PAYMENT button from the Invoice register payment page will let you register the payment from the customer. As shown below, a window or tab to register the payment will open up.
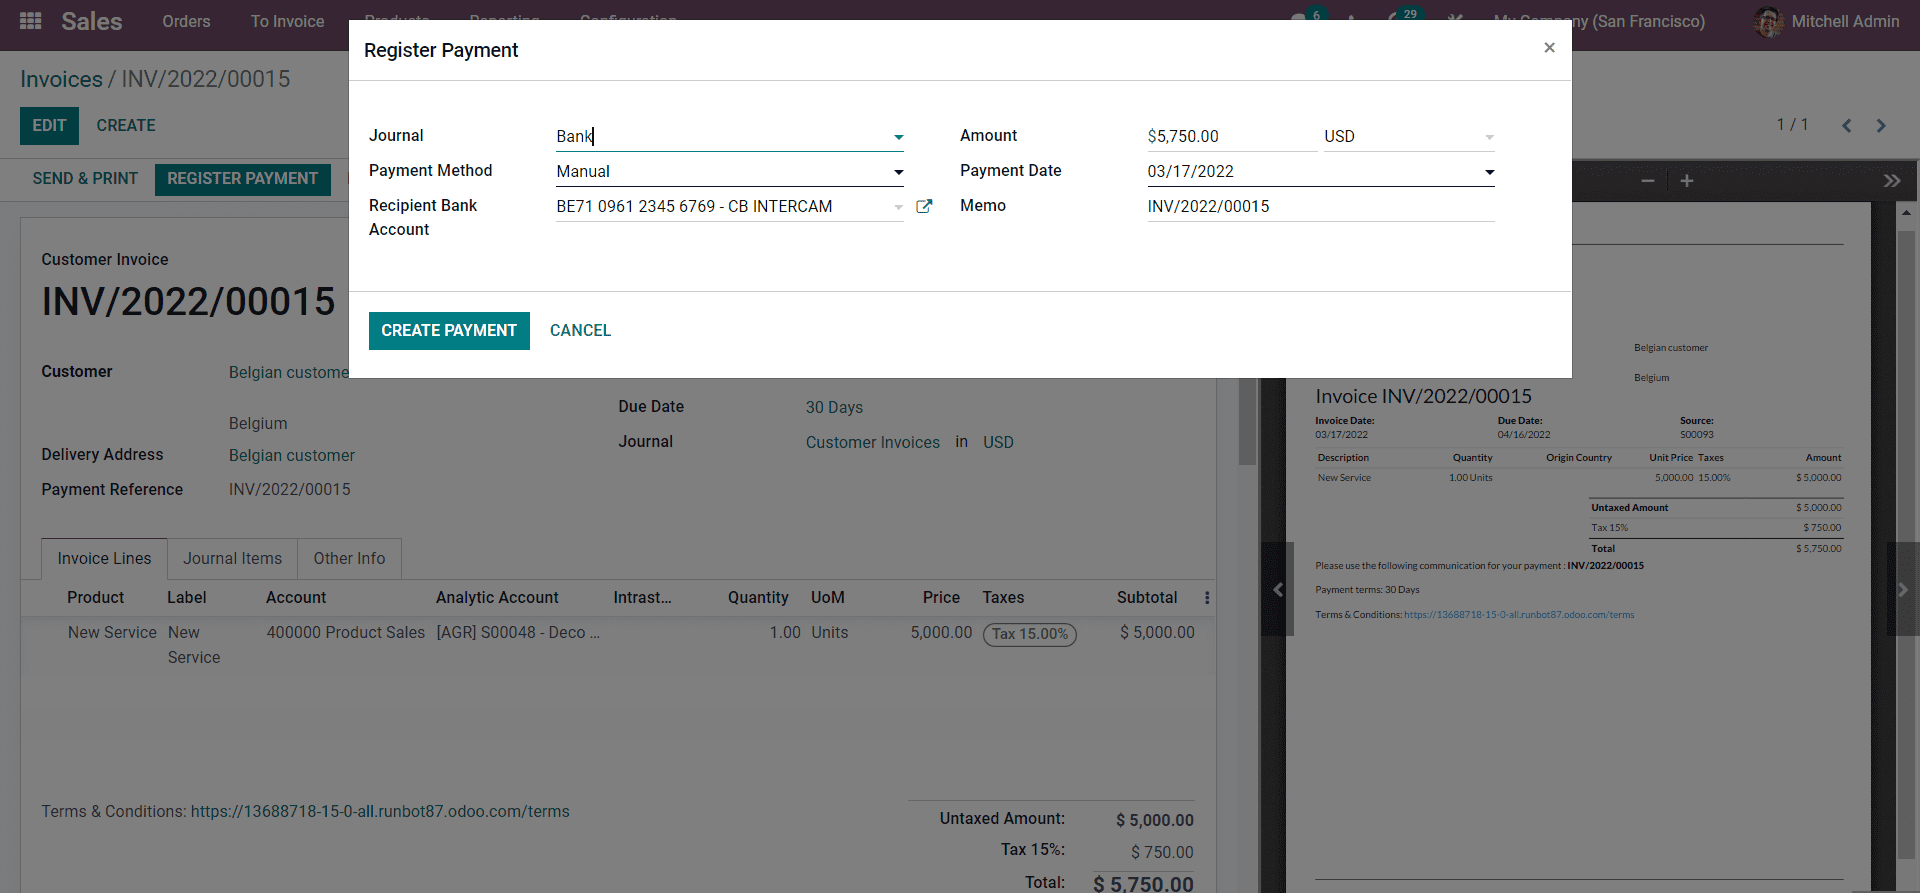
The Journal can be chosen to enter the invoice from the Journal field. The integration between the Invoicing, sales and Accounting modules will let you have direct access to all of the Journals to enter the Invoice data.
The amount and the currency cabe included on the Amount field. The Payment method field will let you enter the method of payment for easy invoice management. After selecting the payment method, you can type in the payment date from the respective field. You can choose the Reciepient bank account and enter the Memo number for easy Invoice management and accessibility. After the configurations, press on the CREATE PAYMENT button to register the payment. The invoices will be immediately noted with an IN PAYMENT button to indicate that the payment is recorded below.
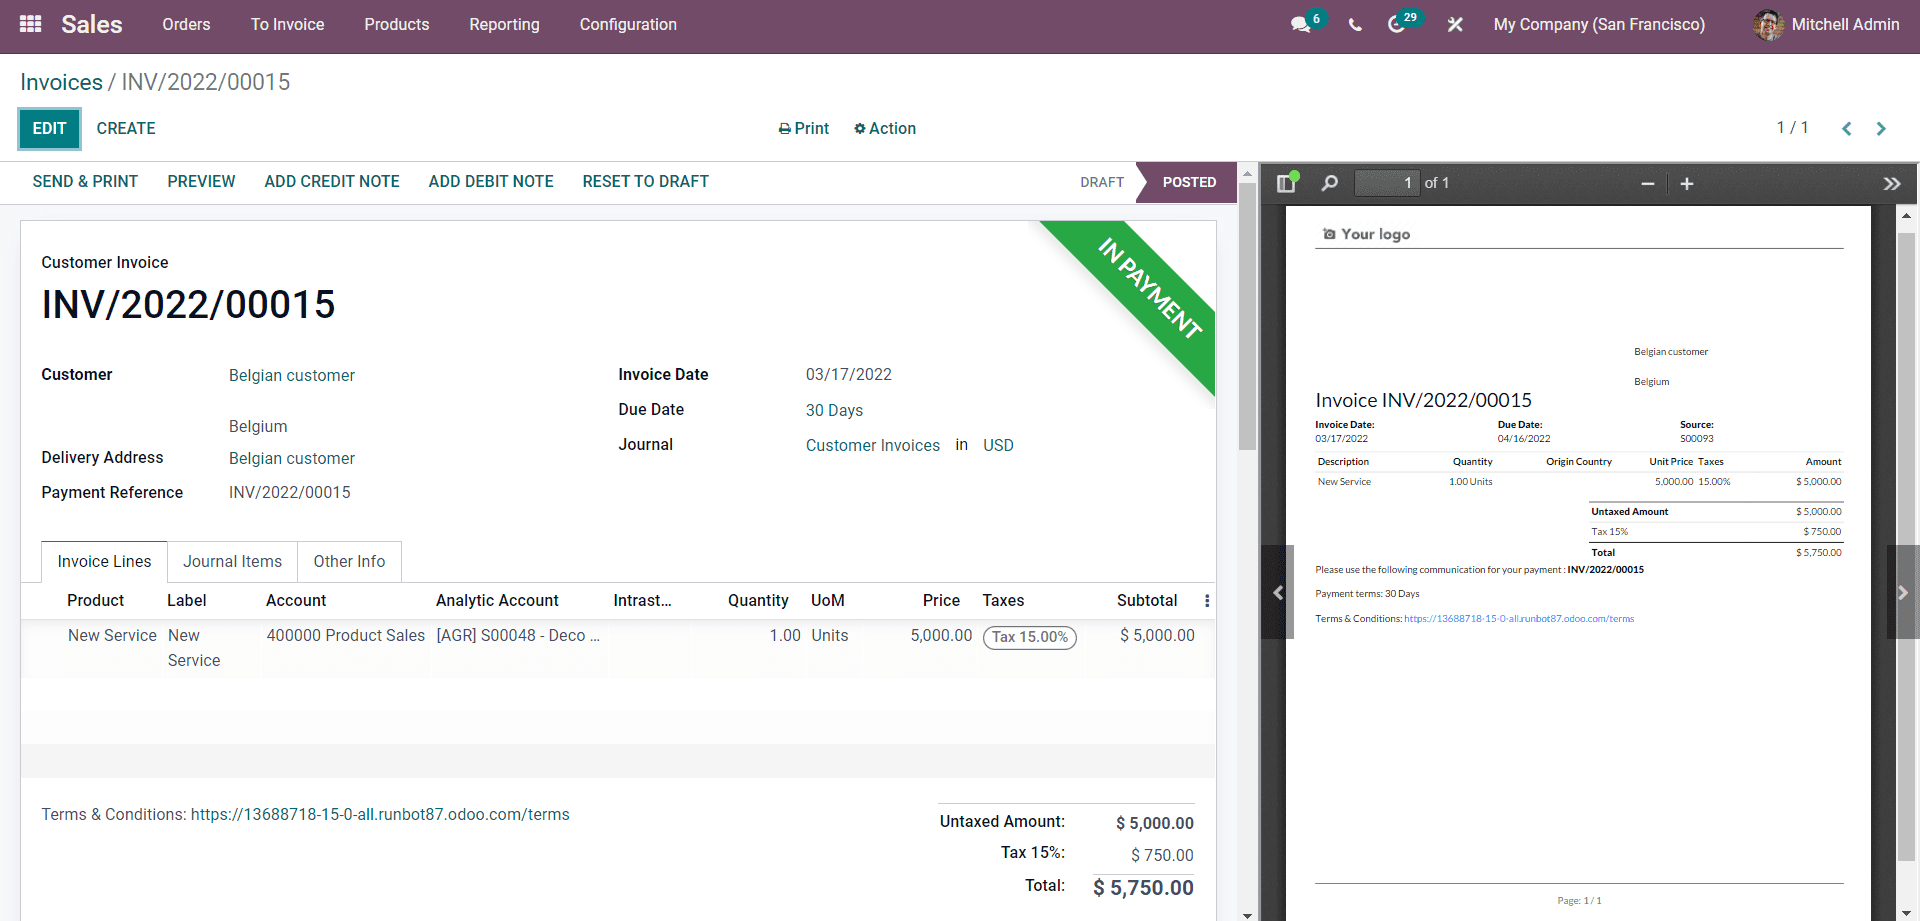
The Sales module dashboard will update the quotation or sales order status to in payment, as shown in the image below.
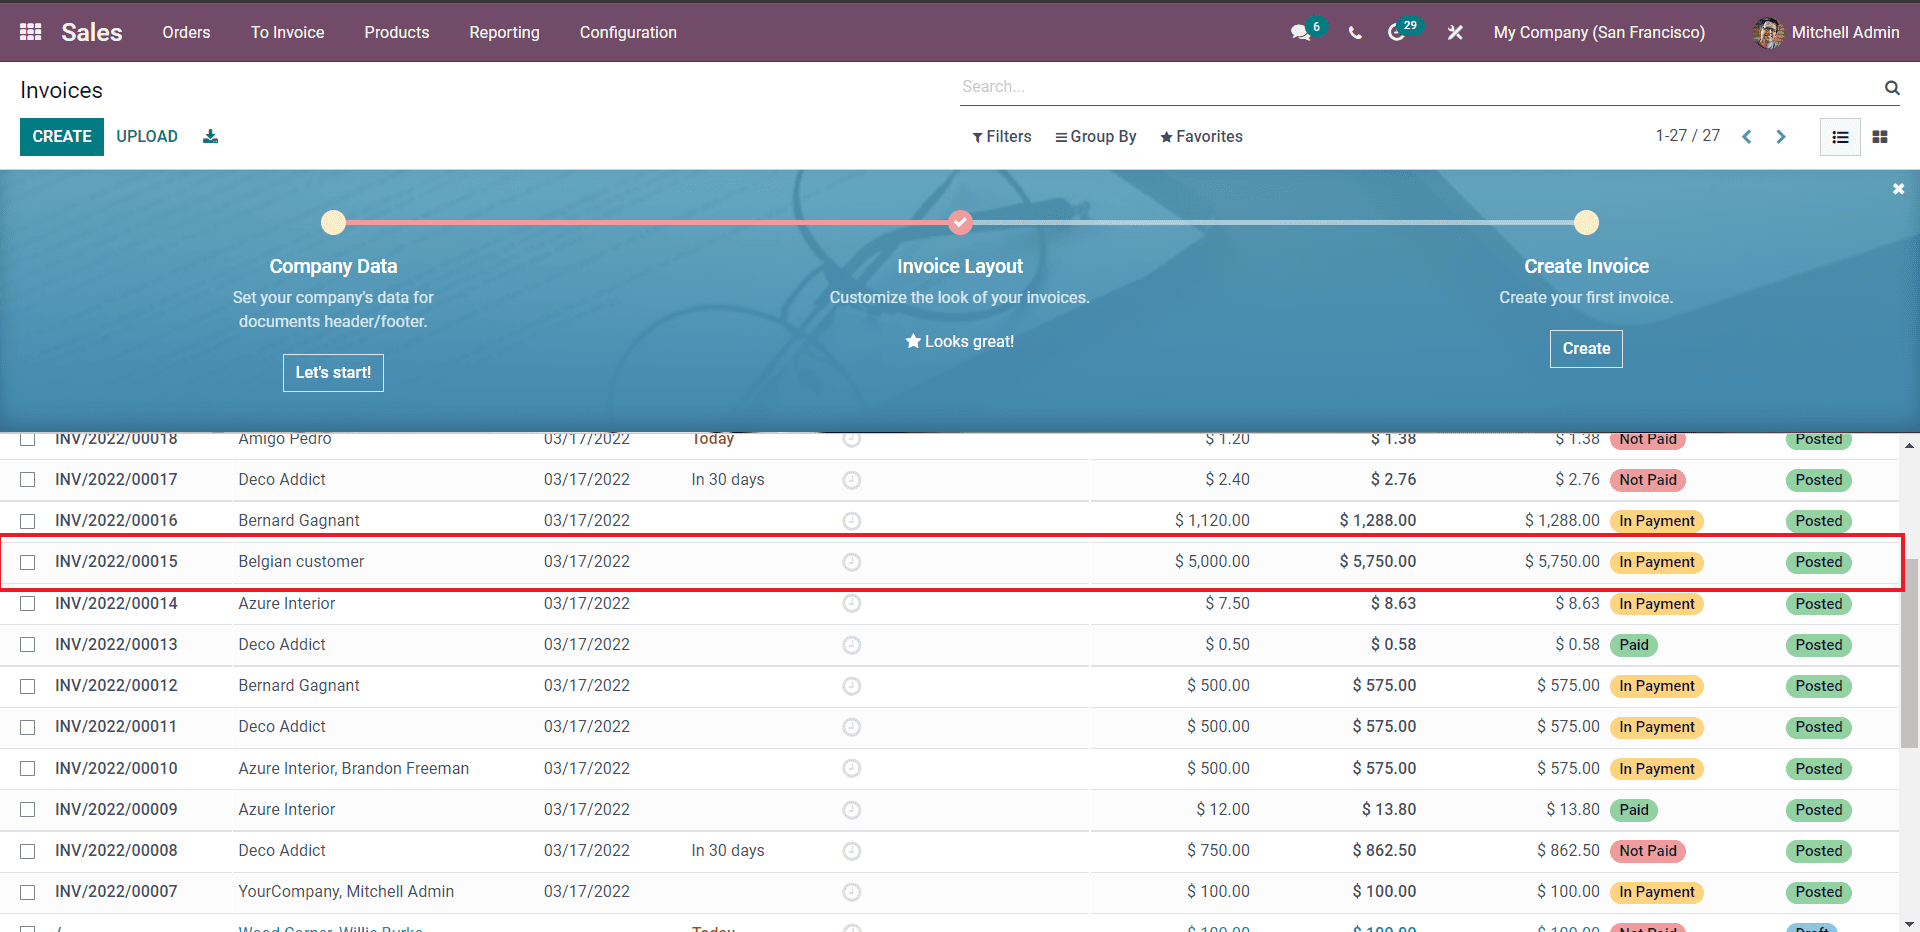
Mitchell can click on the Invoices from the list to view them at any time. This is how you generate and manage the invoices from quotations in the Sales module.
The advanced invoicing feature in Odoo can be used to request a downpayment on the Products. Follow the link to learn more about Invoicing with the Odoo 15 Sales module.
The above-given method of invoicing is the most basic form of Invoicing from the Sales module of Odoo. The Odoo 15 Sales module has a dedicated To Invoice tab to access invoices easily.
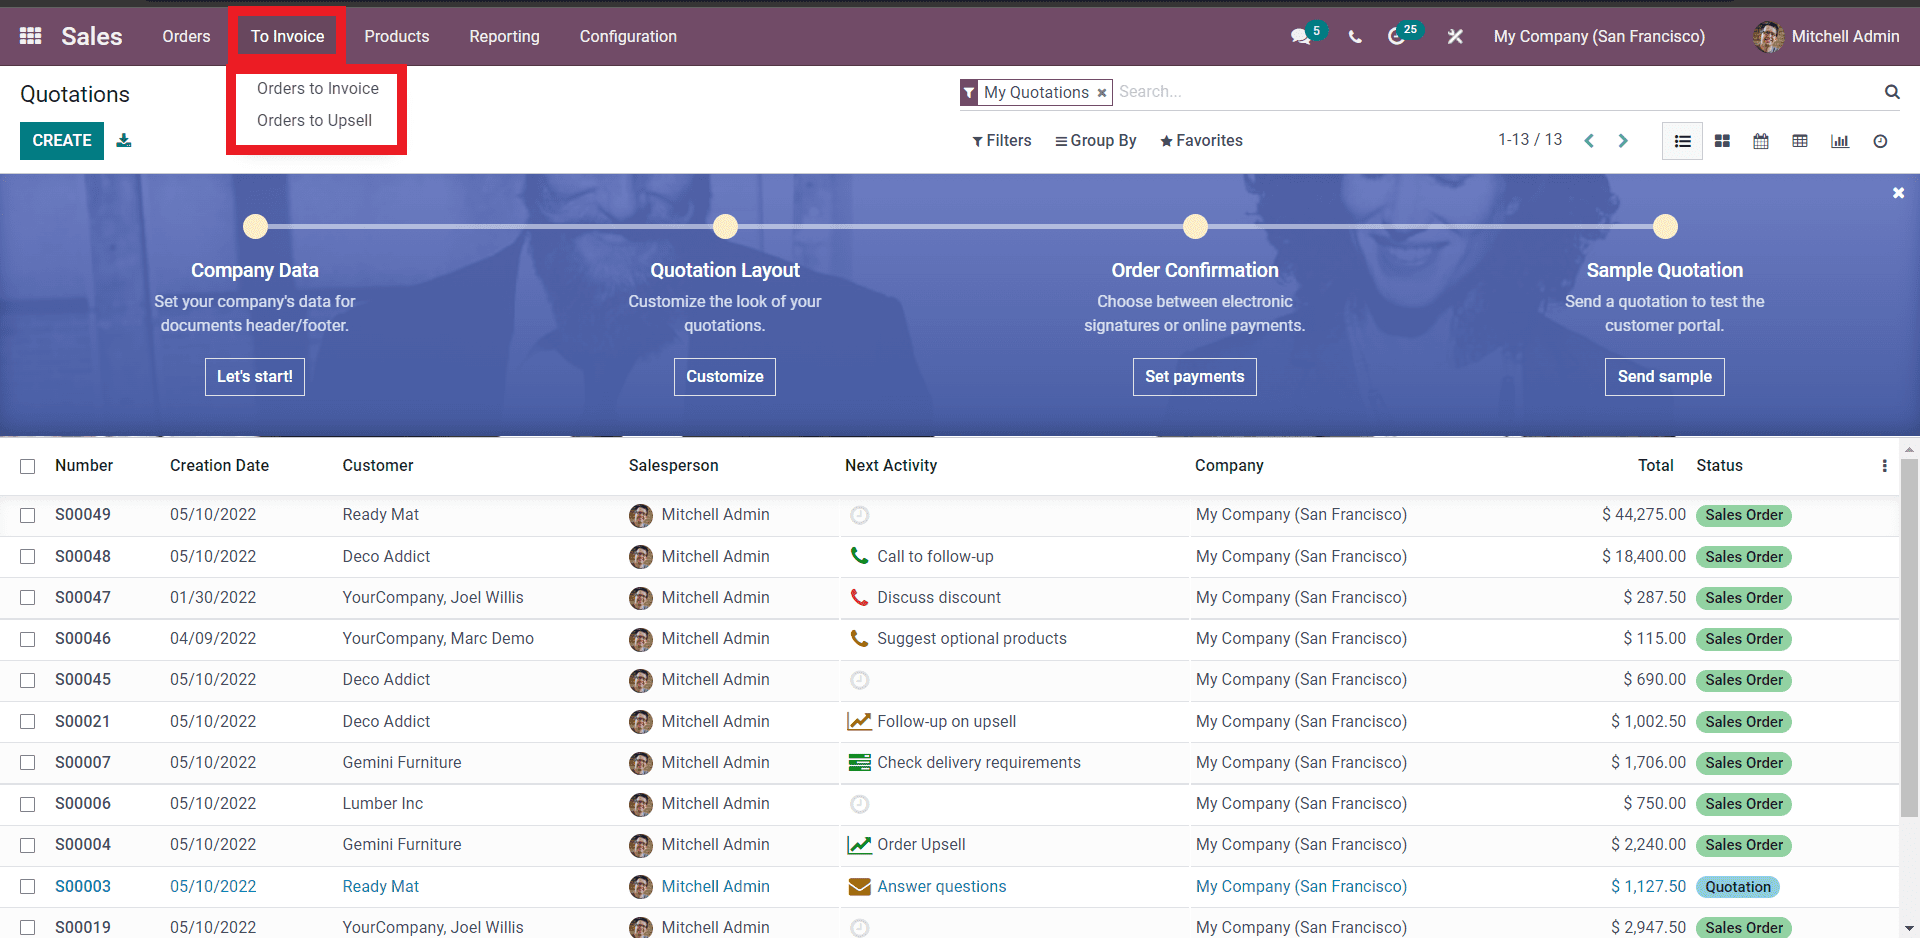
There are two invoicing options under the Invoice tab of the Sales module, Orders to invoice and Orders to upsell.
Orders to Invoice
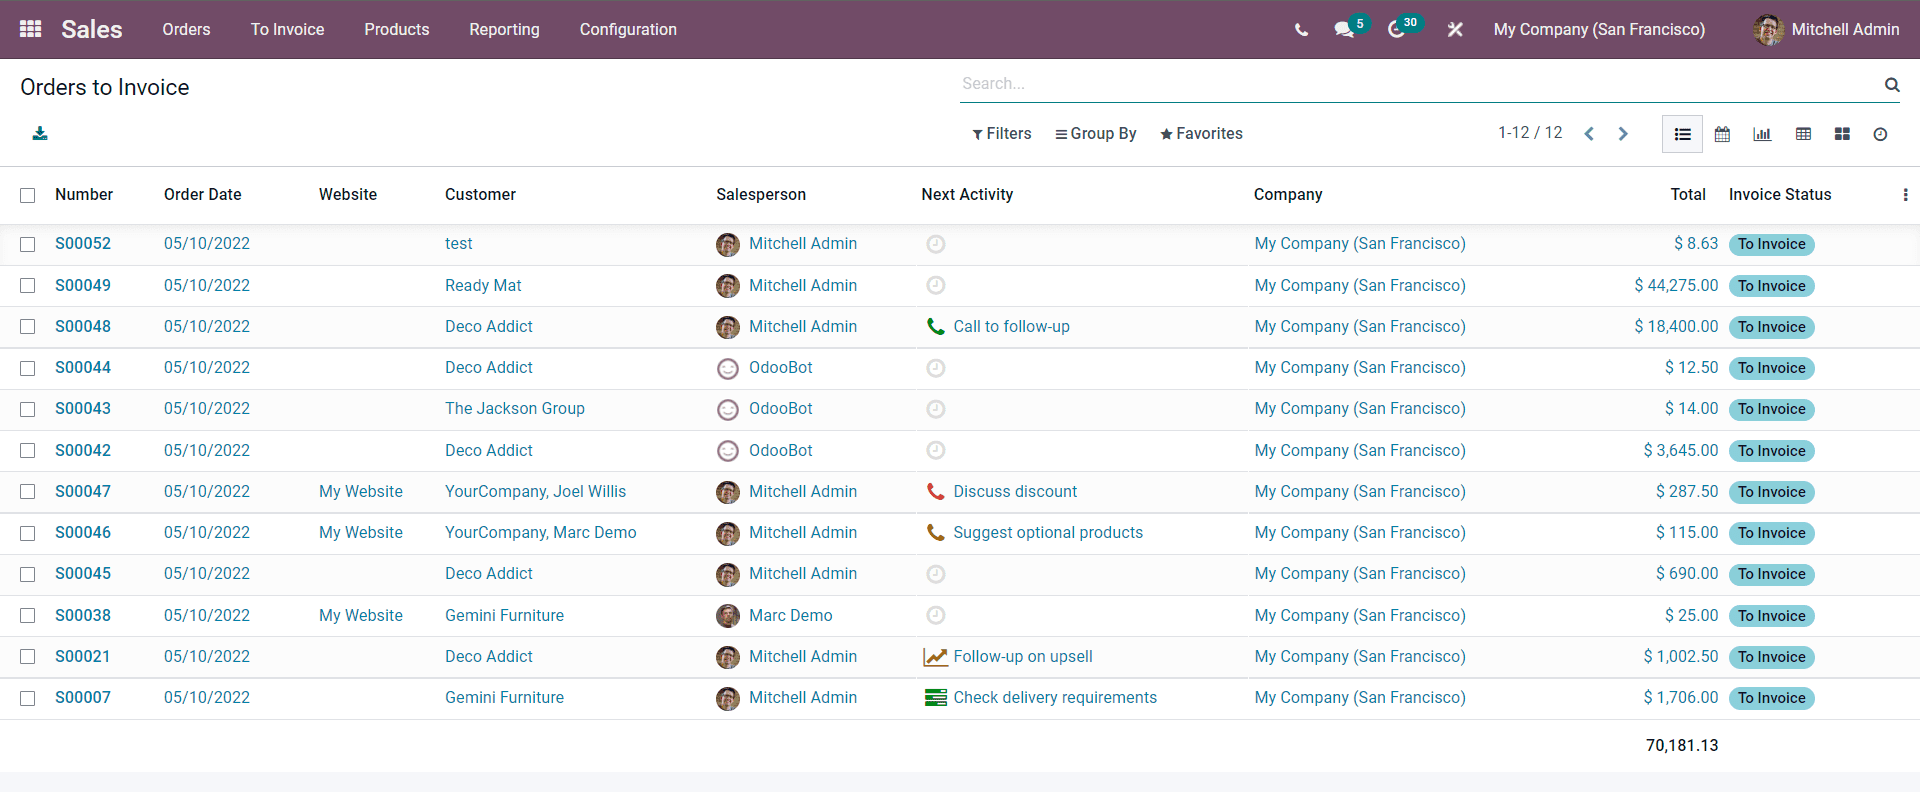
The orders to invoicing section of the module, as the name suggests, includes all of the orders that are waiting to be invoiced. You can see that Under the Invoice status section of the page, the status is To Invoice.
You can click on any orders to access their respective page, as shown below.
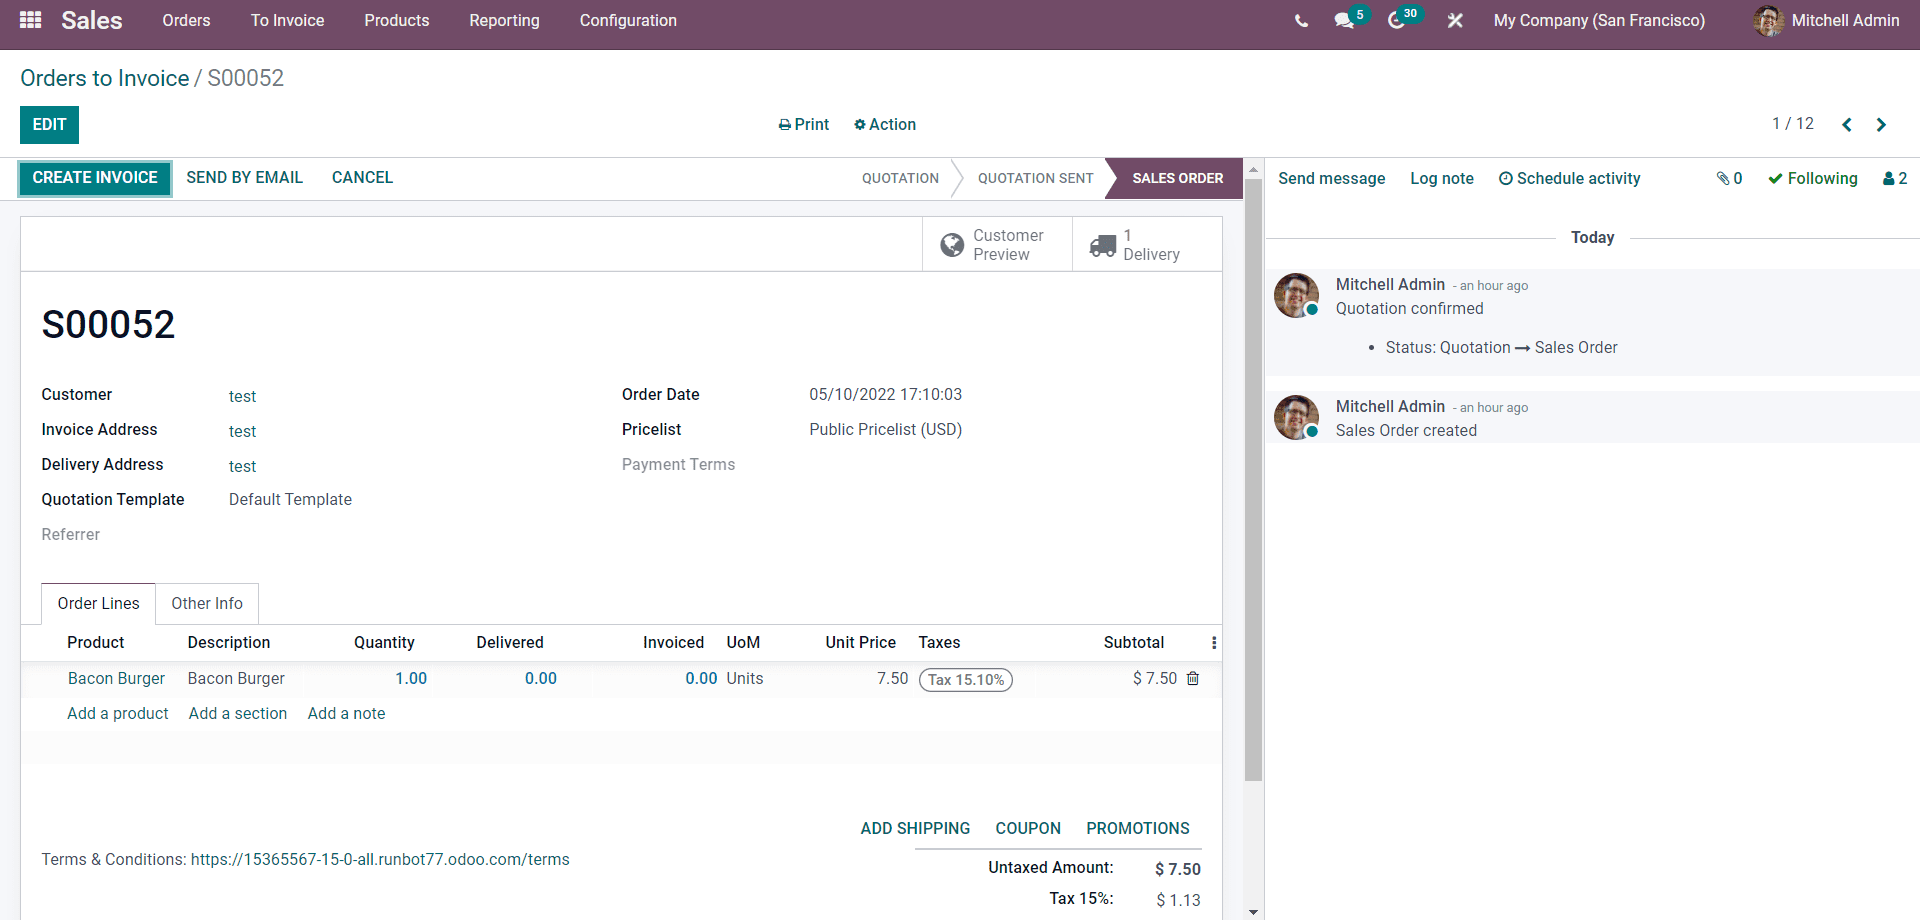
You can have a complete overview of the order from this page, including the invoicing details for generating the invoice. The CREATE INVOICE button on the page will let you create an invoice on order, and the tab on it will open up, as shown below.
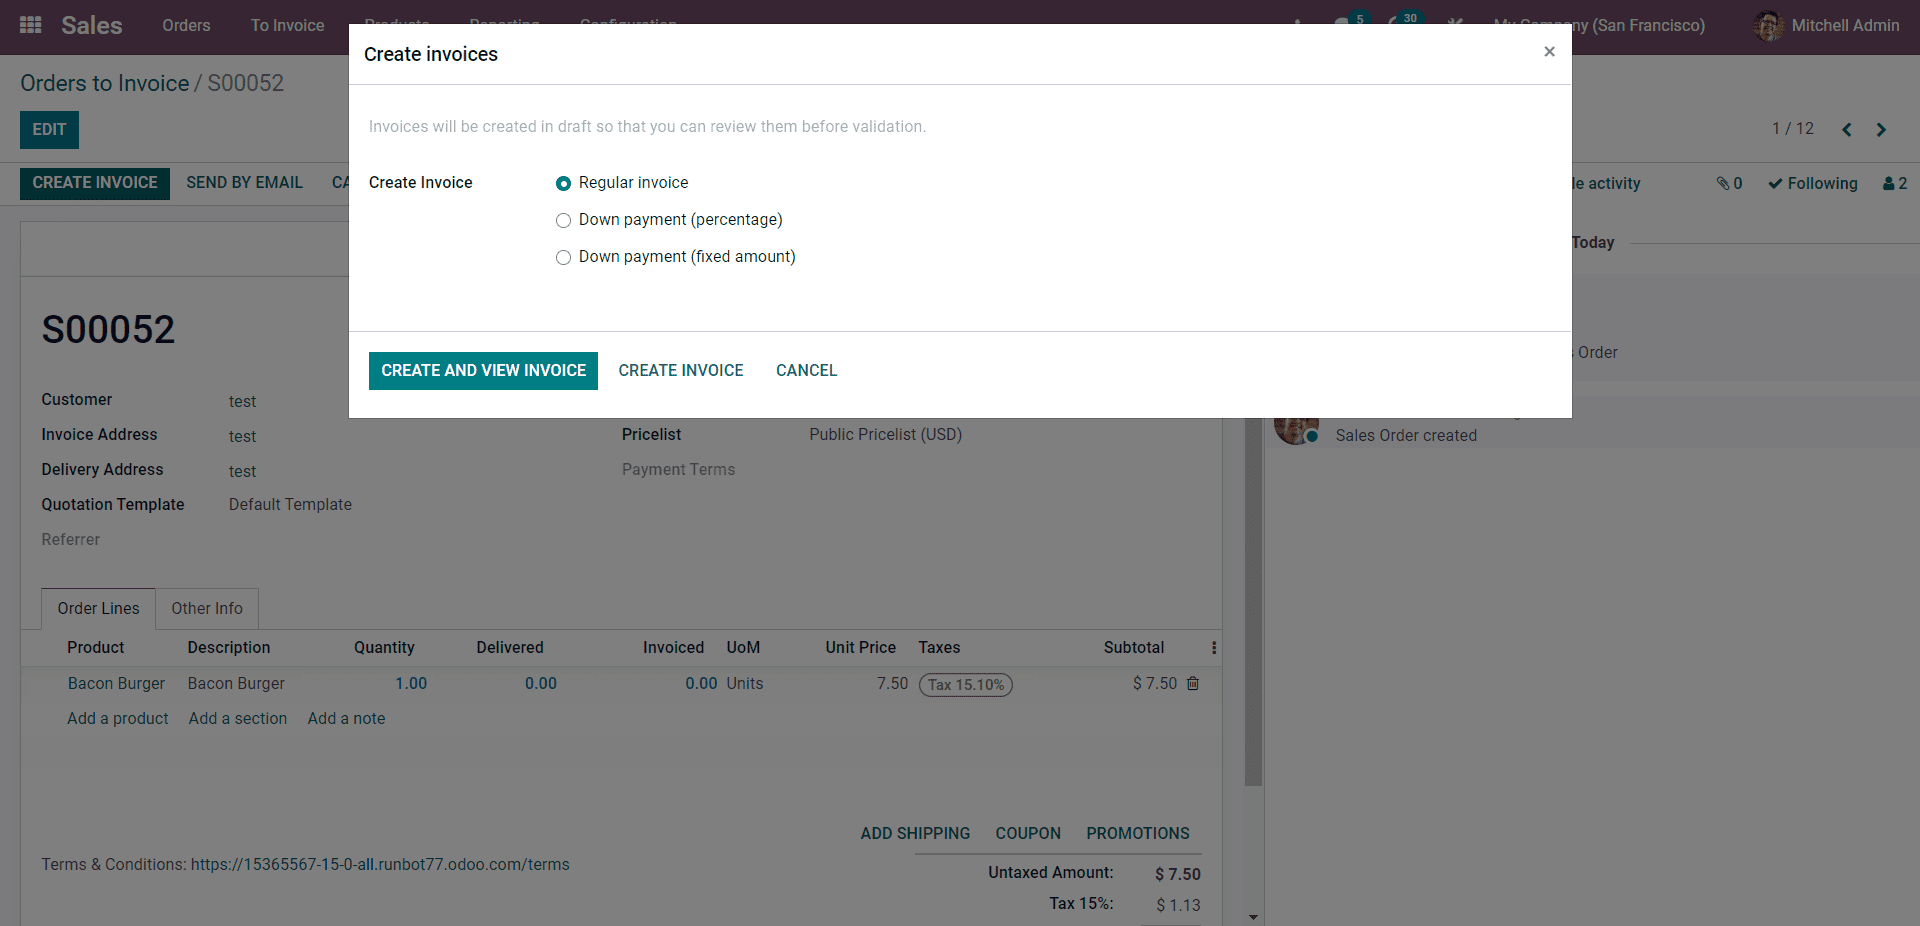
Choose the Invoice type and use the CREATE AND VIEW INVOICE button or CREATE INVOICE button to do the same.
The draft invoice page will open up as shown below if you have opted for the CREATE AND VIEW option.
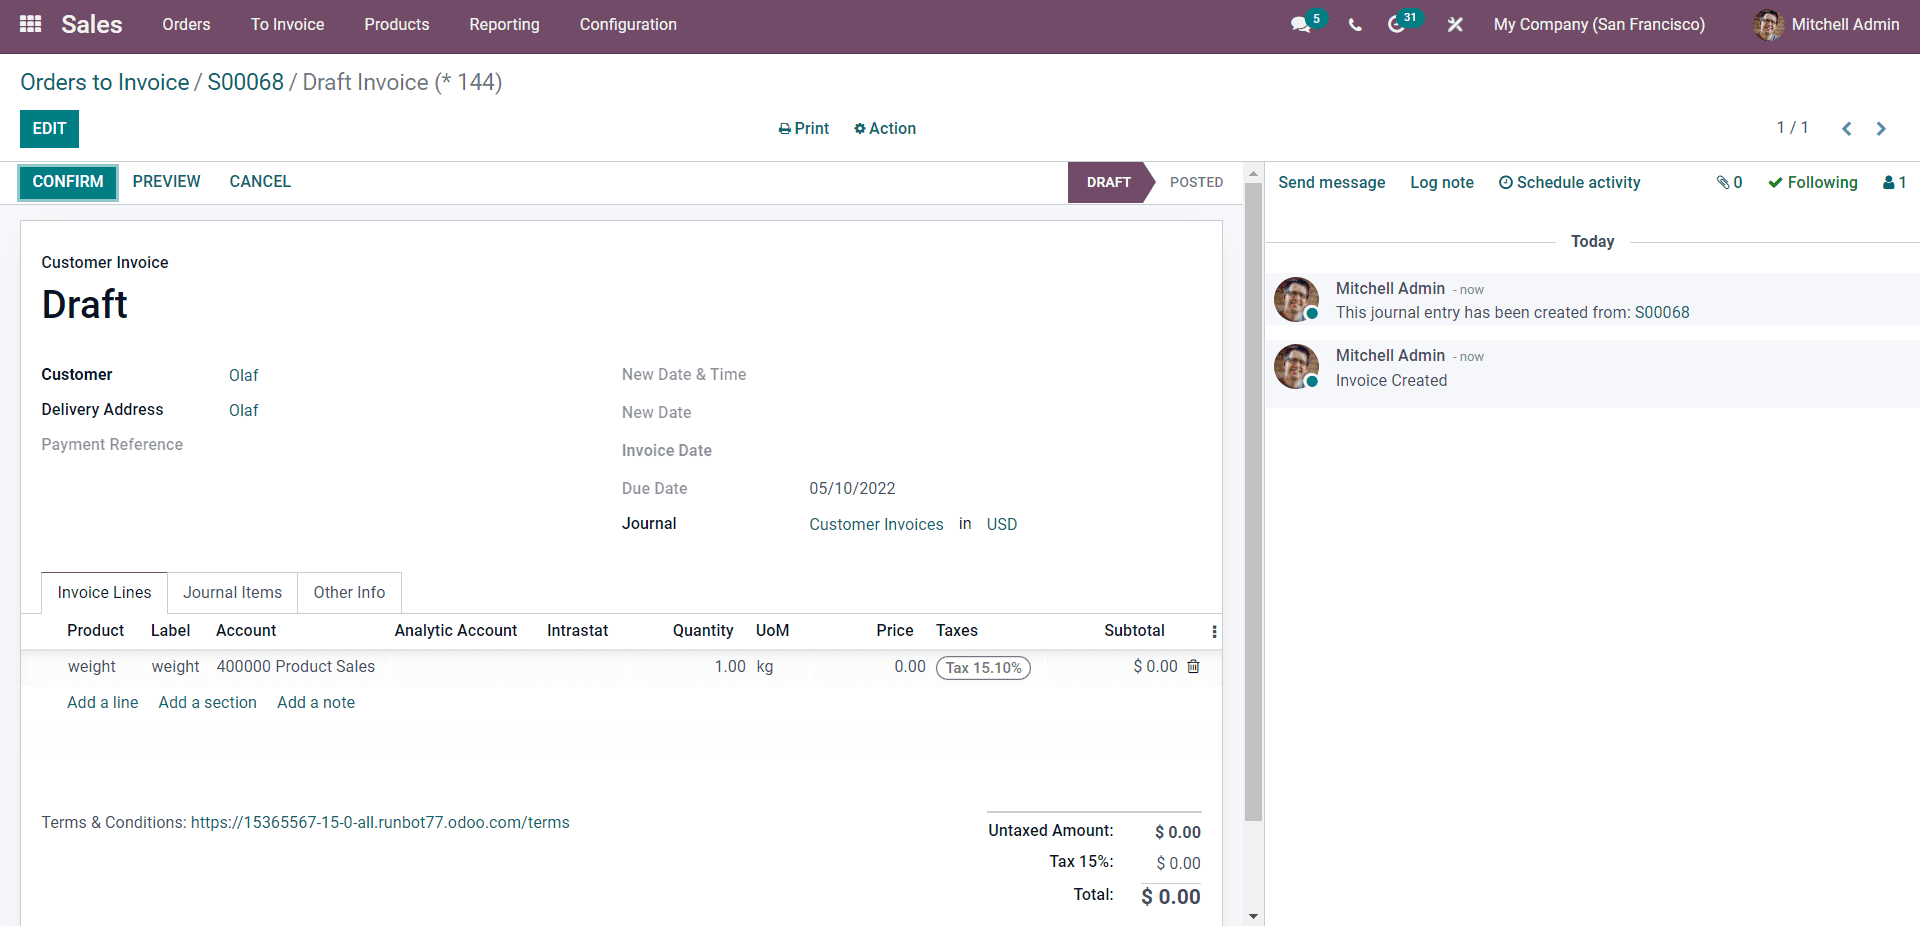
This is the most basic invoice format with the Sales and Accounting modules. There are many advanced features attached to Odoo invoicing to satisfy all of your business invoicing requirements. Follow our blog page to learn more about the various Invoicing procedures with Odoo 15 Sales Module.
The Sales module of Odoo is highly integrated with the Accounting module of Odoo's efficient Invoice management. The integration helps the Sales module to have direct access to the customers and the related info for Invoice registration or creation through the Accounting module. The integration will also let the modules have direct access to the Journals to enter the Invoices for easy data management and accessibility.
Every feature and tool of Odoo invoicing will be fully integrated into the module for generating maximum user accessibility. Follow our blogs for more on Invoicing with all of the modules in Odoo.