Using the expense module in Odoo 16, tracking and managing employee expenditures is simple. Employees can do this by submitting their expenses and receipts for authorized staff to assess and approve. The reimbursement process can be streamlined by automatically rebilling the expenses after managers have been accepted and recording them as payable to the customer. The many capabilities of Odoo 16 also make it simple to track and report staff expenses, enabling effective financial management for the company.
With the help of this expense module, reimbursement expenses can be done in two different ways. One is to directly reimburse the employee for the sum. If an employee adds an expense that was paid for to the firm and includes a receipt, authorized staff will evaluate and approve it to ensure that it complies with company regulations. The expenses will be reimbursed and noted as payable to the employee after approval.
The second option is to include the staff expenses in their salary. Payslips can be used in Odoo 16 to process employee expense reimbursements by first entering the expenses in the expense module and then connecting them to the employee's payslip. This streamlines the reimbursement procedure inside the payroll cycle by guaranteeing that the reimbursement amount is included in the payroll computation.
Let's see how these reimbursement operations are set up and controlled using Odoo 16.
Expense Reimbursement to Employee
The first way of reimbursing expenses is that an employee may receive a straight refund for a cost that has been authorized by the manager. For this, the employee wishes to use the allocated expense module in Odoo 16 to submit the expenses that they incur while working for the company along with receipts. The designated individual will next review and decide whether to approve or reject the expense. The employee will quickly receive a new invoice for the approved expense.
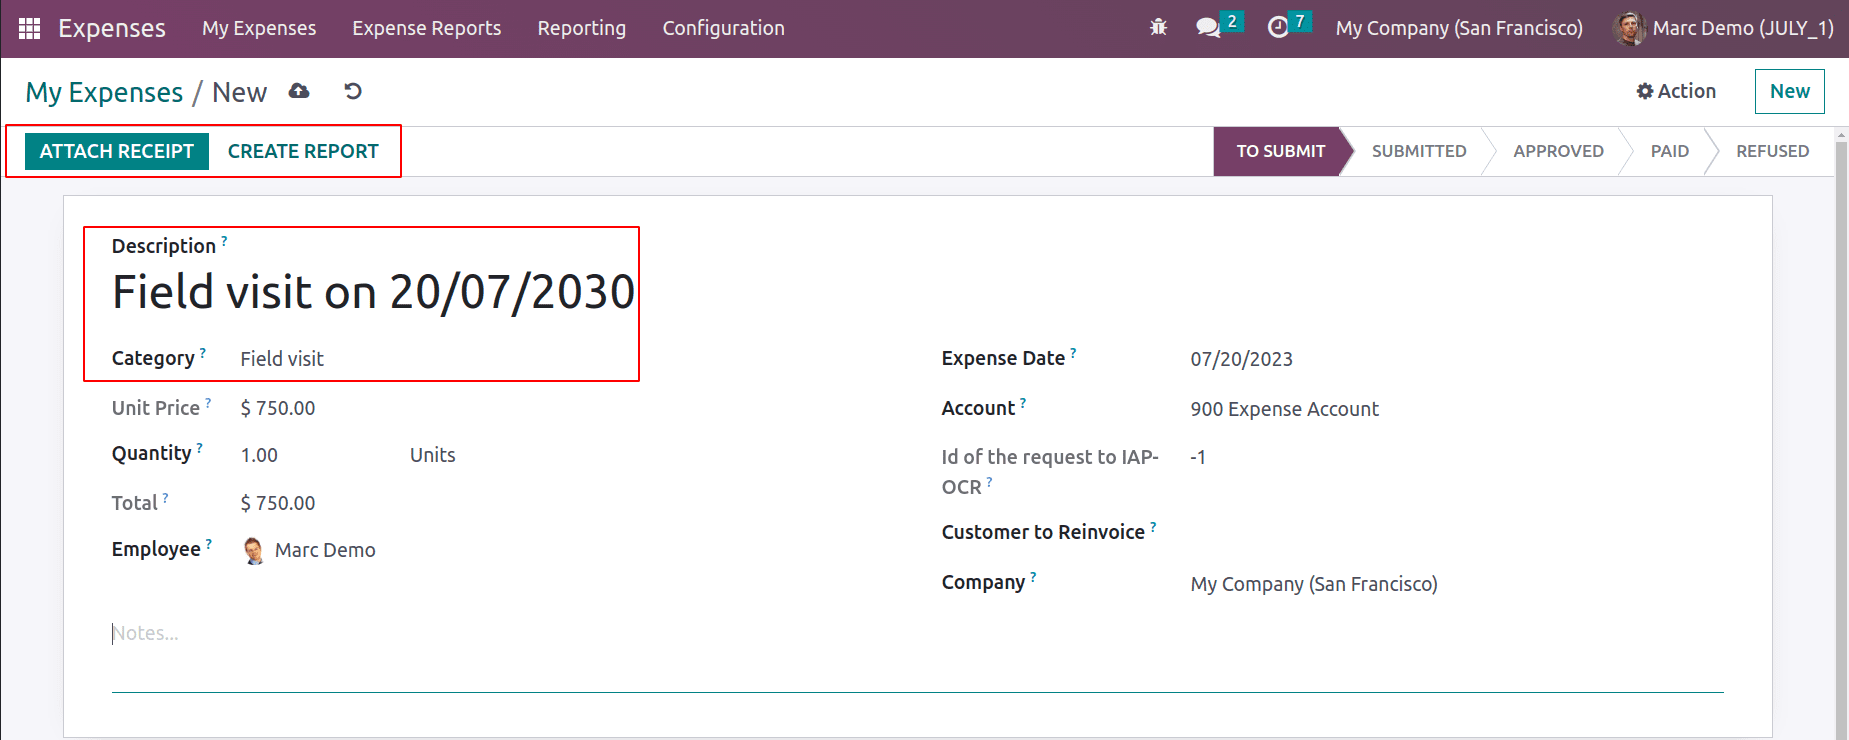
To create a new expense, click on the New button on the ‘My Expenses’ menu. Here, the user is an employee named Marc Demo.

A new expense is created for the employee Marc Demo. The description is added as ‘Field visit on 20/07/2030’. The previously created category Field Visit is added here. So the cost added is updated as Unit Price. Add the quantity. Currently, 1 quantity is added, so the total is updated as $750.
This newly created one has not been submitted, so the stage is in ‘To Submit’. The employee can attach any receipt or bill regarding this expense using the Attach Receipt button. Click on the Create Report button; the employee can add the Expense to Draft.
The created expense can be seen inside the Expense Report. So open the My Report menu from the ‘My Expense’ tab to see all the expense reports of this employee Marc Demo.
: My Expense > My Report
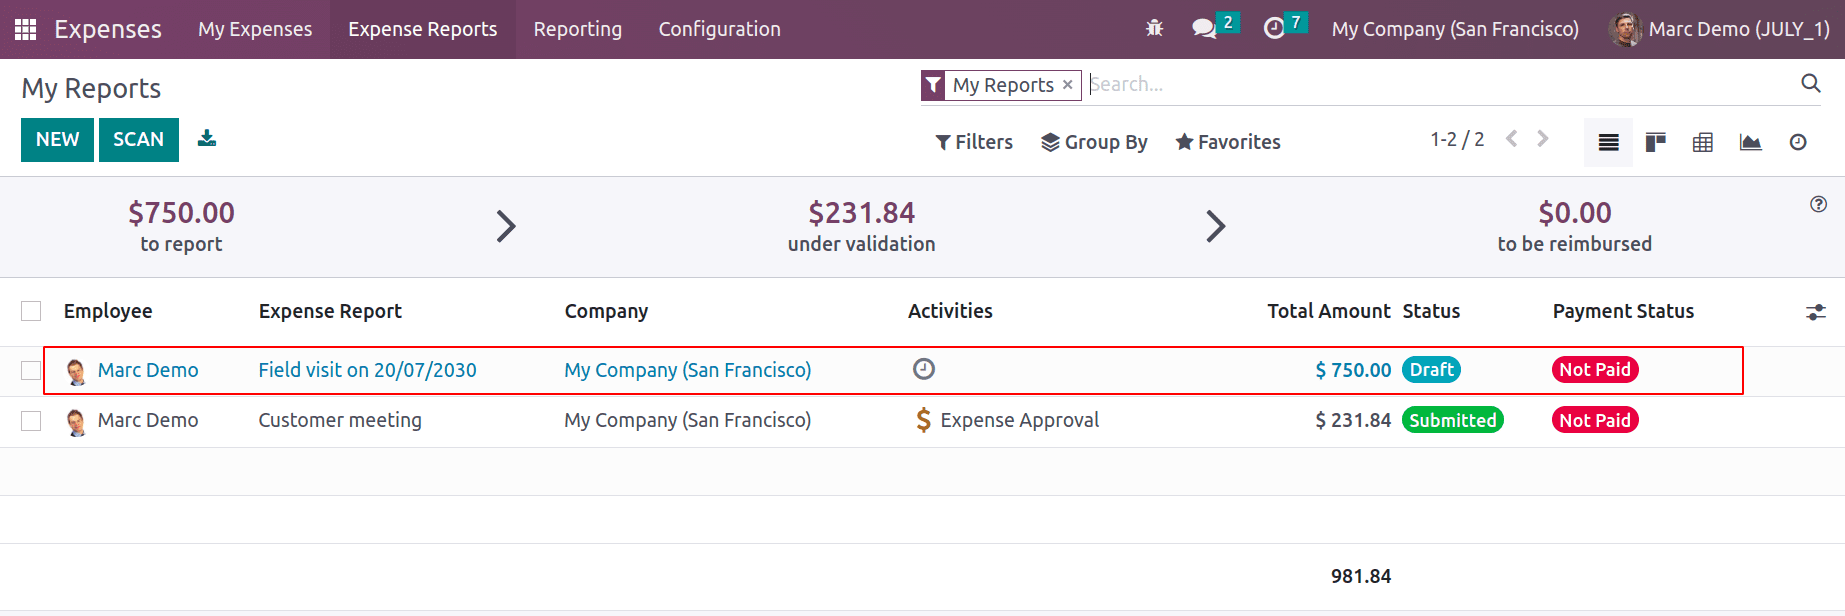
The report contains only one Expense, which is the previously created one. All the expenses added in this report are shown in the smart tab named Expenses. There are two ways of Reimbursement. One is to directly reimburse the amount to the employee. The second one is that the amount is reimbursed to the next payslip of the employee.
If the employee wants to add the amount to his next payslip, click the ‘Report in Next Payslip’ button.
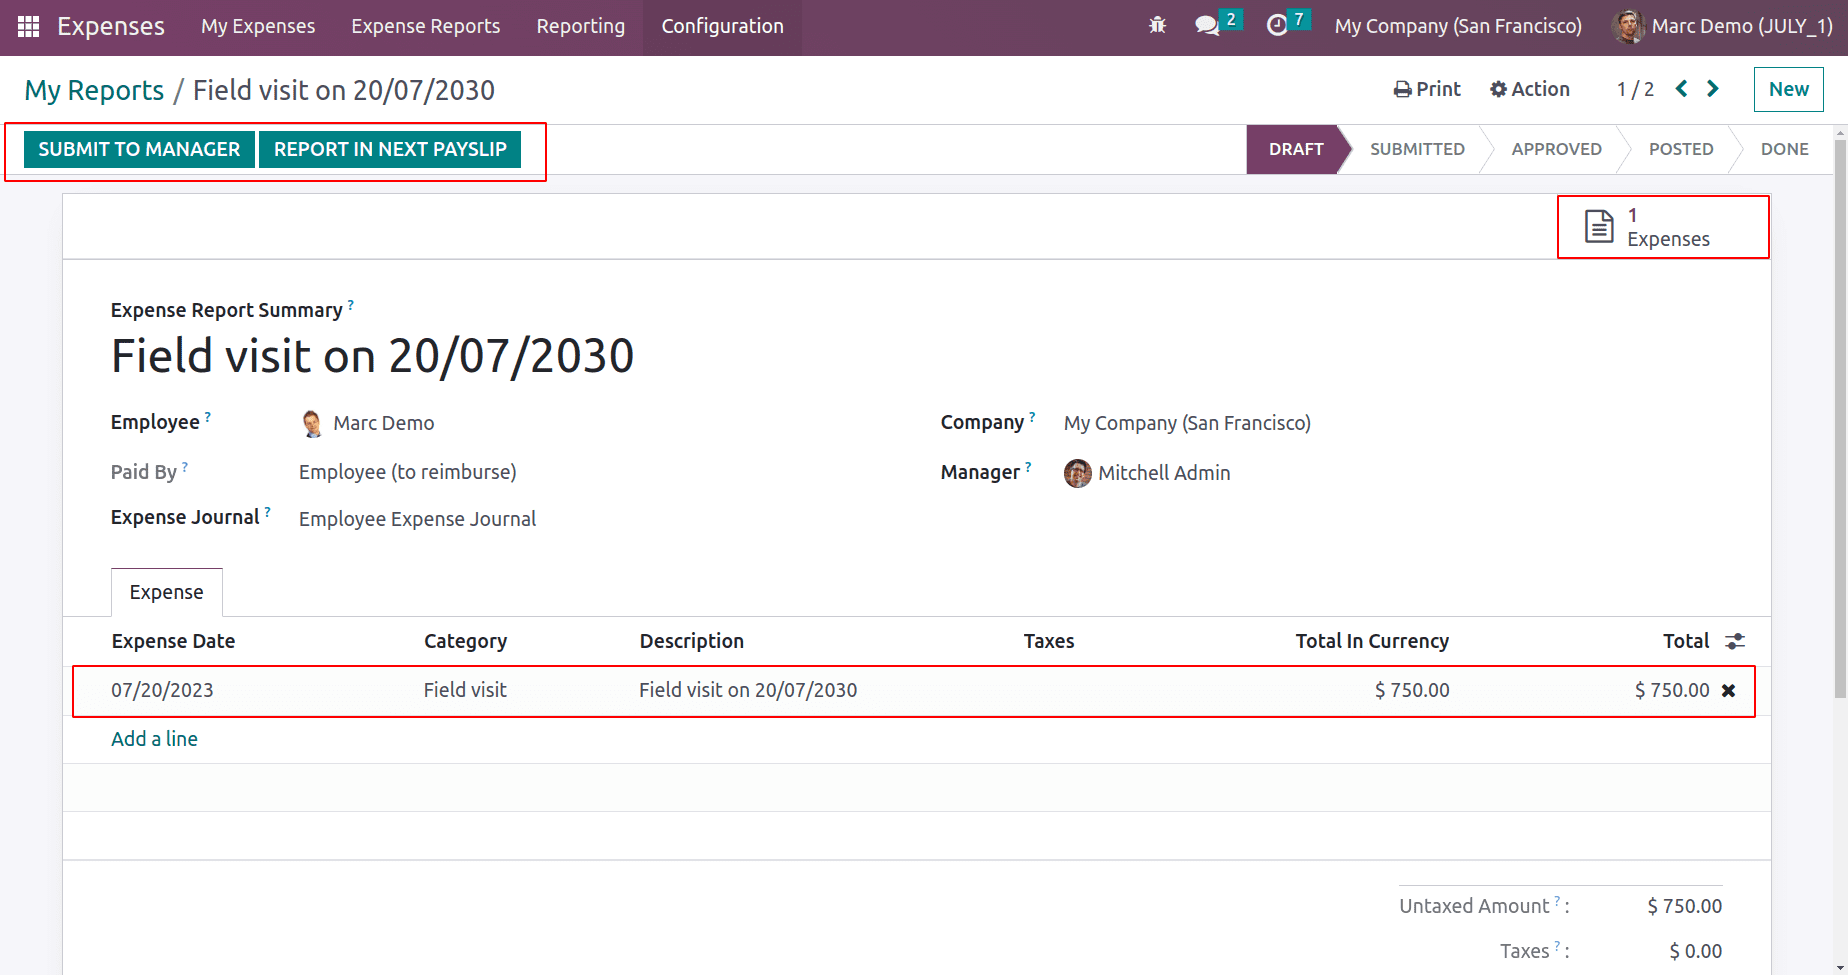
The report must be submitted to the manager for further improvement. The manager wants to check the expenses. An employee may have many expenses and maybe some of them are not for the company or are not affordable for the company. In such cases, the company will not instantly reimburse the amount to the employee. So, the manager will check the expense to give an assurance to the company about the expense. For that, click on the Submit to Manager button.
The manager will check the expense, and he or she has the rights to either Approve or Refuse the expense. So if the Admin login he can view the expense report from the tab Expense Reports.
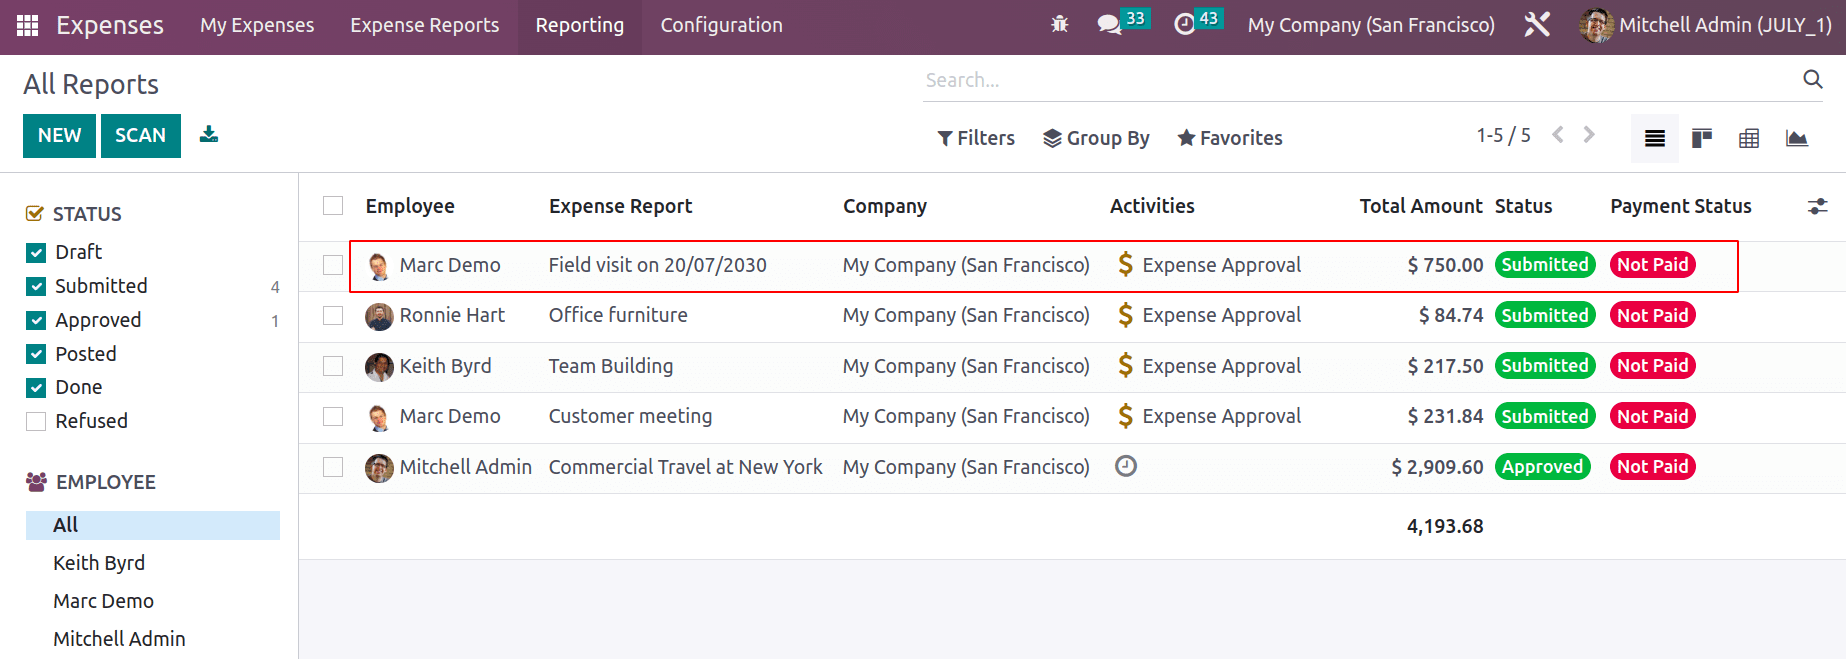
Open the Report. There is the Approve button. After examining the credibility of the expense, approve the expense by clicking the Approve button.
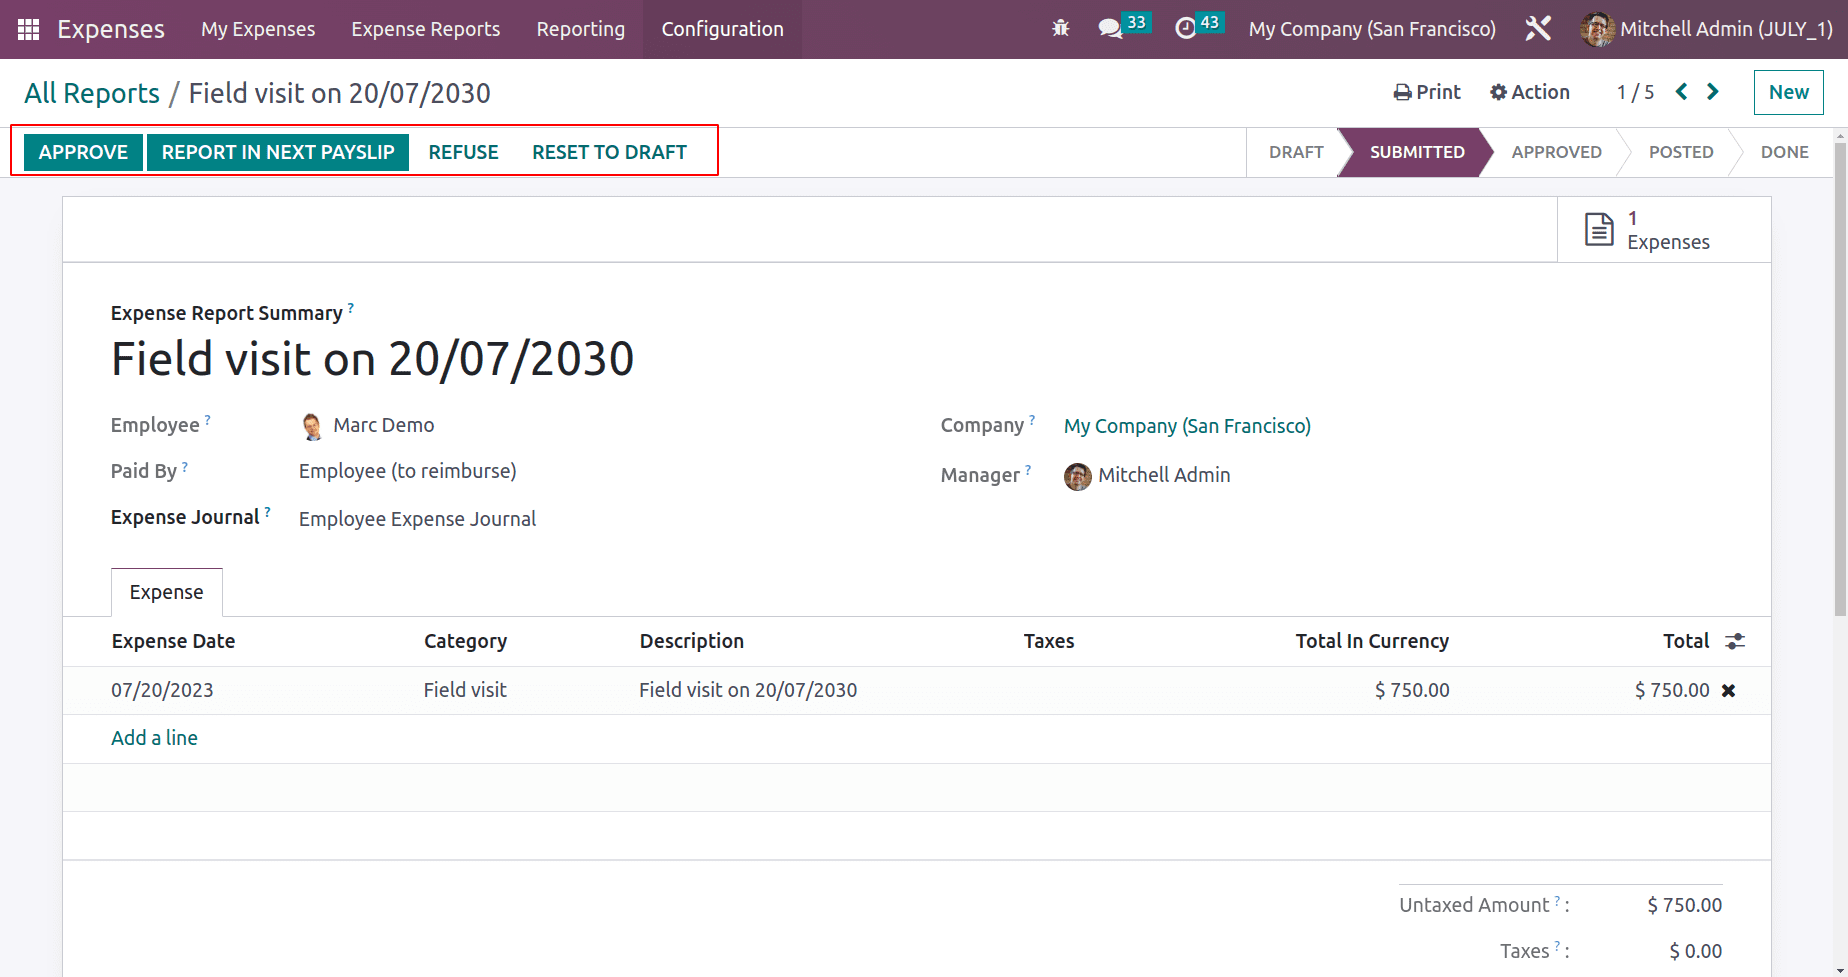
The report then moved to the Approve stage. The user can either Post a Journal entry or Reimburse this to the next employee payslip depending on company policies.
Here, click the Post Journal entry button. The Journal entry will be posted now. The company can give payment to the employee now. For that, click on the Register Payment button.
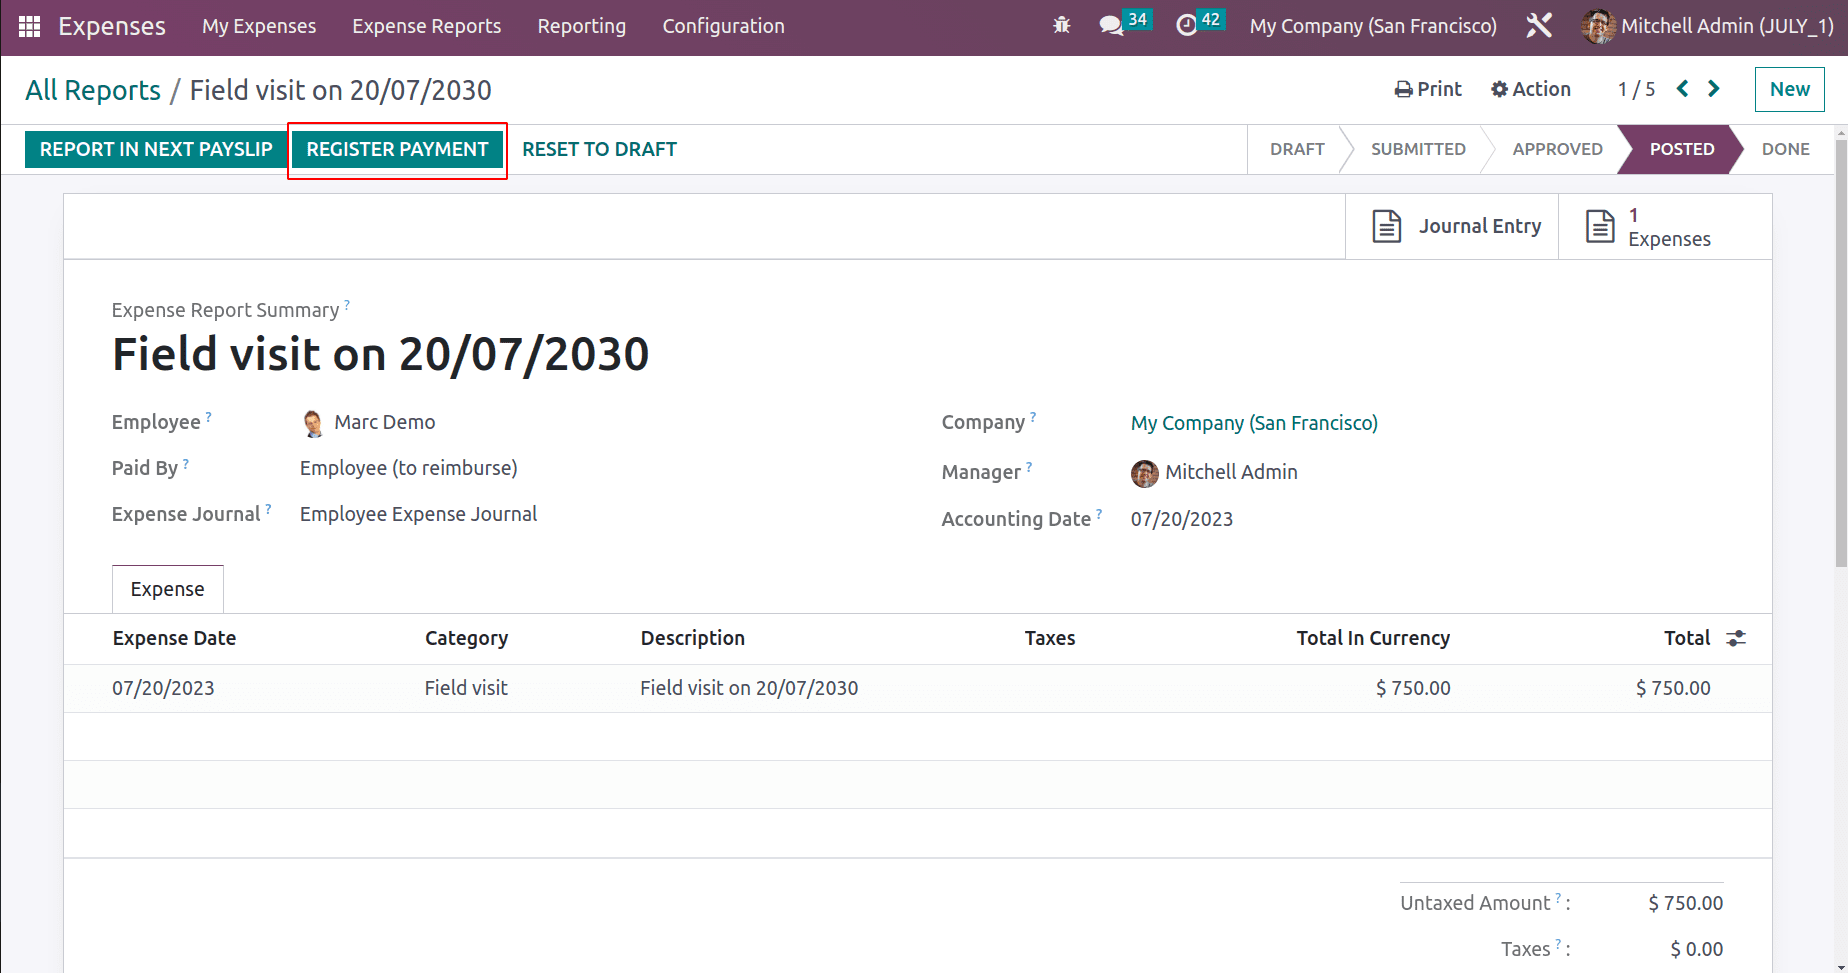
A new popup window will appear there, giving the payment details like Journal, Payment method, Recipient bank, Amount, and Payment date. The memo added is the title of the expense. Click on the Create Payment button.

After that, the expense is in the ‘In Payment’ stage. A smart tab named Journal Entry will appear there.
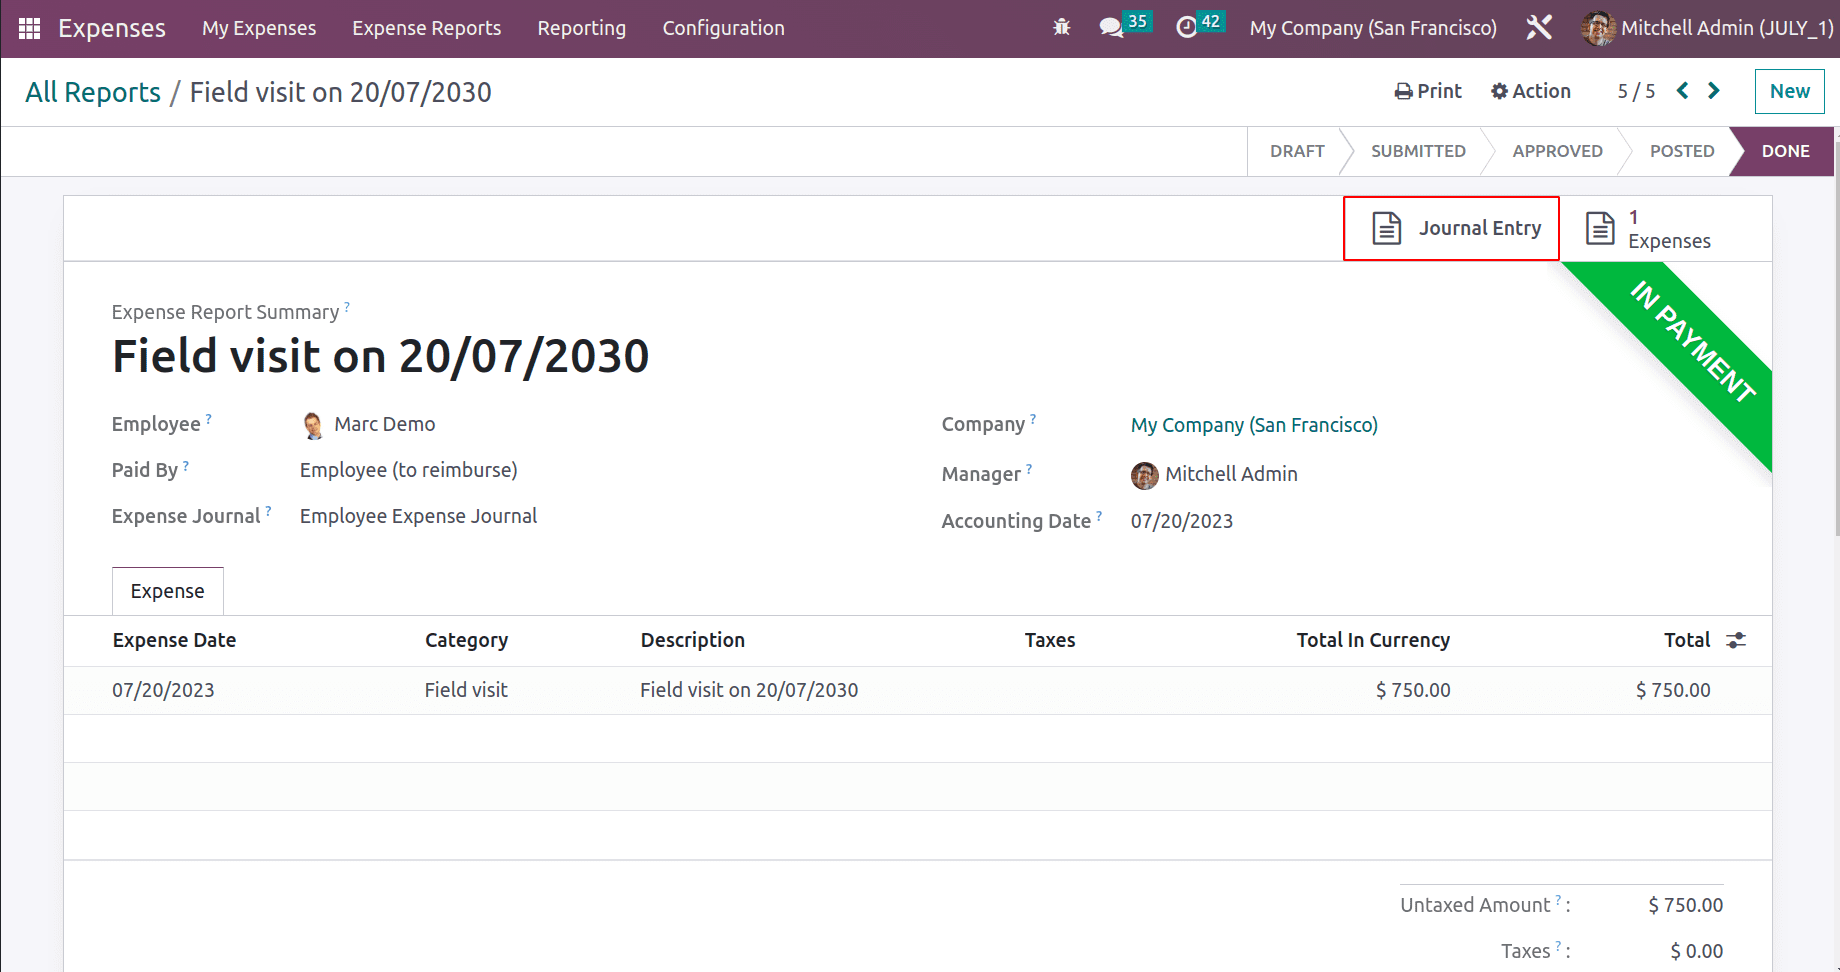
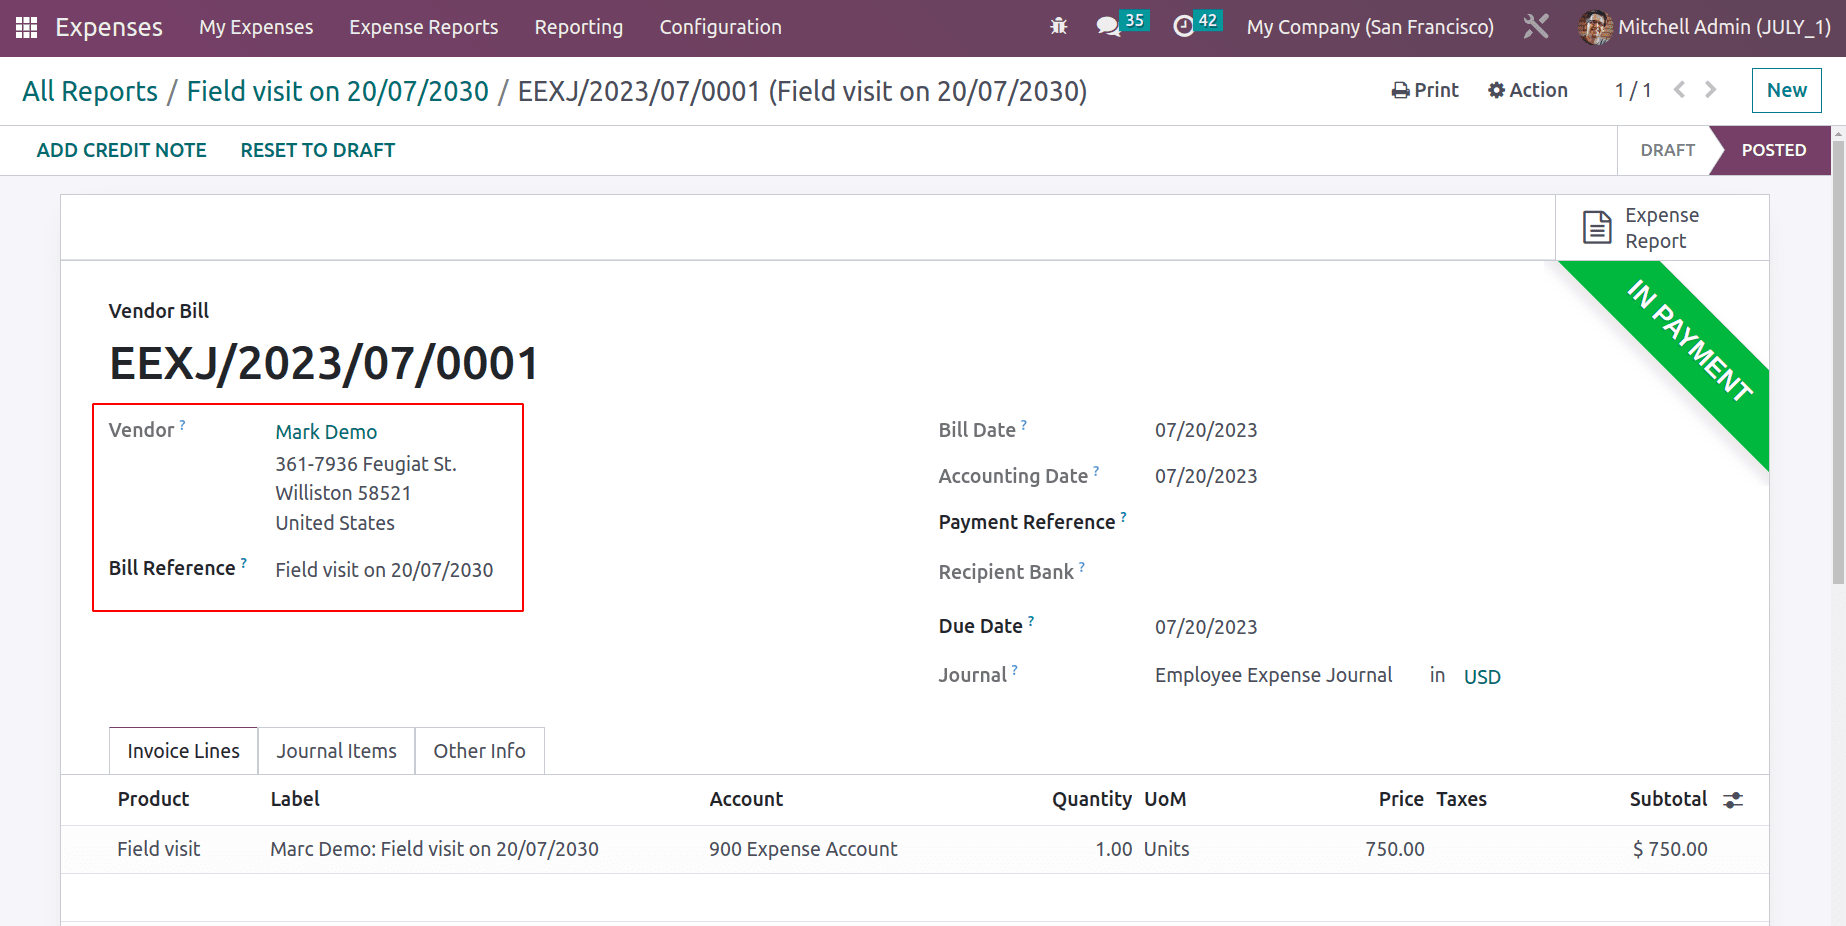
While opening the smart tab Journal Entry, it is a vendor bill to the employee Marc Demo. The bill is in the ‘In Payment’ stage. The created expense amount is now given to the employee here.
Employee Expense Reimbursement through payslip
Payslip can be used in Odoo 16 to process employee expense reimbursement, which simplifies the tracking and payment of employee-incurred costs. An employee's submitted expenditure report is first reviewed and approved by the appropriate manager before being confirmed by the accounting division. The expense amount can be added to the employee's subsequent payslip once it has been verified. This is accomplished by adding the cost amount to the payslip's reimbursements or allowances section as a distinct line item.
Let's check how employee expense is reimbursed through payslips. There is a project named Field Visit, and the employee Marc Demo is working on that project. The employee has a field visit to complete the task. So the expense taken by the employee during this field visit can be added to his next payslip.
Here, the employee Marc Demo had an expense. So let's create a new expense for Marc Demo from the Expense module. The description is added as a Field Visit. The category chosen is which was created previously. So the unit price is added automatically based on the chosen category.
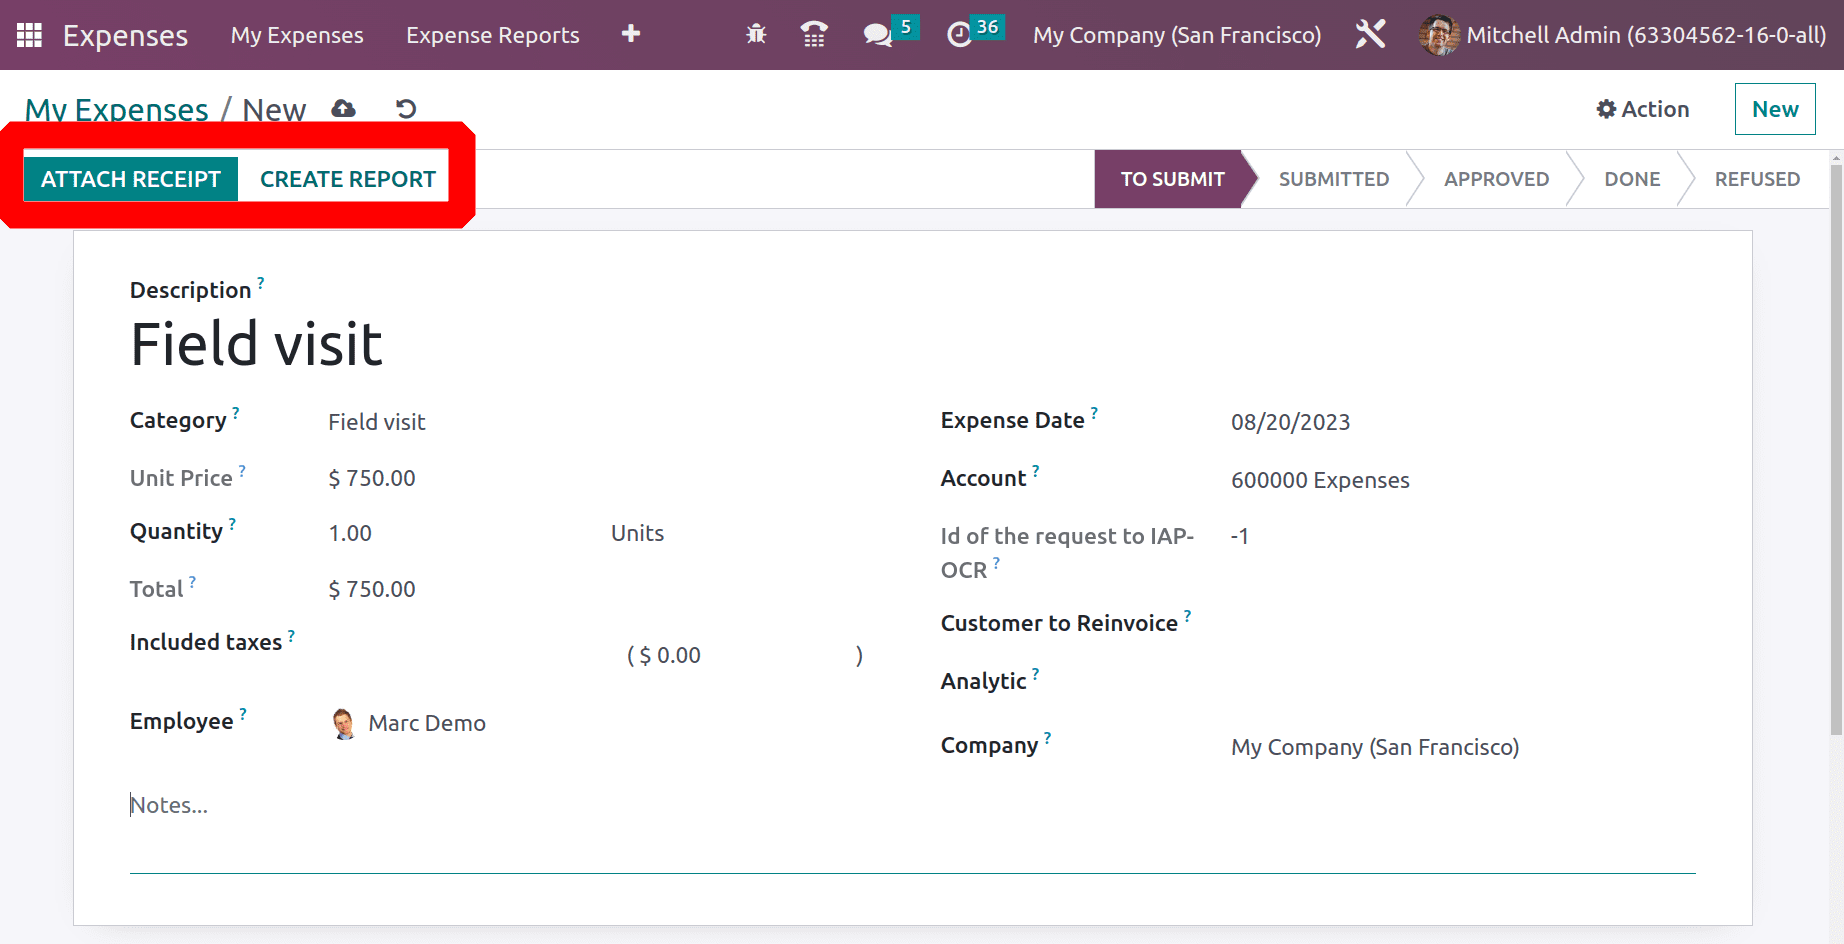
The Attach Receipt button can be used to upload any receipt related to this expense. Then click the Create Report button to add this expense to an expense report. The created expense is added to the report. The user needs Manager approval, so submit the report to the manager. The status of the report is changed to Submitted.
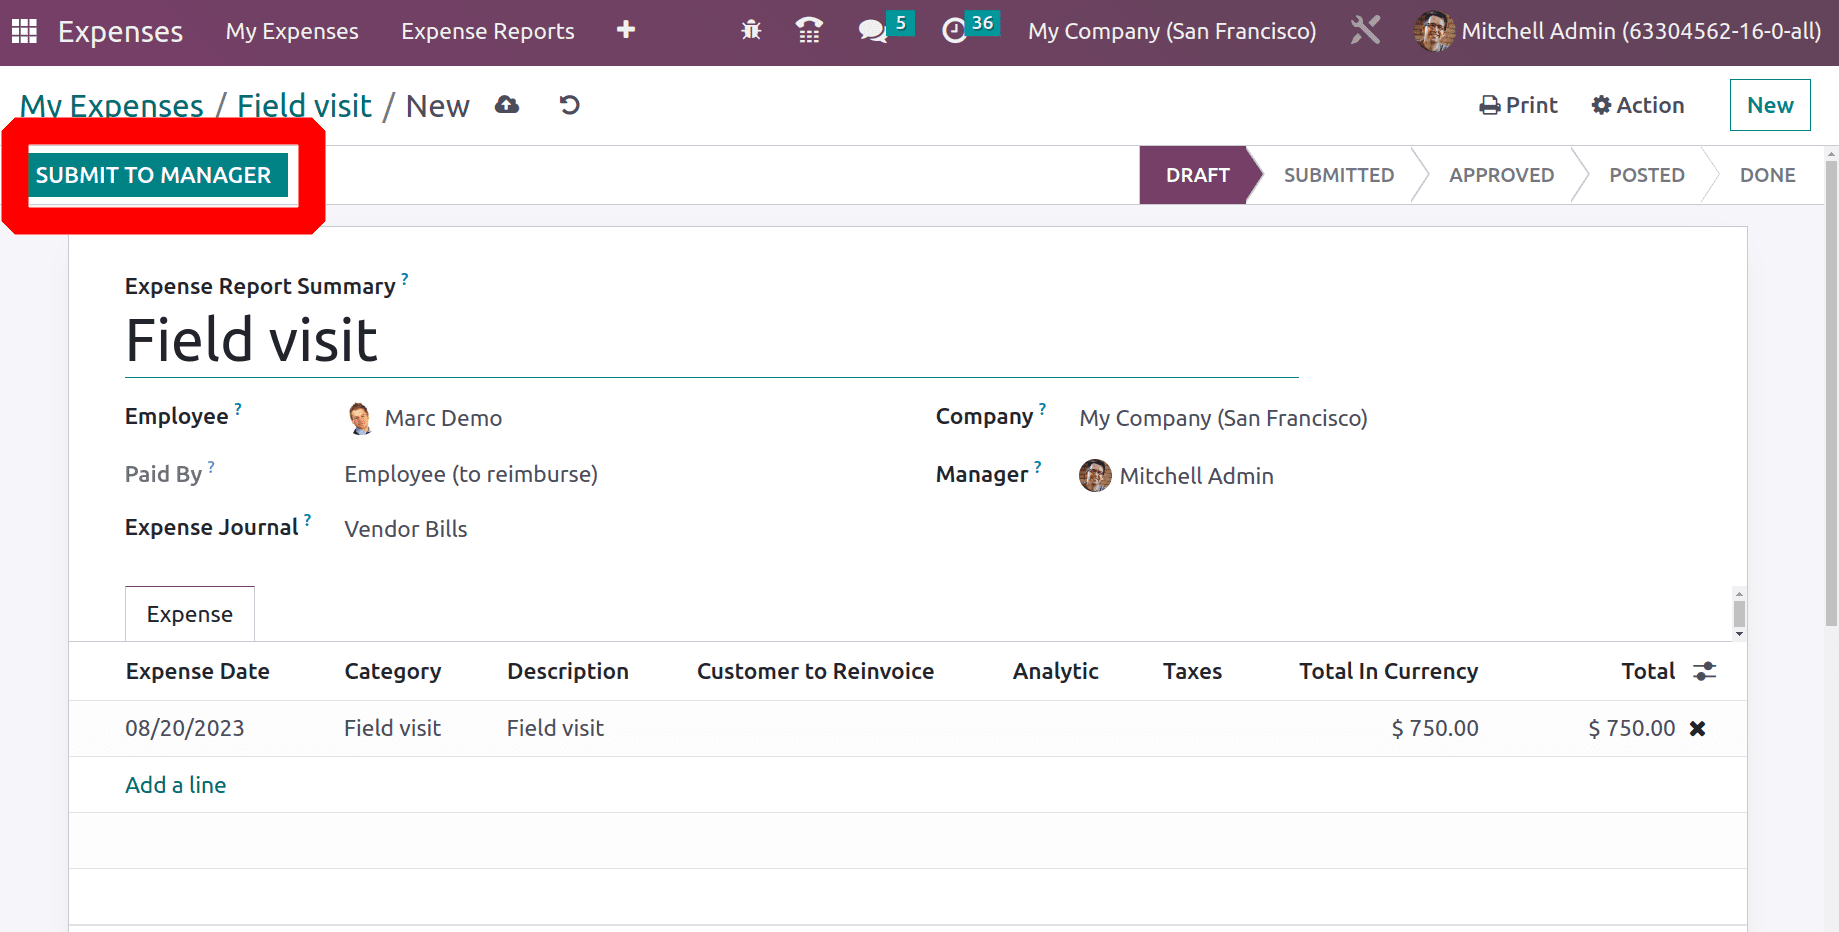
The manager can either Approve or Refuse the expense after checking its credibility. Here the user clicks the Approve button. The approved expense report contains one smart tab. which is Expense, while open the created expense can be viewed there. Users can either post the expense journal entry by clicking the button Post Journal Entries, which we already discussed.
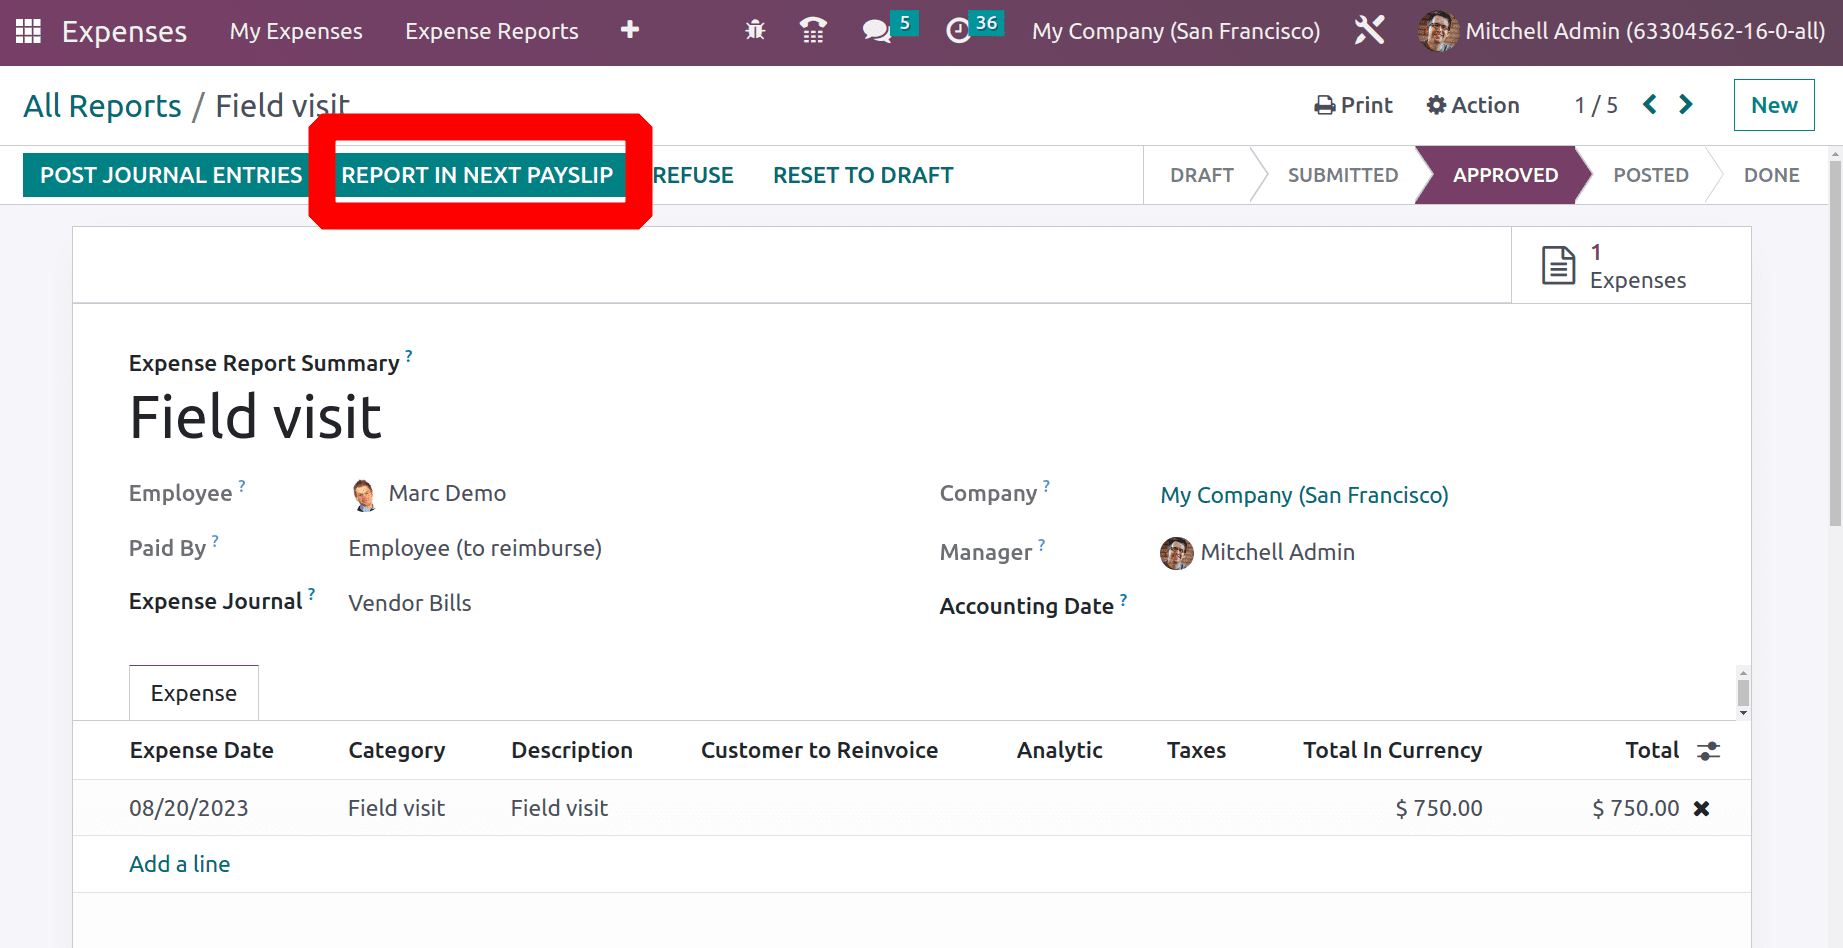
So, there is another button near the Post Journal Entries button. While clicking on the REPORT IN NEXT PAYSLIP button, add the created expense to the payslip.
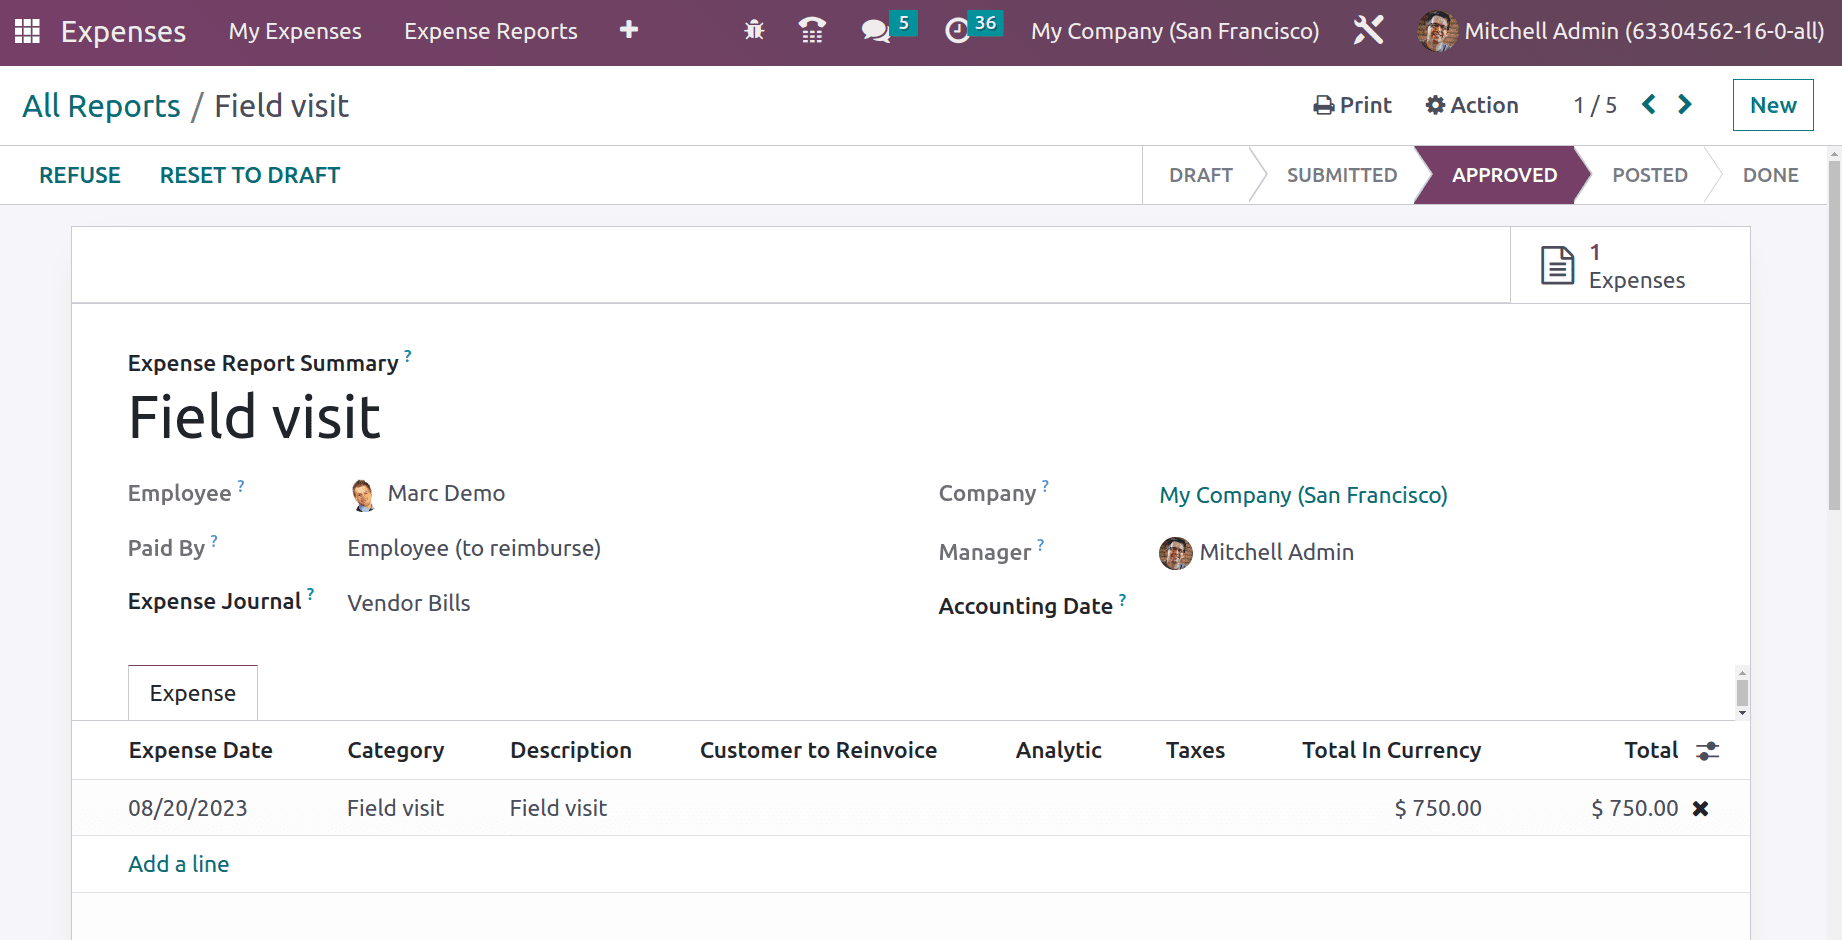
Therefore, the employee's cost Since Marc Demo was created on August 20, 2023, the employee will receive the expense amount in September's wage. Go to the Payroll module to view the payslip.
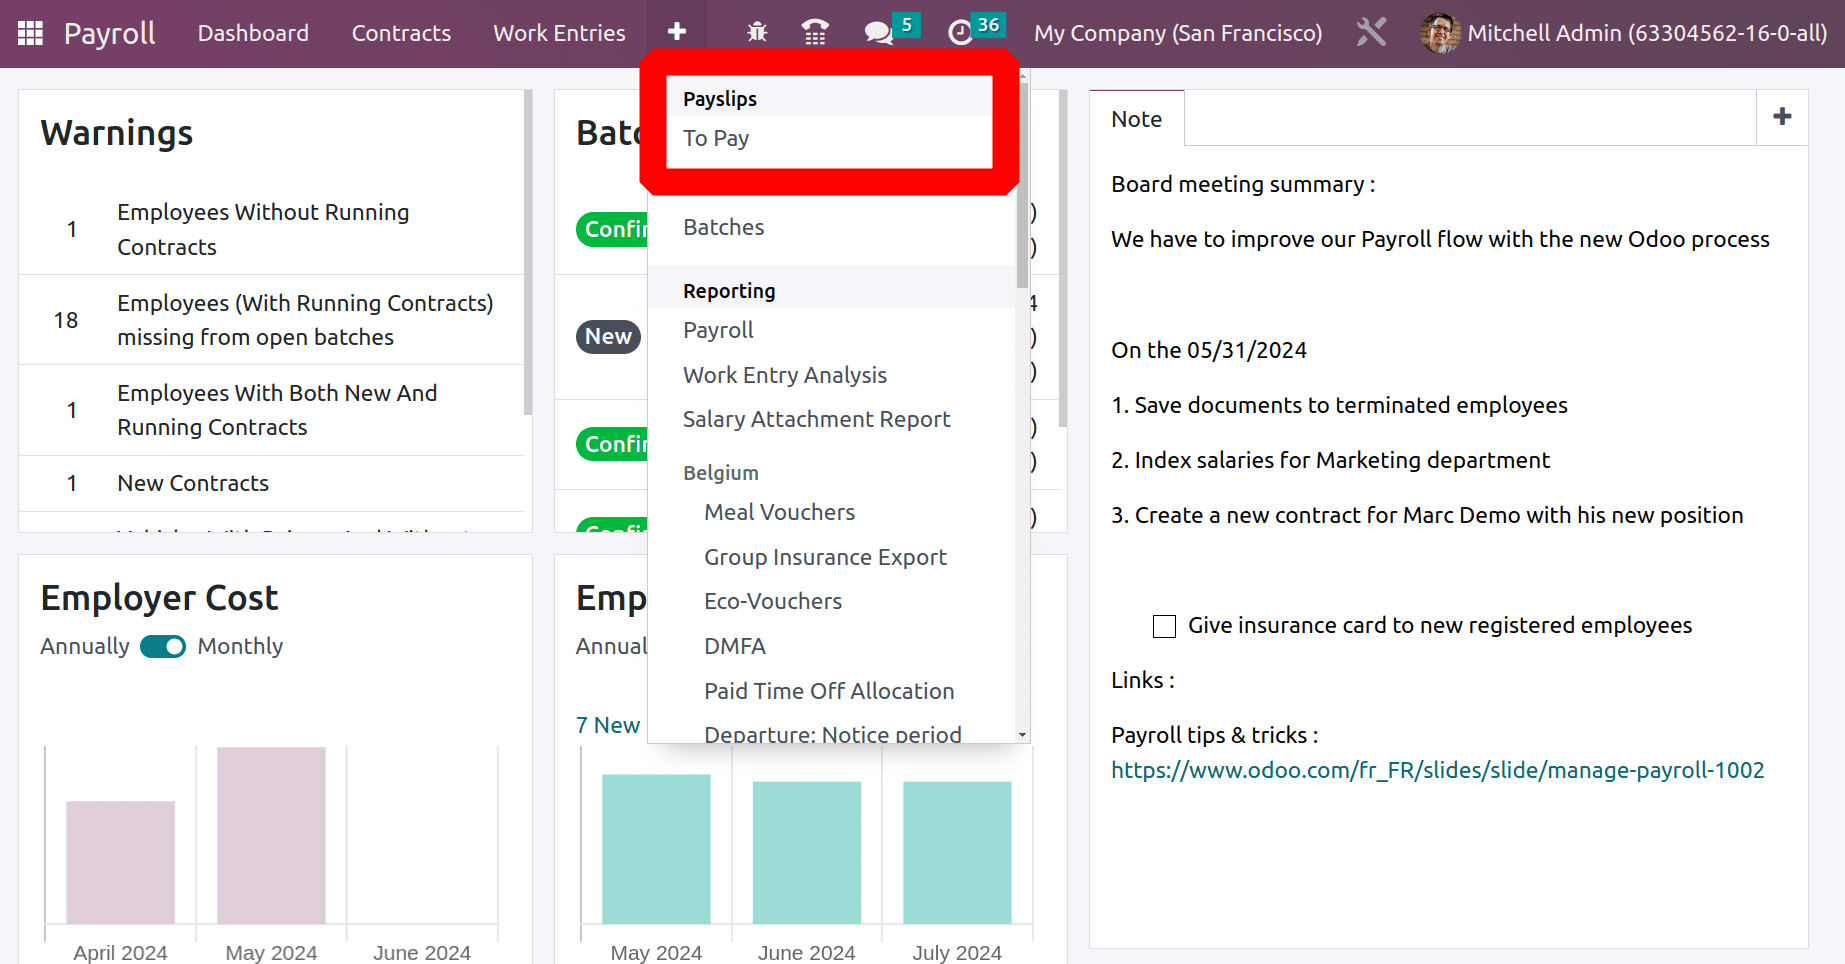
To compute the employee payslip, select To Pay from the Payslips menu. Select Marc Demo, the employee, as the expense is incurred on his behalf. Next, the relevant month. Since the expense in this case was incurred in August, September is selected as the payslip period. Then the COMPUTE SHEET button allows the user to compute the salary.
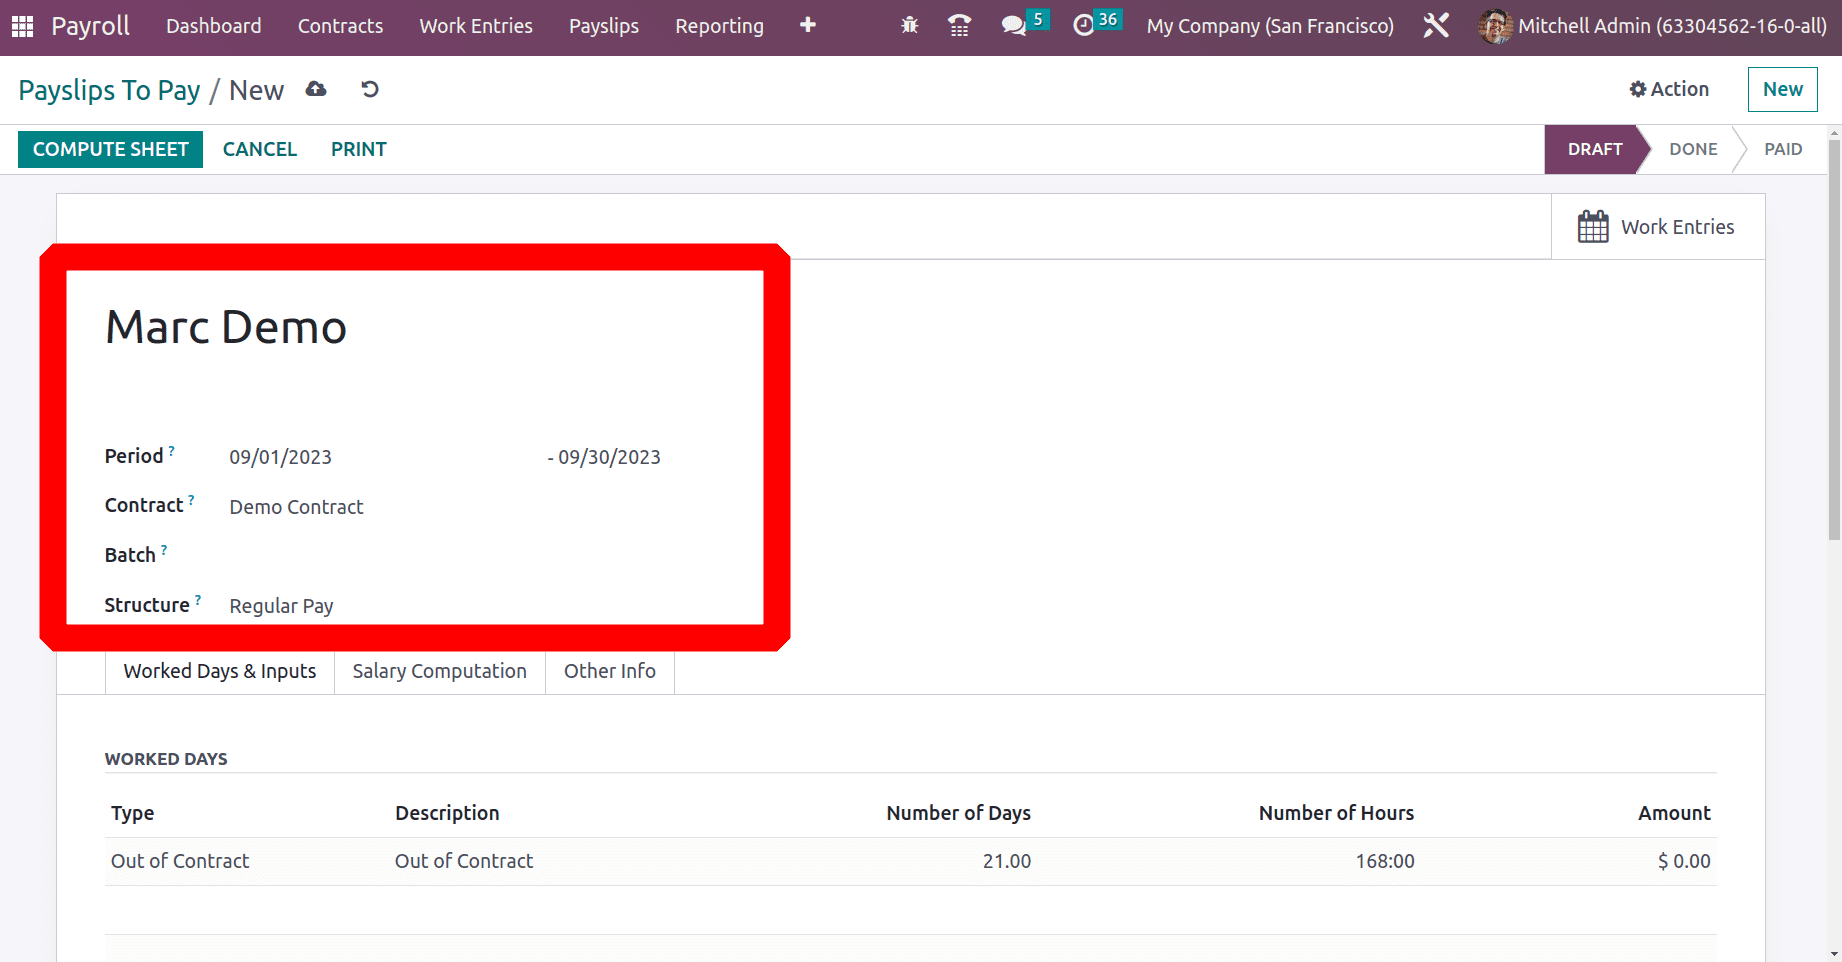
Before computing the payslip, just check the necessary rule for adding the expense to the payslip. This can be done by going through the internal link of the Structure.
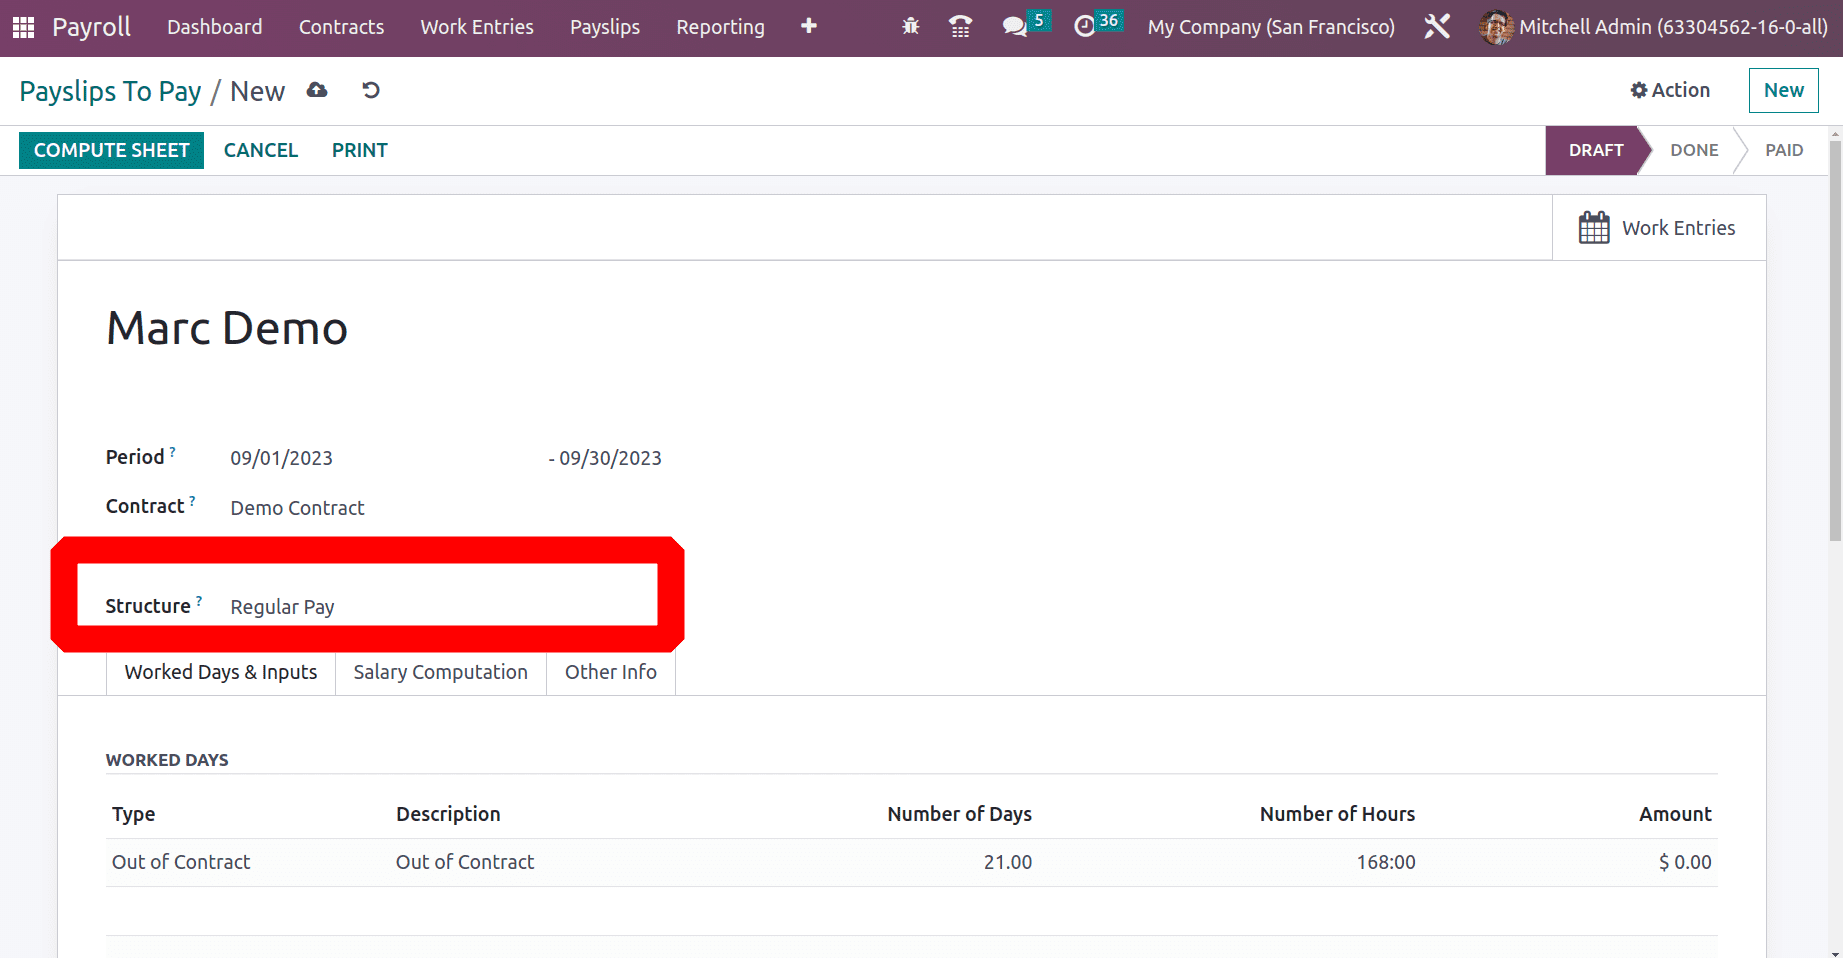
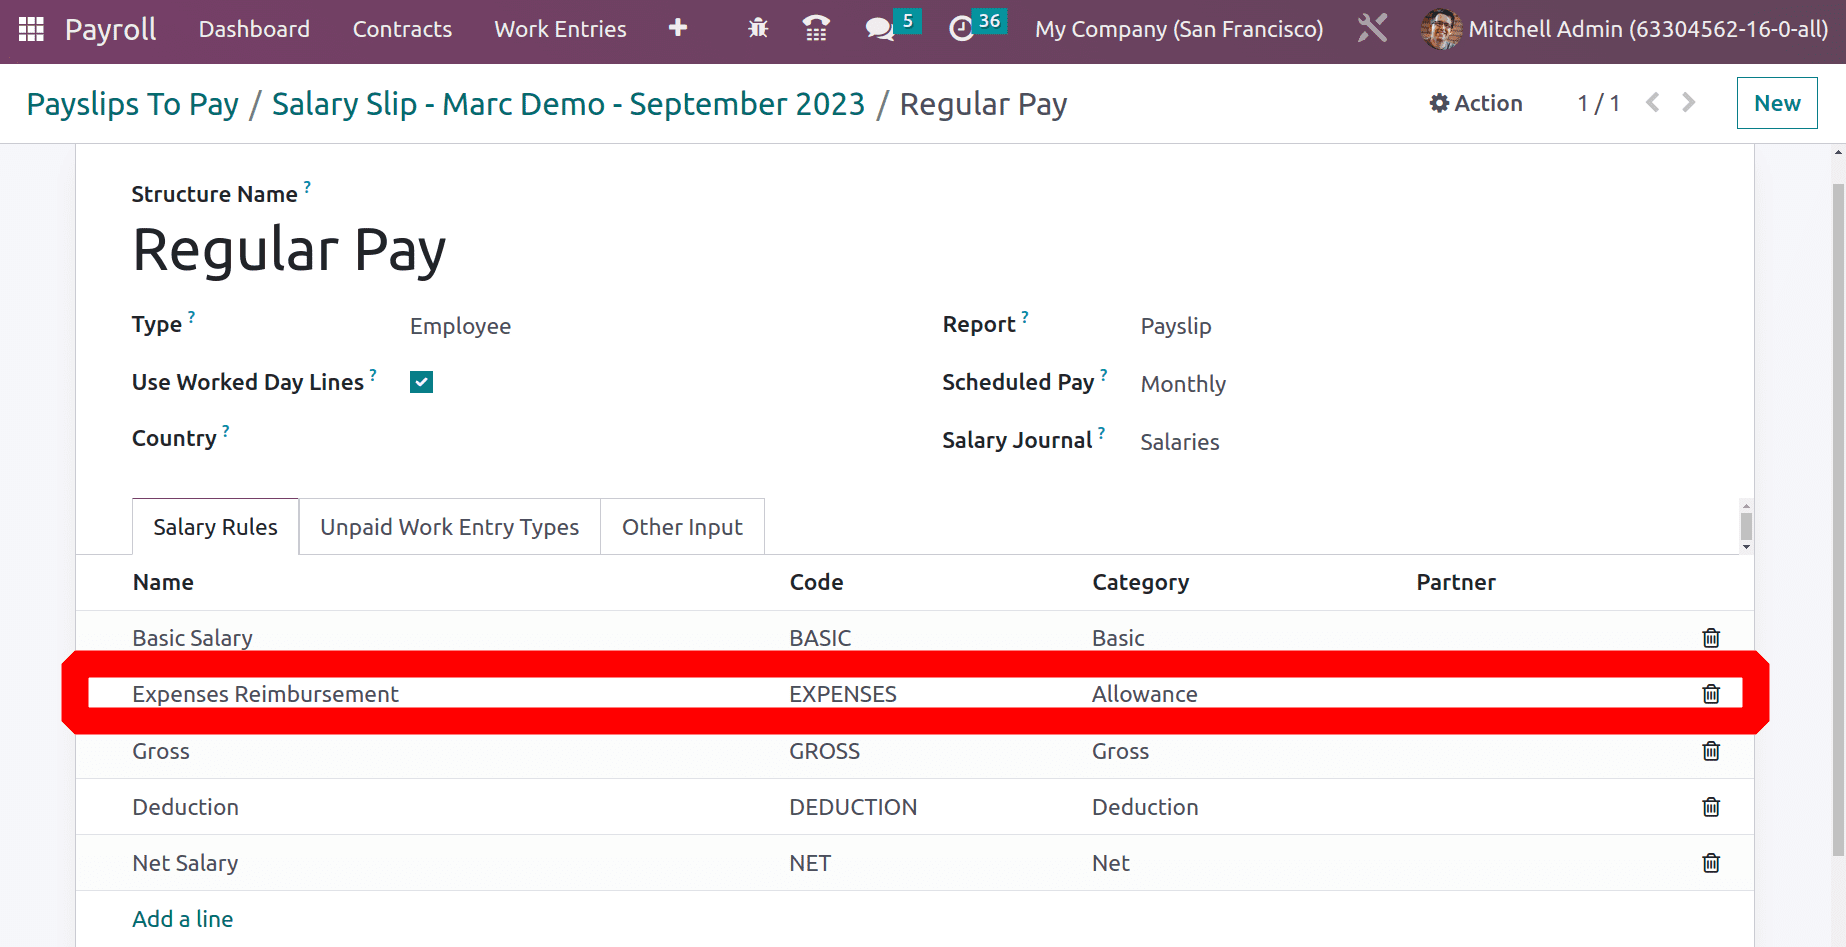
The rule is configured inside the Structure. Here the Structure is Regular Pay. Here a rule Expense Reimbursement rule is created for adding the expense from the Expense module.
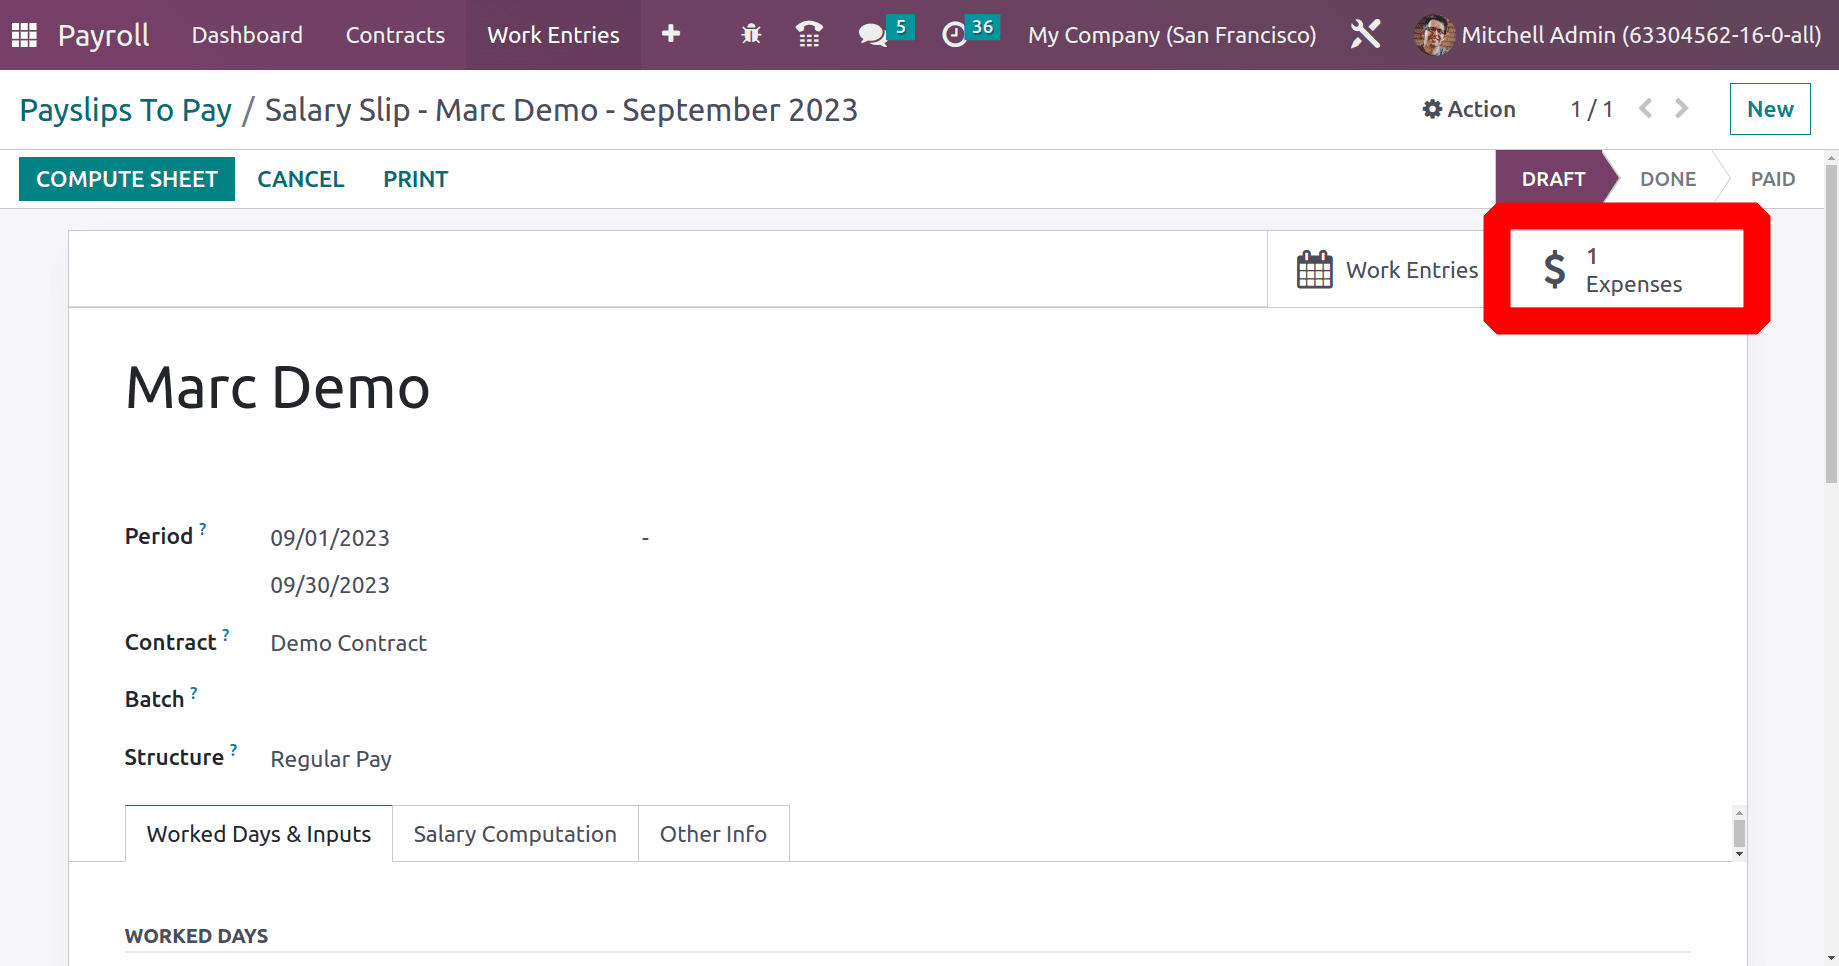
Here, a smart tab is added as Expense. While opening it, the created expense can be viewed from the payslip created for the employee Marc Demo.
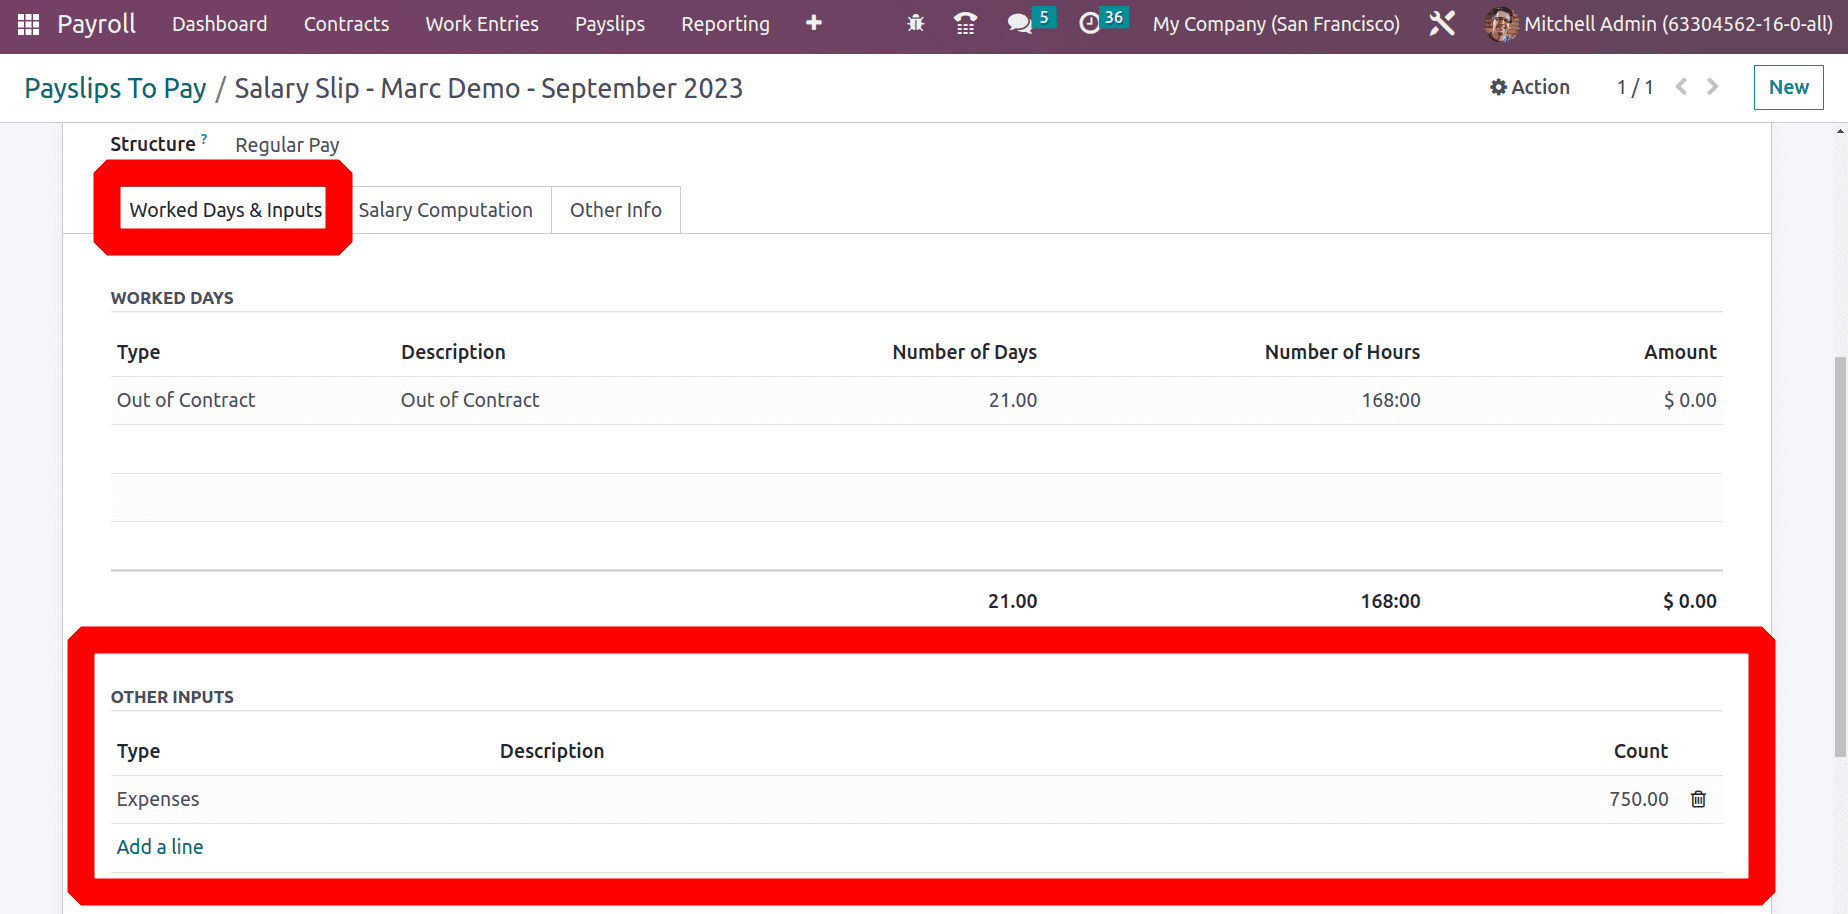
While scrolling down, there is a section named as OTHER INPUTS in the Worked Days & Inputs tab. The expense is also added inside the OTHER INPUTS.
Then click on the COMPUTE SHEET, and the Salary Computation tab will show the computed salaries.
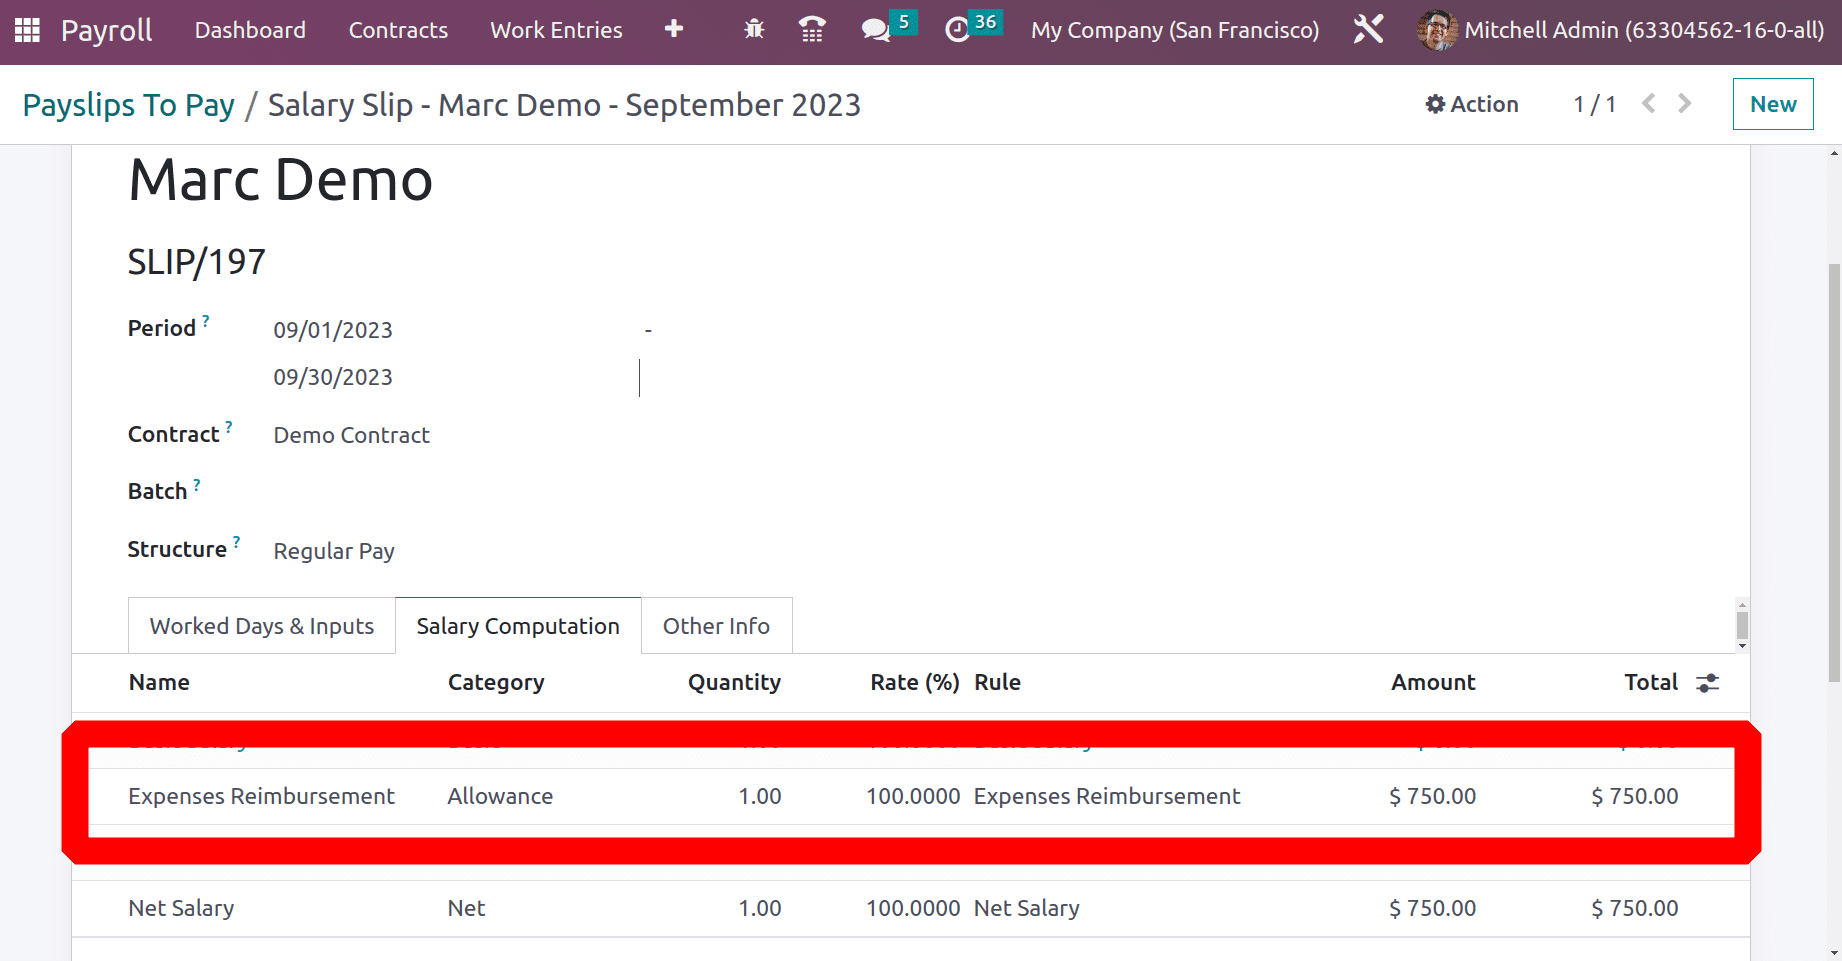
The integration of expense reimbursements into the payslip guarantees effective employee compensation, as the reimbursement is documented alongside the employee's normal wage and other benefits. Combining payroll and reimbursement into a single transaction streamlines financial procedures and lessens administrative effort. Because all costs are managed and recorded in one system, it also guarantees adherence to accounting standards. Pay Stubs are a useful tool for businesses to keep transparent and unambiguous financial records, which are necessary for proper financial reporting and audits.
In conclusion, the Odoo 16 method for reinvoicing employee expenses streamlines and speeds up reimbursement, ensuring open and honest financial management for both the company and its staff.
To read more about How to Manage your Expense with odoo 16 Expenses App, refer to our blog How to Manage your Expense with odoo 16 Expenses App.