How to set milestones with the Odoo 17 Project module
Odoo 17's Project Management module is a tool for managing short- and long-term projects, allowing efficient tracking and organization. From a single dashboard, users can assign resources, oversee deadlines, and track advancement. Project milestones serve as pivotal checkpoints, enabling teams to track progress, identify bottlenecks, and align with project objectives, catering to diverse business operational needs.
Setting Up Milestones in Odoo 17
To leverage the milestone feature within Odoo 17's Project module, users can follow a simple setup process. Begin by accessing the project Settings window and enabling the Milestone functionality.

Once enabled, users can create new projects, define project stages, and add tasks with associated milestones. So, we can go to the Projects Dashboard and create a new project. Inside the displayed Create a project window, provide the project Name and activate the Timesheets and Billing options as illustrated in the screenshot below.
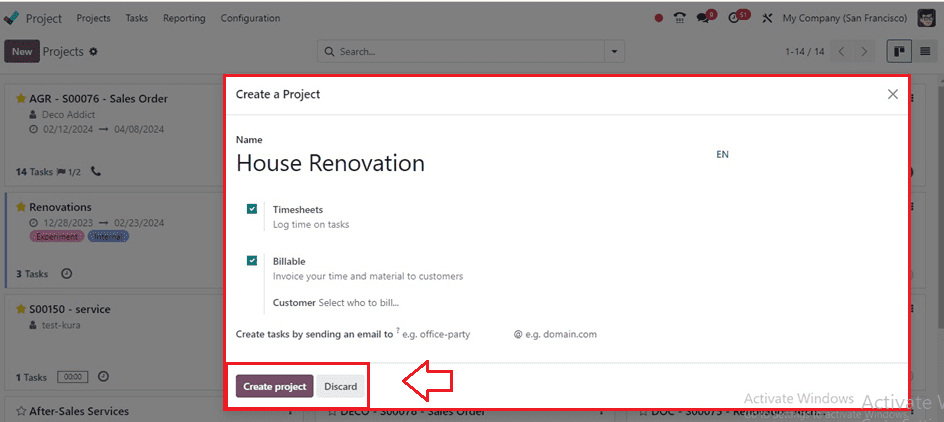
After editing the project name and enabling the required options, press the Create Project button and add the project tasks as per the requirement. Here, I have created some sample project stages and tasks, as shown below.

To set the project’s milestones, open the tasks kanban view, and you will be redirected to the task configuration page.
The names of the Project and Assignees can be viewed inside the form as shown below. If you connect a sales order item to a Milestone, put it in the provided in the relevant area, or we can create a new one. Your services will be delivered immediately when the milestone is reached. To bill the right client for the project's time spent working on it, mention their name in the Customer field. As indicated below, provide the Allocated Time and a Deadline for the project as the basic project data.
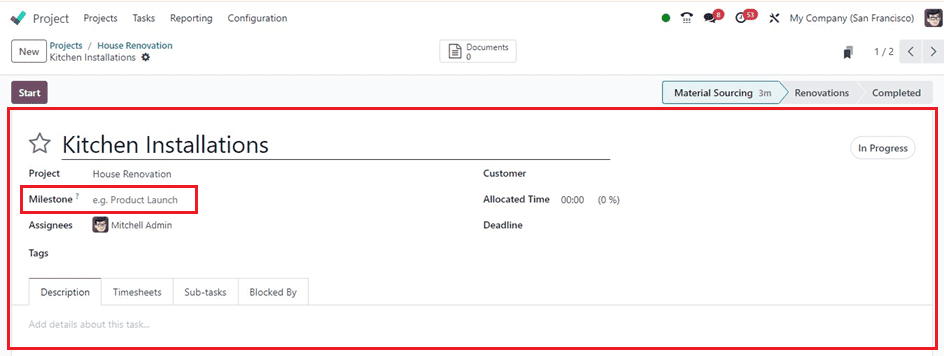
The task allows users to mention milestones, which automatically deliver services when they are reached by linking them to a sales order item.
Invoicing Projects Based On Milestones
Project management involves providing various types of service sales, including prepaid, billed based on time and materials, and fixed-price agreements. The topic of billing project milestones will be covered in this section. For instance, if a product is a service and the invoicing policy is based on milestones and created on order, the task will automatically deliver services when a milestone is reached.
Creating a new product with the milestone invoicing policy
So, we can create a product and set its invoicing policy from the Odoo Sales Module. From the "Products" window under the "Products" menu, you may create the product.
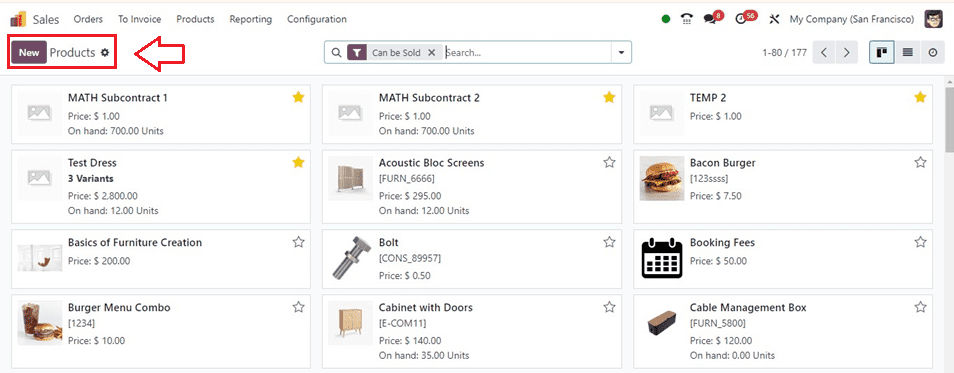
Open the new product configuration and provide the basic product details like its Name and product type.
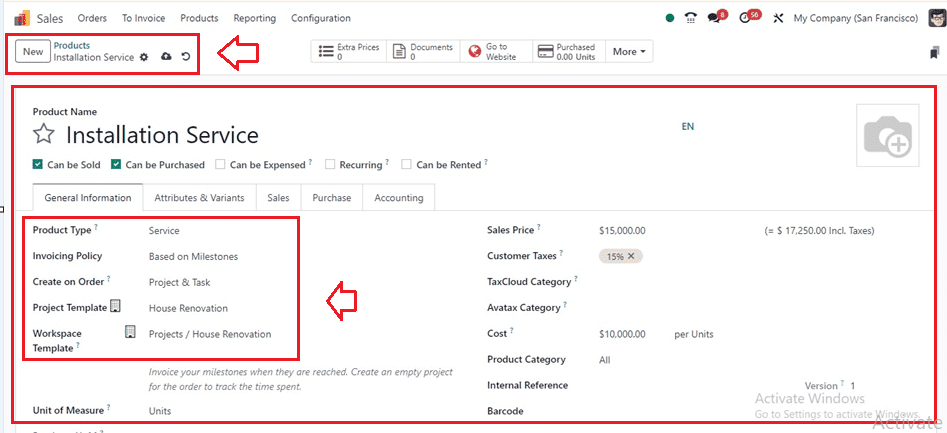
Then, we have to choose the ‘Invoicing Policy’ as ‘Based on Milestones.’After confirming a sales order containing this product, indicate what should be created in the "Create on Order" field. We'll select the "Project & Task" option, ensuring that a sales order with this product generates either a project or task. This makes it possible for us to efficiently oversee and handle these services as separate assignments or projects.
We can also provide the Project Template and Workspace Template as the current project inside the respective fields. Finally, set the Sales Price and Cost of the product or service, fill in the other tab sections based on the service or produce specifics, and save the product data inside the sales database.
Creating a Sales Quotation with the product
After providing the product data, we can create sales order with the above configured product from the Quotations window of the Orders menu of the Odoo Sales Module.
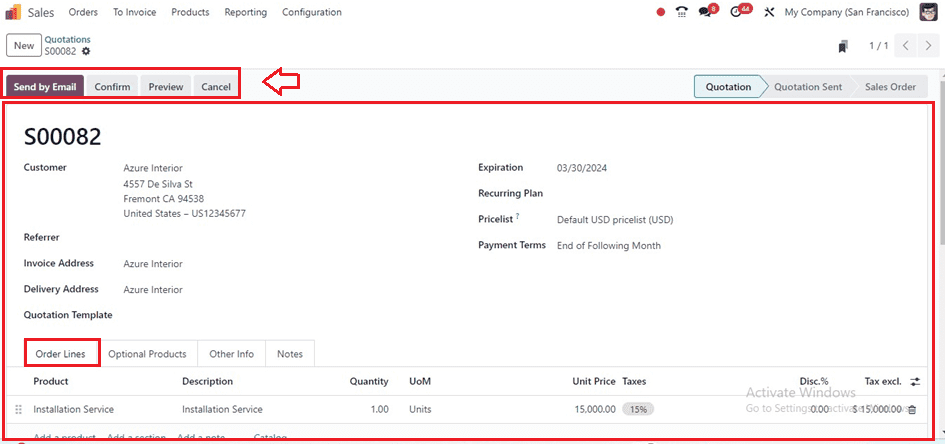
Inside the quotation configuration form, edit the sales quotation details such as the name of the Customer, Expiration, Recurring Plan, Pricelist, Payment Terms, Quotation Template details. Add the newly configured product inside the Order Lines tab area and also provide the other details of the quotation inside the tab sections. Finally, Confirm the order using the Confirm button.
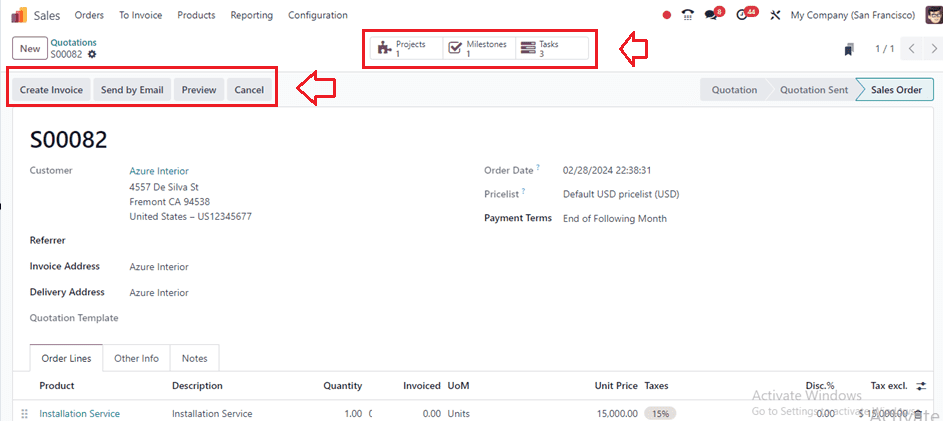
After converting a quotation into a sale order, you can adjust delivery quantities once the necessary milestone is met. The form has Smart buttons for Projects, Milestones, and Tasks. As seen below, the milestone Smart button allows you to add milestones.
Opening the Milestones smart button will open the dashboard of all the milestones added to this particular project. We can also add new milestones immediately from this window using the ‘New’ button and edit the new milestone details inside the editing field depicted in the screenshot below.

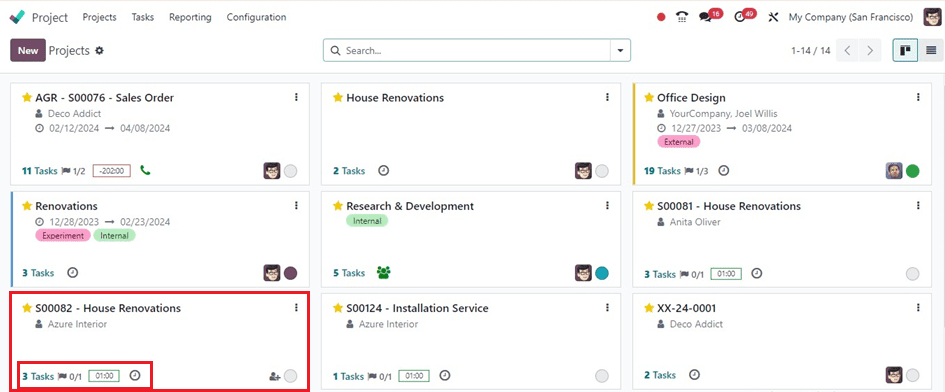
Now, return to our Project module and review the new project. Upon inspection of the project module, you'll notice that a task has been created under our previously established project, 'House Renovation,' as illustrated below.
The generated task will show the hours left to do a certain task in the allotted time for the assignment. Utilize the timer option provided inside the Start button. The job is updated to the next step and put on the timesheet after it is finished, as illustrated in the screenshot below.
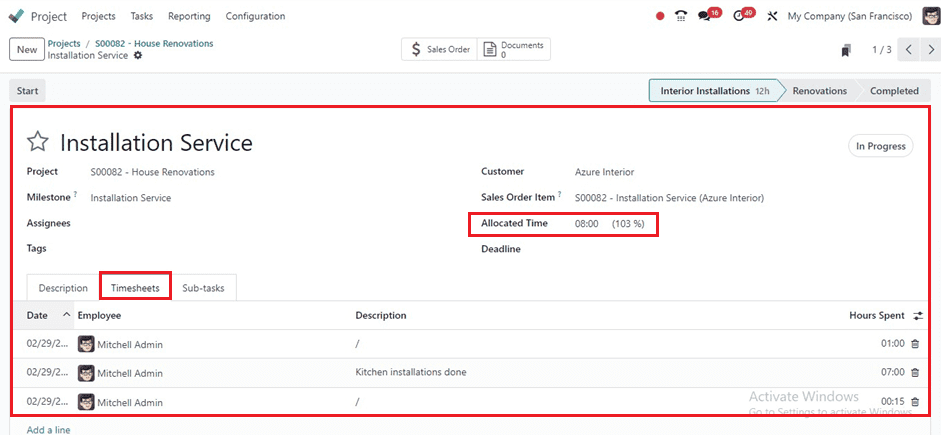
We can manually add the timesheet details and hours spent on the task using the ‘Add a line’ button provided inside the Timesheets tab.
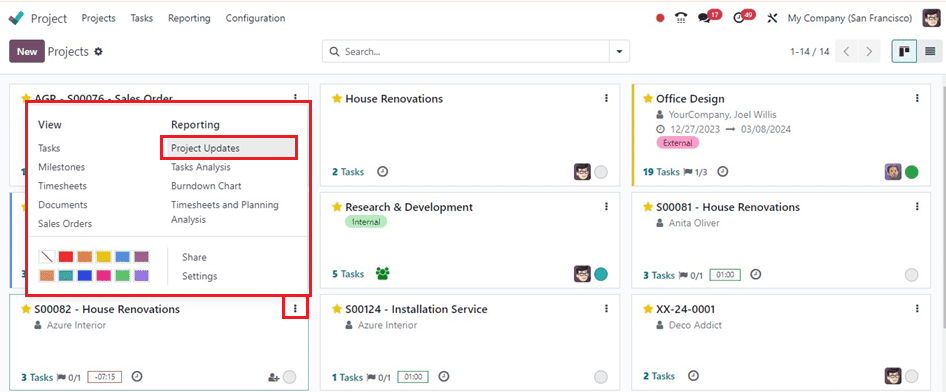
The project may be seen from the Project Updates menu once the job has been updated to the done stage.
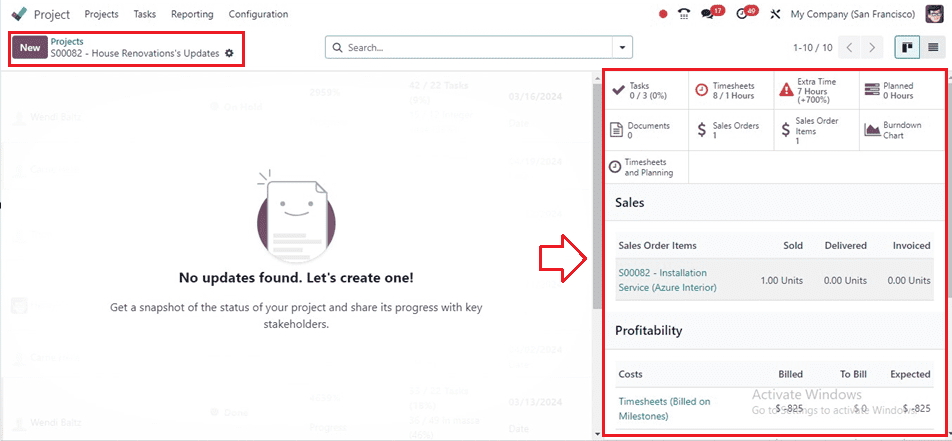
Upon clicking, you will be directed to a window displaying comprehensive updates pertaining to the project's Sales, Profitability, Budgets, Milestones, and additional details at the right corner of the page, as depicted in the screenshot below. This window serves as a centralized hub showcasing all relevant project information, enhancing visibility and facilitating informed decision-making.
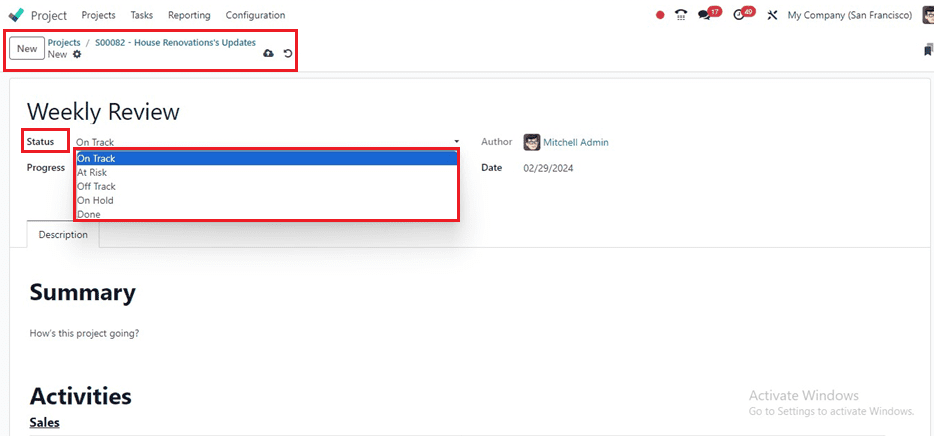
Click on the ‘New’ button to update the project updates and their progress. So, this will open a project update editing form as shown below.
Project updates provide you with the capability to input the current status of the project, which can be modified as needed.
* By checking the Status displayed alongside the project's title, you can readily identify the latest project update. If the status hasn't been assigned, you have the freedom to define it based on the project's advancement.
* For clarification, the statuses that are accessible are "On Track," "At Risk," "Off Track," and "On Hold," each of which is indicated by a different hue. This feature simplifies understanding of the project's current state.
* Additionally, the project status feature facilitates communication of progress with stakeholders and delivers a succinct overview of the project's condition.

Activities Section
The Activities menu has two submenus: Sales, Profitability, and Milestones.
The Sales section provides information on services, their sales, effective hours spent, planned hours, and remaining work. It also shows Profitability and milestones. The Sold menu allows users to view the number of services sold, effective hours spent, planned hours, and remaining work.
Project Updates Review
A detailed rundown of the project's development, including a weekly report, a situation assessment, and the overall number of tasks involved, can be seen in the project update's status option.
In addition to providing the budget's profitability estimate, the Project Updates page enables users to add and track various project milestones using the "Add Milestone" button.
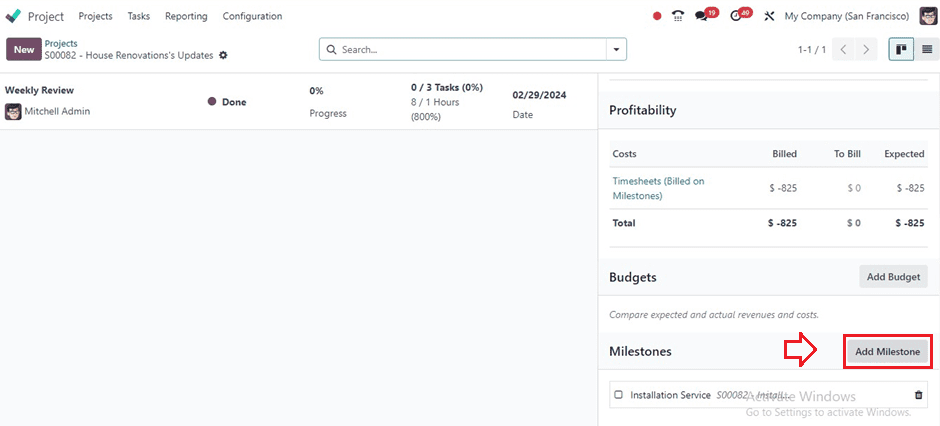
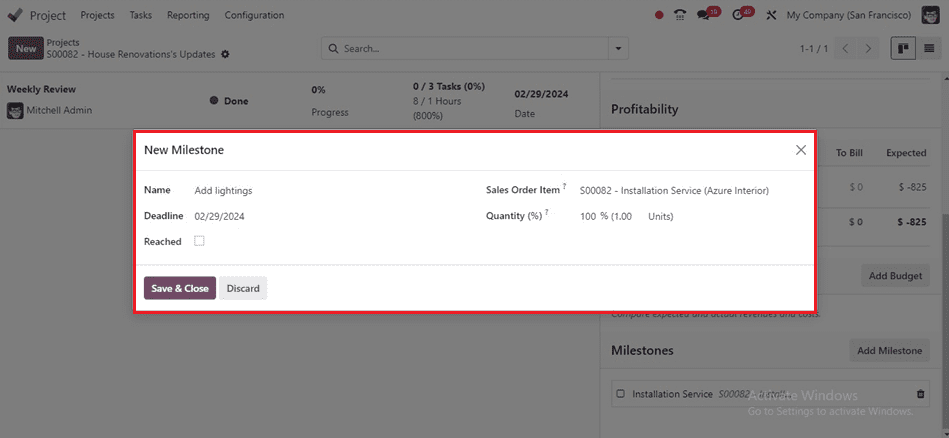
Clicking on the Add Milestone button will open a new pop-up window where we can provide the milestone Name, Deadline, Sales Order Item, and Quantity and press the Save & Close button to save the project milestone.
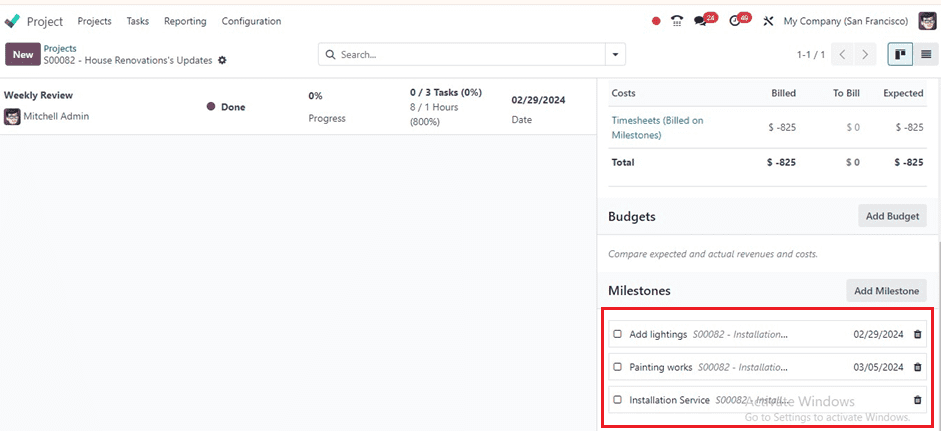
With milestones configured, users can monitor project progress and track milestone achievements directly from the Project Dashboard window. Here, you can see some milestones that i have created for the demonstration purposes from the below screenshot.
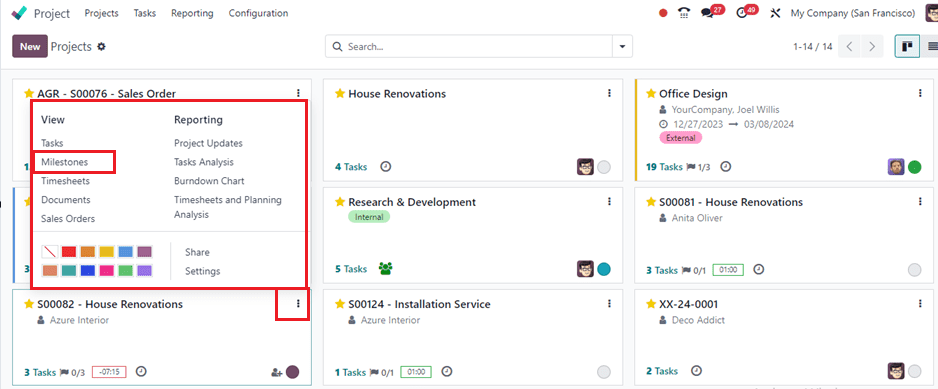
Then we can manage the milestones by clicking on the Milestones option available in the kanban menu of the particular project.
The Milestones dashboard will show the detailed list of the existing milestone Name, Deadline and Reached status as shown below.

The dashboard allows users to view sales orders, tasks, and manage milestones based on project progress, and add new milestones directly from the window.
In summary, the integration of the Odoo Project Module with the Sales Module facilitates milestone-based invoicing for projects, allowing users to generate sales orders associated with project milestones. This adaptable method alleviates financial pressures, enhances transparency, and is particularly beneficial for extensive or high-value projects, ultimately boosting efficiency, transparency, and client contentment. If you want to know more about setting up Milestone for a Project in Odoo please refer to our previous blog.