The Odoo 17 Calendar Module is a user-friendly tool designed to improve scheduling, productivity, and time management for businesses and individuals. The module supports various viewing options, including daily, weekly, monthly, and yearly formats, and color-coded date columns for clear understanding of daily activities. Advanced filtering options, smooth connectivity with other Odoo apps, and improved reporting capabilities are some of the key features. Users can add and manage meeting attendees, configure online appointments, and generate detailed reports on scheduled events. The module also supports notifications via email and SMS, ensuring participants are always informed and prepared.
Calendar Menu
Upon opening the Calendar Module, users can view all scheduled or planned events within the platform. This homepage corresponds to the "Calendar" menu section, as depicted below.
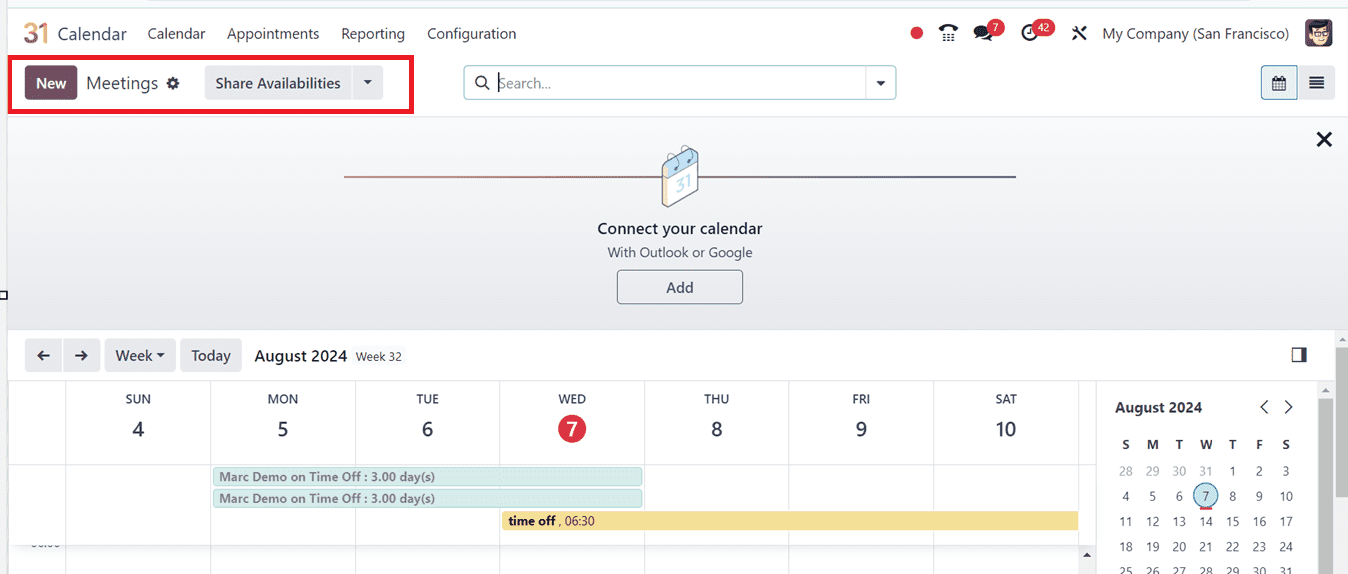
Users can view meetings and other activities according to the DAY, WEEK, MONTH, and YEAR formats. The colored date columns facilitate the identification of scheduled activities for a particular day. Tap the list icon in the window's top right corner to transition to a list view. The "Filter" and "Favorites" options allow users to sort and locate specific meetings or schedules.
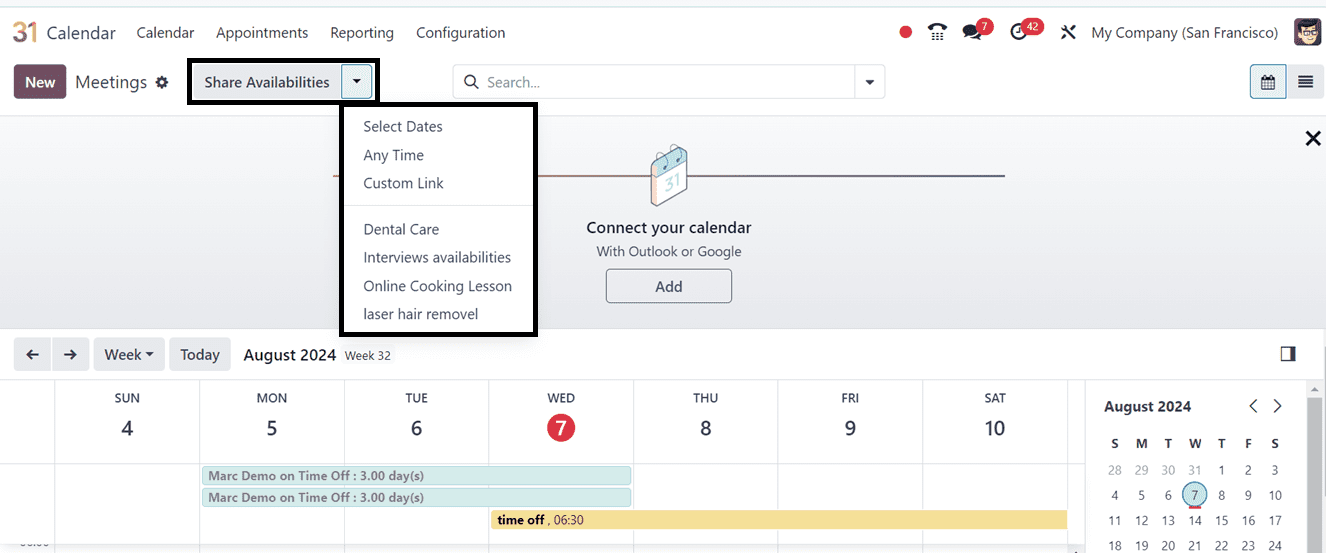
Mark your Availabilities: To mark the your availabilities to attend a particular meeting or appointment to the calendar interface, utilize the Share Availabilities dropdown menu and mark the dates, time, link and other details using the Select Dates, Any Time, Custom Link, Dental Care, Interviews availabilities and other appointments as illustrated below.
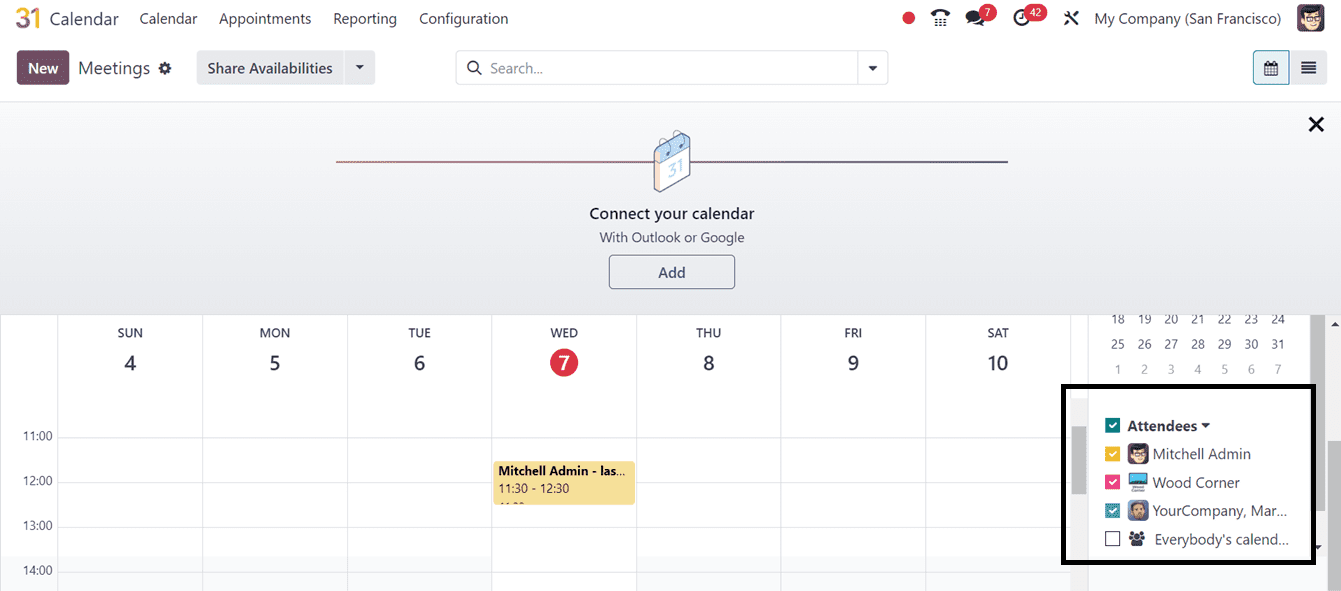
Adding Meeting Attendees: Attendees for a scheduled meeting are listed on the right-hand side of the page. Use the “+Add Attendees” button provided under the dropdown provided under the Attendees option to invite new participants, as demonstrated below.
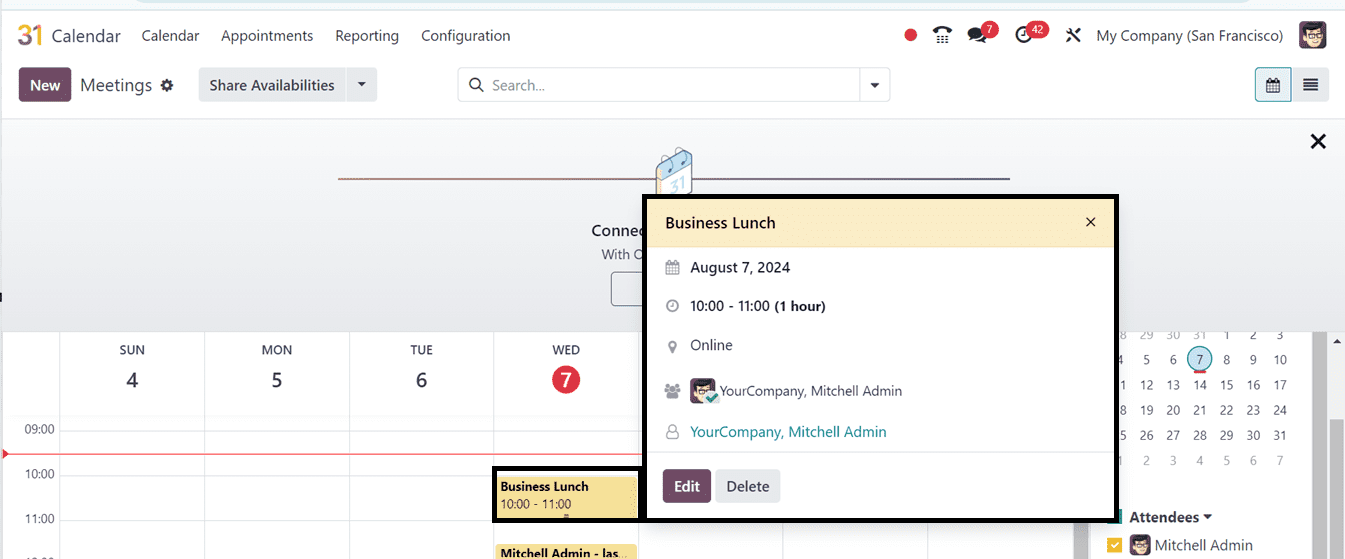
Examining Meeting Details: Users can obtain comprehensive details on a particular meeting by choosing it. This contains the relevant tags, privacy settings, and description of the meeting. To make any further edits to a scheduled meeting, click the Edit icon.
Creating New Meeting Schedules: To schedule a new meeting, navigate to the desired date. Following date selection, a pop-up window will show up asking for the required data to be entered. Click "Save & Close" to proceed.
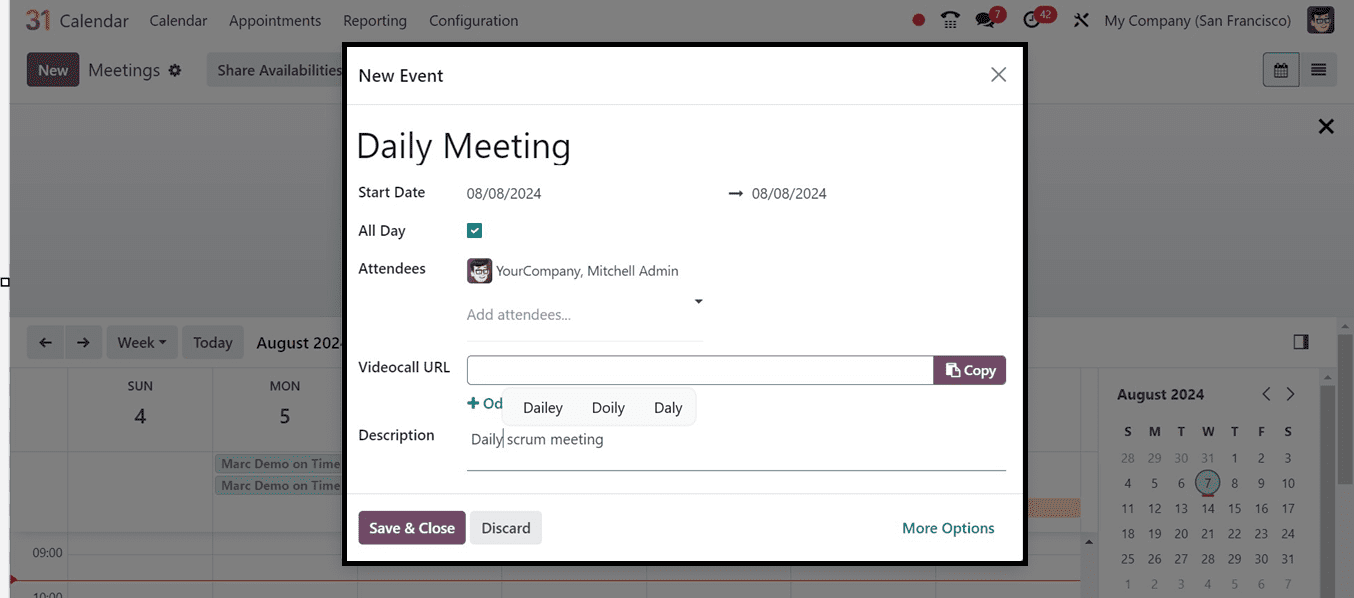
The newly formed meeting will show up in the date column. Click on the meeting date, then choose the "Edit" option from the pop-up window to see more information. Also, we can create a meeting using the New button provided in the Meetings window. Then, a configuration form will be provided, allowing for further modifications.
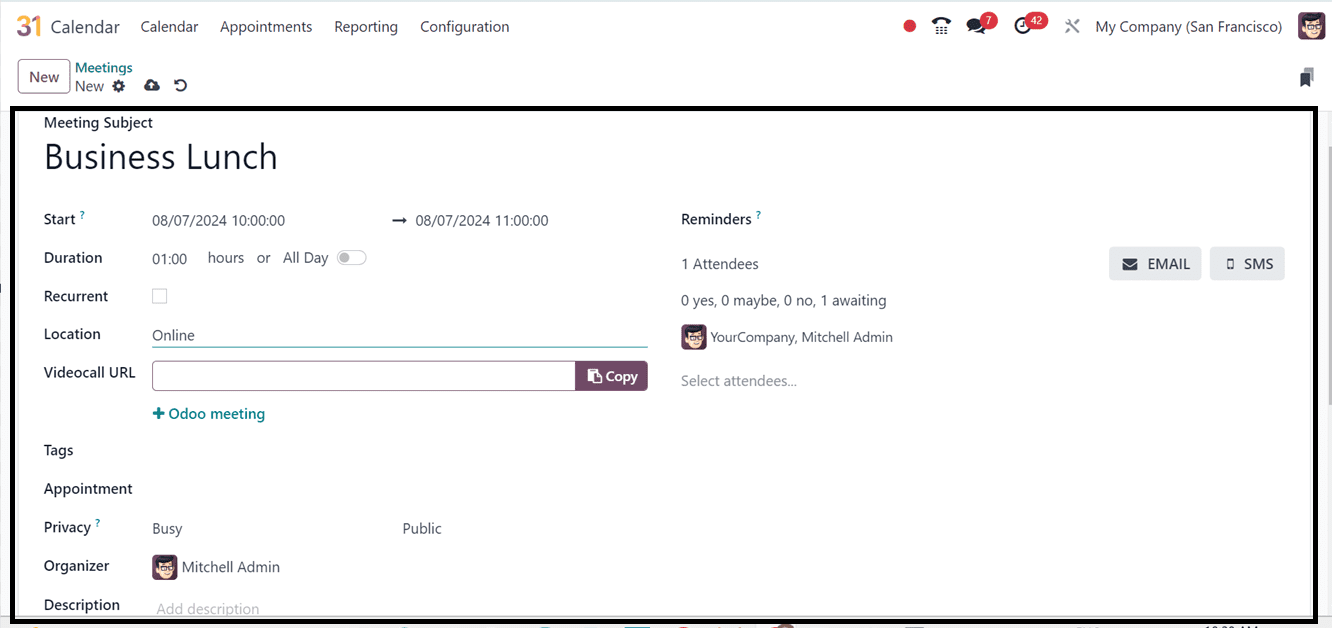
The Meeting Configuration Form has many fields. Users can specify Meeting Subject, Starting and ending dates, Durations, Recurrent and all-day options. Notifications can be sent via Email or SMS next to the Reminders field. The "Description" field allows planners to describe sessions. Reminders can be added for participants. Location and Tags can be specified. A Video call URL can be added. To make a meeting recurring, enable the recurring option, set the recurrence using a calendar format, and choose privacy settings.
Appointments Menu
The Odoo 17 Calendar module facilitates online appointment scheduling, reducing appointment risks for clients and employees. By streamlining appointment scheduling, this tool encourages a productive work environment.
* To configure appointments, click on the available appointment button under the “Set your Availability” section on the homepage banner of the Calendar Module. The form for setting up an online appointment will open as a result.
* From the “Appointments” menu, users can manage and create new appointments. The menu opens a dashboard displaying all previously created appointments as illustrated below.
* The Action menu placed on the upper left corner of the window can be utilized to create Import Records, Create Dashboards, Spreadsheets and make articles using the Odoo Knowledge Module integration properties.
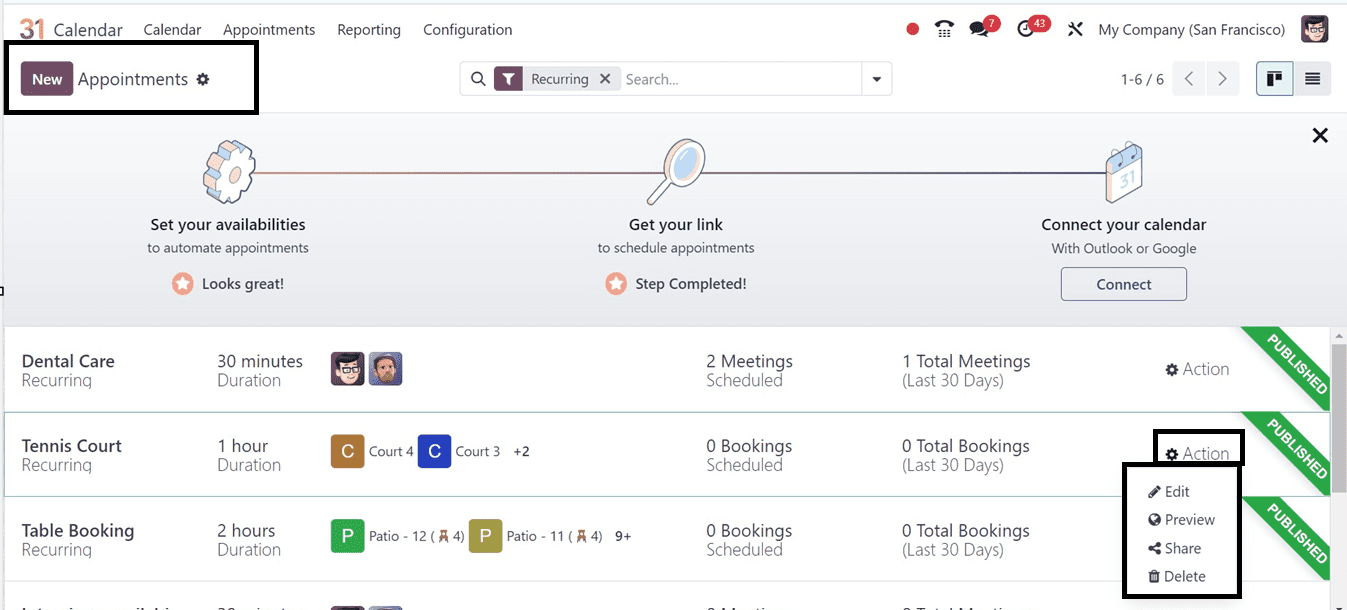
Information is displayed about the appointment, including the name, duration, number of schedules, and overall number of meetings.ent configuration document. Use the "Preview" option available inside the Action button placed on each Appointment Kanban view to view the appointment details and the "Share" button to share them. This Action menu also contains the facility to Edit and Delete the Appointment data.
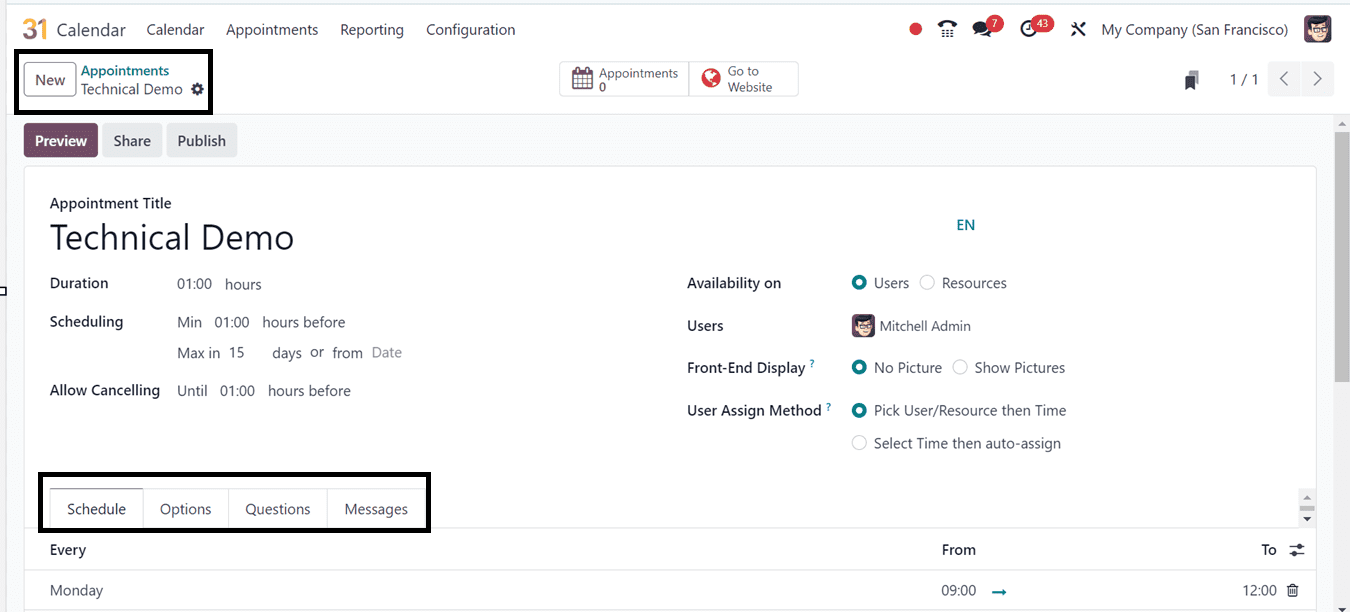
To enter new appointment information, click the "New" button. This will display the appointment configuration form, allowing you to add the necessary details.
Reporting Menu
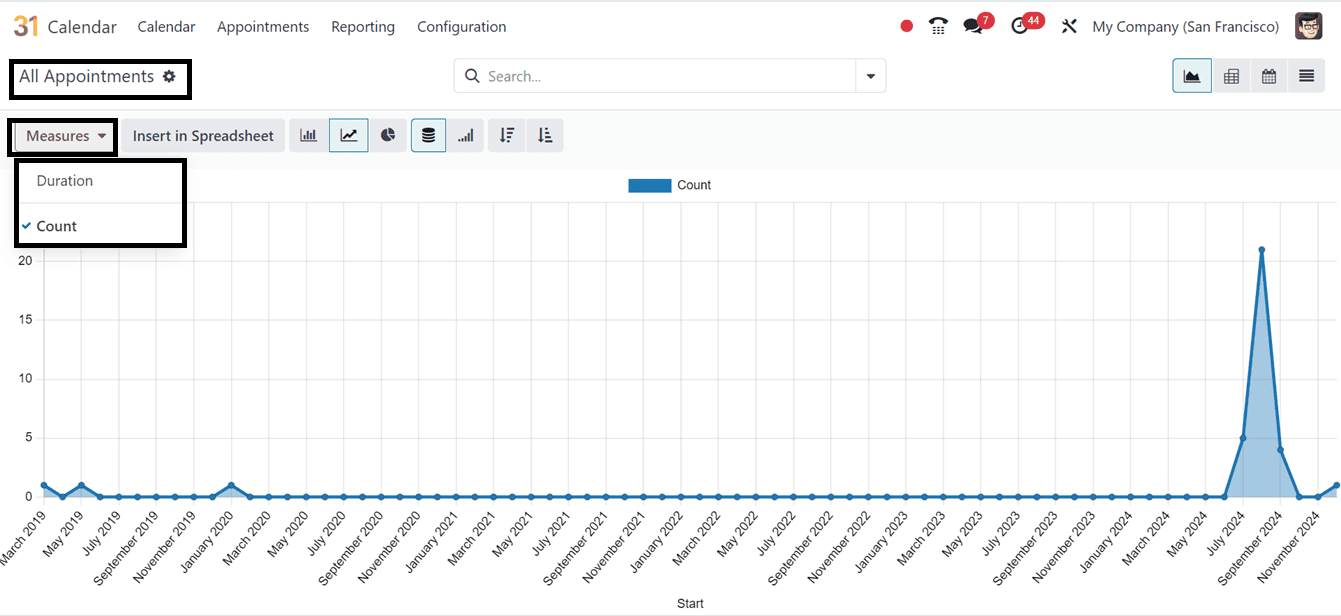
Odoo's Calendar Module includes a “Reporting” menu for detailed appointment analysis. This feature is available for “All Appointments” created on your Odoo database as shown below.
All Appointments:
* The "All Appointments" reporting window provides access to the report analysis for each and every appointment.
* Generate graphical representations of appointments by month to visualize the number of appointments.
* Adjust the report data parameters using the "Measures" section.
* Use the "Filters," "Group By," and "Favourites" options provided in the advanced search bar at the top of the window to filter, group, and mark data as favorites.
* Utilize the multiple report view options to get customized and detailed analysis of appointments and meetings including Graph, Calendar, Pivot, and List views by clicking the respective icons provided at the top right corner.
Configurations Menu
The Odoo 17 Calendar module allows users to synchronize their calendar with external services like Google Calendar or Outlook Calendar streamlining scheduling and ensuring consistency across platforms. Navigate to the Configuration menu and select the Settings window to accomplish this.
Calendar Settings
users must designate the desired calendar service and obtain necessary credentials, such as a Client ID and Client Secret, from the Google Cloud Console in the designated places inside the Settings window as illustrated in the screenshot below. These credentials authenticate the Odoo instance with Google's API.
We can also enable or disable the calendar synchronization using the Pause Synchronization option. This will cause data updates between two calendars, preventing changes from reflecting in the other until synchronization is resumed.
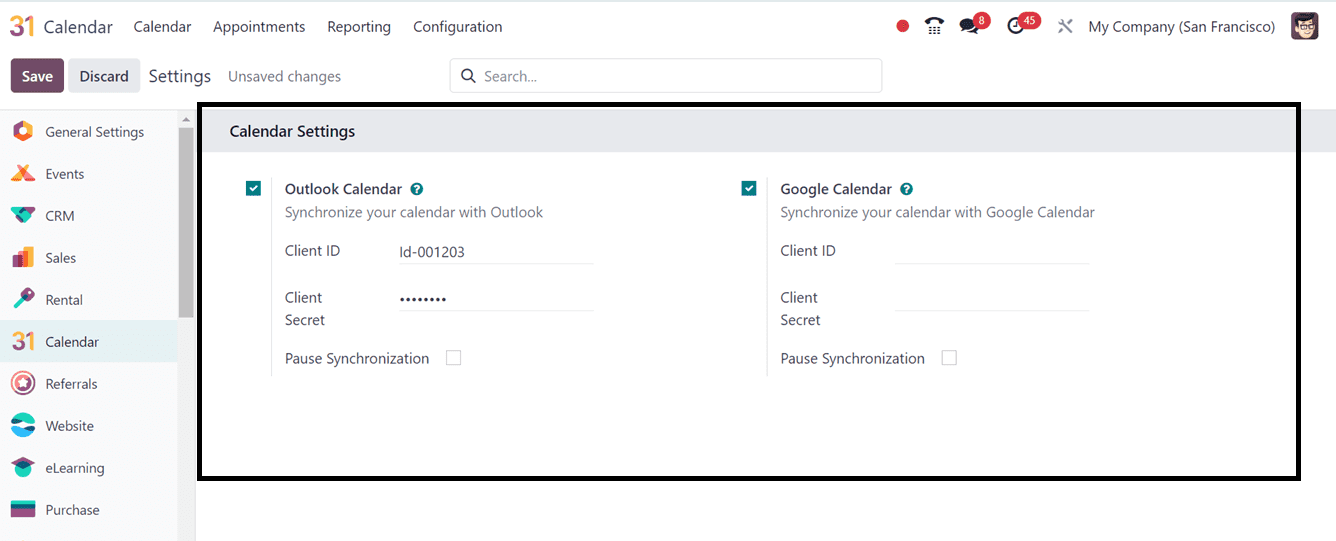
This help users to grant Odoo permission to access their Google Calendar as well as Outlook Calendar. This integration can significantly streamline scheduling and improve overall productivity.
The Odoo 17 Calendar module is a versatile tool for scheduling and time management, offering customizable settings, seamless integration with Google Calendar, and features like recurring events and custom fields. It streamlines operations, improves coordination, and enhances productivity for small businesses and large enterprises.
To read more about An Overview of the Odoo 16 Calendar App, refer to our blog An Overview of the Odoo 16 Calendar App.