An organization's performance relies on organizing every activity, including manufacturing orders, deliveries, and receipts. To provide optimal client service, it is necessary to specify the correct lead time and match scheduled dates. Lead times are the amount of time needed to manufacture, distribute, or receive goods. They can be determined for purchase, sale, and manufacture. Vendor On Time Delivery shows how many products were received "on time" (that is, on or before the set date) and assists in reviewing every item received on a purchase order line. This function guarantees that things arrive promptly and without any delays. When discussing the duration required for a product to be delivered to a customer, vendor lead time and buy lead time are interchangeable terms. Vendors can be added during the vendor price list creation process or positioned beneath the product purchase page, depending on how it is configured at the product level.
This blog will help you understand the process of configuring Vendor Lead Times and On-Time Delivery in the Odoo 17 Purchase Module.
Configuring Vendor Lead Time for a Product
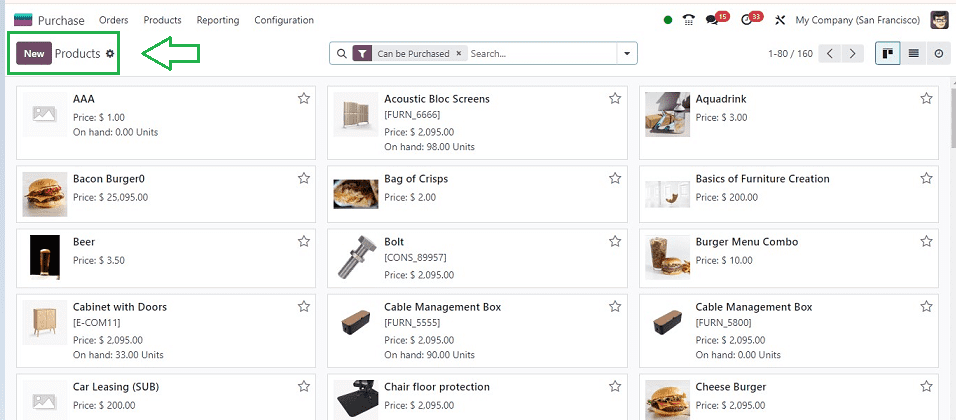
When adding product data to the Odoo 17 Purchase Module, we have the option to set the vendor lead time for a particular product of a particular vendor. To check this, go to the “Products’ window of the “Products” menu and open a new product configuration form using the “New” button.
Inside the form view, provide the required information about the product and other details as shown below.
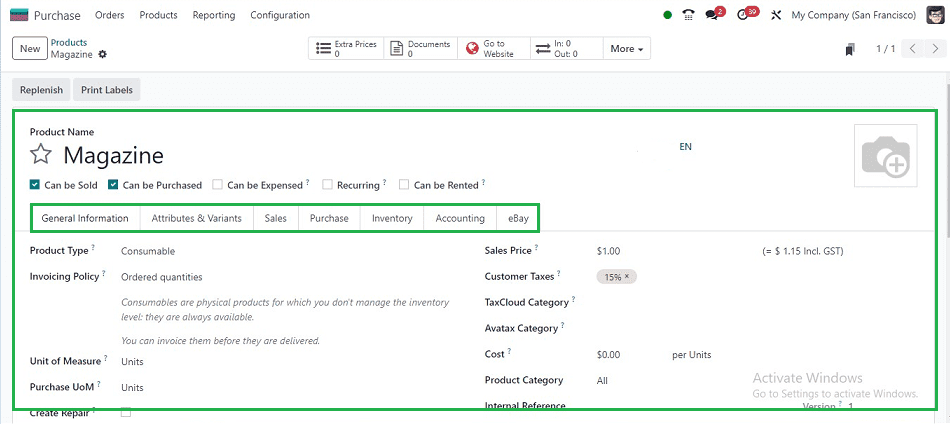
In each form tab section, including General Information, Attributes & Variants, Sales, Purchase, Inventory, Accounting, and eBay, complete the required fields. To illustrate my point, I'm making a product with an example sales price.
Configuring Vendor Lead Time
Vendor lead time is a product-specific configuration that determines how long it takes for a product to be delivered to the buyer. In the Odoo 17 Purchase Module, you can configure the vendor's pricelist and delivery lead time beneath the “Purchase” tab of a product configuration form.
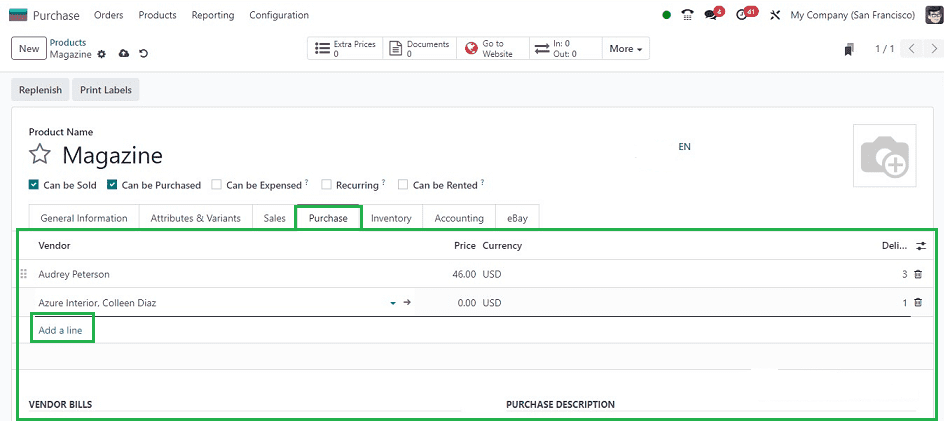
Click on the "Add a line" button to add Vendors, Price, Currency, and Delivery Lead Time. This will show an editing column where you can choose a vendor and enter the lead time for delivery, currency, and product price.
Adding more than one vendor for a single product is possible by using the "Add a line" button. Here, I have added two vendors with different Delivery Lead Times. Now, Let’s create a new purchase order using the configured product. We can use the previously created vendor named “Audrey Peterson” with a delivery lead time of 3 days.
Creating a new Purchase Order
Go to the “Purchase for Quotation” submenu available inside the “Orders” menu.
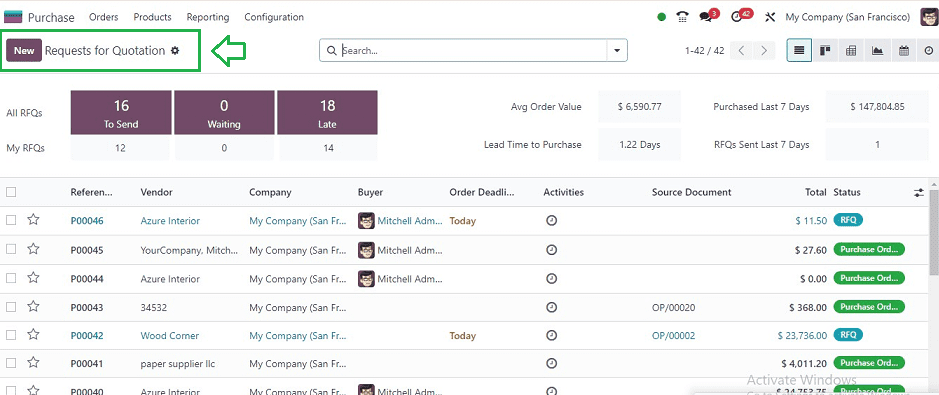
Now, quickly create a new purchase order using the “New” button. Inside the displayed form window, fill in the required details.
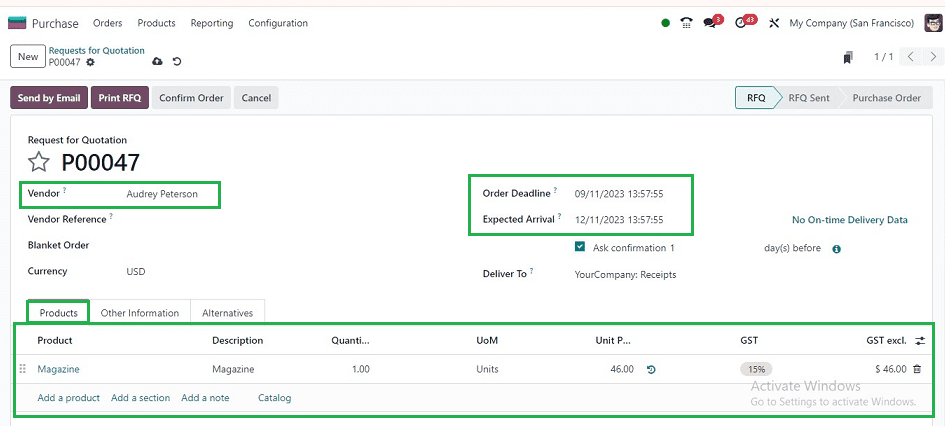
We can choose the “Audrey Peterson” as the “Vendor.” Then, the “Vendor Reference” and “Blanket Order” details can also be filled out. The other details will be automatically filled out, including the vendor “Currency,” “Order Deadline,” “Expected Arrival,” and “Deliver To.”
As the vendor's contract inside the product configuration form indicates, the expected delivery date will be displayed as three days after the order date inside the “Expected Arrival” field. Inside the form view.
There is a note indicating the vendor's three-day arrival. The Odoo 16 Purchase module's Receipt Reminder option must be enabled in order for the "Ask Confirmation" option to be enabled, which permits vendor confirmation prior to the planned delivery date.
Activating the Receipt Reminders
Enabling the “Receipt Reminder” option is the prerequisite for accessing this feature, and you can activate this feature from the “Orders” tab of the “Settings” window.

Adding Products
After editing the required form data, add the products for this purchase order inside the “Products” tab. You can just click on the “Add a product” button. The “Catalog” button in the new Odoo 17 interface will help you add products to an order configuration page from the product's dashboard.

After saving the order details, you can confirm the order and proceed with the further processes.

Managing Vendors and Vendor On Time Delivery
Delays in delivery can affect business sales and stock levels. This issue is resolved by the "Vendor On Time Delivery" feature, which enables users to examine every item received on a purchase order line and determine how many were delivered "on time" by the vendor. By using the Vendor form, you can get this information. By utilizing this feature, businesses can ensure efficient and timely product delivery.
Go to the “Vendors” submenu provided inside the “Orders” menu to check this feature. You can see the Kanban dashboard of all the vendors created inside the Purchase Module Database, as shown below.
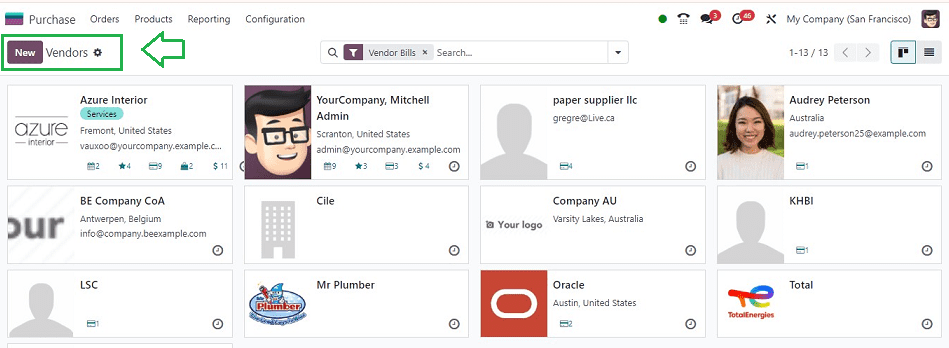
The ‘Vendors” dashboard provides an outlook of the Vendor Name, Tags, Addresses, Mail Addresses, Opportunities, Sales Orders, Purchases, Activities, etc. We can create new vendor details using the “New” button.
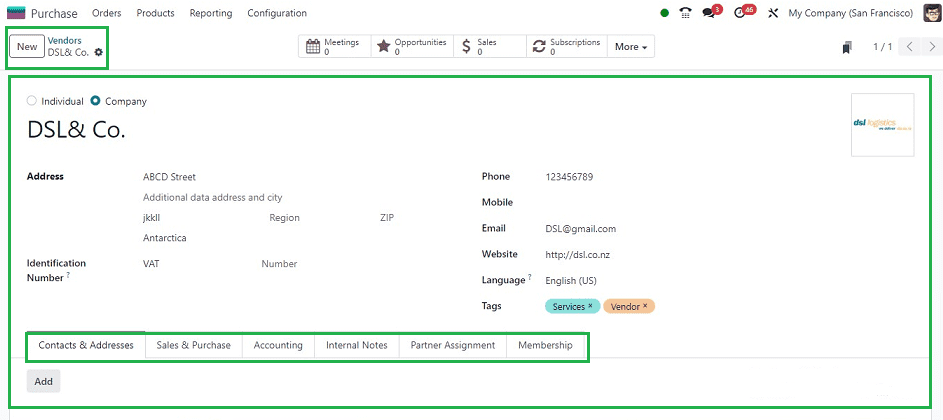
Inside the form view, provide the Company Name, Address, Identification Number, Phone, Mobile, Email, Website, Language, and Tags.
Then, fill in the Contacts & Address, Sales & Purchase, Accounting, Internal Notes, Partner Assignment, and Membership Tab sections as per the vendor policies and requirements.
After saving the details, odoo will display some smart tabs at the top of the vendor form, such as “Meetings,” “Opportunities,” “Sales,” “Subscriptions,” “Purchases,” “On Time Rate,” “Invoices,” “Vendor Bills,” “Partner Ledger,” “Documents” etc.
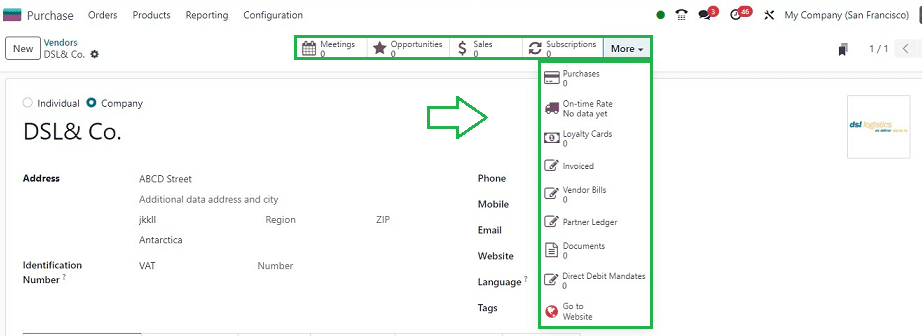
Additionally, you can view the vendor's On Time Delivery rate for that specific product by clicking the “On-time Rate” smart button.