An individual can participate in an event using the ticket, and it is proof of the program's entry. Several types of tickets with different prices are available in any event. For a business event, it is necessary to manage tickets for participants. Most people switch to online booking systems instead of natural processes during the pandemic period. The ticket booking through an online website reduces the management team's pressure. An online booking system for small or large events leads to avoiding errors and checking the ticket's details. A firm can develop any occasion using the Odoo 15 Events module. You can set an event in the Odoo Events module and raise tickets. The Events module assists in giving information about attendees who registered for a particular event. We can manage the limits, price, and registration of tickets using the Odoo 15 Events module.
This blog helps you manage tickets for an event in Odoo 15 Events Module.
Settings
Before creating tickets for an event, we can activate the tickets option in the Settings menu. Select the Settings menu in the Configuration tab of the Events dashboard to start the ticketing options. Inside the Registration tab, you can see additional options such as Tickets and Online Ticketing. Activating these options helps you to ticket sales on websites and orders.
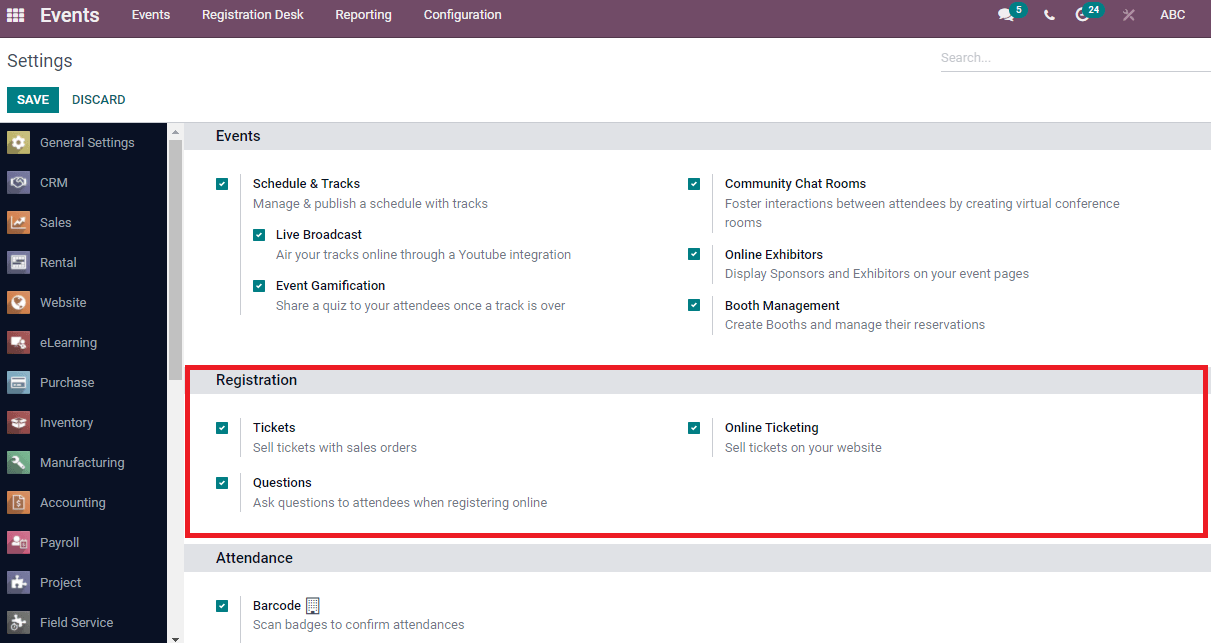
You can manage the tickets after enabling the options inside the registration.
Events Dashboard
We can develop a new event and publish it on a website using the Odoo 15 Events module. Press on Create icon to establish a unique event and a new window appear in front of the user. In the Events window, you can enter general event information such as Name, Date, Company, Template, Website, Timezone, Organizer, Venue and Tags. We can set the registration limit and enter the number of attendees for your event.
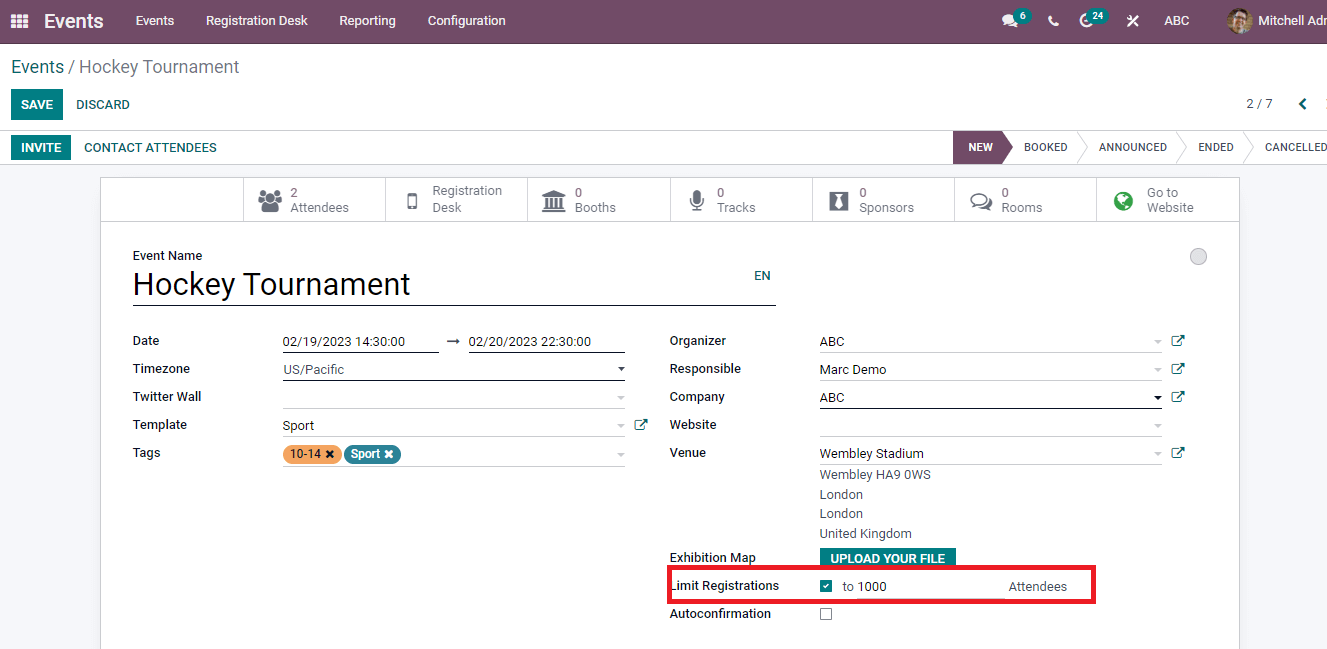
The information regarding the Template is visible by clicking on an external link. You can add the Template name, Tags, registration limits, and Timezone in the Template window. Moreover, you can apply for tickets if the chosen Template does not include ticketing. Save the details to maintain changes in the Template of an event.
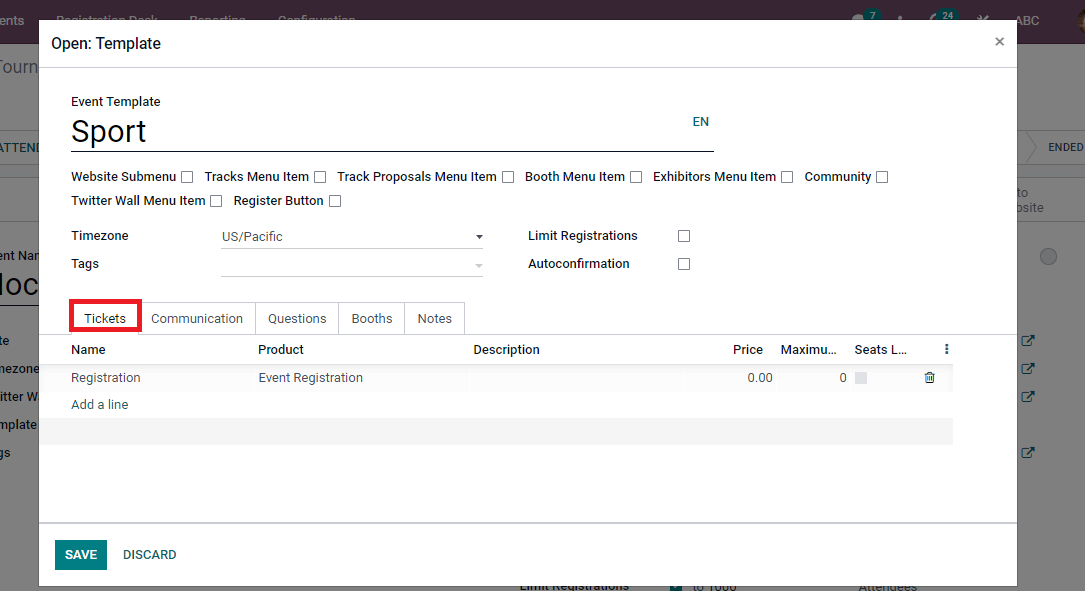
At the end of the Events window, you can see several tabs such as Notes, Communication, Questions and Tickets. A new ticket for an event creates inside the Ticket tab of the events window. Enter the Name, Price, Maximum number, Sales start/end, Confirmed and Product of a ticket. You can also add a Description regarding the ticket.
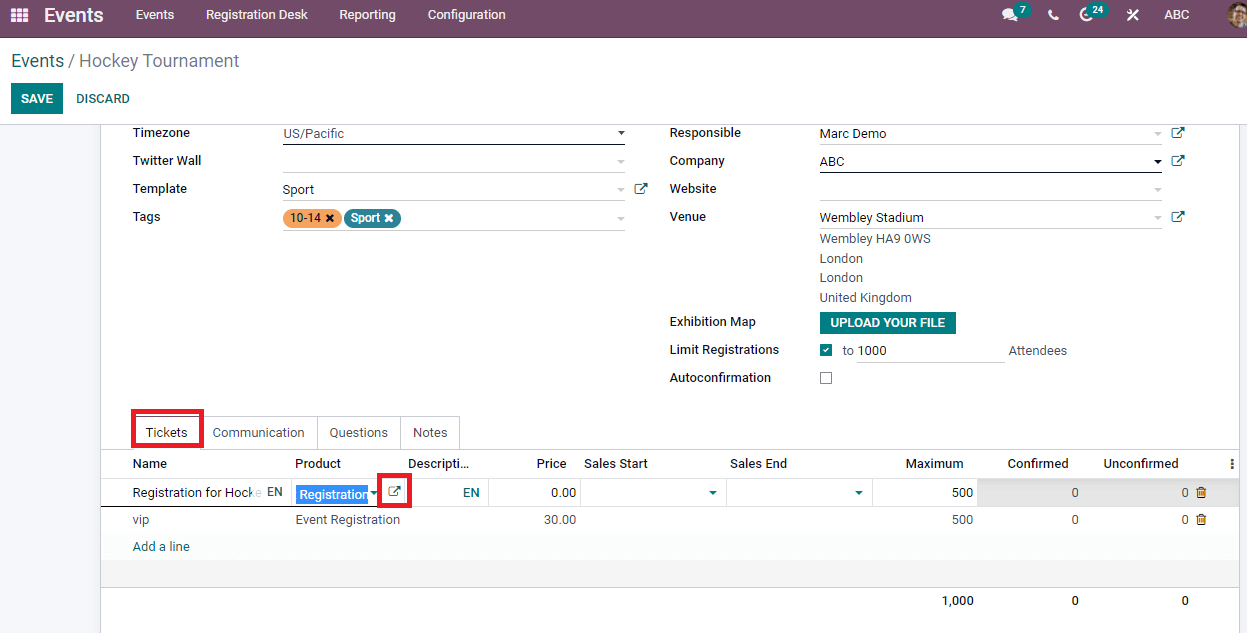
We can add many tickets as we want to the program, and more than one ticket is helpful for an event. The external link near the Product menu lets us know detailed information regarding the product registration.
In the Communication tab, you can send Emails, Social posts or SMS for participants regarding the event. It shows details like Trigger, Interval, Send, Template and Unit
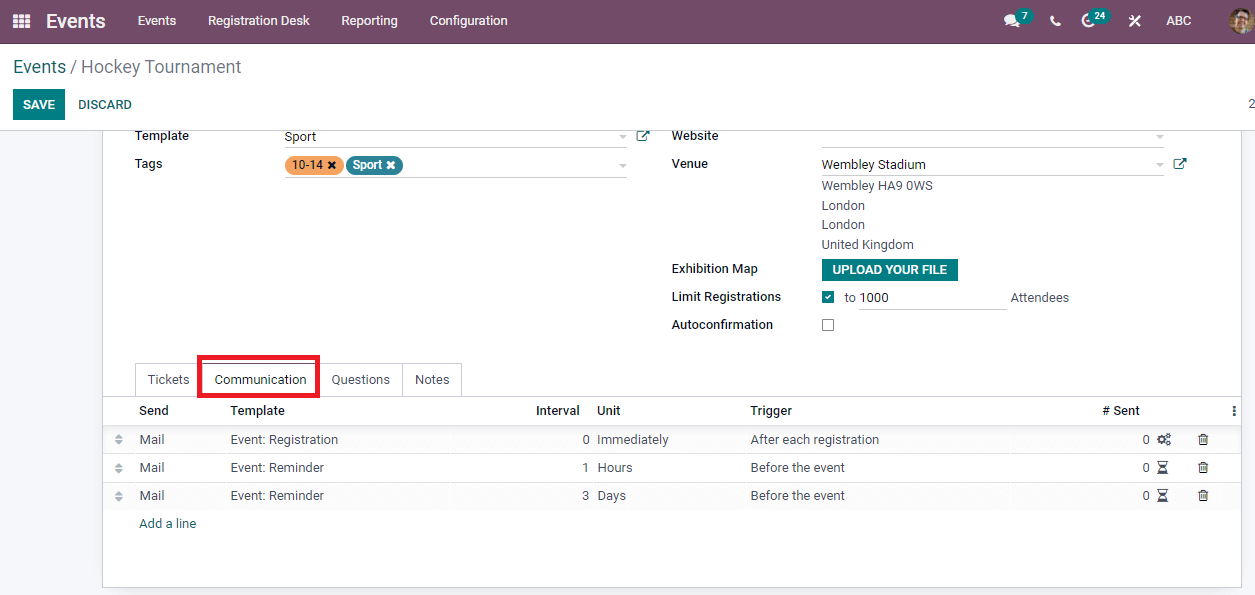
We can add Questions and Notes related to the event under the Questions/Notes tab. The Add a line option helps to implement a new question for participants.
To Register a Ticket for an Event in Website
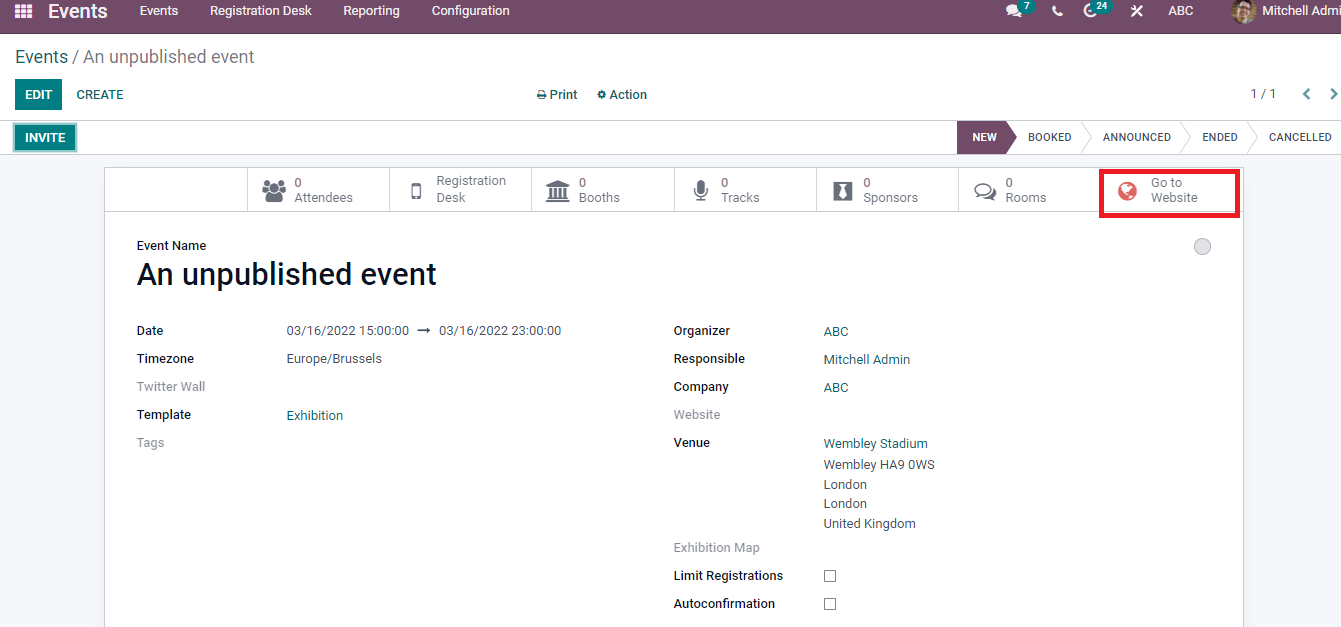
In the Events window, you can see a submenu Go to Website, and the website window opens after clicking on this button.
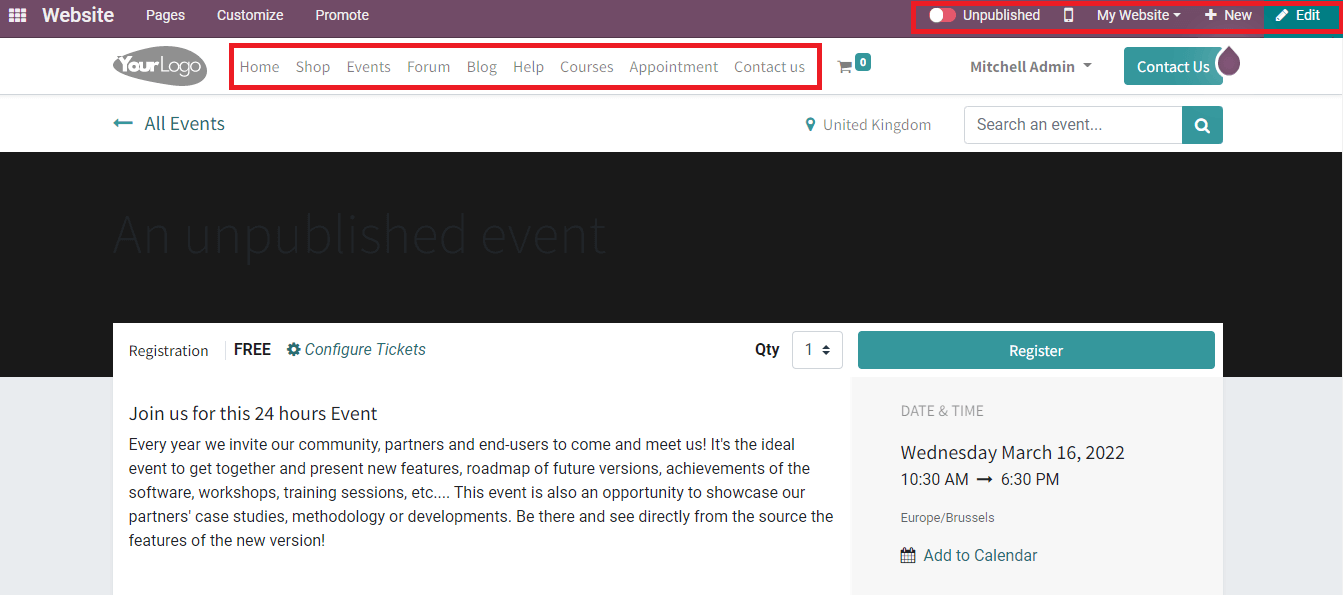
The website dashboard consists of several pages such as Events, Blog, Forum, Courses, Shop and Appointment. On the right side, you can view the icons such as Edit, Unpublished, New and Website.
An overview of the events is visible under the website's Events page, and the search option assists in finding the event you need. In the Upcoming Events tab, you can access the past or upcoming events in a particular month/date. We can also categorize with specific age and Type such as online/conference. Each event's date, time, place, and name are also displayed on the Events page. It aids you to get vast detailed information about each event separately.
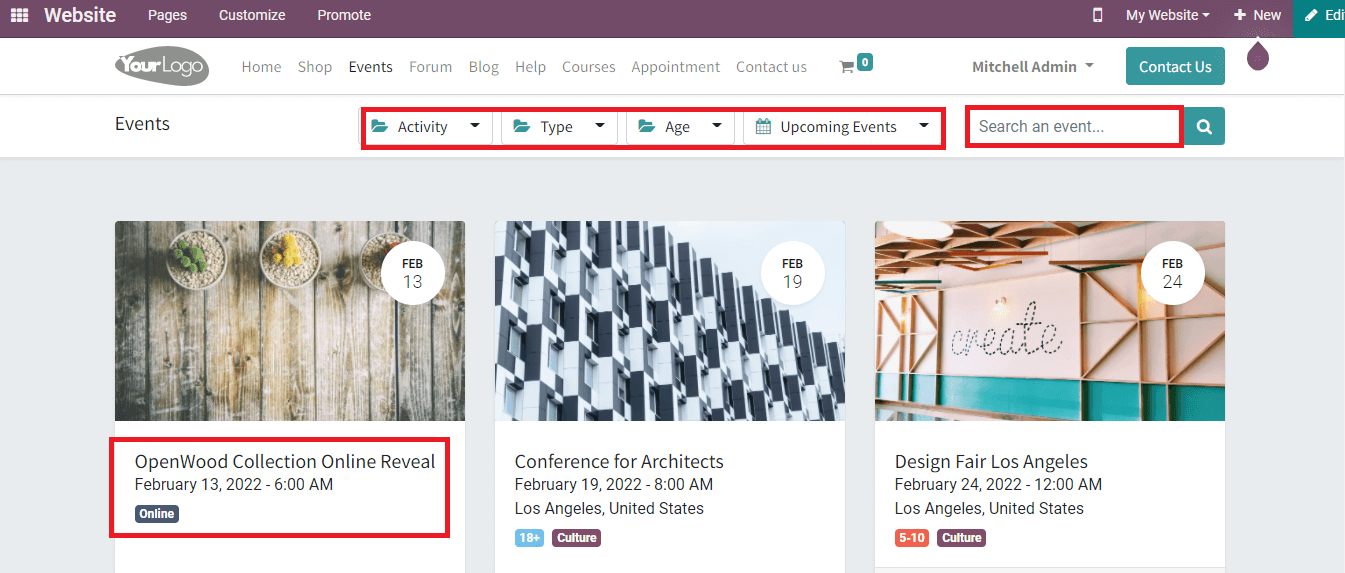
Choose the event according to your interest. The date of the event is depicted in a circle format to attract the audience's attention quickly. Select the event you want to register, and an overview is visible for the user. The website view of an event displays the description, availability of tickets, date, location and time of an event.
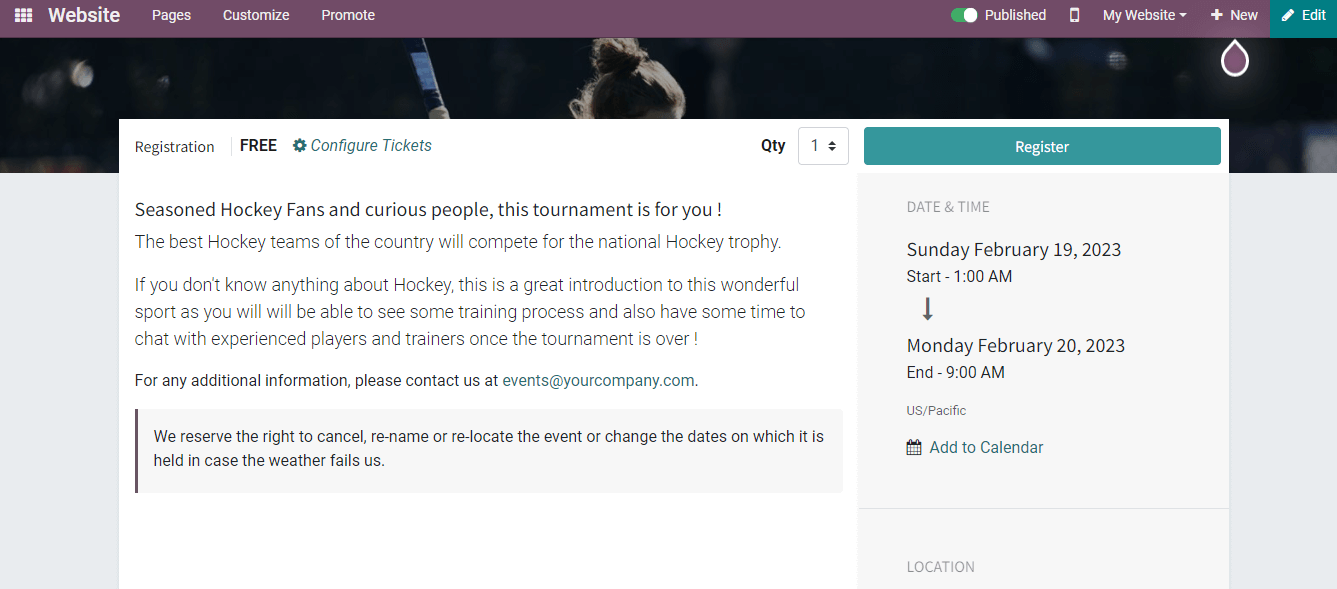
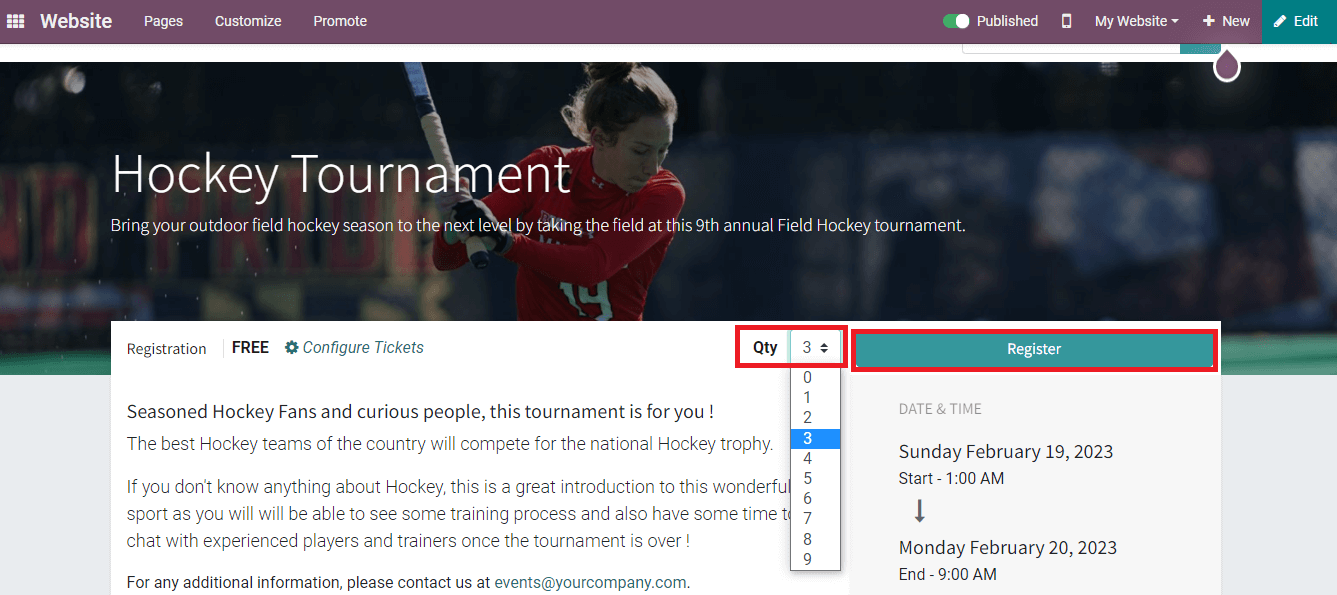
Select the number of tickets you need from the Quantity icon, and you can apply for many tickets. After that, press on Register button to access the ticket for an event.
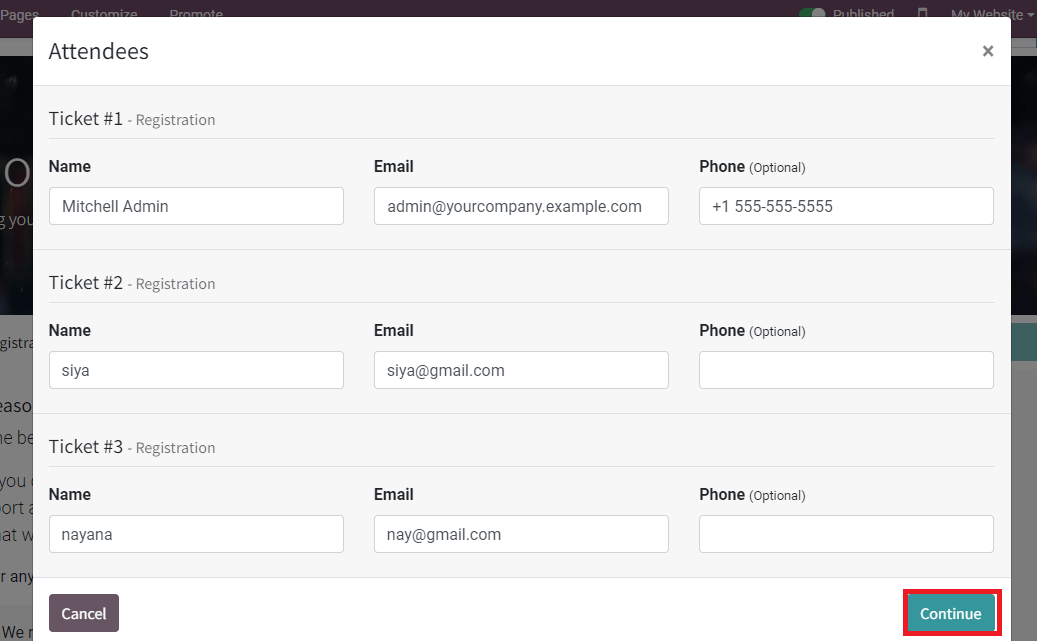
A new page appears to the user after clicking on the Register icon. The forms are generated based on the selection of tickets. Enter the applicant's Name, Email, and contact details in the Attendees window and press the Continue icon.
The registration is confirmed after pressing on the Continue icon displayed in the screenshot below. We can view the details of registered attendees confirmation in the pop-up window.
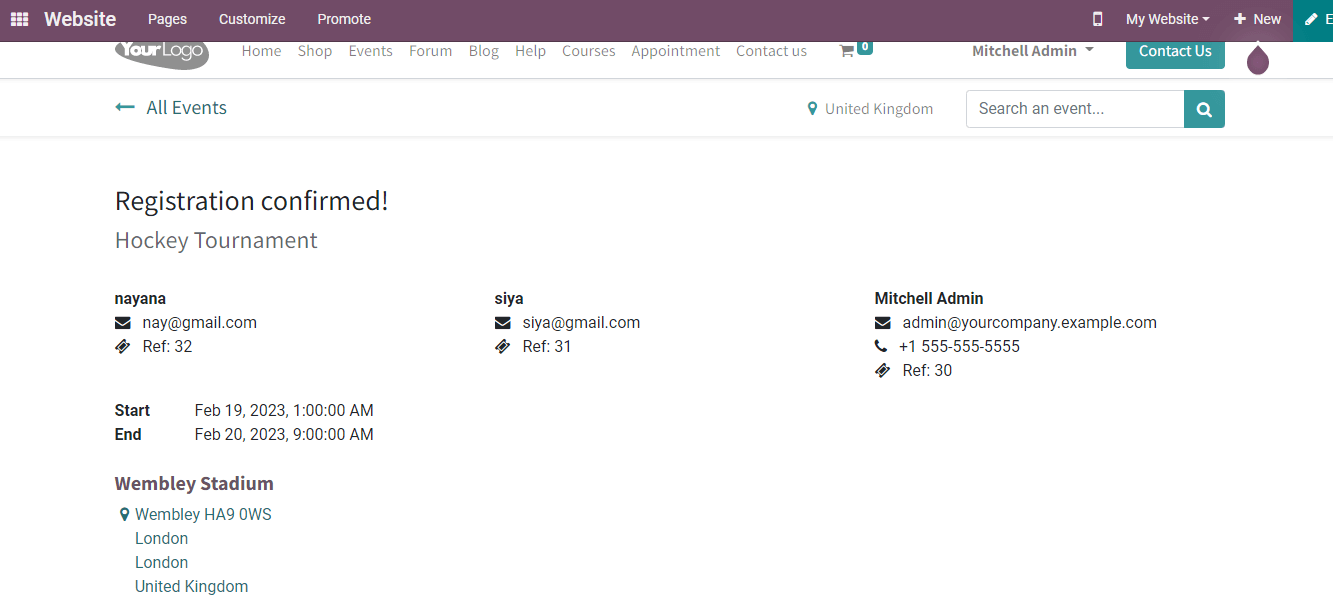
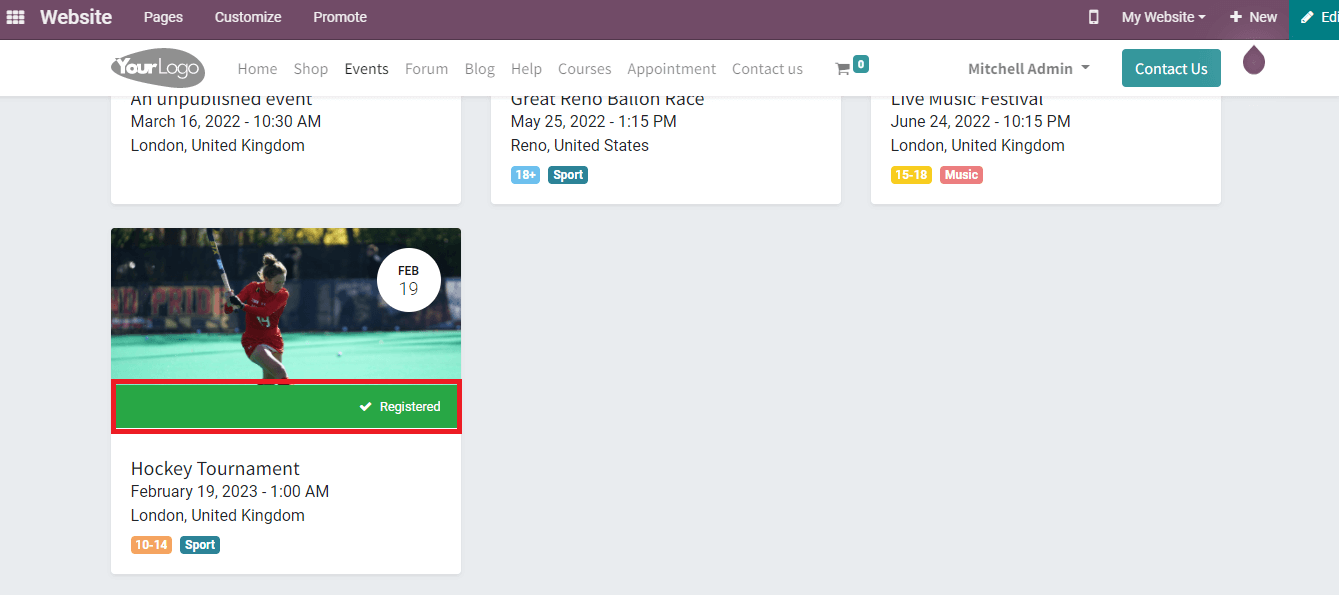
Inside the Events page of the website, you can see that your registration is confirmed and marked as Registered.
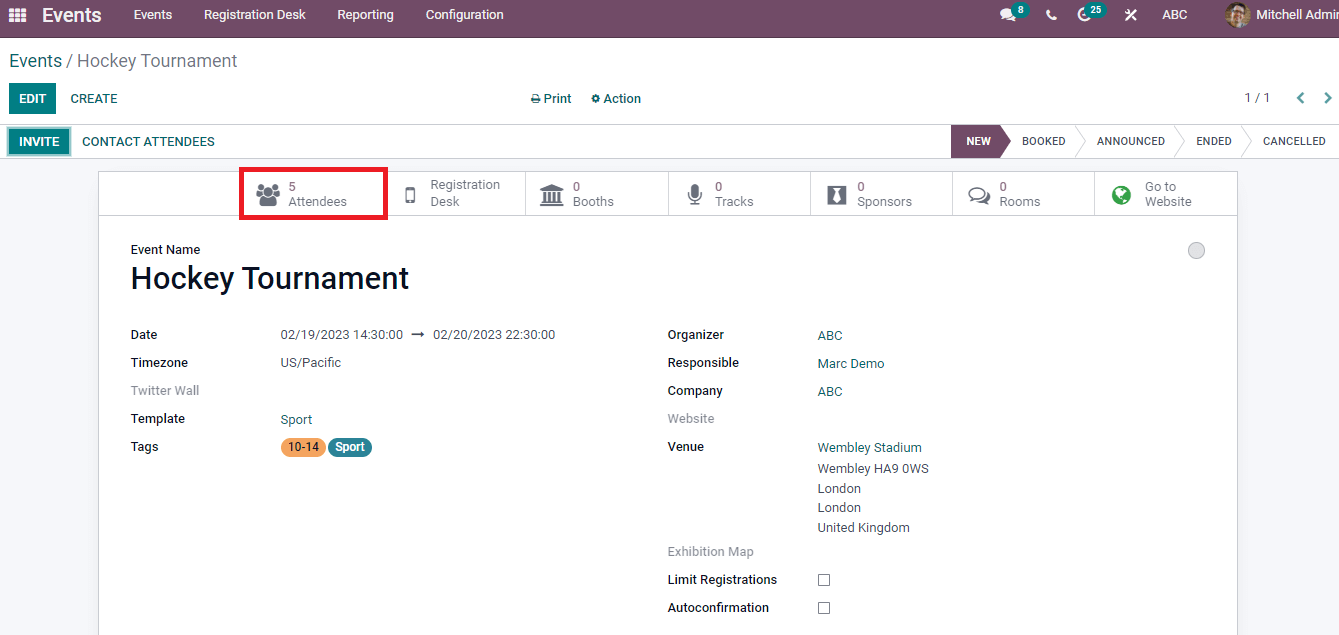
The Events window consist of the Attendees option and press on the Attendees icon. It assists you to know the information of each attendee participating in the event.
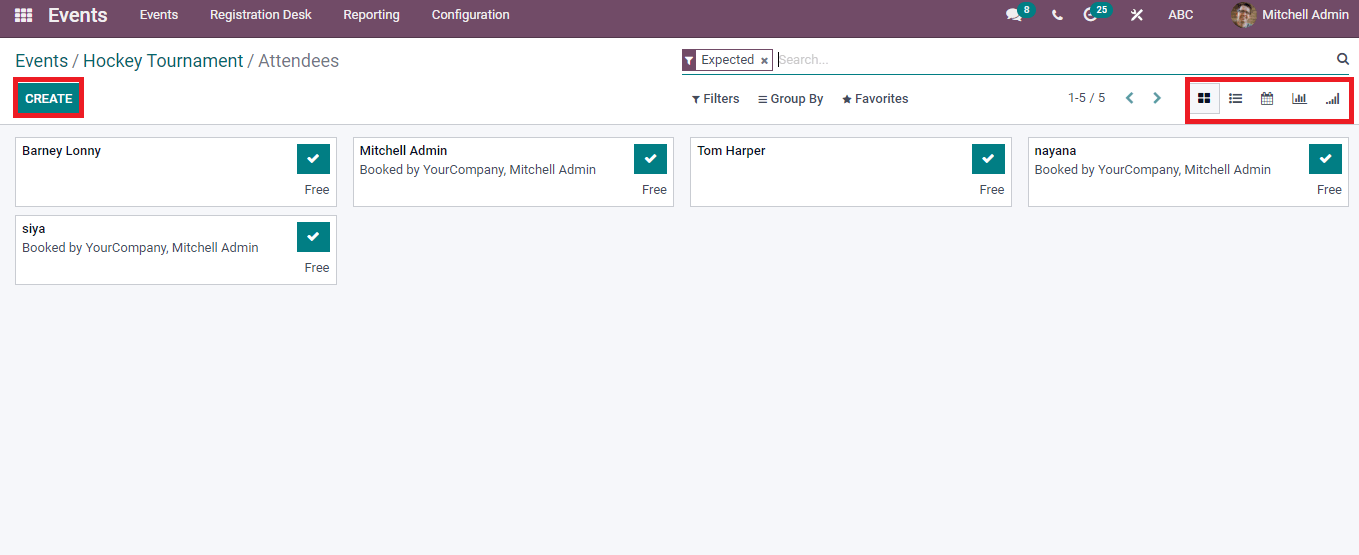
In the Attendees window, we can configure the number and details of registered attendees. By clicking on the specific title of an attendee, you can view the general information of the participant. The Attendees window is viewable in Kanban, Graph, List and Calendar forms. We can develop a new attendee by pressing on Create icon in the Attendees window.
The Odoo 15 Events module assists to organize ticketed events for customers. It may be workshops, seminars, exhibitions, conferences, and cultural programs depending on the promotion of services/products. An organization can handle events easily using the advanced techniques in Odoo 15 Events module, and this module also links with the Website, Sales and Marketing sections of Odoo. Users can easily access the process of events for promotion and marketing with Odoo 15 platform.