Odoo 18 introduces a cleaner, more modern frontend architecture powered by the Owl Framework, which is designed to build reactive components with simplicity and performance in mind. One of the common UI customization needs in enterprise systems is to add a custom dropdown menu to the systray, located at the top-right corner of the screen.
In this guide, we’ll walk you through creating a fully working systray dropdown in Odoo 18, where users can quickly access Sale Orders and Purchase Orders via menu items inside a dropdown.
Create the JavaScript Component
First, create a JavaScript file in your module at static/src/components/systray_dropdown.js:
/** @odoo-module **/
import { registry } from "@web/core/registry";
import { useService } from "@web/core/utils/hooks";
import { Component } from "@odoo/owl";
import { Dropdown } from "@web/core/dropdown/dropdown";
import { DropdownItem } from "@web/core/dropdown/dropdown_item";
class SystrayDropdown extends Component {
   setup() {
       this.action = useService("action");
   }
   // Open Sale Orders in a list view
   openSaleOrders() {
             this.action.doAction({
           type: "ir.actions.act_window",
           name: "Sale Orders",
           res_model: "sale.order",
           views: [[false, "list"], [false, "form"]],
           target: "current",
       });
   }
   // Open Purchase Orders in a list view
   openPurchaseOrders() {
              this.action.doAction({
           type: "ir.actions.act_window",
           name: "Purchase Orders",
           res_model: "purchase.order",
           views: [[false, "list"], [false, "form"]],
           target: "current",
       });
   }
}
SystrayDropdown.template = "systray_dropdown";
SystrayDropdown.components = { Dropdown, DropdownItem };
export const systrayItem = {
   Component: SystrayDropdown,
};
registry.category("systray").add("SystrayDropdown", systrayItem, { sequence: 1 });
Create the XML Template
Next, create an XML template file at
static/src/components/systray_dropdown.xml
<?xml version="1.0" encoding="UTF-8" ?>
<templates xml:space="preserve">
   <t t-name="systray_dropdown" owl="1">
       <Dropdown>
              <div class="new_icon">
                  <div class="icon_div">
                      <div class="toggle-icon" role="button">
<i id='create_order'
                             class="fa fa-shopping-cart fa-1.5x"
                             style="color: black; margin-bottom:10px; padding:13px;"
                             role="img" aria-label="Sale/Purchase Order"/>
                      </div>
                  </div>
              </div>
           <t t-set-slot="content">
               <DropdownItem onSelected="() => this.openSaleOrders()">
                   Sale Orders
               </DropdownItem>
               <DropdownItem onSelected="() => this.openPurchaseOrders()">
                   Purchase Orders
               </DropdownItem>
           </t>
       </Dropdown>
   </t>
</templates>
Register Your Assets
Add the files to your module's assets in the __manifest__.py file:
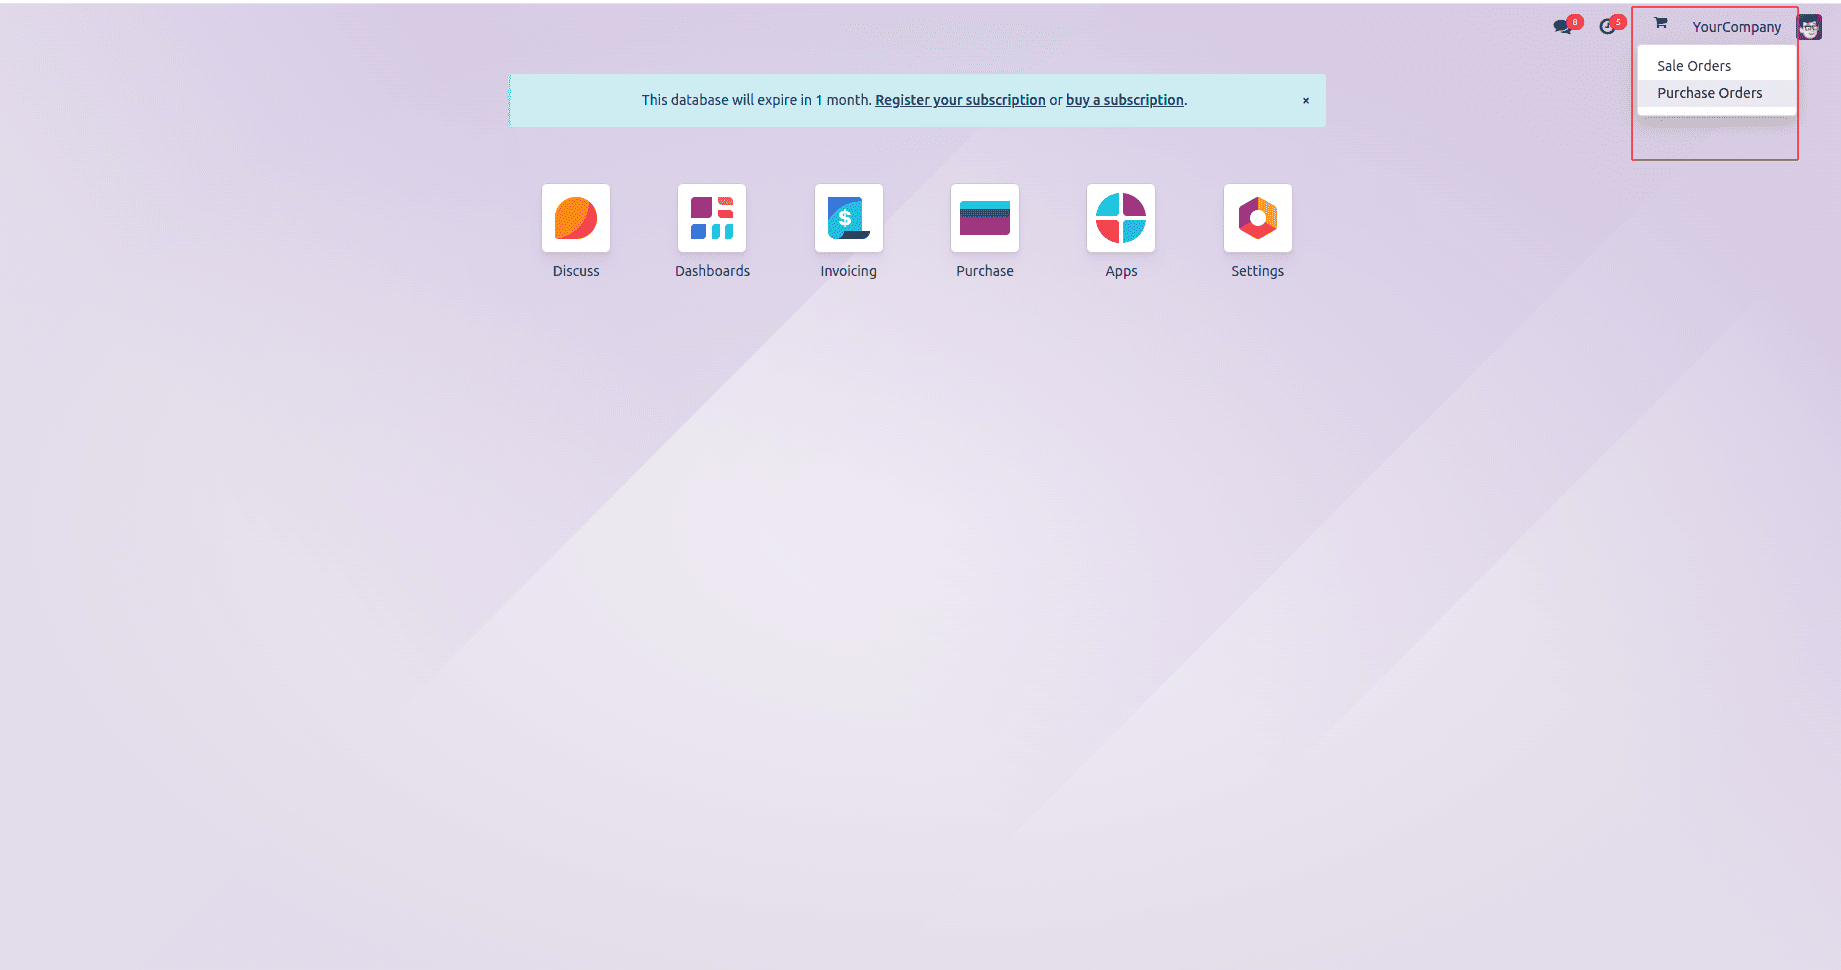
'assets': { 'web.assets_backend': [ 'your_module/static/src/components/systray_dropdown.js', 'your_module/static/src/components/systray_dropdown.xml', ], },With these steps, you'll have a working dropdown in your Odoo 18 systray that can navigate to sale orders and purchase orders, as shown in the images below.
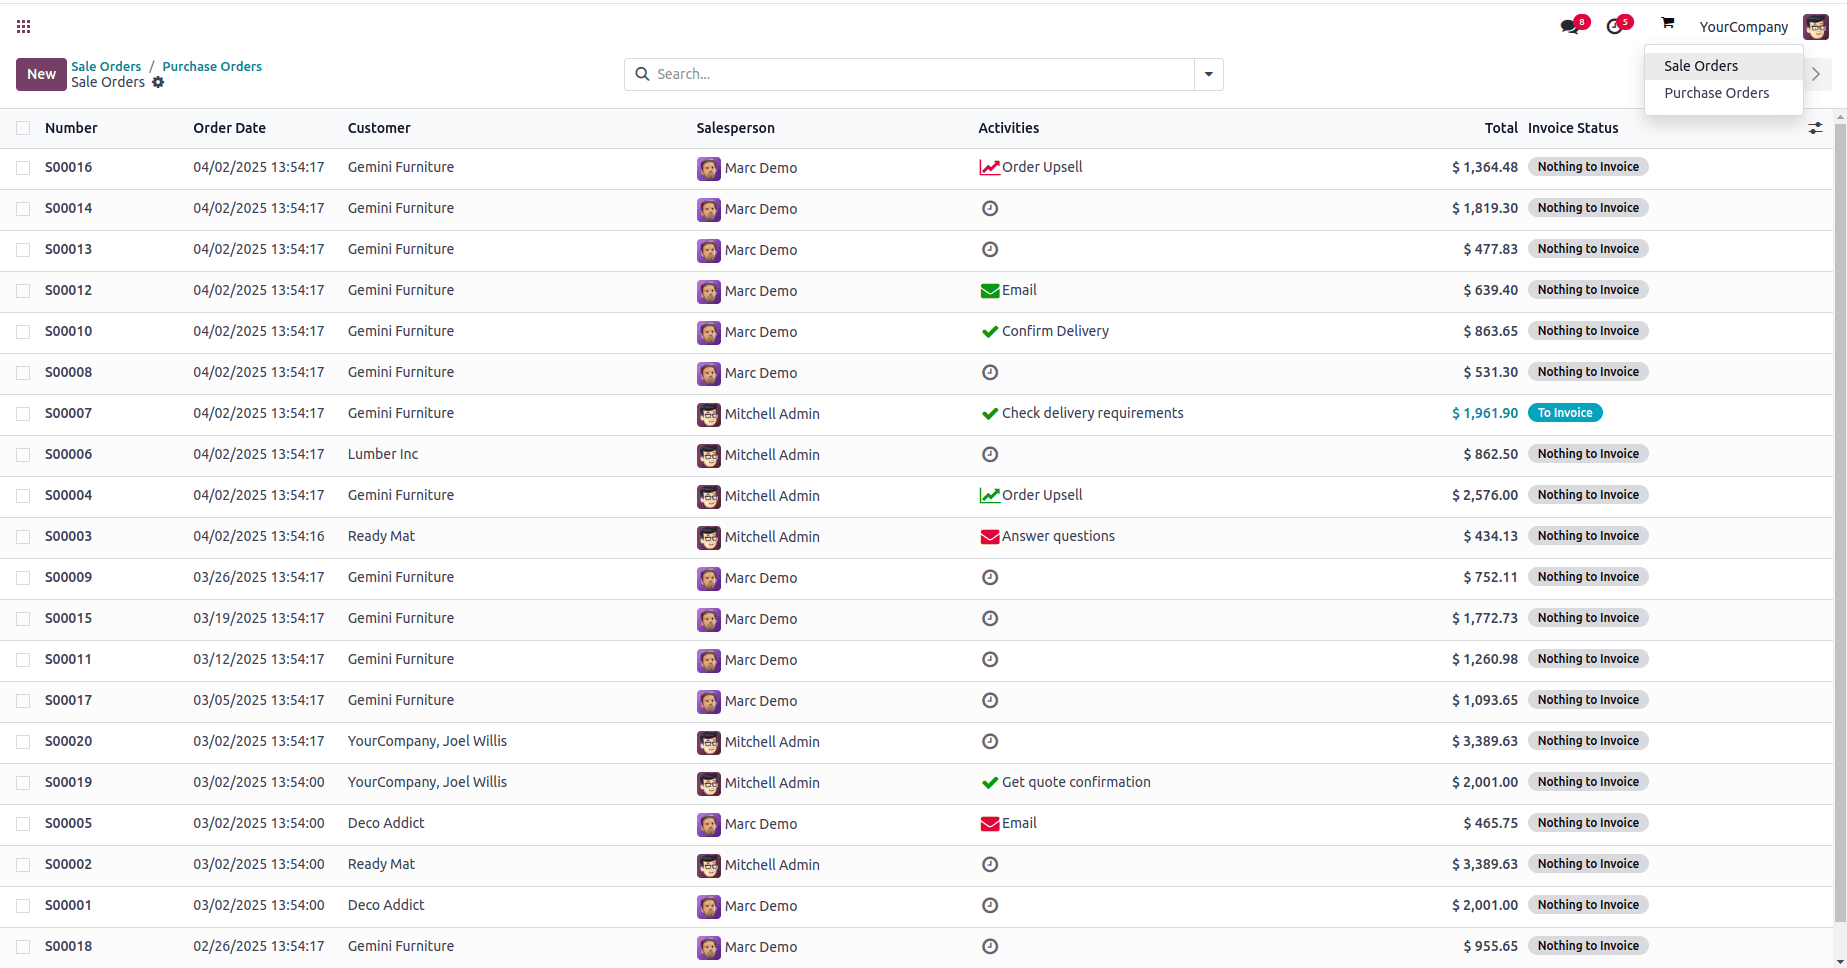
The image below shows the sale orders by clicking on the dropdown menu sale orders from the systray icon.
After restarting your Odoo server and upgrading your module, you’ll see a shopping cart icon in the top-right systray. Clicking it will reveal a dropdown menu with:
* Sale Orders
* Purchase Orders
Clicking either will take you directly to the respective list views—providing a shortcut for common business actions.
To read more about How to Open a Drop Down From Systray in Odoo 16, refer to our blog How to Open a Drop Down From Systray in Odoo 16.