Managing business expenses is made easier with the Odoo 17 Expenses module. Workers may quickly report their expenses, making it easier for supervisors to review and approve them. Accountants gain from this as well since they may record and handle payments for upcoming transactions.
Once you choose the My Expenses option from the My Expenses menu, you can view the dashboard with expenses created by the login person for the expense module. Users can view the history of previously reported expenses on the My Expenses page. The List view may include details regarding expenses, such as the Date of the Expense, the Employee, the Company, the Status, the Description, the Activity, and more information. At the top of the window, you can see the reported expenses, the amount under validation, and the amount of reimbursement. A user has a clear understanding of the status of the expenses after reviewing the report.
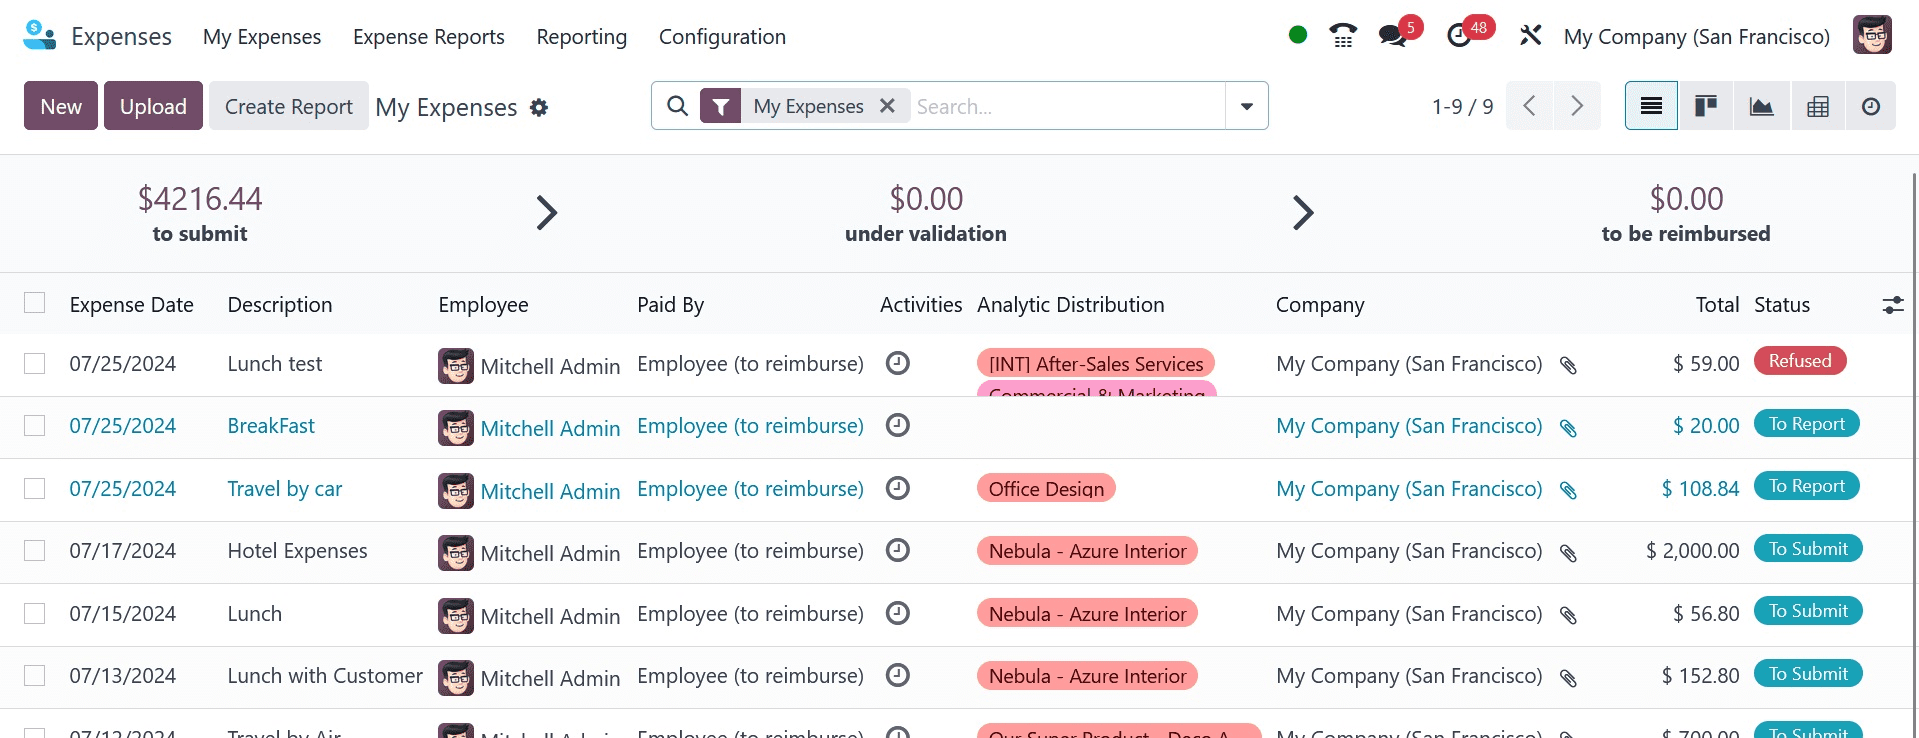
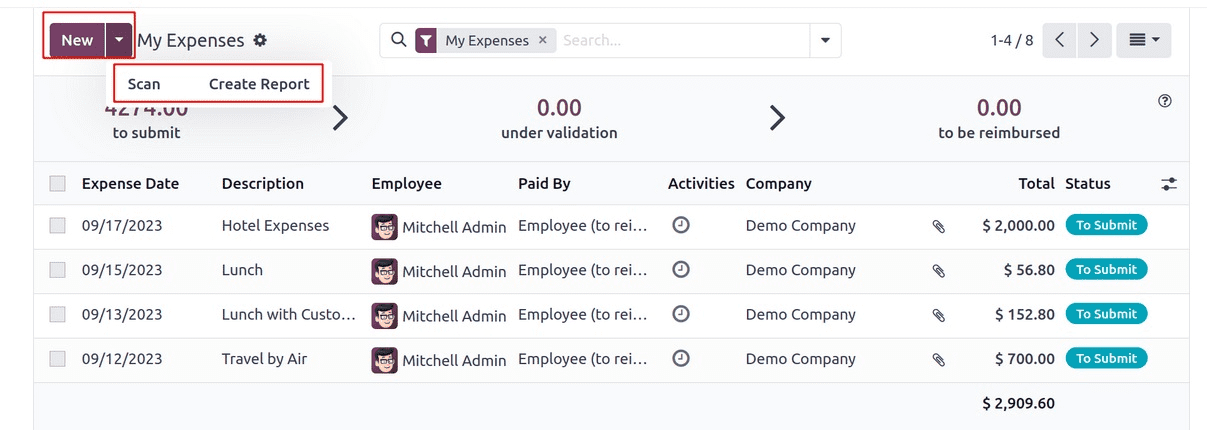
The SCAN icon allows you to upload an expense report from your system and digitize the data to the expense report without manual entry. This will be available once expense digitization is activated from the configuration settings of the expense module. You can also start a new report after you click the Create Report button. To add a new expense, select the NEW symbol in the My Expenses panel.
After providing details about your expenditures in the Description part of the new window, choose the relevant Category. A wide range of spending categories are available to users, including Communication, Gifts, Travel and lodging, Others, etc. The Total column is where users can input the total cost of a certain expense. You can choose the name of a certain employee under the Employee option.
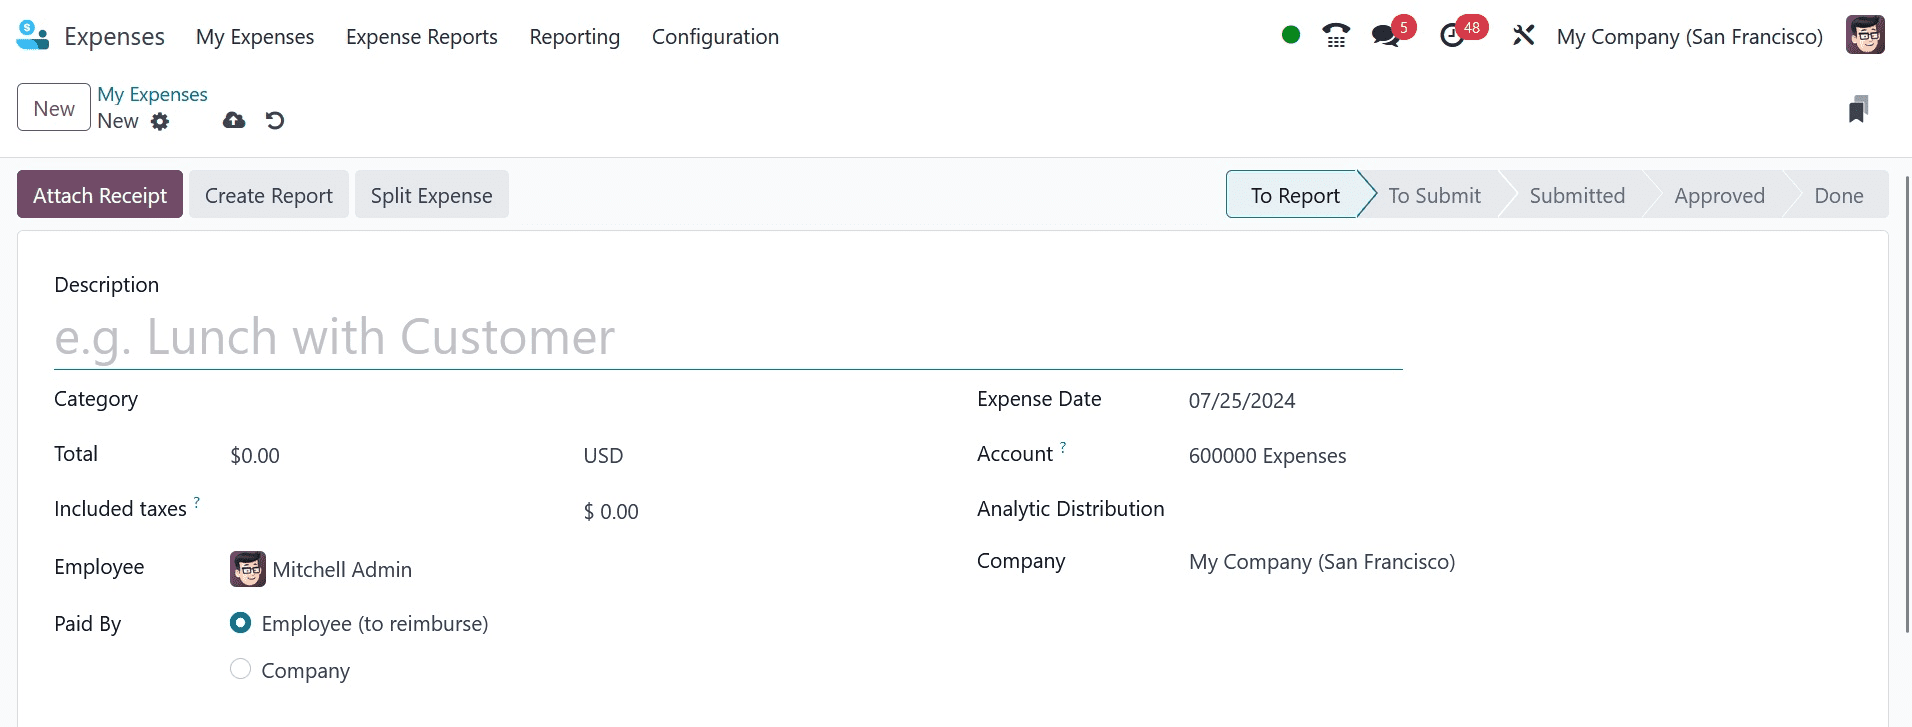
Additionally, you can choose who should pay the expense in the Paid By section. Paying by both the company and the employee is an option. If the employee is paid, the business will later repay the employee for any expenses incurred. Additionally, we can add the Bill Reference and Expense Date, which shows the date on which your item was billed. The anticipated expense account can be selected in the Account option. Additionally, we may choose the category for clients to invoice under and the name of the business.
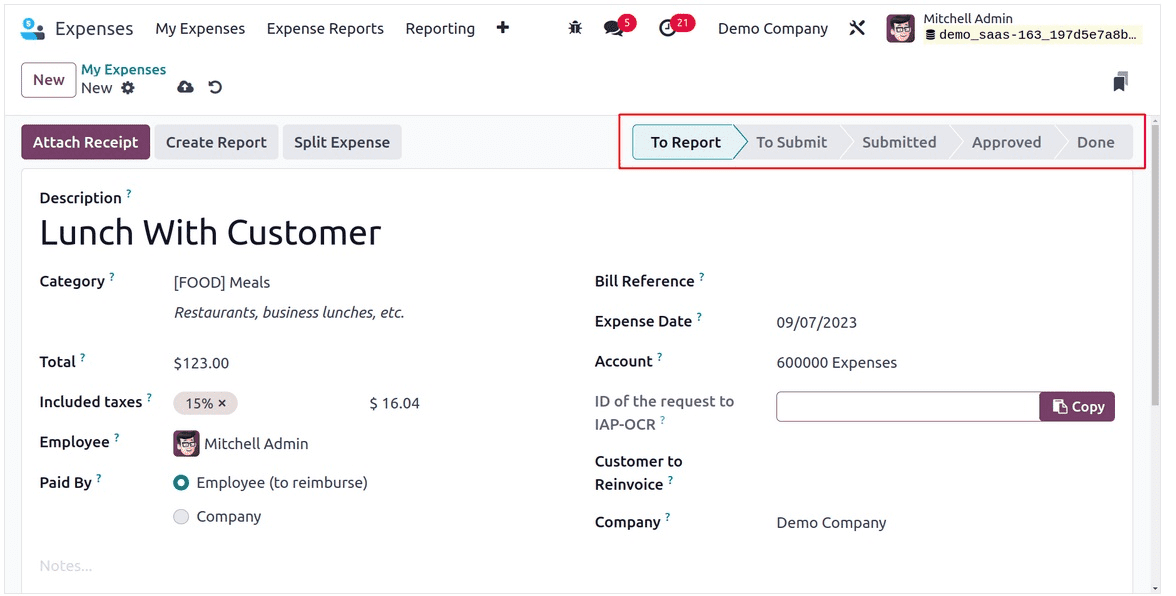
Every piece of data is immediately saved by the Odoo 17. You can also label the expenditure as To Report, To Submit, Submitted, Approved, Rejected, and Completed.
To upload any cost receipt, click the Attach Receipt icon. You can divide the expense after using the Split Expense button. You can define an expense report quickly by selecting the Create Report icon in the My Expenses window.
MY REPORTS
The user can access all of the reports that are currently accessible by selecting the My Reports option, which is located beneath the My Expenses tab. Every detail of reports on topics such as Employee, Activities, Payment Status, Expense Report, Company, and more is visible to the user. By choosing the SCAN icon, you can quickly upload report data to Odoo 17. It's easy to create a new report after selecting the NEW symbol.

EXPENSE REPORTS
By choosing the Expense Reports tab, a user can view all report data. Report information is available in the List view of the Expense Reports window, including Employee, Company, Status, Payment, and more.
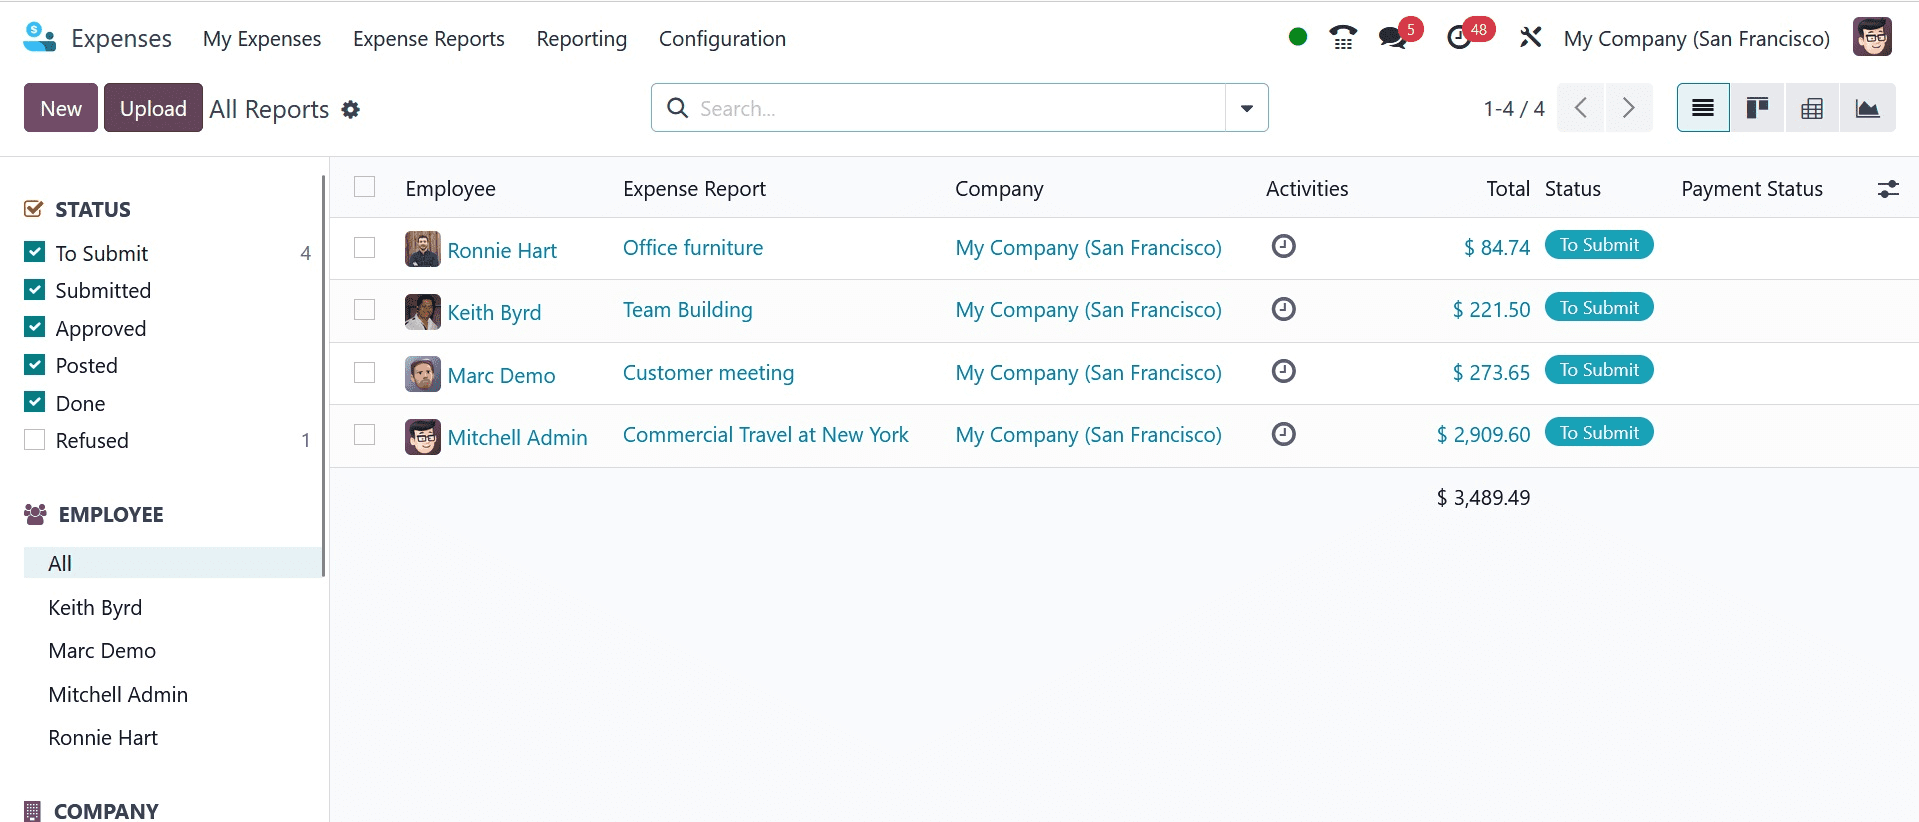
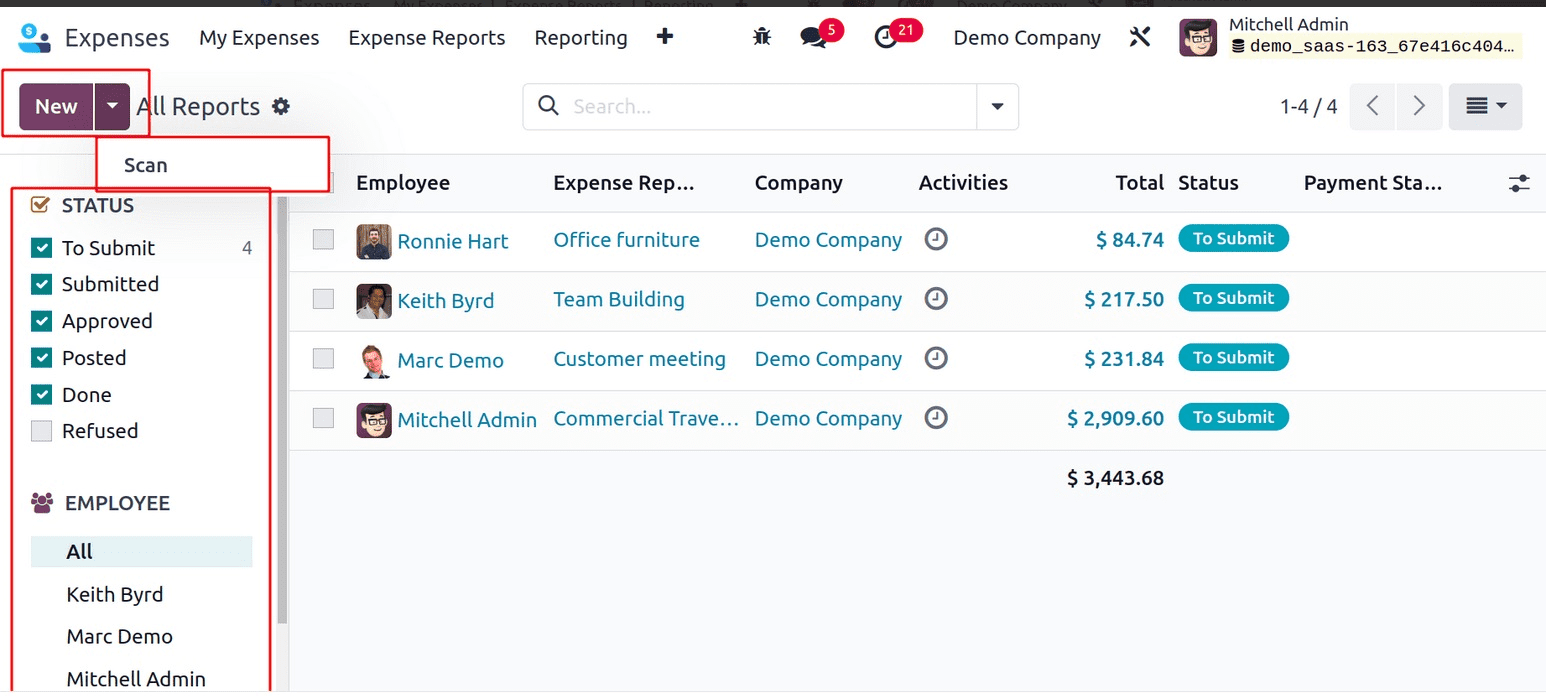
The reports can be sorted by EMPLOYEE, STATUS, and CATEGORIES. All of these are visible to users in the left corner of the window. You can also add a record by choosing the Scan option. Clicking the New button requires you to specify a new report for a particular employee.
The Expense Report Summary section now includes a report description when you click the New button. Later on, you can select the Employee and the Company. Choose the relevant Manager from the list in the Manager section for your report.
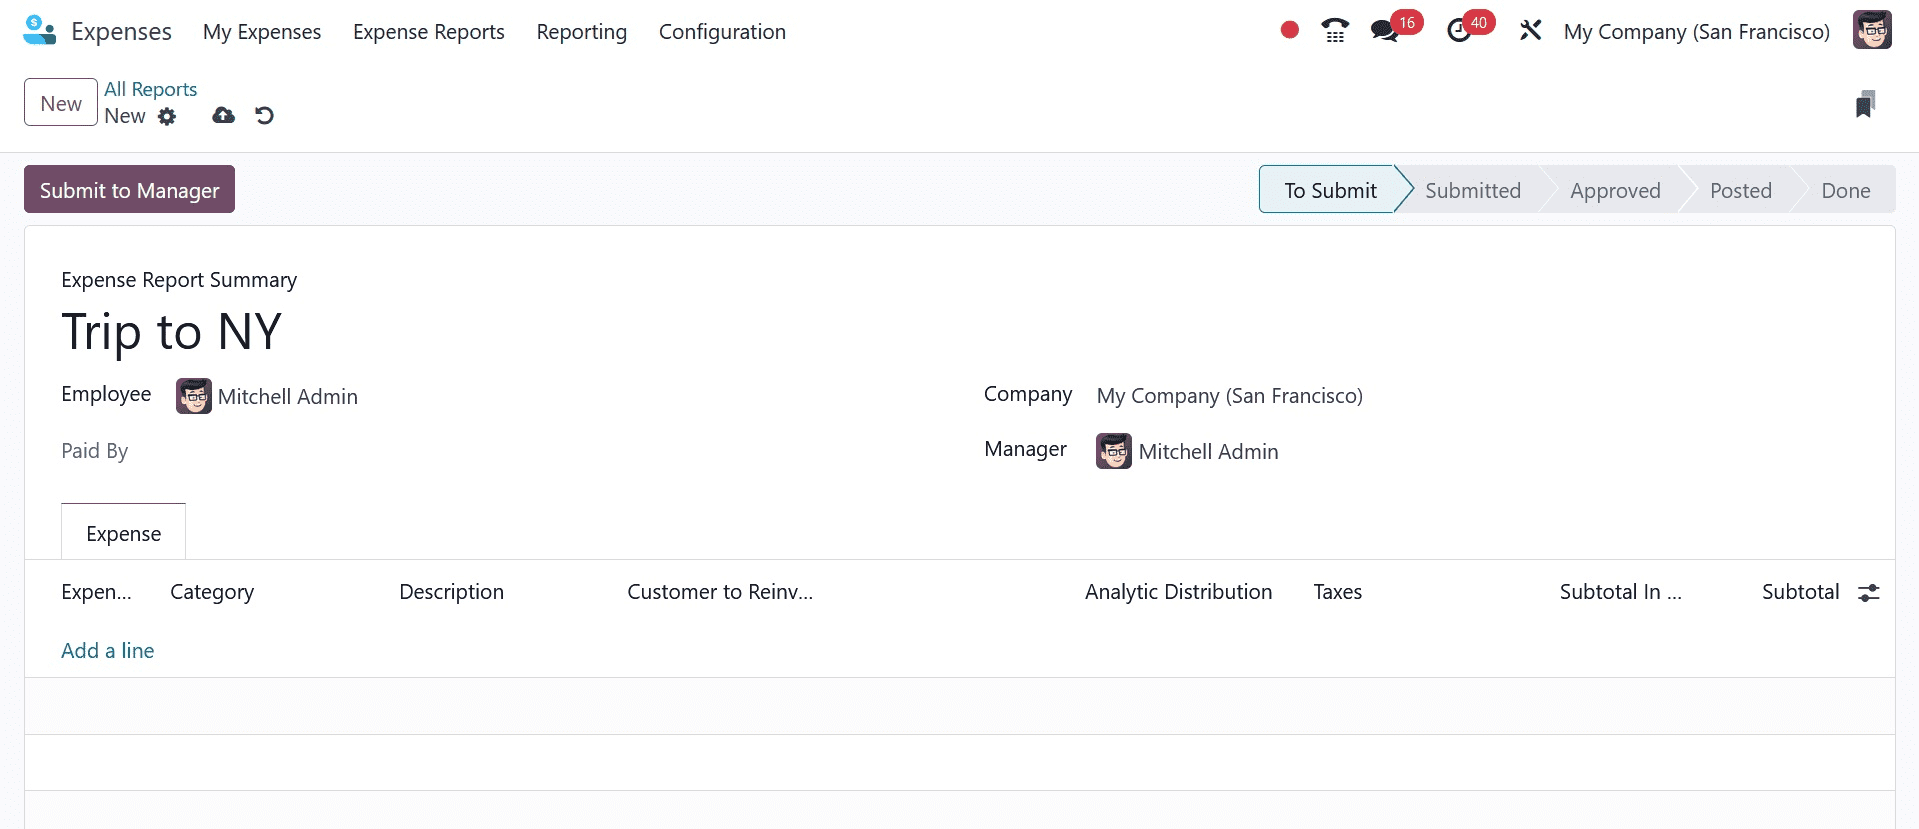
After choosing ‘Add a Line’ from the Expense menu, you may add the report's associated expenses. The user sees the total cost before taxes after selecting the expenses. Once you have entered all the required information, you can send the report to management by selecting the Submit to Manager button, as shown in the above screenshot.
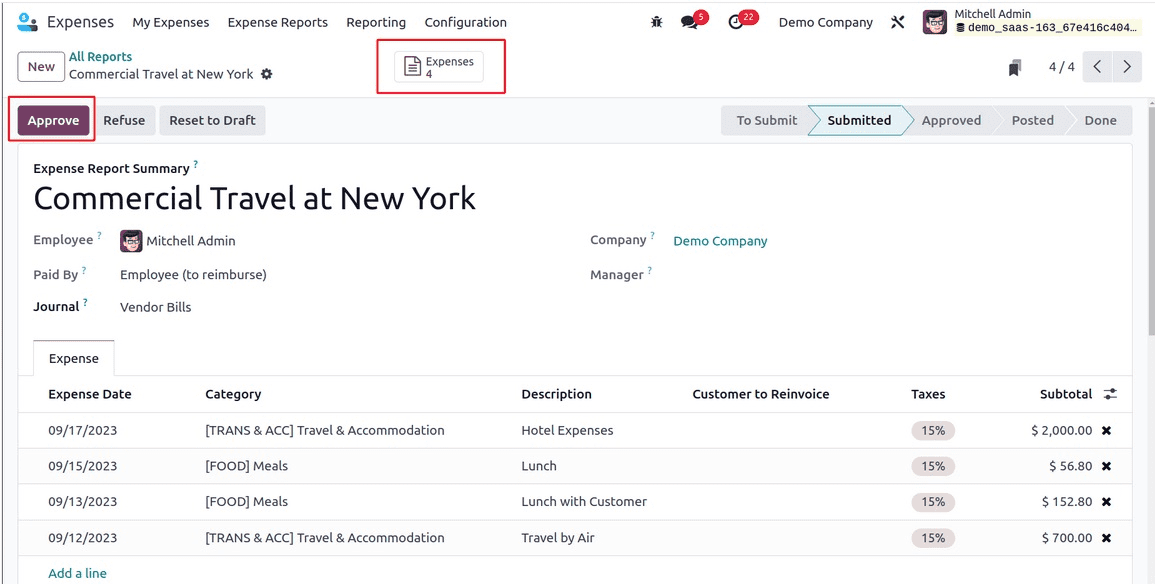
After sending the report to a manager, you may view the generated expense document by choosing the Expenses smart button. The stage has also been changed to Submitted, as in the image above.
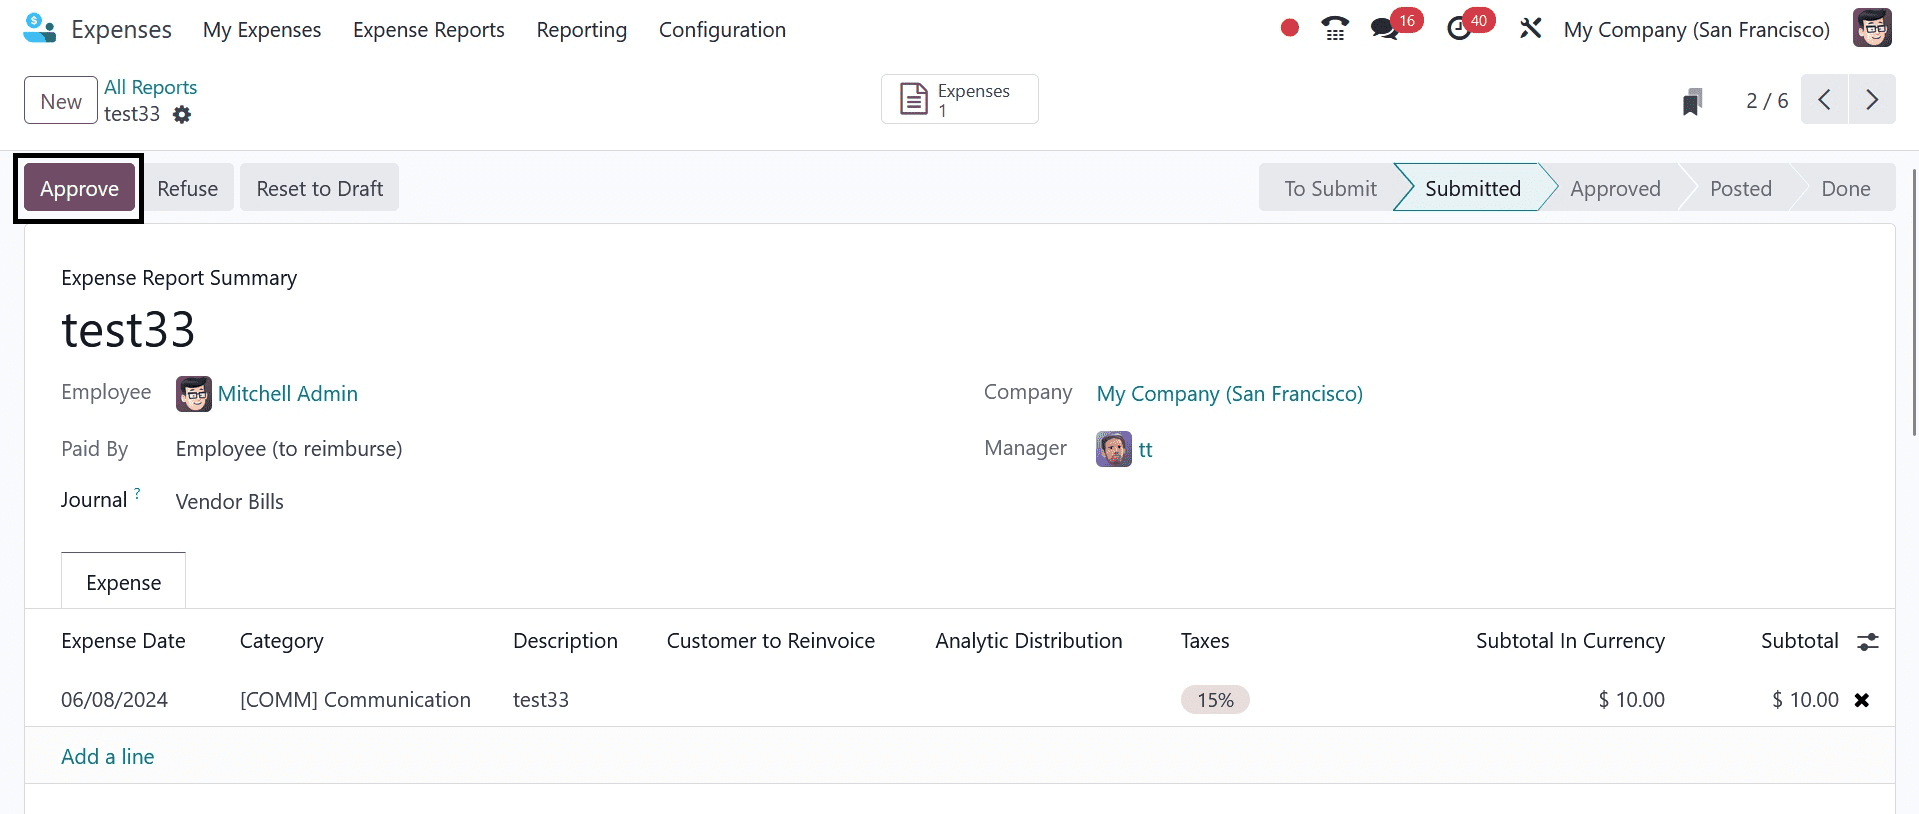
The report can be approved by the concerned management by using the Approve icon, as in the screenshot below.
After approval, the manager has two options, such as posting the journal entries and reporting in the next payslip.
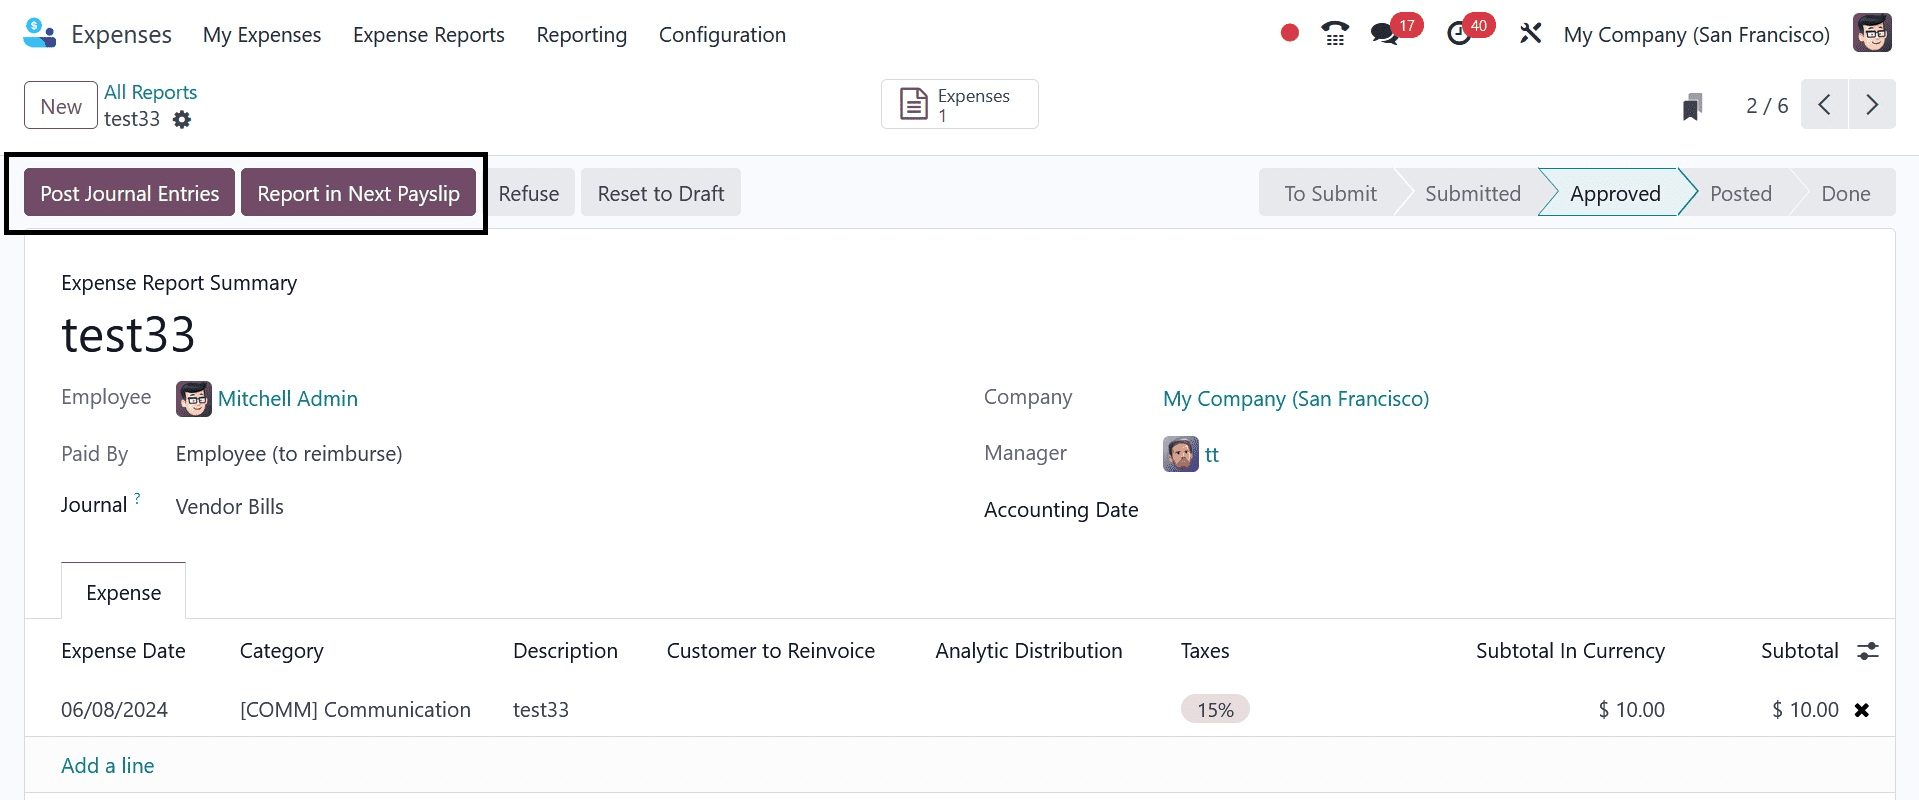
This is James, the employee,'s approved expenditure report. His payslip will serve as the receipt for the reimbursement. Now let's generate a new payslip for James the employee by going to the Payroll section.
On selecting the post journal entries option, you can have the status as posted and simultaneously the option for registering the payment option get appeared, as in the screenshot below.
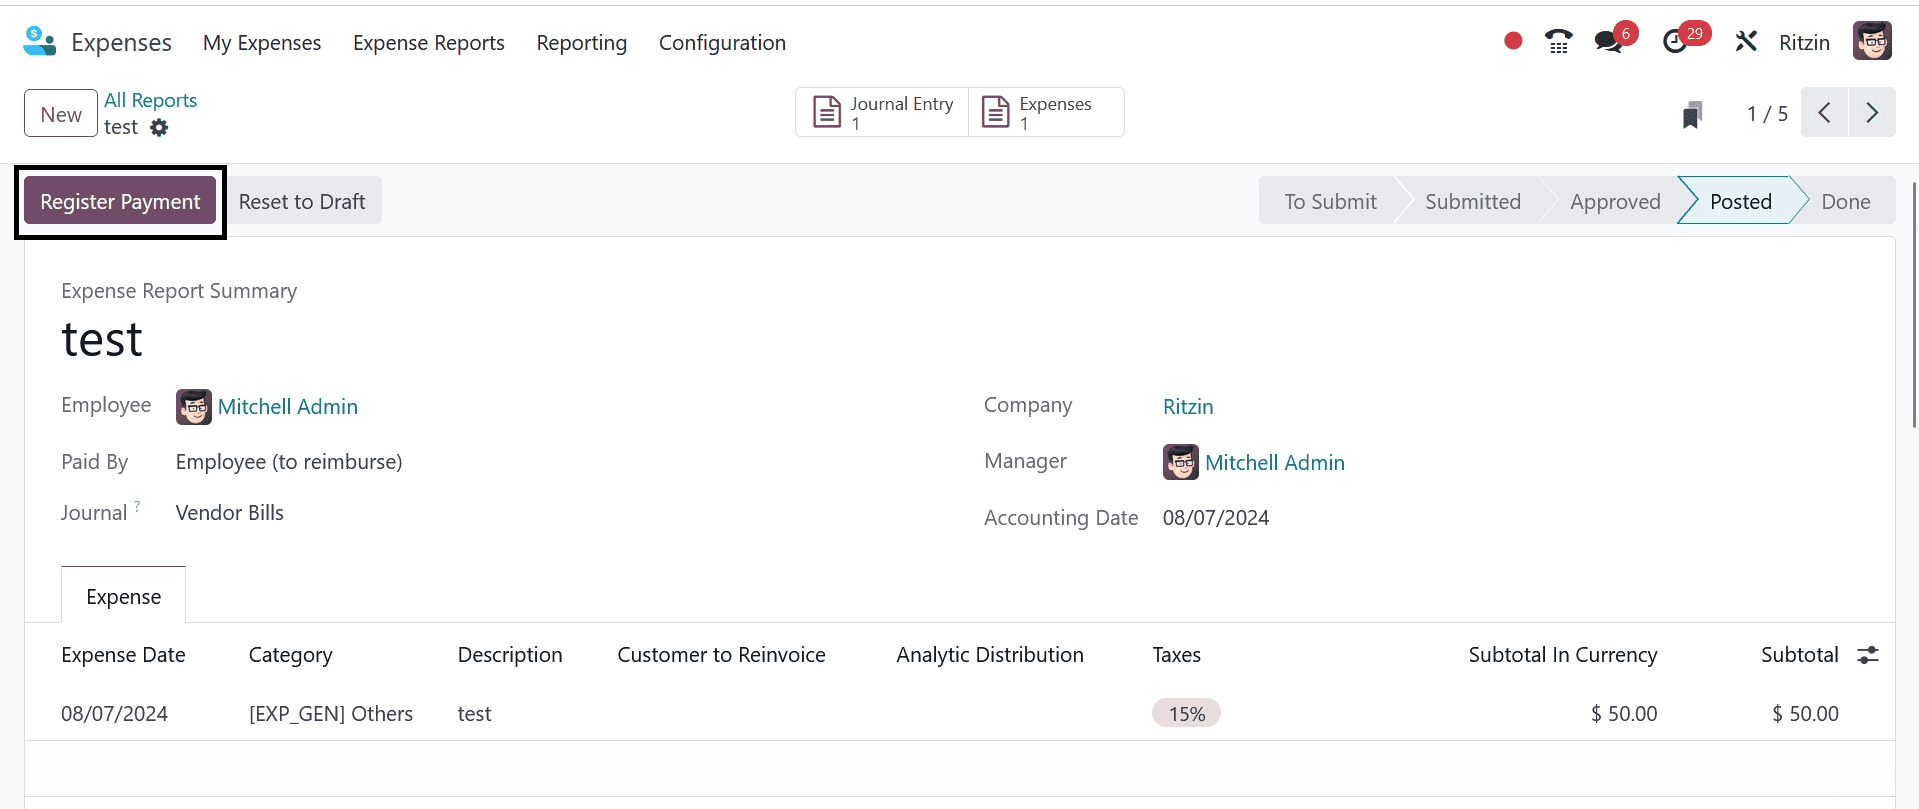
On selecting the Register Payment option, you will be provided with a pop-up window, where you have to provide the details, such as journal, payment method, recipient bank account, amount, payment date, and memo respectively. Then, go to the create payment option, as in the screenshot below.

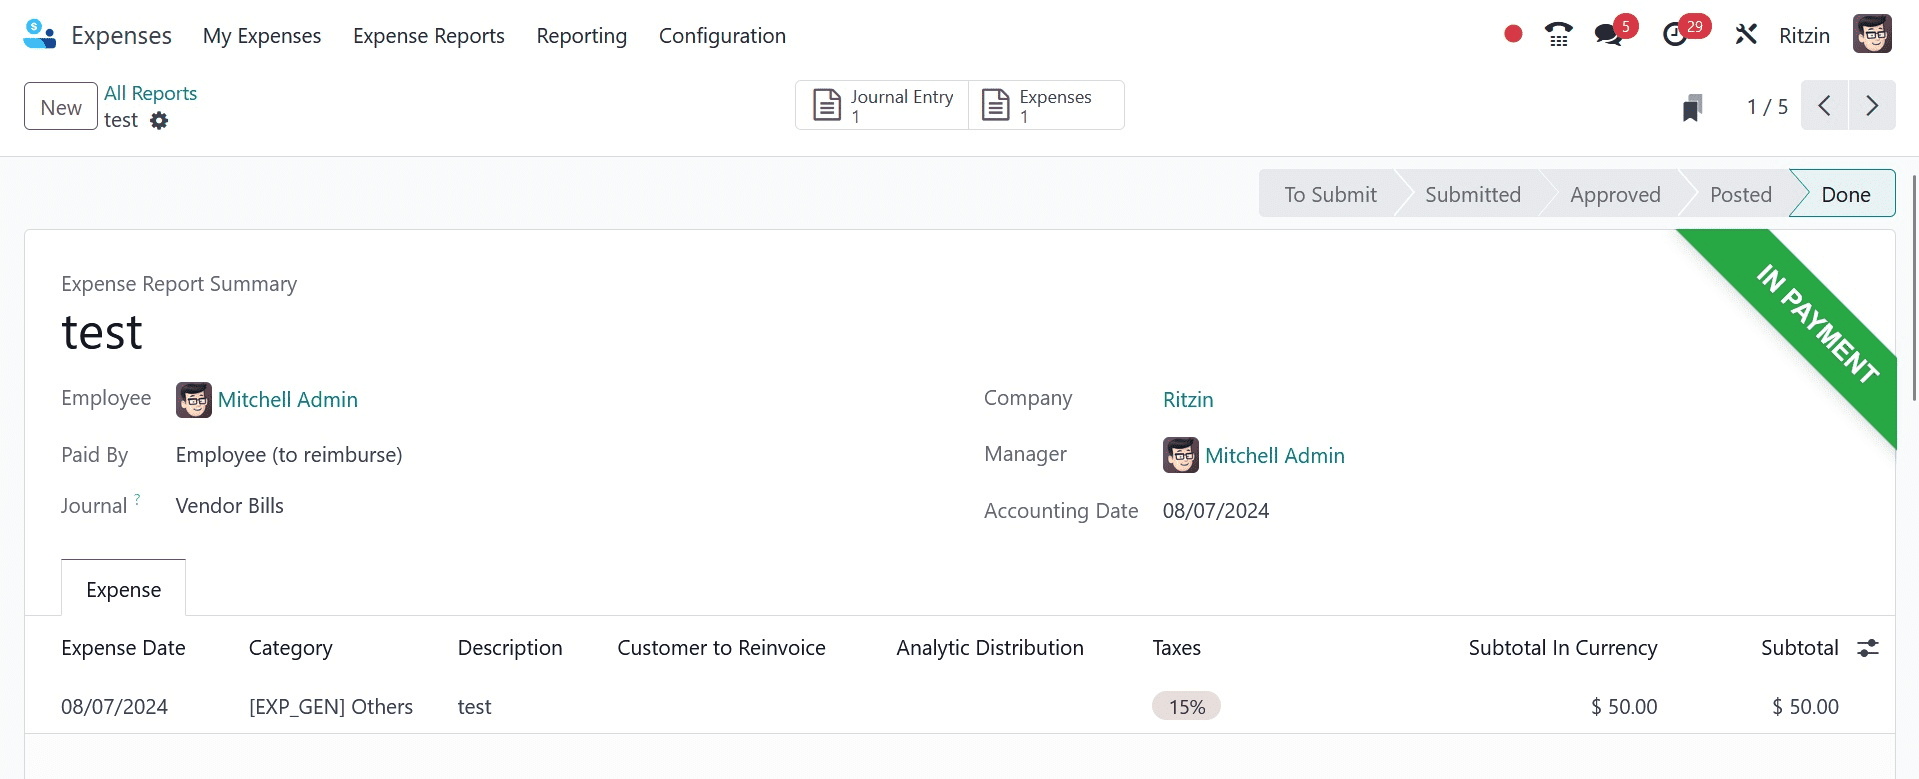
Then, the stage moves to Done and it will be showing as in payment, as in the image given below.
Consequently, it is easy to manage reports in the Odoo 17 Expenses module.
To read more about How to Manage your Expense with odoo 16 Expenses App, refer to our blog How to Manage your Expense with odoo 16 Expenses App.