Designed to handle organizational planning techniques, such as resource planning, by roles, by projects, and by sales orders, the Odoo 17 Planning Module is a feature-rich software package. With just one click, users can create shifts, assign, and reassign them, and employees can view their schedules via a personal portal, making duties easier to complete. The module provides functionalities such as copying schedules from the previous week, publishing weekly or daily schedules for internal employees, and planning new sales orders. Users can filter and group data as per their requirements.
Schedule Menu
The Schedule menu allows employees to review their schedules comprehensively and create new schedules without conflicting with existing work. Schedules are displayed in a calendar view, enabling workers to prioritize tasks and avoid overlaps.
After opening the Planning Module users will see a Gantt chart of the scheduled resources on a dashboard. It shows weekly timetables that you can change by days, months, or years. Names and schedules of the employees are shown in the "Schedule" section.
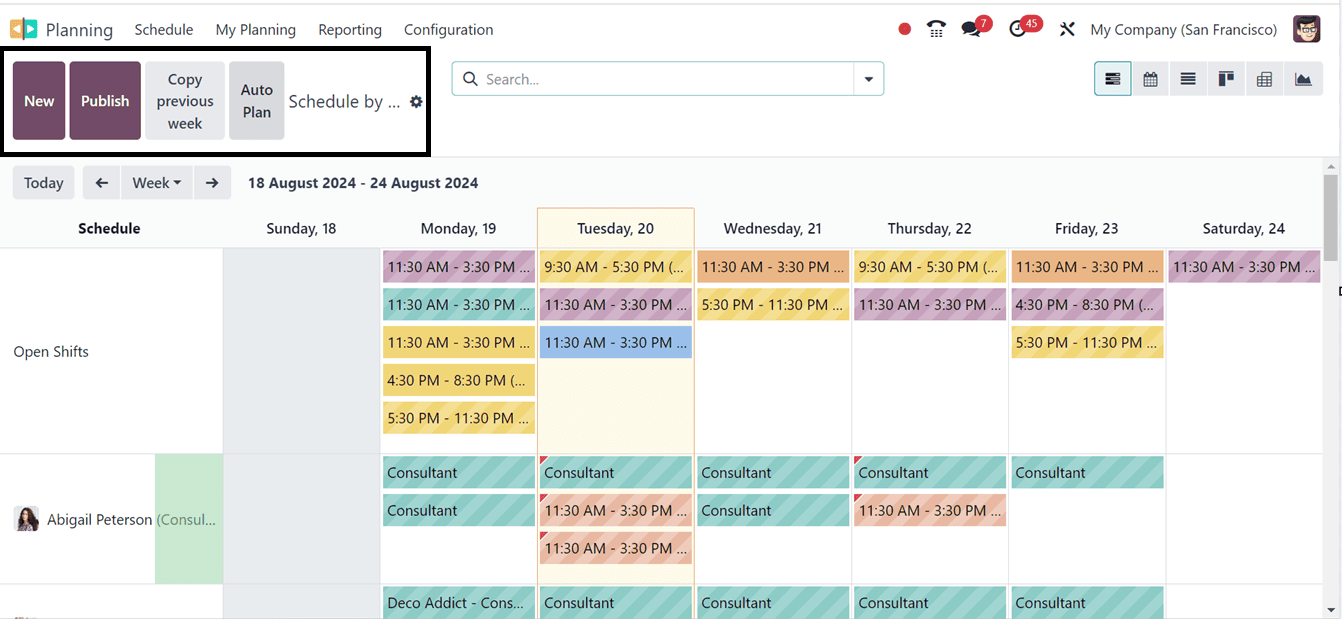
The "Publish" button releases the weekly schedule for workers in the company, while the "Copy previous week" option lets users copy schedules from previous weeks. For new sales orders, use the "Auto plan" option to plan. Clicking on a schedule card will open the schedule details like allocated Time and other details.
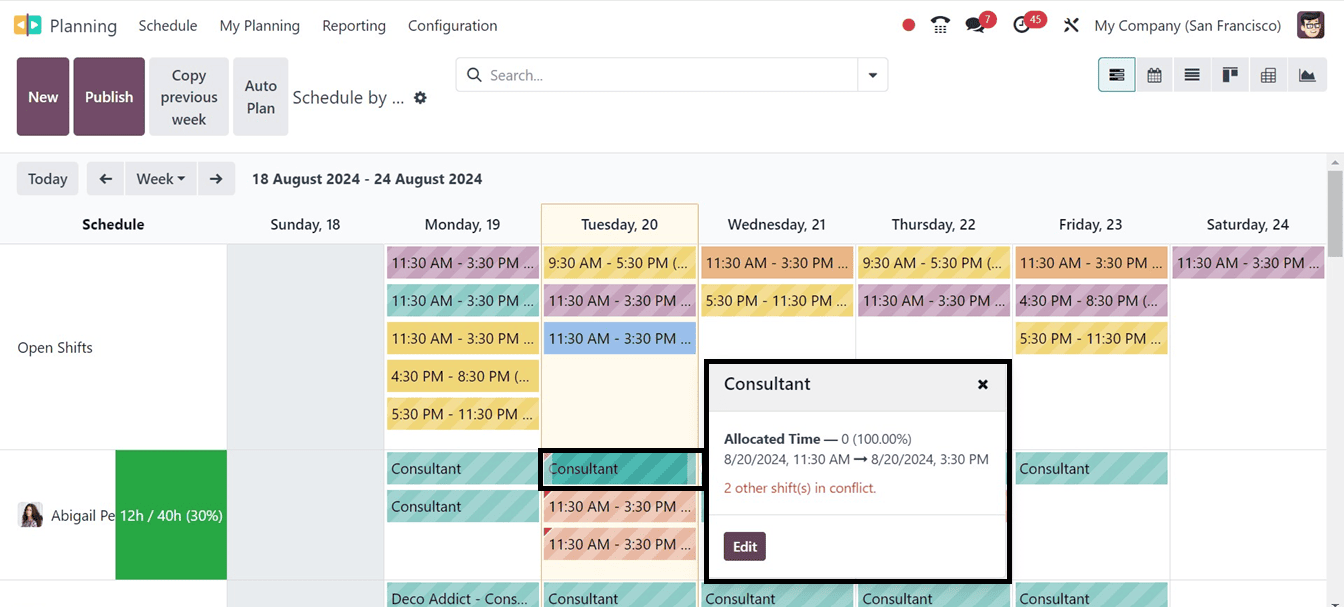
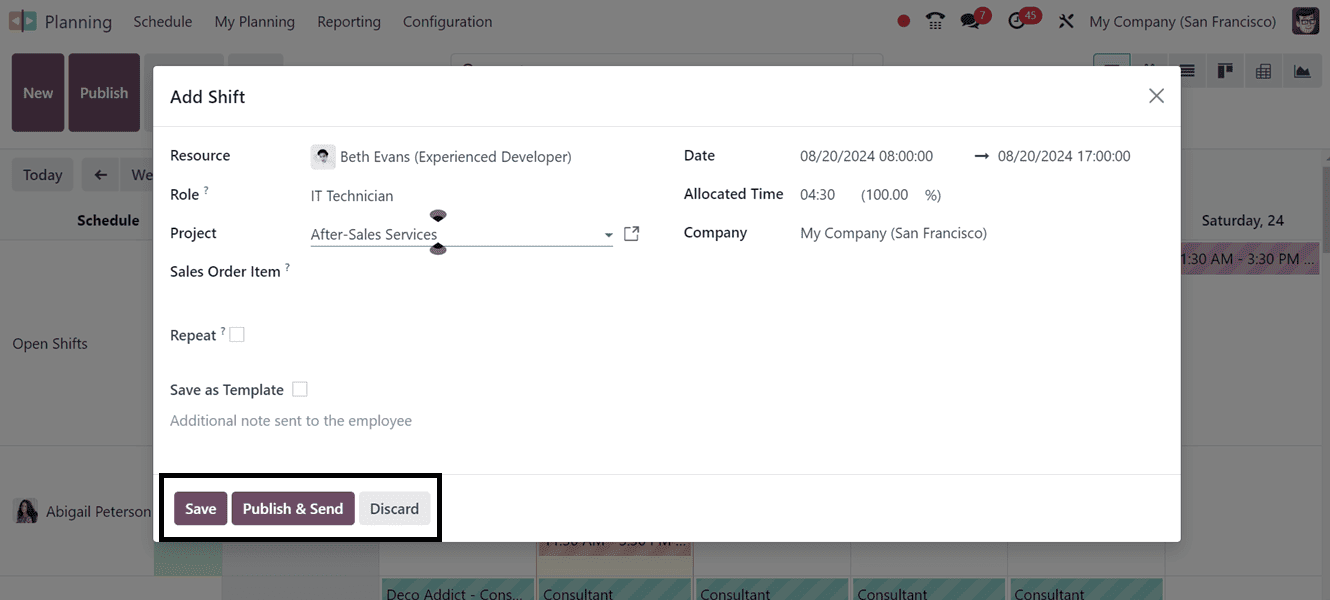
When the Edit button is pressed, a schedule configuration form with comprehensive details about that specific resource schedule appears.
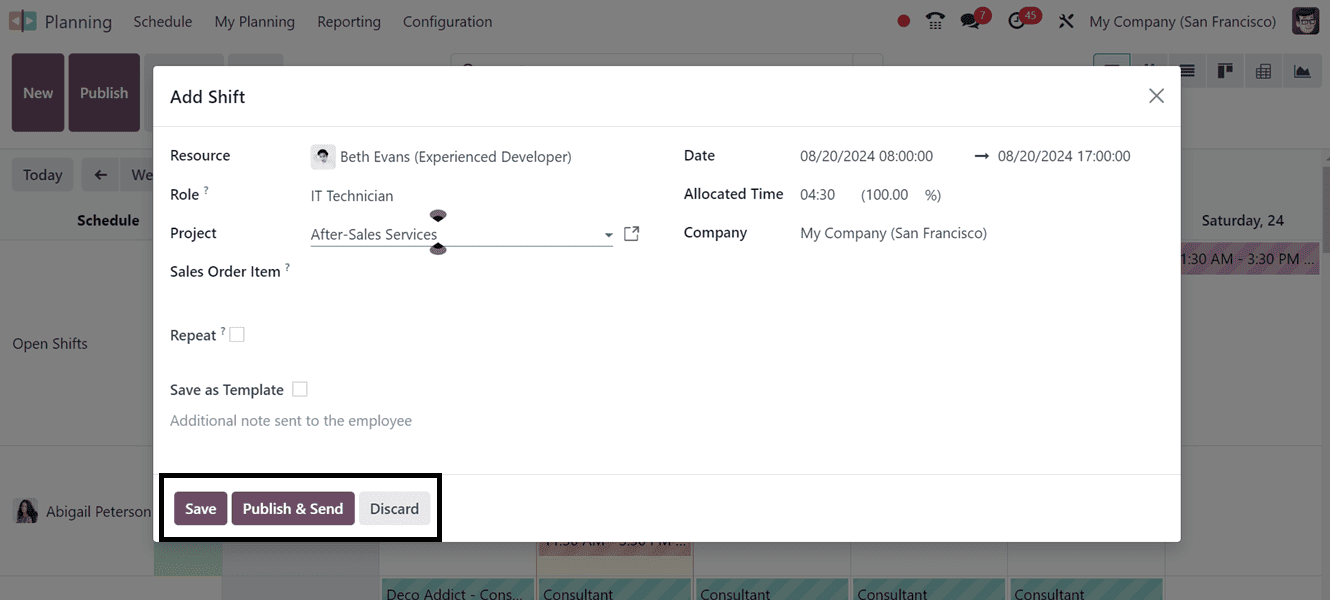
Users can create new planning schedules by clicking the "New" button and inputting essential details such as Resource, Role, Project, Sales Order Item, Date, Company, Repeat Frequency, and Save as Template option as illustrated below.
The Schedule Menu offers various scheduling options:
1. Schedule By Resource: Users can create resource-based schedules by selecting responsible resources, roles, projects, sales order items, dates, company names, and repeat frequencies.
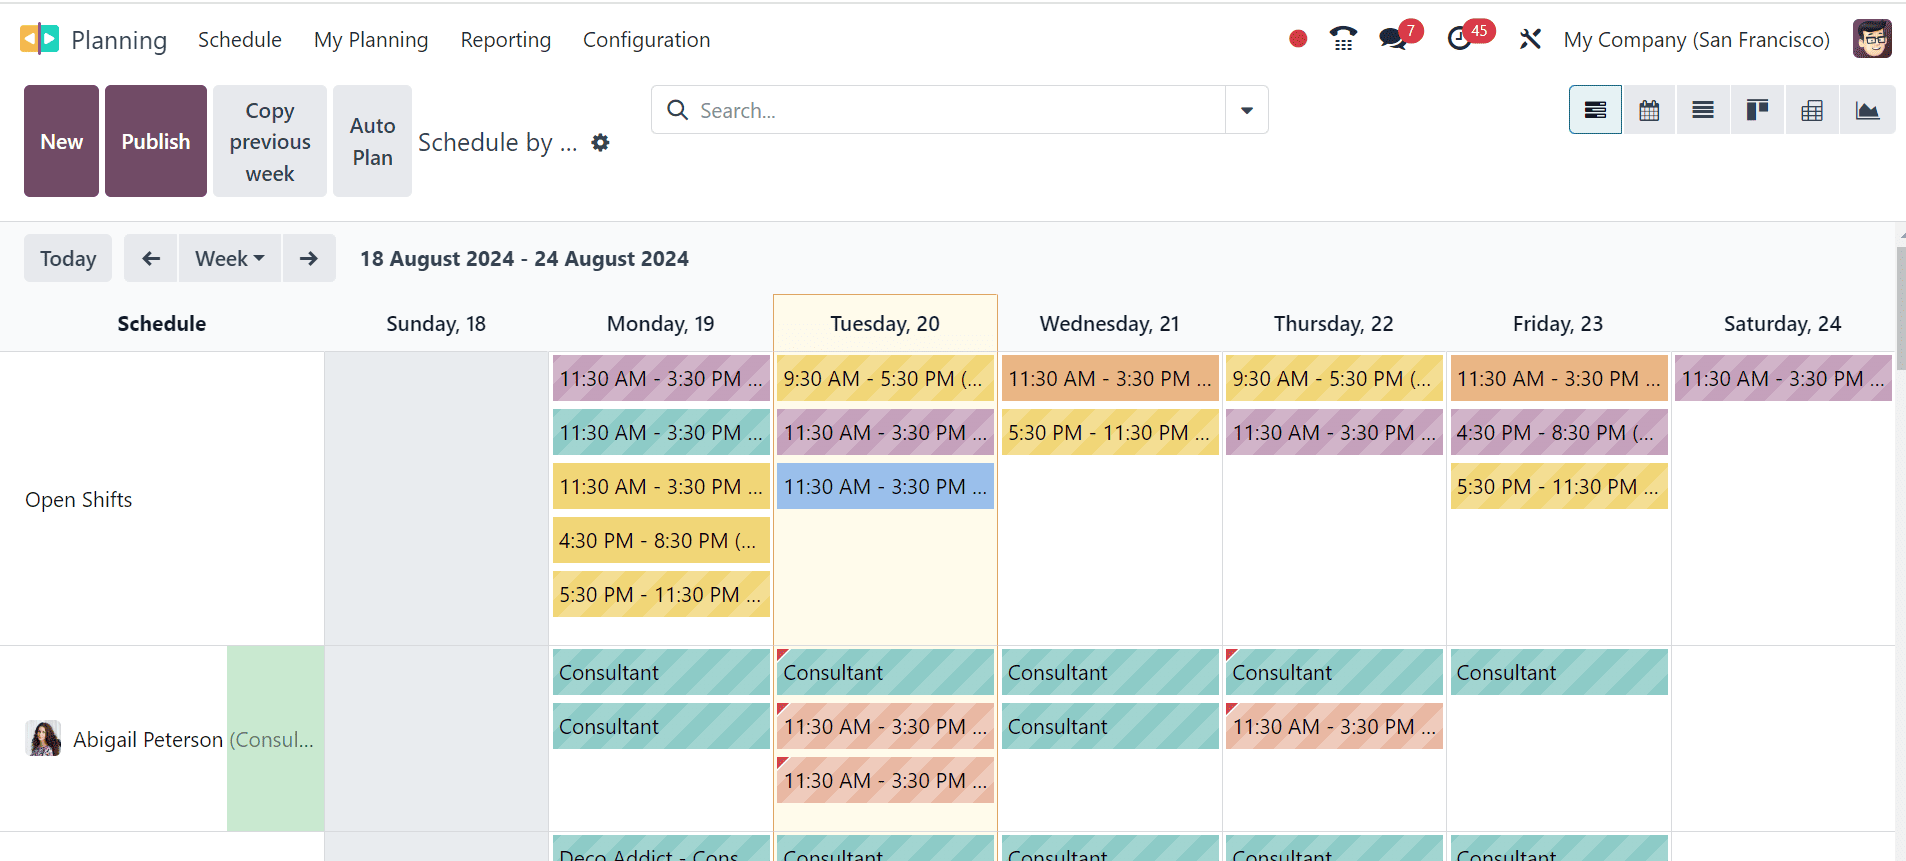
Creating a New Planning
* Users can create a new "Resource Planning" by selecting "New" button.
* Choose responsible "Resource" and "Role" columns.
* Select start and end dates of the schedule.
* Enter frequency in "Repeat" section.
* Save schedule template for future use.
* The "Publish & Send" button facilitates prompt notification about the assigned employee's schedule.
2. Schedule By Role: This section enables users to manage schedules based on roles within the organization, facilitating departmental sorting of schedules.
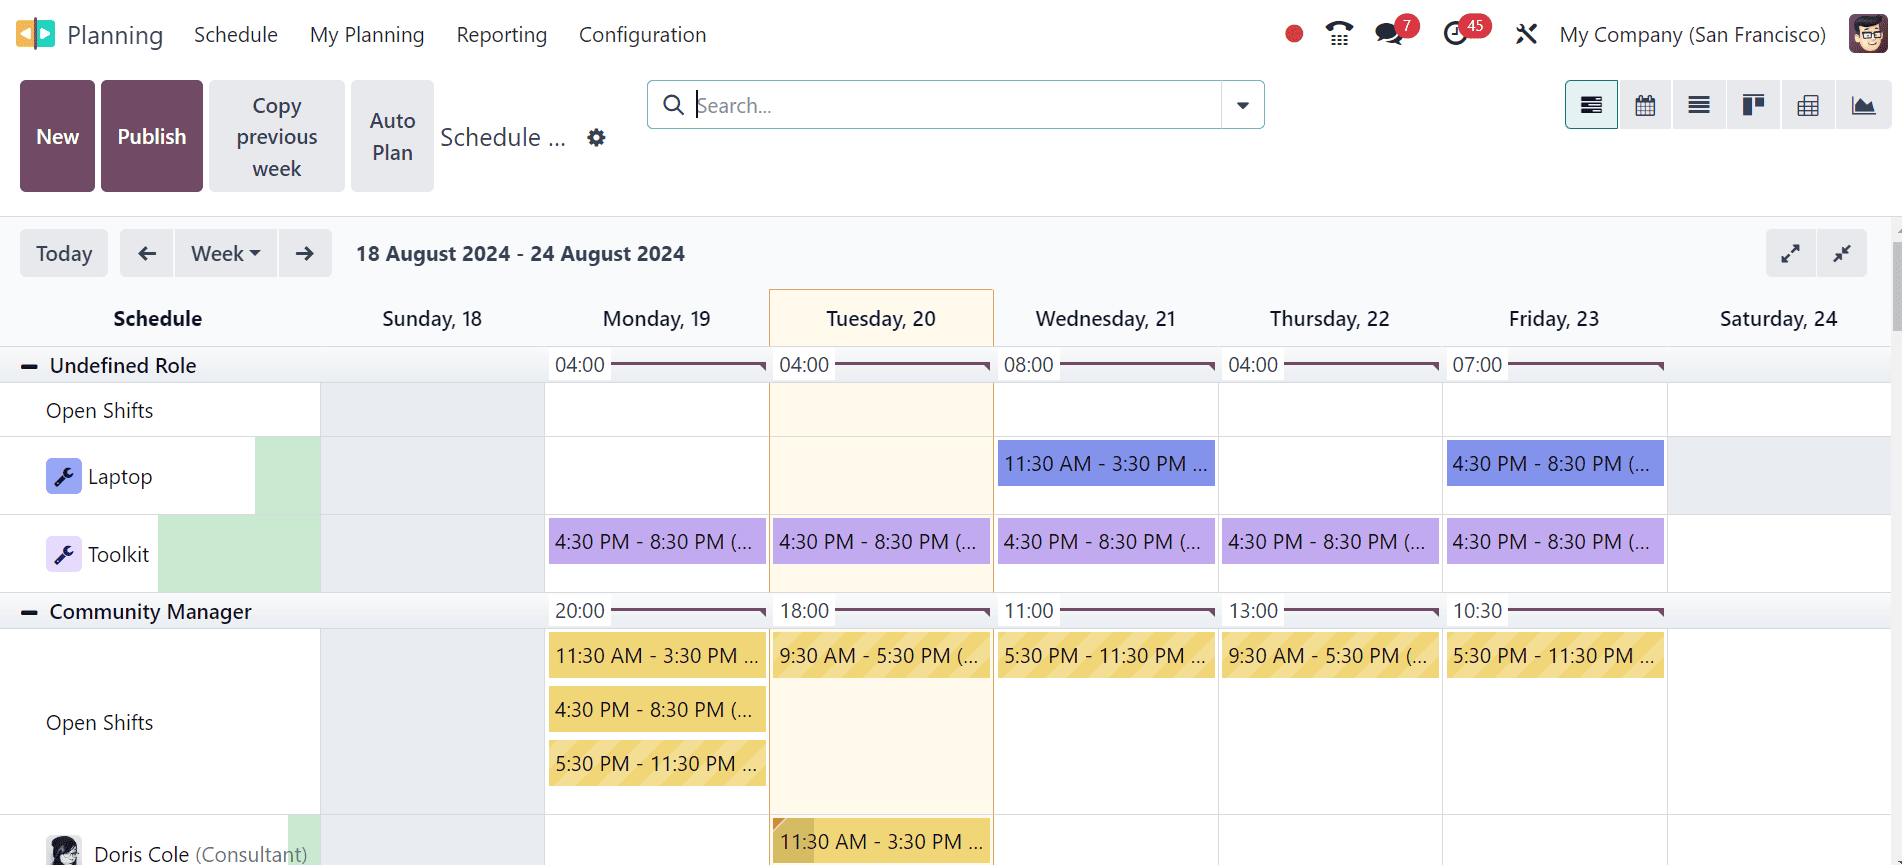
To help accountable staff members efficiently organize the schedules for their departments, the "Schedule By Role" menu enables users to schedule plans according to roles such as Community Manager, Consultant, Developer, etc. Using the "New" button, users can create a new schedule by role. The buttons and settings remain the same.
3. Schedule By Project: Users can manage schedules based on projects, allowing for streamlined project management and scheduling.
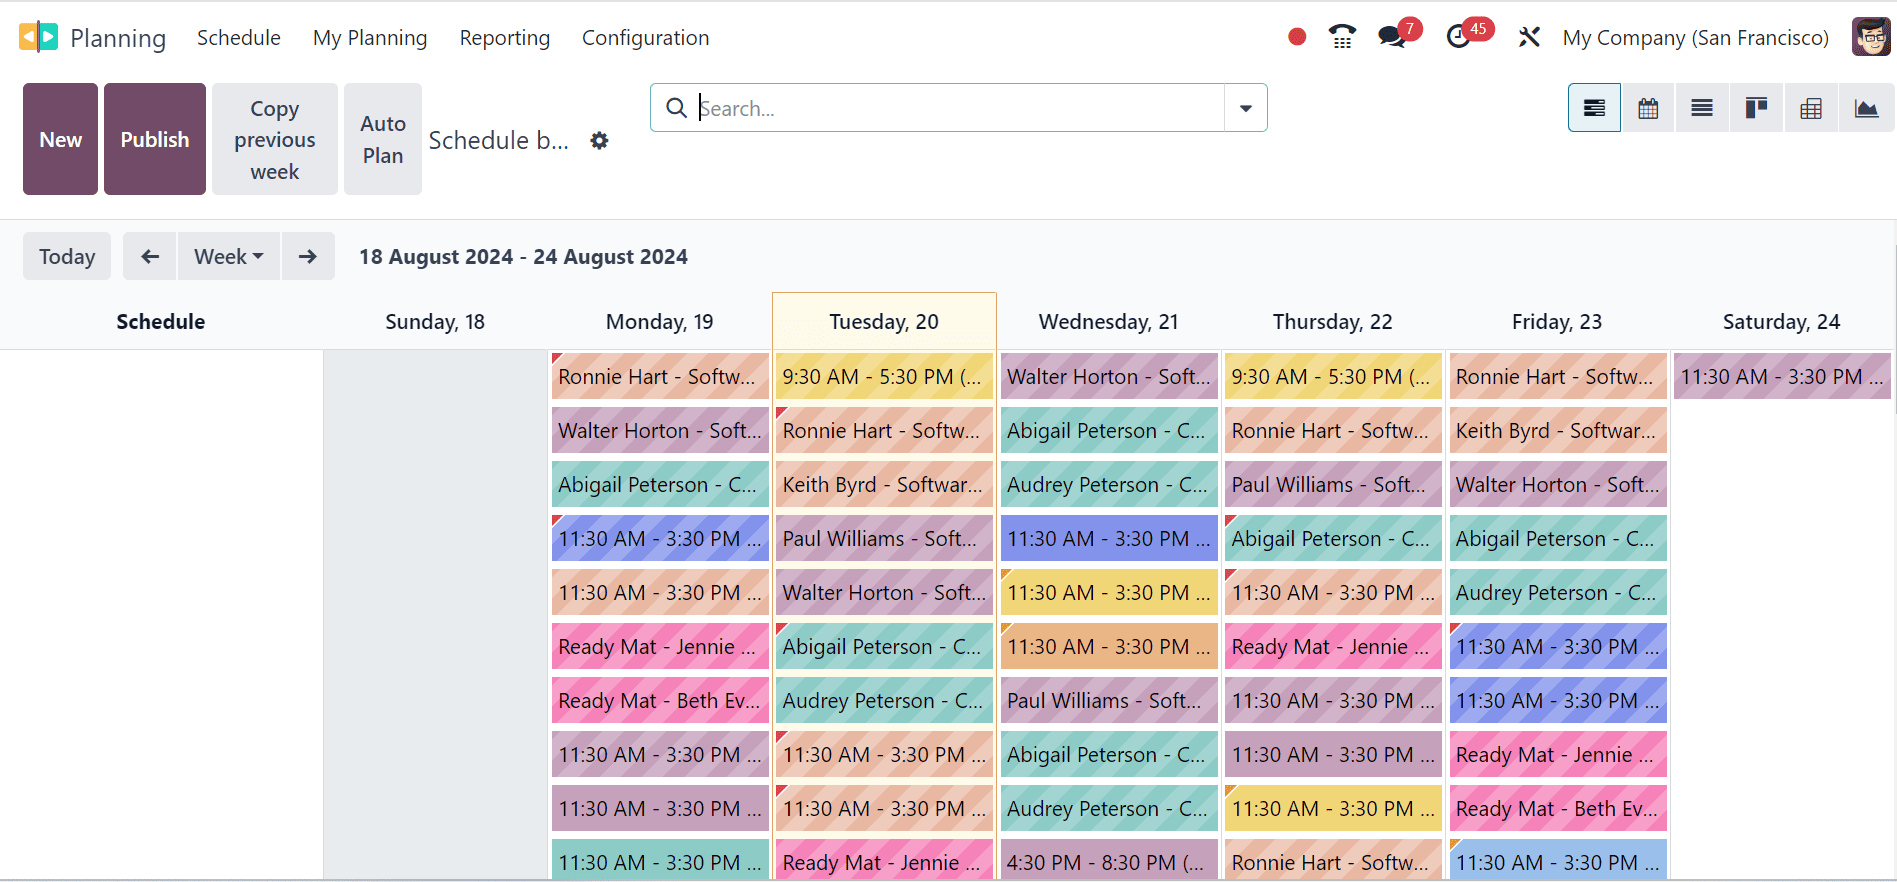
Organizing schedules according to projects is made easier with the "Schedule By Project" menu item. The "Schedule By Project" window provides users with access to the project-based scheduling dashboard. The work of creating a fresh schedule for the project is not too difficult.
4. Schedule By Sales Order: This feature facilitates scheduling based on various sales orders, organizing schedules accordingly.
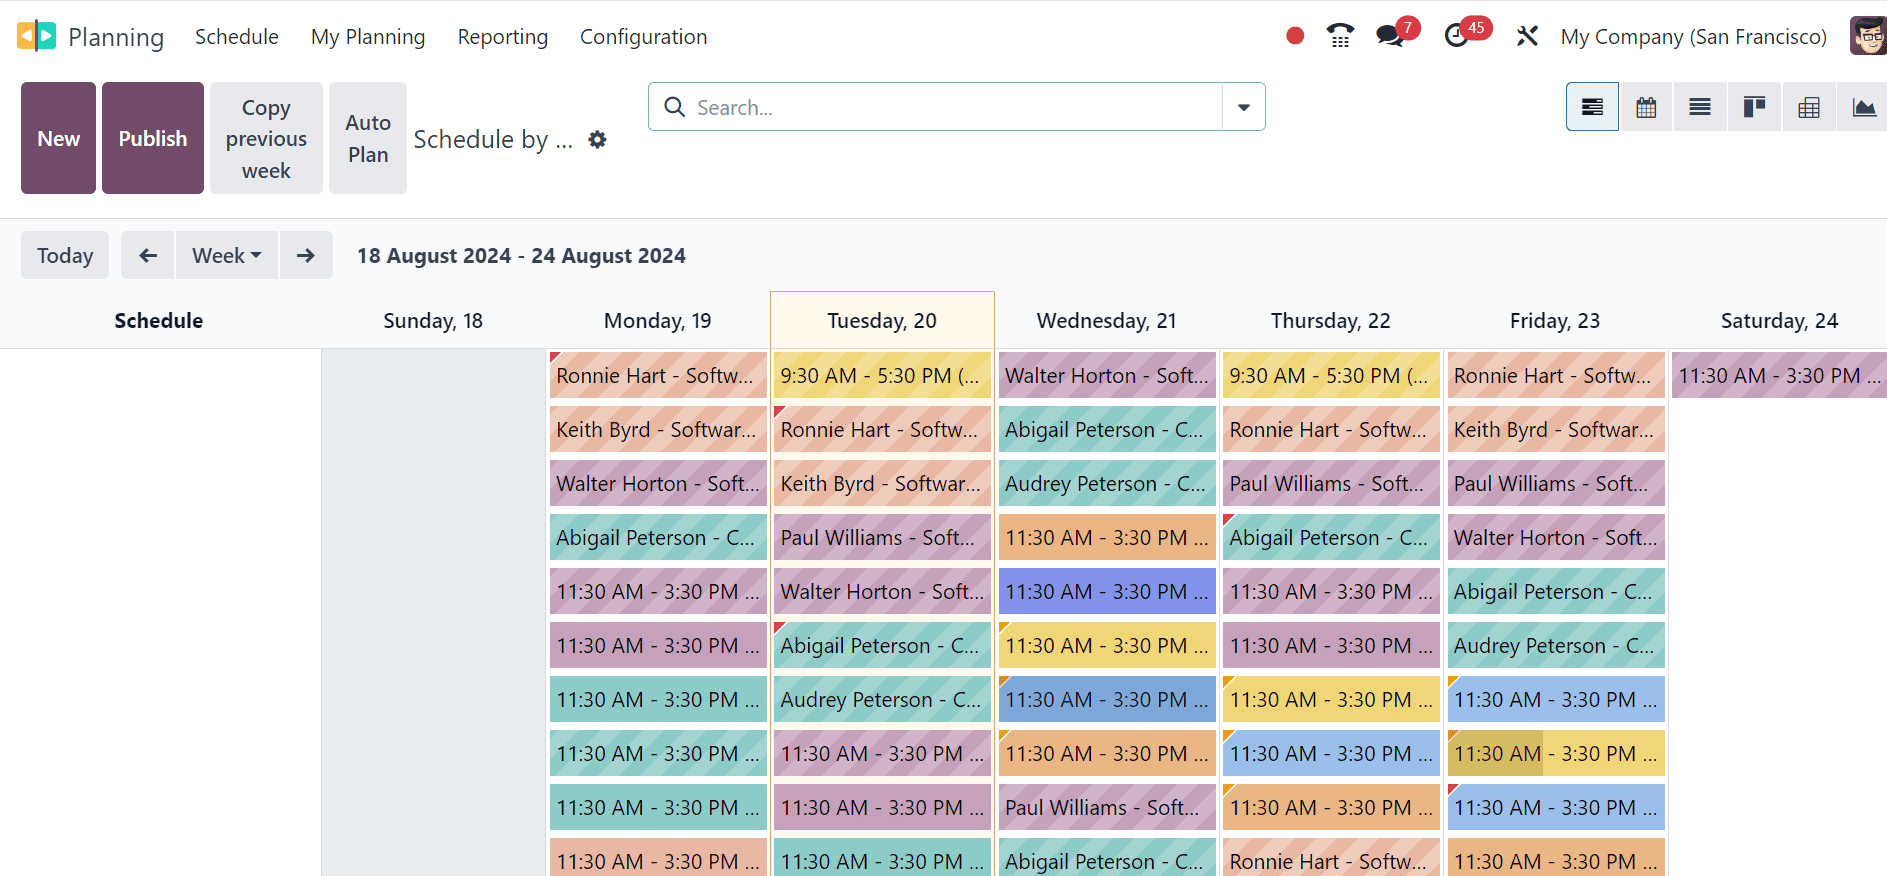
Finally, users can create plans based on different Sales Orders using the "Schedule By Sales Order" option. The "Schedule By Sales Order" tab will display all of the previously made schedules based on various sales orders.
These functionalities empower users to manage their schedules efficiently through the intuitive Odoo user interface, facilitating simple yet elegant schedule management.
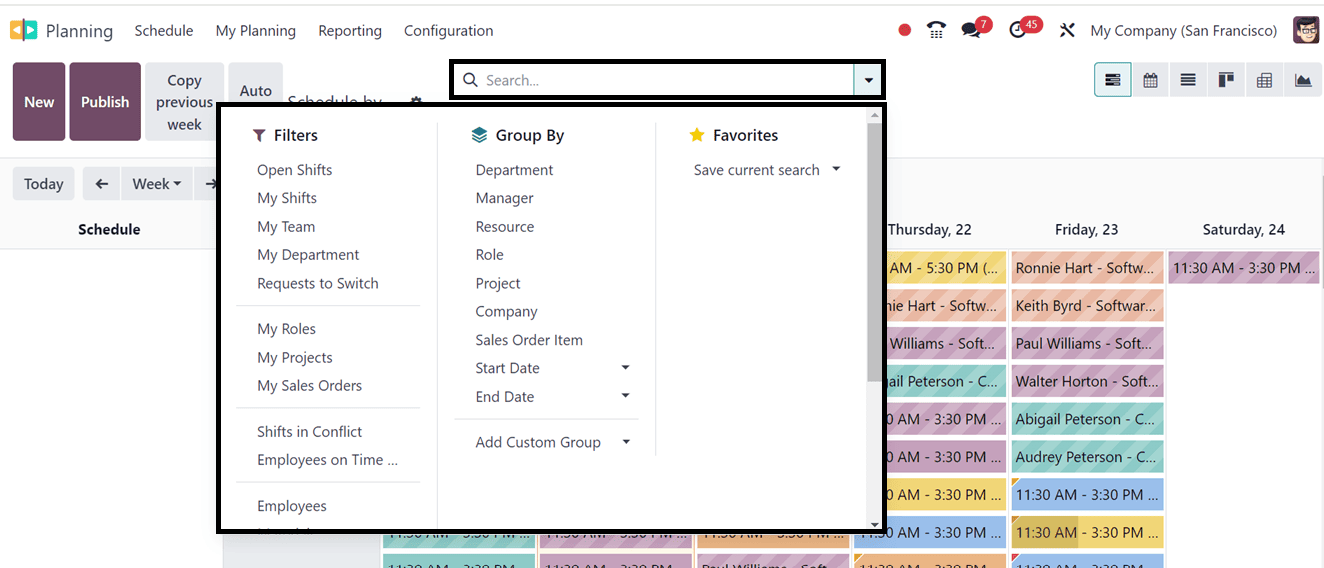
Odoo Planning's Gantt chart tool facilitates rapid modifications and offers a full view of future planning. To obtain customized data, users can use the "Filter," "Group By," and "Favorites" filter options to sort the necessary data as indicated in the screenshot below.
My Planning Menu
Employees can quickly and easily view their whole schedule by selecting the "My Planning" menu in the Planning module. Workers can establish priorities and work toward goals by using the calendar view feature that shows the information from the schedules. The features, buttons, and options are all the same as those discussed in the section before this one. To construct your own custom planning schedules, click the "New" option.

Reporting
The Planning Analysis platform under the Reporting menu provides detailed reports on scheduled activities. With filters and grouping options, you can customize reports to suit your needs, helping streamline your company’s scheduling activities. We can see the Pivotal view of the Planning Analysis reporting window as shown below.
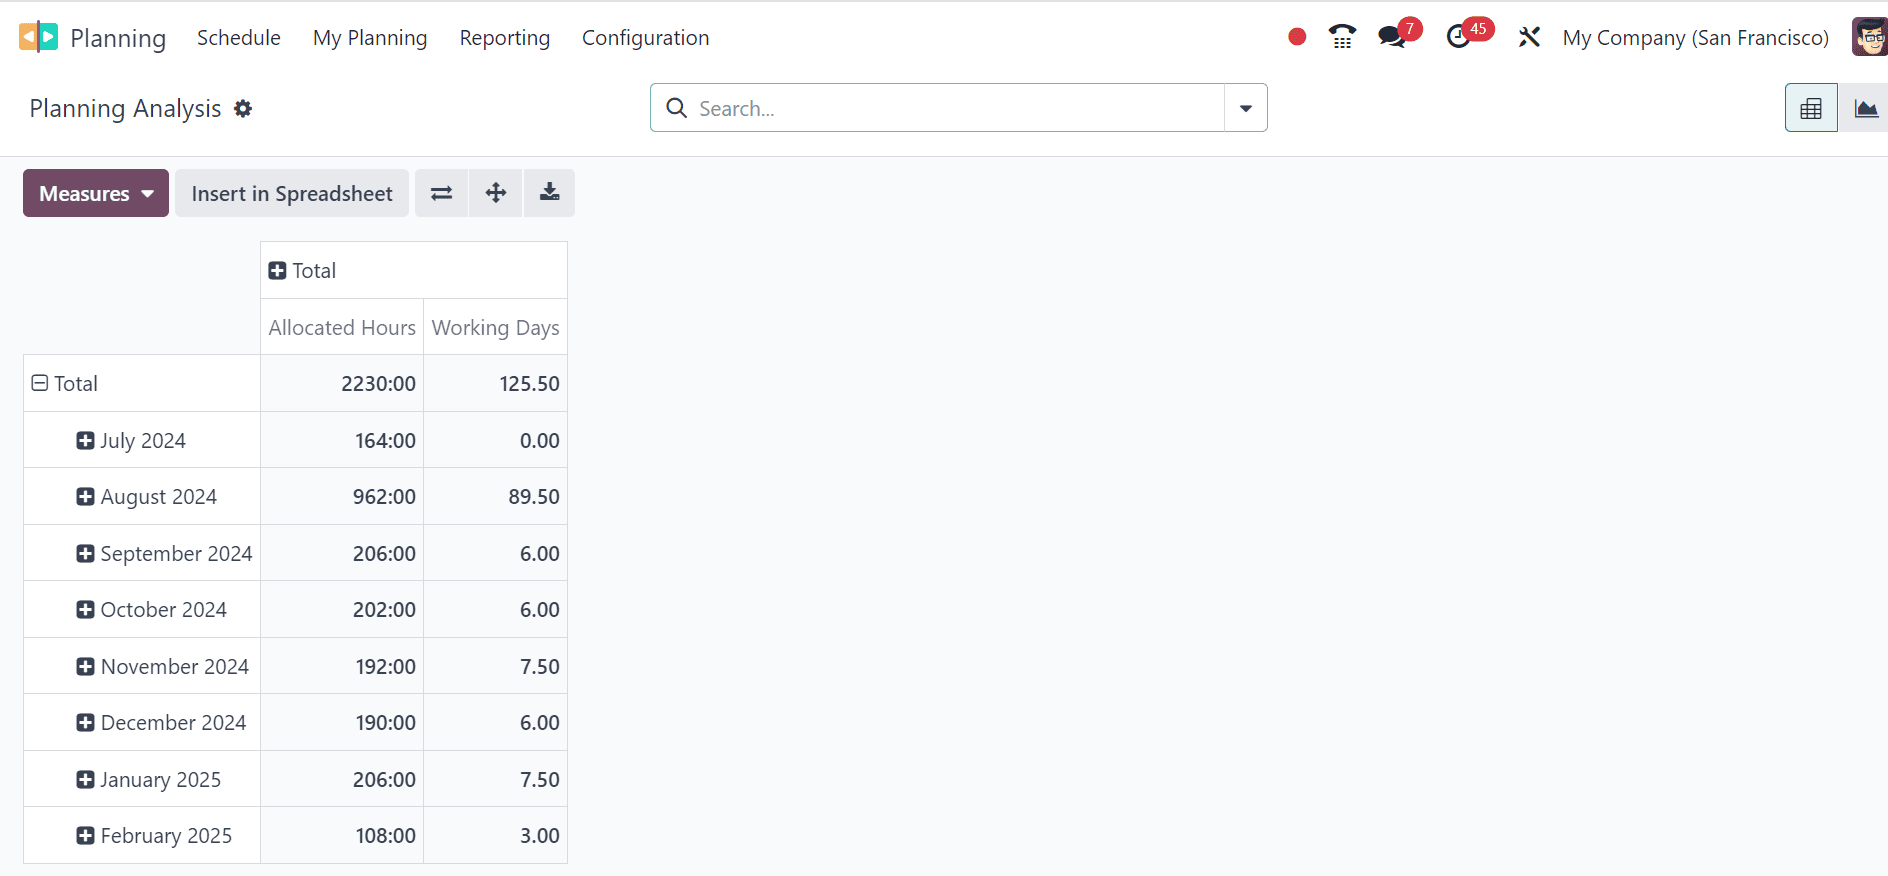
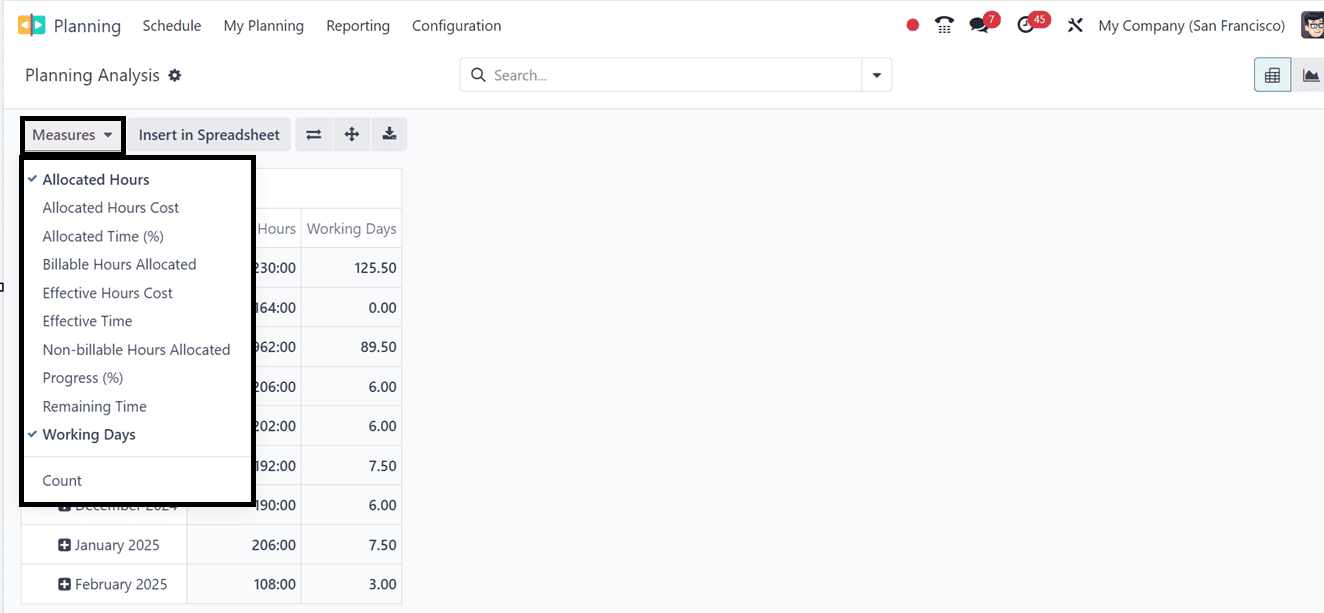
Utilize the Measures section to get detailed reporting based on various metrics like Allocated Hours, Allocated Time, Effective Time, Progress, Remaining Time etc.
This Planning analysis window offers performance monitoring, allowing tracking of key metrics like task completion rates and resource utilization, identifying bottlenecks, and evaluating utilization rates. It also allows comparison of planned budgets with actual outcomes for future adjustments.
Configuration Menu
The Configuration menu contains options to configure the basic planning module Settings, Employees, Materials, Roles and Shift Templates.
Settings
Utilize the Settings window to configure the basic settings options such as;
* Allow Unassignment: Enables employees to withdraw from assigned activities, allowing them to release themselves from shifts within a deadline set by the admin.
* Project Planning : Activate or deactivate the Project Planning option to manage resource allocation across projects and estimate deadlines more accurately.

Employees
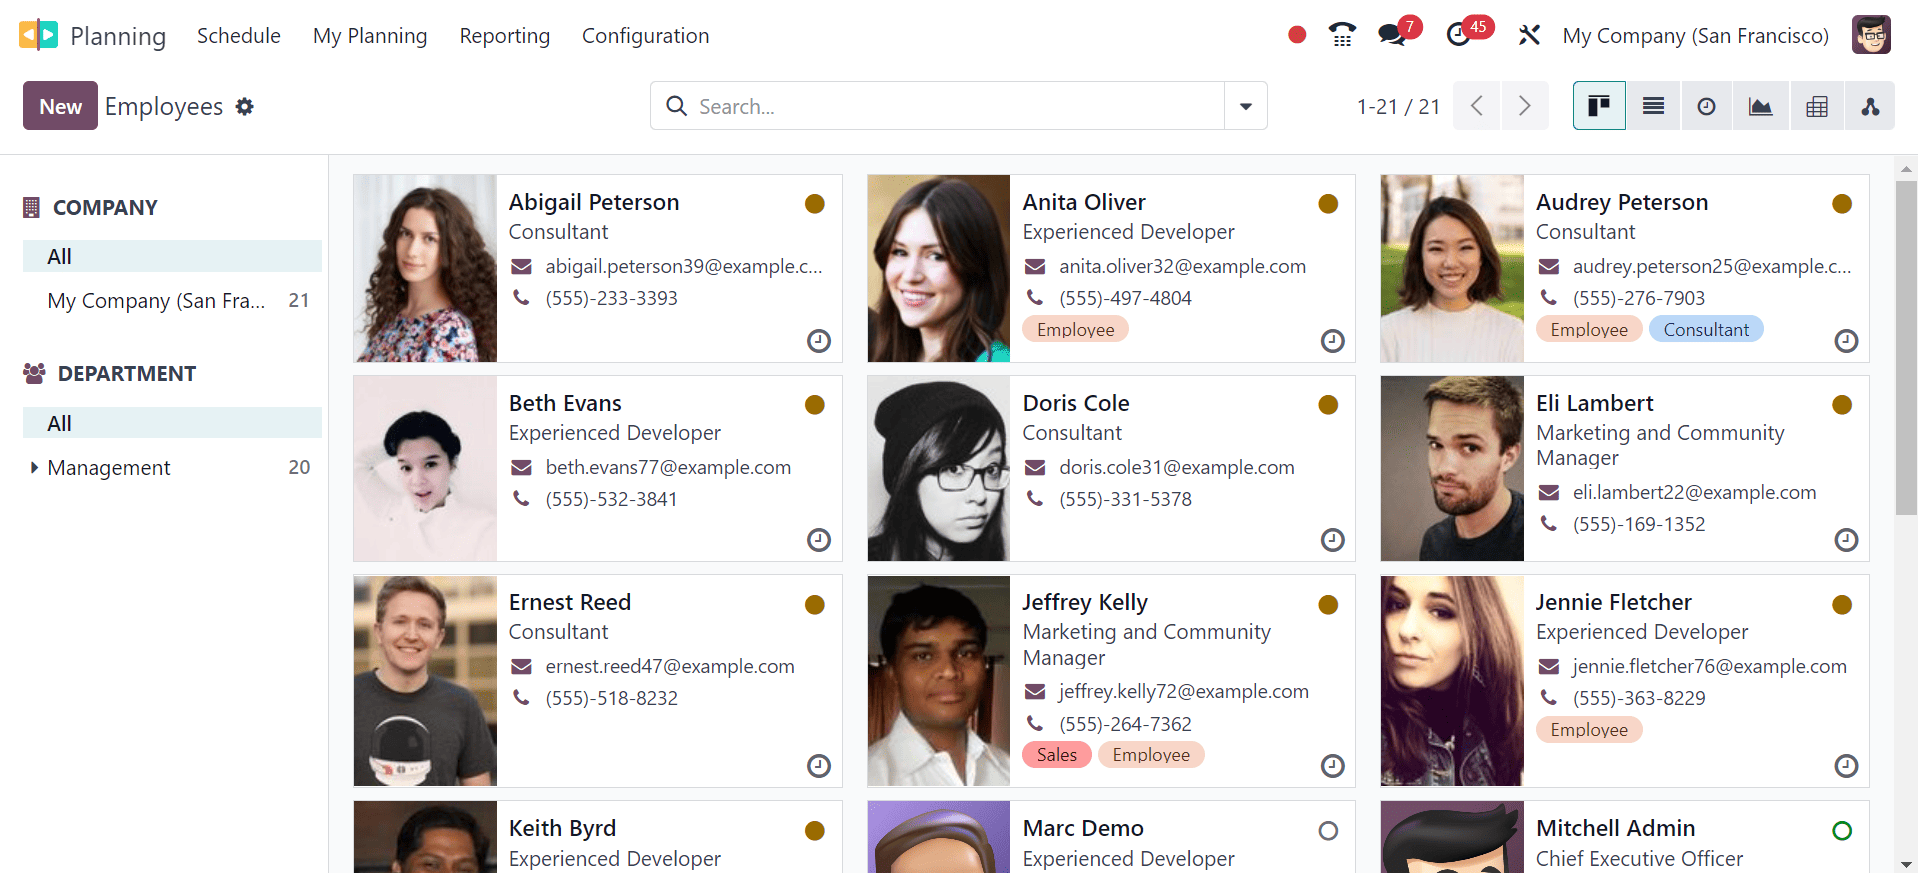
Through the Employees settings window, users may establish, manage, and set up employee responsibilities, work schedules, skills, availability, vacation time, job positions, classifications, oversee authorization, and any other employee details. Using the 'New' button makes it easier to add new employee data.
Materials
The Odoo 17 Planning module now offers a new option called "Materials" under the Configuration menu. This allows users to configure materials needed for scheduled activities. Users can view a list of existing items, including their Names, Roles, Default Role, Company, and Working Time.
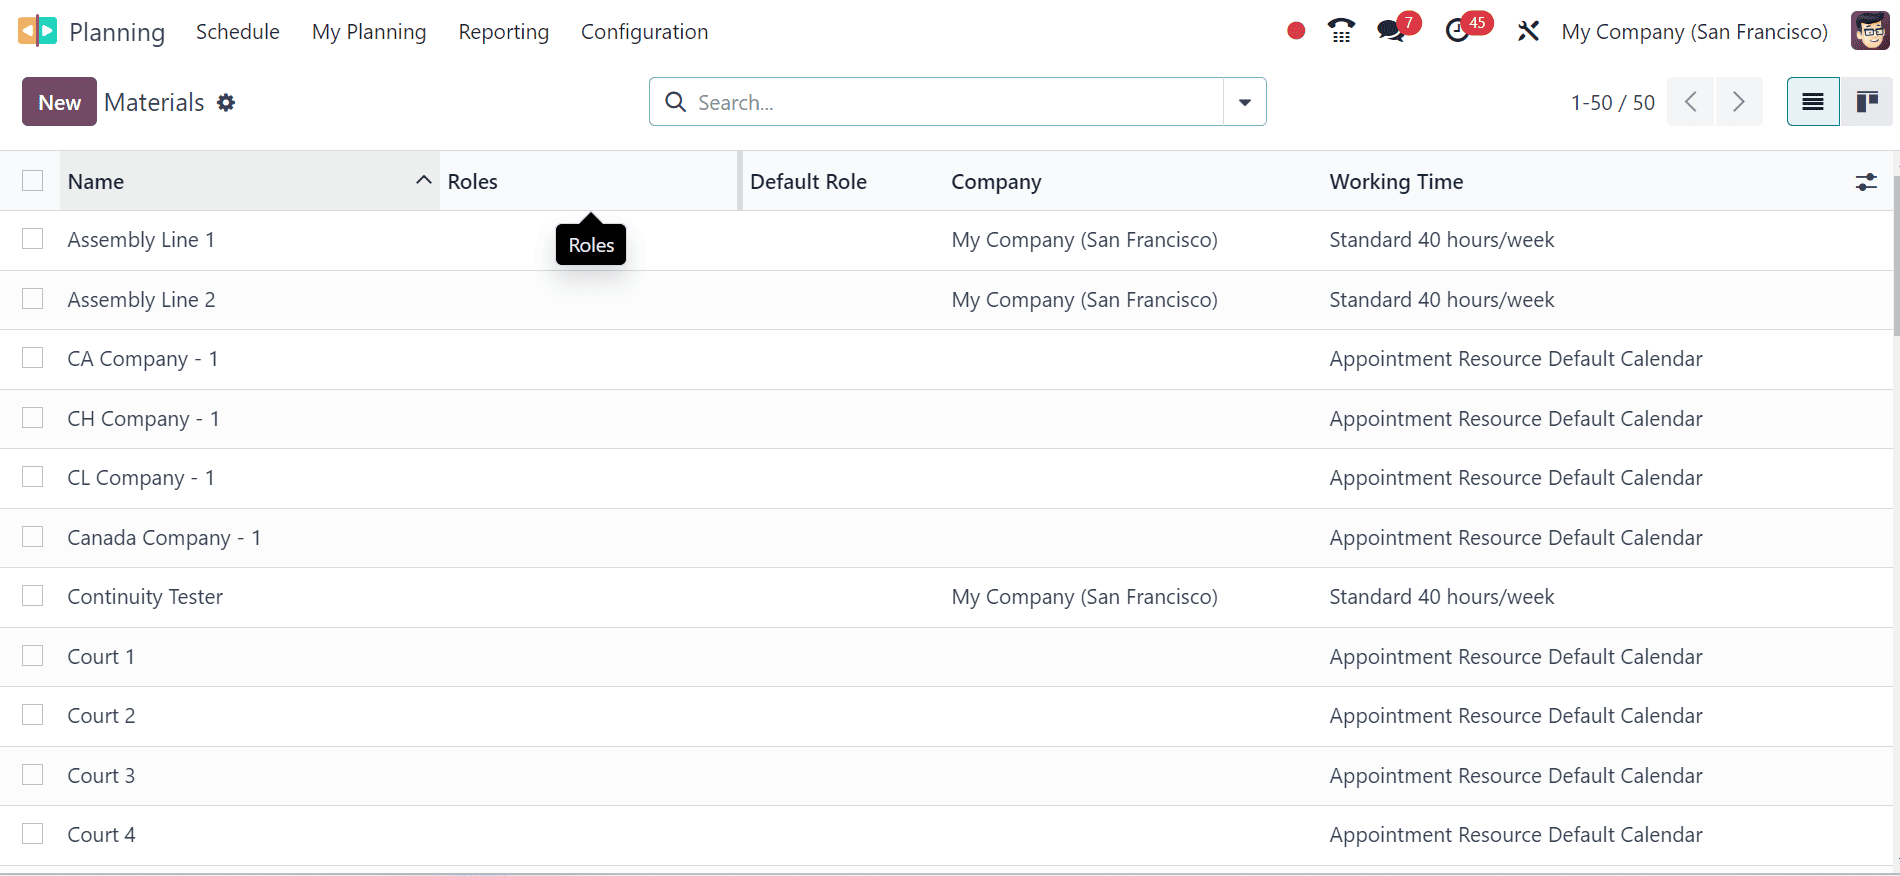
Users can also add new content by selecting the "New" button and adding a new line below the options list. The contents can be named and specified in relevant fields.
Roles
Different positions are assigned to employees so they can comprehend their responsibilities. This allows administrators to quickly allocate tasks based on their responsibilities, providing a clear perspective on the tasks they should complete.
Here we can see the list view of various job roles with their Name, Resources, and Services as shown below.
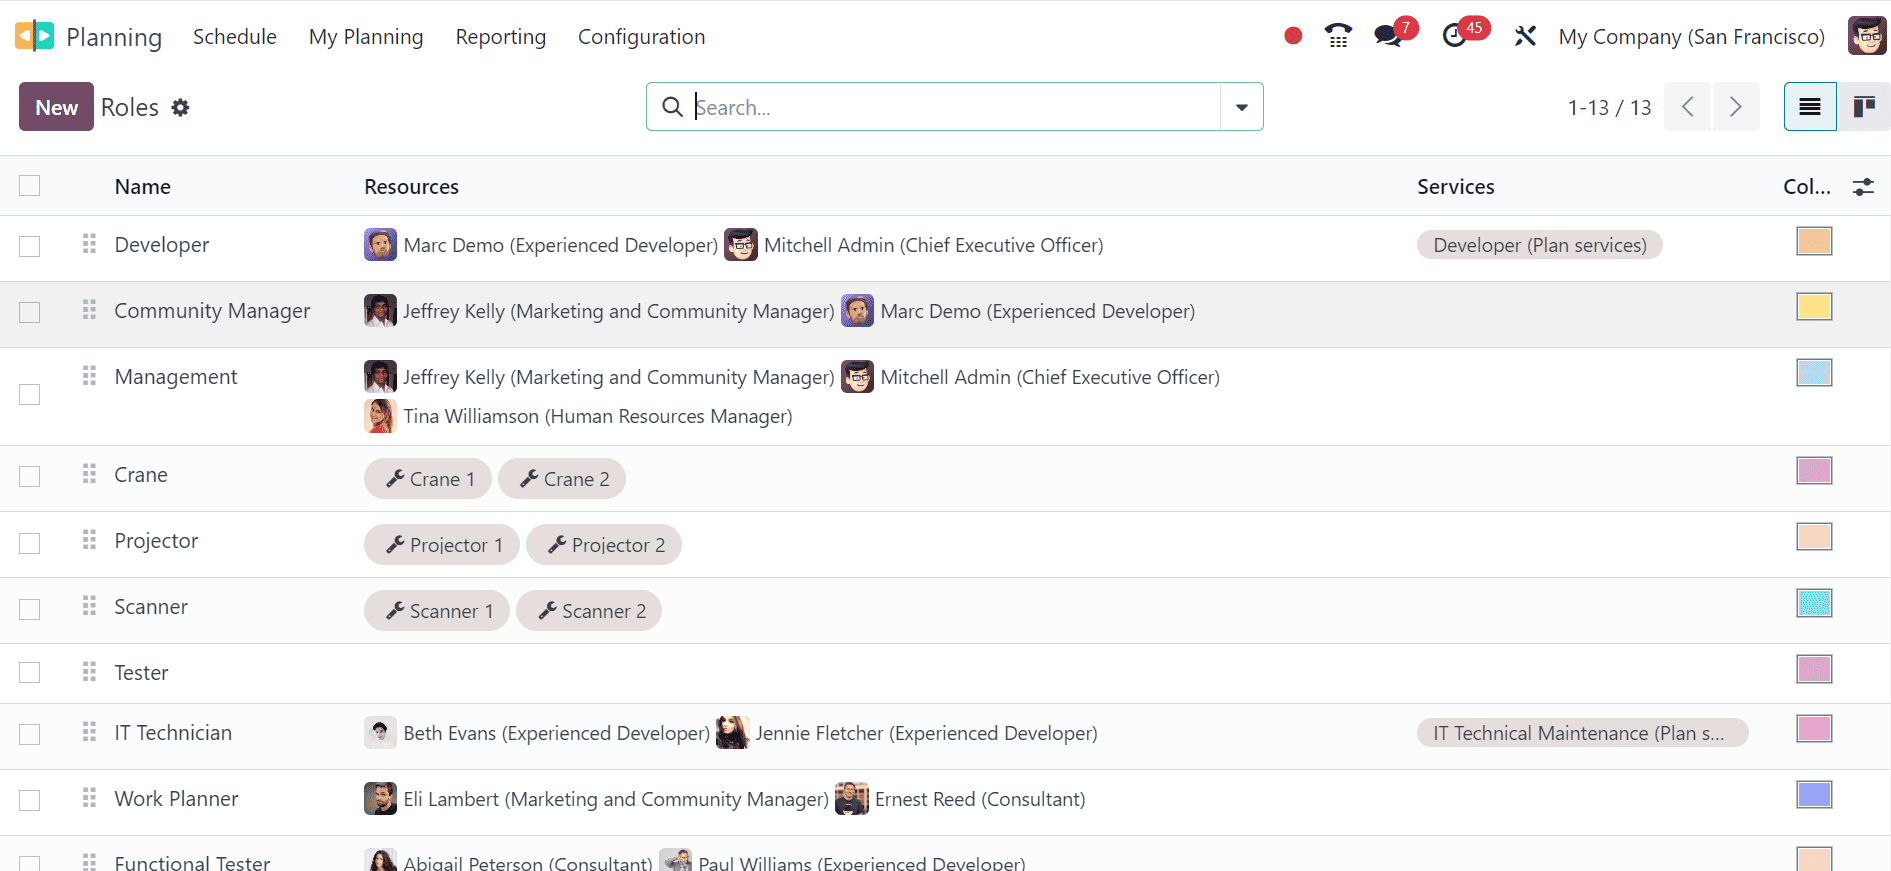
When you select the New button, a new role can be added to the list. The role name can be provided in the box provided, and employees can be assigned to the function in the Resources field. Different colors can be assigned to certain jobs for easier identification.
Shift Templates
The Odoo 17 Planning module allows users to add shift templates to new schedules, incorporating pre-configured data into the new schedule. It is no longer necessary to manually specify things because of this. From the Configuration menu, users can build a new shift template and save a new schedule as a template. Hours, Rule, and Project are displayed in the Shift Templates window as pre-existing shift templates.
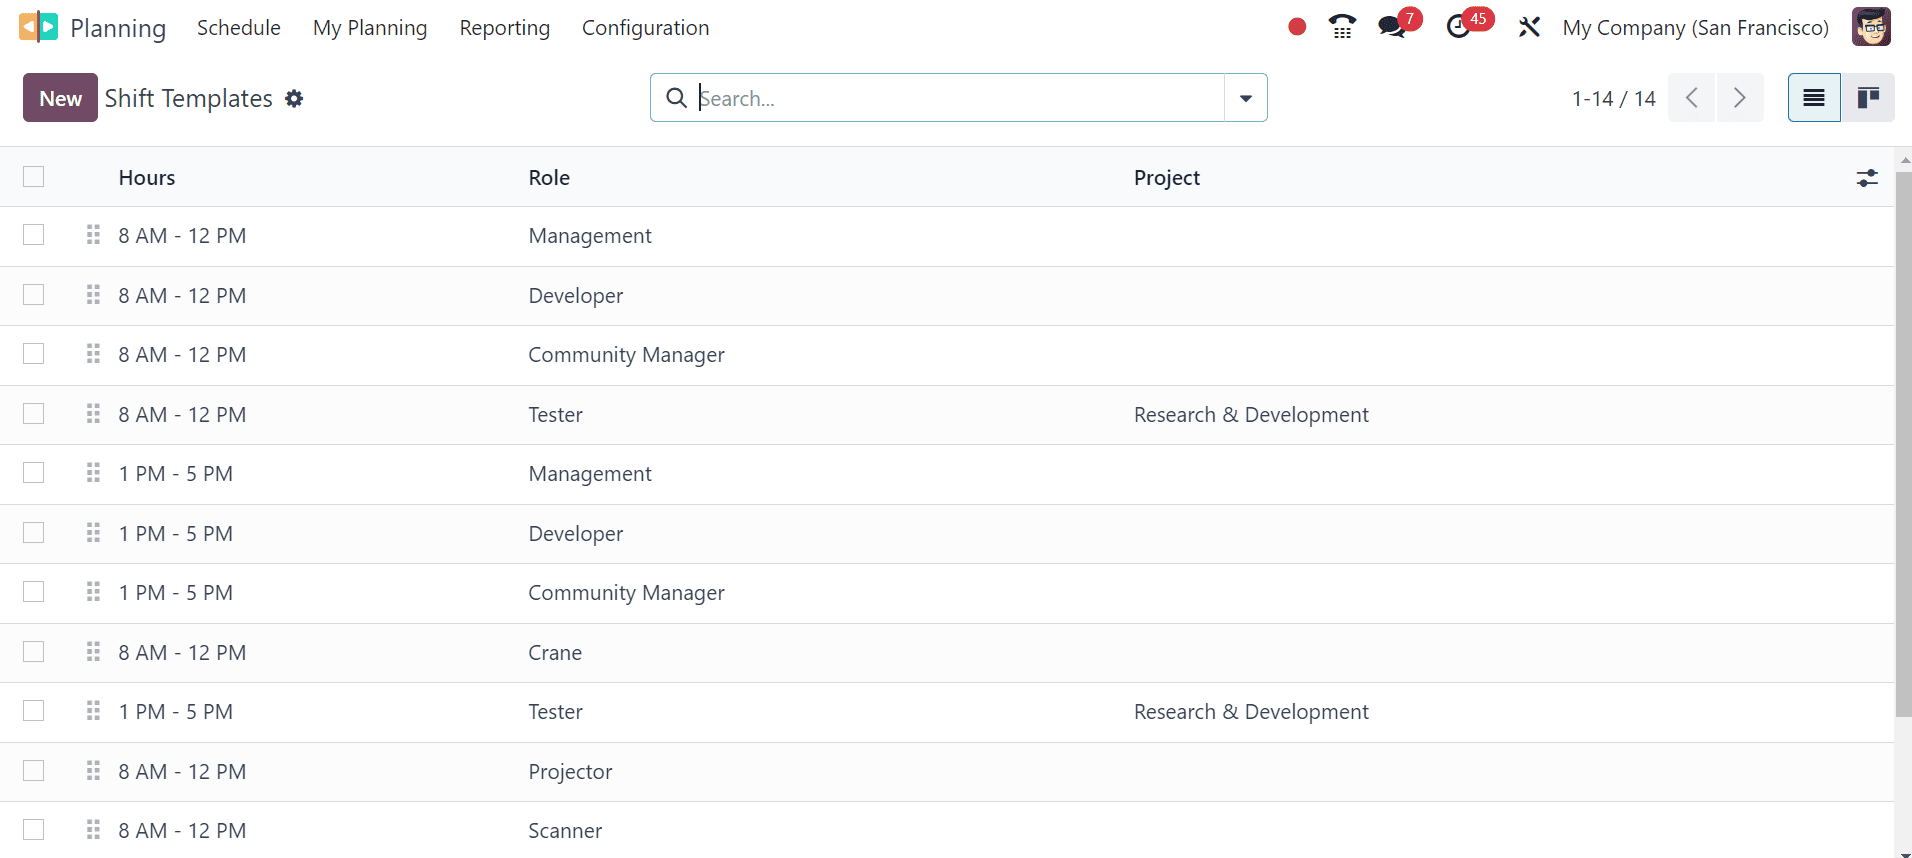
Click the New button to start making new templates. As seen in the screenshot below, a new view opens up and users can fill in the fields for Project, Role, Duration, and Planned Hours.

For controlling employees and resource allocation, increasing productivity, decreasing scheduling conflicts, and streamlining planning procedures across projects, the Odoo 17 Planning module is a versatile solution.
To read more about How to Manage, Plan, & Access Shift in Odoo 16 Planning App, refer to our blog How to Manage, Plan, & Access Shift in Odoo 16 Planning App.