Deferred Income in accounting is considered as the amount of money that one company receives from customers in advance for any goods or services that the company sells which is not delivered or completed yet. As the status of the money is still received and not earned, we can not report this amount in the company account. Unless the delivery or service is completed, it is impossible to change the status of this revenue or income. It can be possible after reporting the amount as a liability in accounting.
Let’s check how deferred income is managed in the Odoo 16 Accounting module.
You can select the Odoo Accounting module from the main dashboard of Odoo. When you check the module, you can find the option to manage the deferred revenue under the Accounting menu of the module. Prior to the configuration of new deferred revenue in the Odoo Accounting module, Odoo 16 allows you to create suitable deferred revenue models in the module. In order to get access to the Deferred Revenue Model option, you can go to the Configuration menu of the Accounting module. Creating new deferred revenue models will allow you to group similar deferred revenues under the same model.
In the Management tab of the Configuration menu, you can find the Deferred Revenue Models option. Here, you can see the pre-configured list of models with the details regarding the Revenue Name, Revenue Account, Deferred Revenue Amount, Number of Recognitions, and Period Length.

You can use the Create button to create a new deferred revenue model in the Odoo 16 Accounting. As soon as you click on the Create button, you will get a new form view as shown in the screenshot below.

The name for the Deferred Revenue Model can be provided in the given space. In the Depreciation Method section, you can specify the number of depreciation needed to depreciate your asset in the Number of Recognition field. The Computation field will define the method of depreciation, which can be set as No Prorata, Constant Periods, or Based on Days per Period. Under the Accounting section, the Company name will be automatically available in the given field. The account used to record the deferred income can be provided in the Deferred Revenue Account field. This account will be used in the depreciation entries to decrease the asset value. In the Revenue Account field, you can specify the account used to recognize the revenue. This account will be used in the periodical entries to record a part of the asset as an expense. Mention the Journal to record the accounting entries of the deferred revenue in the respective field.
After completing the configuration of the Deferred Revenue Model, we are going to create new deferred revenue in the Accounting module. For this, you can go to the Accounting menu and click on the Deferred Revenues option. When you click on this button, you will get a list view of the deferred revenues, as shown in the screenshot below.

Here, the list view shows the details of Revenue Name, Book Value, Depreciable Value, Currency, Company, and Status of available deferred revenues. Clicking on the Create button will lead you to a new window where you can set a new record for deferred revenue.
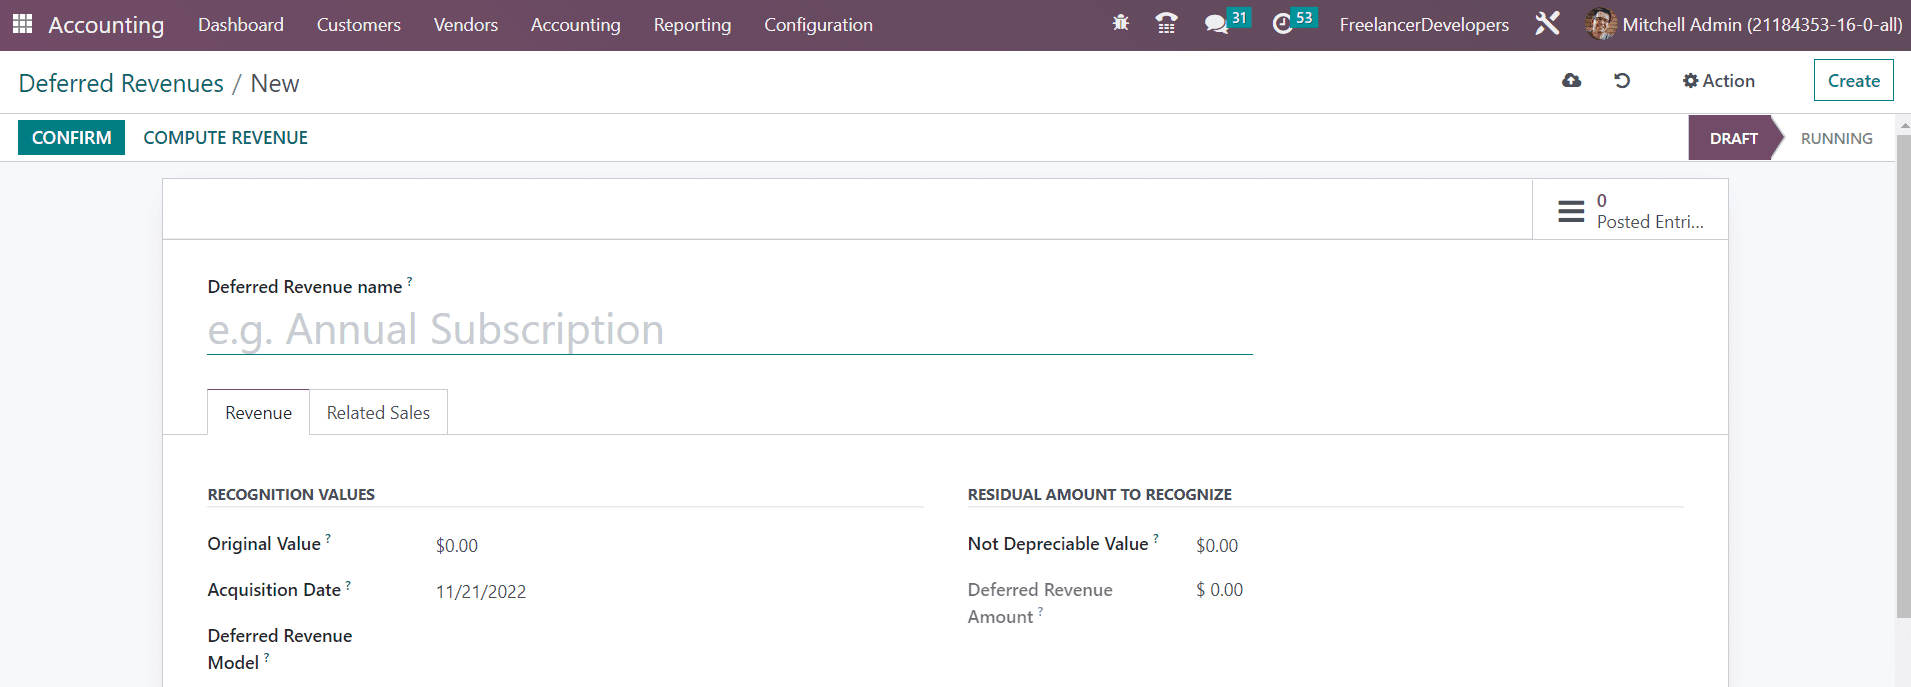
In the respective field, you can specify the name of the Deferred Revenue. You can provide the Original Value of the revenue under the Recognition Values tab. The Acquisition Date will be available in the corresponding field as the current date, which can be later edited as per your requirement. In the Deferred Revenue Model field, you can select a suitable model for this deferred revenue from the list that we created earlier.
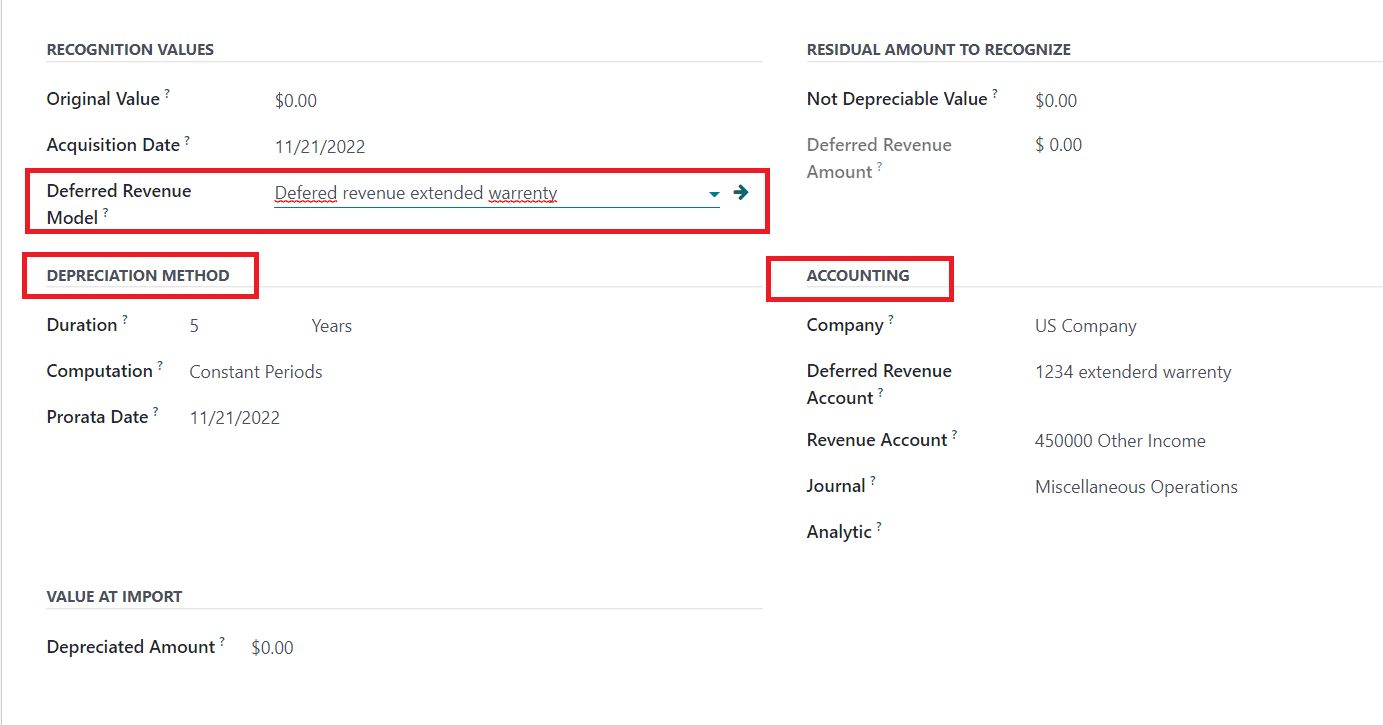
As soon as you mention a suitable model of the deferred revenue, the Depreciation Method and Accounting sections will be auto-populated as per the data specified in the selected model. In the Residual Amount to Recognize section, you can mention the Not Depreciable Value, which indicates the amount you plan to have that you can not depreciate. The Deferred Revenue Amount shows the sum of the depreciable value, the salvage value, and the book value of all value increase items. In case of an import from another software, you might need to use the Depreciated Amount field to have the right depreciation table report.
Under the Related Sales tab, you can add the details related to the sales of this deferred revenue using the Add a Line button.
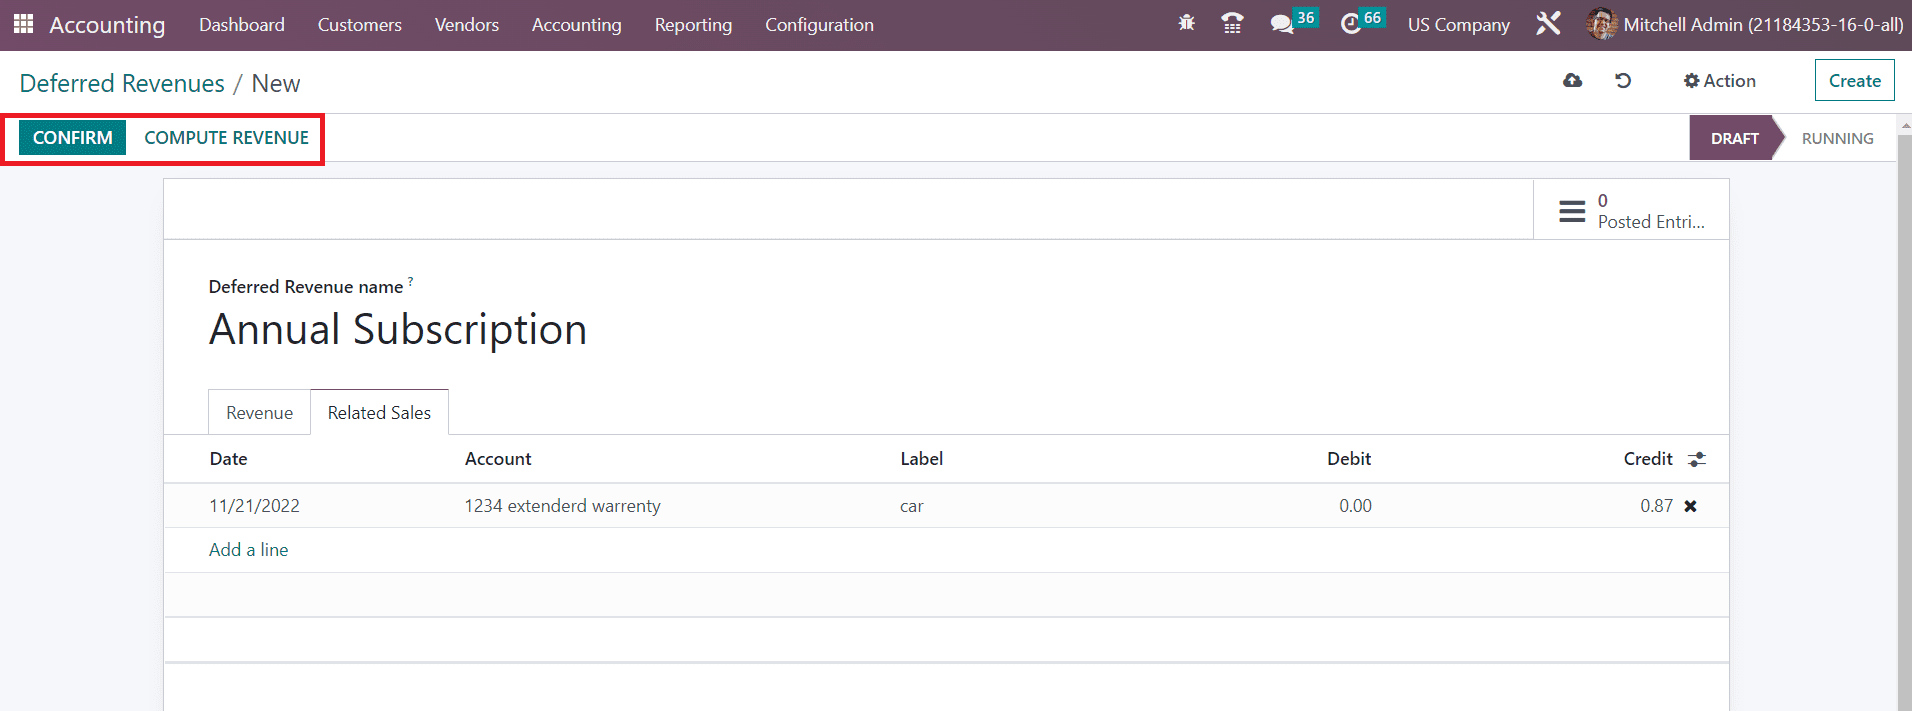
Once you add corresponding journal items related to sales in the Related Sales tab, click on the Compute Revenue. When you click on this button, you will get a Revenue Board under a separate tab on the screen as shown in the image below.
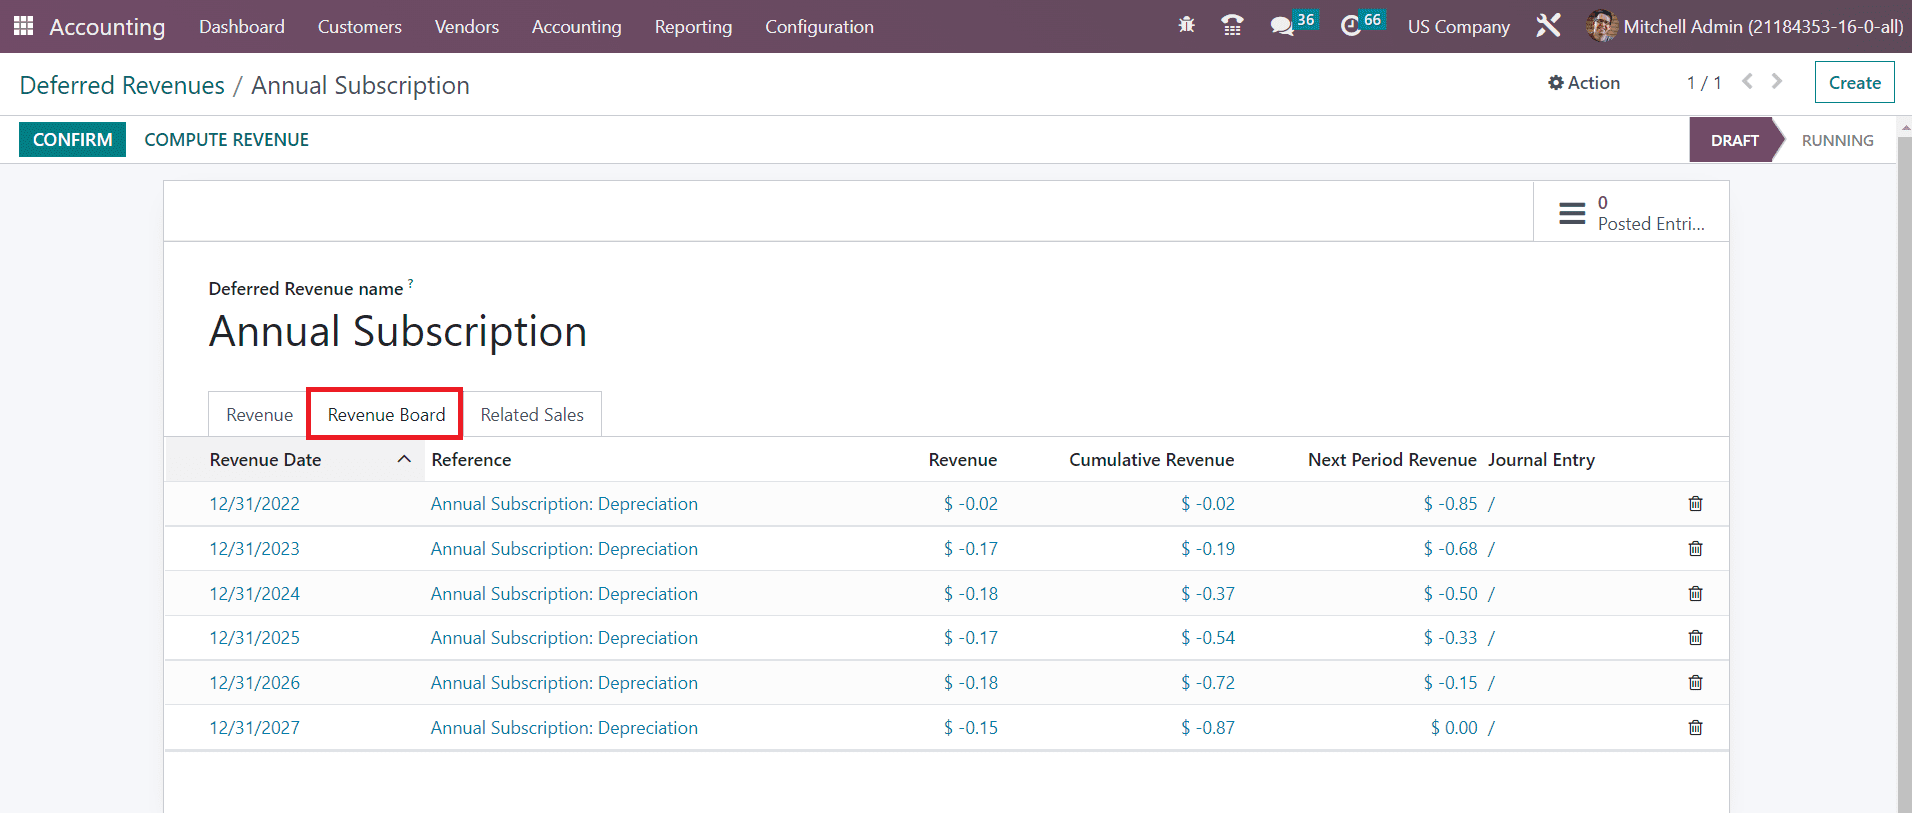
You will get the details of the Revenue Date, Reference, Revenue, Cumulative Revenue, Next Period Revenue, and Journal Entry under this tab. Clicking on the Confirm button will confirm the new deferred revenue and change the status from ‘Draft’ to ‘Running’.
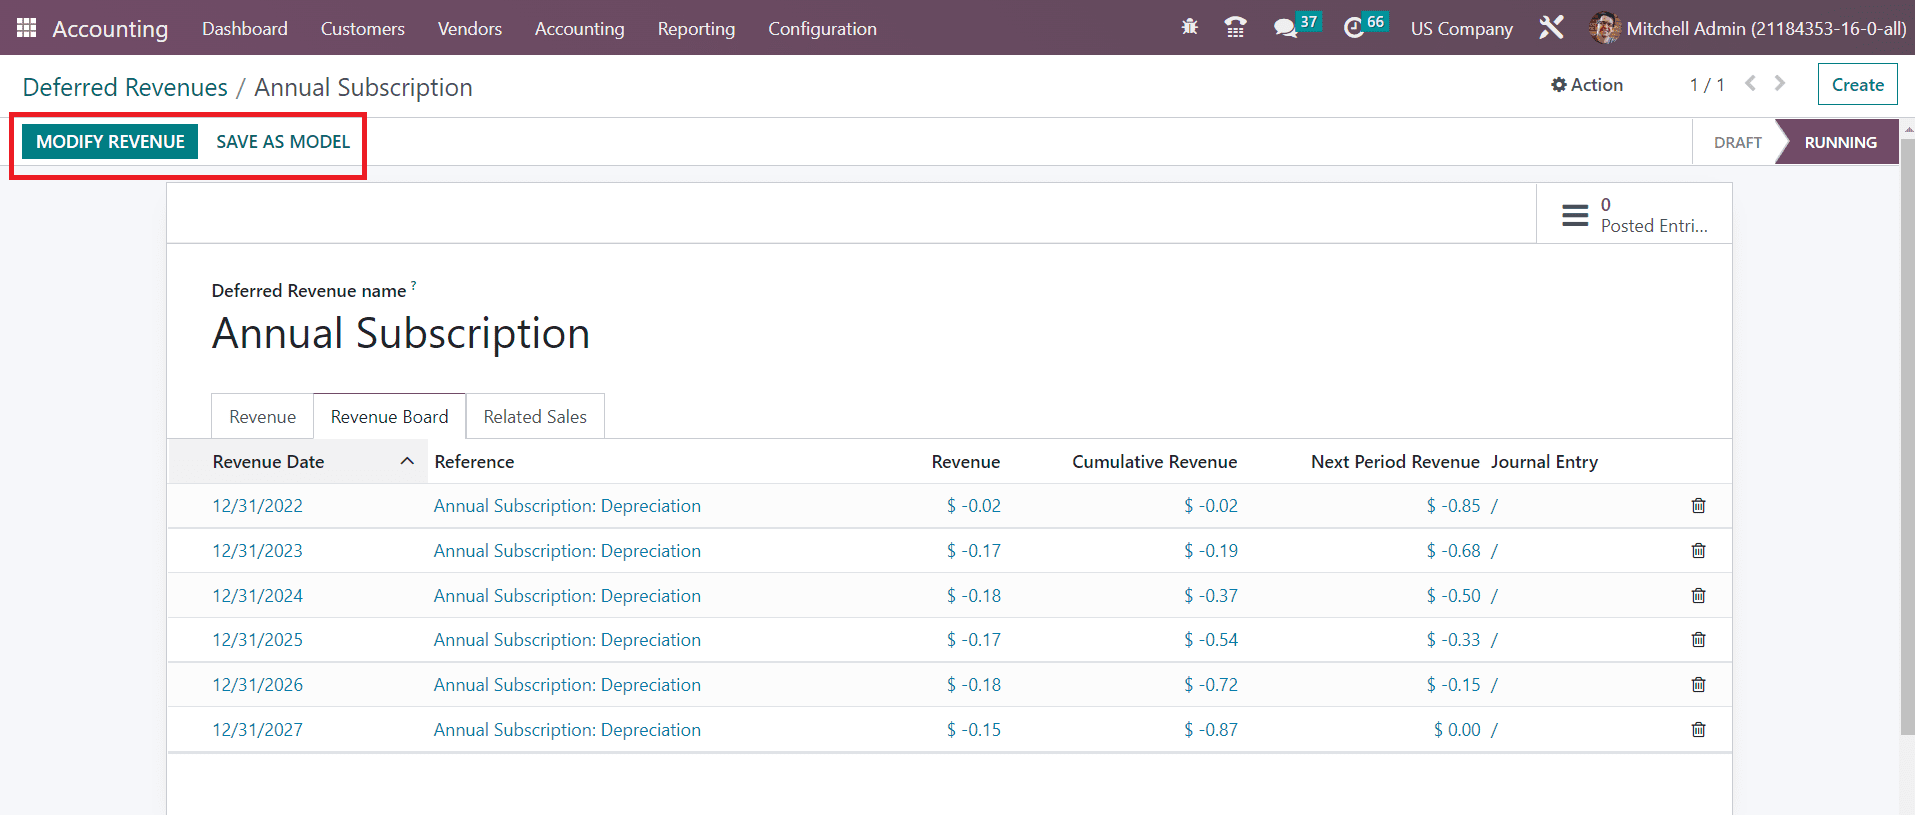
Just like we discussed in the blog on Assets management in Odoo 16 Accounting, you can modify the revenue using the Modify Revenue button and save it as a new deferred revenue model using the Save as Model button. This is how we manage deferred income in the Odoo 16 Accounting module.