The amount that a buyer pays beforehand towards the entire cost of an item, such as a Home, Automobile, Electronics, Installments, or any other product or service, is known as a down payment. Debt, interest, and monthly payment amounts for the borrower may all be greatly decreased as a result. In order to confirm the supply of their goods or services to the client, the merchant takes a down payment, with the expectation that the remaining balance will be paid later. Customers may pay a portion of the price when placing their purchase, pay the entire balance during delivery, or pay the remainder later using the “Down Payment” option on the Odoo platform. As it draws clients and companies, this feature is advantageous for enterprises and organizations. Depending on the organization's preferences, down payments may be applied for an exact amount or a specified percentage of the total cost. Due to variations in company organizations, the Odoo 17 Sales module allows for the establishment of a down payment in both fixed amounts and percentages.
This blog will guide you through the process of configuring Down payments in settings, deducting previous payments, and advance payment in the delivered quantity invoicing policy.
Configuring Down Payments
The Odoo 17 Sales Module users can configure and customize the down payments for their sales business from the “Settings” submenu of the “Configuration” menu.
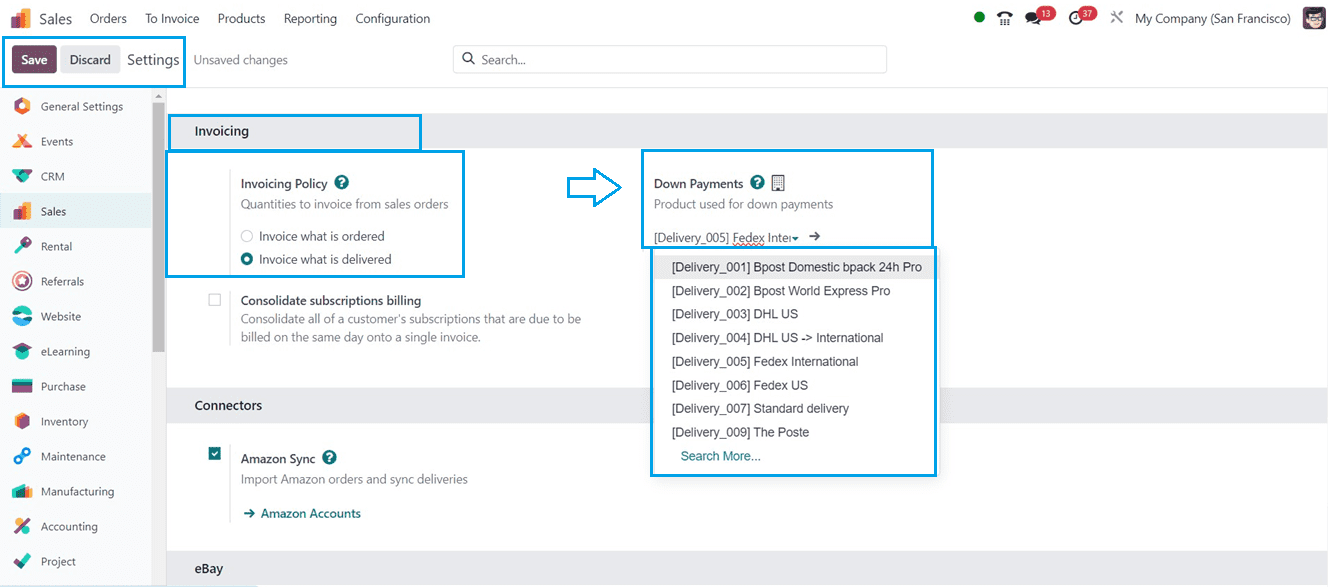
You can choose a product used for down payments from the “Down Payments” available inside the “Invoicing” tab section. Here, We are going to select “Fedex International” as the product used for down payments. Also, we can set the “Invoicing Policy” and” Consolidate subscription billing” features from this section. Here, we will see the functionality of advance payments based on the delivered quantity invoicing policy. So we can choose the “Invoice what is delivered” from the “Invoicing Policy” option. Now, we need to create a Sales order in order to explain the Down Payment feature.
Creating a Sales Order
To create a new Sales Order, go to the “Orders” menu and choose the “Orders” submenu. This will display the list view of all the available sales orders created within the Odoo Sales Module platform, as shown below.
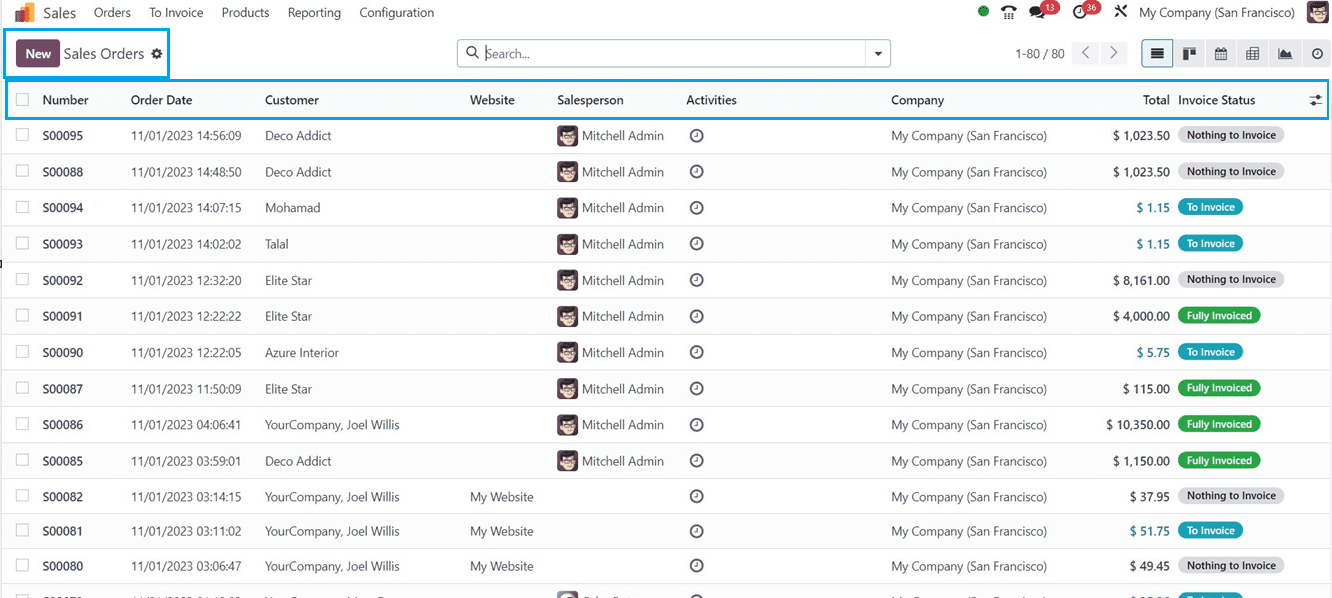
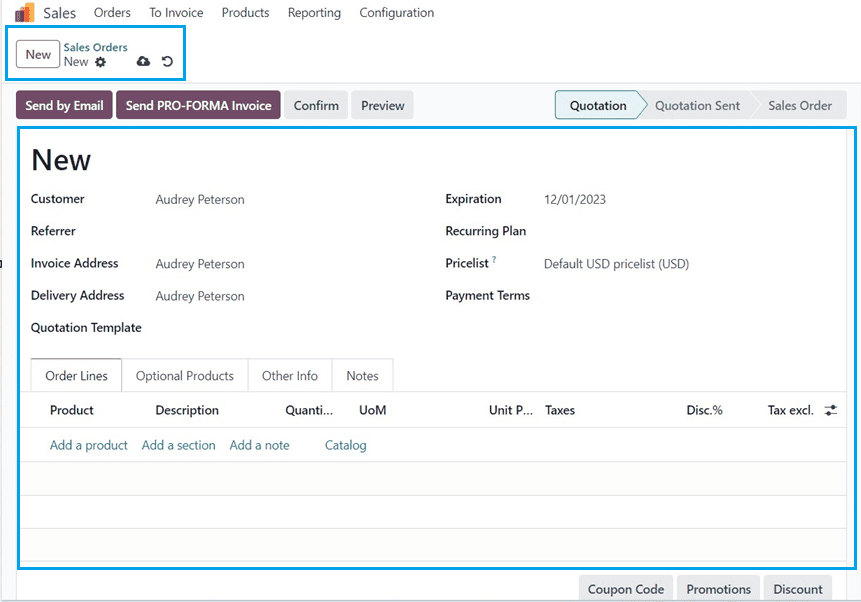
Now, we can create a new sales order using the “New” button and start filling in the form data. Basic sales order information such as "Customer," "Invoice Address," "Delivery Address," "Referrer," "Expiration Date," "Recurrence," "Pricelist," and "Payment Terms" can be provided.
Order Lines Tab
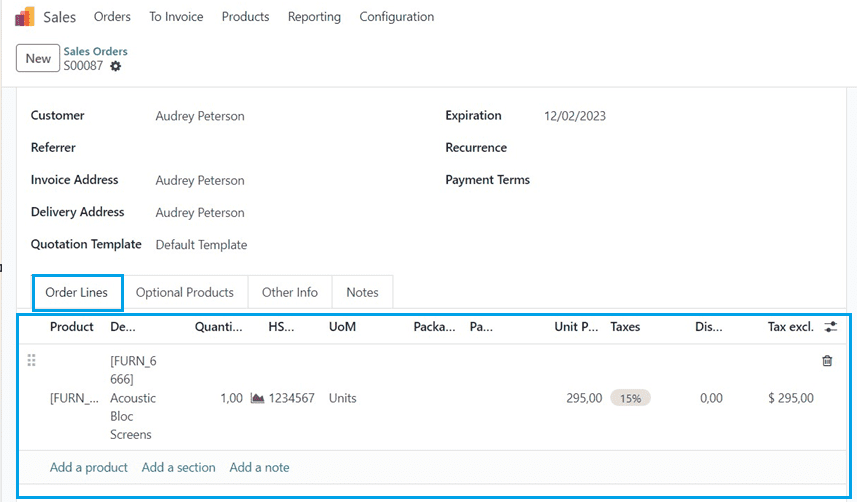
The "Add a product" option will then appear under the "Order Lines" menu. You can add products for the sales order from this area. The “Catalog” button can be used to add products directly from the products catalog window.
Optional Products Tab
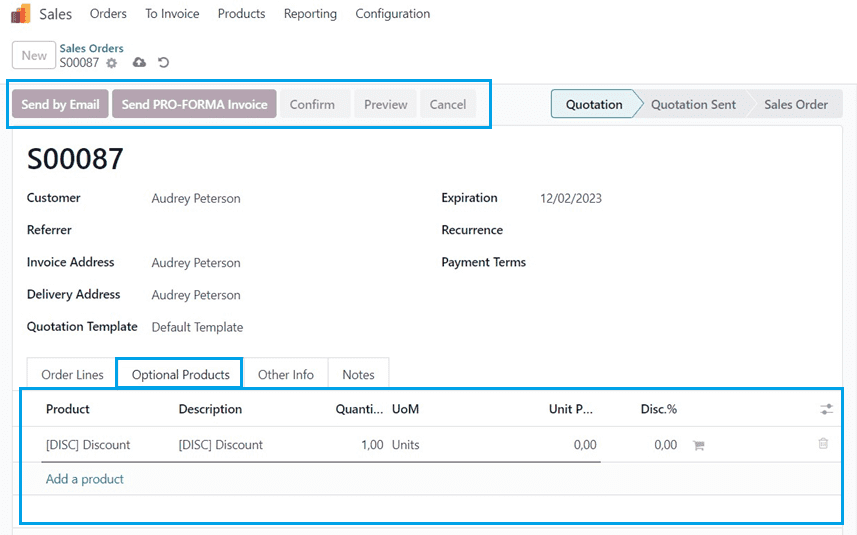
The “Optional Products” tab can be used to add optional products. As part of a marketing plan, optional products cross-sell related and helpful products to customers to boost sales.
Other Info Tab
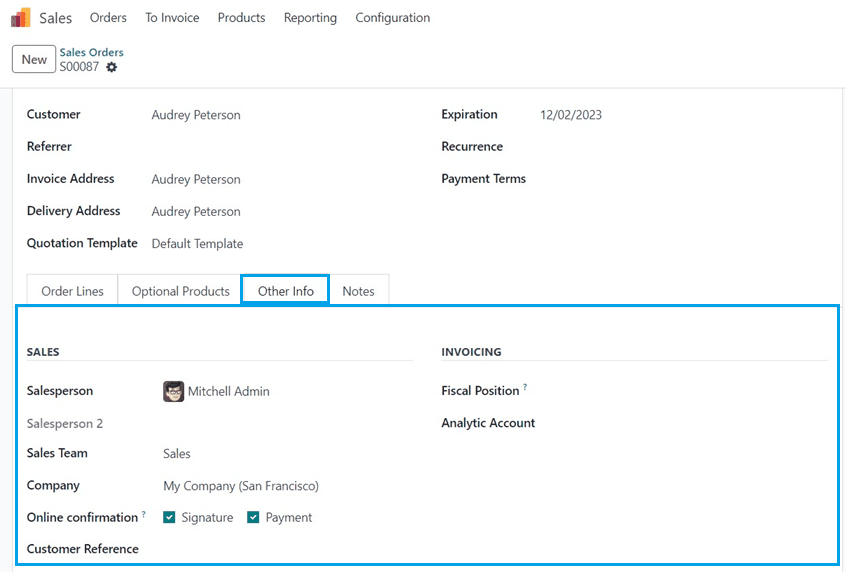
You can provide the Sales, Subscription, Invoicing, Delivery, and Tracking details of a Sales Order.
Notes Tab
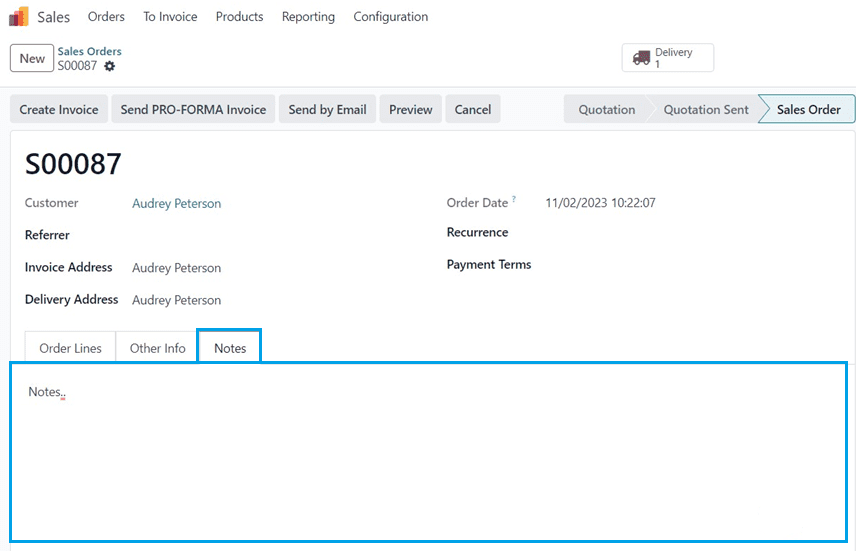
The Terms and Conditions, Descriptions, or any Notes regarding the sales order.
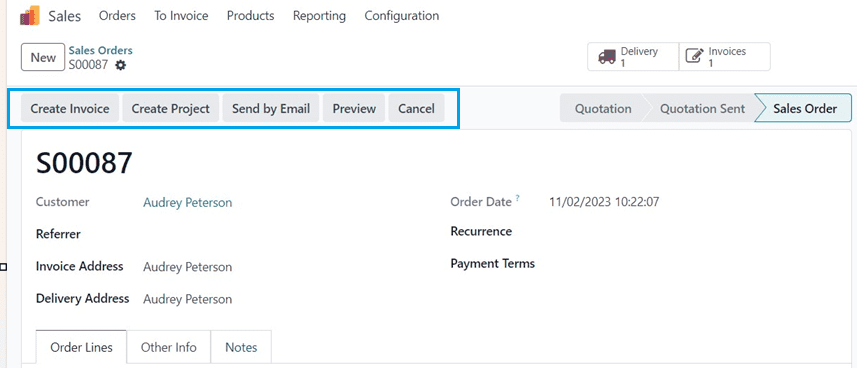
Save the form data after filling in the required fields and use the “Confirm” button to confirm the sales order. You can also be sent the sales order details by mail using the “Sent by Email” button.
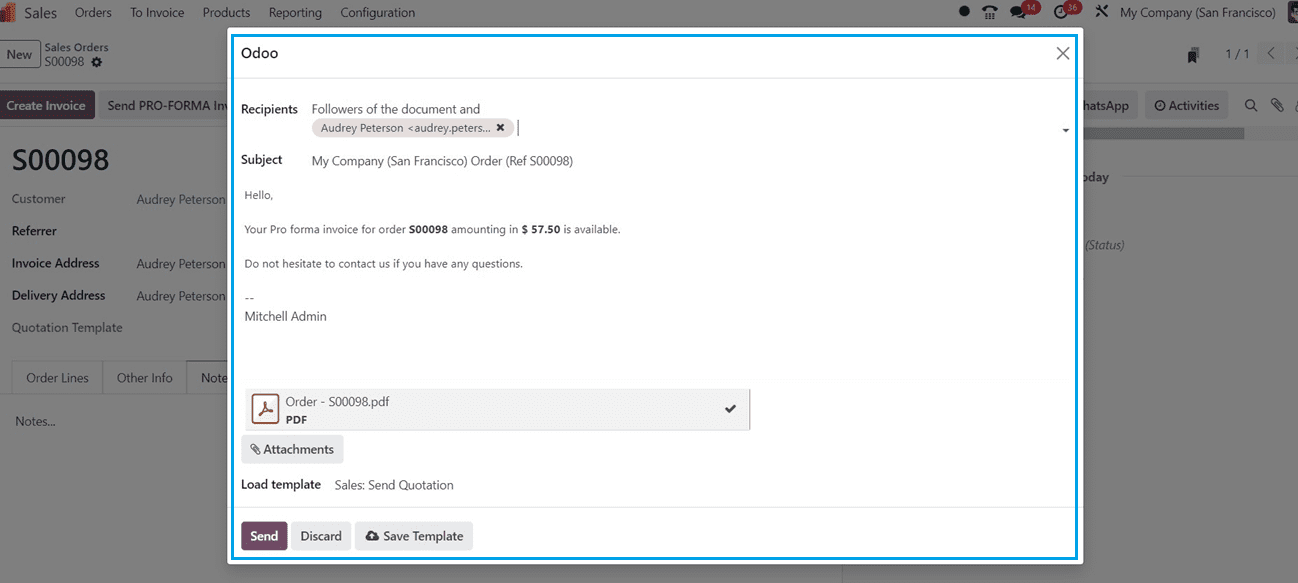
An approximated or simplified invoice that is provided before the delivery of goods is known as a pro forma invoice and can be sent using the “Send PRO-FORMA Invoice” button. Clicking on this button will display a pop-up window where you can send the invoice even before the order delivery, as shown below.
Creating Invoices and making Down Payments
Then, you can create the invoice for the sales order using the “Create Invoice” button. As seen below, this will trigger a pop-up window to open.
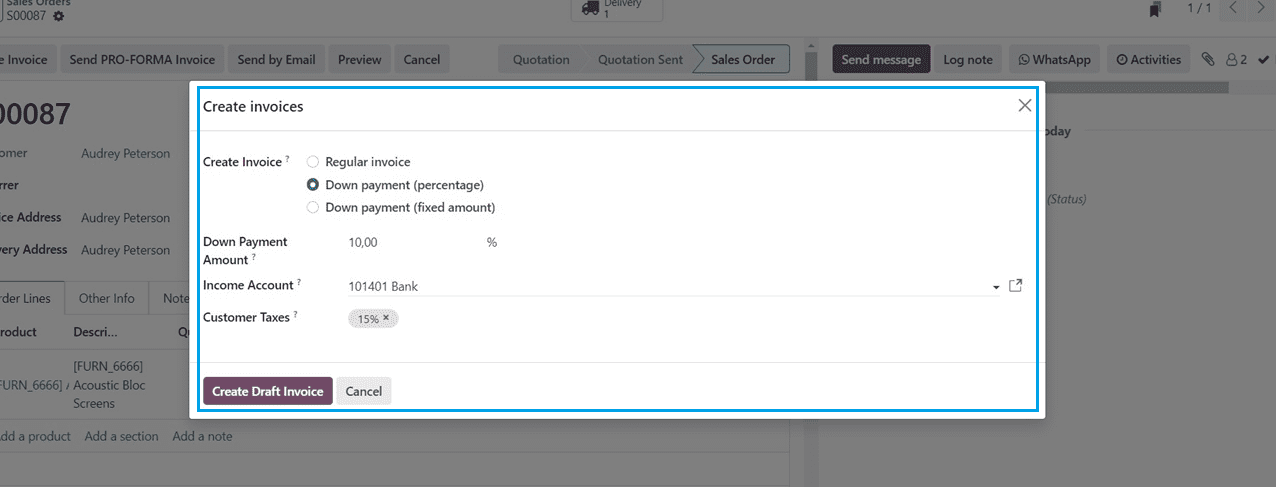
The pop-up window that appears has three options for creating an invoice: "Regular Invoice," "Down Payment (Percentage)," and "Down Payment (Fixed Amount)." The invoicing method that best meets the user's needs can be selected. An invoice created using a "Regular Invoice" is standard.
Two alternatives are available for down payments: a set percentage option and a fixed sum option. These options are both adaptable and can be used for specific service demands. We can select the "Down Payment (Percentage)" option; the user may choose a portion of the invoiced amount exclusive of taxes that must be paid in advance.
You can enter the appropriate advance payment amount in the “Down Payment Amount” column. The down payment for a specific product can be set at 10% in percentage terms, requiring a 10% down payment. Once these details are verified, click the "Create Draft Invoice" button to go to the Draught Invoice page, where you can check the details listed below.
The Draft Invoice provides a detailed breakdown of the down payment, including the customer's intended amount at the order's onset. The sub-total, account details, pricing, taxes, and down payment percentage are all shown on the "Invoice Lines" tab. Combining the Untaxed Amount and Tax Amount yields the Total Amount. By choosing the "Confirm" button, you can fulfill the preferences of certain companies that require the first down payment to be made prior to delivery. Click the "Register Payment" button once you have checked and verified the invoice details.
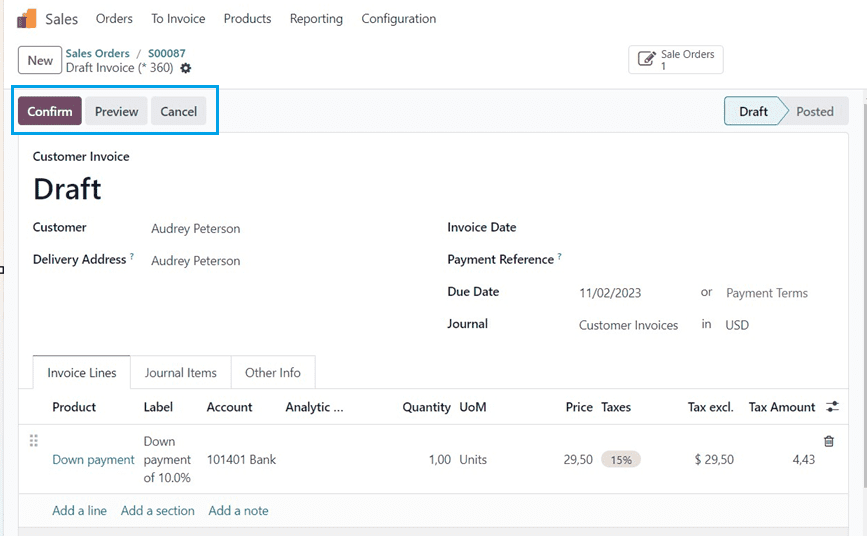
After reviewing and confirming the invoice details, click on the “Register Payment” button.
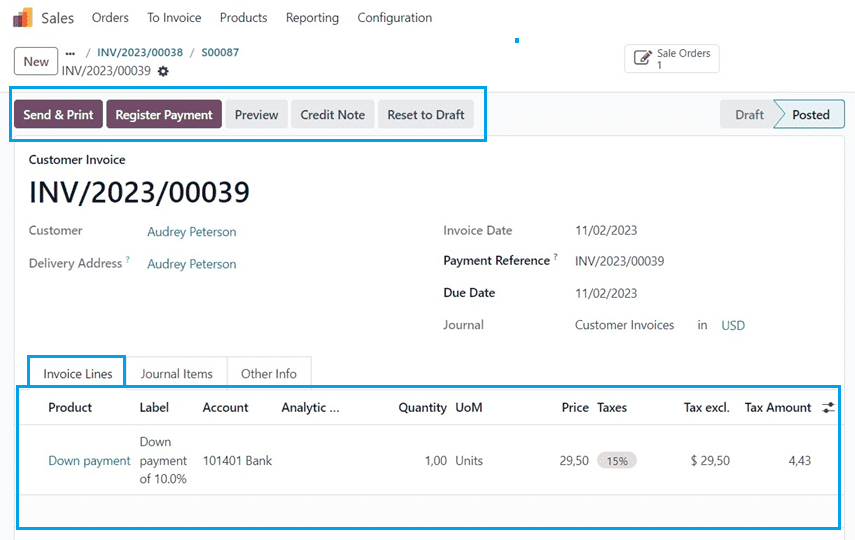
The invoice draft can also be sent using the “Send & Print” button, or the invoice can be reset to draft using the “Reset to Draft” button. Deciding to register the payment and clicking on the “Register Payment” button will open another pop-up window.
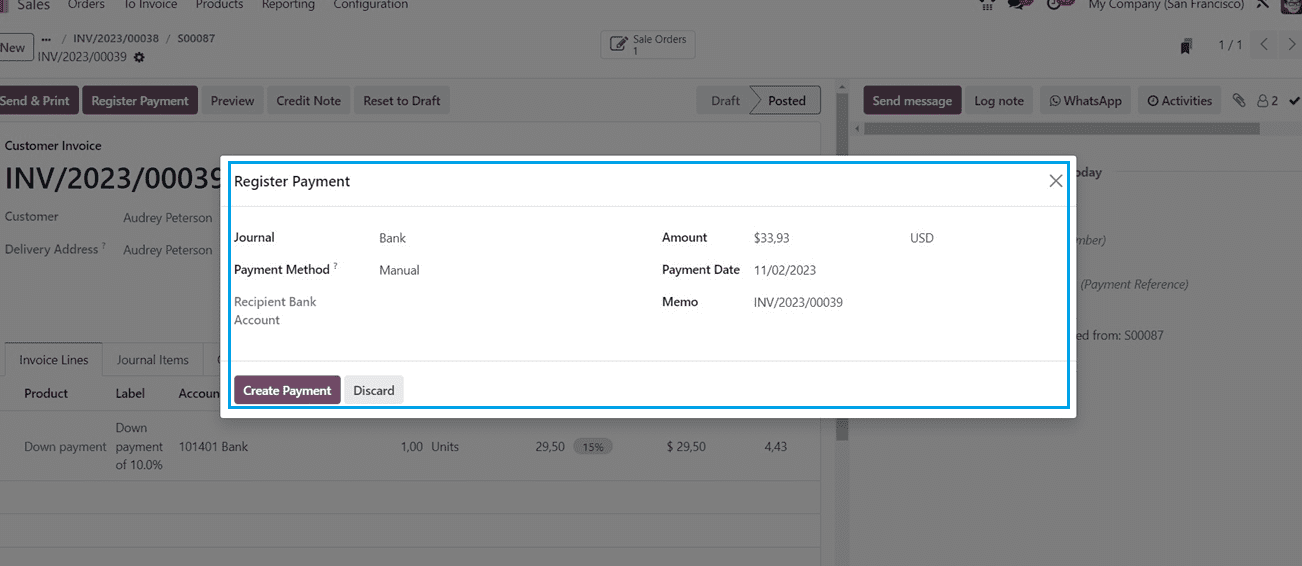
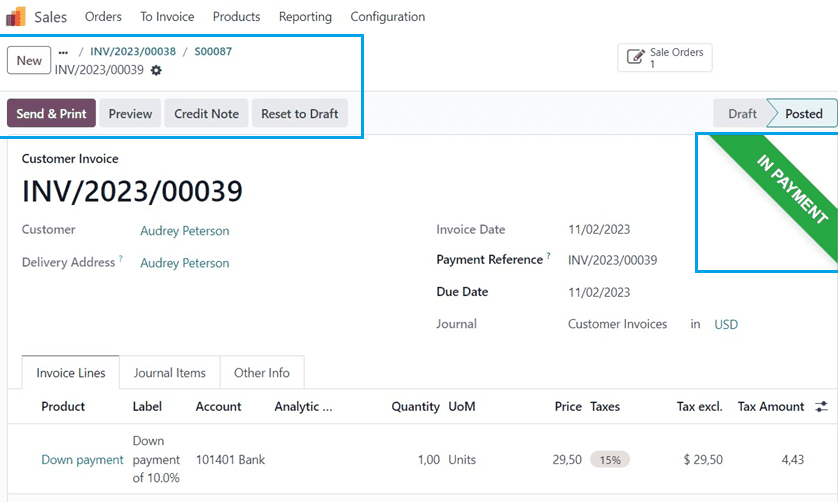
You can see some payment-related fields such as payment Journal, Payment Method, Receipt bank Account, Amount, Payment Date, and Memo. Once you've examined the payment receipt, select the "Create Payment" button. You can see the “IN PAYMENT” ribbon will be shown inside the form view.
Generate Invoice for the Downpayment
If the invoice policy of the company for payment is set as “Invoice what is delivered,” the user will have to wait for the delivery confirmation and count the number of units delivered as per the order quantity. We can update the delivery by getting inside the “Sale Order” smart button provided at the top of the form page, and you can update the delivery from the “Delivery” smart button, as shown below.
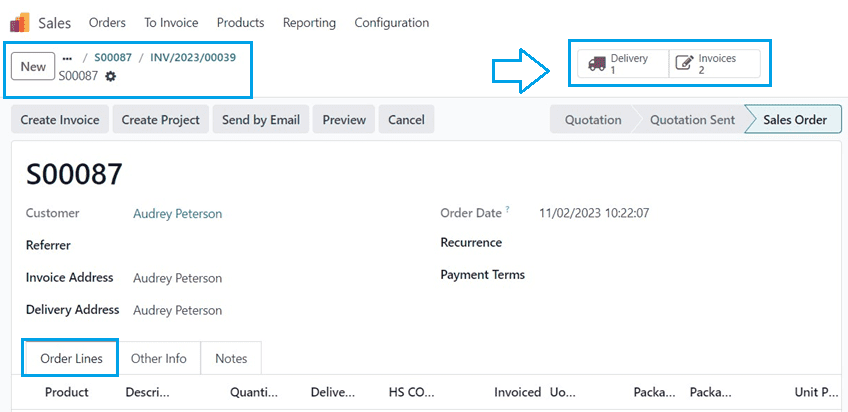
The “Delivery” smart tab will open the delivery section, where you can validate the delivery order.
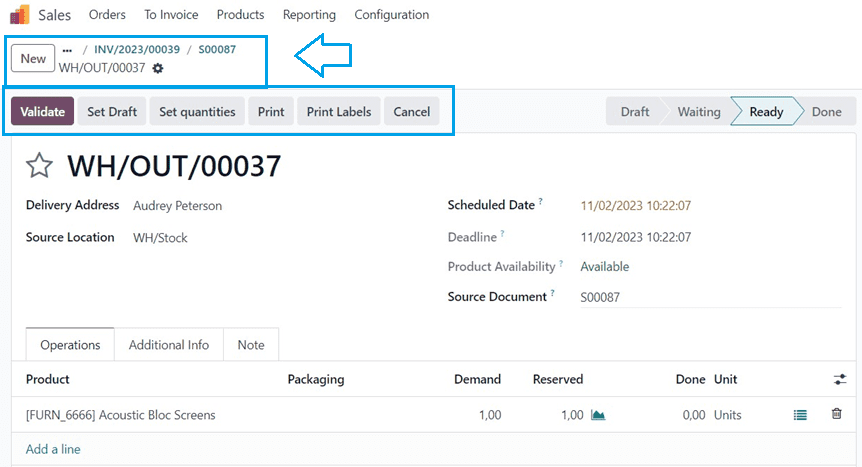
Selecting the sales order and completing the invoice generation procedure will allow the user to issue an invoice for the remaining down payment when the buyer verifies delivery. Throughout the invoice-generating process, a new option will be shown.
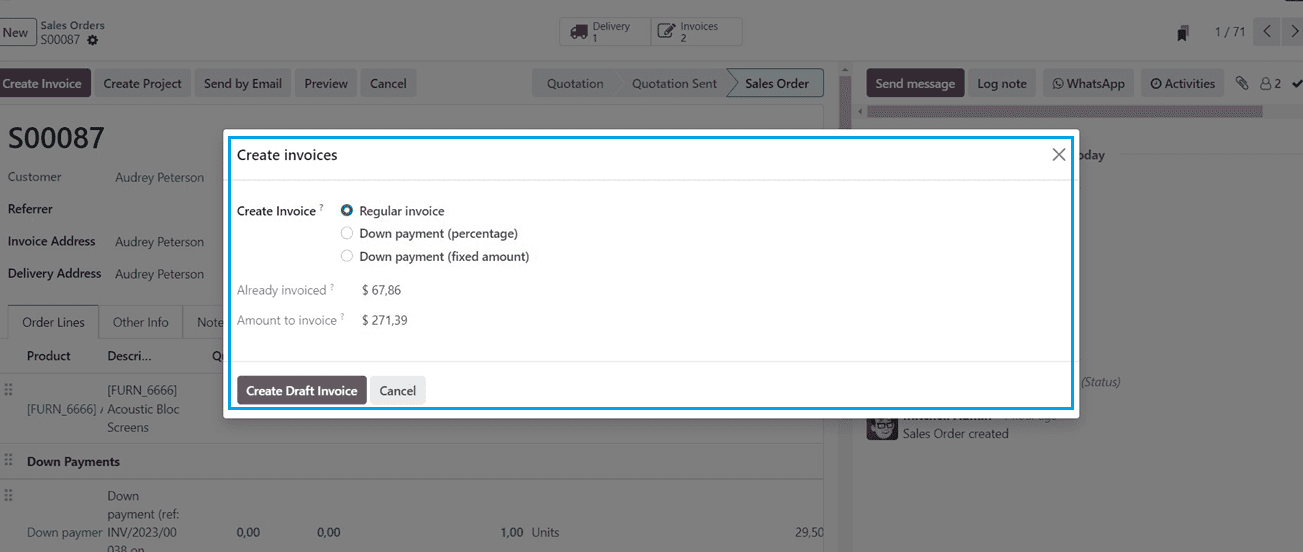
You will see the down payment has been deducted from the “Already invoiced” field. The rest of the amount that is pending to be invoiced will be shown inside the “Amount to invoice” field and click on the “Create Draft Invoice” button. Again, you can register the full payment after delivering the product.
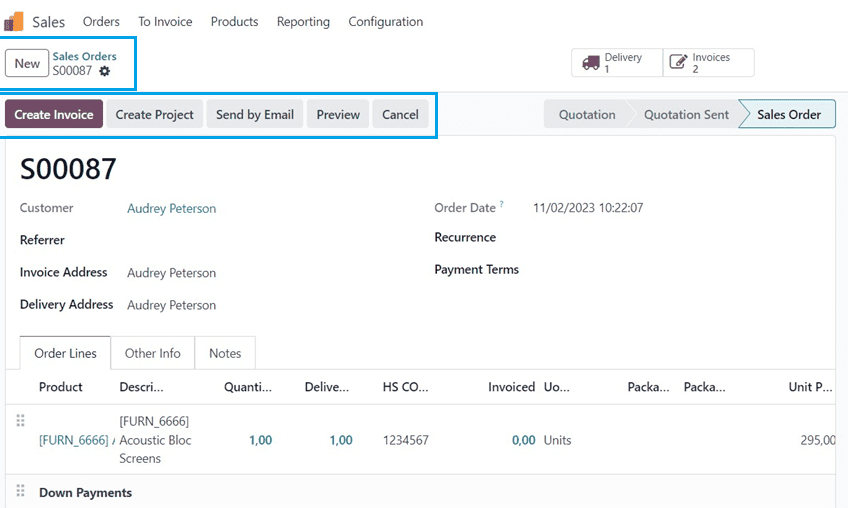
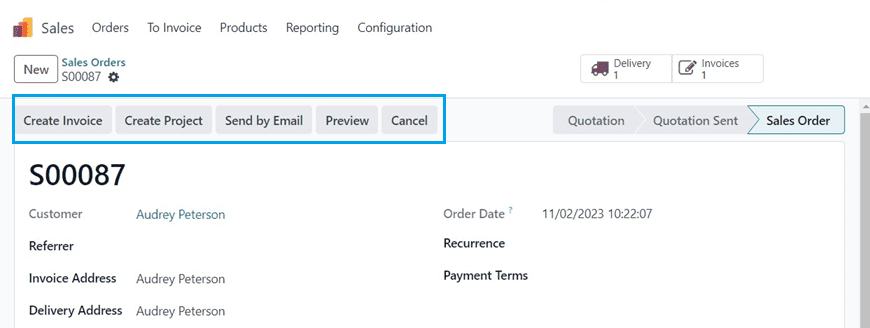
After completing all the invoicing procedures and registering the payments, you can make the sales order as a quotation. Then, you can also create projects regarding the sales order using the “Create Project” button available at the top of the form view.
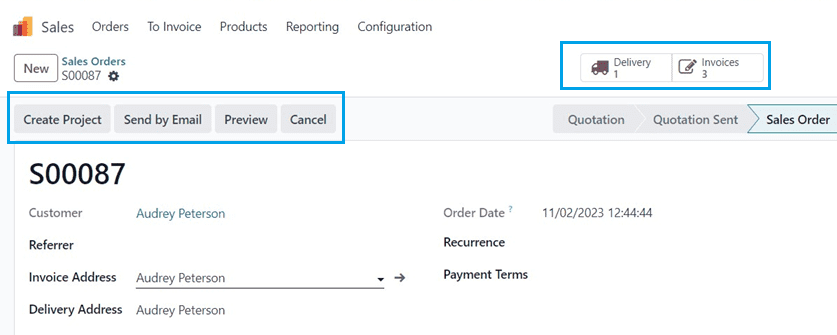
You can manage the invoices and delivery details from the “Delivery” and “Invoices” smart buttons respectively.
These are the functional overview of making down payments for a sales order inside the Odoo 17 Sales Module. Businesses can manage their client' down payments seamlessly using this feature.