In the world of business, presentation is everything. A well-structured and visually appealing invoice or quotation can leave a lasting impression on your customers. Enter the realm of the quotation layout, where the aesthetics and clarity of your document matter.
Designing a quotation layout within the Odoo 17 Sales module is your pathway to success. It offers the flexibility to craft layouts that resonate with your clients, creating an impactful and professional image for your business.
The power of quotation layouts
Quotation layouts are your canvas for presenting information about quotation orders. It’s a critical step in developing a sales order for a customer, making it necessary for business. This is where ERP software, like Odoo 17 Sales, comes into play.
This blog focuses on the art of setting up quotation layouts within the Odoo 17 Sales module.
Customization Made Simple
Customizing quotations has never been easier, thanks to the user-friendly Odoo Sales application. It offers a comprehensive set of tools for managing quotation templates, attributes, sales teams, products, and more. Let us have a look at how to set up the Quotation Template in the Odoo 17 Sales module.
Setting Up Quotation Templates in Odoo 17 Sales
Customizing the appearance of quotations is a vital aspect of enhancing business productivity. To embark on this journey, we must first design the quotation layout. Begin by selecting the ‘Quotations’ menu within the ‘Orders’ tab.
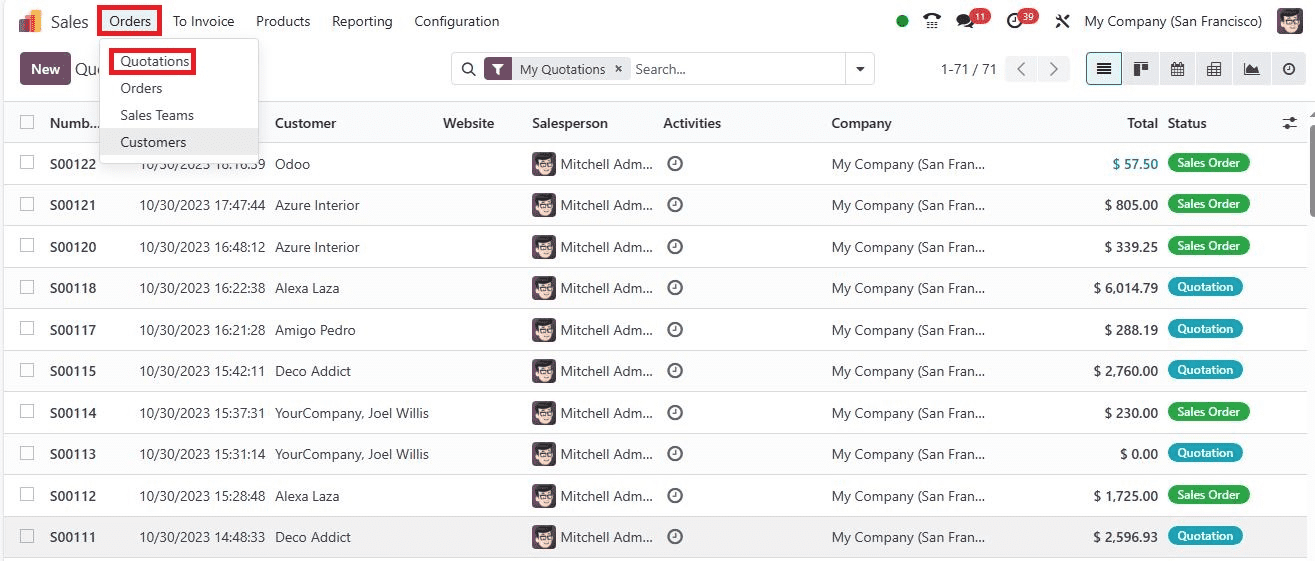
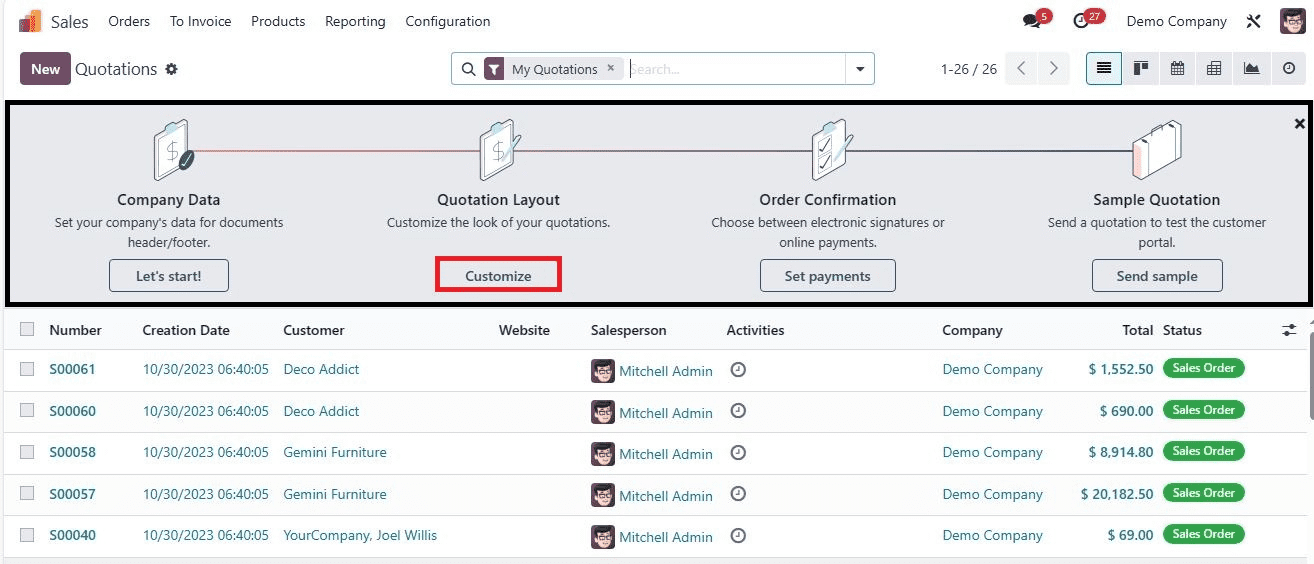
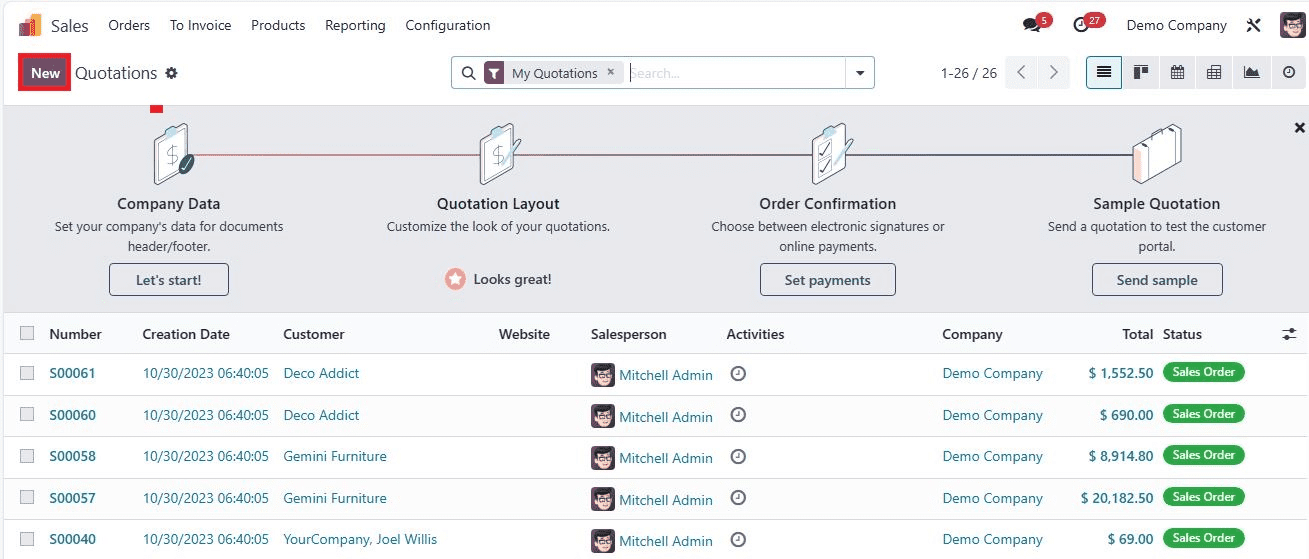
Here, you will find a list of all your quotations. In the quotations window, you can set company data, configure the quotation layout, confirm the order, and send it to the customer using the onboarding panel, as shown in the screenshot below.
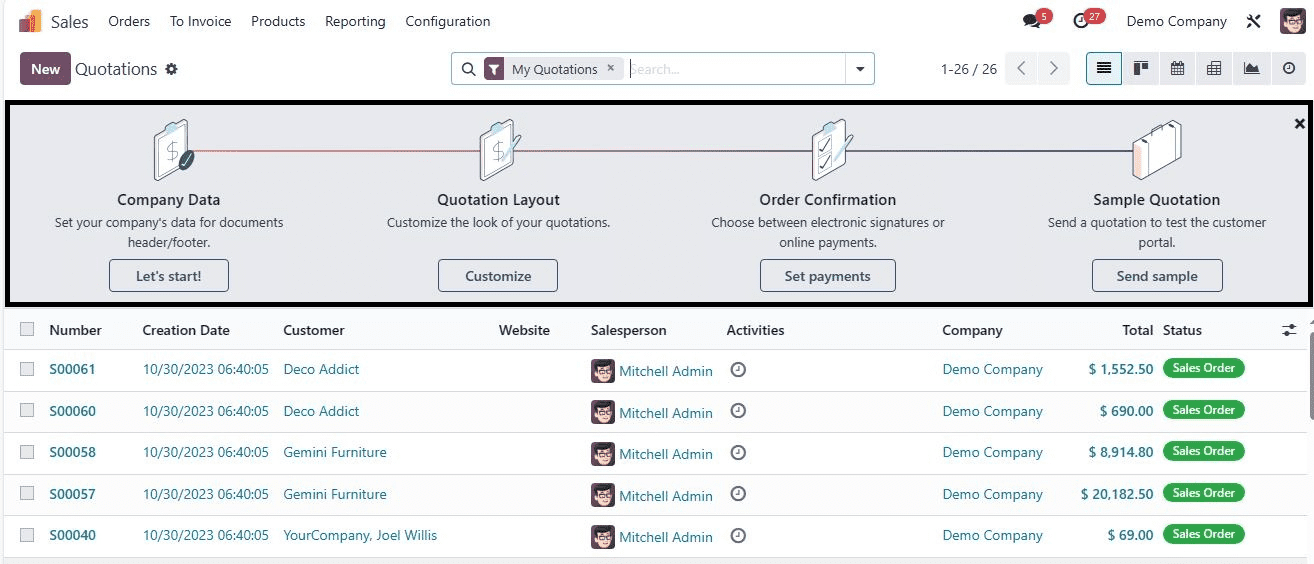
The list of each quotation, including its number, the associated company, status, salesperson, and more, is neatly laid out. To create a new quotation, simply click on the “New” button.
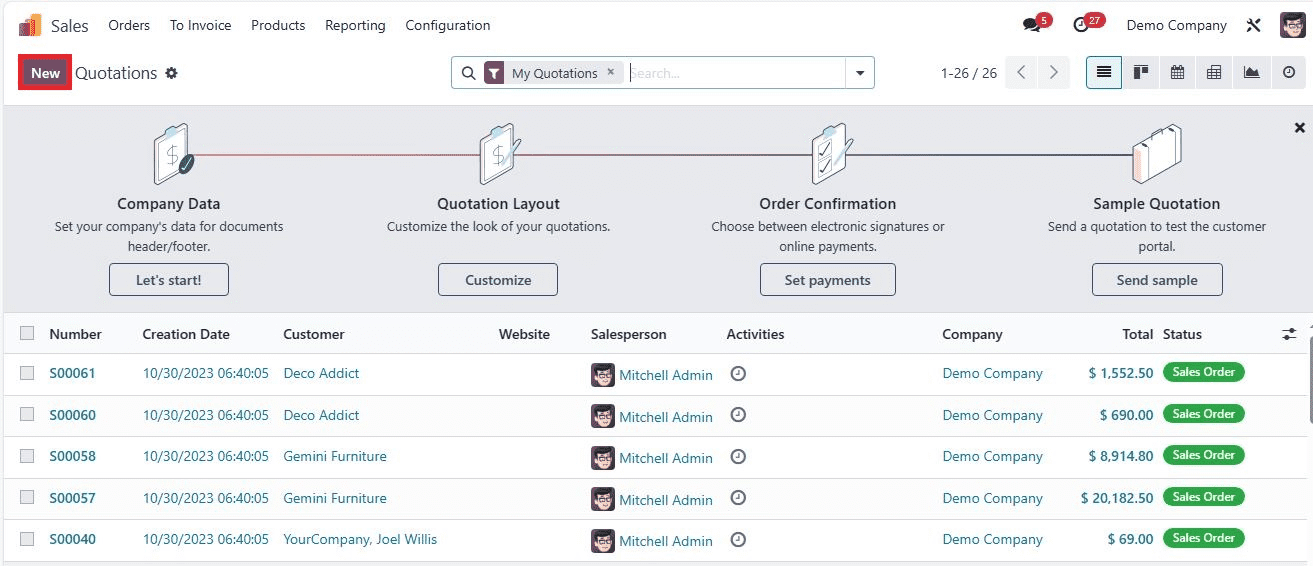
When you look into the onboarding panel, you will find the option to set the company data. Using the ‘Let’s start!’ option, you can set your company’s data for documents header/footer. Then, the system will reveal a ‘Set your company data’ pop-up window, as shown in the screenshot below.
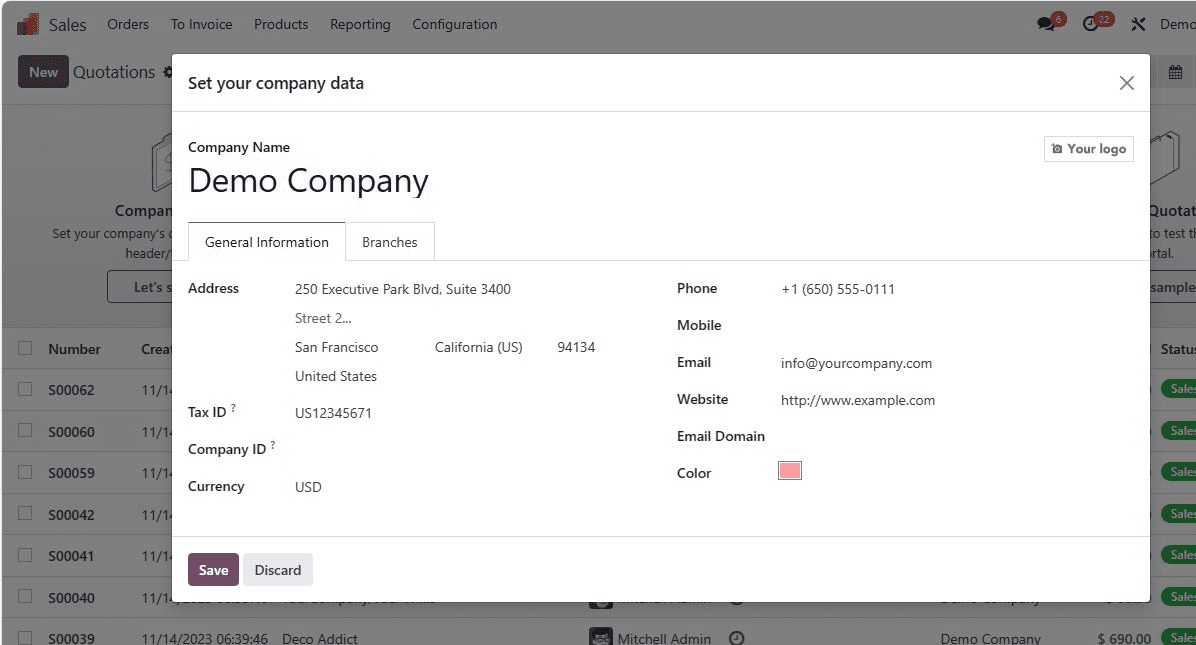
Using the pop-up window, you can do it by providing relevant details in the respective fields.
Now, the real artistry begins. To customize the look of a quotation, click on the “customize” icon located in the “quotation layout” section.
This opens up a new window where you can configure the document layout for the customer’s invoice.
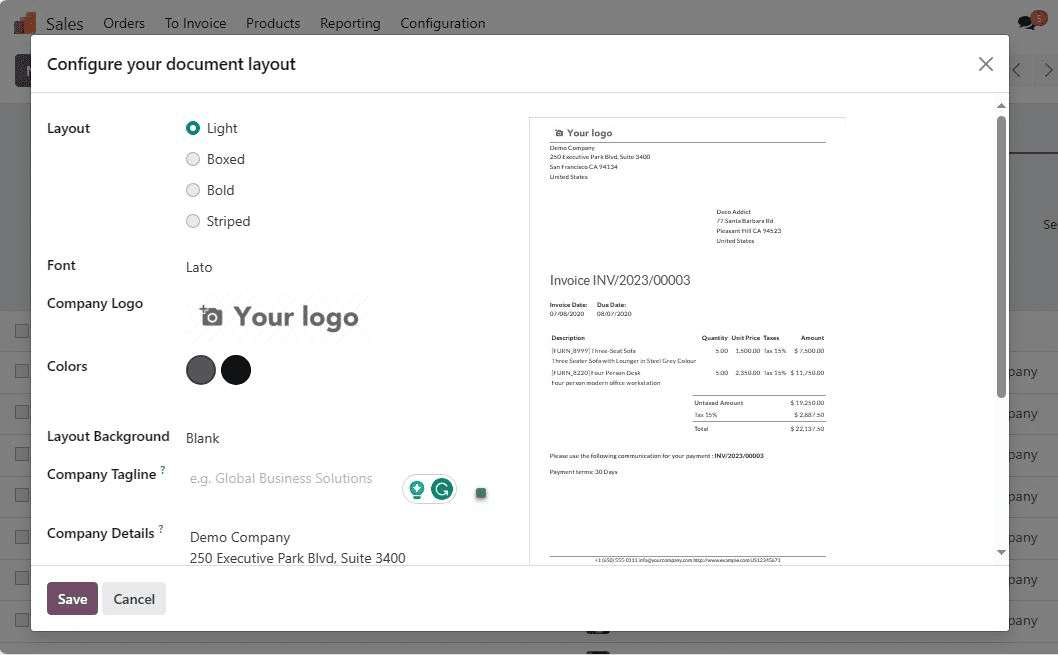
You have the freedom to select the layout style- whether it’s “Light,” “Boxed,” “Bold,” or “Striped.” In this example, we choose the “Boxed” option in the “Layout” field and select the “Lato” font.
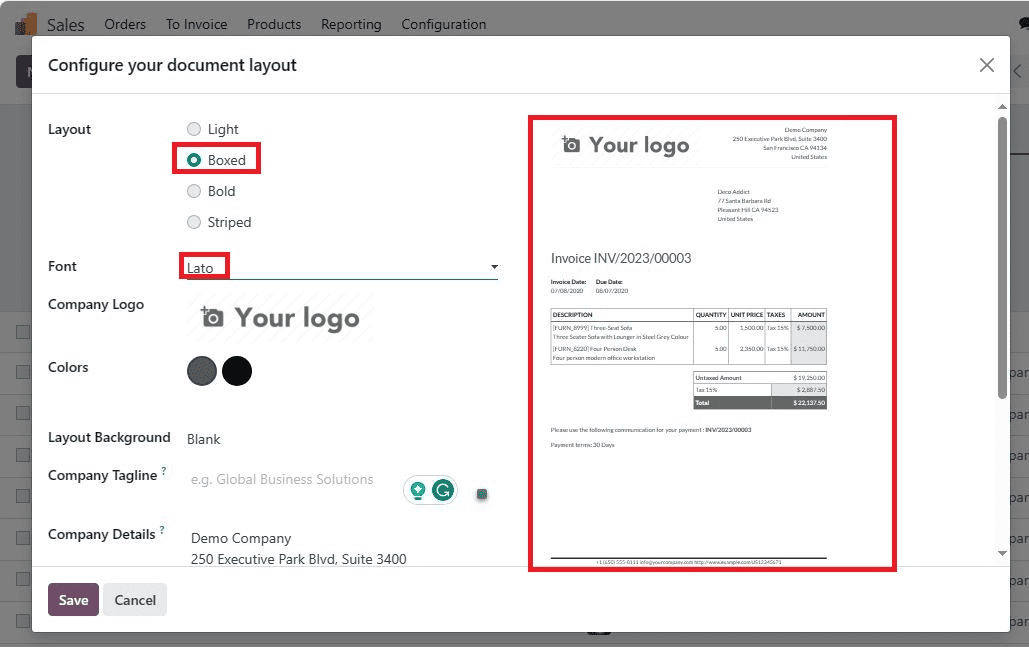
Want to add a personal touch? Click on the “Edit” icon in the “Company Logo” field to upload your company’s logo.
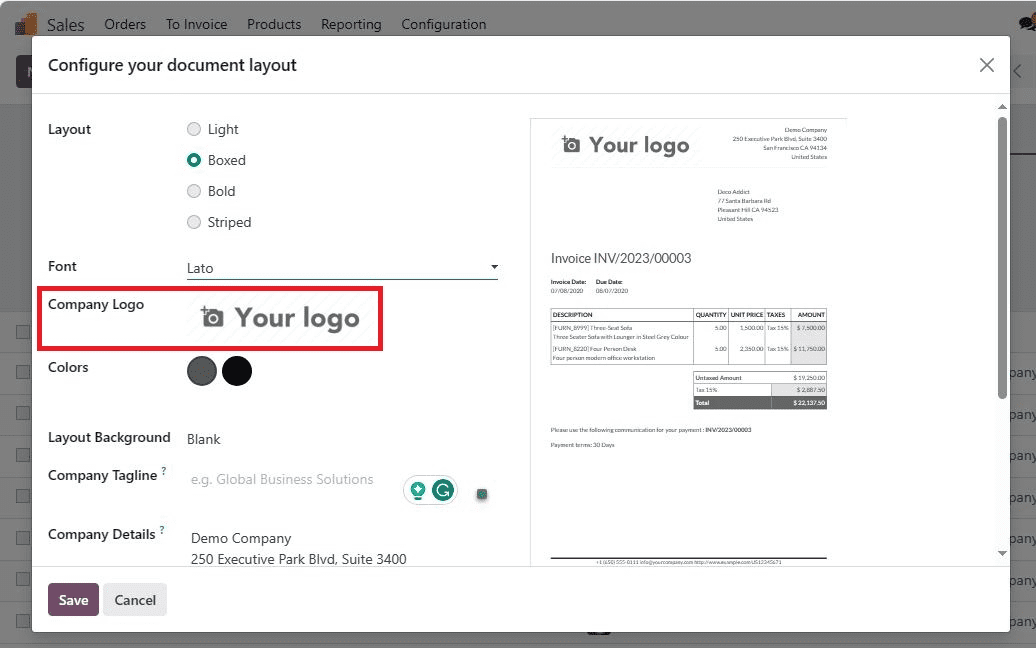
The selected symbol will be visible in the document preview.
The design doesn’t stop here. You can choose specific colors for the document layout by clicking on the circular button in the “colors” field. A pop-up window allows you to select your preferred color, which is visible within the circle. This color choice is instantly reflected in the preview of the document layout on the right.
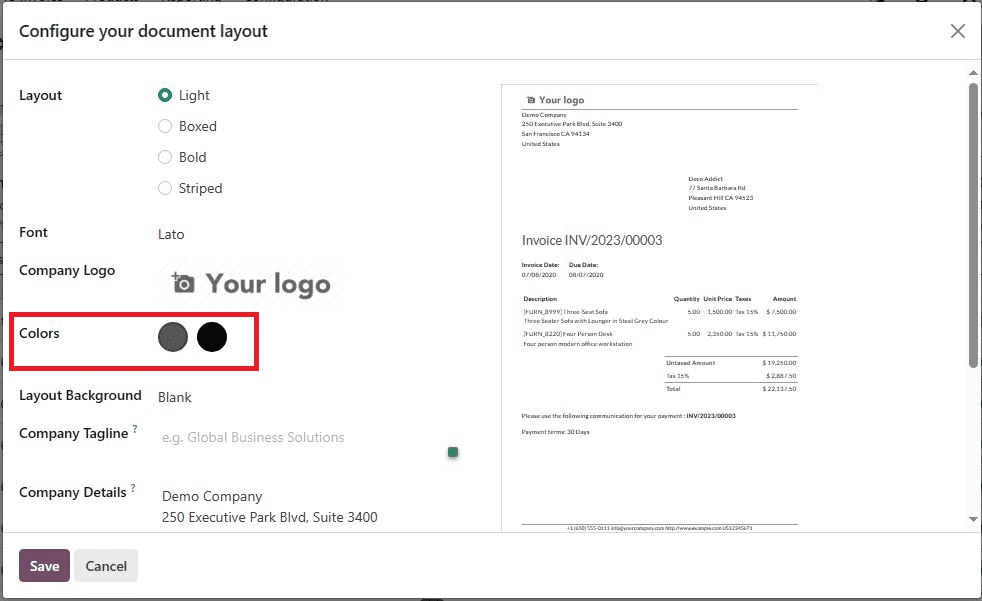
You can also select the background layout for the document in the “Layout Background” field. Here, we've chosen the “Blank Layout Background” and added the company’s tagline.
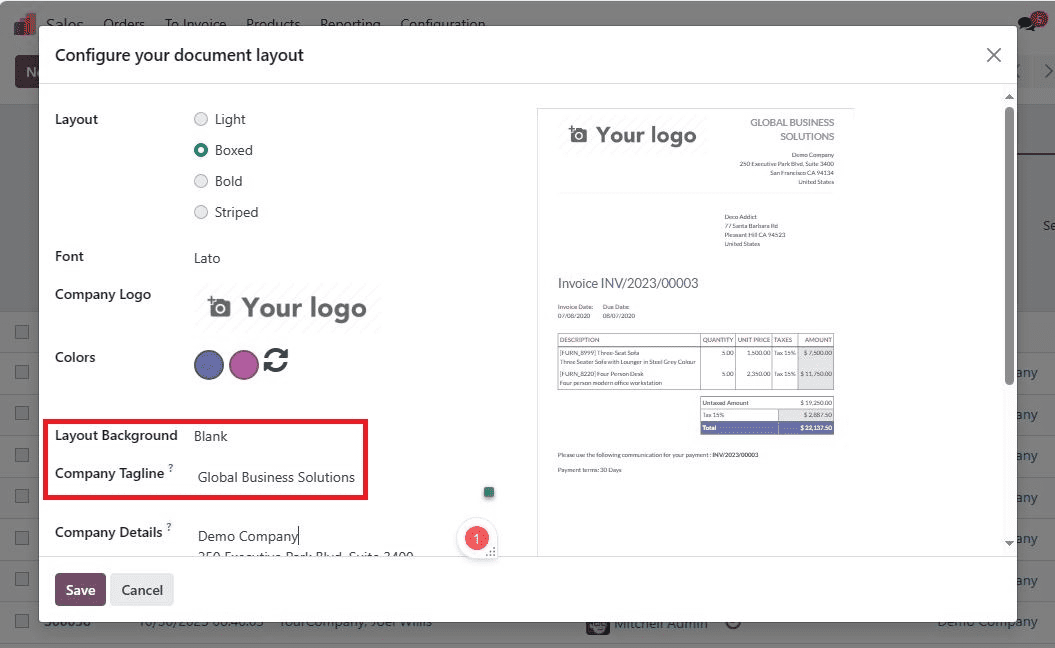
The firm’s address is automatically displayed in the “Company Details” field.
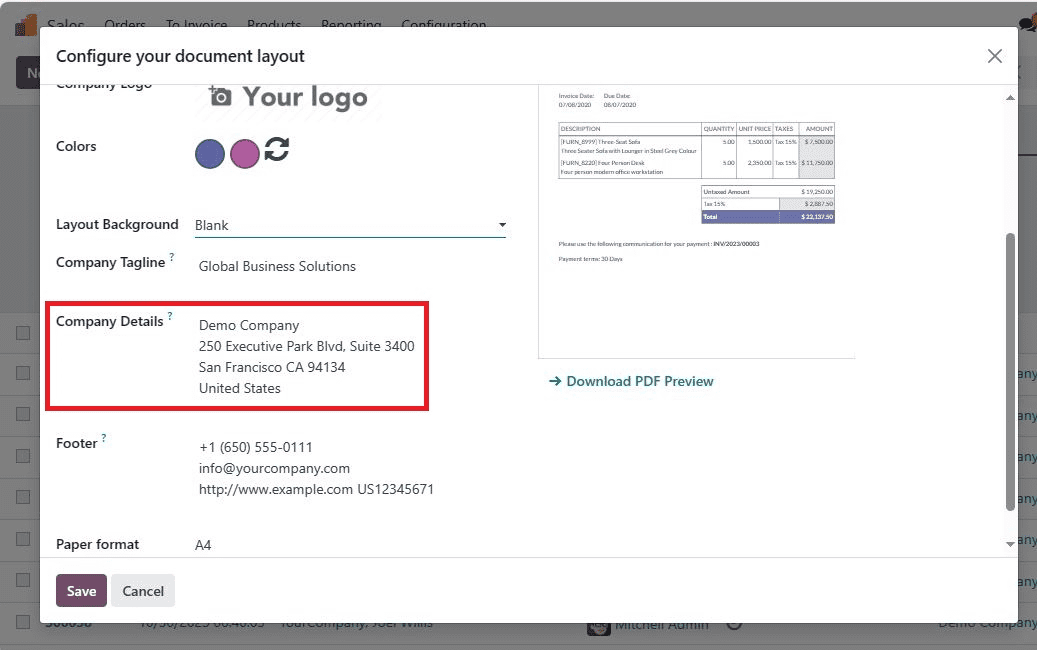
At the top of the report, you can define the header text, while the company’s link is accessible in the “Footer” field at the end of the report. To choose the format for the document, navigate to the “Paper Format” field.
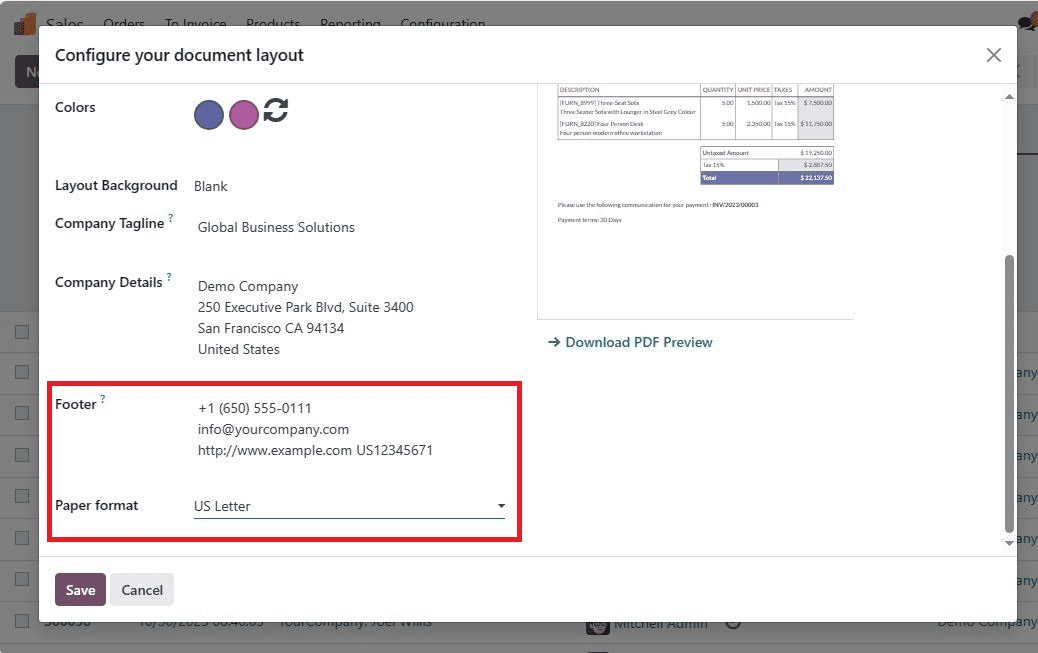
Once you’re satisfied with the design, click the “Save” button.
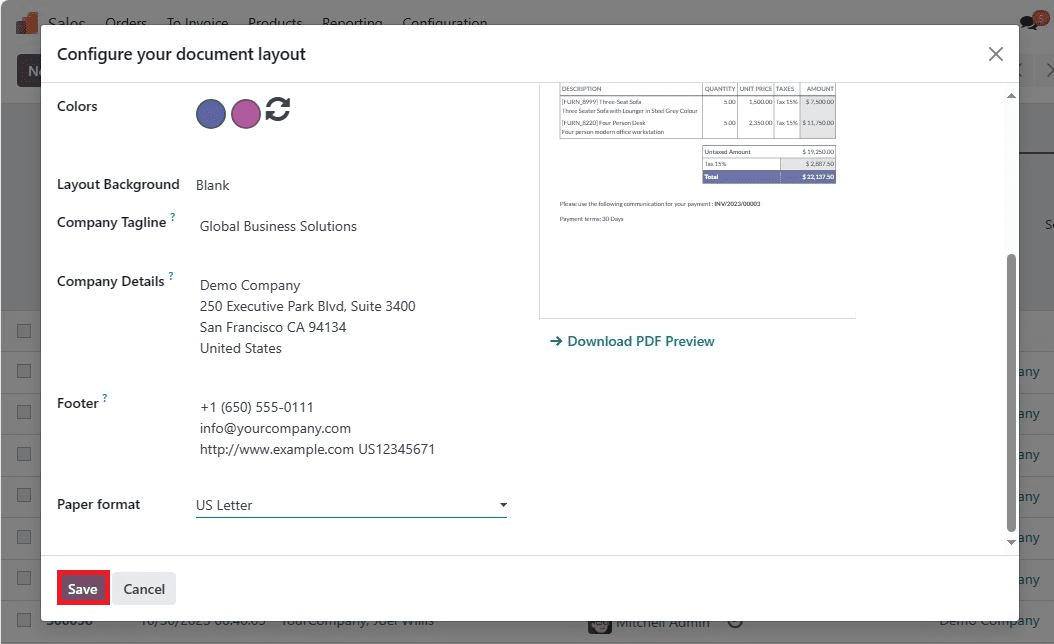
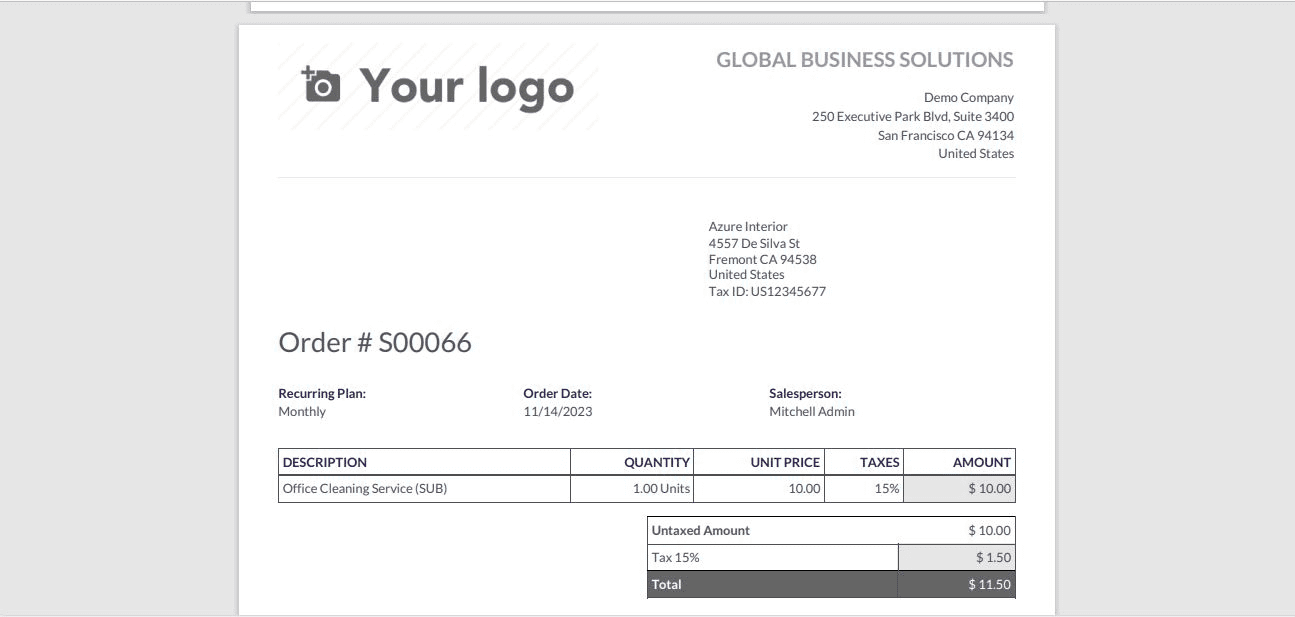
You’ve successfully crafted a unique quotation layout in Odoo 17 Sales. Now, you can generate a quotation and see the layout come to life when you print out the invoice.
Accessing your quotation layout
To access the created quotation layout, you must first generate a new quotation for a customer. Click on the ‘Quotations’ menu within the ‘Orders’ tab to view all created quotations. Here, you can find details like the quotation number, customer name, associated company, status, activities, and more.
To create a new quotation, simply click the ‘New’ button.
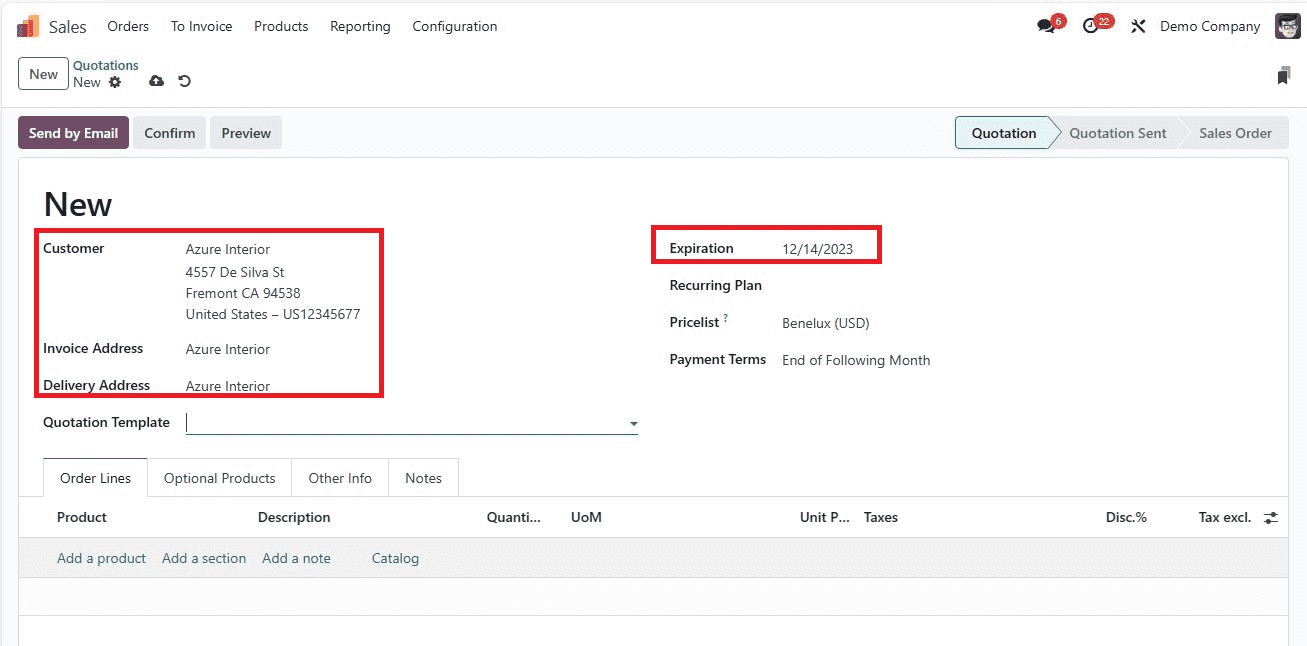
On the new page, you can select the customer, and set your quotation template. You can also define the expiration date and the quotation Template.
Adding items is a breeze - just click on the ‘Add a product’ icon under the ‘Order Lines’ tab. Once you have filled in the necessary product details, manually save your quotation.
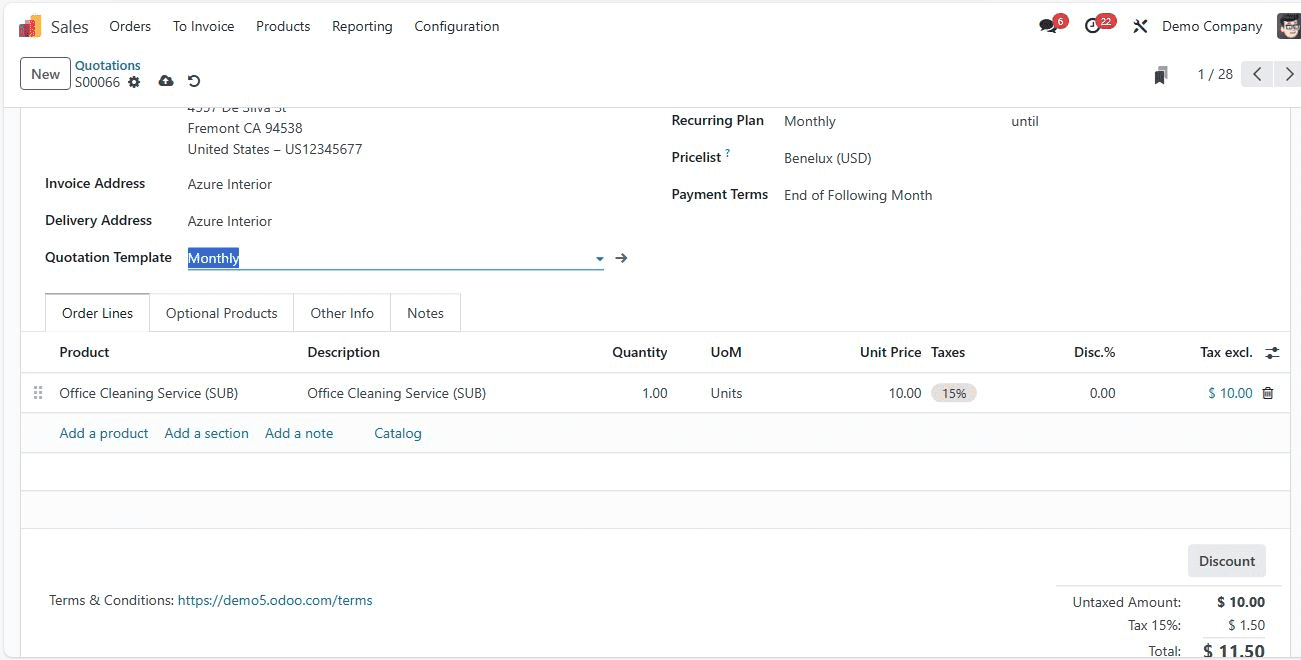
To validate your order, choose the ‘CONFIRM’ icon.
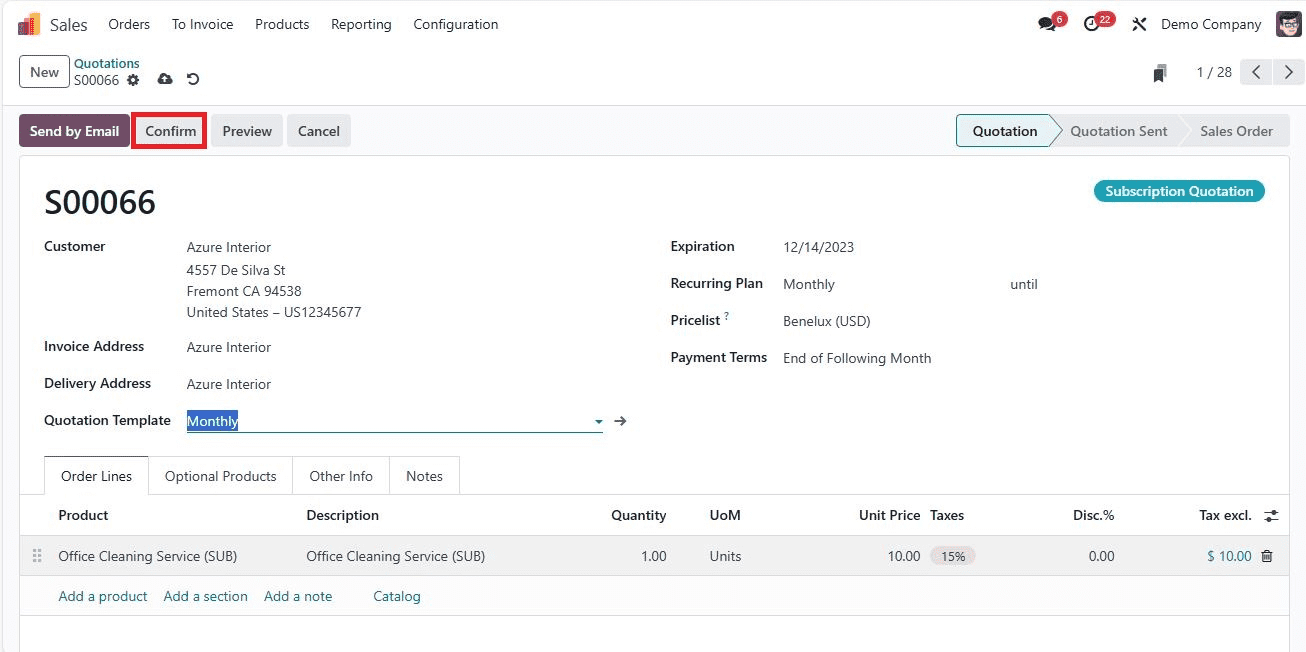
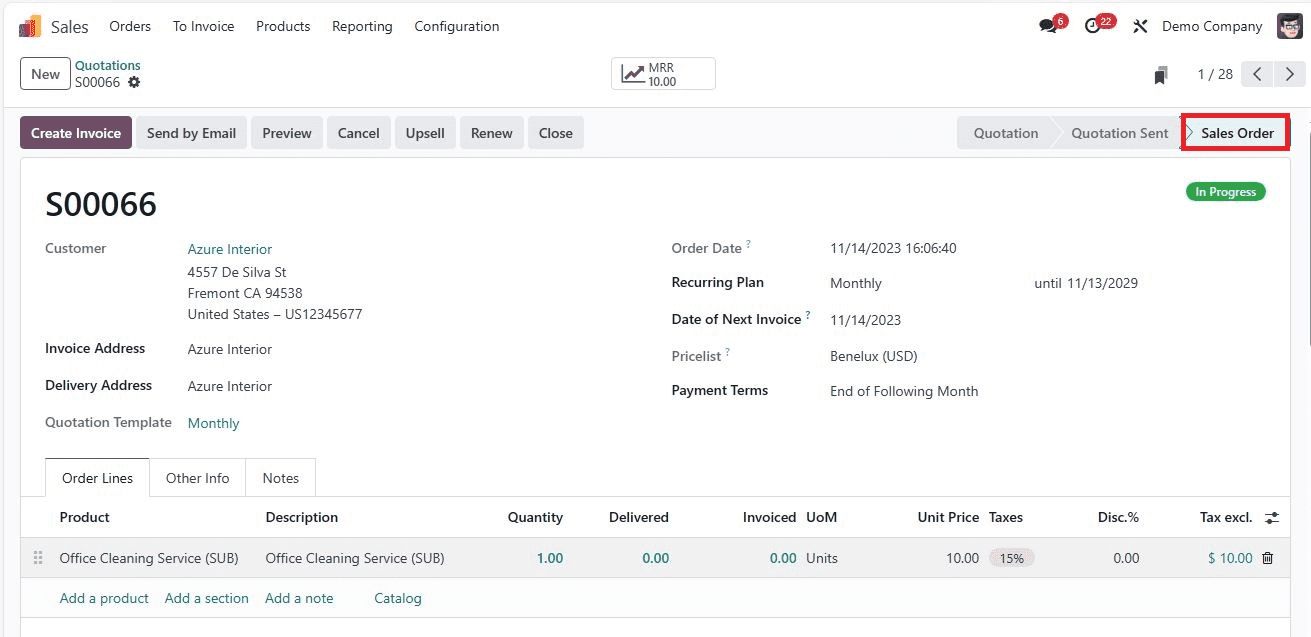
Your quotation now evolves into a ‘SALES ORDER,’ and a delivery is generated.
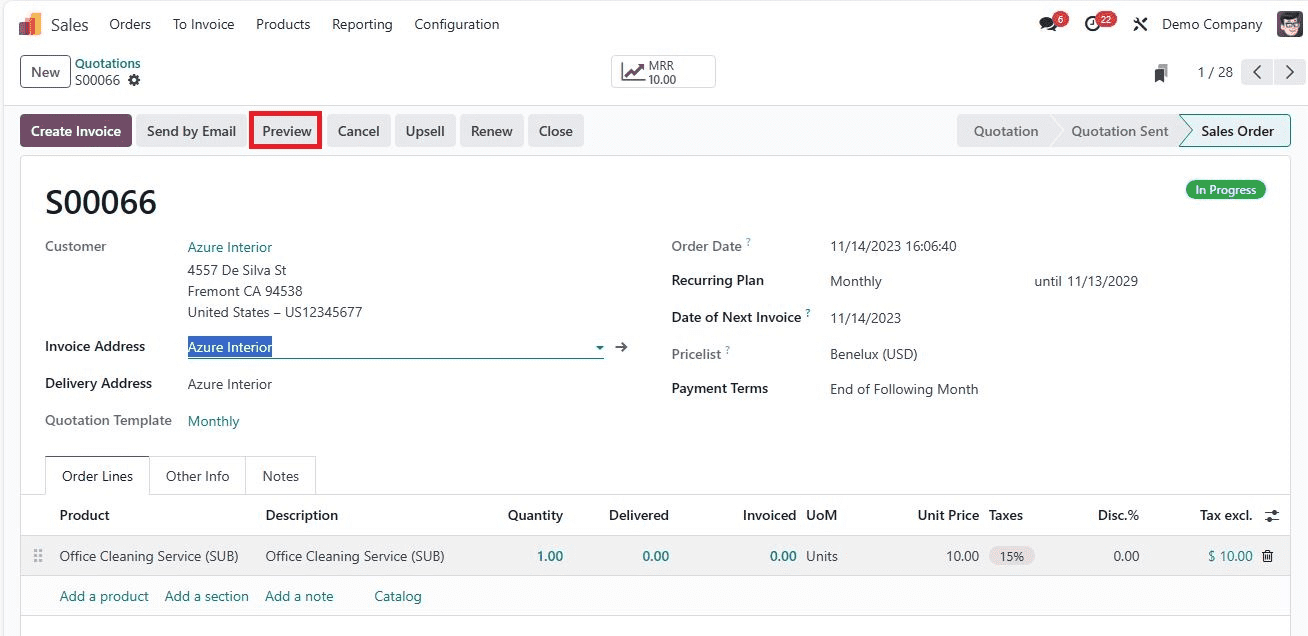
To get a preview of the quotation for a customer, click on the ‘Preview’ icon which is highlighted in the screenshot below.
On the Customer Portal Page, you will find sales order details such as the order date, delivery address, expiration date, invoicing, and shipping address.
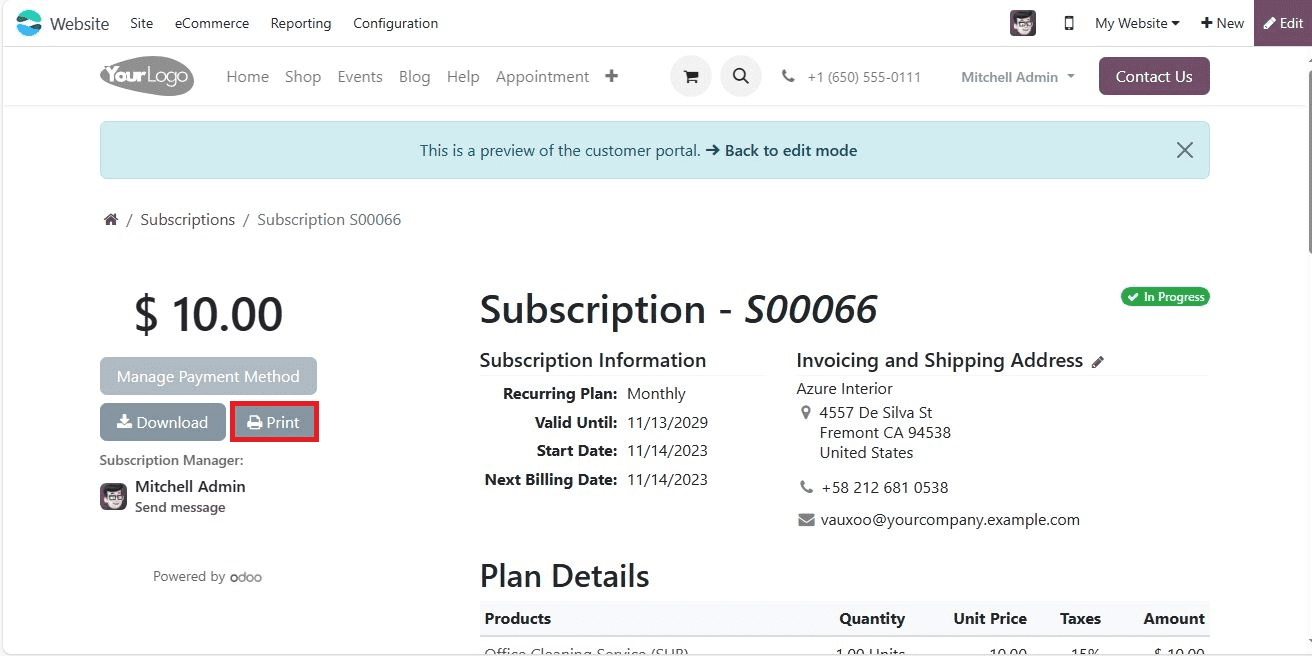
To obtain the quotation in a printed form, choose the ‘Print’ icon within the Customer Portal window. The document opens on a new page, showcasing the design of your quotation layout.
In conclusion, Odoo 17 Sales simplifies the task of managing quotation layouts. With this system, businesses can create and customize quotation layouts effortlessly for clients, customers, and other partners.